Simple rockets are not only fun to launch, but teach kids the basics of fin design (how many fins are best?), projectile motion(does launch angle matter for furthest distance), and basic construction (can you really make fins from just tape itself?). Let your kid's imagination soar with this easy and fun project.
[am4show have='p8;p9;p10;p37;p95;' guest_error='Guest error message' user_error='User error message' ]
Materials:
What happens if you strap this to a paper airplane?
[/am4show]
- straw
- rubber band
- skewer
- scissors
- tape
You get to not only build as many rockets as you want, but also the launcher to go with it! Although the launcher takes about 20 minutes to assemble, it will serve you for thousands of rocket launches, and doesn’t require an air compressor or even a bike pump! You’re going to make your own single-piston air pump using everyday hardware store parts. You can opt to include the protractor if you want to be more precise in your measurements. You can use this experiment in more advanced projects, like science fairs. See tips below for more information.
[am4show have='p8;p9;p10;p37;p95;' guest_error='Guest error message' user_error='User error message' ]
Materials:
Rocket
After the initial fun, you may start to wonder about how you can use this as a science fair project or something that really does some real science. This is a great setup for this type of experimenting, since you can do repeated launches and measure your results. The first thing you’ll need to do is figure out a way to make it so that you push down with the same amount of force each time you launch the rocket. You can attach a bungee cord to connect the cap of the 1-1/4” PVC pipe to the opening of the 2” PVC pipe, and add small increments on the 1-1/4” pipe. This experiment can show the effect of gravity of different masses of rockets, since the speed of the rocket is the same at all angles fired at (if you launch with the same force each time). You can also vary the launch angle and measure how far the rocket goes horizontally each time, or make the vertical measurement tool shown in the video as well. You can experimentally figure out the best angle to launch at, since if you launch completely vertical, all the energy goes into making the rocket move vertically and it doesn't travel any vertical distance, and lets drag stop the rocket while it’s still in the air. If you aim it near the horizontal, there’s less energy available to overcome the pull of gravity, so it doesn't fly nearly as high and it hits the ground and drags to a stop, wasting energy. There’s a “best launch angle” that balances these two effects to make a parabolic trajectory (path) that the rocket takes when launched. Other ideas including carrying the nose-weight of the rocket. You’ll need to be able to measure the clay (in grams) and see what effect this has on flight as well. Try a rocket without any clay at all and see how it flies! Use a pencil tip or an edge of a ruler to balance each rocket and find it’s center of gravity, and measure this from the nose and record this with your data in a table. What happens if you change the size, shape, and location of the fins? What if you put fins in the front, middle or back of the straw? Use big or small fins? [/am4show]
- Straw
- Masking tape
- Small ball of clay
- 2” PVC pipe approx. 2’ long
- 1 1/4” PVC pipe approx. 2’ long
- 1/2” PVC pipe approx. 6” long
- 1-1/4” PVC end cap
- 1/2” PVC plug
- 1/2” PVC elbow
- 2” to 1/2” PVC reducer
- 2” PVC elbow
- 3/16” brass tubing
- PVC cement
- Hot glue
- 2” pipe clamp
- 2 wood screws
- Electrical tape
- Protractor (optional)
- Drill and drill bits (3/16”)
- Scrap piece of wood
After the initial fun, you may start to wonder about how you can use this as a science fair project or something that really does some real science. This is a great setup for this type of experimenting, since you can do repeated launches and measure your results. The first thing you’ll need to do is figure out a way to make it so that you push down with the same amount of force each time you launch the rocket. You can attach a bungee cord to connect the cap of the 1-1/4” PVC pipe to the opening of the 2” PVC pipe, and add small increments on the 1-1/4” pipe. This experiment can show the effect of gravity of different masses of rockets, since the speed of the rocket is the same at all angles fired at (if you launch with the same force each time). You can also vary the launch angle and measure how far the rocket goes horizontally each time, or make the vertical measurement tool shown in the video as well. You can experimentally figure out the best angle to launch at, since if you launch completely vertical, all the energy goes into making the rocket move vertically and it doesn't travel any vertical distance, and lets drag stop the rocket while it’s still in the air. If you aim it near the horizontal, there’s less energy available to overcome the pull of gravity, so it doesn't fly nearly as high and it hits the ground and drags to a stop, wasting energy. There’s a “best launch angle” that balances these two effects to make a parabolic trajectory (path) that the rocket takes when launched. Other ideas including carrying the nose-weight of the rocket. You’ll need to be able to measure the clay (in grams) and see what effect this has on flight as well. Try a rocket without any clay at all and see how it flies! Use a pencil tip or an edge of a ruler to balance each rocket and find it’s center of gravity, and measure this from the nose and record this with your data in a table. What happens if you change the size, shape, and location of the fins? What if you put fins in the front, middle or back of the straw? Use big or small fins? [/am4show]
There's really nothing better than making a rocket in less than 5 minutes that can shoot clear across the room using stuff you'd find in a desk or kitchen drawer. Here's how you do it:
[am4show have='p8;p9;p10;p37;p109;p95;' guest_error='Guest error message' user_error='User error message' ]
Materials:
If you're having trouble with the rocket catching on the end of the rubber band, make the "hook" part smaller. Bend it straight again, and then re-bend it so there's not quite so much of it hanging down. You can also adjust the angle so it's more than a 90 degree bend so it will release quicker. Play with the design and see what kind of improvements you can think up!
[/am4show]
- index card
- paperclip
- rubber band
- straw
- popsicle stick
- tape
- scissors

This is a recording of a recent live teleclass I did with thousands of kids from all over the world. I've included it here so you can participate and learn, too!
Blast your imagination with this super-popular class on rocketry! Kids learn about fin design, hybrid and solid-state rocketry, and how rockets make it into space without falling out of orbit. This class is taught by a real live rocket scientist (me!). We'll launch rockets during the class, too!
[am4show have='p8;p9;p11;p38;p95;' guest_error='Guest error message' user_error='User error message' ]
Materials:
Below you will find an older version of the same teleclass. We are making a different experiment during class, so the materials you will need are a little different:
Materials:
- straw
- paperclip
- rubber band
- index card
- popsicle stick
- scissors
- masking tape
- water
- alka-seltzer tablets (generic brands work fine)
- film canister or small container with tight-fitting lid
- OPTIONAL: Small toy car
- 2L soda bottle
- 1/2" PVC pipe
- duct tape
- pen or pencil
- index cards
- sheets of paper
- bicycle inner tube
Key Concepts
A rocket has a few parts different from an airplane. One of the main differences is the absence of wings. Rockets utilize fins, which help steer the rocket, while airplanes use wings to generate lift. Rocket fins are more like the rudder of an airplane than the wings. Another difference is the how rockets get their speed. Airplanes generate thrust from a rotating blade, whereas rockets get their movement by squeezing down a high-energy gaseous flow and squeezing it out a tiny exit hole. If you've ever used a garden hose, you already know how to make the water stream out faster by placing your thumb over the end of the hose. You're decreasing the amount of area the water has to exit the hose, but there's still the same amount of water flowing out, so the water compensates by increasing its velocity. This is the secret to rocket nozzles - squeeze the flow down and out a small exit hole to increase velocity. The rockets we're about to build get their thrust by generating enough pressure and releasing that pressure very quickly. You will generate pressure both by pumping and by chemical reaction, which generates gaseous products.What's Going On?
For every action, there is equal and opposite reaction. If flames shoot out of the rocket downwards, the rocket itself will soar upwards. It's the same thing if you blow up a balloon and let it go-the air inside the balloon goes to the left, and the balloon zips off to the right (at least, initially). Your rocket generates a high pressure by squeezing the air into a very small space and using Bernoulli's Principles in action! As you stomp on the rocket, the air pressure leaves the bottle pretty quickly, pushing the paper rocket out of the way as it zooms out of the tube. By narrowing the exit diameter, you allow the air to speed up as it exits, creating a higher launch for your rocket. You can modify your rocket body design. Add more fins, tilt the fins at a angle, or try no fins at all! You can add a more steeply slanted nose. You can cut the rocket body in half or make it twice as long. There's so many things you can test out, change, or modify with this simple activity! You can also add canards (glider-type wings) to either side of the rocket body right under the nose and turn it into a glider when it starts to fall back to Earth!Questions to Ask
- Does it matter how many fins you use?
- What happens if there's an air leak in the system?
- How can you make the rocket fly even higher? Name three different ways.
- Is the center of pressure before or aft of the center of gravity on your rocket?
- For stable flight, how many fins do you ideally need?
- How can you make the rocket spin as it launches?
This is a faster, easier project than the Linear Accelerator, and builds on the ideas from both Unit 11: Magnetism and Unit 2: Motion (in the momentum section).
Have you ever shot a billiard ball toward another on a pool table and watched the first one stop while the second goes flying? This has to do with a concept known as momentum.
[am4show have='p8;p9;p10;p37;p95;' guest_error='Guest error message' user_error='User error message' ]
Momentum can be defined as inertia in motion. Something must be moving to have momentum. Momentum is how hard it is to get something to stop or to change directions. A moving train has a whole lot of momentum. A moving ping pong ball does not. You can easily stop a ping pong ball, even at high speeds. It is difficult, however, to stop a train even at low speeds.
Mathematically, momentum is mass times velocity, or Momentum=mv. The heavier something is and/or the faster it’s moving the more momentum it has. The more momentum something has, the more force it takes to get it to change velocity and the more force it can apply if it hits something.
Momentum is inertia in motion, how hard it is to get something to change directions or speed. Momentum = mv. Conservation of momentum; mv = mv. If something hits something else the momentum of the objects before the collision will equal the momentum of the objects after the collision.
This experiment is a great example of how momentum can be transferred from one object to another, just like on the pool table.
Materials (refer to shopping list for online stores):
- five 1/2" ball bearings (or similar size)
- 1-4 neodymium magnets
- paper towel tube
The ball furthest from the magnet breaks free because it has enough momentum (which is directly related to speed) to escape the magnetic field of the strong magnet. What happens if you try this experiment without the magnets? Can you get one ball bearing to transfer all its momentum to a second one? You can read more about momentum here.
Turn this experiment into a first-prize science fair project by using our Science Fair Project guides!
Advanced students: Download your Momentum lab here.
[/am4show]
Newton's Third Law states that all forces come in pairs. When you push against the wall, the wall pushes back against you with an equal amount of force (or push). When a rocket fires, the rocket moves forward as the exhaust gases move in the opposite direction. An inflated balloon will zip through the air as the air escapes. For every action there is an equal and opposite reaction.
If you were to fart in space, what do you think would happen (before it froze)? You would move in the opposite direction!
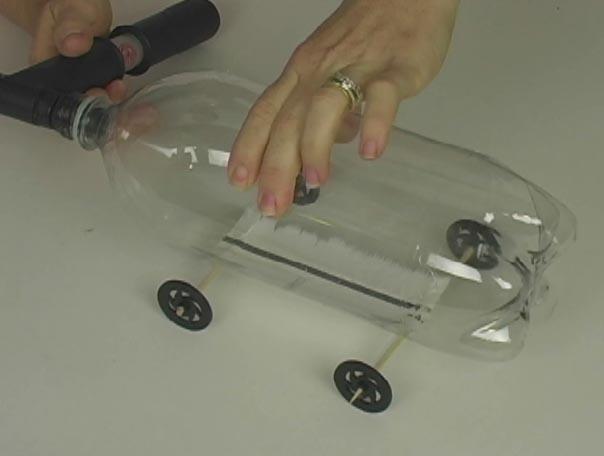
This rocket car uses high pressure on the inside to blow a weight out the back (the neoprene stopper) and propel itself forward.
[am4show have='p8;p9;p10;p37;p95;' guest_error='Guest error message' user_error='User error message' ]
Materials:
- 2L soda bottle
- scissors
- 2 straws
- 2 skewers (make sure these fit into your straws)
- 4 wheels (milk jug caps, film canister lids, cardboard circles...)
- needle valve (the kind you'd use to fill up a basketball with)
- neoprene stopper (fits your soda bottle)
- bike pump (make sure it fits the needle valve)
- hot glue gun with glue sticks
Download Student Worksheet & Exercises
When you pump air into the bottle, you are building up pressure inside the bottle. The neoprene cork stays in because there's a high amount of friction between the bottle and the cork. Eventually, however, there's enough of a push from the inside pressure to overcome this frictional force and cause the cork to go flying out of the bottle, which in turn propels the rocket forward. The compressed air inside the bottle also escapes out the open end, which also propels the rocket car forward!
Exercises
- What is inertia?
- What is Newton’s First Law?
[/am4show]
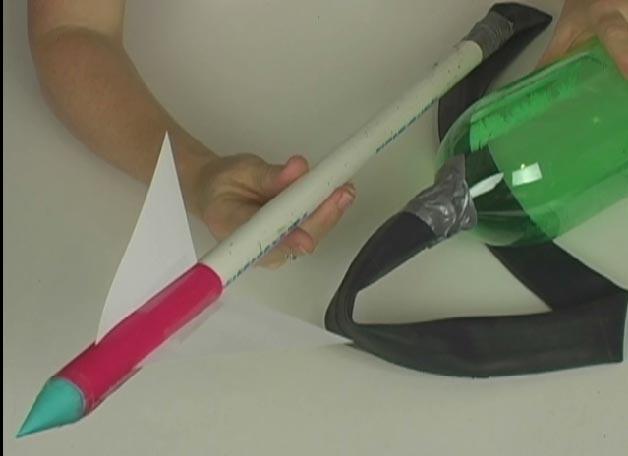
These rockets use air pressure to launch your lightweight rocket skyward. Using simple materials, you'll be able to make your launcher in minutes and as many rockets as you want. The first time I flew these, they got stuck on the roof, so be prepared with a few extras just in case.
[am4show have='p8;p9;p10;p37;p109;p95;' guest_error='Guest error message' user_error='User error message' ]
Materials:
The higher pressure is generated inside the bottle when you stomp on it. Because air is a gas, it's also compressible, which means you can pack the same volume of air into a tighter space. When you decrease the volume, you increase the pressure. Since higher pressure always pushes, the rocket feels a push as soon as the bottle collapses down, which moves the rocket forward.
[/am4show]
- 2L soda bottle
- 1/2" PVC pipe
- duct tape
- pen or pencil
- index cards
- sheets of paper
- bicycle inner tube

You'll see these in toy stores, but why not design your own version? You can add weight to the nose, widen the fins, and lengthen the slingshot part to figure out how to get to to soar further.
Materials:
- foam tube (I used a piece of foam from 3/4" pipe insulation, but you can also use a paper towel tube)
- foam sheet
- film canister or other small container to hold the rubber band in place (or tape the rubber bands to the outside using duct tape)
- paper clip
- 5 to 8 rubber bands
- scissors
- hot glue gun
- duct tape
[am4show have='p8;p9;p10;p37;p109;p95;' guest_error='Guest error message' user_error='User error message' ]
Punch a small hole in the bottom of a black Kodak film canister. Chain 5 rubber bands together and push one end of the rubber band chain through the hole from the outside, catching it with a paper clip on the inside like a cotter pin so it can’t slip back through the opening.
Hot glue the canister into one end of a 6-inch piece of ¾-inch foam pipe insulation. Check the hardware store for this insulation, which comes in 6 foot. Tape the circumference of the pipe with a few wraps of duct tape. The rubber bands should be hanging out of the foam pipe.
Cut out triangular fins from a foam sheet and attach with hot glue to the opposite end. To launch, hook the rubber band over your thumb, pull back, and release!
Want to make a Paper Slingshot Rocket?
[/am4show]
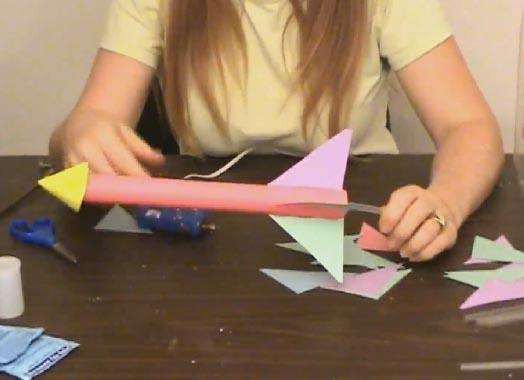
This is the kind of thing I wish I had back in grade school. I could have launched these across the room without anyone being the wiser. Be sure to fold the nose down securely, or you'll have air leaks (and no launch!) This is a smaller version of the Rocketships experiment.
Materials:
All you need is a
Spiral-wrap a thin strip of paper around and along the length of a wood pencil and use tape to secure. You can alternately use a naked straw instead of making your own rocket body from paper, but then you’ll need a slightly smaller launch tube straw. Hot glue triangular fins made from an index card to one end. Fold the opposite end over twice and secure the fold with a ring of tape to make a nose for the rocket. Insert straw into the rocket body and blow hard! [/am4show]
- sheet of paper
- a straw
- tape
- scissors
Paper Blow Gun Rocket
Spiral-wrap a thin strip of paper around and along the length of a wood pencil and use tape to secure. You can alternately use a naked straw instead of making your own rocket body from paper, but then you’ll need a slightly smaller launch tube straw. Hot glue triangular fins made from an index card to one end. Fold the opposite end over twice and secure the fold with a ring of tape to make a nose for the rocket. Insert straw into the rocket body and blow hard! [/am4show]
 Click here for a printer-friendly version of this page.
Objective Kids love going fast and blowing things skyward. This set of experiments should satisfy both needs. The goal is to not only provide them with a safe set of activities that will keep their eyebrows intact, but also to get them really excited about aerodynamics and rocket design by building projects that really work. Most rockets will require a certain amount of tweaking (like the Flying Machines experiments did) in order to fly straight. This is an excellent time to hone their observation skills and get them into the habit of changing and testing only one thing at a time.
We’re going to continue learning about pressure as we generate high pressure through both bicycle pumps as well as chemical reactions. The first thing to do is watch the video on the Rocketry website page, and then dive into the experiments.
Main Ideas While the kids are playing with the experiments see if you can get them to notice these important ideas. When they can explain these concepts back to you (in their own words or with demonstrations), you’ll know that they’ve mastered the lesson.
- For every action, there is an equal and opposite reaction.
- The position of the center of pressure relative to the center of gravity of a rocket determines how stable the flight will be.
About the Experiments The experiments in this section vary from small indoor flights to rockets that go over a football field in distance. All rockets move by a quick release in pressure. Once your rocket takes flight, take a clear look (or better, a video so you can watch it a few times over) at how it flies when it’s up there. By launching at an angle instead of straight up, you’ll get a better view… just be sure your launch area is clear.
Stability of Flight: A rocket has two key points (CP & CG, covered in the Flying Machines experiments) that you need to know in order to have stable flight. Here’s how you find and adjust them:
- Finding the Center of Pressure: You can find center of pressure by tying a string around the rocket body and swinging it around your head. The balance point is your center of pressure. Mark the point as CP.
- Finding the Center of Gravity: Balance your rocket on a pencil tip. Mark the point as CG. Note if this is forward or aft of your CP.
- To adjust the CG/CP: It’s easier to adjust the CG – add weight to the nose or more fins to the tail section. Re-measure your CG when you’re done.
- Read more about rocket stability here.
The How and Why Explanation Rockets shoot skyward with massive amounts of thrust, produced by chemical reaction or air pressure. Scientists create the thrust force by shoving a lot of gas (either air itself, or the gas left over from the combustion of a propellant) out small exit nozzles.
According to the universal laws of motion, for every action, there is equal and opposite reaction. If flames shoot out of the rocket downwards, the rocket itself will soar upwards. It’s the same thing if you blow up a balloon and let it go—the air inside the balloon goes to the left, and the balloon zips off to the right (at least, initially, until the balloon neck turns into a thrust-vectored nozzle, but don’t be concerned about that just now).
A rocket has a few parts different from an airplane. One of the main differences is the absence of wings. Rockets utilize fins, which help steer the rocket, while airplanes use wings to generate lift. Rocket fins are more like the rudder of an airplane than the wings.
Another difference is the how rockets get their speed. Airplanes generate thrust from a rotating blade, whereas rockets get their movement by squeezing down a high-energy gaseous flow and squeezing it out a tiny exit hole.
If you’ve ever used a garden hose, you already know how to make the water stream out faster by placing your thumb over the end of the hose. You’re decreasing the amount of area the water has to exit the hose, but there’s still the same amount of water flowing out, so the water compensates by increasing its velocity. This is the secret to converging rocket nozzles—squeeze the flow down and out a small exit hole to increase velocity.
The rockets we’re about to build get their thrust by generating enough pressure and releasing that pressure very quickly. You will generate pressure both by pumping and by chemical reaction, which generates gaseous products. Let’s get started!
Questions to Ask When you’ve worked through most of the experiments ask your kids these questions and see how they do:
- If you inflate a balloon (don’t tie the end), which direction does the air in the balloon and the balloon itself travel? (a) both the same way (b) in opposite directions (c) nothing happens
- When you drop an effervescent tablet into water, what happens? (a) bubbles foam up (b) it burps (c) carbon dioxide gas is released (d) it produces a chemical reaction that can propel a rocket skyward
- Puff Rockets use which of the following propellants? (a) air pressure (b) chemical reactions (c) both (d) neither
- The most dangerous parts of the Water Rocket experiment is are: (a) working with high pressure (b) that you’ve stripped out the threads that normally secure the cap in place, and now it’s easier to accidentally release the rocket and shoot someone’s eyeballs out (c) reusing the bottles over and over causes fissures and cracks to form in the bottle, increasing the chances of bursting if you don’t replace the bottle after every 7-10 launches (d) all of the above and more
- The most important things to remember when launching water rockets are: (a) safety goggles or face shield (b) 70 psi maximum air pressure (c) always hold the valve-side down when holding the bottle (d) only use soda bottles that are build to hold pressure (e) never water bottles, juice bottles, sports drink bottles, or any others that don’t say pssssst! when you first open them
- To get the multi-staging rockets to work correctly, where does the trigger need to be? (a) inside the first balloon (b) on the string (c) in the straw (d) squished between the first balloon and the cup
- How does a Slingshot Rocket work? Where does the thrust come from?
- If your Blow Gun Rocket straw rips loose, what can you do to quickly repair it without rebuilding the entire rocket?
How many of these items do you already have? We’ve tried to keep it simple for you by making the majority of the items things most people have within reach (both physically and budget-wise).
You do not need to do ALL the experiments – just pick the ones you want to do! Look over the experiments and note which items are needed, and off you go!
Click here for a printer-friendly version of this page.
Materials
- 10 sheets of 8×11” paper
- 5 index cards
- 7-9” latex balloon
- 15 large straws
- 5 small straws (make sure these slide easily into the larger straws)
- wooden spring-type clothespin
- 4 popsicle sticks (any size)
- 5 skewers
- 8 milk jug lids, film tops, or other small, plastic lids that are round for wheels
- 6” long piece of 3/4” foam pipe insulation
- foam sheet from a craft store
- 4 Fuji film canisters or plastic M&M containers (check recycle bin at a photo developing store)
- 2 small paper clips
- 8 rubber bands
- effervescent tablets (generic alka seltzer works great)
- clean, empty shampoo or lotion bottle
- small piece of squishy foam or packing peanut
- wood skewer (should fit inside straws)
- bike pump
- needle valve
- neoprene stopper that fits a 2L soda bottle
- empty 2-liter soda bottles
Tools
- duct tape
- scissors
- tape
- hot glue gun
Optional Materials: These rockets go a lot further, but also require adult help to create or are more expensive to build. Watch the video first before starting these projects!
- razor blade
- vice or vice grips
- drill with ½” drill bit (spade bit is best)
- air compressor and/or air tank
- spray-nozzle for compressor/tank
- 3 foot piece of metal tubing that fits just inside the larger straws (listed above)
- car tire valve (find this at a tire repair shop)
- 2 to 5 empty 2-liter soda bottles with caps
- 5 ball bearings , ½” diameter
- 4 neodymium (super-strong) magnets (1/2″ cube)
- paper towel tube
- 1 inch wide bike tube (at least 3 feet long)
- 12” long x 1/2” diameter PVC pipe
If you don't have access to an air compressor or air tank with a spray-nozzle, you can either make your own rocket launcher (watch second video below), or make the blow-gun rockets. Either way, you're going to be launching sky-high in no time!
Materials:
- Two straws each in two different sizes
- two sheets
- index cards
- scissors
- tape
- hot glue gun
- air compressor or air tank with spray-nozzle
- metal tubing that fits just inside the larger straws
[am4show have='p8;p9;p10;p37;p109;p95;' guest_error='Guest error message' user_error='User error message' ]
Make a very long straw by joining two straws with tape. Roll an 8½x11-inch sheet of paper into a long tube and tape it shut. Cut triangle fins out of the index card and hot glue to the base end of the rocket.
Construction Tip: Younger kids can roll the paper around a dowel to help.
To make the nosecone, cut a circle out of paper. You can trace the inner diameter of masking tape roll to get a good circle. To make a flat circle into a 3D cone, begin to cut the circle in half, but stop cutting when you get to the center. Slide one flap over the other to form a nose for your rocket and tape it shut. Pile a lot of glue inside the cone insert the long straw and wait to for it to dry. Slip the straw inside the tube and seal the nosecone to the rocket body.
When dry, blow into your straw to check for leaks. It should be impossible to blow through. If you have a leak, go back and fix it now. Otherwise, slip a metal tube slightly larger than the straw over the straw and blow hard. Tip: Check a hardware store for the metal tube.
What’s going on? This rocket uses air pressure to launch itself skyward. When you blow hard, you create a higher pressure region behind the rocket. Higher pressure always pushes, so off it goes!
If you have an air tank or compressor handy, the nozzle from it to blast these rockets hundred of feet in the air! Check out the video below for making your own rocket launcher that uses a bicycle pump!
Repair Tip: If your straws come loose, simply cut the rocket body just below the nosecone and rebuild the straw-cone assembly, fastening it in place when dry.
Materials & Tools:
1-1/4" SCH40 PVC pipe pieces:
| 1-1/4" SCH40 PVC pipe pieces:
1-1/4" Fittings:
1" SCH40 PVC pipe pieces & fittings:
1/2" SCH40 PVC pipe pieces:
More fittings:
|
[/am4show]
Here are a few ideas for making a mini-stomp rocket called a PUFF ROCKET that uses something other than your lungs to get your rocket launched.
When you do this experiment, think about which kind of bottles will work the best. And does straw length matter? In our testing, we had one rocket that cleared 25 feet!
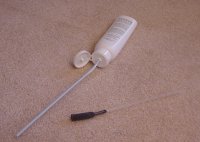
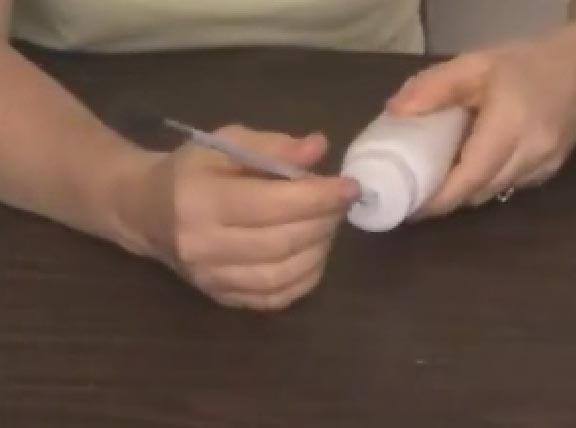
1. Grab a clean, empty shampoo or lotion bottle. Make sure the bottle you choose gives you a good puff of air out the top cap when you squeeze it. You’ll also need two straws, one slightly smaller than the other. And a small piece of foam. 2. Insert the smaller straw into the hole in the cap. If you have trouble, ream out the hole or just take off the cap and seal the connection with a lump of clay or a lot of hot glue. Insert a small bit of foam into one end of the larger straw. Slide the larger straw (your rocket) onto the smaller straw (your launcher). 3. Squeeze the bottle hard! POOF! [/am4show]
- clean lotion bottle or shampoo bottle
- larger straw that fits onto a smaller straw
- small piece of foam that fits snugly into the straws
- hot glue gun
1. Grab a clean, empty shampoo or lotion bottle. Make sure the bottle you choose gives you a good puff of air out the top cap when you squeeze it. You’ll also need two straws, one slightly smaller than the other. And a small piece of foam. 2. Insert the smaller straw into the hole in the cap. If you have trouble, ream out the hole or just take off the cap and seal the connection with a lump of clay or a lot of hot glue. Insert a small bit of foam into one end of the larger straw. Slide the larger straw (your rocket) onto the smaller straw (your launcher). 3. Squeeze the bottle hard! POOF! [/am4show]
Rockets shoot skyward with massive amounts of thrust, produced by chemical reaction or air pressure. Scientists create the thrust force by shoving a lot of gas (either air itself, or the gas left over from the combustion of a propellant) out small exit holes out the back of the nozzles.
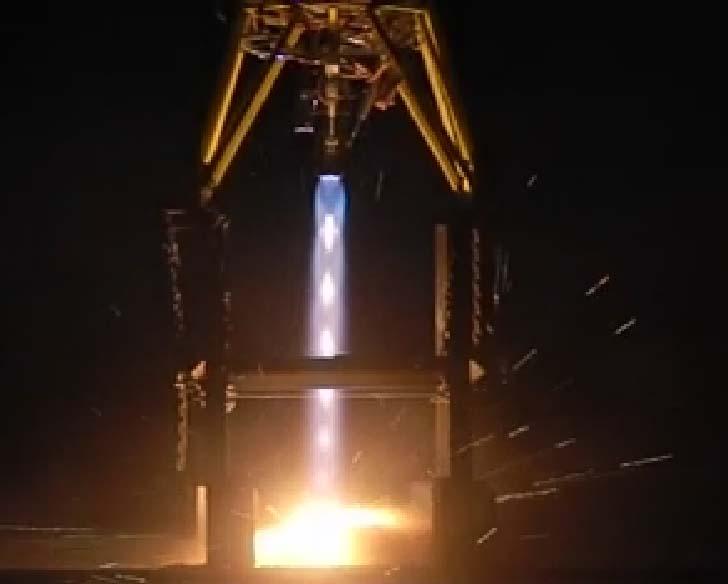
Here are two videos of real rockets being tested. The second video uses a special type of photography to see the shock waves (you will learn more about how that's done in Unit 9).
For every action, there is equal and opposite reaction. If flames shoot out of the rocket downwards, the rocket itself will soar upwards. It’s the same thing if you blow up a balloon and let it go—the air inside the balloon goes to the left, and the balloon zips off to the right. They both follow Newton's Third Law: for every action, there is an equal and opposite reaction.
What you're looking at in the video below is exactly the kind of work I did as a graduate student in college when I was 21. The end of a rocket nozzle is on the right side, and you're looking at supersonic air (made visible by a special type of photography called 'Schlieren') as a rushes past from right to left. The thick white lines are shock waves, which are lines where the pressure drop is huge. When the flow is fast enough (around Mach 2 and up), you'll see nicely shaped 'Mach Diamonds' form.
Scientists use these images to tell how well the engines will perform at high-speed flight. One of the greatest aeronautical engineers, Kelly Johnson, who founded Skunkworks at Lockheed, said the greatest compliment he ever received was when a friend commented: "It's amazing... he can actually see airflow." This is what Johnson could visualize in his mind simply because he understood the fundamentals of aerodynamics:
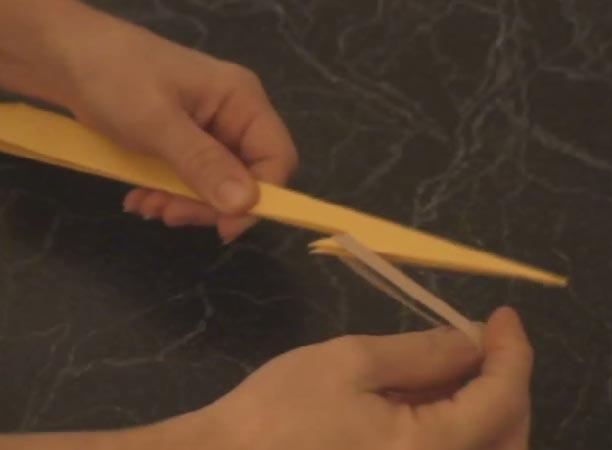
This project is simple, yet highly satisfying. The current record distance traveled is 74 feet... can you beat that? Make sure you launch these UP, not horizontally! You only need three items, all of which are in your house right now! First, you need a piece of...
[am4show have='p8;p9;p10;p37;p109;p93;p95;' guest_error='Guest error message' user_error='User error message' ]
...paper, a skinny rubber band, and a pair of scissors.
[/am4show]
Rockets shoot skyward with massive amounts of thrust, produced by chemical reaction or air pressure. Scientists create the thrust force by shoving a lot of gas (either air itself, or the gas left over from the combustion of a propellant) out small exit nozzles.
According to the universal laws of motion, for every action, there is equal and opposite reaction. If flames shoot out of the rocket downwards, the rocket itself will soar upwards. It’s the same thing if you blow up a balloon and let it go—the air inside the balloon goes to the left, and the balloon zips off to the right (at least, initially, until the balloon neck turns into a thrust-vectored nozzle, but don’t be concerned about that just now).
A rocket has a few parts different from an airplane. One of the main differences is the absence of wings. Rockets utilize fins, which help steer the rocket, while airplanes use wings to generate lift. Rocket fins are more like the rudder of an airplane than the wings.
Another difference is the how rockets get their speed. Airplanes generate thrust from a rotating blade, whereas rockets get their movement by squeezing down a high-energy gaseous flow and squeezing it out a tiny exit hole.
If you’ve ever used a garden hose, you already know how to make the water stream out faster by placing your thumb over the end of the hose. You’re decreasing the amount of area the water has to exit the hose, but there’s still the same amount of water flowing out, so the water compensates by increasing its velocity. This is the secret to converging rocket nozzles—squeeze the flow down and out a small exit hole to increase velocity.
There comes a point, however, when you can’t get any more speed out of the gas, no matter how much you squeeze it down. This is called “choking” the flow. When you get to this point, the gas is traveling at the speed of sound (around 700 mph, or Mach 1). Scientists found that if they gradually un-squeeze the flow in this choked state, the flow speed actually continues to increase. This is how we get rockets to move at supersonic speeds or above Mach 1.
 The image shown here is a real picture of an aircraft as it breaks the sound barrier. This aircraft is passing the speed at which sounds travel. The white cloud you see in the photo is related to the shock waves that are forming around the craft as it moves into supersonic speeds. Because the aircraft is moving through air, which is a gas, the gas can compress and results in a shock wave.
You can think of a shock wave as big pressure front. In this photo, the pressure is condensing water vapor in the air, hence the cloud. There are lots of things on earth that break the sound barrier – bullets and bullwhips, for example. The loud crack from a whip is the tip zipping faster than the speed of sound.
The rockets we're about to build get their thrust by generating enough pressure and releasing that pressure very quickly. You will generate pressure both by pumping and by chemical reaction, which generates gaseous products. Let's get started!
For this experiment, you will need:
[am4show have='p8;p9;p10;p37;p109;p95;' guest_error='Guest error message' user_error='User error message' ]
- film canister or other plastic container with a tight-fitting lid (like a mini-M&M container)
- alka-seltzer or generic effervescent tablets
- water
- outside area for launching
The record for these rockets is 28' high. What do you think about that? Note - you can use anything that uses a chemical reaction... what about baking soda and vinegar? Baking powder? Lemon juice?
Important question: Does more water, tablets, or air space give you a higher flight?
Variations: Add foam fins and a foam nose (try a hobby or craft shop), hot glued into place. Foam doesn’t mind getting wet, but paper does. Put the fins on at an angle and watch the seltzer rocket spin as it flies skyward. You can also tip the rocket on its side and add wheels for a rocket car, stack rockets, for a multi-staging project, or strap three rockets together with tape and launch them at the same time! You can also try different containers using corks instead of lids.
More Variations: What other chemicals do you have around that also produces a gas during the chemical reaction? Chalk and vinegar, baking soda, baking powder, hydrogen peroxide, isopropyl alcohol, lemon juice, orange juice, and so on.
[/am4show]
[am4show have='p9;p39;' guest_error='Guest error message' user_error='User error message' ]
Advanced students: Download your Pop Rockets Lab here.
[/am4show]
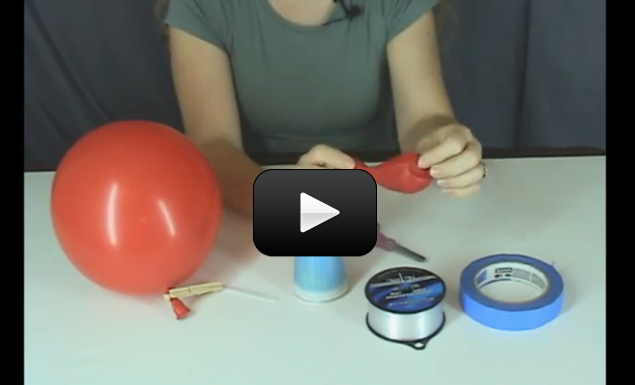
We’re going to experiment with Newton’s Third law by blowing up balloons and letting them rocket, race, and zoom all over the place. When you first blow up a balloon, you’re pressurizing the inside of the balloon by adding more air (from your lungs) into the balloon. Because the balloon is made of stretchy rubber (like a rubber band), the balloon wants to snap back into the smallest shape possible as soon as it gets the chance (which usually happens when the air escapes through the nozzle area). And you know what happens next – the air inside the balloon flows in one direction while the balloon zips off in the other.
Question: why does the balloon race all over the room? The answer is because of something called ‘thrust vectoring’, which means you can change the course of the balloon by angling the nozzle around. Think of the kick you’d feel if you tried to angle around a fire hose operating at full blast. That kick is what propels balloons and fighter aircraft into their aerobatic tricks.
We’re going to perform several experiments here, each time watching what’s happening so you get the feel for the Third Law. You will need to find:
- balloons
- string
- wood skewer
- two straws
- four caps (like the tops of milk jugs, film canisters, or anything else round and plastic about the size of a quarter)
- wooden clothespin
- a piece of stiff cardboard (or four popsicle sticks)
- hot glue gun
First, let’s experiment with the balloon. Here’s what you can do:
[am4show have=’p8;p9;p12;p39;p109;p72;p92;p95;’ guest_error=’Guest error message’ user_error=’User error message’ ]
1. Blow up the balloon (don’t tie it)
2. Let it go.
3. Wheeeee!
4. Tie one end of the string to a chair.
5. Blow up the balloon (don’t tie it).
6. Tape a straw to it so that one end of the straw is at the front of the balloon and the other is at the nozzle of the balloon.
7. Thread the string through the straw and pull the string tight across your room.
8. Let go. With a little bit of work (unless you got it the first time) you should be able to get the balloon to shoot about ten feet along the string.
This is a great demonstration of Newton’s Third Law – the air inside the balloon shoots one direction, and the balloon rockets in the opposite direction. It’s also a good opportunity to bring up some science history. Many folks used to believe that it would be impossible for something to go to the moon because once something got into space there would be no air for the rocket engine to push against and so the rocket could not “push” itself forward.
In other words, those folks would have said that a balloon shoots along the string because the air coming out of the balloon pushes against the air in the room. The balloon gets pushed forward. You now know that that’s silly! What makes the balloon move forward is the mere action of the air moving backward. Every action has an equal and opposite reaction.
Multi-Stage Balloon Rocket
You can create a multi-stage balloon rocket by adding a second balloon to the first just like you see here in the video:
Tie a length of string through the room, having at least twenty feet of clear length. Thread two straws onto the string before securing the end. Punch the bottoms out of two foam coffee cups and tape parallel to the threaded straws.
Blow up balloons while they are inside the cups, so they extend out either end. When blowing up the second balloon, sandwich the untied end of the first inflated balloon between the second inflated balloon surface and inside the cup. Hold the second balloon’s end with a clothespin and release!
Balloon Racecar
Now let’s use this information to create a balloon-powered racecar. You’ll need the rest of the items outlined above to build your racecar. NOTE: in the video, we’re using the popsicle sticks, but you can easily substitute in a sheet of stiff cardboard for the popsicle sticks. (Either one works great!)
Download Student Worksheet & Exercises
You now have a great grasp of Newton’s three laws and with it you understand a good deal about the way matter moves about on Earth and in space. Take a look around. Everything that moves or is moved follows Newton’s Laws.
In the next unit, we will get into Newton’s Third Law a little deeper when we discuss momentum and conservation of momentum by whacking things together *HARD*. But more on this later…
Exercises
- What is Newton’s Third Law of Motion?
- Why does the balloon stop along the string?
[/am4show]
[am4show have=’p9;p39;’ guest_error=’Guest error message’ user_error=’User error message’ ]
Advanced students: Download your Balloon Racer Lab here.
[/am4show]
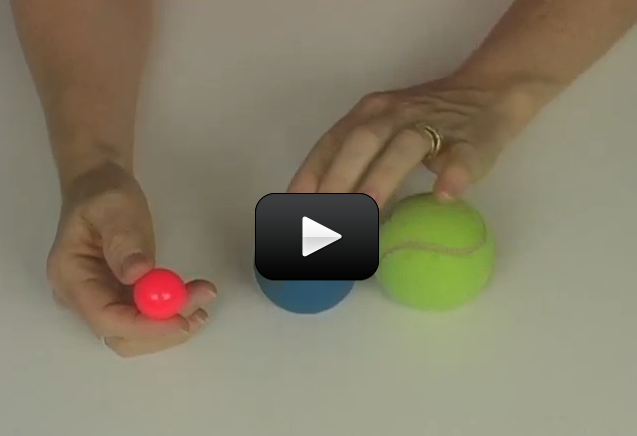
This is a satisfyingly simple activity with surprising results. Take a tennis ball and place it on top of a basketball… then release both at the same time.
Instant ball launcher!
You’ll find the top ball rockets off skyward while the lower ball hit the floor flat (without bouncing much, if at all). Now why is that? It’s easier to explain than you think…
Remember momentum? Momentum can be defined as inertia in motion. Something must be moving to have momentum. Momentum is how hard it is to get something to stop or to change directions. A moving train has a whole lot of momentum. A moving ping pong ball does not. You can easily stop a ping pong ball, even at high speeds. It is difficult, however, to stop a train even at low speeds.
Mathematically, momentum is mass times velocity, or Momentum=mv.
One of the basic laws of the universe is the conservation of momentum. When objects smack into each other, the momentum that both objects have after the collision, is equal to the amount of momentum the objects had before the crash. Once the two balls hit the ground, all the larger ball’s momentum transferred to the smaller ball (plus the smaller ball had its own momentum, too!) and thus the smaller ball goes zooming to the sky.
Materials:
- two balls, one significantly larger than the other
[am4show have=’p8;p9;p12;p39;p72;p92;p95;’ guest_error=’Guest error message’ user_error=’User error message’ ]
Download Student Worksheet & Exercises
Do you see how using a massive object as the lower ball works to your advantage here? What if you shrink the smaller ball even more, to say bouncy-ball size? Momentum is mass times by velocity, and since you aren’t going to change the velocity much (unless you try this from the roof, which has its own issues), it’s the mass that you can really play around with to get the biggest change in your results. So for momentum to be conserved, after impact, the top ball had to have a much greater velocity to compensate for the lower ball ‘s velocity going to zero.
You can also try a small bouncy ball (about the size of a quarter) and a larger bouncy ball (tennis-ball size) and rest the small one on top of the large one. Hold upright as high as you can, then release. If the balls stay put (the small one stays on top of the larger) at impact, the energy transfer will create a SUPER high bounce for the small ball. (Note how high the larger ball bounces when dropped.)
What happens if you try THREE?
Exercises
- What is the mathematical formula for momentum?
- Explain momentum in words.
- What happens to the momentum of the bottom ball in this experiment?
[/am4show]