Click here for a printable version of this page.
There are 18 scientific principles, most of which kids need to know before they hit college. With the content in this unit, you’ll be able to quickly figure out what they know and where the gaps are, so you can focus on the areas you need to most.
Once kids have wrapped their heads around these ideas, they can pretty much explain the universe around them, including why airplanes fly, how electricity works, and why socks disappear in the dryer.
Don’t worry if these ideas are new to you – it may have been that no one has ever explained them to you or how important they are. The content in this unit is just a quick overview of what we’ll be learning in the main e-Science Online Learning program. The content in this program can be stretched over several years, so don’t try to cover it all in one night.
You’ll be able to tell when your child has mastered these principles in the way they describe how things work when they teach these ideas to others.
One of the most important things you can do as parents is to focus on the long-term outcome (how to think like a scientist), not how quickly you can get your child to memorize these top principles.
Scientists do real science by being patient observers, getting curious about the world around them, and asking questions.
There seems to be a predominant myth about scientists: that real scientists put on a white lab coat, walk into their lab, and have an ah-HA! moment about how to cure the common flu or invent warp drive and then fame and fortune follows (along with a wild hairdo).
That’s not the way real scientists do science. In fact, nothing could be further from reality.
 Real scientists are everyday folks that have a curiosity mindset (How does that work? Why did that happen? What’s really going on here?) and are really good at watching the world around them. They see things in ways most people overlook. Why are things overlooked? Either because they are too busy or just weren’t trained to think like a scientist.
Thinking like a scientist is a way you train your mind to focus on how you can make things better for people or the planet. It’s a way of contributing while at the same time challenging yourself to understand something that you didn’t just a moment ago. It’s fun to figure things out if they are not too far out of reach. Just as you wouldn’t teach a toddler to sky-dive, we wouldn’t start you on your science adventure with stuff that too complicated to understand. We’ll make sure to go at your pace and throw enough solid content your way so you grow in order to keep up.
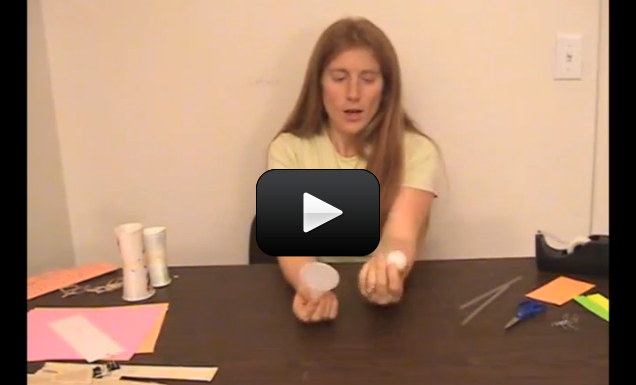
One of the quickest ways to kill your child’s passion for science is to not teach him how to deal with frustration when it pops up. If you’re anxious about doing science because you don’t want him to ever feel frustrated while doing science, let me tell you the good news up front:
SCIENCE CAN BE FRUSTRATING! This is especially true if you’re doing an experiment right in front of other people.
While every scientist gets to feeling frustrated or disappointed at times, they also don’t stay there long. When an experiment goes awry, or something doesn’t work, it’s important to work through these emotions (and events) with your child so they get into the habit of picking themselves up, brushing themselves off, and getting back in the saddle. What this usually means is taking a closer look at your experiment setup, your original ideas and guesses and see what happened.
Everyone gets frustrated. It’s part of life, part of reality. What’s not realistic is letting frustration stop you, or even reliving the same frustration over and over in your mind. That’s not how the real world operates. Everyone experiences setbacks, and the sooner your child figures out how to deal with these, the more resilient they are going to be and the faster they’re going to learn what works and what doesn’t.
In fact, one of the greatest experiments of all time gave a null result, which baffled top scientists for decades until Einstein came to the rescue with his special theory of relativity. It was the 1887 Michelson-Morley experiment that failed to detect the Earth’s motion through the ‘ether’. It’s good thing, too, because now we know the truth Einstein’s relativity principles that tell us the speed of light being constant for all observers (we’ll cover more of that in Unit 7).
We’re going to focus on the top scientific principles that will make you a brainiac extraordinaire. You might be surprised at the materials or experiment setup. But real science doesn’t need to be fancy – you can demonstrate all of these spades of science for dirt cheap. Ready?
Newtonian Physics
Scientists study motion. They study how things move through space and time in order to understand and predict the world.
The Principles of Galilean (Newtonian) Relativity are where Einstein’s original principles of relativity came from. The ideas that “I am at rest” don’t mean anything unless you talk about your motion relative to something else.
There is a natural state of motion to move at constant speed in a straight line. When you toss a ball, it wants to go in a straight line. But air resistance (drag) and gravity are working to bring it to a stop. Launch a Voyager spacecraft into space and it goes in a straight line until it hits something or is gravitationally affected by another object.
Newton’s three laws of motion (which are based on Galileo’s work) make all motion predictable once we know all the forces acting on the object:
[am4show have=’p8;p9;p10;p37;’ guest_error=’Guest error message’ user_error=’User error message’ ]
First Law: Objects at rest stay at rest. Objects move uniformly unless acted on by outside forces. The soccer ball rolls down the field because you pushed it (or kicked it), and it rolls to a stop because of air resistance (the ball hits air particles) and friction (between the ground and the ball). More on this in Unit 1 and Unit 2.
Second Law: F=ma. This tells us how much force makes a change in motion. Acceleration (a) is the change of velocity. Velocity has two parts: speed and direction (55 mph heading east is velocity.)
When you hit the gas pedal (accelerator) in the car, the car changes speed (accelerates). When you make a turn while traveling at constant speed, you are also changing the velocity (changing the direction), so traveling in a circle is also acceleration.
This law also states that momentum is always conserved. That is, mass multiplied by velocity into a system equals the mass multiplied by the velocity coming out. For example…
When you aim a billiard ball toward another, the momentum is transferred from one ball to another. The first ball will slow if not stop altogether after impact while the second one zooms away. More on this in Unit 1 and Unit 2.
Third Law: For every action there is an equal and opposite reaction. Another way of saying this is that forces come in pairs. If you push against the wall, the wall pushes back against you with the same about of push (force). A rocket fires a flame out the back which pushes it forward. More on this in Unit 1 and Unit 2.
 Law of Gravitation: Every object attracts another with a force that depends on both their masses and the distance between them.
Newton realized that the circular motion of the planets and the apple falling from the tree are really the same thing. (Whether he was hit on the head with the apple first is still up for debate.)
Further, he guessed that all objects have an attraction to each other.
He was on his way to prove this idea when he ran into a road block – the math he needed to prove his idea about gravitation did not yet exist. So he invented a branch of Mathematics (called Calculus) in order to figure out his law of gravitation. More on this in Unit 1.
Maxwell’s Equations
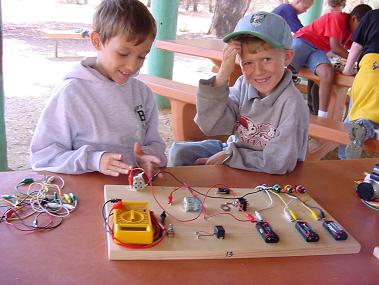
James Maxwell and a host of others worked to form new ideas that formed a new branch of physics called Electricity & Magnetism.
Maxwell’s First Equation: Electrical charge is a fundamental property of matter. Like charges repel, and opposite charges attract. A balloon rubbed on your hair collects a negative static charge as electrons are collected on the balloon. These negative charges attract the positive charges in your hair and your hair stands up when the balloon is brought close. More on this in Unit 10.
Maxwell’s Second Equation: All magnets have two poles. Like poles repel, opposite poles attract. North attracts the South pole of a bar magnet. More on this in Unit 11.
Maxwell’s Third Equation: Invisible fields exert forces on charges and magnets. You can have an electric field or a magnetic field (or both).
Drop a magnet into a pile of iron filings, and you’ll find the filing arrange themselves to show you the magnetic field lines around the magnet.
You detect an electric field when you have a bad hair day! But here’s another way:
Place an object that is sensitive to electrical charges (like a fluorescent light) in an electrical field (you can do this by vigorously rubbing the outside of a long fluorescent light with a plastic bag), and you’ll find the fluorescent tube lights up without having it being plugged in! More on this in Unit 10 and Unit 11.
Maxwell’s Fourth Equation: A moving electric charge produces magnetism.
When you wrap a wire around a nail and run electric current through the wire, the nail-coil turns into a magnet (you can even pick up paper clips!). It’s called an electromagnet, as you can turn the magnet on and off by switching the electricity on and off.
Changing magnetic fields produce electric fields. Wave a permanent magnet back and forth along a coil of wire (or your electromagnet nail used previously), and you’ll measure a pulse of electricity.
Electromagnetic Radiation was first predicted by James Maxwell. He suggested when the magnetic fields produce electrical fields, those emerging electrical fields generated magnetic fields, which then created electrical fields… and continue to create each other, leap-frogging their way through space. He calculated the speed those waves would travel at and was surprised to find it was the speed of light! Maxwell concluded that light must be an electromagnetic wave traveling at speed c, which created a new field of study called optical science, now a branch of electromagnetism.
We’ll cover more on magnetism in Unit 11, and how to make circuits in Unit 10 and Unit 14.
The Electromagnetic Spectrum
If a wave moves across the surface of a pond, wave itself moves, not the water. The energy travels through water as a wave, just like light. Light waves are traveling energy, but they don’t need substances to travel through – they can travel through the vacuum of space.

If you could count the number of waves that pass by you in one second, the number would determine what color of light you see. Red light has 430 trillion waves that pass by in one second, while violet light has 750 trillion. The more energy a light wave has, the higher the frequency. Violet light is higher energy than red light.
Light travels at different speeds, depends on what it travels through. When light passes through different substances, the speed of the wave and the angle change, which is exactly what eyeglasses to: they allow you to focus the light.
The photoelectric effect (electrons are ejected from a substance when illuminated by an intense blue or UV light) was the first experiment that proved light traveled as a wave and interacted as a particle. When the light hits the substance, the photons (light particle) are absorbed and transfer their energy to the material, and if there’s enough energy, the electrons are allowed to escape. Hertz first saw this as sparks in his electroscope in the 1890s. We’ll cover more on this in Units 9 and Unit 10.
Ideal Gas Law
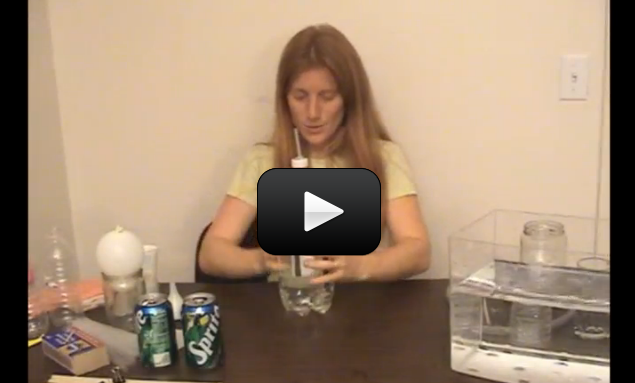
We live in a sea of air called the atmosphere. Everything around us has atoms pushing on it equally in all directions, a lot like a room full of continuously-bouncing ping pong balls.
Think of each ping pong ball as a molecule. If we raise the temperature of the molecules, they start whizzing around faster and faster. Temperature is basically a speedometer for molecules. The faster they are wiggling and jiggling, the higher the temperature and the higher the thermal energy that object has.
If we lower the temperature, the ping pong balls move more slowly. The push the wall feels from each ball add up to equal the total pressure on the wall by the balls. The faster the balls move around, the more pushes the wall feels. This means the higher the temperature, the higher the pressure.
If we keep the temperature constant but instead shrink the size of the room in half, the balls also move more quickly. When the volume of a gas decreases, the temperature and pressure increase. More on this in Unit 13.
The Atom
 All matter is made of atoms. An atom is the smallest part of stable matter.
If you magnify an apple to be the size of the earth, the atoms inside would be the size of an apple.
If you magnified the atom to be the size of the earth, then nucleus would be the size of a basketball at the center of the earth and the first electron shell would be on the surface of the earth. An atom is mostly empty space!
Atoms rarely hang out alone. They join together in groups from two to millions of atoms. H2O for example is made up of two hydrogen atoms and one oxygen atom.
Atoms are made of three basic particles: neutrons, protons, and electrons. Neutrons and protons are made up of smaller particles called quarks (more on this in Unit 7).
Neutrons and protons are together in the middle of the atom and make up the nucleus of the atom. Electrons move around the nucleus. They don’t “orbit” the nucleus. Next lesson we will talk more about how they move. It’s one of the wacky things about electrons.
Atoms differ from one another by how many protons, neutrons, and electrons they have in them.
Elements are specific kinds of atoms. Every atom is a type of element.
There are over 112 elements. Ninety of which are found naturally. Twelve different elements are the major ingredients of over 90% of all matter.
Five different elements are the major ingredients of all living things. Carbon, Hydrogen, Oxygen, Nitrogen, and Calcium are the five main elements that make up all living matter.
Most atoms come from stars and have been around since the beginning of time.
Atoms get used, and reused again and again as things change over time. Atoms, which is to say matter, cannot be created or destroyed, only changed into another form.
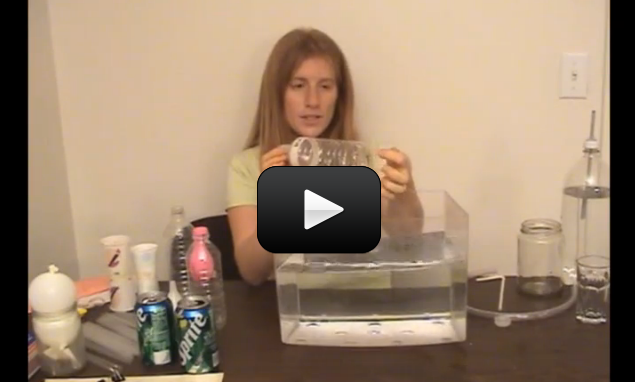
 You can split apart the water molecule into separate tubes of hydrogen and oxygen using a battery. You can then recombine the hydrogen and oxygen back into water and use the energy generated by this combination to power a motor. It takes energy to split apart the molecules, and the chemical reaction of recombining the atoms into a new molecule generated energy. Matter and energy are two sides of the same coin (more on this soon when we get to E=mc2).
Electrons are as small as you can get (only recently have scientists figured out how to split an electron… normally we call particles we can’t split apart any further ‘elementary particles’). Electrons don’t orbit nuclei. They pop in and pop out of existence. Electrons do tend to stay at a certain distance from a nucleus. This area that the electron tends to stay in is called a shell.
The electrons move so fast around the shell that the shell forms a balloon like ball around the nucleus.
An atom can have as many as seven shells. The number of electrons an atom has determines how many shells it has. A shell can only hold so many electrons. Atoms are “satisfied” if they have a full outer shell or if they have a multiple of eight electrons in their outer shell. If an atom is not “satisfied” it will gladly share electrons with other atoms forming molecules. We’ll cover more on this in Unit 3 and Unit 8.
States of Matter
There are five states of matter: Solid, liquid, gas, plasma, and BEC. Since BEC is only found at very unusual places in special laboratories, we’ll outline the four more common states of matter.
Solids have strong, stiff bonds between molecules that hold the molecules in place.
Liquids have loose, stringy bonds between molecules that hold molecules together but allow them some flexibility.
Gasses have no bonds between the molecules.
Plasma is similar to gas but the molecules are very highly energized. The molecules in this state are moving around so fast that they are knocking electrons off each other, which ionizes the gas (gives the molecules in the gas an electrical charge).
Materials change from one state to another depending on the temperature and these bonds.
Changing from a solid to a liquid is called melting. When enough energy is added to a solid, the atoms start vibrating so hard that they jiggle loose from the solid structure into a liquid form.
Changing from a liquid to a gas is called boiling, evaporating, or vaporizing. When more energy is added to the liquid, the top layer vibrates even faster and breaks free of the liquid state atoms to float off in a gaseous state.
Changing from a gas to a liquid is called condensation. When you pull enough energy from a substance, you slow down the molecules enough that they start to link up with each other.
Changing from a liquid to a solid is called freezing. When enough energy is pulled from the system, the atoms (or molecules) lock into place with strong bonds.
We’ll discover more about matter and the bonds that hold it together (including how to break them!) in Unit 3 and Unit 8 and Unit 15.
Energy
There are many different kinds of energy: kinetic, potential, elastic, chemical, nuclear, electrical, mechanical, thermal…
Energy can be transferred, in other words it can be changed from one form to another and from one object to another.
First Law of Thermodynamics: Energy cannot be created or destroyed in a closed system. A system is the place the energy is happening in.
The terms hot, cold, warm etc. describe what physicists call thermal energy. Thermal energy is how much the molecules are moving inside an object. The faster molecules move, the more thermal energy that object has.
Heat is the movement of thermal energy from one object to another.
Second law of thermodynamics: Heat can only flow from an object of a higher temperature to an object of a lower temperature. Heat can be transferred from one object to another through conduction, convection and radiation.
Imagine your cup of hot coffee on a cold morning… which way does the heat flow? Does your coffee get warmer or cooler over time?
Gravitational potential energy is the amount of energy something has due to its height above the ground. The higher it is and more mass it has the more gravitational potential energy it has.
Kinetic energy is energy of motion. The faster something is moving and/or the more massive it is the more kinetic energy it has.
Imagine a ball dropping and hitting the floor. If the system is closed, that means no energy can get in or escape from the system. The energy the ball started with is the same energy it hit the floor with and transferred to the floor at impact. No energy was created or destroyed, just transferred within the system.
Now here’s a question you may be asking yourself, “If energy is neither created nor destroyed in a closed system then why doesn’t a kid swinging on the playground swing go forever?
Energy is neither created nor destroyed, but it can be transferred into non-useful energy. In the case of the swinging kid (picture a pendulum), every swing loses a little bit of energy, which is why each swing goes slightly less high than the swing before it.
Where does that energy go? To heat. The second law of thermodynamics states basically that eventually all energy ends up as heat. If you could measure it, you’d find that the string, and the weight have a slightly higher temperature then they did when they started due to friction.
Elastic Potential Energy is the energy stored by stretching or compressing something. If you take a rubber band and stretch it out, you’re storing more energy in that rubber band. We’ll cover more on this in Unit 4 and Unit 5.
Airplanes are Heavier than Air… How Do They Fly?
There’s air surrounding us everywhere, all at the same pressure of 14.7 pounds per square inch (psi). (Remember the ping pong ball experiment earlier?)
An interesting thing happens when you change a pocket of air pressure – things start to move. Higher pressure always pushes stuff around. While lower pressure does not “pull,” we think of higher pressure as a “push”. The higher pressure inside a balloon pushes outward and keeps the balloon in a round shape.
When air moves quickly, it doesn’t have time to push on a nearby surface, such as an airplane wing. The air just zooms by, barely having time to touch the surface, so not much air weight gets put on the surface. Less weight means less force on the area, which really means less pressure.
Bermoulli’s Principle: Fast moving air creates low pressure regions. There’s a reason airplane wings are rounded on top and flat on the bottom. The rounded top wing surface makes the air rush by faster than if it were flat.
When you put your thumb over the end of a gardening hose, the water comes out faster when you decrease the size of the opening.
The same thing happens to the air above the wing: the wind rushing by the wing has less space now that the wing is curved, so it zips over the wing faster, and creates a lower pressure area than the air at the bottom of the wing. The faster air travels over a surface, the less time it has to push down on that surface and create pressure.
The reason airplanes fly? There’s more lift (generated from the wings) than weight and more thrust (from the engine) than drag. We’ll talk a lot more about this in the Flight Lab (released in summer).
Mass and Energy
E=mc2 is the conversion between mass and all energy. This includes nuclear, chemical, electromagnetic, elastic, potential, kinetic, electrical, mechanical, thermal, etc. (not just the energy inside the nucleus).
If you stretch a rubber band, you could measure the mass and find it’s slightly greater than its un-stretched length (if you had a scale sensitive enough).
The extra mass didn’t come from extra atoms, but rather from the energy you put into the rubber band by stretching it. The energy is stored in the electromagnetic forces holding the atoms together, and anything that stores energy will have mass associated with it. We’ve got an entire lesson on this in Unit 7.
[/am4show]
 If you've ever wanted to sneak a peek into my cabinet of educational games and books for kids, now is your chance. Use this list for gift ideas, boredom busters, and just plain family fun. Some of these games you can pick up at the store, and the rest are the home-made, print-it-out, cut-and-play variety that your kids will really learn from.
 Math Games


 This project is for advanced students. Make sure you’ve completed the
 This project is for advanced students. Make sure you’ve completed the
 This project is for advanced students. Make sure you’ve completed the


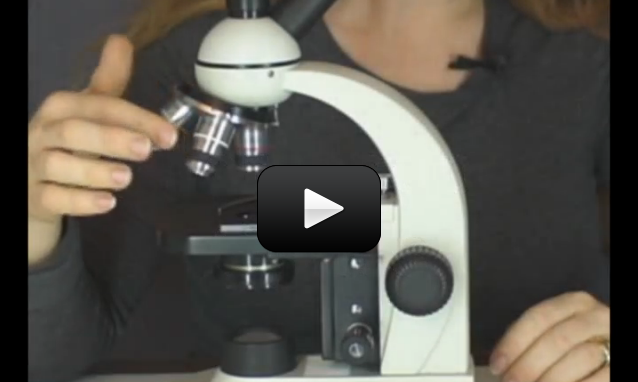
 Did you know you can create a compound microscope and a refractor telescope using the same materials? It’s all in how you use them to bend the light. These two experiments cover the fundamental basics of how two double-convex lenses can be used to make objects appear larger when right up close or farther away.


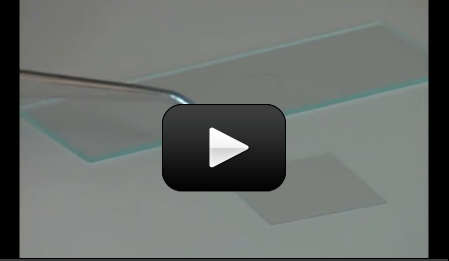
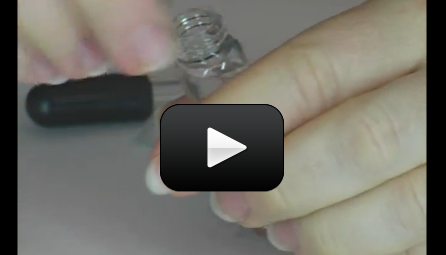
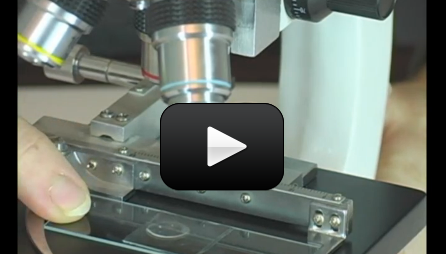
 In addition to a microscope, you'll also need additional items like slides, cover slips, tweezers, and other basic equipment. Here's what you need to complete the labs in this section:


 Make sure you’ve completed the