Involuntary responses are ones that you can’t control, but they are usually in place to help with survival. One good example is when you touch something hot. Your hand does not take the time to send a message to your brain and then have the brain tell your hand to pull away. By then, your hand might be seriously hurt! Instead, your body immediately removes your hand in order to protect it from further harm.
Today you will test an involuntary reflex by using the tendon reflex test. A thick, rubbery band called the patellar tendon holds your knee cap in place. Having one leg on top of the other not only stretches the tendon, but it also makes it possible to see a reaction. You can test the reflex by giving your tendon a tap and watching what happens.
Sit with your legs crossed at the knee on the edge of your seat. Reach forward and see if you can feel the patellar tendon. It is right below your knee cap.
Ask your partner to gently tap the tendon with the outside edge of their hand. This will look like a careful little karate chop. If your partner gets the right spot it will be obvious. You will notice your leg kick out a little in a reflex reaction.
Your partner can try other spots on the tendon if reaction isn’t achieved at first. If it hurts, stop right away! It’s possible that you might not have a tendon response reflex. Not everyone does and that is perfectly normal.
What’s going on?
There are three main parts that make up your peripheral nervous system. They are the autonomic nerves, which control reflexes like the one we have studies here. Autonomic nerves also send information to your organs, blood, and other parts of the body. The second part of your peripheral nervous system is made up of the nerves that deal with the five senses. The last part is your motor nerves. They help you to move the muscles in your body and are responsible for voluntary reactions.
The tendon reflex is in place because the knee is such a sensitive and vulnerable part of the body. When the tendon is stretched out and bumped, your body tries to move the leg and knee out of harm’s way so that it won’t get hurt. As you could probably tell, it’s an involuntary response that neutralizes any conscious, voluntary control that your brain has over the leg through the motor nerves.
Exercises
What are the main parts of the nervous system?
What are the two parts of the peripheral nervous system and what are their functions?
Which part of the nervous system controls involuntary reflexes?
The skeleton is your body’s internal supporting structure. It holds everything together. In addition to providing support, bones act as shock absorbers when you jump, fall, and run. Bones have big responsibilities and so they must be really strong. They also need to be arranged properly for the best support and shock absorption.
In this experiment, we will look at the internal arrangement of the bones holding together your body.
First you will explore different bone structures. Start by taking 20 skinny straws and arrange them randomly in your hand so that they are pointing in different directions.
Lay your arm and hand on a table so that it is braced. Next, have a friend place a heavy book on this column of straws. What happens then it’s exposed to the weight?
Now take 20 more straws and arrange in a circle so that they are all held vertically in your hand.
Repeat step 2 with these more organized straws. Do you notice a difference? The uniformly arranged straws should be stronger than those that were randomly arranged.
The tubes inside your bones are more like the uniform model of straws. They also have a kind of glue that hold them in place inside the bones. Let’s incorporate this idea into your model by lining the inside of the toilet paper tube with tape.
Next, add some straws inside the tube as well. Add a single layer of straws, then another layer on top of it. Finally, fill the middle of the tube with straws, making sure they are tightly packed.
Test your model’s strength by placing a book on top of the tube. What happens when the model is exposed to the book’s weight?
For an extra study opportunity, visit the butcher in your local grocery store and ask for the end of a beef bone. (This is sometimes packaged as a soup bone). Look at the end of the bone. What do you see? It should look like a hard outer shell of bone protecting a softer, spongy portion. Draw a picture of your observations.
What’s going on?
In your experiment, it should have been readily apparent that the more organized and uniform straws were much stronger than the randomly arranged ones. Your own bones have a similar pattern in their soft, spongy part called cancellous bone. This portion of bone has a honeycombed structure which makes the bones very strong, but relatively light. The tiny tubes that make up the honeycomb are called the Haversian system and the actual tissue of the structures is made up of collagen. This allows them to maintain flexibility, but they are still composed of minerals – notably calcium and phosphorus which give them their hardness and strength.
Exercises
Name some of the parts that make up our skeletal system.
What is the smooth, hard, protective layer on the outside of bones called?
What is the inside spongy, porous, honeycombed bone called?
Some groups of muscles are stronger than others because each group is designed for a different and specific function. It just makes sense that the muscle groups in our legs would need to be stronger than the ones in our toes.
For this experiment, you will use a bathroom scale to test the strength of various muscle groups.
Put the scale between your knees. Now squeeze it as hard as you can and have your partner record the scale’s reading.
Use the technique to test the muscles in the following list. Place the scale between the body parts and squeeze! Be sure to record the readings for data-keeping purposes.
a. thighs
b. ankles
c. palms
d. elbows
e. elbow and rib cage
What’s going on?
Not all muscles need to be big and powerful. Actually, muscles have various functions and uses that vary by their design. The muscles in our fingers are detail-oriented. They need to be fast and perform relatively small, precise movements like the ones used in writing. The design of a specific muscle group will vary depending upon the muscles’ ultimate use.
Have you even had a muscle cramp? They occur when a muscle is overworked and fatigued. The muscle simply contracts and stays contracted. Not fun!
Exercises
What are the two main types of muscles?
Give an example of a muscle group that’s more specific than your answers above.
Why aren’t the muscles in our fingers big and strong like those in our arms and legs?
In this experiment, we will continue to explore Ruffini’s endings in your skin. We also look at your body’s ability to detect temperature and regulate its own temperature. You will study how the body cools and warms itself.
Position the thermometer strip on the back of your hand. Give it a moment to register the temperature of your body. Record this temperature as a base reading for your data.
Put some rubbing alcohol on a cotton ball. Now use the cotton ball to wipe the alcohol on the surface where you took the reading, right on the back of your hand. Quickly put the thermometer strip right back on the spot where you have put the alcohol and take another reading. Note the temperature in your records.
Now put the glove on your hand and run around in the yard, do some jumping jacks, or find another way to be physically active for 3 minutes. When you have worked up a sweat, come back to the experiment area. With your hand still in the glove, put the liquid crystal thermometer on the back of your hand where you took the first reading. Record this temperature information in your data records.
Finally, take off the glove and observe your hand. Can you tell that your sweat glands have been working? If so, have they been very active or just a little active?
What’s going on?
Your body likes to keep your temperature in equilibrium, which is a state of balance. It works hard to regulate your temperature and avoid any sudden changes that could be harmful. Constant and predictable is your body’s goal and it uses your skin to help.
When you are cold, blood flow to the skin is reduced in order to help stem the loss of heat. Your hair also stands on end in an error to trap air next to the body and help insulate it…although this doesn’t work very well for most of us! This is a more effective tool against heat loss with much furrier mammals.
In order to cool you down, skin can use some of your three million sweat glands. Sweat absorbs and displaces extra heat and can also close openings to cells on the surface to avoid excess gains in heat.
Your data in the lab should have simulated the effects of body temperature in three different conditions: equilibrium, excess cold, and excess heat.
Your fingers have receptors which perform various jobs. In addition to touch, they can detect pressure, texture, and other physical stimuli. One specialized type of receptors is called Ruffini’s receptors. They are good at identifying changes in pressure and temperature. In this experiment, we will test their ability to distinguish between hot and cold temperatures. We are actually going to try and trick your Ruffini endings. Do you think it will work?
Place the three glasses in front of you on a table. They should be in a row: left, middle and right.
Put hot water from the faucet into the first glass on your right. Pour very cold water from the tap into the far left glass. You can even add a couple of ice cubes if you have them available. Finally, fill the glass that is in the middle with room temperature water.
Now use your right hand to hold on to the glass on the right with hot water. Really spread out your fingers and wrap them around the glass. Do the same thing with your left hand and the glass filled with cold water. Be sure to check the clock and leave your hands on the glasses for exactly one minute.
After one minute, take your hands and put them both on the middle glass. (You may need to stack one on top of the other if your glasses are narrow). Note the temperature you feel with each hand: hot, cold, or medium. You can use the thermometer to record the actual water temperature.
Now repeat steps 1-4. This time, switch the hot and cold glasses so that you are holding the hot water with your left hand and the cold water with your right hand. Compare these results with your initial results. Do both hands respond in a similar way or is one more sensitive that the other?
Some questions to think about:
Does the temperature of the middle glass feel warmer, cooler, or the same when you touch it with your hand that was holding the warm glass?
What does your hand that was touching the cold glass feel when it touches the middle glass?
What do you feel when both hands are on the middle glass?
Why do you think your hands are not the best instruments for determining temperature?
What’s going on?
Your hands are designed to adapt to temperature. Touching the warm glass relaxes the muscles of your hands, increases circulation, and enhances flexibility. When your hand touches the cold glass the cells on your skin’s surface begin to contract to minimize loss of heat and your hand becomes less flexible. Then, when you grab the middle can your hands get a bit confused. Relatively speaking, the middle glass feels warmer to the hand that was holding the cold glass and it feels cooler to the hand that was holding the warm one. The hands are still feeling the temperature, but your brain gets confused.
Did you know that our skin does not have receptors to indicated burning hot? This sensation is actually created by three different receptors which fire at the same time: pain, cold, and warm. This explain why to some people, very hot things actually feel cold. If you could prepare a group of alternating hot and cold metal bars, touching them with your fingers would be an odd experience. Your brain will think they are too hot to touch and will tell you to pull away your hand!
Exercises
Does the temperature of the middle glass feel warmer, cooler, or the same when you touch it with your hand that was holding the warm glass?
What does your hand that was touching the cold glass feel when it touches the middle glass?
What do you feel when both hands are on the middle glass?
Why do you think your hands are not the best instruments for determining temperature?
Which nerve endings help to detect changes in temperature?
Skin has another function that it vital to your survival: temperature regulation. Being exposed to high temperatures causes your skin’s pores to open up and release sweat onto your body. This helps cool us off by the resulting process of evaporation.
Your pores will close in extremely cold temperatures. Also, the body stops blood flowing to the skin in order to conserve heat for the important vital organs and their processes.
In this lab, we study the moisture that your skin produces – even when you are not aware of it!
Record a description of how moist your hand is prior to putting it in the baggie. This is at 0 minutes.
Put your hand in the baggie and ask your assistant to tie it closed around your wrist. No air should be able to get in or out of the baggie. Record the time for tracking purposes.
Check your hand every 10 minutes for a half hour. With each observation note the amount of moisture that has accumulated. Record your observations at 10 minutes, 20 minutes, and 30 minutes.
What do you think will happen if you go outside and run around with your hand inside the bag? Try it and see if it accelerates the process.
What’s going on?
Sweat glands are always producing moisture on our skin. Most of the time, we don’t really notice this process. By enclosing your hand in plastic, this moisture can’t evaporate as it normally would. The bag collects and condenses it.
It is interesting to note that your body can produce up to a gallon of water in extremely hot temperatures – 110 degrees Fahrenheit and higher. This is one of the reasons it’s so important to stay hydrated in extreme heat!
Exercises
How is sweat released from the body through the skin?
How does sweat help to cool the body?
What did you observe at the 30 minute mark in your experiment?
What is evaporation and how is it different from condensation?
This lab has two parts. First, you will learn a bit about how specific chemicals react in a specific manner. And next, you will learn a bit of biology: the structure of bird bones and the minerals that compose them.
Make sure all the meat and cartilage is gone. Check near the joints for soft, white-gray matter and clean it off. Now break a bone in half. What does the inside look like? Note the color and hardness for your data. Be sure to wash your hands well after studying the bones.
Pour some vinegar in a cup and gently place the bones in the solution. Add more to cover the bones, if needed. Put the cup in a spot where it won’t be disturbed for a few days. It will take a while for the vinegar to fully react with the bones.
Take a look at the egg and note its color and hardness in your experiment data. Now carefully place the fresh egg in the second cup and pour vinegar over it. Be sure to completely cover the egg. You will need to cover the egg or keep an eye on it. The vinegar will evaporate and will need to be replenished. This portion of the experiment will take around 24 hours.
Use the spoon to remove the egg after 24 hours has passed. Set it down and gently push on it. What happened to the part that used to be shell? Check your notes from the previous day and note any changes that have occurred in the color and hardness of the egg after it has been in the vinegar.
After a few more days, take the chicken bones out of the vinegar. Bend them and see what happens. Do they break as easily as they did the first day? Look at your data and compare the color and hardness of the bones now to how they looked on the first day. Record the changes you observe.
What’s going on?
Calcium is the mineral in both bones and eggshells that makes them hard. Putting the bones and egg in vinegar caused the calcium to begin to react. Vinegar leached calcium from both the bones and the shell, which caused their hardened structure to become weak.
Did you know that your bones and teeth contain 99% of the calcium in your body? About ¾ of your bones are compact, but the remaining ¼ of them is spongy. But do you think your bones or your teeth are harder? The second hardest material in your entire body is the compact, hard bone. Your teeth enamel is actually the hardest material.
This experiment has two parts. For the first half, you will mix two chemicals that will produce heat and gas. The temperature receptors in your skin will be able to detect the heat. Your ears will detect the gas at it vibrates and escapes its container.
In the second portion you will demonstrate a characteristic in a chemical reaction. For this experiment, it will be an endothermic reaction, which is the absorption of heat energy. This type of reaction is easy to notice because it makes things cold to touch. The chemical you will be using, ammonium nitrate, is actually used in emergency cold packs.
Put about ½ cup of warm water in one of the baggies.
Add about a third of an ounce of calcium chloride to the water. Close the baggie and start to roll around the pellets with your fingers. As they start to dissolve, the chemical also starts to increase the temperature of the water.
Now dispose of these ingredients down the drain. Flush with lots of running water.
Open the ammonium nitrate and fill its cap with pellets. Put these in the second baggie.
Start to pinch the ammonium nitrate through the plastic bag and check for a temperature change. Does anything happen in the absence of water?
Now put a small amount of water (about room temperature) into the bag. Fill it about ¼ of the way full.
Hold the bottom of the bag with both hands and begin to rock it back and forth a bit. This should start to dissolve the pellets. With your hands on the water, you should start to note a temperature decrease. If this doesn’t work, roll the pellets around as you did with the calcium chloride.
When you are finished, you can pour the contents out on to brown spot of grass (because ammonium nitrate is a main ingredient in many fertilizers). Or if you would prefer, just empty the contents down the drain.
What’s going on?
Calcium chloride splits into calcium ions and chloride ions when it is mixed with water. As this occurs, energy is released in the form of heat. This is the same heat energy you felt when holding the baggie and rubbing the pellets.
Adding ammonium nitrate to water causes both its ammonium and nitrate ions to dissolve, which results in heat absorption as iconic bonds are broken. This is an endothermic reaction.
The point of both of these experiments is that the Ruffini’s endings in your skin are what allow the heat and/or cold data to be collected and sent to your brain for translation.
Your skin has many other parts in addition to its receptors. Some examples include hair, blood vessels, and sweat glands. Blood vessels and sweat glands respond to heat and cold, helping to control your body’s temperature. You are probably familiar with how sweat glands help to cool you down (evaporation), but how about blood vessels? As an example, if you run around outside on a hot day, your cheeks get red because the blood vessels on your skin’s surface have dilated, which brings more blood to the surface and allows the body to cool its insides a bit.
Exercises
Which chemical when mixed with water was an endothermic (absorbed heat and felt cold) reaction?
Which chemical resulted in an exothermic reaction (gave off heat)? Why does this happen?
What are ways that the human body can detect temperature?
In addition to looking pretty neat with all those loops and whirls, your fingertips are great at multitasking. The skin on them has a ton of receptors that help us to gather a lot of information about our environment such as texture, movement, pressure, and temperature.
This experiment will test your ability to determine textures by using touch receptors. You will use shoeboxes with holes cut into them to make texture boxes. Each box will have a textured surface that you can feel, but not see. Through the receptors in your fingers, you will determine whether the surface is rough, waxy, soft, or smooth.
Using the soup can as a guide, draw a circle at the end of a shoebox. Then use the scissors to cut out the circle.
Cut a piece of sandpaper to fit the bottom of the shoebox (a ruler might also be handy to get an exact measurement). Glue the sandpaper to the inside bottom of the shoebox. Put the lid on the box and label it as Box 1.
Repeat the first two steps for each of the boxes, putting the wax paper, flannel, and plastic in boxes 2-4. Be sure to label each.
Now ask a partner to reach into each box, feel the texture, and describe it as rough, waxy, soft, or smooth. Record their answer. Use undecided if they aren’t sure.
Once your friend has identified a texture and you have recorded their response, open the box so that you can both see what material they have evaluated. Be sure to note in your data whether your friend was correct with a Y or N. Repeat steps 4 and 5 for each of the boxes.
Have your friend leave the room or look away so that you can rearrange the box lids. Then give them the gloves to wear and repeat the test using gloved hands. Record the data and compare the effectiveness of gloved hands. Does this have an impact on the touch receptors?
What’s going on?
The fabric of the gloves interferes with the ability of our touch receptors to function fully. Our fingertips are feeling the fabric of the gloves on their receptors and this makes it difficult to perceive what they are touching through the gloves.
We have 5 different types of receptors. They are types of nerve endings in our skin and are connected to our brains.
The ones that respond to deep pressure are called Pacini’s endings and they are embedded deep in our skin.
Merkel’s endings detect moderate pressure.
Meissner’s ending respond to vibrations and light pressure.
Ruffini’s ending, which detect changes in temperature, can also respond to pressure.
Our pain receptors are called free endings.
Exercises
Name, in order, the three main layers of skin.
Which layer of skin contains the mechanoreceptors? Name two more items in this layer.
Name the five types of nerve endings and their specialization.
Did you know that the patterns on the tips of your fingers are unique? It’s true! Just like no two snowflakes are alike, no two people have the same set of fingerprints. In this experiment, you will be using a chemical reaction to generate your own set of blood-red prints.
Pour a couple teaspoons of the baking soda (sodium carbonate) into a cup of water. Swish your right index finger in the damp baking soda and then roll that finger on the goldenrod paper. This should leave a bright red fingerprint on the paper. Label it right index.
Continue the procedure for each finger on both hands to make a full set of prints. Be sure to label each fingerprint as you make it to identify which print goes to each finger. Don’t forget to make prints of your thumbs!
Compare your prints to the basic patterns in the guide. Check for features such as whorls or loops and label them appropriately on your prints. Use abbreviations such as A for accidental, PW for plain whorl, and DL for double loop.
After you have identified the dominant pattern on each of your fingertips, prepare a simple chart for each hand to record the data by finger.
When you are finished studying your own prints, ask a volunteer to let you make prints of their fingers.
What’s going on?
Goldenrod paper is made using phenolphthalein, a chemical that turns red when exposed to materials with relatively high pH. Baking soda (or sodium bicarbonate) is a base which has a pH of about 8.5. Rolling your baking soda covered fingers on the goldenrod paper creates a chemical reaction which produces a red fingerprint.
Exercises
What are the three main types of patterns on fingerprints? Describe each.
How do fingerprints have the potential to help solve crime?
Why does baking soda (or washing soda) show up red on the paper?
What kind of pH do bases have?
What kind of reaction do we see when the red fingerprints show up on the paper?
Your body moves when muscles pull on the bones through ligaments and tendons. Ligaments attach the bones to other bones, and the tendons attach the bones to the muscles.
If you place your relaxed arm on a table, palm-side up, you can get the fingers to move by pushing on the tendons below your wrist. We’re going to make a real working model of your hand, complete with the tendons that move the fingers! Are you ready?
A gram of water (about a thimble of water) contains 1023 atoms. (That’s a ‘1’ with 23 zeros after it.) That means there are 1,000,000,000,000,000,000,000,000 atoms in a thimble of water! That’s more atoms than there are drops of water in all the lakes and rivers in the world.
Nearly all the mass of an atom is in its nucleus which occupies less than a trillionth of the volume of the atom. They are very dense. If you could pack nuclei like marbles, into something the size of a large pea, they would weigh about a billion tons! That’s 2,000,000,000,000 pounds! More than the weight of 20,000 battle ships! That’s a heavy pea!
The distance from the nucleus to the electron is 100,000 times the diameter of the nucleus itself. So, if you were to somehow blow up a nucleus to be the size of a golf ball, the electron would be 8,300 feet away or more than 1.5 miles from the golf ball. If you put that golf ball on the ground, you would need to climb to the top of five and a half Sears Towers to get to the electron!
Danish physicist David Bohr, a famous scientist who won the Nobel Prize in Physics in 1922 for his work with the atomic structure.
Let’s compare this to the Sun and the Earth. We’ll be doing more about distances and sizes when we do our lesson in Astronomy, but for now, we’ll just use this quick example:
If you shrank the Sun down to a golf ball, the Earth would only be 9 inches away. Nine inches vs. 1.5 miles! There is 11,000 times more distance between the nucleus and an electron than there is between the Sun and the Earth! This means that if they were all the same size (to scale), then the Earth-Sun distance is waaaay smaller than the electron-nucleus distance!
Here’s one last example – if you enlarged the hydrogen atom (one proton in the nucleus and one electron in a shell) so that it’s the size of the Earth, the electron would be skimming along on the surface of the Earth while the nucleus (just a proton in this instance) would be only the size of a basketball deep inside the core. The rest, from the core to the surface, is empty space. (Look out your window – can you even see the curvature of the Earth from where you are? Probably not – it’s just too vast a distance!)
Are you mind-boggled? What this is basically saying, is that matter is virtually empty. The nucleus, which is incredibly tiny and quite heavy for it’s size, is outrageously far away from its electrons. An atom has almost nothing in it and yet everything we come in contact with is made of this ‘nothing’! I don’t know about you, but I find that fantastic!
We will talk more about this wacky atom thing and we’ll get into more detail about the even wackier electron. In the meantime, try to think about everything as a bunch of atoms. The next time you drink milk, you’re drinking atoms. The next time you feel wind, you’re feeling atoms. A lot of things become a bit clearer if you think of objects as being nothing more than bunches of small particles stuck together.
Limewater….carbon dioxide…indicators. We don’t know too much about these things. Sure, we know a little. Carbon dioxide is exhaled by us and plants need it to grow. Burning fossil fuels produces carbon dioxide.
Indicators…something we observe that confirms to us that something specific is happening. Lime water turns cloudy and forms a precipitate in the presence of carbon dioxide. Blue litmus paper turns red in the presence of an acid. The dog barking at the door and dancing around indicates that you better let the dog out, and quick, to avoid….a pet spill?
Sodium hydrogen sulfate (NaHSO4) (MSDS) Sodium hydrogen sulfate is very toxic. Respect it, handle it carefully and responsibly. Do not take it for granted.
NOTE: Be very careful when handling the sodium hydrogen sulfate – it’s highly corrosive and dangerous when wet. Handle this chemical only with gloves, and be sure to read over the MSDS before using.
When pouring our limewater into the test tube, be careful! Limewater is dangerous to your skin and your nasal passages. Pour just the limewater into the test tube, not any solids that may have gotten into the limewater container.
A chemical reaction will occur between sodium hydrogen sulfate, sodium carbonate, and water. We could have used any combination of chemicals for this lab that will produce carbon dioxide (CO2), but these chemicals are already in our kits, so……
The reaction will create a gas, that gas, we think, is carbon dioxide. If we are right, we will be bubbling CO2 gas into lime water. If we observe the limewater becoming cloudy and if a precipitate forms on the bottom of the test tube, that is a positive indicator that CO2 is present.
C3000: Experiment 31
Here’s what’s going on in this experiment:
Some combination of chemicals will produce carbon dioxide –> CO2 + ?
Notice that specific chemicals are not in the chemical equation? The actual chemistry of the chemical reaction is not our focus in this lab. We want to experience how an indicator can test for a particular compound or element.
Instead of sodium hydroxide and sodium carbonate and water, we could choose to combine vinegar and baking soda for example. Even simple household supplies can be chemicals for our experiments.
Cleanup: We are going to clean everything thoroughly after we finish the lab. After cleaning with soap and water, rinse thoroughly. Chemists use the rule of “three” in cleaning glassware and tools. After washing, chemists rinse out all visible soap and then rinse three times more.
Storage: Place cleaned tools and glassware in their respective storage places.
Disposal: Liquids can be washed down the drain. Solids are thrown in the trash.
ACID!!! The word causes fear to creep in and get our attention.
BASIC!!! The word causes nothing to stir in most of us.
The truth is, a strong acid (pH 0-1) is dangerous, but a strong basic (pH 13-14) is just as dangerous. In this lab, we will get comfortable with the basics of bases and the acidity of acids along with how you can use both and tell the difference between them.
Acids usually taste sour and turn blue litmus paper red. There are exceptions. One exception to this is with apples. They contain malic acid. Malic acid does in fact taste sour by itself, but apples produce so much sugar that the sour taste of the acid is overpowered with sweetness. Making lemonade is a good example as well.
NaOH – Be very careful working with sodium hydroxide (NaOH). It isn’t an acid, so it shouldn’t be very harmful, right? WRONG! A strong base is just as dangerous as a strong acid. Please be careful when using them.
Don’t get confused and don’t forget what litmus paper indications mean. Acids turn blue litmus paper red, and bases turn red litmus paper blue. If you are testing a substance and the paper doesn’t change color, try the other type. The substance might not be neutral, but an acid or base that you used the wrong color litmus paper.
When testing with litmus paper, don’t dip the litmus paper into the chemical bottle. Use a clean dropper to transfer the chemical to the paper. Dipping into the chemical can and will, eventually, contaminate the chemical.
When shaking a liquid in a test tube or flask, put a solid rubber stopper on top. If you just start shaking from there, your stopper may fly across the room and scare your dog unnecessarily. The hot, or acidic, or basic contents of the container will find a place on the salad waiting to be served. The paramedics will be puzzled when they find the entire family, heads down, lettuce hanging from their mouths. With the stopper firmly inserted, wrap your hand around the container with your thumb over the stopper, pushing down to hold it in place while you shake.
After we finish the experiment, don’t discard the contents of the Erlenmeyer flask. It now contains limewater, a substance that we want to save for later experiments. Carefully pour the liquid into a storage bottle and discard the solids in the trash. Place a sticker on the bottle and/or use a permanent marker to label the bottle for future use. Keep the storage bottle out of direct sunlight when storing it.
We will explore for ourselves some of the properties of acids and bases. If we consider the acid-base theory discussed below, it will help us to further understand what we are experiencing in our lab.
Cleanup: We must clean everything thoroughly after we finish with the lab. After cleaning with soap and water, we need to rinse everything thoroughly. Chemists use the rule of “three” in cleaning glassware and tools. After washing, chemists rinse out all visible soap and then rinse three times more.
Storage: Place cleaned tools and glassware in their respective storage places.
Disposal: Liquids can be washed down the drain, and solids put in the trash.
Don’t put this in your car….yet. Hydrogen generation, capture, and combustion are big deals right now. The next phase of transportation, and a move away from fossil fuels in not found in electric cars. Electric cars are waiting until hydrogen fuel cell vehicles become practical. It can be done and is being done.
Cars being powered by hydrogen are here, but not on the market yet. Engineers and chemists are always finding new ways to improve the chemical reaction that produces hydrogen and making the vehicles more efficiently use the fuel. Hydrogen fuel is not just easy to make, it is inexpensive, and the “exhaust” is water.
We will generate hydrogen in this lab. We will also see how combustible it is. Just let your imagination wander….just a bit and you will see noiseless cars and trucks zipping along the streets and interstates, carrying people and cargo. The Indianapolis 500 wouldn’t be quite the same, though. “And there they go, roaring, I mean quietly entering turn two…”
Sodium hydrogen sulfate NaHSO4 (MSDS) Sodium hydrogen sulfate is very toxic. Respect it, handle it carefully and responsibly. Do not take it for granted.
NOTE: Be very careful when handling the sodium hydrogen sulfate – it’s highly corrosive and dangerous when wet. Handle this chemical only with gloves, and be sure to read over the MSDS before using.
We will combine sodium hydrogen sulfate, water, and zinc. As soon as they are all together in our test tube, bubbles will begin forming in the solution. The bubbles will continue coming off, but we can speed up the reaction by adding a little copper sulfate. Now, instead of leisurely coming off, the gas is being given off quickly and we must act quickly ourselves to capture as much of the gas as possible. We can aid the gas movement ourselves by swirling the solution gently.
Sodium hydrogen sulfate is added to water and dissolved completely. Zinc is added and hydrogen gas is generated by the chemical reaction. Copper sulfate is added as a catalyst to speed up the generation of hydrogen.
Double replacement occurs where the compounds are broken apart and the pieces realign and re-bond with different parts of the original molecules, and zinc oxide is left as a byproduct of the oxidation of the zinc powder. Hydrogen gas is freed in the reaction.
Cleanup: We are going to clean everything thoroughly after we finish the lab. After cleaning with soap and water, rinse thoroughly. Chemists use the rule of “three” in cleaning glassware and tools. After washing, chemists rinse out all visible soap and then rinse three times more.
Storage: Place cleaned tools and glassware in their respective storage places.
Disposal: Liquids must be neutralized before they can be washed down the drain. Solids are thrown in the outside trash.
Ever wonder how the water draining down your sink gets clean again? Think about it: The water you use to clean your dishes is the same water that runs through the toilet. There is only one water pipe to the house, and that source provides water for the dishwasher, tub, sink, washing machine, toilet, fish tank, and water filter on the front of your fridge. And there’s only one drain from your house, too! How can you be sure what’s in the water you’re using?
This experiment will help you turn not only your coffee back into clear water, but the swamp muck from the back yard as well. Let’s get started.
[am4show have=’p8;p9;p11;p38;p92;p80;p84;p101;p30;p57;’ guest_error=’Guest error message’ user_error=’User error message’ ]
clean play sand
alum (check the spice section of the grocery store)
distilled water
water sample (a cup of coffee with the ground put back in works great)
activated charcoal or carbon (check an aquarium store)
cheese cloth
clear disposable cups
popsicle sticks
medicine dropper or syringe (no needle)
funnel (the top portion of a water bottle can work also)
There are several steps you need to understand as we go along:
Aeration: Aerate water to release the trapped gas. You do this in the experiment by pouring the water from one cup to another.
Coagulation: Alum collects small dirt particles, forming larger, sticky particles called floc.
Sedimentation: The larger floc particles settle to the bottom of the cup.
Filtration: The smaller floc particles are trapped in the layer of sand and cotton.
Disinfection: A small amount of disinfectant is added to kill the remaining bacteria. This is for informational purposes only — we won’t be doing it in this experiment. (Bleach and kids don’t mix!)
Preparing the Sample
Make your “swamp muck” sample by filling a small pitcher with water, coffee, and the coffee grounds. Fill up another small pitcher with clean water. In a third small pitcher, pour a small scoop of charcoal carbon and cold water.
Fill one clear plastic cup half full of swamp muck. Stir in ½ teaspoon aluminum sulfate (also known as alum) and ¼ teaspoon calcium hydroxide (also known as lime; it’s nasty stuff to breathe in so keep it away from kids). You have just made floc, the heavy stuff that settles to the bottom.
Aside: For pH balance, you can add small amounts of lime to raise the pH (level 7 is optimal), if you have pH indicators on hand (find these at the pharmacy).
Stir it up and sniff — then don’t touch for 10 minutes as you make the filter.
Making the Filter
Grab a cotton ball and fluff it out HUGE. Then stuff it into the funnel. The funnel will take two or three balls. (Don’t stuff too hard, or nothing will get through!) Strain out the carbon granules from the pitcher, and put the black carbon water back into the pitcher. Place the funnel over a clean cup and pour the black water directly over the cotton balls. Run the dripped-out water back through the funnel a few times. Those cotton balls will turn gray-black! Discard all the carbon water.
Add a layer of sand over the top of the cotton balls. It should cover the balls entirely and come right up to the top of the funnel. Fill a third empty cup half-full of clean water from the pitcher. Drip (using a dropper) clean water into the funnel. (This gets the filter saturated and ready to filter.)
Showtime!
It’s time to filter the swamp muck. Without disturbing the sample, notice where the floc is… the dark, solid layer at the bottom. You’ve already filtered out the larger particles without using a filter! Using a dropper, take a sample from the layer above the floc (closer to the top of your container) and drip it into the funnel. If you’ve set up your experiment just right, you’ll see clear water drip out of your funnel.
Continue this process until the liquid starts to turn pale – which indicates that your filter is saturated and can’t filter out any more particles.
To dissect the filter and find out where the muck got trapped, invert the funnel over four layers of paper towel. Usually the blacker the cotton, the better the filter will work. Look for coffee grounds in the sand.
“Radioactive” Sample
Activate a disposable light stick. Break open the light stick (use gloves when handling the inner liquid), and using the dropper, add the liquid to the funnel. You can also drip the neon liquid by the drop into the swamp muck sample and pass it through your filter.
You can test out other types of “swamp muck” by mixing together other liquids (water, orange juice, etc.) and solids (citrus pulp, dirt, etc.). Stay away from carrot juice, grape juice, and beets — they won’t work with this type of filter.
Phenolphthalein is a weak, colorless acid that changes color when it touches acidic (turns orange) or basic (turns pink/fuchsia) substances. People used to take it as a laxative (not recommended today, as ingesting high amounts may cause cancer). Use gloves when handling this chemical, as your skin can absorb it on contact. I’ll show you how:
Sprinkle a tiny amount of sodium carbonate into the bottom of your test tube. Fill your test tube partway with water (the solution should still be clear). Add a few drops of phenolphthalein (which is clear inside the dropper), cap, and shake.
You can use this as real ink by using it BEFORE you combine them together like this: dip a toothpick into the first solution (sodium ferrocyanide solution) and with the tip write onto a sheet of paper.
While the writing is drying, dip a piece of paper towel int other solution (ferric ammonium sulfate solution) and gently blot along where you wrote on the paper… and the color appears as blue ink. You can make your secret message disappear by wiping a paper towel dipped in a sodium carbonate solution.
You can also grow purple, gold, and red crystals with these chemicals… we’ll show you how!
CAUTION: Do not mix sodium ferrocyanide with any other chemical other than specified here, as it can produce hydrogen cyanide gas, which is lethal. Handle this chemical with care, wear gloves, and keep it locked away when not in use.
Measure out a tiny bit of sodium ferrocyanide into a test tube filled partway with water. You want to add enough of the crystals so that when you shake the solution (with the cap on), all of the crystals dissolve into the water and make a saturated solution.
Into a second test tube, dissolve another tiny bit of ferric ammonium sulfate in water, adding just enough to make a saturated solution. When you’re ready, pour one test tube into the other and note the change!
Bonus Experiment Idea! You can grow yellow-gold crystals by cooling off a cup of hot water. Here’s how: into a test tube, add 40 drops of hot water and 1 small spoon measure of sodium ferrocyanide. Suspend a small pebble attached to a thread into the test tube (this is your starter-seed for your crystals to attach to). If after a day or two your crystals aren’t growing, just reheat the solution and add a little bit more of the chemical. To grow purple crystals, use ferric ammonium sulfate instead of the sodium ferro-cyanide. You can also use 2 spoonfuls of cobalt chloride in a fresh test tube to grow red-colored crystals.
ANOTHER Bonus Experiment Idea!Mix 1/3 measure of ferric ammonium sulfate and 1/3 measure of sodium Ferro-cyanide in a glass 1/2 full of water. To another glass 1/2 full of water, add 5 drops of phenolphthalein solution. In an empty glass put 1 spoonful of sodium silicate powder and 2 spoonfuls of water. Pour the contents of these last two glasses into the first glass, stir and watch what happens.
[/am4show]
This experiment is for advanced students.Have you ever taken a gulp of the ocean? Seawater can be extremely salty! There are large quantities of salt dissolved into the water as it rolled across the land and into the sea. Drinking ocean water will actually make you thirstier (think of eating a lot of pretzels). So what can you do if you’re deserted on an island with only your chemistry set?
Let me show you how to take the salt out of water with this easy setup.
Mars is coated with iron oxide, which not only covers the surface but is also present in the rocks made by the volcanoes on Mars.
Today you get to perform a chemistry experiment that investigates the different kinds of rust and shows that given the right conditions, anything containing iron will eventually break down and corrode. When iron rusts, it’s actually going through a chemical reaction: Steel (iron) + Water (oxygen) + Air (oxygen) = Rust Materials
This lab is best done over two consecutive days. Plan to set up the experiment on the first day, and finish up with the observations on the next.
Line up four empty bottles on the table.
Label your bottles so you know which is which: Water, Water + Salt, Vinegar, Vinegar + Salt
Fill two bottles with water.
Fill two with vinegar.
Add a tablespoon of salt to one of the water bottles.
Add one tablespoon of salt to one of the vinegar bottles.
Stuff a piece of steel wool into each bottle so it comes in contact with the liquid.
Stretch a balloon across the mouth of each bottle.
Let your experiment sit (overnight is best, but you can shorten this a bit if you’re in a hurry).
The trick to getting this one to work is in what you expect to happen. The balloon should get shoved inside the bottle (not expand and inflate!). Check back over the course of a few hours to a few days to watch your progress.
Fill in the data table.
What’s Going On?
Rust is a common name for iron oxide. When metals rust, scientists say that they oxidize, or corrode. Iron reacts with oxygen when water is present. The water can be liquid or the humidity in the air. Other types of rust happen when oxygen is not around, like the combination of iron and chloride. When rebar is used in underwater concrete pillars, the chloride from the salt in the ocean combines with the iron in the rebar and makes a green rust.
Mars has a solid core that is mostly iron and sulfur, and a soft pastel-like mantle of silicates (there are no tectonic plates). The crust has basalt and iron oxide. The iron is in the rocks and volcanoes of Mars, and Mars appears to be covered in rust.
When iron rusts, it’s actually going through a chemical reaction:
Steel (iron) + Water (oxygen) + Air (oxygen) = Rust
There are many different kinds of rust. Stainless steel has a protective coating called chromium (III) oxide so it doesn’t rust easily.
Aluminum, on the other hand, takes a long time to corrode because it’s already corroded — that is, as soon as aluminum is exposed to oxygen, it immediately forms a coating of aluminum oxide, which protects the remaining aluminum from further corrosion.
An easy way to remove rust from steel surfaces is to rub the steel with aluminum foil dipped in water. The aluminum transfers oxygen atoms from the iron to the aluminum, forming aluminum oxide, which is a metal polishing compound. And since the foil is softer than steel, it won’t scratch.
Instead of using glue as a polymer (as in the slime recipes above), we're going to use PVA (polyvinyl alcohol). Most liquids are unconnected molecules bouncing around. Monomers (single molecules) flow very easily and don't clump together. When you link up monomers into longer segments, you form polymers (long chains of molecules).
Polymers don't flow very easily at all - they tend to get tangled up until you add the cross-linking agent, which buddies up the different segments of the molecule chains together into a climbing-rope design.
By adding borax to the mix, you cross-link the long chains of molecules together into a fishnet, and the result is a gel we call slime. PVA is used make sponges, hoses, printing inks, and plastic bags.
You can add food coloring (or a bit of liquid Ivory dish soap to get a marbled appearance). You can also add a dollop of titanium dioxide sunscreen to your slime before cross-linking it to get a metallic sheen.
Magnesium is one of the most common elements in the Earth’s crust. This alkaline earth metal is silvery white, and soft. As you perform this lab, think about why magnesium is used in emergency flares and fireworks. Farmers use it in fertilizers, pharmacists use it in laxatives and antacids, and engineers mix it with aluminum to create the BMW N52 6-cylinder magnesium engine block. Photographers used to use magnesium powder in the camera's flash before xenon bulbs were available.
Most folks, however, equate magnesium with a burning white flame. Magnesium fires burn too hot to be extinguished using water, so most firefighters use sand or graphite.
We're going to learn how to (safely) ignite a piece of magnesium in the first experiment, and next how to get energy from it by using it in a battery in the second experiment. Are you ready?
tile or concrete surface (something non-flammable)
gloves, goggles
Burning magnesium produces ultraviolet light. This isn’t good for your eyes, and the brightness of the flame is another danger for your eyes. Avoid looking directly into the flame.
Burning magnesium is so hot that if it gets on your skin it will burn to it and not come off. As difficult as burning magnesium is to put out, avoid letting the burning metal come in contact with you or anything else that might catch fire.
As explained later in this lab, magnesium burns in carbon dioxide. Therefore, a CO2 fire extinguisher won’t work to put it out. Water won’t work, CO2 won’t work. It takes a dry chemical fire extinguisher to put it out, or just wait for it to burn up completely on its own.
Magnesium is a metal, and in this experiment, you'll find that some metals can burn. The magnesium in this first experiment combines with the oxygen in the air to produce a highly exothermic reaction (gives off heat and light). The ash left from this experiment is magnesium oxide:
2Mg (s) + O2(g) --> 2Mg O (s)
Not all the magnesium from this experiment turned directly into the ash on the table - some of it transformed into the smoke that escaped into the air.
Caution: Do NOT look directly at the white flame (which also contains UV), and do NOT inhale the smoke from this experiment!
As you burn your magnesium, you will get your very own fireworks show….a little one, but still cool.
2Mg + O2 --> 2MgO
Magnesium burned in oxygen yields magnesium oxide. Because the temperature of burning magnesium is so high, small amounts of magnesium react with nitrogen in the air and produce magnesium nitride.
3Mg + N2 --> 2Mg3N2
Magnesium plus nitrogen yield magnesium nitride. Magnesium will also burn in a beaker of dry ice instead of in air (oxygen).
2Mg + CO2 --> 2MgO + C
Magnesium burned in carbon dioxide yields magnesium oxide and carbon (ash, charcoal, etc.)
Cleanup: Rinse off and pat dry the rest of the magnesium strip.
Storage: Place everything back in its proper place in your chemistry set.
Disposal: Dispose of all solid waste in the garbage.
Magnesium Battery
Now let's see how to make a battery using magnesium, table salt, copper wire, and sodium hydrogen sulfate (AKA sodium bisulfate).
Materials:
magnesium strip
test tube and rack
light bulb (from a flashlight)
2 pieces of wire
measuring cup of water
salt (sodium chloride)
copper wire (no insulation, solid core)
measuring spoon
sodium hydrogen sulfate (NaHSO4) (MSDS) Sodium hydrogen sulfate is very toxic. Respect it, handle it carefully and responsibly. Do not take it for granted.
gloves, goggles
NOTE: Be very careful when handling the sodium hydrogen sulfate - it's highly corrosive and dangerous when wet. Handle this chemical only with gloves, and be sure to read over the MSDS before using.
C1000: Experiment 75 C3000: Experiment 295
We're going to do another electrolysis experiment, but this time using magnesium instead of zinc. In the previous electrolysis experiment, we used electrical energy to start a chemical reaction, but this time we're going to use chemical energy to generate electricity. Using two electrodes, magnesium and copper, we can create a voltaic cell.
TIP: Use sandpaper to scuff up the surfaces of the copper and magnesium so they are fresh and oxide-free for this experiment. And do this experiment in a DARK room.
How cool is it to generate electricity from a few strips of metal and salt water? Pretty neat! This is the way carbon-core batteries work (the super-cheap brands labeled 'Heavy Duty' are carbon-zinc or 'dry cell' batteries). However, in dry cell batteries scientists use a crumbly paste instead of a watery solution (hence the name) by mixing in additives.
In this chemical reaction, when the magnesium metal enters into the solution, it leaves 2 electrons behind and turns into a magnesium ion:
Oxidation: Mg (s) --> Mg2+(aq) + 2e-
The magnesium strip takes on a negative charge (cathode), and the copper strip takes on a positive charge (anode). The copper strip snatches up the electrons:
Reduction: Cu2+(aq) + 2e- --> Cu (s)
and you have a flow of electrons that run through the wire from surplus (cathode) to shortage (anode), which lights up the bulb.
Note: You can substitute a zinc strip or aluminum strip for the magnesium strip and a carbon rod (from a pencil) for the copper wire.
Going further: You can expand on this experiment by substituting copper sulfate and a salt bridge to make a voltaic cell from two half-cells in Experiment 16.5 of the Illustrated Guide to Home Chemistry Experiments.
Is it hot where you live in the summer? What if I gave you a recipe for making ice cream that doesn’t require an expensive ice cream maker, hours of churning, and can be made to any flavor you can dream up? (Even dairy-free if needed?)
If you’ve got a backyard full of busy kids that seem to constantly be in motion, then this is the project for you. The best part is, you don’t have to do any of the churning work… the kids will handle it all for you!
This experiment is simple to set up (it only requires a trip to the grocery store), quick to implement, and all you need to do guard the back door armed with a hose to douse the kids before they tramp back into the house afterward.
One of the secrets to making great ice cream quickly is [am4show have=’p8;p9;p11;p38;p92;p23;p50;p80;p88;p101;’ guest_error=’Guest error message’ user_error=’User error message’ ] to be sure that the milk and cream is COLD. I will make this particular recipe, it’s usually with hundreds of kids, and our staff will stuff the milk products in the freezer for an hour or two or under hundreds of pounds of ice to make sure it’s super-cold.
If you’re going for the dairy-free kind, simply skip the milk and cream and add a bit of extra time to the chill time of your substitute ‘milk’. We’ve had the best luck with almond and soy milk. Are you ready?
Here’s what you need:
Materials:
1 quart whole milk (do not substitute, unless your child has a milk allergy, then use soy or almond milk)
1 pint heavy cream (do not substitute, unless your child has a milk allergy, then skip)
1 cup sugar (or other sweetener)
1 tsp vanilla (use non-alcohol kind)
rock salt (use table salt if you can’t find it)
lots of ice
freezer-grade zipper-style bags (you’ll need quart and gallon sizes)
How does that work? Ice cream is basically “fluffy milk”. You need to whip in a lot of air into the milk fat to get the fluffy pockets that make this stuff worthwhile. The more the kids shake the bag, the faster it will turn into ice cream.
Why do we put salt on the ice?
If you live in an area where they put salt on the roads, you already know that people do this to melt the ice. But how does salt melt ice? Think about the chemistry of what’s going on. Water normally freezes at zero degrees Celsius. But salt water presses lower than zero, so the freezing point of salt water is lower than fresh water. By sprinkling salt on the roads, you’re lowering the point at which water freezes at. When you add a solute (salt) to the solvent (water) to alter the freezing point of the solution, it’s known as the “freezing point depression”.
Tips: Don’t use nonfat milk – it won’t work with this style of ice-cream making. if you’re adding fruit or chocolate bits, make sure you get those cold in advance too, or they will slow down your process as they heat your milk solution. (We usually add those bits last after the ice cream is done.)
IMPORTANT: Do NOT substitute dry ice for the water ice – the carbon dioxide gases build quickly and explode the bag, and now you have flying bits of dry ice that will burn skin upon contact. That’s not the biggest issue, though… the real problem is that now animals (like your dog) and small children pop a random piece of dry ice into their mouths, which will earn your family a visit to the ER. So stick with the regular ice from your fridge.
If you don’t have equipment lying around for this experiment, wait until you complete Unit 10 (Electricity) and then come back to complete this experiment. It’s definitely worth it!
Electroplating was first figured out by Michael Faraday. The copper dissolves and shoots over to the key and gets stuck as a thin layer onto the metal key. During this process, hydrogen bubbles up and is released as a gas. People use this technique to add material to undersized parts, for place a protective layer of material on objects, to add aesthetic qualities to an object.
Place the copper sulfate in your jar and add a thin stream of water as you stir. Add enough water to make a saturated solution (dissolves most of the solids). Connect one alligator wire to the copper strip and the positive (red) wire from the clip lead. Connect the other alligator wire to the key and the negative (black) lead.
Place the copper strip and the key in the solution without touching each other. (If they touch, you’ll short your circuit and blow up your battery.) Let this sit for a few minutes… and notice what happens.
Clean up: Clean everything thoroughly after you are finished with the lab. After cleaning with soap and water, rinse thoroughly. Chemists use the rule of “three” in cleaning glassware and tools. Rinse three times, wash with soap, rinse three times.
Wipe off the electrodes. The solution and solids at the bottom of your cup cannot go in the trash. The liquid contains copper, a toxic heavy metal that needs proper disposal and safety precautions. Another chemical reaction needs to be performed to remove the heavy metal from the copper sulfate: Add a thumb sized piece of steel wool to the solution. The chemical reaction will pull out the copper out of the solution. The liquid can be washed down the drain. The solids cannot be washed down the drain, but they can be put in the trash. Use a little water to rinse the container free of the solids.
Place all chemicals, cleaned tools, and glassware in their respective storage places.
Dispose of all solid waste in the garbage. Liquids can be washed down the drain with running water. Let the water run awhile to ensure that they have been diluted and sent downstream.
Exercises
Look at your key. What color is it?
Where did the copper on your key come from?
What happened when you added a second battery?
Which circuit (series or parallel) did the reaction accelerate faster with?
This is looks like a chemical reaction but it's not - it's really just a physical change. It's a really neat trick you can do for your friends or in a magic show. Here's how it works:
You can use styrofoam beads, packing peanuts, styrofoam packing materials, or even a styrofoam cup and place it in your glass jar containing acetone. Styrofoam is made up of polystyrene foam, which is mostly air (that's why foam is so lightweight). When you add the foam cup to the acetone, you're removing the air in the foam which makes it look like you're dissolving this huge amount of cups (you can go through a whole stack with only a cup of acetone).
Why does this work? You are removing the structure that supports the shape of the foam, and are left with only the foam molecules at the bottom of the container (it will look like a blob). Think about a camping tent: when you take away the poles, what happens to the tent? It loses its support structure and collapses down. The same thing is happening to the foam when you place it in the acetone - you are removing the structure that holds the shape. Acetone is found in most nail polish removers. [/am4show]
Lewis and Clark did this same experiment when they reached the Oregon coast in 1805. Men from the expedition traveled fifteen miles south of the fort they had built at the mouth of the Columbia River to where Seaside, Oregon now thrives.
In 1805, however, it was just men from the fort and Indians. They built an oven of rocks. For six weeks, they processed 1,400 gallons of seawater, boiling the water off to gain 28 gallons of salt.
Lewis and Clark National Historic Park commemorates the struggles of the expedition. (The reconstructed fort is also there to visit.) It is Fort Clatsop National Memorial, and is quite an experience to go through the fort.
Lewis and Clark went to great lengths to obtain salt. The men had been complaining that fish without salt had become something to avoid. Salt is important to us as well. It is a condiment, an addition to food that brings out the food’s natural flavor. Besides its food value, salt is used as a food preservative. It destroys bacteria in food by removing moisture from their “bodies” and killing them.
Sodium chloride, table salt, NaCl….they’re all acceptable names for salt. If NaCl is broken down into its component elements, the elements don’t act like our friend salt. Its components are sodium and chlorine.
Sodium is a highly reactive alkali metal, element #11 on the periodic table. It is exothermic in water, which means that is gives of heat as it reacts with water. Small pieces tossed into water will react with it. The sodium particles give off heat that melts them into round balls. The sodium particles bounce and scurry around the surface at a high rate of speed. If you ever get the chance to observe this, do it. The reaction continues until the sodium is gone. Sodium, as it reacts with the water, changes chemically into sodium hydroxide. These cool things that sodium does are also dangerous. Sodium and sodium hydroxide are caustic…they are so pH basic that they will burn you.
Chlorine is a halogen, group 17, element #17. Chlorine is used in bleach, disinfectants, and in swimming pool maintenance. It seems that anywhere you want to remove color or life, chlorine is your element. This property of chlorine to kill was used in war. (It would react with the mucous linings in their throat, undergoing a chemical reaction to turn into hydrochloric acid in their throats. Hydrochloric acid is a very dangerous acid, usually fatal once inside you.) Chlorine is known as bleach at home. Never, never, drink it or breathe its fumes.
Materials:
Goggles
Gloves
Jar or glass
2 90o glass tubes
Chemistry stand
Rubber tubing
Test tube clamp
Erlenmeyer flask
One-hole rubber stopper
Wire screen
Alcohol burner
Lighter
Test tube
Water
Saltwater
Heating rod
Look out for the hot flask and other glassware. Allow everything to cool before cleaning.
When done heating, move the rubber tubing out of the water. There is a difference in pressure between the heated glassware and the water bath. That difference in pressure will cause the water to enter the tubing and cool water will flow into the hot glassware and could cause catastrophic damage to the glassware.
Never…Never!….drink the results of an experiment. Yeah, I know that plain old water is supposed to be in the test tube, but follow the experiment’s safety guidelines. You’ve had other stuff in that test tube, too.
C3000: Experiment 83
Here’s what’s going on in this experiment:
That flask of saltwater will start to boil, and water vapor will leave the flask and travel to the test tube. There is no chemical change occurring in this experiment, but a physical one. A physical change involves a change in state (melting, freezing, vaporization, condensation, sublimation). Physical changes are things like crushing a can, melting an ice cube, breaking a bottle, or boiling saltwater until there is nothing left but salt and steam.
Cleanup: Clean everything thoroughly after you are finished with the lab. After cleaning with soap and water, rinse thoroughly. Chemists use the rule of “three” in cleaning glassware and tools. After washing, chemists rinse out all visible soap and then rinse three times more.
Storage: Place cleaned tools and glassware in their respective storage places.
Have you ever tried washing dishes without soap? It doesn’t work well, especially if there’s a lot of grease, fat, or oil on the dish!
The oils and fats are slippery and repel water, which makes them a great choice for lubration of bearing and wheels, but lousy for cleaning up after dinner.
So what’s inside soap that makes it clean off the dish? The soap molecule looks a lot like a snake, with a head and a tail. The long tail loves oil (hydrophobic) and the head loves water (hydrophilic). The hydrophilic end dissolves in water and the hydrophobic end wraps itself around fat and oil in the dirty water, cleaning it off your dishes.
Let’s do an experiment that will really make you appreciate soap and fat:
While it may not look like it (or taste like it), milk is mostly water with minerals, proteins, and fat trapped inside. When you add a drop of soap, the hydrophobic end races around and grabs the fat and links up with other tail ends of soap molecules, forming the colors you see in the dish. The higher the fat content of your milk, the longer the show.
[/am4show]
Glo-sticks! Parents hang them from their trick or treaters, backpackers read with them light late at night in a tent. Glo-sticks work on the principle of chemiluminescence. Chemiluminescence is defined as emitting light without heat as the result of a chemical reaction.
We might be tempted to mistake cold light for fluorescence. Fluorescent light is created by exciting electrons, not from a chemical reaction.
Luminol is one of out chemicals in this lab. Luminol is most famous by its use by criminal investigators when they need to locate blood. What makes this happen is that the iron in the blood reacts with the luminol to generate cold light.
Let’s have fun creating our own little version of cold light….I’ll use the term “cold light” from now on. It takes a long time to type out “chemiluminescence”.
The chemical reaction in this lab produces light without heat. Photons of light are emitted, but no heat. That must be cold heat. The light emitted from this lab is not as bright as a glow stick, but it still emits light. The same principle is used in the glow sticks. Our light will be seen as a low power blue-green light. The cold light effect is best viewed in a darkened room.
Solution #1 C8H7N3O2 + NaOH is added to Solution #2 H2O2 + K3Fe(CN)6 –> Cold Light
Cold Light is the production of light from a chemical reaction without the radiation of heat. There are three types of cold light reactions: Fluorescence, phosphorescence, and chemiluminescence. In chemiluminescence no radiation is absorbed. A chemical reaction provides the energy needed to emit light. Chemiluminescence is usually referred to as “cold light”. It rolls off the tongue much better and is easier to type. (I find that every time I type “chemiluminescence” I spell it differently.)
People used to rub their walking sticks with a luminescent jellyfish to light the path while walking. Today, light sticks from the store aren’t made from jellyfish. Modern-day light sticks involve a different reaction from the experiment you will be performing. We will have the luminal glow, but light sticks use a different reaction.
Light sticks use a di-ester of hydrogen peroxide that oxidizes in an organic solvent. The reaction is tons slower, giving a light stick a life span of hours instead of seconds or minutes. Dyes are added to produce different colors. When you break the class vial inside to activate the light stick, you mix the luminol with the other reactant, and the chemical reaction is under way.
A general chemical equation producing cold light:
A + B –> high energy intermediate à products + light
The luminol is oxidized by B. This oxidation produces cold light.
Cleanup: We are going to clean everything thoroughly after we finish the lab. After cleaning with soap and water, rinse thoroughly. Chemists use the rule of “three” in cleaning glassware and tools. After washing, chemists rinse out all visible soap and then rinse three times more.
Storage: Place cleaned tools and glassware in their respective storage places.
Disposal: Liquids can be washed down the drain. Solids are thrown in the trash.
Cobalt chloride (CoCl2) has a dramatic color change when combined with water, making it a great water indicator. A concentrated solution of cobalt chloride is red at room temperature, blue when heated, and pale-to-clear when frozen. The cobalt chloride we’re using is actually cobalt chloride hexahydrate, which means that each CoCl2 molecule also has six water molecules (6H2O) stuck to it.
[am4show have=’p8;p9;p11;p38;p92;p18;p45;p68;p80;’ guest_error=’Guest error message’ user_error=’User error message’ ]
For this experiment you’ll need:
Fill your test tube partway with water and add 1 teaspoon of cobalt chloride. Cap and shake until the solids dissolve. Continue to add cobalt chloride, 1 teaspoon at a time, until you cannot dissolve any more into your solution. (You have just made a saturated solution.)
Using your cotton swab like a paintbrush, dip into the solution (your “paint”) and write on the index card. Use a hair dryer to blow across the solution. (Be careful not to scorch the paper!) What happens? Stick it in the freezer. Now what happens? What if you blow dry it after it comes out of the freezer? What else can you come up with? What happens if you spritz it with water?
What’s Going On? The cobalt changes color when hydrated/dehydrated – think of it as an indicator for water. It should be red when you first mix it, but blue when hit with the hair dryer. It doesn’t react to acids and bases the way the anthocyanin (in red cabbage juice) or universal indicator does, but rather with humidity.
Bonus Experiment Idea! You can grow red crystals by cooling off a cup of hot water. Here’s how: into a test tube, add 40 drops of hot water and 2 small spoon measure of cobalt chloride. Suspend a small pebble attached to a thread into the test tube (this is your starter-seed for your crystals to attach to). If after a day or two your crystals aren’t growing, just reheat the solution and add a little bit more of the chemical.
ANOTHER Bonus Experiment Idea! By soaking a strip of tissue or crepe paper (it’s got to be thin) in the cobalt chloride solution, you can create your own weather forecaster! Simply let dry and when it turns blue, you’re in for blue skies and pink means it’s going to rain. (It’s basically a humidity gauge.)
If you’re fascinated by the simple complexity of the standard soap bubble, then this is the lab for you. You can easily transform these ideas into a block-party Bubble Festival, or just have extra fun in the nightly bathtub. Either way, your kids will not only learn about the science of water, molecules, and surface tension, they’ll also leave this lab cleaner than they started (which is highly unusually for science experiments!)
Soap also makes water stretchy. If you’ve ever tried making bubbles with your mouth just using spit, you know that you can’t get the larger, fist-sized spit bubbles to form completely and detach to float away in the air. Spit is 94% water, and water by itself has too much surface tension, too many forces holding the molecules together. When you add soap to it, they relax a bit and stretch out. Soap makes water stretch and form into a bubble.
[am4show have=’p8;p9;p11;p38;p92;p80;p101;’ guest_error=’Guest error message’ user_error=’User error message’ ]
The absolute best time to make gigantic bubbles is on an overcast day, right after it rains. Bubbles have a thin cell wall that evaporates quickly in direct sun, especially on a low-humidity day. If you live in a dry area with low-humidity, be sure to use glycerin. The glycerin will add moisture and deter the rapid thinning of the bubble’s cell wall (which cause bubbles to tear and pop).
Best Bubble Solution Gently mix together 6 cups cold water in a shallow tub with 1 cup green Dawn (or clear Ivory) dish soap. If it’s a hot, dry day, add a few tablespoons of glycerin. (Glycerin can be found at the drugstore.) If you’re finding the solution too thin, add a second cup of dish soap. You can add all sorts of things to find the perfect soap solution: lemon juice, sugar, corn syrup, Karo syrup, maple syrup, glycerin — to name just a few. Each will add its own properties to the bubble solution. (You can have buckets of each variation along with plain dish soap and water to compare.) You can reduce the water, increase the soap, etc… but here’s a good starting point: 2 cups dish soap with 1 cup Karo syrup and 6 cups cold water.
Zillions of Tiny Bubbles can be made with strawberry baskets. Simply dip the basket into the bubble solution and twirl around. You can also use plastic six-pack soda can holders.
Trumpet Bubbles are created by using a modified water bottle. Cut off the bottom of the bottle, dip the large end in the soap solution, put the small end to your lips, and blow. You can separate the bubble from the trumpet by rolling the large end up and away from your bubble.
Bubble Castles are built with a straw and a plate. First, spread bubble solution all over a smooth surface (such as a clean cookie sheet, plate, or tabletop). Dip one end of a straw in the bubble solution and blow bubbles all over the surface. Make larger domes with smaller ones inside. Notice how the bubbles change shape and size when they connect with others.
Stretch and Squish! Get one hand-sized bubble in each hand. Slap them together (so they join, not pop!). What if you join them s l o w l y?
Light Show is always a favorite. Find a dark room. Find a BIG flashlight and stand it on end. Rub soap solution all over the bottom of an uncolored plastic lid (such as from a coffee can). Balance the lid, soapy side up, on the flashlight (or on the spring-type clothespins). Blow a hemisphere bubble on top of the lid. Blow gently along the side of the bubble. Watch the colors swirl.
Weird Shapes are the simplest way to show how soap makes water stretchy. Dip a rubber band completely in the soap solution and pull it up. Stretch the rubber band using your fingers. Twist and tweak into all sorts of shapes. Note that the bubble always finds a way of filling the shape with the minimum amount of surface area. Make a Moebius bubble by cutting a thick ribbon, giving one end a half-twist, and reattaching the ends (by sewing, stapling, or taping).
Polygon Shapes allow you to make square and tetrahedral bubbles. Create different 3-D shapes by bending pipe cleaners into cubes, tetrahedrons, or whatever you wish. Alternatively, you can use straws threaded onto string to make 3-D triangular shapes. Notice how the film always finds its minimum surface area. Can you make square bubbles?
Gigantic Bubbles Using the straws and string, thread two straws on three feet of string and tie off. Grasp one straw in each hand and dip in soap solution. Use a gentle wind as you walk to make BIG bubbles. Find air thermals (warm pockets of air) to take your bubbles up, up, UP!
Kid-in-a-Bubble Pour your best bubble solution into a child’s plastic swimming pool. Lay a Hula-hoop down, making sure there is enough bubble solution to just cover the hoop. Have your child stand in the pool (use a stool if you want to avoid wet feet), and lift the hoop! For a more permanent project, use an old car tire sliced in half lengthwise (the hard way) to hold the bubble solution. The kid stands in the hole and doesn’t get wet!
Electric Bubbles Blow some fist-sized bubbles and set them loose. Rub an inflated balloon on your head or wool sweater to charge the balloon and get the charged balloon close to a soap bubble. If you are fast and careful enough, you can steer the bubble around the room.
Hover Bubbles Since bubbles are light, you can float them on a gas that is slightly denser than the air they are filled with, such as carbon dioxide. Place a shallow glass dish inside a larger glass dish or tank (like an unoccupied aquarium). Into the smaller dish, add two cups vinegar and one cup baking soda.
After the fizzing has subsided, your larger container is now filled with carbon dioxide gas. Make sure it’s away from drafts or movement so the invisible carbon dioxide gas stays in there. Gently blow bubbles near the opening so they settle into the large tank. (Don’t blow directly into the container, or you’ll slosh out the CO2.) Your bubbles will hover in the tank so you can have a closer look. What colors do you see? Do the colors change? Does the bubble stay in one place, rise, sink, or move around? If your bubble stays in the tank without popping, you’ll notice that it slowly becomes larger!
Mammoth Bubbles To create bubbles the size of a small car, use your lace trim. Knot the ends together to form a large loop, and dip your lace into the bubble solution. Gently pick up the loop with your hands about two feet apart, the rest dangling below. You should see a thin bubble film in the loop. Keep your hands spread apart and walk (keeping the bottom loop above the ground), and a bubble will form behind you. When it’s big enough, close the loop by bringing your hands together to seal off the bubble. You can also spin slowly in a circle to put yourself inside a “bubble-bagel” (mathematical term for this shape: toroid). If you do this in a place with warm updrafts (like next to a building), your bubbles will float up and away and quite possibly attract a small crowd… like the photo below.
The How and Why Explanation If you pour a few droplets of water onto a sweater or fabric, you’ll notice that the water will just sit there on the surface in a ball (or oval, if the drop is large enough). If you touch the ball of water with a soapy finger, the ball disappears into the fibers of the fabric! What happened?
Soap makes water “wetter” by breaking down the water’s surface tension by about two-thirds. Surface tension is the force that keeps the water droplet in a sphere shape. It’s the reason you can fill a cup of water past the brim without it spilling over. Without soap, water can’t get into the fibers of your clothes to get them clean. That’s why you need soap in the washing machine.
Soap also makes water stretchy. If you’ve ever tried making bubbles with your mouth just using spit, you know that you can’t get the larger, fist-sized spit bubbles to form completely and detach to float away in the air. Spit is 94% water, and water by itself has too much surface tension, too many forces holding the molecules together. When you add soap to it, they relax a bit and stretch out. Soap makes water stretch and form into a bubble.
The soap molecule looks a lot like a snake; it’s a long chain that has two very different ends. The head of the snake loves water, and the tail loves dirt. When the soap molecule finds a dirt particle, it wraps its tail around the dirt and holds it.
The different colors of a soap bubble come from how the white light bounces off the bubble into your eye. Some of the light bounces off the top surface of the bubble and bends only a little bit, while the rest passes through the thin film and bounces off the inner surface of the bubble and refracts more.
If you made the Hover Bubbles, you’ll notice that the bubbles slowly get larger the longer they live in the tank. Remember that the bubble is surrounded by CO2 gas as it sinks. The bubble grows because carbon dioxide seeps through the bubble film faster than the air seeps out, as CO2 is more soluble in water than air (meaning that CO2 mixes more easily with water than air does).
This is a recording of a recent live teleclass I did with thousands of kids from all over the world. I’ve included it here so you can participate and learn, too!
We’re going to be mixing up dinosaur toothpaste, doing experiments with catalysts, discovering the 5 states of matter, and building your own chemistry lab station as we cover chemical kinetics, phase shifts, the states of matter, atoms, molecules, elements, chemical reactions, and much more. We’re also going to turn liquid polymers into glowing putty so you can amaze your friends when it totally glows in the dark. AND make liquids freeze by heating them up (no kidding) using a scientific principle called supercooling,
OPTIONAL: Instant reusable hand warmer (containing sodium acetate )
Liquid soap
Popsicle sticks
Scissors or pliers
Sodium tetraborate (also called “Borax”)
Water bottle
Yeast
Yellow highlighter
Optional: If you want to see your experiments glow in the dark, you’ll need a fluorescent UV black light (about $10 from the pet store – look in cleaning supplies under “Urine-Off” for a fluorescent UV light). UV flashlights and UV LEDs will not work.
A magnetic field is the area around a magnet or an electrical current that attracts or repels objects that are placed in the field. The closer the object is to the magnet, the more powerfully it’s going to experience the magnetic effect. Nearly all minerals that are magnetic have iron as a component.
Minerals can become attracted to a magnetic field if they are heated to a certain temperature. These minerals become ferromagnetic after heating them up. Some minerals also act as magnets when they are heated, but this effect is only temporary for as long as the mineral stays at that temperature.
Magnetism is a very useful way of identifying a mineral, because it’s so precise. When testing for magnetism, you’ll get better results if you use the strongest magnet you can find. You’ll find minerals that respond to magnets (without heating them up first) are metallic-looking samples.
Most student-grade geology books refer to minerals that are attracted to magnetic fields as “magnetic,” which leads to confusion because there’s a difference between being “magnetic” (acting as a magnetic field) and being “attracted to magnetic fields.” When you fill out your observations in the data table, keep this in mind when you write down what you see by using the words “magnetic” or “attracted to a magnetic field.”
Label and number each of your samples and record this on your data table.
Hold your mineral close to the magnet and observe how strongly it is attracted to the magnet. How far away do you have to be to start influencing the sample?
Complete the data table.
There are several magnetic properties that geologists use to specify the type of magnetism within a mineral:
Ferromagnetism is the kind of magnetism you’ll see in magnetite and pyrrhotite, as these have strong attraction to magnetic fields.
Paramagnetism is a weak attraction to magnetic fields, such as with the minerals hematite and franklinite.
Diamagnetism occurs in only one mineral, bismuth, which means it’s repelled from magnetic fields.
Magnetism is found in only one mineral called lodestone, which is the magnetic version of magnetite. It’s really rare, since it’s only found in a couple locations in the entire world. Lodestone is weakly magnetic, but if you drop small paperclips, staples, and iron filings onto a piece, they’ll stick.
Exercises
Is lodestone the same as magnetite?
Which mineral is repelled from any magnetic field?
Which element is usually present in minerals that have magnetic properties?
Your goal is to identify samples according to their reactivity with acid. Minerals that react are called chemical rocks, and minerals that don’t are called clastic rocks. Some chemical rocks contain carbonate minerals, like limestone, dolomite, and marble which react with the acid.
[am4show have=’p8;p9;p30;p57;p79;’ guest_error=’Guest error message’ user_error=’User error message’ ] Materials
Acetic acid (plain distilled white vinegar) in a dropper bottle or in a small cup with a medicine dropper
Pie tin
Paper towels
Steel nail
Optional: handheld magnifier
Rock samples (in the video: bituminous coal, limestone, conglomerate, coquina, shale, siltstone, sandstone, and dolomite)
If your sample fizzed, you’ve got carbonate in your sample, and your sample might be calcite, marble, coquina, or limestone. If the powder fizzed, you’ve probably found dolomite, which is similar to calcite except it also has magnesium, which bonds more tightly than calcium, making the sample less reactive than limestone.
The reaction doesn’t always occur quickly. Sometimes you’ve got to be patient and wait. For example, magnesite has a weak reaction with acid, and if you grind it to a powder and then test, you have to wait half a minute for tiny bubbles to form. Magnifiers are helpful for these smaller, weaker reactions.
A lot of rocks contain small amounts of calcite or other carbonate minerals, so all of these make a fizz even though carbonate is only a small part of the rock. There might be small veins or crystals of carbonate minerals that you can’t even see, yet when you place a drop of acid on them, they bubble up. You can tell these types of rocks from the real thing because you won’t be able to do more than one acid test on them. The second time you try to add a drop of acid, there will be no reaction. The acid test is just one of many tests used, and shouldn’t be the only one that you use to determine your sample’s identification.
Chemically speaking, when you add the acid to the samples, you’re dissolving the calcium in the samples and releasing carbon dioxide gas into the air (these are the bubbles you see during the reaction).
For calcium carbonate and vinegar, the reaction looks like this:
2CH3COOH + CaCO3 → Ca(CH3COO)2 + H2O + CO2
The first term on the left CH3COOH is the acetic acid (vinegar), and the second term CaCO3 is the calcium carbonate. They both combine to give water H2O, carbon dioxide CO2, and calcium acetate Ca(CH3COO)2.
Carbonate minerals that react with acid (either vinegar or hydrochloric acid (HCl) as shown in the video) include aragonite, azurite, calcite, dolomite, magnesite, malachite, rhodochrosite, siderite, smithsonite, strontianite, and witherite. You can increase the reactivity with HCl by warming the HCl solution before using for the acid test.
You can do this experiment in other ways, too! Place a piece of chalk in a cup of vinegar and watch the tiny bubbles form on the chalk. This also works for egg shells, because they also contains calcium.
Do not let kids test their minerals with hydrochloric acid.
(For teachers demonstrating the HCl version of this test: CaCO3 + 2HCl → Ca++ + 2Cl–+ H2O + CO2)
Note: a few rocks, like coquina, oolite, and tufa can produce an extreme reaction with hydrochloric acid because they have a lot of calcite, and/or a lot of pore space that allows for high surface areas (exposing more of the calcium carbonate to the acid). The reaction will be quick, foamy, and vigorous, which is why we only use one drop of acid at a time.
Number and label your samples using the data table.
Use a dropper to take vinegar out of its bottle.
Drop a few drops onto your sample and watch for a reaction. You’re looking for bubbles, both in size and quantity. A few tiny bubbles don’t count. You’re looking for a reaction similar to the baking soda and vinegar reaction you are probably familiar with.
Optional: check with your hand lens while the reaction is taking place.
Record your observations in your data table.
Wipe your samples dry with a clean, damp cloth.
Test the hardness of your sample with the nail and record it in your data table. If the sample is softer than the nail, you’ll see a scratch and a powder left behind. Scratch it a couple of times to dig up more powder, then add a drop of the vinegar to the powder. Record your results. Did you see bubbles on the powder?
Do not let kids test their minerals with hydrochloric acid. (For teachers demonstrating the HCl version of this test: CaCO3 + 2HCl → Ca++ + 2Cl—+ H2O + CO2) Note: a few rocks, like coquina, oolite, and tufa can produce an extreme reaction with hydrochloric acid because they have a lot of calcite, and/or a lot of pore space that allows for high surface areas (exposing more of the calcium carbonate to the acid). The reaction will be quick, foamy, and vigorous, which is why we only use one drop of acid at a time. Exercises
What state(s) of matter is/are present during the chemical reaction of the acid test?
Write the chemical equation that describes the reaction using your own words. For example, to make water, you’d write: oxygen + hydrogen = water. What would you write for the reaction on the rocks?
By the end of this lab, you will be able to line up rocks according to how hard they are by using a specific scale. The scale goes from 1 to 10, with 10 being the hardest minerals.
[am4show have=’p8;p9;p30;p57;p70;p79;’ guest_error=’Guest error message’ user_error=’User error message’ ] Materials
Steel nail
Penny
Small plate of glass (optional)
Rock samples (minerals in the video: talc, selenite, calcite, fluorite, apatite, feldspar, quartz)
The sample’s hardness is determined by trying to scratch and be scratched by known materials, like pennies, steel, glass, and so forth. If the material leaves a mark on the mineral, then we know that the material is harder than the mineral is. We first start with a fingernail since it’s easy to use and very accessible. If it leaves a mark, that means that your fingernail is harder than the mineral and you know it’s pretty soft. Talc is one of the softest minerals, making it easy to scratch with your fingernail.
However, most minerals can’t be scratched with a fingernail, so we can try other objects, like copper pennies (which have a hardness of 2.5-3.5), steel nail (3.5-5.5), steel knife (5.5), and even quartz (7). The most difficult part of this experiment is keeping track of everything, so it’s a great opportunity to practice going slowly and recording your observations for each sample as you go along.
Number your samples on the data table and place each rock on the table. If you have the same samples listed above, you can scratch each rock with every other rock to find where they are on the Mohs’ Hardness Scale, where 1 is the softest and 10 is the hardest: Mohs’ Scale of Hardness Talc
Selenite
Calcite
Fluorite
Apatite
Feldspar
Quartz
Topaz
Corundum
Diamond
If you don’t have one of each from the following scale (at least up to quartz), then you’ll need to do this experiment a different way – the way most geologists do it in the field. Here’s how:
Scratch one of the rocks with your fingernail. If you can leave a mark, then write “Y” in the second column of the data table. Now skip over to the last column and estimate the hardness to be less than 2.5.
If you can’t scratch it with your fingernail, try using the mineral to scratch a copper penny. If it doesn’t leave a mark on the penny, skip over to the last column and estimate the hardness to be between 2.5-3.5.
If it does leave a scratch on the penny, then try scratching the mineral with a steel nail. If the nail leaves a scratch, skip over to the last column and estimate the hardness between 3.5-5.5.
If you can’t scratch the sample with the nail, see if the mineral can make a scratch on the plate glass. Glass has a hardness of 6-7. If it doesn’t make a scratch on the glass, then it’s between 5.5-6.5. If it does, it’s higher than 6.5. For example quartz will make a scratch on the plate, and its hardness has been recorded at 7.
Exercises
If a mineral scratches a penny but doesn’t get scratched by a nail, can you approximate its hardness?
Give examples of the hardest and softest minerals on the Mohs’ Scale.
Every mineral has a set of unique characteristics that geologists use to test and identify them. Some of those tests include looking at the color of the surface, seeing if the mineral is attracted to a magnet, dripping weak acids on the rock to see if they chemically react, exposing them to different wavelengths of light to see how they respond, scratching the rocks with different kinds of materials to see which is harder, and many more. There are more than 2,000 different types of minerals and each is unique. Some are very hard like diamonds, others come in every color of the rainbow, like quartz and calcite, and others are very brittle like sulfur.
The color test is as simple as it sounds: Geologists look at the color and record it along with the identification number they’ve assigned to their mineral or rock. They also note if the color comes off in their hands (like hematite). This works well for minerals that are all one color, but it’s tricky for multi-colored minerals. For example, azurite is always blue no matter where you look. But quartz can be colorless, purple, rose, smoky, milky, and citrine (yellow).
Also, some minerals look different on the surface, but are really the same chemical composition. For example, calcite comes in many different colors, so surface color isn’t always the best way to tell which mineral is which. So geologists also use a “streak test”.
For a streak test, a mineral is used like a pencil and scratched across the surface of a ceramic tile (called a streak plate). The mineral makes a color that is unique for that mineral. For example, pink calcite and white calcite both leave the same color streak, as does hematite that comes in metallic silvery gray color and also deep red. This works because when the mineral, when scratched, is ground into a powder. All varieties of a given mineral have the same color streak, even if their surface colors vary. For example, hematite exists in two very different colors when dug up, but both varieties will leave a red streak. Pyrite, which looks a lot like real gold, leaves a black streak, while gold will leave a golden streak.
The tile is rough, hard, and white so it shows colors well. However, some minerals are harder than the mineral plate, like quartz and topaz, and you’ll just get a scratch on the plate, not a streak.
Number your rock samples by placing them on your data table.
Using your data table, record the color of each sample.
Now use your streak plate. Take a rock and draw a short line across your streak plate (unglazed porcelain tile).
Record the color of the streak in your data table. Are there any surprises?
Exercises
What does it mean if there’s no streak left?
Give an example of a kind of rock that leaves a streak a different color than its surface color.
What is a mineral that appears in two different colors, yet leaves the same color streak?
two clean glass jars
yarn or string
epsom salts
water
tin foil or cook sheet
adult help, sauce pot, and a stove.
Make a supersaturated saturated solution from warm water and Epsom salts (magnesium sulfate). (Add enough salt so that if you add more, it will not dissolve.) Fill two empty glass jars with the salt solution. Space the jars a foot apart on a layer of foil or on a cookie sheet. Suspend a piece of yarn or string from one jar to the other. Wait impatiently for about three days. A stalactite should form from the middle of the string!
Geodes are formed from gas bubbles in flowing lava. Up close, a geode is a crystallized mineral deposit that is usually very dull and ordinary-looking on the outside. When you crack open a geode, however, it’s like being inside a crystal cave. We’ll use an eggshell to simulate a gas bubble in flowing lava.
We’re going to dissolve alum in water and place the solution into an eggshell. In real life, minerals are dissolved in groundwater and placed in a gas bubble pocket. In both cases, you will be left with a geode.
Note: These crystals are not for eating, just for looking.
This is a continuation of the Laundry Soap and Rock Candy experiments, so make sure you’ve done those before trying this one.
Find a clean half eggshell. Fill a small cup with warm water and dissolve as much alum in the water as you can to make a saturated solution (meaning that if you add any more alum, it will fall to the bottom and not dissolve).
Fill the eggshells with the solution and set aside. Observe as the solution evaporates over the next few days. When the solution has completely evaporated, you will have a homemade geode. If no crystals formed, then you had too much water and not enough alum in your solution.
We’re going to take two everyday materials, salt and vinegar, and use them to grow crystals by creating a solution and allowing the liquids to evaporate. These crystals can be dyed with food coloring, so you can grow yourself a rainbow of small crystals overnight.
The first thing you need to do is gather your materials. You will need:
2 teaspoons to 2 tablespoons of vinegar (you decide how much you want to use)
a shallow dish (like a pie plate)
a porous material to grow your crystals on (like a sponge)
First, mix together the salt, vinegar, and water in a cup. (You cal alternatively boil the water on the stove and stir in as much salt as the water will dissolve.) Add the vinegar after you turn off the heat. Next, place your sponge in a bowl and pour the solution over the sponge, submerging the sponge in the solution. Leave out, undisturbed, until the liquids evaporate, leaving behind a sheet of crystals.
You can add more liquid carefully to the bowl to continue the growth of your crystals for long after the first solution dries up. Also, as your crystals grow, dot the sponge with drops of food coloring to crow various colors of crystals.
Although it takes awhile for the crystals to start growing, once they do, they will continue to grow quickly!
Can we really make crystals out of soap? You bet! These crystals grow really fast, provided your solution is properly saturated. In only 12 hours, you should have sizable crystals sprouting up.
You can do this experiment with either skewers, string, or pipe cleaners. The advantage of using pipe cleaners is that you can twist the pipe cleaners together into interesting shapes, such as a snowflake or other design. Make sure the shape fits inside your jar.
1. Cut a length of string and tie it to your pipe cleaner shape; tie the other end around a pencil or wooden skewer. You want the shape suspended in the jar, not touching the bottom or sides.
2. Bring enough water to fill the jar (at least 2 cups) to a boil on the stove (food coloring is fun, but entirely optional).
3. Add 1 cup of borax (aka sodium tetraborate or sodium borate) to the solution, stirring to dissolve. If there are no bits settling to the bottom, add another spoonful and stir until you cannot dissolve any more borax into the solution. When you see bits of borax at the bottom, you’re ready. (You’ll be adding in a lot of borax, which is why we asked you to get a full box). You have made a supersaturated solution. Make sure your solution is saturated, or your crystals will not grow.
4. Wait until your solution has cooled to about 130oF (hot to the touch, but not so hot that you yank your hand away). Pour this solution (just the liquid, not the solid bits) into the jar with the shape. Put the jar in a place where the crystals can grow undisturbed overnight, or even for a few days. Warmer locations (such as upstairs or on top shelves) is best.
The atoms in a solid, as we mentioned before, are usually held close to one another and tightly together. Imagine a bunch of folks all stuck to one another with glue. Each person can wiggle and jiggle but they can’t really move anywhere.
Atoms in a solid are the same way. Each atom can wiggle and jiggle but they are stuck together. In science, we say that the molecules have strong bonds between them. Bonds are a way of describing how atoms and molecules are stuck together.
There’s nothing physical that actually holds them together (like a tiny rope or something). Like the Earth and Moon are stuck together by gravity forces, atoms and molecules are held together by nuclear and electromagnetic forces. Since the atoms and molecules come so close together they will often form crystals.
Try this experiment and then we will talk more about this:
[am4show have=’p8;p9;p11;p38;p92;p13;p40;p70;p79;’ guest_error=’Guest error message’ user_error=’User error message’ ]
Lay about 20-50 pennies on the table so that they are all sitting flat on the table. Now, use the ruler (or your hand) to push the pennies toward one another so that you have one big glob of pennies on the table all touching one another. Don’t push so hard that they pile on top of one another. Just get one nice big flat blob of pennies.
Pretty simple huh? However, take a look at the pennies, do you notice anything? You may notice that the pennies form patterns. How could that happen? You just shoved them together you didn’t lay them out in any order. Taa daa! That’s what often happens when solids form.
The molecules are pulled so close to one another that they will form patterns, also known as matrices. These patterns are very dependent on the shape of the molecule so different molecules have a tendency to form different shaped crystals. Salt has a tendency to be “cubey”. Go take a look… and you’ll find that they are like little blocks!
Water has a tendency to from triangle or hexagon shapes which is why snowflakes have six sides. Your pennies also form a hexagon shape. Solids don’t always form crystals but they are more common than you might think. A solid that’s not in a crystalline form is called amorphous. Before you put your pennies away I want you to notice one more thing.
Here’s what you do:
1. Take your pennies and lay them flat on the table.
2. Push them together so they all touch without overlapping.
3. Place your ruler on the right hand side of your penny blob so that it’s touching the bottom half of your pennies.
4. Slowly push the ruler to the left and watch the pennies.
You may have noticed that the penny “crystal” split in quite a straight line. This is called cleavage. Since crystals form patterns the way they do they will tend to break in pretty much the same way you saw your pennies break.
Break an ice cube and take a look. You may see many straight sections. This is because the ice molecules “cleave” according to how they formed. The reason you can write with a pencil is due to this concept. The pencil is formed of graphite crystal. The graphite crystal cleaves fairly easily and allows you to write down your amazing physics discoveries!
(The image here is a graphite crystal.) [/am4show]
Crystals are formed when atoms line up in patterns and solidify. There are crystals everywhere — in the form of salt, sugar, sand, diamonds, quartz, and many more!
To make crystals, you need to make a very special kind of solution called a supersaturated solid solution. Here’s what that means: if you add salt by the spoonful to a cup of water, you’ll reach a point where the salt doesn’t disappear (dissolve) anymore and forms a lump at the bottom of the glass.
The point at which it begins to form a lump is just past the point of saturation. If you heat up the saltwater, the lump disappears. You can now add more and more salt, until it can’t take any more (you’ll see another lump starting to form at the bottom). This is now a supersaturated solid solution. Mix in a bit of water to make the lump disappear. Your solution is ready for making crystals. But how?
glass jar (cleaned out pickle, jam or may jars work great)
8 cups of sugar
3 cups water
paper clip
adult help and a stove
food coloring is optional but fun!
If you add something for the crystals to cling to, like a rock or a stick, crystals can grow. If you “seed” the object (coat it with the stuff you formed the solution with, such as salt or sugar), they will start forming faster. If you have too much salt (or other solid) mixed in, your solution will crystallize all at the same time and you’ll get a huge rock that you can’t pull out of the jar. If you have too little salt, then you’ll wait forever for crystals to grow. Finding the right amount takes time and patience.
1. If you plan on eating the sugar crystal when you’re done you probably want to boil water with the jar and the paper clip in it to get rid of any nasties. Be careful, and don’t touch them while they are hot.
2. Tie one end of the string to the pencil and the opposite end to the paper clip. (You can alternatively use a skewer instead of a piece of string to make it look more like the picture above, but you’ll need to figure out a way to suspend the skewer in the jar without touching the sides or bottom of the jar.)
3. Wet the string a bit and roll it in some sugar. This will help give the sugar crystals a place to start.
4. Place the pencil across the top of the jar. Make sure the clip is at the bottom of the jar and that the string hangs straight down into the jar. Try not to let the sting touch the side of the jar.
5. Heat 3 cups of water to a boil
6. Dissolve 8 cups of sugar in the boiling water (again be careful!). Stir as you add. You should be able to get all the sugar to dissolve. You can add more sugar until you start to see undissolved bits at the bottom of the pan. If this happens, just add a bit of water until they disappear.
7. Feel free to add some food coloring to the water.
8. Pour the sugar water into the jar. Put the whole thing aside in a quiet place for 2 days to a week. You may want to cover the jar with a paper towel to keep dust from getting in.
You should see crystals start to grow in about 2 days. They should get bigger and bigger over the few days. Once you’re happy with how big your crystals get, you can eat them! It’s nothing but sugar! (Be sure to brush your teeth!) This one (left) us about 6 months old.
There you go! Next time you hold a pencil, throw a ball, or put on a shoe try to keep in mind that what you’re doing is using an object that is made of tiny strange atoms all held tightly together by their bonds.
When you hear the word “bacteria” what do you think of? If you’re like most people, you probably think of things that can make you sick. Although some bacteria do make us sick, this is not true for all of them. In fact, as we’ll see a little later, some bacteria are very helpful.
Did you know that bacteria can have a virus? It’s true! But first, you might be wondering: what’s the difference between viruses and bacteria?
Bacteria grows and reproduces on its own, while viruses cannot exist or reproduce without being in a living cell of a plant, animal, or even bacteria. Size-wise, bacteria are enormous.
The T4 bacteriophage is a virus that looks like a spaceship from an alien planet. It attaches to the surface of the Escherichia coli (E. coli) bacteria using its six legs and injects DNA into the bacteria. The DNA then tells the bacteria to multiply and essentially fill the bacterial cell to bursting. This is how the T4 kills E. coli.
In this video below, you’ll first see large E. coli bacteria floating around, one of which is attacked by a T4 bacteriophage. Notice how the T4 injects the DNA strand into the bacterium. (What’s not shown is how it bursts, but we’ll leave that to your imagination!)
Some bacteria are responsible for diseases in humans and other organisms. Strep throat, tuberculosis, and pneumonia are all the result of bacteria.
Bacteria can also be responsible for food poisoning. Raw eggs and undercooked meats can contain bacteria that can cause digestive problems. One simple step everyone can take to reduce these kinds problems is washing your hands before cooking or eating. Cleaning cooking surfaces and fully cooking food can also help.
In 2007 the United States Food and Drug Administration (FDA) approved using bacteriophages on all food products. Other places you’ll find bacteriophages are in hospitals, uniforms, sutures and surgery surfaces where it’s important to keep surfaces very clean.
Bacteria have a bad reputation. Walk down the cleaning aisle of any store and you’ll see rows and rows of products promising to kill them. There are definitely some bacteria that cause problems for people, and we’ll talk about them soon, but we are going to start off positive, and talk about the many ways bacteria can be helpful.
First, decomposers help control waste. Without these bacteria, the amount of waste in soil would quickly make the soil a place where nothing could grow. Bacteria are even used in sewage treatment plants to treat our waste. Decomposers also help provide organisms with nitrogen, as was discussed earlier.
Bacteria also have an important role in the foods we eat. Yogurt and some cheeses are made from using bacteria to ferment milk, and sauerkraut is made from using bacteria to ferment cabbage.
Once we’ve eaten, bacteria continue to help us. Bacteria line the digestive tract and help us digest food. In your gut, the number of bacteria cells is greater than the number of your own cells.
In science labs, researchers have found ways to use bacteria to produce medicines. For example, some people with the disease diabetes need insulin. Mass-produced insulin, made possible by bacteria, has lowered the cost of insulin for people suffering from this disease.
Researchers from Japan’s National Institute of Advanced Industrial Science and Technology (AIST) have figured out a way to get motion from bacteria. This team of scientists have developed a motor that is powered by bacteria movement.
Because this motor is so small (it’s only 20-microns across, where 1 micron = 1 millionth of a meter), we’ve posted a picture (above) so you can see the six revolving motor blades. Each blade has a tab that sits in a circular groove area, which is treated with a substance that makes the bacteria move only in one direction. As the bacteria moves, they push the tabs (which spins the motor). This is a great way to get power for tiny devices, such as tiny pumps inside medical devices.
What is true about bacteria is that they are made of only a single cell, are prokaryotes, and are very common. They are the most common living things on Earth. In fact, there are more bacteria living in the mouth of a single person than there are people on the planet!
Since bacteria are made of only one cell, they are very small. The only way to see bacteria is to look at them in a microscope. When you look at bacteria in a microscope, they usually have one of three shapes.
Bacilli are shaped like rods, cocci are shaped like spheres, and spirilli are shaped like spirals. Using shapes to describe bacteria helps scientists but bacteria into groups, which is often called classification.
Ah-chooo! Influenza (the “flu”) is when you get chills, fever, sore throat, muscle pains, headaches, coughing, and feel like all you want to do is lie in bed. The flu is often confused with the common cold, but it’s a totally different (and more severe) virus.
The flu is passed from person to person (or animals or birds) by coughing or sneezing. With plants, it’s transmitted through the sap via insects. In the case of birds and animals, the flu is usually transmitted by touching their droppings, which is why hand-washing is so important! In addition to soap, the flu virus can be inactivated by sunlight, disinfectants and detergents.
A virus can only replicate inside the living cells of organisms, and most are way too small to be viewed through a microscope. Viruses can infect organisms, animals, plants, bacteria and archaea. Virus particles (virions) are made up of two or three parts, including the genetic material (from either DNA or RNA), long molecules which bring genetic information, and a special coat that protects the genes.
Viruses can be helical or complex structures, but they are a lot smaller than bacteria usually by about a hundredth.
One place where bacteria can be found is on your teeth. This is why it’s so important to brush well. Don’t believe me? Then this experiment is for you. You’ll need to gather your materials and make sure you have a toothbrush and microscope nearby.
This is important because prokaryotes are incredibly common and have a huge impact on our lives. You may already know some of the ways bacteria can be harmful to you, and this is certainly important information. Scientists have used knowledge of prokaryotes to create medications, vaccines, and healthy living habits that have led to a healthier life for billions of people.
Gently brush your toothbrush against your teeth and then apply the saliva from the brush to the slide.
Add a cover slip, and observe under the microscope. Draw what you see.
Here’s a short video on a real bacterial colonization of the mouth after only 8 hours of having a cleaning done at the dentist:
If you’ve ever gone to the store to buy toothpaste, you know there many brands. Do any actually do a better job of getting rid of bacteria on your teeth? This is a great question for the scientific method. Here’s what you do:
Brush your teeth really well.
Swab your teeth with a cotton ball and apply to a petrie dish of agar.The next day, brush with a different brand of toothpaste, and again, swab and apply to a different dish.
Repeat for five days with five different brands. Record the growth of bacteria on each dish for each day.
Remember that “day 1” for the first dish will be different than “day 1” for the second dish, and so on.
Which brand left the fewest bacteria? Could there be factors that caused the difference besides toothpaste brand? (Hint: Do you eat the same thing every day?)
Some organisms, like bacteria, consist of only one cell. Other organisms, like humans, consist of trillions of specialized cells working together. Even if organisms look very different from each other, if you look close enough you’ll see that their cells have much in common.
Most cells are so tiny that you can’t see them without the help of a microscope. The microscopes that students typically use at school are light microscopes.
Robert Hooke created a primitive light microscope in 1665 and observed cells for the very first time. Although the light microscope opened our eyes to the existence of cells, they are not useful for looking at the tiniest components of cells. Many structures in the cell are too small to see with a light microscope.
[am4show have=’p8;p9;p11;p38;p92;p26;p53;p78;’ guest_error=’Guest error message’ user_error=’User error message’ ]
In this experiment, you will get to observe single-celled organisms (bacteria, actually) that live in the mouths of both humans and dogs using your compound microscope.
1. You’ll need to get your materials together. Be sure to label the Petri dishes and have your other equipment out: the cotton swabs, the canine volunteers and the human volunteers.
2. First, scrape the inside of a volunteer’s cheek use the cotton tip to swab. Swirl the cotton swab onto a Petri dish.
3. Repeat this for the rest of your human and dog volunteers.
4. Find a dark, warm spot for your Petri dishes to live in that won’t be disturbed for at least 24 hours.
5. After a day, remove the Petri dishes and place it next to your compound microscope.
6. Use a fresh swab to move the bacteria from the Petri dish to the slide and use a staining technique (covered in the Microscope Lab).
7. View each of your specimens, recording everything as you go along.
8. So what do you think? Whose mouth is cleaner – dogs or people?
If you have ever seen mold growing on an old loaf of bread or eaten a mushroom, you have encountered a fungus. Fungi (that’s the plural of fungus) are a group of organisms, or living things, that are all around us. Mold on bread and mushrooms on pizza are both examples of fungi.
Fungi have an important job. They help break down other material, so that living things are able to grow in soil. This helps make nutritious foods for other organisms. Fungi are needed for life!
Do you think mushrooms are plants? Scientists used to think that all fungi were plants. Now they know that there are some very important different between these two groups of organisms. One of the most important differences is that plants are autotrophic. This means that they can make their own food, just by using the sunlight. Fungi can’t do this. They have to “eat” other living things in order to get the energy they need. This is called being heterotrophic.
Another difference between plants and fungi is that fungi have cell walls like plants do, but their cell walls are made of chitin. Chitin is a material containing nitrogen that is also found in the shells of animals including beetles and lobsters.
Fungi do not have a vascular system, the system used to transport water and nutrients in plants, but do have hyphae, a structure you will learn about in the next section. Although mold and mushrooms are easy to see, most fungi are a lot harder to see. Some are so small they can only be seen with a microscope.
Others are big enough to see, but live in places that make them hard to find. For example, some fungi live deep in the soil, in decaying logs, inside plants and animals, or even inside or on top of other fungi!
Scientists have estimated that there are 1.5 million species of fungi, and these organisms live all over. Most are found on land, although some do live in water. Some fungi can even live in deserts. No matter their environment, fungi act as decomposers. This means that the fungi break down materials to make their environment better for other organisms to grow.
Humans use fungi for many purposes. One of the most common uses is in food. Mushrooms are eaten by many people on pizza or in salads. But yeast is used in the fermentation process to make beer, wine, and bread.
We’re going to learn how to grow our own mushrooms in this video below. Remember, never eat a mushroom unless you check with an expert first. Poisonous mushrooms look similar to edible ones, so be absolutely certain which kind it is before popping one in your mouth.
NEVER pick wild mushrooms! In addition to the uncertainty in the type of mushroom, there’s also possible harmful bacteria growing on the mushroom.
Fungi are also important in the production of some antibiotics, including penicillin and the chitin in cell walls has been said to have wound healing properties.
Art and science meet in a plant press. Whether you want to include the interesting flora you find in your scientific journal, or make a beautiful handmade greeting card, a plant press is invaluable. They are very cheap and easy to make, too!
Cut or fold the sheets of newspaper into squares the same size as the cardboard.
Place 4 sheets of newspaper between each piece of cardboard. You can also use white copy paper.
Place the plants you want to press in between the newspaper.
If you want, you can sandwich the plant press with the wood planks for added pressure.
Bind it tightly with the rubber bands or a belt buckle.
Leave it in a dry place for two to four days.
How does it work? The pressure from the rubber band/string pushes the water from the plants. The water is then absorbed by the newspaper. Since the pressure is the key to the press, it’s important not to open the press for at least two days (more is better).
Troubleshooting: The press works by pushing the moisture out of the plants, so any way moisture can stay in (or get back in) to the plants will make the press less effective. First, storing the press in a dry place is essential. If the press is left in a moist area not only will in not work, but it will grow mold and ruin the press and the plants. Conversely, if the pressure is not great enough, the moisture will not be pressed out. Thus make sure that the plants fit in the press, are bound tightly, and that the press is stored in a dry area for at very least two days.
Exercises
Draw and describe the functions of the following plant parts: root, stem.
What two major processes happen at the leaf?
Why are flowers necessary?
Do all plants have roots, stems, leaves and flowers?
Here we’re going to discuss the differences between three types of worms; flatworms, roundworms, and segmented worms. The word “worm” is not, in fact, a scientific name. It’s an informal way of classifying animals with long bodies and no appendages (no including snakes). They are bilaterally symmetrical (the right and left sides mirror each other). Worms live in salt and fresh water, on land, and inside other organisms as parasites.
The differences between the three types of worms we will discuss depend on the possession of a body cavity and segments. Flatworms have neither a body cavity nor segments. Roundworms only have a body cavity, and segmented worms have both a body cavity and segments.
Flatworms (Phylum Platyhelminthes) have incomplete digestive systems. That means that their digestive system has only one opening. The gas exchange occurs on the surface of their bodies. There are no blood vessels or nervous systems in flatworms. Some are non-parasitic, like the Sea flat worm, and some are parasitic, like the tapeworm.
Roundworms (Phylum Nematoda) have body cavities—as contrasted with flatworms which do not. The body cavity allows roundworms to have complete digestive tracts (both a mouth and an anus). The mouth and anus are connected by a gut—where the food is digested. They also have a simple nervous system and brain.
Roundworms can be parasites of plants and animals. In dogs they are often know to cause heart problems. In humans roundworm parasites can sometimes cause a swelling disease called elephantitis.
Annelids or Segmented Worms (Phylum Annalida) the most developed of the three, have both a body cavity and segments. Their body cavity helps give them structure—it serves as a hydroskeleton. By “segmented” it’s meant that they are divided into repeating units. They can be non-parasitic (i.e. earthworms) or parasitic (i.e. leeches). Interestingly, the giant red leech only eats giant earthworms.
Worm Column
If you’re fascinated by worms but frustrated that you can’t see them do their work underground, then this worm column is just the ticket for you. By using scrap materials from the recycling bin, you’ll be able to create a transparent worm farm. here’s what you need:
The outer layer of the worms: Is it hard? Is it segmented? What are other observations that can be made?
Do they have legs?
Do they have antenna?
What are the main differences?
What are the main similarities?
Garden Worm Tower
Here’s how you can make your own worm tower right in your garden:
Build your own worm farm and watch them turn food scraps into soil!
Materials:
2 polystyrene boxes with lids the same size. (Let’s call them Bin A and Bin B.)
A sheet of insect screen to fit the bottom of the boxes
Newspaper clippings
Garden soil
Food scraps (half-eaten fruits and veggies, stale biscuits and cakes, crushed egg shells, coffee grounds)
Water
Worms (Either “Tiger”, “reds”, or “blues”; ask for them at your local garden store)
Build the farm:
Punch evenly spaced holes in the bottom of Bin A.
Place the insect screen on the bottom of Bin A (this is so that the worms don’t fall out).
Fill Bin A ¾ full with wet newspaper clippings.
Add a layer of garden soil to Bin A.
Add the worms.
Place Bin A in Bin B. Make sure there’s enough room in Bin B when Bin A’s placed in it to collect the worm pee and waste. Be sure to empty and clean Bin B every couple days.
Add food to bin A! Start off small. You don’t want to over-feed the worms. Start out with a couple scraps in the corner and see how long it takes for them to disappear—that should give you a good idea of how much to feed your worms.
How does salt affect plant growth, like when we use salt to de-ice snowy winter roads? How does adding fertilizer to the soil help or hurt the plants? What type of soil best purifies the water? All these questions and more can be answered by building a terrarium-aquarium system to discover how these systems are connected together.
Water drips off the roof of your house, down your driveway, over your toothbrush and down the sink, through farm fields, and into rivers, lakes and oceans. While traveling, this water picks up litter, nutrients, salts, oil, and also gets purified by running through soil. All of this has an affect on fish and animals that live in the oceans. The question is, how does it affect the marine ecosystem? That’s what this experiment will help you discover.
Land and aquatic plants are excellent indicators of changes in your terraqua system. By using fast-germinating plats, you’ll see the changes in a relatively short about of time. You can also try grass seeds (lawn mixes are good, too), as well as radishes and beans. Pick seeds that have a life cycle of less than 45 days.
How to Care for your TAC (Terra-Aqua Column) EcoSystem:
Keep the TAC out of direct sunlight.
Keep your cotton ball very wet using only distilled water. Your plants and triops are very sensitive to the kind of water you use.
Feed your triops once they hatch (see below for instructions)
Keep an eye on plant and algae growth (see below for tips)
About the plants and animals in your TAC:
Carnivorous plans are easy to grow in your TAC, as they prefer warm, boggy conditions, so here are a few tips: keep the TAC out of direct sunlight but in a well-lit room. Water should condense on the sides of the column, but if lots of black algae start growing on the soil and leaves, poke more air holes! Water your soil with distilled water, or you will burn the roots of your carnivorous plants. Trim your plants if they crowd your TAC.
If you run out of fruit flies, place a few slices of banana or melon in an aluminum cup or milk jig lid at the bottom of a soda bottle (which has the top half cut off). Invert the top half and place it upside down into the bottom part so it looks like a funnel and seal with tape so the flies can’t escape. Make a hole in the cap small enough so only one fly can get through. The speed of a fruit fly’s life cycle (10-14 days) depends on the temperature range (75-80 degrees). Transfer the flies to your TAC. If you have too many fruit flies, discard the fruit by putting it outside (away from your trash cans) or flush it down the toilet.
You can’t feed a praying mantis too much, and they must have water at all times. You can place 2-3 baby mantises in a TAC at one time with the fruit flies breeding below. When a mantis molts, it can get eaten by live crickets, so don’t feed if you see it begin to molt. When you see wings develop, they are done fully mature. Adult mantises will need crickets, houseflies, and roaches in addition to fruit flies.
Baby triops will hatch in your TAC aquarium. The first day they do not need food. Crush a green and brown pellet and mix together. Feed your triop half of this mixture on the 2nd and the other half on the 4th day (no food on day 3). After a week, feed one pellet per day, alternating between green and brown pellets. You can also feed them shredded carrot or brine shrimp to grow them larger. If you need to add water (or if the water is too muddy), you can replace half the water with fresh, room temperature distilled water. You can add glowing beads when your triop is 5 days old so you can see them swimming at night (poke these through the access hole).
It drives me crazy it when my store-bought tomatoes go straight from unripe to mush. After talking with local farmers in my area, I discovered a few things that might help you enjoy this fruit without sacrificing taste and time.
Grocery store owners know that their products are very perishable. If the tomatoes arrive ripe, they might start to rot before they can get on the shelf for the customer. Ripe tomatoes are near impossible to transport, which means that farmers often pick unripe (green and therefore very firm) tomatoes to put on the truck. Grocery stores prefer hard, unripe tomatoes so their customers can get them home safely.
The problem is, how do you enjoy a tomato if it’s not ready?
Scientists and food experts ripen tomatoes quickly with ethylene while they are in storage. As the gas surrounds the green tomato, it chemical reacts to speed up the ripening process, causing the tomato to soften and change color to red or orange.
[am4show have=’p8;p9;p11;p38;p92;p27;p54;p78;’ guest_error=’Guest error message’ user_error=’User error message’ ]
The color change in this video is subtle – can you tell the difference between the beginning and end?
Another hormone involved in plants is ethylene. Ethylene is an unusual hormone because it is a gas. What does this mean? Find out using a fruit with plenty of ethylene, a ripe banana.
Materials:
green banana
very ripe banana
paper bag
Experiment:
Place one green banana in a paper bag.
Place another green banana in a paper bag, along with a very ripe banana.
Make daily observations about each banana.
What’s causing the differences you see? (Hint: Think about ethylene and how it can travel.)
What’s Happening: In the bag with two bananas, the gas travels from one to the other, ripening it.
Ethylene, a hydrocarbon gas like propane and butane, is generated by other fruits like bananas. When you store a banana next to a tomato, the banana’s gas triggers the ripening process in the tomato. Scientists have found that tomatoes ripened this way keep longer, but farmers and customers have found that these tomatoes have less flavor and mushier texture.
If you’ve noticed the recent vine-ripened tomato trend at the grocery store, it’s because those tomatoes tend to have more flavor than the green ones picked from the vine and stored in a room of ethylene gas.
When you’re at home, keep fully ripe tomatoes out of the refrigerator, as they are best kept at room temperature on your counters. If you stick a tomato in the fridge, you’ll find it less flavorful and starting to have a starchier texture.
Experiment:
Place a green tomato in a bag with a banana.
Make daily observations about the tomato and banana.
How did the banana take to ripen?
The bottom line? Use the banana-gas trick for tomatoes you cook or bake with, and enjoy your fresh tomatoes straight from the vine and stored on your countertop.
Birds, people, plants, and microscopic organisms need to know where they are as well as where they want to be. Birds migrate each year and know which way is south, and plants detect the sun so they can angle their leaves properly. People consult a map or GPS to figure out where they are.
Magnetotactic bacteria orients itself along magnetic field lines, whether from a nearby magnet or the Earth’s magnetic field. It’s like having a built-in internal compass.
Discovered in 1975, scientists noticed that certain bacteria seemed to move to the same side of the microscope slide. After placing a magnet near the slide, they were able to determine these bacteria contain tiny bits of iron (magnetic crystals, to be exact). The bacteria place the iron (which act like magnets) in a line to make one long magnet, and use this magnet to align to the earth’s magnetic field, just like a compass.
Bacteria move away from oxygen and toward areas with low (or no) oxygen. In water, oxygen levels decrease with depth, so you’ll find magnetotactic bacteria in the deeper parts. These bacteria use their internal compass to figure out which way is deeper.
Since the Earth’s geomagnetic north pole actually points at an angle, the “north-seeking” bacteria aligned to the field lines are also pointing down. When the bacteria move north along the field lines, they are moving into deeper water (with less oxygen). On the flip side (Southern Hemisphere), magnetotactic bacteria must be “south-seeking” in order to go deeper. Of course, at the equator, there’s a mixture of north-seeking and south-seeking bacteria.
Since the magnetic crystals are found in the organisms, even dead cells will align themselves!
Fungi and protists, including mold, moss, yeast, and mushrooms, are found all around us. One common group of fungi is mold. Mold, like all fungi, are heterotrophs, which means they rely on other living things for their energy. This is different than an autotroph like a plant, which gets its energy from the sun.
Mold commonly grows on bread, getting food from this source. What do you think makes mold grow? Being in a dark place? Being exposed to moisture? Something else? The scientific method is a series of steps some scientists use to answer question and solve problems. To conduct an experiment based on the scientific method, you must have a control sample, which has nothing done to it, and several experimental samples, which have changes made to them. You can then observe results in the experimental sample to see how your changes to them affect results.
Place a wet paper towel on the bottom of a pie tin
Add a slice of bread
Cover with plastic wrap and place in a dark place for three days
Take the pie tin out and make observations
What organisms do you think you see?
In the dark environment, mold grows on the bread. The exact type of mold will be different depending on the type of bread. Is there a difference between white and wheat? Organic and Wonder Bread? Now let’s take this a step further:
Take five pieces of bread. Place one in a pie tin and leave it on the kitchen counter. This is your “control” bread.
Place the other pieces of bread in pie tins and do something you think will help make mold grow. These are experimental samples.
Every day, observe each slice of bread and take notes.
What made the mold grow fastest? Did anything slow down mold growth, and form less mold than the control?
What does this tell us about food storage?
You probably found that mold grows well in the dark, and warm conditions. So, if you want to make your bread last longer, keep it cool and out of the dark.
Build an Ecosystem
Protists can be classified as animal-like, plant-like, and fungus-like. Animal-like protists are able to move and are heterotrophic, relying on other organisms for food. Many protozoa live in grasses, especially those found in lakes, rivers, and streams, where they are able to get the nutrients they need to survive. Create your own mini-ecosystem of these remarkable creatures in the activity below.
Materials:
grass
clean, empty glass jar
microscope with slides (optional)
Experiment:
Add water and a handful of grass to the jar
Put the lid on the jar but don’t seal it all the way
Keep the jar in a dark area for three days
Take it out and make observations. If possible, observe the organisms under a microscope.
Protozoa and other protists live of the grass, and increase in number after the jar is in the dark for several days.
Fun with Yeast
There are over 1,500 species of yeast currently discovered, and scientists estimate that this is only 1% of all yeast species. Most reproduce by budding, although a few use mitosis. Most yeasts are single-celled, although the multicellular varieties use a string to connect budding cells (pseudohyphae or false hyphae). Yeast is a fungus used in cooking many products, including bread. Why is yeast important in the baking process? Let’s find out!
Materials:
yeast
zipper-type sandwich bag
warm water
sugar
Experiment:
Put about a teaspoon of yeast into a sandwich bag.
Add about three spoons of sugar and about half a cup of very warm water. If you stick your finger into the water, it should feel warm but comfortable.
Squeeze out as much air as you can and then seal the bag. Place it in a warm spot
After about 5 minutes, you should start to see tiny bubbles forming. After 15 minutes, you should see quite a few more bubbles. After an hour, the bag should be inflated quite a bit.
Imagine that the yeast is inside some bread dough instead of the bag. As it changes the flour into sugar and consumes it, it gives off carbon dioxide and alcohol. Your bread will not be alcoholic, but when the alcohol cooks away, it leaves behind flavors that add to the taste of the bread.
More Ideas!
What happens if you place leftover food in three different cups and placed one of the cups on a sunny windowsill, another cup in the refrigerator, and a third cup in a dark cupboard? What if you use a magnifier? How does light or temperature affect the mold’s growth? Are the molds all the same color, or are they different?
Living things are all around us. Sometimes the living things we notice the most are animals, whether its birds chirping in the trees, our pet dogs, or even our fellow human beings. However, most living things are not animals - they include bacteria, archae, fungi, protists, and plants. These organisms are extremely important to learn about. They make life possible for animals, including human beings, by keeping soil ready for growth, and providing oxygen for our survival. No life would be possible without these remarkable organisms.
The prokaryotes, bacteria and archaea represent an amazingly diverse group of organisms only visible when one looks under a microscope. These single-celled organisms obtain energy and reproduce in a variety of ways.
Though some bacteria are harmful, causing disease, many are very helpful, providing the nitrogen we need to live and aiding in digestion. Archaea have been found in some of the most extreme environments on the planets, including environments that are remarkably hot or salty.
[am4show have='p8;p9;p11;p38;p92;p27;p54;p78;' guest_error='Guest error message' user_error='User error message' ]
Here are a couple of videos that will give you a few ideas on how to view this amazing world using a compound microscope, UV light, and more. First, we're going to grow our own bacteria, then we'll look how to identify the bacteria already around you.
Grow Your Own Bacteria
Bacteria, both good and bad, are all around. In fact, there are more bacteria in your mouth than people on Earth! See where you can find bacteria in the activity below.
Materials:
petri (petrie) dish
agar
cotton swab
sink or bathtub
Experiment:
1. Prepare your petrie dish of agar.
2. Using your cotton ball, swab a certain area of your house. (Think about what areas might have a lot of bacteria.)
3. Rub the swab over the agar with a few gentle strokes before putting the lid back on and sealing the petrie dish.
4. Allow the dish to sit in a warm area for 2 or 3 days.
5. Check the growth of the bacteria each day by making a drawing and describing the changes.
6. Try repeating the process with a new petrie dish and a swab from under your finger nails or between your toes.
7. Throw away the bacteria by wrapping up the petrie dish in old newspaper and placing in the trash. (Don't open the lid.)
What's happening?
The agar plate and warm conditions provide the ideal place for bacteria to grow. The bacteria you obtained with the cotton ball grow steadily, becoming visible with the naked eye in a relatively short time. Different samples produce different results. What happened when you took a swab sample from your own body?
Want to grow your own bacteria using a hand-washing kit from Home Science Tools?
Is it safe to wash my hands in water?
When you want a glass of water, where do you usually get it from? Do you drink bottled water or get it from the tap? You probably don’t drink from a pond (although people in many countries do.) Why do we have these different ways of getting water? Is there anything really different about bottled water, tap water, and lake water? Let’s find out!
Materials:
three different water samples (see experiment below)
microscope with slides and coverslips
notebook with pencil for sketching
Experiment:
Obtain three water samples – tap water, bottled water, and water from outside. (The “outside” water could be a stream, lake, or just a puddle.)
Make slides using several drops of each water sample.
Observe the slides under the microscope.
Make drawings of what you see, comparing and contrasting each sample.
Is soap better than sanitizer?
In this activity, you will compare the ability of bar soap and hand sanitizer to remove bacteria from your hand. This is another example of using the scientific method to answer questions and solve problems.
Materials:
soap
hand sanitizer
petri dish
agar
cotton call or cotton swab
Experiment:
Wash one of your hands with bar soap and clean the other with a hand sanitizer.
Swab each hand with a cotton ball and rub each swab in a Petrie dish with agar.
Place in a warm place and allow to sit for several days.
Compare the bacteria growth in each plate. Which method of cleaning was more effective?
If your kitchen is like most kitchens, you probably have cabinets for cups and pots and pans, along with drawers for silverware and cooking utensils. You might also have a drawer you call the “junk drawer.” The things in this drawer aren’t actually “junk.” If they were, you’d throw them away. Instead, things usually get put here because they just don’t fit anywhere else.
You might be surprised to learn that the system for classifying organisms has its own “junk drawer.” It’s called the protist kingdom. Its members, like the contents of your kitchen junk drawer, are important, but don’t fit nicely in one of the other kingdoms.
Broadly, protists can be classified as animal-like, plant-like, or fungus-like. It is important to remember that being “animal-like” does not make a protist an animal. Such and organism, like plant-like or fungus-like protists, are members of an entirely different group of living things.
[am4show have=’p8;p9;p11;p38;p92;p27;p54;p78;’ guest_error=’Guest error message’ user_error=’User error message’ ]
Amoeba are protists that walk using a method called a false foot, or pseudopodia. The amoeba extend a “false foot” and then pull the rest of their body along with them.
Animal-like protists are called protozoa. Like animals, protozoa can move on their own and are heterotrophic. Some protozoa eat by wrapping their bodies around their prey, creating a “food storage compartment.” Toxins are then produced which paralyze the prey, and food moved into the waiting protist.
Other protozoa have flagella, or tails, that assist in feeding. The flagella whip back and forth creating a current that brings food to the protist. Still other protozoa are parasites, and get nutrients from a host organism, harming the host in the process.
Animal-like protists can be classified, or placed into groups, based on how they move. Some move with the aid of a flagellum (that’s the singular form of flagella.) Others have many small tail-like structures called cilia which they move back and forth to get around. Still others have what is known as a “fake foot” or pseudopodia. These protozoa have a part of their cell stretch out, which pulls the rest of the organism along. The amoeba is a common example of this type of protozoan. Finally, some protozoa don’t move at all.
This type of slime Physarum Polycephalum is called the “many-headed slime”. This slime likes shady, cool, moist areas like you’d find in decaying logs and branches. Slime (or slime mold) is a word used to define protists that use spores to reproduce. (Note: Slime used to be classified as fungi.)
Real slime lives on microorganisms that inhabit dirt, grass, dead leaves, rotting logs, tropical fruits, air conditioners, gutters, classrooms and laboratories. Slime can grow to an area of several square meters.
Slime shows curious behaviors. It can follow a maze, reconnect itself when chopped in half, and predict whether an environment is good to live in or not. Scientists have battled with the ideas that at first glance, slime appears to be simply a “bag of amoebae”, but upon further study, seem to behave as if they have simple brains, like insects.
Slime can be either a plasmodial slime, a bag of cytoplasm containing thousands of individual nuclei, or a cellular slime which usually stays as individual unicellular protists until a chemical signal is released, causing the cells to gather and acts as one organism.
[am4show have=’p8;p9;p11;p38;p92;p27;p54;p78;’ guest_error=’Guest error message’ user_error=’User error message’ ]
Slime feeds by surrounding its food completely and secreting enzymes to digest it. If the slime dries out before its finished eating, it will form a hard tissue shell to protect the dormant slime until the weather turns wet again. The cool part is that the slime will continue searching for food once it hydrates and softens up. When slime can’t find food, it will begin the reproductive phase. Spores form from the mitosis phase and are spread by wind currents. Spores can remain formant for years if the conditions are unfavorable.
Scientist have discovered that physarum polycephalum (orange slime) seems just as intelligent as some insects! A team researchers set up a maze (made of agar) and found that the slime found the shortest possible path to the food.
Another team of scientists are working on bio-computing devices, which use slime instead of semiconductors. The scientists found that slime reacts consistently to certain stimuli. (If they poke it here, it moves to the left…) This team is also figuring out how to precisely point and steer slime using light and food sources.
What this means is that you’ve got a creature that will always emerge from a maze the same way when dropped in at random, is direction-controllable, and always reacts to stimuli the same way. Sounds like the inner workings of a computer, doesn’t it?
[/am4show]
All living things need a way to get energy. Bacteria get their food and energy in many ways. Some bacteria can make food on their own, while others need other organisms.
Some bacteria help other living things as they get energy, others hurt them while they get energy, and still others have no affect on living things at all.
Some living things, or organisms, are able to make their own food in a process called photosynthesis.
In this process, the organism turns energy from the sun into energy that can be used for energy. Organisms that get their energy from photosynthesis are called autotrophs. Some bacteria get their energy this way.
Some bacteria, called chemotrophs, get their energy by breaking down chemical compounds in the environment, including ammonia. Breaking down ammonia is important because ammonia contains the element nitrogen.
All organisms need nitrogen to survive, and the nitrogen released by bacteria is crucial to these living things’ survival. Clearly, chemotrophs are very important and beneficial to other living things. Living things that cannot get their energy through photosynthesis or from breaking down chemical compounds have to get their energy from other living things. Some bacteria, called decomposers, get their energy by breaking down dead organisms or waste products into simple nutrients and energy.
Pseudomonas bacteria are decomposers found in the soil, where they recycle dead plant material. The last groups of bacteria get energy from organisms that are still alive, and depend on these organisms to survive.
Mutualistic bacteria get their energy in ways that help another organism. For example, some bacteria live in the roots of legumes, including pea plants. The bacteria make the nitrogen the pea plants need and the pea plants provide a place for the bacteria to live. Other bacteria, called parasitic bacteria, hurt the organism they are getting help from. For example, some bacteria cause illness. We will talk about ways bacteria can be helpful or harmful a little later.
All living things reproduce. This is the only way to ensure the organisms continued survival. Bacteria reproduce asexually. This means that a single “parent” organism produces offspring on their own. In the case of bacteria, a process called binary fission is used. In binary fission, the DNA in the nuceleoid region and plasmids double, and the bacterium splits into two identical copies. If everything happens the way it’s supposed to, the two new bacteria will be identical to the original bacterium. These bacteria can then split again to increase the number of bacteria in the population. Through binary fission, bacteria reproduce very quickly. Some populations can double their size in less than ten minutes!
How to Grow Your Own Bacteria
Although we often think of bacteria as things that cause disease, some bacteria are very helpful. In fact, if you like to eat yogurt, you are eating helpful bacteria all the time! See for yourself in these two activities:
Materials:
clean plastic cup
yogurt
dropper or toothpick
microscope with slides and coverslips
Place a very small portion of plain yogurt onto the slide, and add one drop of water. Place the coverslip on top.
Under low power, find a section where the yogurt is pretty thin; this is where you will find the bacteria.
Switch to high power (400X for most microscopes) for a better view of the bacteria.
Make a sketch of your view under different magnifications.
Finding Bacteria in Yogurt
Materials:
clean plastic cup
yogurt
toothpick
water
microscope with slides and coverslips
Clean a small plastic cup. Make sure ALL soap is completely rinsed off.
Put a small amount of yogurt in the cup, and put it aside in a dark, relatively warm area. Leave undisturbed for at least 24 hours.
After the time has past, take a small sample with a toothpick and place on a slide. If the sample seems too thick, dilute with a drop of water. Next, place a cover slip on top.
First observe the bacteria at low power 100X to find a good place to start looking. The diaphragm setting should be very low (small) because these bacteria are nearly transparent.
Switch into the highest power to identify the bacteria according to arrangement.
From here you can identify any bacteria you might find. For example, a common inhabitant of yogurt is a paired, round bacteria or diplococcus (see list below)
Did you observe more bacteria in part 1 or 2? Why do you think this is?
Do you want to take it a step further? Think about all the kinds of yogurt out there. There are different flavors, different brands, some that are non-fat, and much more. Do some types have more bacteria than others? This is a great question to investigate using the scientific method. So come up with a specific question, write a hypothesis, grab some yogurt, and get experimenting!
If you have a backyard garden, be sure to give it plenty of sunshine, water, and garbage.
Wait… garbage? Yes, you read that right.
Garbage like rotting food and coffee grounds, made into compost, can be highly beneficial to garden plants. Why? It all has to do with nitrogen.
Plants need nitrogen in order to survive. There is plenty of nitrogen in the atmosphere; the problem is that plants can’t use it in the form found in the atmosphere. For this, bacteria are needed. Bacteria “fix” nitrogen, meaning that they change it into a usable form.
This is where the garbage comes in. Bacteria break down the garbage by eating it. When other organisms living in the soil, particularly worms, eat the bacteria, the nutrients they have stored up are released. The result is soil far more rich in nutrients.
So, how do you create your own compost pile to create plenty of garbage for your garden’s bacteria to enjoy? Well, you already have the garbage, which is a good first start. Next, you’ll want to get a compost bin. Garden supply stores sell bins, although you could also make one with wood and chicken wire. For even simpler compost bins, a pit in the ground or plastic garbage bag with holes in it will work, although you’ll need to be sure to air out the plastic bag every couple days.
Fill your bin with 1/3 brown material (dead leaves or plants are good), 1/3 vegetation, and 1/3 soil. Then, pile on the garbage! Add kitchen waste, grass clippings, dry leaves, dead plants, shredded newspaper, lint from your clothes dryer, and pet hair. The ideal compost heap will have a 25 to one ratio of things like dead leaves and newspapers, which are high in carbon to grass and other plants, which are high in nitrogen. Adding cattle, horse, or chicken manure is a great idea. Trash to avoid are bones, meat, and fat (all of which can attract pests), human or pet waste (which can spread disease), and weeds or diseased plants (which can re-introduce the weed or disease into your garden.)
[/am4show]
Keep your compost heap moist, but not soggy and turn it with a pitchfork or spade to add air into the mix. Once your compost bin is going strong, you can add it to your garden for improved plant growth!
Plants need light, water, and soil to grow. If you provide those things, you can make your own greenhouse where you can easily observe plants growing. Here’s a simple experiment on how to use the stuff from your recycling bin to make your own garden greenhouse.
We’ll first look at how to make a standard, ordinary greenhouse. Once your plants start to grow, use the second part of this experiment to track your plant growth. Once you’ve got the hang of how to make a bottle garden, then you can try growing a carnivorous greenhouse.
[am4show have=’p8;p9;p11;p38;p92;p27;p54;p65;p78;p87;’ guest_error=’Guest error message’ user_error=’User error message’ ]
Materials:
2 liter bottle
scissors or razor
gravel or sand
spanish moss
dish or plate
seeds of your choice
Experiment:
Using an exacto knife or scissors, cut the label from the soda bottle. Carefully cut the bottle in half so that the bottom (container) piece is deep enough to hold soil and plants. Poke a few holes into the bottom of the container for drainage.
Fill the bottom of the bottle with a half cup of sand or gravel to provide drainage. Use playground sand, aquarium gravel or small stones picked up from a hike. If sand or gravel isn’t available, crush an old clay pot and use that. (Let an adult crush the pot.)
Place a 1-inch layer of Spanish or Spaghnum moss in the mini greenhouse to keep the soil from mixing with the rock layer. Place a thick layer of potting soil on top of the moss, at least 4 inches deep or 1 inch from the top. Tamp down lightly with your finger
Put the top half of the soda bottle back on, tucking inside the edges of the container. If necessary, you can cut small slits into the upper portion to make it fit. Leave the cap on.
Place atop a waterproof plate in a sunny spot and water sparingly. The lid retains moisture and heat, so your seeds should sprout quickly. Because the plastic is clear, you’ll be able to see the roots beneath the surface of the soil. If the greenhouse gets too steamy, you can remove the lid once in a while. When your seedlings get big enough, transplant to the garden, and plant a new crop!
Tracking Plant Growth
You know that plants grow… but when a plant grows, is the entire stem getting longer, like rolling dough, or is only the tip growing, like squeezing the end of a toothpaste tube?
This simple experiment can give you the answer. Ready?
Tie string around the edge of a plants stem, between the last leaf at the end, and the next leaf.
Make observations as the plant grows.
What’s going on? If the entire stem grows, your string will always stay at the end. If just the tip grows, the string will become further and further from the edge. Which is it? Are you surprised?
Carnivorous Greenhouse
Was the last activity too tame for you? You’ll need to order carnivorous plant seeds. Carnivorous plants are heterotrophs. As you learned, this means they must get their energy from other organisms instead of the sun. Such plants are good at catching small animals, such as insects, to eat. Used the video below to learn how to plant the seeds that will produce these carnivores, and how to care for them once they have sprouted.
What grows in the corner of your windowsill? In the cracks in the sidewalk? Under the front steps? In the gutter at the bottom of the driveway? Specifically, how doe these animals build their homes and how much space do they need? What do they eat? Where do fish get their food? How do ants find their next meal?
These are hard questions to answer if you don’t have a chance to observe these animals up-close. By building an eco-system, you’ll get to observe and investigate the habits and behaviors of your favorite animals. This column will have an aquarium section, a decomposition chamber with fruit flies or worms, and a predator chamber, with water that flows through all sections. This is a great way to see how the water cycle, insects, plants, soil, and marine animals all work together and interact.
You can easily incorporate the Water Cycle Column, the Terraqua Column, the Predator-Prey Column, Worm Column, and the Fruit Fly Trap into your Eco-Column. If you want to make your Eco-Column more permanent, seal it together with silicone sealant, making sure you have enough drainage holes and air holes in the right places first.
Exercises
What are parts of the eco system?
Give an example of each.
What do decomposers do?
How do fruit flies breed?
How does the precipitation funnel function in this eco column?
The way animals and plants behave is so complicated because it not only depends on climate, water availability, competition for resources, nutrients available, and disease presence but also having the patience and ability to study them close-up.
We’re going to build an eco-system where you’ll farm prey stock for the predators so you’ll be able to view their behavior. You’ll also get a chance to watch both of them feed, hatch, molt, and more! You’ll observe closely the two different organisms and learn all about the way they live, eat, and are eaten.
This experiment comes in two parts. The materials you need for both parts are:
four 2-liter soda bottles, empty and clean
2 bottle caps
one plastic lid that fits inside the soda bottle
small piece of fruit to feed fruit flies
aluminum foil
plastic container with a snap-lid (like an M&M container or film can)
scissors and razor with adult help
tape
ruler
predators: spiders OR praying mantis OR carnivorous plants (if you’re using carnivorous plants, make sure you do this Carnivorous Greenhouse experiment first so you know how to grow them successfully)
soil, twigs, small plants
Fruit Fly Trap
In order to build this experiment, you first need prey. We’re going to make a fruit fly trap to start your prey farm, and once this is established, then you can build the predator column. Here’s what you need to do to build the prey farm:
Did you know that fruit flies don’t really eat fruit? They actually eat the yeast that growing on the fruit. Fruit flies actually bring the yeast with them on the pads of their feet and spread the yeast to the fruit so that they can eat it. You can tell if a fruit fly has been on your fuit because yeast has begun to spread on the skin.
When you have enough fruit flies to transfer to the predator-prey column, put the entire fruit fly trap in the refrigerator for a half hour to slow the flies down so you can move them.
If you find you’ve got way too many fruit flies, you might want to trap them instead of breed them. Remove the foil buckets every 4-7 days or when you see larvae on the fruit, and replace with fresh ones and toss the fruit away. Don’t toss the larvae in the trash, or you’ll never get rid of them from your trash area! Put them down the drain with plenty of water.
Predator-Prey Column
You can use carnivorous plants, small spiders, or praying mantises. If you use plants, choose venus flytraps, sundews, or butterworts and make sure your soil is boggy and acidic. You can add a bit of activated charcoal to the soil if you need to change the pH. Since the plants like warm, humid environments, keep the soil moist enough for water to fog up the inside on a regular basis. You know you’ve got too much moisture inside if you find algae on the plants and dirt. (If this happens, poke a couple of air holes.) Don’t forget to only use distilled water for the carnivorous plants!
Keep the column out of direct sunlight so you don’t cook your plants and animals.
Exercises
What shape is the head of the mantis?
How many eyes does a praying mantis have?
How else has the mantis head evolved to stalk their prey?
If you’ve ever eaten fruits or vegetables (and let’s hope you have), you have benefited from plants as food. Of course, the plants we eat have been highly modified by growers to produce larger and sweeter fruit, or heartier vegetables.
There are three basic ways to create plants with new, more desirable traits:
Grafting takes advantage of the fact that trees have the ability to heal themselves. In this method, a branch of a tree is cut off and replaced with the branch of a different tree. Wait a season and, voila, a new tree with the traits of the branch that was added on, or grafted, is growing on the original tree.
There are many reasons for grafting. First, it allows growers to produce a tree with more than one type of fruit. Peaches, plums, and apricots can all be found on the same tree after grafting has occurred. Grafting of the same fruit can also beneficial. Sweet oranges are preferred for taste, but trees that produce these types of oranges are at greater risk for disease. Also, sweet oranges often have no seeds, making it impossible for them to reproduce naturally. By grafting sweet oranges onto sour orange trees, both problems can be avoided.
Hybridization
You’ve probably noticed that children look like their parents, and that brothers and sisters tend to look alike as well. We share more traits with the people we are most closely related to. This is the basic idea of the branch of science called genetics. It’s not just true with people, though. Plants will share traits with their offspring.
Breeders have been using the ideas of genetics for years. They have been forcing plants with traits people find desirable to breed, hoping that the offspring will share those traits. Traits such as resistance to disease, large size, and sweetness, are bred for. When breeders began doing this, they didn’t know about genes, the factors that carry traits from parents to offspring. As this became known, breeders became better at making crosses that would produce the traits they were looking for.
Transgenics
Every living thing has a genome. A genome is the complete sequence of genes the organism has. The genes of each organism are different, which is why a bacterium is different than, say, a tomato. For the most part, that’s a good thing. We wouldn’t want our tomatoes to be much like bacteria. But what if we did? At least a little. If there was something in bacteria that would be helpful to tomatoes, would there be a way to add the bacteria gene to the tomato genome? It turns out that the answer is yes, and transgenics refers to the process of adding something helpful to another organism’s genome.
In the case of the bacteria and the tomato, some bacteria have a gene that would give tomatoes resistance to disease. This gene has been placed in many tomatoes. Some people have concerns about transgenics, worrying that adding to genomes could have unintended consequences. Nevertheless, this process has become very common.
Alexander Graham Bell developed the telegraph, microphone, and telephone back in the late 1800s. We’ll be talking about electromagnetism in a later unit, but we’re going to cover a few basics here so you can understand how loudspeakers transform an electrical signal into sound.
This experiment is for advanced students.We’ll be making different kinds of speakers using household materials (like plastic cups, foam plates, and business cards!), but before we begin, we need to make sure you really understand a few basic principles. Here’s what you need to know to get started:
[am4show have=’p8;p9;p11;p38;p92;p43;p77;’ guest_error=’Guest error message’ user_error=’User error message’ ] For this experiment to really make sense, you’ll need to complete the Telephone and the Seeing Sound Waves Experiments first. This will cover the basic mechanics of sound vibrations and waves.
Let’s talk about the telegraph. A telegraph is a small electromagnet that you can switch on and off. The electromagnet is a simple little thing made by wrapping insulated wire around a nail. An electromagnet is a magnet you can turn on and off with electricity, and it only works when you plug it into a battery.
Anytime you run electricity through a wire, you also get a magnetic field. You can amplify this effect by having lots of wire in a small space (hence wrapping the wire around a nail) to concentrate the magnetic effect. The opposite is true also – if you rub a permanent magnet along the length of the electromagnet, you’ll get an electric current flowing through the wire. Magnetic fields cause electric fields, and electric fields cause magnetic fields. Got it?
A microphone has a small electromagnet next to a permanent magnet, separated by a thin space. The coil is allowed to move a bit (because it’s lighter than the permanent magnet). When you speak into a microphone, your voice sends sound waves that vibrate the coil, and each time the coil moves, it causes an electrical signal to flow through the wires, which gets picked up by your recording system.
A loudspeaker works the opposite way. An electrical signal (like music) zings through the coil (which is also allowed to move and attached to your speaker cone), which is attracted or repulsed by the permanent magnet. The coil vibrates, taking the cone with it. The cone vibrates the air around it and sends sounds waves to reach your ear.
If you placed your hand over the speaker as it was booming out sound, you felt something against your hand, right? That’s the sound waves being generated by the speaker cone. Each time the speaker cone moves around, it create a vibration in the air that you can detect with your ears. For deep notes, the cone moves the most, and a lot of air gets shoved at once, so you hear a low note. Which is why you can blow out your speakers if your base is cranked up too much. Does that make sense?
Here’s a video to help make sense of all these ideas. One of our scientists, Al, is going to demonstrate how to use a signal generator to drive a speaker at different frequencies. We even brought in specialist (with very good hearing!) to detect the full range of sound and used a special microphone during recording, so you should hear the same thing we did during the testing.
1 audio plug or other cable that fits into your stereo / mp3 player
Now you’re ready to make your speakers. Note that these speakers are made from cheap materials and are for demonstration purposes only… they do not have an amplifier, so you’ll need to place your ear close to the speaker to detect the sound. DO NOT connect these speakers up to your iPOD or other expensive stereo equipment, as these speakers are very low resistance (less than 2 ohms) and can damage your sound equipment if you’re not careful. The best source of music for these speakers is an old boom box with a place to plug in your headphones. We’ll show you everything in this video:
We’re going to build on the quick ‘n’ easy DC motor to make a tiny rail accelerator (any larger, and you’ll need a power plant and a firing range and a healthy dose of ethics.) So let’s stick to the physics of what’s going on in this super-cool electromagnetism project. This project is for advanced students.
Here’s what we’re going to do:
We’re going to create two magnetic fields at right angles (perpendicular) to each other. When this happens, it causes things to move, spin, rotate, and roll out of the way. We’re going to focus this down to making a tiny set of wheel zip down a track powered only by magnetism. Ready?
Did you notice how this rail accelerator is really just two of the ‘quick ‘n’ easy DC motors connected together? The wire is now the aluminum rail, and the magnetic field in the rail create a force perpendicular gold disk’s magnetic field. These two magnetic fields interact, causing the little wheels to roll. Which is why if you have the wheels on ‘backwards’ (or your battery connected backwards), your wheels will roll toward (instead of away) from you.
Troubleshooting: If you drop your wheels from too high up, you’ll knock the axle off-center and the wheels won’t roll. If your wheels still don’t roll, flip one of the magnets around (they must be in opposite directions for this to work!). Also make sure you’ve got a fresh 9V battery and good electrical connection between your clips and the track.
Exercises
Do the magnets need to be opposite in order for this to work?
Want to hear your magnets? We’re going to use electromagnetism to learn how you can listen to your physics lesson, and you’ll be surprised at how common this principle is in your everyday life. This project is for advanced students.
We’re going to invert the ideas used when we created our homemade speakers into a basic microphone. Although you won’t be able to record with this microphone, it will show you how the basics of a microphone and amplifier work, and how to turn sound waves back into electrical signals. You’ll be using the amplifier and your spare audio plug from the Laser Communicator for this project.
An amplifier’s job is to take small electrical voltages (AKA the ‘input) and make them bigger (amplify them). Then, we usually plug a speaker or headphones into the amplifier and those turn the bigger electrical signal (AKA the ‘output’) into sound. So any small voltage that we plug into the amplifier’s input will get larger and then turn into sound through the built-in speaker.
One way to show this is to use a coil of wire and a magnet. If you take a coil of wire and move a magnet past, around, or through it, you will create a small electrical voltage (and current) in the wire. In fact, if you have enough wire and a big enough magnet, and move the magnet fast enough, the electricity coming out of the coil of wire can light up a light bulb (this is how an electric generator works).
So back to the amplifier: if we take the voltage from our little coil/magnet generator, and we put it into the amplifier, we’ll hear the sound from the speaker each time it makes a voltage. If we move the magnet back and forth really fast, we’ll hear a fast clicking sound. And if we were to move it super-incredibly-fast (faster than you could with your hands), then those clicks would blend together into a tone. Tones like this are what all sounds are made of.
In fact, this is exactly what a microphone does. Many microphones have a magnet and a coil of wire attached to a very thin piece of plastic or metal that vibrates when sound waves hit it. The plastic (or metal) in turn moves the coil of wire next to the magnet super-fast. Then this causes the electric voltage to come out of the coil and if you plug it into an amplifier it will make the same sound that the microphone heard, only louder.
Exercises
Why does the electromagnet make sound when you bring the permanent magnet close to it?
Imagine you have two magnets. Glue one magnet on an imaginary record player (or a ‘lazy susan’ turntable) and hold the other magnet in your hand. What happens when you bring your hand close to the turntable magnet and bring the north sides together?
The magnet should repel and move, and since it’s on a turntable, it will circle out of the way. Now flip your hand over so you have the south facing the turntable. Notice how the turntable magnet is attracted to yours and rotates toward your hand. Just as it reaches your hand, flip it again to reveal the north side. Now the glued turntable magnet pushes away into another circle as you flip your magnet over again to attract it back to you. Imagine if you could time this well enough to get the turntable magnet to make a complete circle over and over again… that’s how a motor works!
This next activity mystifies even the most scientifically educated! Here’s what you need:
Materials:
magnet
magnet wire (26g works well)
D cell battery
two paper clips (try to find the ones shown in the video, or else bend your own with pliers)
1. Start out by winding the magnet wire around a D-cell battery 12-15 times. Coil the wire around the circular loop to keep the wires together. Be sure that the “ears” are straight (see photo below). This is now your ‘rotor’:
2. IMPORTANT! Remove the insulation by sanding the entire length of both “ears”, flip the rotor over, and sand only one “ear” side, leaving the insulation intact on the side of the remaining “ear”.
3. Wrap the rubber band around the battery long-ways. Untwist a paper clip to make the shape shown in the video.
4. Make two of these paper clip shapes. You can use pliers to help make the shape. Place the left end under the rubber band in the center of the each end. The loop on the right end is where the rotor will hang (you can flip it over or bend accordingly if it falls out too much.)
5. Slide the rotor into the loops.
6. Place the magnet on the battery just under the rotor under the rubber band (you can use an additional rubber band to secure if needed). You want the rotor to be as close to the magnet as possible without hitting it. Give it a spin, and you’re off!
Troubleshooting: Usually problems arise when checking the connection between the battery and paper clips. Hold the battery with the fingertips in the center of each battery end and squeeze to make a good connection. If it still fails to spin, check your rotor: one ear should be insulation-free, the other should have a stripe of insulation down its length.
If you’re still having trouble, check the ears to be sure they are straight. The rotor needs to be able to spin nicely, so ensure it is well-balanced. Egg-shaped rotors just won’t turn.
Wow! How does THAT work? When you run electricity through any wire, it turns slightly into a magnet. When you stack wires on top of each other (as you did with the coil of wire), you multiply this effect and get a bigger magnet.
For the DC motor: The coil of wire is the O-shaped ring. When the sanded parts of the “ears” are connected to the paper clip, current flows through the circuit. When this happens, everything connects together and turns the coil wire into an electromagnet, which is then attracted to the magnet on the battery.
When the O-ring rotates, it moves around until the un-sanded portion breaks the connection and turns it back into just a coil of wire. The coil continues to float around in a circle until it hits the sanded parts again, which re-energizes the coil, turning it back into an electromagnet, which is now attracted to the magnet on the battery, which pulls it around again…and round it goes!
This experiment is for advanced students. If you’ve attempted the relay and telegraph experiment, you already know it’s one of the hardest ones in this unit, as the gap needs to be *just right* in order for it to work. It’s a super-tricky experiment that can leave you frustrated and losing hope that you’ll ever get the hang of this magnetism thing.
Fear not, young scientist! Here’s a MUCH simpler relay experiment that will actually give a nice blue spark when fired up, along with a nice zap to the hand that touches it in just the right spot. You can also use this relay in your electricity experiments as a switch you can use to turn things on and off using electricity (instead of your fingers moving a switch), including how to make a latching burglar alarm circuit.
Find a spare magnet – one you really don’t care about. Bring it up close to another magnet to find where the north and south poles are on the spare magnet. Did you find them? Mark the spots with a pen – put a N for north, and a S for south. Now break the spare magnet in half, separating the north from the south pole. (This might take a bit of muscle!) You should have one half be a north magnet, and the other a south. Or do you?
One of the big mysteries of the universe is why we can’t separate the north from the south end of a magnet. No matter how small you break that magnet down, you’ll still get one side that’s attracted to the north and the other that’s repelled. There’s just no way around this!
If you COULD separate the north from the south pole, you could point a magnet’s south pole toward your now-separated north pole, and it would always be repelled, no matter what orientation it rotated to. (Normally, as soon as the magnet is repelled, it twists around and lines up the opposite pole and snap! There go your fingers.) But if it were always repelled, you could chase it around the room or stick a pin through it so it would constantly move and rotate.
Well, what if we sneakily use electromagnetism? Note that you can use a metal screw, ball bearing, or other metal object that easily rotates. If your metal ball bearing is also magnetic, you can combine both the screw and the magnet together.
Famous scientist Michael Faraday built the first one of these while studying magnetic and electricity, and how they both fit together. What to see what he figured out?
Note: In case you missed it on the shopping list, you can order the disc magnet here.
The current from the battery is flowing through the wire, creating a magnetic field around the wire, which interacts with the magnetic field in the gold disk magnet. Since the wire creates a magnetic field that is perpendicular to the field in the gold magnet, the magnet feels a push, which causes it to rotate. Watch your fingers on this experiment – if you’re not careful and leave your wire contacting the magnet too long, you’ll roast your battery (and that’s really bad).
Exercises
How does this experiment work?
What happens if you reverse the polarity and attach the screw to the negative side of the battery?
Have you noticed that stuff sticks to your motor? If you drag your motor through a pile of paperclips, a few will get stuck to the side. What’s going on?
Inside your motor are permanent magnets (red and blue things in the photo) and an electromagnet (the copper thing wrapped around the middle). Normally, you’d hook up a battery to the two tabs (terminals) at the back of the motor, and your shaft would spin.
However, if you spin the motor shaft with your fingers, you’ll generate electricity at the terminals. But how is that possible? That’s what this experiment is all about.
If you move a magnet along the length of a wire, it will create a very faint bit of electricity inside the wire. If you moved that magnet back and forth fast enough you could power a light bulb. However, by fast enough, I mean like 1000 times a second or more! If you had a stronger magnet, or many more coils in your wire, then you could make a greater amount of electricity each time you moved the magnet past the wire.
A motor has a coil of wire wrapped around a central axis, so instead of rubbing back and forth (which is tough to going fast enough, because you have to stop, reverse direction, and start moving again every so often), it rotates past a set of magnets continuously.
When you add a battery pack to the motor terminals at the back, you energize the coil inside the motor, and it begins to rotate to attempt to line up its north and south poles. But the magnets are lined up in a way that it will continually ‘miss’ and overshoot, which keeps the shaft spinning over and over, faster and faster.
You can turn your motor into a generator by simply giving the shaft a quick spin with your fingers. Remember that attached to this shaft is a coil of wire. When you spin the shaft, you’re also moving a coil of wire past the permanent magnets inside to motor, which will create electricity in your coil and out the terminals.
You can attach a low-voltage LED directly to the motor terminals and spin the shaft to see the LED light up. Depending on the size of the magnets inside your motor, you may need to spin the shaft super fast to see the LED light up. The larger the motor, the easier this activity is. Try using a larger, 12V DC motor from the main shopping list for this section.
You can wrap wire around an iron core (like a nail), which will intensify the effect and magnetize the nail enough for you to pick up paperclips when it’s hooked up. See how many you can lift!
You can wrap the wire around your nail using a drill or by hand. In the picture to the left, there are two things wrong: you need way more wire than they have wrapped around that nail, and it does not need to be neat and tidy. So grab your spool and wrap as much as you can – the more turns you have around the nail, the stronger the magnet.
(We included this picture because there are so many like this in text books, and it’s quite misleading! This image is supposed to represent the thing you’re going to build, not be an actual photo of the finished product.)
Find these materials:
Batteries in a battery holder with alligator clip wires
A nail that can be picked up by a magnet
At least 3 feet of insulated wire (magnet wire works best but others will work okay)
1. Take your wire and remove about an inch of insulation from both ends. (Use sandpaper if you’re using magnet wire.)
2. Wrap your wire many, many times around the nail. The more times you wrap the wire, the stronger the electromagnet will be. Be sure to always wrap in the same direction. If you start wrapping clockwise, for example, be sure to keep wrapping clockwise.
3. Now connect one end of your wire to one terminal of the battery using an alligator clip (just like we did in the circuits from Unit 10).
4. Lastly, connect the other end of the wire to the other terminal of the battery using a second alligator clip lead to connect the electromagnet wire to the battery wire. This is where the wire may begin to heat up, so be careful.
5. Move your compass around your electromagnet. Does it affect the compass?
6. See if your electromagnet can pick up paper clips.
7. Switch the wires from one terminal of the battery to the other. Electricity is now moving in the opposite direction from the direction it was moving in before. Try the compass again. Do you see a change in which end of the nail the north side of the compass points to?
What happened there? By hooking that coil of wire up to the battery, you created an electromagnet. Remember, that moving electrons causes a magnetic field. Well, by connecting the two ends of your wire up to the battery, you caused the electrons in the wire to move through the wire in one direction.
Since many electrons are moving in one direction, you get a magnetic field! The nail helps to focus the field and strengthen it. In fact, if you could see the atoms inside the nail, you would be able to see them turn to align themselves with the magnetic field created by the electrons moving through the wire. You might want to test the nail by itself now that you’ve done the experiment. You may have caused it to become a permanent magnet!
[/am4show]
Galvanometers are coils of wire connected to a battery. When current flows through the wire, it creates a magnetic field. Since the wire is bundled up, it multiplies this electromagnetic effect to create a simple electromagnet that you can detect with your compass.
[am4show have=’p8;p9;p11;p38;p92;p21;p48;p106;p77;p58;’ guest_error=’Guest error message’ user_error=’User error message’ ]
Here’s what you need to do:
1. Remove the insulation from about an inch of each end of the wire. (Use sandpaper if you’re using magnet wire.)
2. Wrap the wire at least 30-50 times around your fingers, making sure your coil is large enough to slide the compass through.
3. Connect one end of the wire to the battery case wire.
4. While looking at the compass, repeatedly tap the other end of the wire to the battery. You should see the compass react to the tapping.
5. Switch the wires from one terminal of the battery to the other. Now tap again. Do you see a difference in the way the compass moves?
You just made a simple galvanometer. “Oh boy, that’s great! Hey Bob, take a look! I just made a….a what?!?” I thought you might ask that question. A galvanometer is a device that is used to find and measure electric current. “But, it made a compass needle move…isn’t that a magnetic field, not electricity?” Ah, yes, but hold on a minute. What is electric current…moving electrons. What do moving electrons create…a magnetic field! By the galvanometer detecting a change in the magnetic field, it is actually measuring electrical current! So, now that you’ve made one let’s use it!
More experiments with your galvanometer
You will need:
Your handy galvanometer
The strongest magnet you own
Another 2 feet or more of wire
Toilet paper or paper towel tube
1. Take your new piece of wire and remove about an inch of insulation from both ends of the wire.
2. Wrap this wire tightly and carefully around the end of the paper towel tube. Do as many wraps as you can while still leaving about 4 inches of wire on both sides of the coil. You may want to put a piece of tape on the coil to keep it from unwinding. Pull the coil from the paper towel tube, keeping the coil tightly wrapped.
3. Hook up your new coil with your galvanometer. One wire of the coil should be connected to one wire of the galvanometer and the other wire should be connected to the other end of the galvanometer.
4. Now move your magnet in and out of the the coil. Can you see the compass move? Does a stronger or weaker magnet make the compass move more? Does it matter how fast you move the magnet in and out of the coil?
Taa Daa!!! Ladies and gentlemen you just made electricity!!!!! You also just recreated one of the most important scientific discoveries of all time. One story about this discovery, goes like this:
A science teacher doing a demonstration for his students (can you see why I like this story) noticed that as he moved a magnet, he caused one of his instruments to register the flow of electricity. He experimented a bit further with this and noticed that a moving magnetic field can actually create electrical current. Thus tying the magnetism and the electricity together. Before that, they were seen as two completely different phenomena!
Now we know, that you can’t have an electric field without a magnetic field. You also cannot have a moving magnetic field, without causing electricity in objects that electrons can move in (like wires). Moving electrons create a magnetic field and moving magnetic fields can create electric currents.
“So, if I just made electricity, can I power a light bulb by moving a magnet around?” Yes, if you moved that magnet back and forth fast enough you could power a light bulb. However, by fast enough, I mean like 1000 times a second or more! If you had a stronger magnet, or many more coils in your wire, then you could make a greater amount of electricity each time you moved the magnet through the wire.
Believe it or not, most of the electricity you use comes from moving magnets around coils of wire! Electrical power plants either spin HUGE coils of wire around very powerful magnets or they spin very powerful magnets around HUGE coils of wire. The electricity to power your computer, your lights, your air conditioning, your radio or whatever, comes from spinning magnets or wires!
“But what about all those nuclear and coal power plants I hear about all the time?” Good question. Do you know what that nuclear and coal stuff does? It gets really hot. When it gets really hot, it boils water. When it boils water, it makes steam and do you know what the steam does? It causes giant wheels to turn. Guess what’s on those giant wheels. That’s right, a huge coil of wire or very powerful magnets! Coal and nuclear energy basically do little more than boil water. With the exception of solar energy almost all electrical production comes from something huge spinning really fast!
Exercises
Why didn’t the coil of wire work when it wasn’t hooked up to a battery? What does the battery do to the coil of wire?
How does a moving magnet make electricity?
What makes the compass needle deflect in the second coil?
Does a stronger or weaker magnet make the compass move more?
Does it matter how fast you move the magnet in and out of the coil?
A ferrofluid becomes strongly magnetized when placed in a magnetic field. This liquid is made up of very tiny (10 nanometers or less) particles coated with anti-clumping surfactants and then mixed with water (or solvents). These particles don’t “settle out” but rather remain suspended in the fluid.
The particles themselves are made up of either magnetite, hematite or iron-type substance.
Ferrofluids don’t stay magnetized when you remove the magnetic field, which makes them “super-paramagnets” rather than ferromagnets. Ferrofluids also lose their magnetic properties at and above their Curie temperature points.
Ferrofluids are what scientists call “colloidal suspensions”, which means that the substance has properties of both solid metal and liquid water (or oil), and it can change phase easily between the two. (We as show you this in the video below.) Because ferrofluids can change phases when a magnetic field is applied, you’ll find ferrofluids used as seals, lubricants, and many other engineering-related uses.
Here’s a video on toner cartridges and how to make your own homemade ferrofluid. It’s a bit longer than our usual video, but we thought you’d enjoy the extra content.
Engineering and scientists use ferrofluids to make a liquid seal in hard disks around the spinning disks to keep out dust and grit (hard drives must be kept exceptionally clean!). They do this by adding a layer of ferrofluid between the rotating shaft and magnets which surround the shaft.
You can also use ferrofluids to reduce friction, the way ice and water are used in ice skating rinks. If you coat a strong magnet with ferrofluid, you can get it to glide across a smooth surface like a hockey puck.
NASA uses ferrofluids in the flight instruments for spacecraft, also!
Each particle of ferrofluid is like a each grain or a micro-magnet, which not only interacts with magnetic fields, but also with light.
With loudspeakers, the large magnets that interacting with the coil often heat up. If we replace the magnet with ferrofluid (which is a liquid, remember!) it will actively conduct the heat away from the coil and cool it down because cold ferrofluid is more strongly attracted than hot, and thus the cooler fluid flows toward the coil, and the warmer fluid moves away from the coil.
Exercises
Is the ferrofluid a solid or a liquid?
Does the strength of a magnet matter?
What would happen if the magnet went over the rim of the cup?
Does the ferrofluid have a north and south pole?
What happens if you bring a compass near the ferrofluid?
Name three specific ways ferrofluid makes our lives easier. How might you use a ferrofluid if you were inventing something?
There are two ways to create a magnetic field. First, you can wrap wire around a nail and attach the ends of the wire to a battery to make an electromagnet. When you connect the battery to the wires, current begins to flow, creating a magnetic field. However, the magnets that stick to your fridge are neither moving nor plugged into the electrical outlet – which leads to the second way to make a magnetic field: by rubbing a nail with a magnet to line up the electron spin. You can essential “choreograph” the way an electron spins around the atom to increase the magnetic field of the material. This project is for advanced students.
There are several different types of magnets. Permanent magnets are materials that stay magnetized, no matter what you do to it… even if you whack it on the floor (which you can do with a magnetized nail to demagnetize it). You can temporarily magnetize certain materials, such as iron, nickel, and cobalt. And an electromagnet is basically a magnet that you can switch on and off and reverse the north and south poles.
The strength of a magnetic field is measured in “Gauss”. The Earth’s magnetic field measures 0.5 Gauss. Typical refrigerator magnets are 50 Gauss. Neodymium magnets (like the ones we’re going to use in this project) measure at 2,000 Gauss. The largest magnetic fields have been found around distant magnetars (neutron stars with extremely powerful magnetic fields), measuring at 10,000,000,000,000,000 Gauss. (A neutron star is what’s left over from certain types of supernovae, and typically the size of Manhattan.)
Linear accelerators (also known as a linac) use different methods to move particles to very high speeds. One way is through induction, which is basically a pulsed electromagnet. We’re going to use a slow input speed and super-strong magnets and multiply the effect to generate a high-speed ball bearing to shoot across the floor.
For this experiment, you will need:
[am4show have=’p8;p9;p11;p38;p92;p48;p77;’ guest_error=’Guest error message’ user_error=’User error message’ ]
• Wood or plastic ruler with a groove down the center
• Thick rubber bands or strong, super-sticky tape
• Four super-strong magnets (try 12mm or ½” neodymium magnets)
• Nine steel ball bearings (1/2”, 5/8”, or other sizes)
Question: Does it really matter where where you start the first ball bearing? If so, does it matter much?
What’s going on? The metal ball bearing is seriously attracted to your magnets, and this pull intensifies the closer the ball gets to the magnet (inverse-square law). When the ball smacks into the magnet, the energy wave from the impact zips through the magnet and attached ball bearings until it knocks the furthest ball free, which has the least magnetic pull on it (it’s furthest from the magnet)… which is good, or it would be slowed down and possible reattached to the magnet it just broke away from.
With each impact, there’s an increase in velocity. Imagine if you had a hundred of these things lined up… how fast could you get that last ball bearing going?
After each firing, you have to reset your system, and chances are, it takes a bit of effort to pull the ball bearings from the magnets! you are providing the energy that gets released during each collision and adds to the velocity of the ball bearings.
Want to turn this into a Science Fair Project?Click here for step-by-step instructions.
Exercises
Does it really matter where you start the first ball bearing? If so, does it matter much?
Why does only the last ball go flying away? Why don’t the others break away as well?
What happens if you try this experiment without the magnets?
How many inches did the first initial ball (the one you let go of) travel?
How many inches did the last ball (the one that detached from the magnet) travel?
Why did we use four magnets in the second lab? What did that do?
Marie Curie, a scientist famous for being the first person to receive two Nobel Prizes as well as her extensive work on radioactivity.
Magnetic material loses its ability to stick to a magnet when heated to a certain temperature called the Curie temperature. The Curie temperature for nickel is 380 oF, iron is 1,420oF, cobalt is 2,070 oF, and for ceramic ferrite magnets, it starts at 860oF.
We’re going to heat a magnet so that it loses temporarily loses its magnetic poles, and watch what happens as it cycles through cooling. Pierre and Marie Curie’s first scientific works were actually in magnetism, not chemistry, and their papers in magnetic fields and temperature when among the first noticed by the scientists at the time.
The Curie temperature for the ceramic magnet is much higher than a candle can produce, which is why the permanent magnet isn’t affected by the flame. The Curie temperature for the tiny bead magnet is around 600oF, which is easily obtainable by your candle.
At the end of the swinging wire, there’s a tiny bead magnet, which is quite strong for its size. The magnet is attracted to the large ceramic magnet and moves toward it, almost touching it. The candle heats up the tiny bead magnet, causing it to temporarily lose its magnetism by adding energy into the atom and randomizing their orientation within the magnet. You’ll notice that the magnet quickly regains its magnetism after it cools. While you can permanently destroy the magnetic field in the bead magnet, you’d need something hotter than a propane torch to do it.
By the way, the Curie temperature for ceramic rare earth magnets is just under 600oF, also within reach of your candle’s heat. The magnets are also on the small size, so they tend to heat up faster.
Exercises
Why does the tiny magnet lose its attraction to the large magnet?
How long does it take for the attraction-repulsion cycle to repeat?
Draw out your experiment, explaining how it works and labeling each part:
We took our first step into the strange world of magnetism when we played with magnetizing a nail. We learned that magnets do what they do because of the behavior of electrons. When a bunch of those crazy little guys get going in the same direction they create a magnetic field. So what’s a magnetic field, you ask? That’s what this experiment is all about.
As the North and South sides of a magnet get closer together, the pull of the magnetic force is stronger. This is typical of fields. The closer you get, the stronger the pull of the force gets. The farther you get, the weaker the pull of the force gets.
When you build the little boats, remember that you kept the poles all the same (all north pointed up, for example). The floating magnets repel each other because they have the same pole oriented up. But notice that when you bring the larger magnet close, they are all attracted to it and also make geometric patterns! When you bring the larger magnet in closer, the size of your pattern changes, doesn’t it? Most patterns have at least one (sometimes two) stable patterns, each of which is a local minimum energy pattern. The patterns that the little boats make are very similar to the crystal structures in solids.
Notice how the magnet boats repel each other when they get too close, yet the hold each other in a pattern. Atoms do the same thing – they repel each other when you try to squish them together, yet hold together to form molecules.
Exercises
What shape do three magnets give? Why is this different from the shape that four magnets make?
Why do the magnets flip over when you first place them in the water?
How many magnets make a hexagon?
How is this experiment like the compass experiments we’ve done so far?
Why do the boats repel each other, yet still hold in a pattern?
Wouldn’t it be cool to have an alarm sound each time someone opened your door, lunch box, or secret drawer? It’s easy when you use a reed switch in your circuit! All you need to do it substitute this sensor for the trip wire and you’ll have a magnetic burglar alarm.
The first thing you need to do is get your reed switch out, because we have to tear into it in order to get the part we need. Here’s what you need:
This is a quick and simple experiment to answer the question of magnetic field strength: Do four magnets have a stronger magnetic pull than one? You’ll find the answer quite surprising… which is: it depends. Here’s what you need to do to see for yourself:
What’s going on here? When you bring the bottoms of the two film canisters together, you can feel the force of repulsion (if not, flip one of the stacks inside one of the the canisters). While you’ll definitely notice that the force of 4-on-4 magnets is larger than 1-on-1, you won’t be able to tell the difference between 4-on-1 or 1-on-4. Or, put more simply, you can’t tell which has one magnet and which has four. So what’s going on?
The more magnets you have, the more magnetic force they exert. The magnetic forces between two stacks of ten magnets magnets are equal and opposite. The magnetic force exerted by a stack of two magnets and five magnets is also equal and opposite, although somewhat less than the stack of ten.
It’s the same with gravity – the force of gravity between two masses (like the sun and the Earth) is also equal and opposite – or the earth would get pulled into the sun or go flying out of the solar system. The Earth exerts the same pull on the sun as the sun exerts on the Earth.
Say WHAT?!?
Did you expect four magnets to push with four times the force on the single magnet? That’s what common sense tells us. However, think of it this way: the 2nd, 3rd, and 4th magnets magnets are further away than the 1st magnet and so they each exert less and less of a push on the single magnet.
Exercises:
Why can’t you simply rub the needle back and forth with the magnet? Why do you have to stroke it in one direction?
What other objects/materials can you use to make a compass?
Want to see a really neat way to get magnetic fields to interact with each other? While levitating objects is hard, bouncing them in invisible magnetic fields is easy. In this video, you’ll see how you can take two, three, or even four magnets and have them perform for you.
Did you notice that if the north pole of the bottom magnet is up, then the south pole of the magnet stacked above it will be down? The stack holds together because opposites attract (north-south). You probably already knew that, right? But notice when you pull the top magnet to the side the bottom south face is repelled into the air above the north face of the fixed magnet. So what gives?
Remember that a magnet isn’t strictly north or south. There are field lines that connect the two poles. The field lines start at one end and swoop down to the other and back again like in this picture to the left, reversing from north to south as it does so. This is why the south face is repelled – because it’s actually the magnetic fields that are doing the repelling.
You can adjust your two bouncing magnets to have nearly the same ‘bouncy’ (frequency) by changing their distance apart. Notice that when one magnet starts bouncing, the magnetic field changes, which pushes and pulls on the other magnet. The two magnets interact with each other through their magnetic fields, pushing and pulling each other into resonance.
British physicist Michael Faraday, famous for his many contributions to science including electrochemistry and electromagnetism.
Once you’ve mastered two magnets, why not try three? Or four? What happens when you bring a conductor, like a thick sheet of copper, aluminum (cookie sheet or cake pan) nearby? The eddy currents created in the metal by the moving magnet created an opposing magnetic field that work to ‘brake’ the moving magnet and stop it from bouncing.
While this activity may seem a bit trivial (and a little fun), the idea of a magnetic field is one of the greatest leaps ever made in science. Scientist Michael Faraday imagined the idea that a magnet had not only a magnetic field, but that it cold push and pull on other magnets and moving electric charges. This crazy idea was so wild that it took many scientists a lifetime to come to terms with it… as it replaced an older idea from Newton that had stood for centuries.
And, as usually happens when someone has a new bright idea, others are quick to add to it. Shortly after Faraday’s idea about magnetic fields and electrical charges, Maxwell combined complicated mathematics (stuff you’ll only see at a university) into his four famous equations (Maxwell’s Equations) that describe all electric and magnetic fields.
Exercises
Why does the magnet float?
After you tap the floating magnet, does it vibrate for a short or long time? Why?
Why do we stack the magnets first before trying to levitate them?
How many magnets can you get to interact while floating?
When you float two magnets above the main magnet, how do the floating magnets interact with each other? Why do they do that?
Have you ever been close to something that smells bad? Have you noticed that the farther you get from that something, the less it smells, and the closer you get, the more it smells? Well forces sort of work in the same way.
Forces behave according to a fancy law called the inverse-square law. To be technical, an inverse-square law is any physical law stating that some physical quantity or strength is inversely proportional to the square of the distance from the source of that physical quantity.
The inverse-square law applies to quite a few phenomena in physics. When it comes to forces, it basically means that the closer an object comes to the source of a force, the stronger that force will be on that object. The farther that same object gets from the force’s source, the weaker the effect of the force.
Mathematically we can say that doubling the distance between the object and the source of the force makes the force 1/4th as strong. Tripling the distance makes the force 1/9th as strong. Let’s play with this idea a bit.
Using a magnet (the stronger the better), paper clip, string (or yarn or even dental floss!), and tape, you can make a flying paper clip.
OPTIONAL: If you happen to have a spring scale and ruler, get those out, too…otherwise, just skip these items – they are not essential to understanding the concept here.
1. Tie about 4 inches of string to a paper clip.
2. Tape the magnet to the table.
3. Hold the end of the string that is not tied to the paper clip and let the paper clip dangle.
4. Slowly bring the paper clip closer and closer to the magnet.
5. Notice that the closer you get to the magnet, the stronger the force of the magnetic field is on the paper clip.
If you have a spring scale:
6. Attach the paper clip to the spring scale.
7. Move the paper clip closer to the magnet until the magnetic field affects the paper clip.
8. Measure how far the paper clip is from the magnet with a ruler.
9. Measure how much pull there is on the paper clip. Use newtons if your spring scale shows that measurement, but grams are OK if it doesn’t.
10. Bring the paper clip a half inch closer and measure the force of the pull again either in grams or Newtons.
11. Continue to get closer to the magnet half an inch at a time, measuring the force until you can’t get any closer.
What you may have noticed here was that the closer you got the paper clip to the magnet (the object causing the force field) the stronger the force was on the paper clip. You have just seen the inverse-square law in action!
Exercises:
Circle one: The closer you get to the magnet, the (stronger | weaker) the force of the magnetic field is on the paper clip.
Why does it matter which way you orient the magnet in this experiment?
I can still remember in 2nd grade science class wondering about this idea. And I still remember how baffled my teacher was when I asked her this question: “Doesn’t the north tip of a compass needle point to the south pole?” Think about this – if you hold up a magnet by a string, just like the needle of a compass, does the north end of the magnet line up with the north or south pole of the earth?
If you remember about magnets, you know that opposite attract. So the north tip of the compass will line up with the Earth’s SOUTH pole. So compasses are upside-down! Here’s an activity you can do right now…
Materials:
The magnetic pole which was attracted to the Earth’s north pole was labeled as the Boreal or “north-seeking pole” in the 1200s, which was later shortened to “north pole”. To add to the confusion, geologists call this pole the North Magnetic Pole.
Exercises
How are the lines of force different for the two magnets?
How far out (in inches measured from the magnet) does the magnet affect the compass?
What makes the compass move around?
Do you think the compass’s north–south indicator is flipped, or the Earth’s North Pole where the South Pole is? How do you know?
Maxwell’s Second Equation: All magnets have two poles. Magnets are called dipolar which means they have two poles. The two poles of a magnet are called north and south poles. The magnetic field comes from a north pole and goes to a south pole. Opposite poles will attract one another. Like poles will repel one another.
Materials: magnet you can break or cut in half, scissors or hammer (depending on the size of your magnet)
[am4show have=’p8;p9;p11;p38;p92;p10;p37;p77;’ guest_error=’Guest error message’ user_error=’User error message’ ]
What happens if you cut (or break) a magnet in half? The new magnets will each sport their own North-South poles!
Find out more about this key principle in Unit 10.
The smallest thing around is the atom, which has three main parts – the core (nucleus) houses the protons and neutrons, and the electron zips around in a cloud around the nucleus.
The proton has a positive charge, and the electron has a negative charge. In the hydrogen atom, which has one proton and one electron, the charges are balanced. If you steal the electron, you now have an unbalanced, positively charge atom and stuff really starts to happen. The flow of electrons is called electricity. We’re going to move electrons around and have them stick, not flow, so we call this ‘static electricity’.
These next experiments rely heavily on the idea that like charges repel and opposites attract. Your kids need to remember that these activities are all influenced by electrons, which are very small, easy to move around, and are invisible to the eye.
[am4show have=’p8;p9;p11;p38;p92;p20;p47;p76;p97;’ guest_error=’Guest error message’ user_error=’User error message’ ]
Blow up a balloon. If you rub a balloon on your head, the balloon steals the electrons from your head, and now has a negative charge. Your head now has a positive charge because your head was electrically balanced (same number of positive and negative charges) until the balloon stole your negative electrons, leaving you with an unbalanced positive charge.
Let’ play with a more static electricity experiments, including making things move, roll, spin, chime, light up, wiggle and more using static electricity!
Here’s what you need:
7-9″ balloon (get two in case one pops)
a wall
wool sweater or scarf
sink
ping pong ball
comb
neon bulb
tissue paper
wire coat hanger
tape
packing peanuts
bubble juice
fluorescent bulb (burnt-out bulbs are fine to use)
Expt. 1: Static Hairdo Charge a balloon by rubbing it on your head for 30 seconds. Pull the balloon up about six inches to check your progress – if the hair isn’t sticking to the balloon, try again on someone with clean, dry hair (without any hair styling goop). When you put the balloon close to your head, notice how your hair reaches out for the balloon. Your hair is positive, the balloon is negative, and you can see how they are attracted to each other!
Your hair stands up when you rub it with a balloon because your head is now positively charged, and all those plus charges don’t like each other (repel). They are trying to get as far away from each other as possible, so they spread far apart. Does the hair continue to stand apart even after you remove the balloon? Does it matter what hair color or texture? (Does the balloon shape matter?)
Bonus Question: How can you get rid of the extra electrons?
Expt. 2: Finding Attraction Rub your head with the balloon and then hold the balloon to a wall. Can you make it stick? How about the ceiling? How many other things does the balloon stick to? (Hint – try a wool sweater.)
Expt. 3 Wiggly Wonder Hold the charged balloon near a stream of water running from a faucet. Can you make the water wiggle without touching it? The charged balloon attracts the stream of water. The water is like a bar magnet in that there are poles on a water molecule: there’s a plus side and a minus side, and the water molecules line up their positive ends toward the balloon when you bring it close.
Expt. 4 Ping Pong Puzzle Rub a comb with a wool sweater, and bring it close to a ping pong ball resting on a flat table. Why do you think the ping pong ball moves? Does it work if you use a charged balloon instead? What if you swap the ping pong ball for a piece of styrofoam?
Expt. 5: Static Neon Store up a good charge of electrons by scuffing along the carpet in socks on a warm, dry day. To make this a much more interesting experiment, hold one end of a neon bulb and watch it light as you touch the other end to a nearby object such as a metal faucet, metal part of a lamp, etc. You can also bring it close to your TV set (the old tube TV kind), both turned on and just turned off, to see if it has any effects on the neon lamp bulb?
Hint: you’ll need to get the neon bulb out of the plastic encasing and hold only one of the wires to make this experiment work – one wire act a as the collector, the other is grounded (via your hand) to the earth. You can also hold onto one lead as you slide down a plastic slide and then touch something grounded (like your mom).
You steal electrons and take on a negative charge when you scuff along the carpet in socks. Remember that just like magnets, ‘like’ charges (negative-to-negative or positive-to-positive) repel, and opposite charges (negative-to-positive) attar, which is why you can make your hair stand up on end by scuffing around a lot. The hairs all become negative, trying to get as far away from each other as they can.
Expt. 6: Electric Tail Feathers Cut a sheet of tissue paper into 12 thin strips, about 1/2″ wide and 8-12″ long. Straighten out a wire coat hanger (snip off the hook part), or find yourself a 10g piece of metal uninsulated wire. Tape the strips to the end of a wire coat hanger (make sure your coat hanger do not have plastic insulation around it – use sandpaper to sand off any clear enamel if you’re not sure). Attach a piece of plastic with tape or clay to the center of the rod, making a V-groove so the handle sits better on the wire. Bring a very charged balloon near the end of the wire – what happens?
Expt. 7: Ghost Words (Although this experiment has also held the name “Ghost Poop”… ) Rub packing peanuts with wool or your hair to build up a strong, quick static charge. Stick the stryfoam to the wall to spell out words. How long do they stay attached to the wall? Does humidity matter? (Try spritzing with a light mist of water).
Expt. 8: Static Bubbles Blow a few big, round bubbles (use store-bought bubble solution, or make your own with 12 cups cold water and 1 cup clear Ivory dish soap and a wire coat hanger stretched into a diamond shape). Chase your bubbles with a charged balloon – what happens? Try the comb rubbed with wool – which works better? What other two things can you use to change the path of the soap bubble? (Photo: Tom Noddy, one of the greatest bubble magicians ever – he’s the first one to ever blow a square bubble.)
Expt. 9: Fluorescents Unplugged In a dark room, rub the length of a fluorescent bulb with a piece of plastic wrap (or polyethylene bag or wool sweater) vigorously and then pull your arm away – the bulb should light up momentarily. What other materials cause it to glow?
Expt. 10: Ghost Leg This experiment is absolutely hilarious to watch, but you must be persistent to get it right. On a cold winter day, crank up the heat in your house to warm and dry out the air. You now have the ideal static electricity environment. Take a nylon stocking (just a single knee-length will work, or just use half of a full pair, but roll up the unused half so it’s out of your way) and press the toe part against a nearby wall. Line your other hand with a piece of a clear plastic bag (if the plastic can stretch, it’s the right kind) and rub the nylon stocking vigorously. Now hold the stocking in the air and see if you scrubbed it well enough to charge the stocking with enough static charge so it repels itself and fills out – looking as if there’s a ghost filling out the leg!
Why do these experiments work?
The triboelectric series is a list that ranks different materials according to how they lose or gain electrons. Near the top of the list are materials that take on a positive charge, such as air, human skin, glass, rabbit fur, human hair, wool, silk, and aluminum. Near the bottom of the list are materials that take on a negative charge, such as amber, rubber balloons, copper, brass, gold, cellophane tape, Teflon, and silicone rubber.
When you rub a glass rod with silk, the glass takes on a positive charge and the silk holds the negative charge. When you rub your head with a balloon, the hair takes on a positive charge and the balloon takes on a negative charge.
When you scuff along the carpet, you build up a static charge (of electrons). Your socks insulate you from the ground, and the electrons can’t cross your sock-barrier and zip back into the ground. When you touch someone (or something grounded, like a metal faucet), the electrons jump from you and complete the circuit, sending the electrons from you to them (or it).
The fluorescent bulb lights up when the electrons jump around. The inside of the bulb is coated with phosphor (a white powder) and filled with mercury vapor gas. The phosphor gives off light whenever it gets smacked with UV light. The mercury vapor gives off UV light whenever it gets excited by electricity (movement of electrons). When you rub the outside of the bulb, electrons start to jump around, exciting the gas, which generated UV light, which hits the phosphor and causes it to glow briefly. When the bulb is in balance, it stays dark. If you tip the balance, electrons flow and you get light.
Exercises
Why does the hair stick to the balloon?
How do you get rid of electrons?
Can you see electrons? Why or why not?
Does it matter what kind of hair you rub the balloon on?
How long does the hair continue to stand up after you remove the balloon?
Does it matter what kind of balloon you use?
How fast or slow do you need to rub for the biggest charge on the balloon?
Does hair color matter?
This evening, find an article or story that describes how electricity improves our lives. Bring the article to school. If you bring in an article that no one else brings in, you get extra points.
It’s easy to use chemistry to generate electricity, once you understand the basics. With this experiment, you’ll use aluminum foil, salt, air, and a chemical from an aquarium to create an air battery. This experiment is for advanced students.
The first thing you should do is dig out your digital multimeter. We’ll be using this to find out just how much voltage your battery cell generates (and this will also tell you how many of these batteries you need to make to power a LED or motor.)
1. Make a saturated salt solution (dissolve as much salt as you can into water in a bowl). It’s better to have an over-saturated solution (so you still see undissolved bits at the bottom).
2. Rip off a square of aluminum foil and set it on your table.
3. Soak a sheet of paper towel in your salt solution, then gently fold in half (without tearing!) and lay on top of the foil.
4. Sprinkle a 1/2″ thick layer of activated charcoal on the damp towel.
5. Lay one alligator clip lead on the carbon (make sure the metal is exposed) in the center of the layer so it makes good contact with the carbon. Clip a second clip lead to the bottom layer of foil. Note that the two clip leads should not touch! And be sure the top clip lead is completely surrounded by the charcoal and has no chance of touching the aluminum foil.
6. Fold your layers over in thirds. Clip the two leads sticking out to your digital multimeter and check the voltage. If it’s higher than 2.5V, then try attaching an LED or motor. If it’s less than 2.5 volts, you’ll need to make a second (or third) battery and hook them up together to generate enough power to light stuff up.
7. Squish the battery to make good contact between the carbon, salt, and foil. Your voltage should change when you do this.
8. Use your digital voltmeter to measure your voltage again. Make a second battery and hook the new one’s positive to the first one’s negative terminal. The two wires left are your leads to connect to the multimeter (or LED).
How does it work?
Most homemade batteries light up LEDs and a few flashlight bulbs, but dimly. It takes a lot more current to get a motor spinning. So what gives?
This ‘aluminum air battery’ uses a chemical reaction between the foil and air (well, specifically the oxygen in the air). The combination of oxygen and foil produces aluminum oxide and energy. If you build your battery well, you can see the energy in your turning motor shaft, but the oxide layer will be invisible to your eye. Your battery should last between 4 – 10 minutes, depending on how well you built it. You can get a larger amount of voltage by using larger wires (with more surface area contacting the charcoal). What do you have that would be a larger electrode for the battery?
The more salt you use, the better your air battery will work! (You’ll notice there’s a point, though, where no matter how much more salt you add, you can’t increase the voltage… due to the saturation point of the water. Have you tried changing the temperature of the water to increase the capacity?)
Exercises
How many air batteries does it take for your LED to light up?
Which electrode is positive? Which is negative? (Hint: Use the DMM to figure this out.)
What is the electrolyte in this experiment?
What could you use instead of an exposed alligator clip lead to make this battery last longer?
Never polish your tarnished silver-plated silverware again! Instead, set up a ‘silverware carwash’ where you earn a nickel for every piece you clean. (Just don’t let grandma in on your little secret!)
We’ll be using chemistry and electricity together (electrochemistry) to make a battery that reverses the chemical reaction that puts tarnish on grandma’s good silver. It’s safe, simple, and just needs a grown-up to help with the stove.
You can safely dip it into a self-polishing solution:
In a saucepan lined with aluminum foil, heat a solution of 1 cup water, 1 teaspoon baking soda, and 1 teaspoon salt.
When your solution bubbles, place the tarnished silverware directly on the foil. (Try a piece that’s really tarnished to see the cleaning effects the best.)
What’s happening? This is a very simple battery, believe it or not! The foil is the negative charge, the silverware is the positive, and the water-salt-baking-soda solution is the electrolyte.
Your silver turns black because of the presence of sulfur in food. Here’s how the cleaning works: The tarnished fork (silver sulfide) combines with some of the chemicals in the water solution to break apart into sulfur (which gets deposited on the foil) and silver (which goes back onto the fork). Using electricity, you’ve just relocated the tarnish from the fork to the foil. Just rinse clean and wipe dry.
Toss the foil in the trash (or recycling) when you’re done, and the liquids go down the drain.
Exercises
Where is the electrolyte in this experiment?
Where does the black stuff that was originally on the silverware go?
Where’s the electricity in this experiment?
Where would you place your DMM probes to measure the generated voltage?
Using ocean water (or make your own with salt and water), you can generate enough power to light up your LEDs, sound your buzzers, and turn a motor shaft. We’ll be testing out a number of different materials such as copper, aluminum, brass, iron, silver, zinc, and graphite to find out which works best for your solution.
This project builds on the fruit battery we made in Unit 8. This experiment is for advanced students.
The basic idea of electrochemistry is that charged atoms (ions) can be electrically directed from one place to the other. If we have a glass of water and dump in a handful of salt, the NaCl (salt) molecule dissociates into the ions Na+ and Cl-.
When we plunk in one positive electrode and one negative electrode and crank up the power, we find that opposites attract: Na+ zooms over to the negative electrode and Cl- zips over to the positive. The ions are attracted (directed) to the opposite electrode and there is current in the solution.
Fill a cup with water, adding a teaspoon of salt, a teaspoon of distilled white vinegar, and a few drops of bleach. NOTE: BE very careful with bleach! Cap it and store as soon as you’ve added it to the cup.
Find two of the following materials: copper*, aluminum*, brass, iron, silver, zinc, graphite (* indicates the ones that are easiest to start with – use a copper penny and a piece of aluminum foil). Attach an alligator clip lead to each one and dunk into your cup. Make sure these two metals DO NOT TOUCH in the solution.
You’ve just made a battery! Test it with your digital volt meter and make a note of the voltage reading. Connect the multimeter in series to read the current (remove a clip from the metal and clip it to one test probe, and attach the other test probe to the metal. Make sure you’re reading AMPS, not VOLTS when you note the reading for current).
Test out different combinations of materials and note which gives the highest voltage reading for you. Is it enough to light an LED? Buzzer? Motor? What if you made two of these and connected them in series? Three? Four?
Electrochemistry studies chemical reactions that generate a voltage and vice versa (when a voltage drives a chemical reaction), called oxidation and reduction (redox) reactions. When electrons are transferred between molecules, it’s a redox process.
Fruit batteries use electrolytes (solution containing free ions, like salt water or lemon juice) to generate a voltage. Think of electrolytes as a material that dissolves in water to make a solution that conducts electricity. Fruit batteries also need electrodes made of conductive material, like metal. Metals are conductors not because electricity passes through them, but because they contain electrons that can move. Think of the metal wire like a hose full of water. The water can move through the hose. An insulator would be like a hose full of cement – no charge can move through it.
You need two different metals in this experiment that are close, but not touching inside the solution. If the two metals are the same, the chemical reaction doesn’t start and no ions flow and no voltage is generated – nothing happens.
Exercises
Which combination gives the highest voltage?
What happens if you use two strips of the same material?
This experiment shows how a battery works using electrochemistry. The copper electrons are chemically reacting with the lemon juice, which is a weak acid, to form copper ions (cathode, or positive electrode) and bubbles of hydrogen.
These copper ions interact with the zinc electrode (negative electrode, or anode) to form zinc ions. The difference in electrical charge (potential) on these two plates causes a voltage.
Roll and squish the lemon around in your hand so you break up the membranes inside, without breaking the skin or leaking any juice. If you’re using non-membrane foods, such as an apple or potato, you are all ready to go.
Insert the copper and zinc strips into the lemon, making sure they do not contact each other inside. Clip one test wire to each metal strip using alligator wires to connect to the digital multimeter. Read and record your results.
What happens when you gently squeeze the lemon? Does the voltage vary over time?
You can try potatoes, apples, or any other fruit or vegetable containing acid or other electrolytes. You can use a galvanized nail and a copper penny (preferably minted before 1982) for additional electrodes.
If you want to light a light bulb, try using a low-voltage LED in the 1.7V or lower hooked up to several lemons connected in series. For comparison, you’ll need about 557 lemons to light a standard flashlight bulb.
What’s going on?
The basic idea of electrochemistry is that charged atoms (ions) can be electrically directed from one place to the other. If we have a glass of water and dump in a handful of salt, the NaCl (salt) molecule dissociates into the ions Na+ and Cl-.
When we plunk in one positive electrode and one negative electrode and crank up the power, we find that opposites attract: Na+ zooms over to the negative electrode and Cl- zips over to the positive. The ions are attracted (directed) to the opposite electrode and there is current in the solution.
Electrochemistry studies chemical reactions that generate a voltage and vice versa (when a voltage drives a chemical reaction), called oxidation and reduction (redox) reactions. When electrons are transferred between molecules, it’s a redox process.
Fruit batteries use electrolytes (solution containing free ions, like salt water or lemon juice) to generate a voltage. Think of electrolytes as a material that dissolves in water to make a solution that conducts electricity. Fruit batteries also need electrodes made of conductive material, like metal. Metals are conductors not because electricity passes through them, but because they contain electrons that can move. Think of the metal wire like a hose full of water. The water can move through the hose. An insulator would be like a hose full of cement – no charge can move through it.
You need two different metals in this experiment that are close, but not touching inside the solution. If the two metals are the same, the chemical reaction doesn’t start and no ions flow and no voltage is generated – nothing happens.
Exercises
What kinds of fruit make the best batteries?
What happens if you put one electrode in one fruit and one electrode in another?
What happens if you stick multiple electrode pairs around a piece of fruit, and connect them in series (zinc to copper to zinc to copper to zinc…etc.) and measure the voltage at the start and end electrodes?
If you don’t have equipment lying around for this experiment, wait until you complete Unit 10 (Electricity) and then come back to complete this experiment. It’s definitely worth it!
Electroplating was first figured out by Michael Faraday. The copper dissolves and shoots over to the key and gets stuck as a thin layer onto the metal key. During this process, hydrogen bubbles up and is released as a gas. People use this technique to add material to undersized parts, for place a protective layer of material on objects, to add aesthetic qualities to an object.
Place the copper sulfate in your jar and add a thin stream of water as you stir. Add enough water to make a saturated solution (dissolves most of the solids). Connect one alligator wire to the copper strip and the positive (red) wire from the clip lead. Connect the other alligator wire to the key and the negative (black) lead.
Place the copper strip and the key in the solution without touching each other. (If they touch, you’ll short your circuit and blow up your battery.) Let this sit for a few minutes… and notice what happens.
Clean up: Clean everything thoroughly after you are finished with the lab. After cleaning with soap and water, rinse thoroughly. Chemists use the rule of “three” in cleaning glassware and tools. Rinse three times, wash with soap, rinse three times.
Wipe off the electrodes. The solution and solids at the bottom of your cup cannot go in the trash. The liquid contains copper, a toxic heavy metal that needs proper disposal and safety precautions. Another chemical reaction needs to be performed to remove the heavy metal from the copper sulfate: Add a thumb sized piece of steel wool to the solution. The chemical reaction will pull out the copper out of the solution. The liquid can be washed down the drain. The solids cannot be washed down the drain, but they can be put in the trash. Use a little water to rinse the container free of the solids.
Place all chemicals, cleaned tools, and glassware in their respective storage places.
Dispose of all solid waste in the garbage. Liquids can be washed down the drain with running water. Let the water run awhile to ensure that they have been diluted and sent downstream.
Exercises
Look at your key. What color is it?
Where did the copper on your key come from?
What happened when you added a second battery?
Which circuit (series or parallel) did the reaction accelerate faster with?
When an atom (like hydrogen) or molecule (like water) loses an electron (negative charge), it becomes an ion and takes on a positive charge. When an atom (or molecule) gains an electron, it becomes a negative ion. An electrolyte is any substance (like salt) that becomes a conductor of electricity when dissolved in a solvent (like water).
This type of conductor is called an ‘ionic conductor’ because once the salt is in the water, it helps along the flow of electrons from one clip lead terminal to the other so that there is a continuous flow of electricity.
This experiment is an extension of the Conductivity Tester experiment, only in this case we’re using water as a holder for different substances, like sugar and salt. You can use orange juice, lemon juice, vinegar, baking powder, baking soda, spices, cornstarch, flour, oil, soap, shampoo, and anything else you have around. Don’t forget to test out plain water for your ‘control’ in the experiment!
Electrical circuits are used for all kinds of applications, from blenders to hair dryers to cars. And games! Here’s a quick and easy game using the principles of conductivity.
This experiment is a test of your nerves and skill to see if you can complete the roller coaster circuit and make it from one end to the other. You can opt to make a noisy version (more fun) or a silent version (for stealth). Are you ready?
Insert batteries into cases and connect a buzzer (or LED for a silent game) so that it works. Set aside as you make the next part.
Using a paper clip, form a loop and secure to a popsicle stick so that it looks like a bubble wand, with the ends poking out of the bottom of the tape. Bend the ends up so you can clip onto them with your alligator clips later. (You should have ¼ – ½” poking upwards).
Bend and twist an un-insulated coat hanger wire into spirals and dizzy roller-coaster shapes. When you’ve got right, make a small loop at each end. Insert one screw into each small loop and screw into wood base, about 10” apart (be sure to thread the bubble wand loop onto wire first!). Your roller coaster wire should stand up on its own.
Disconnect the clip lead wire from your positive battery terminal and clip it to the exposed paper clip end on your popsicle-stick bubble-wand. Wrap the exposed end of the positive terminal around one end of the coat hanger near the screw and seal with tape.
Can you travel the entire path without setting off the buzzer (or light)? (The photo above has both!) Where in your circuit can you add a switch to turn the game on and off?
Troubleshooting:
1. Make sure your coat hanger is really just a bare rod of metal. Sandpaper the entire length before using it in the project.
2. Make sure the batteries are fresh and inserted the right way.
3. Use a block of wood or foam for best results… they are both excellent insulators for the wire track.
4. Places where kids most often forget to hook up: (a) connect the wire to a bare spot on the track itself, near the base; (b) be sure your loop also has a wire connection.
Exercises
Can you travel the entire path without turning on the light?
Where in your circuit can you add a switch to turn the game on and off?
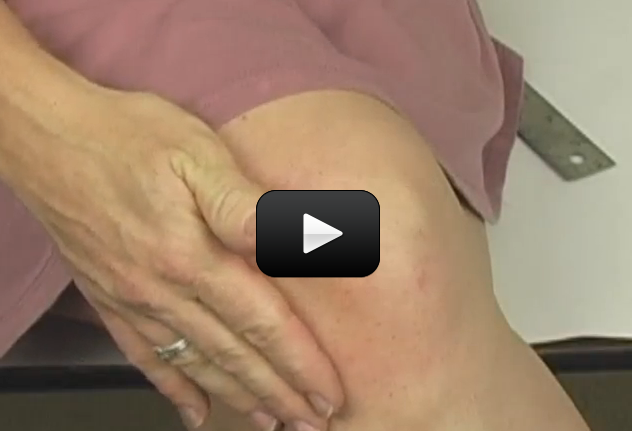
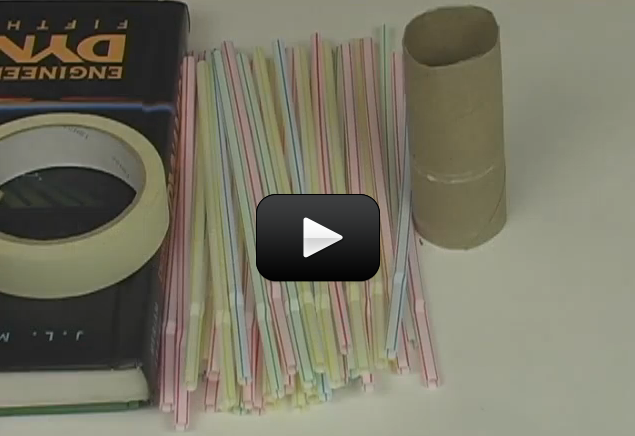
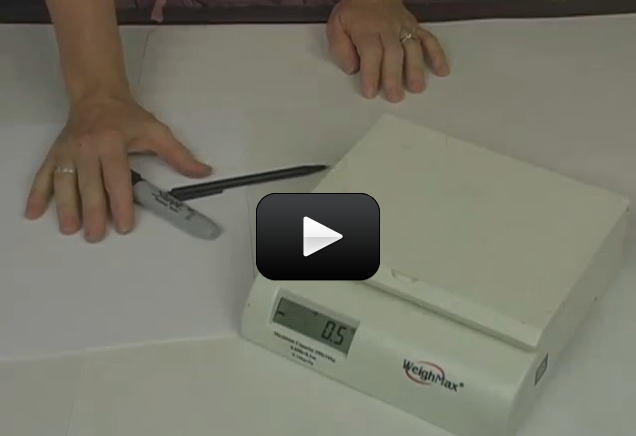
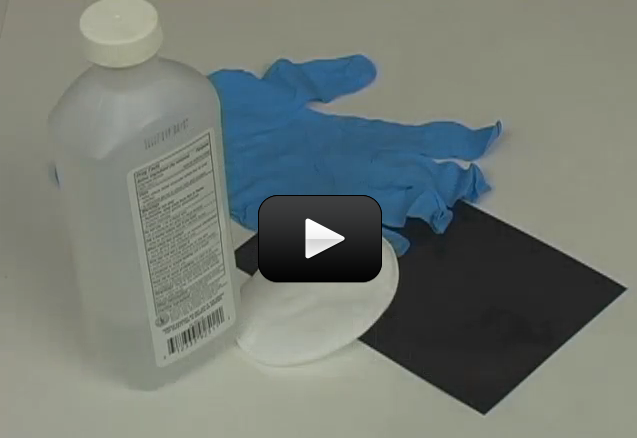
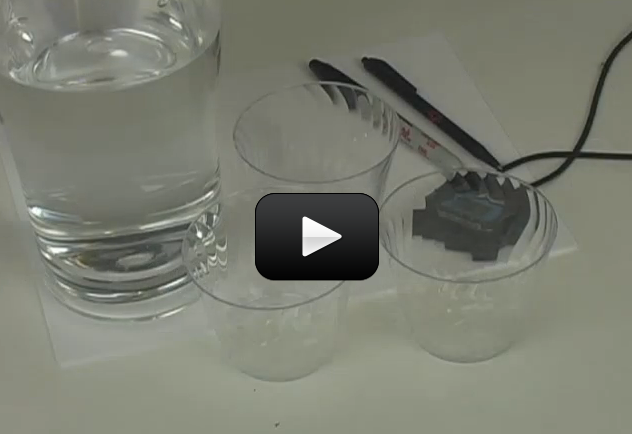
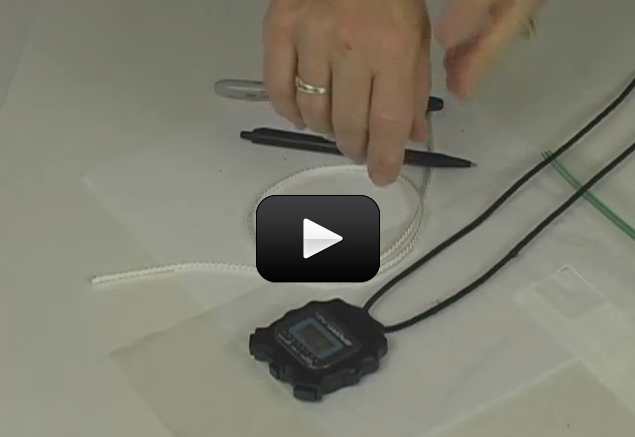
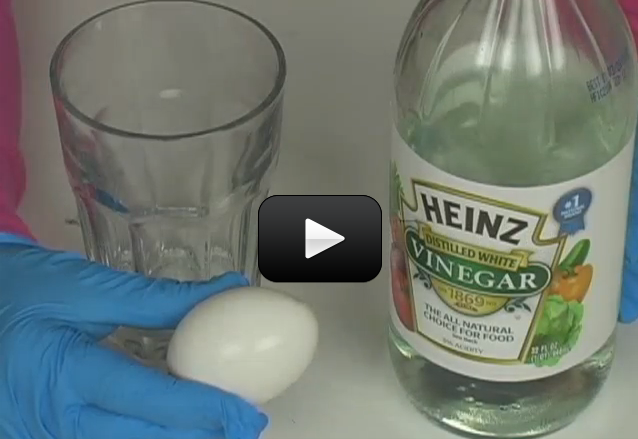
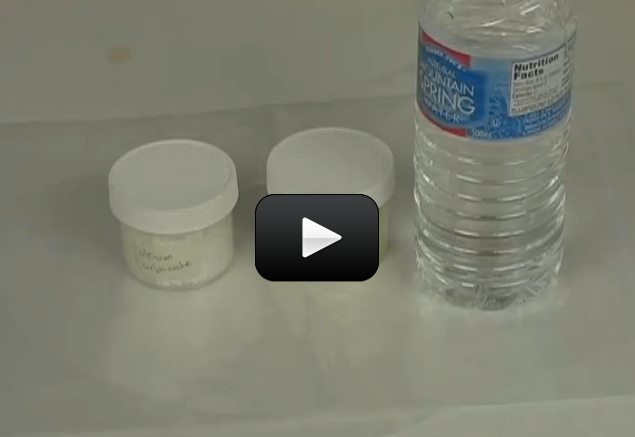
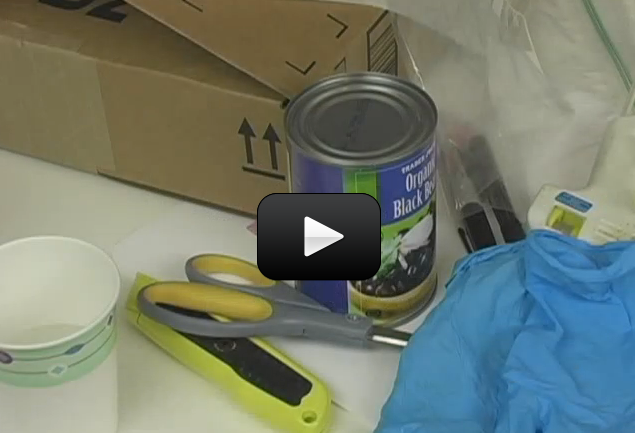
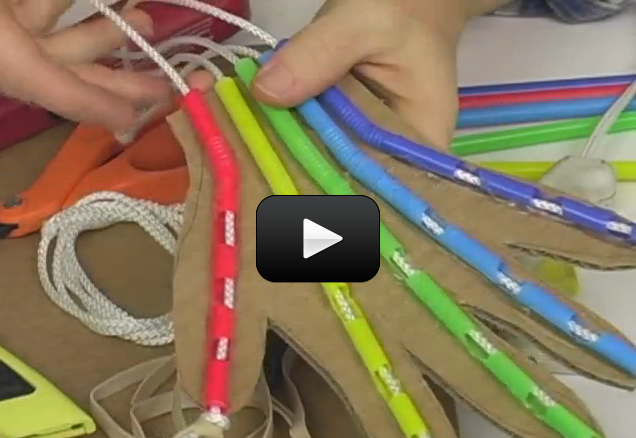
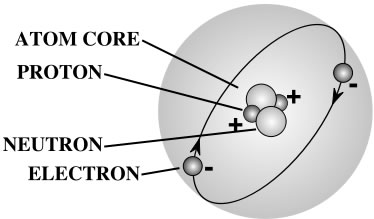
 A gram of water (about a thimble of water) contains 1023 atoms. (That’s a ‘1’ with 23 zeros after it.) That means there are 1,000,000,000,000,000,000,000,000 atoms in a thimble of water! That’s more atoms than there are drops of water in all the lakes and rivers in the world.
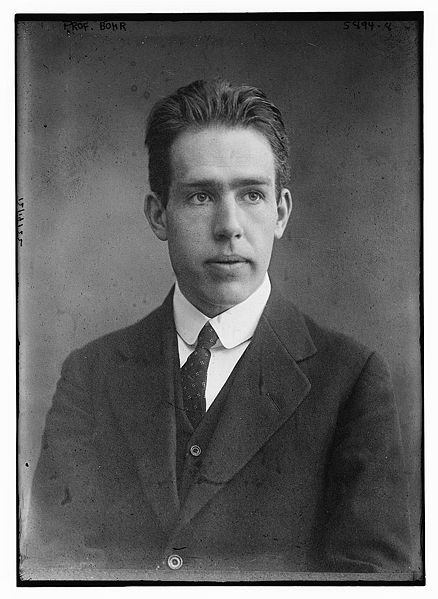
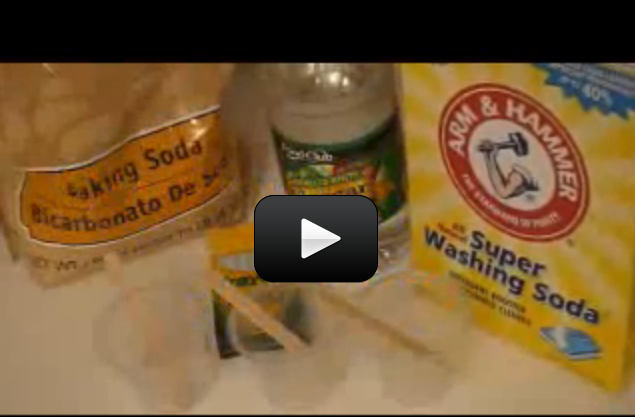

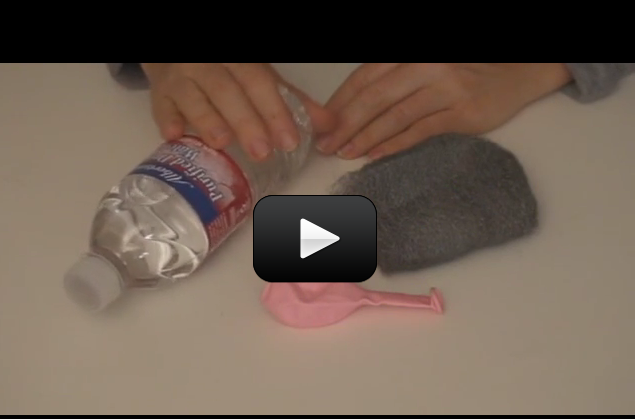
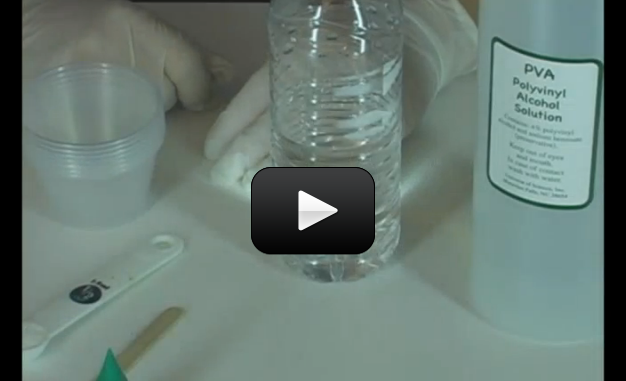
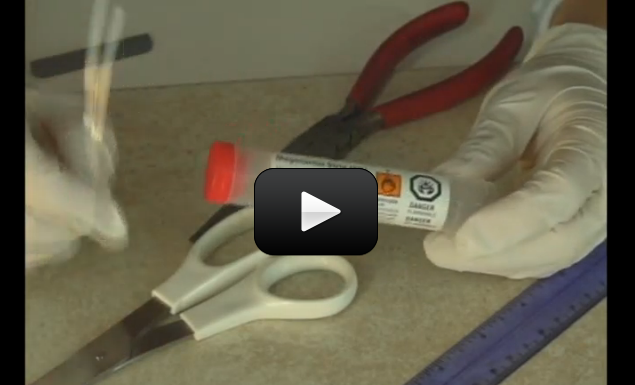
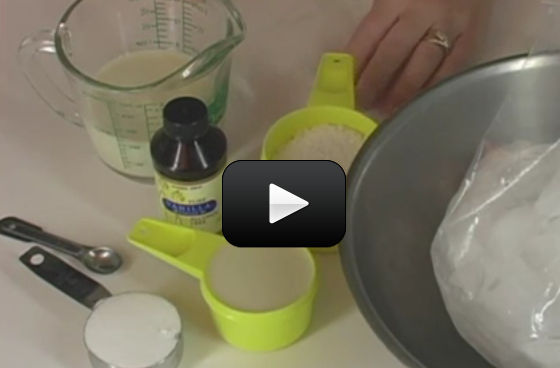
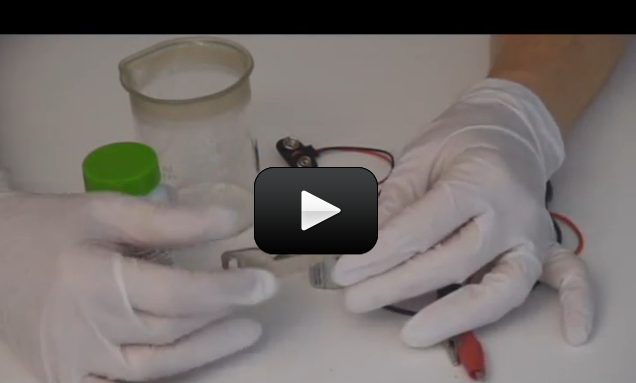
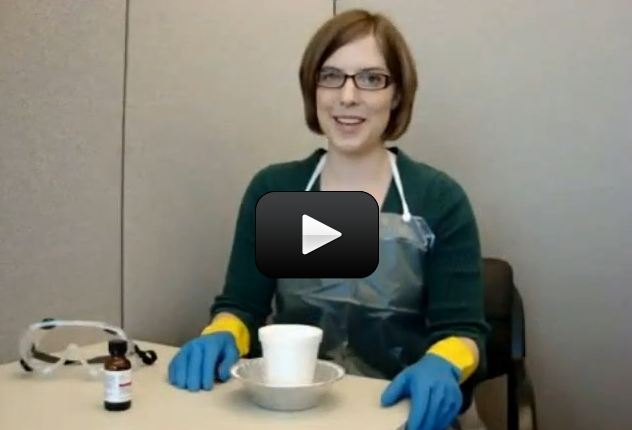
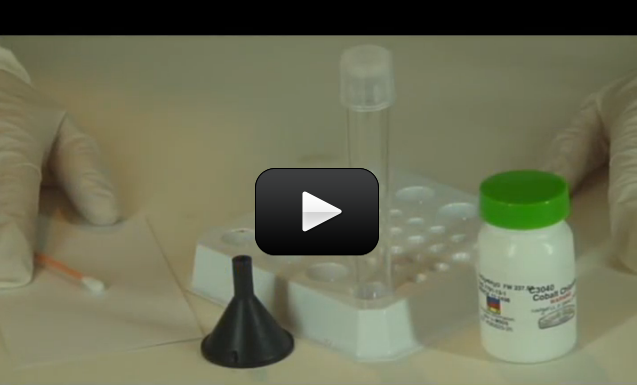

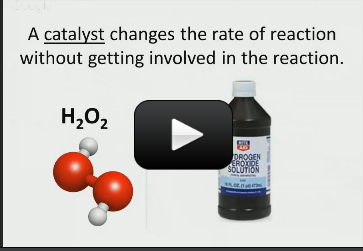
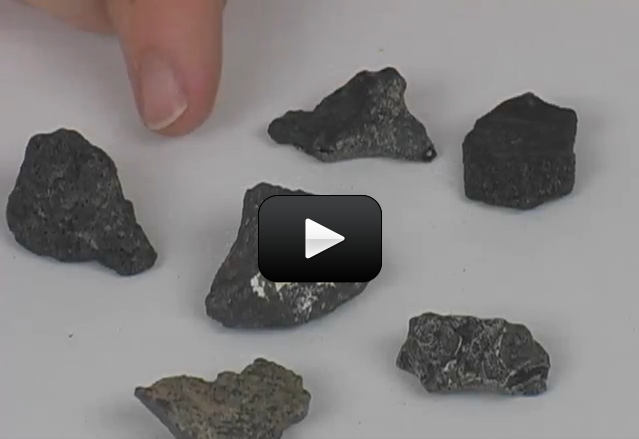
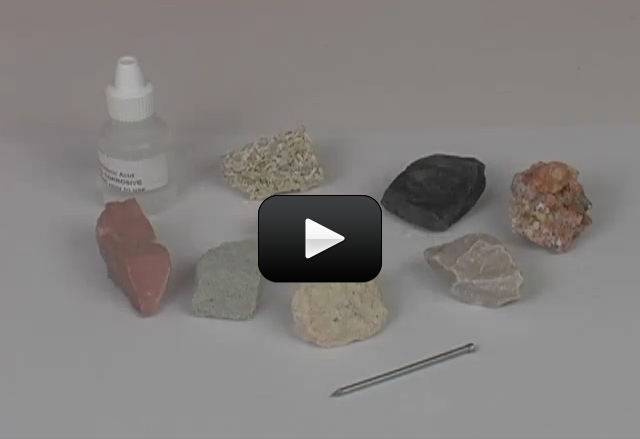
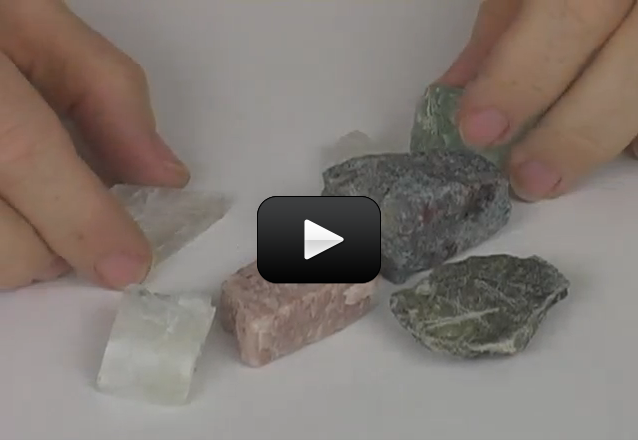
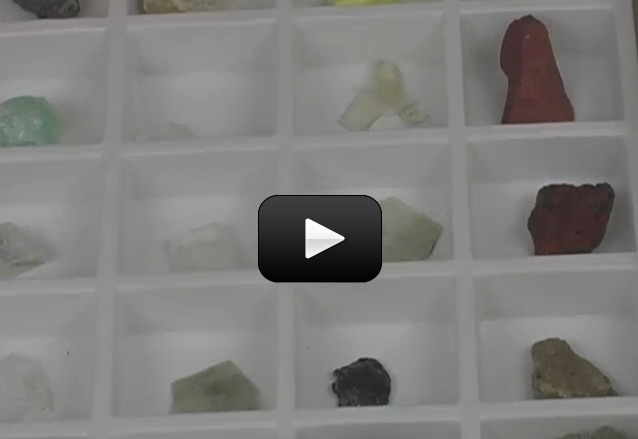

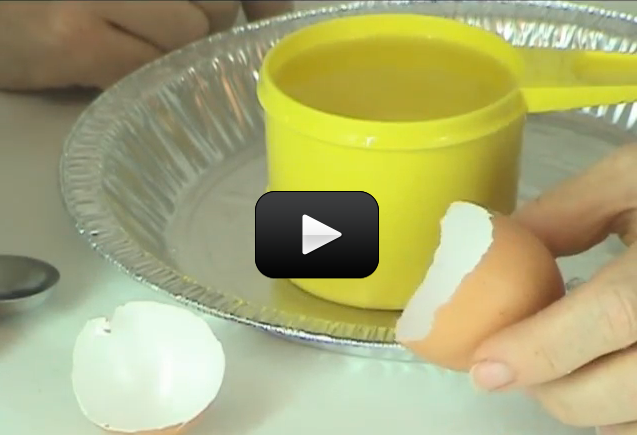
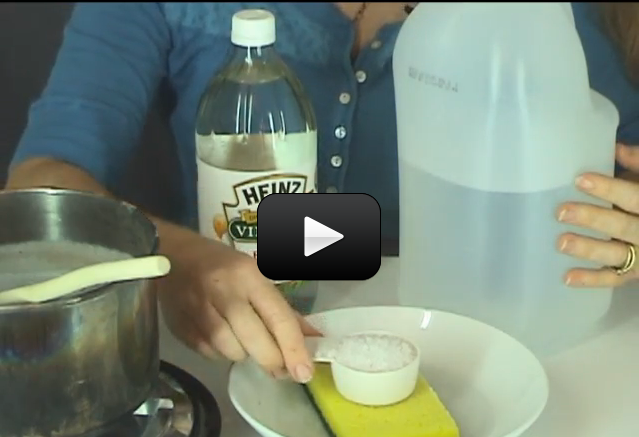
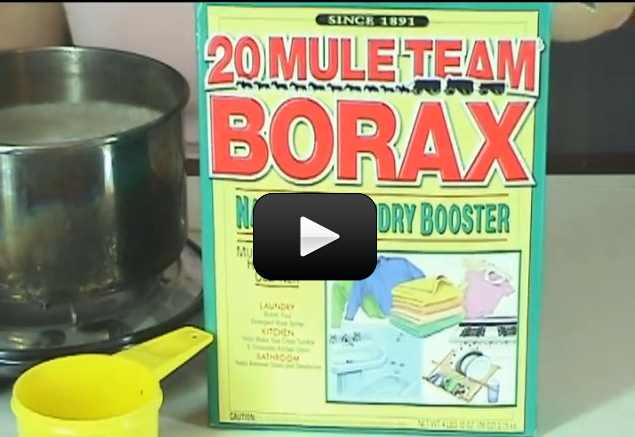
 Can we really make crystals out of soap? You bet! These crystals grow really fast, provided your solution is properly saturated. In only 12 hours, you should have sizable crystals sprouting up.
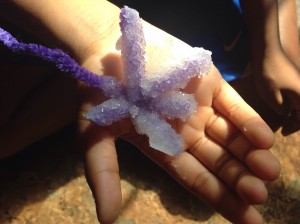
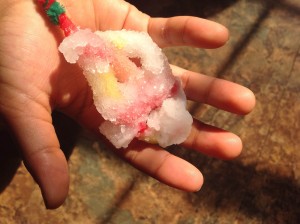
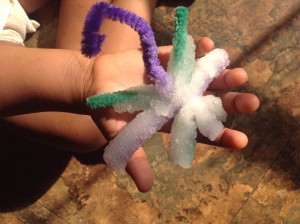
 The atoms in a solid, as we mentioned before, are usually held close to one another and tightly together. Imagine a bunch of folks all stuck to one another with glue. Each person can wiggle and jiggle but they can’t really move anywhere.
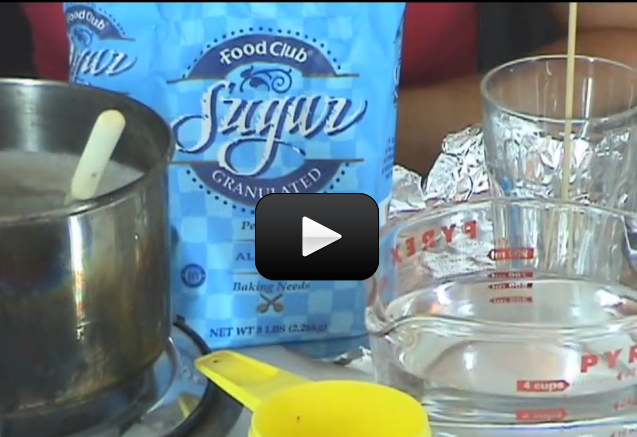
 8. Pour the sugar water into the jar. Put the whole thing aside in a quiet place for 2 days to a week. You may want to cover the jar with a paper towel to keep dust from getting in.

 Some organisms, like bacteria, consist of only one cell. Other organisms, like humans, consist of trillions of specialized cells working together. Even if organisms look very different from each other, if you look close enough you’ll see that their cells have much in common.
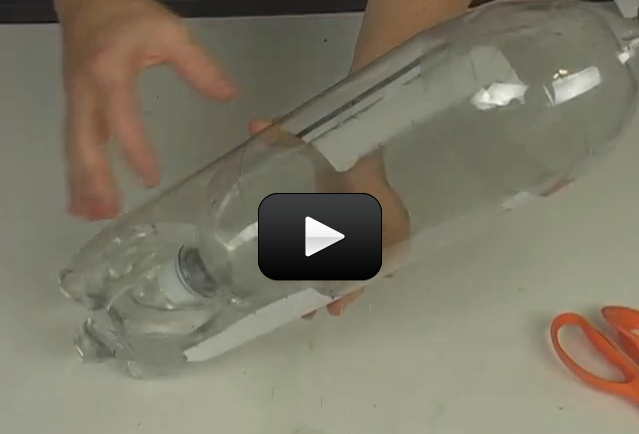
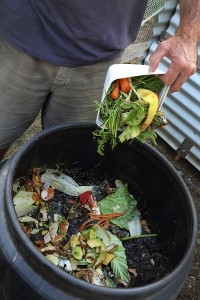
 If you have a backyard garden, be sure to give it plenty of sunshine, water, and garbage.


 If you’ve ever eaten fruits or vegetables (and let’s hope you have), you have benefited from plants as food. Of course, the plants we eat have been highly modified by growers to produce larger and sweeter fruit, or heartier vegetables.
 Alexander Graham Bell developed the telegraph, microphone, and telephone back in the late 1800s. We’ll be talking about electromagnetism in a later unit, but we’re going to cover a few basics here so you can understand how loudspeakers transform an electrical signal into sound.

 Imagine you have two magnets. Glue one magnet on an imaginary record player (or a ‘lazy susan’ turntable) and hold the other magnet in your hand. What happens when you bring your hand close to the turntable magnet and bring the north sides together?

 This experiment is for advanced students. If you’ve attempted the
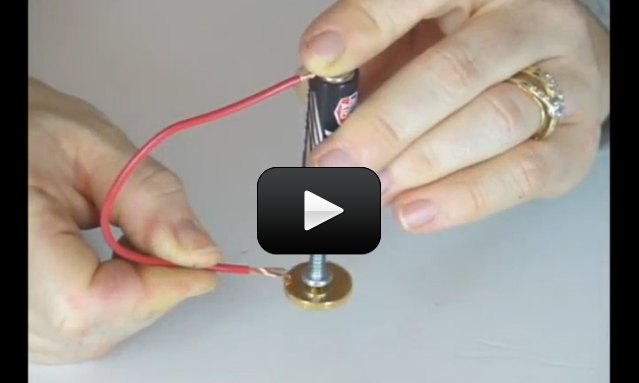

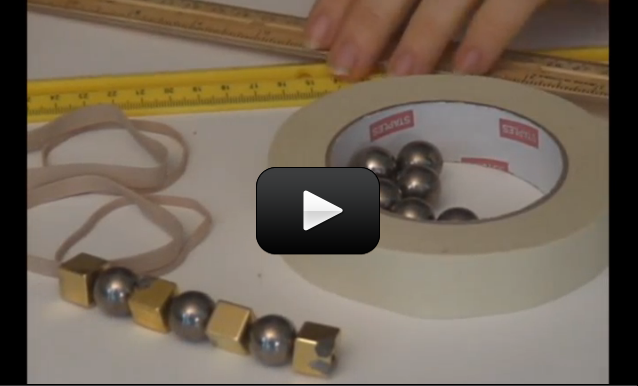
 There are two ways to create a magnetic field. First, you can wrap wire around a nail and attach the ends of the wire to a battery to make an electromagnet. When you connect the battery to the wires, current begins to flow, creating a magnetic field. However, the magnets that stick to your fridge are neither moving nor plugged into the electrical outlet – which leads to the second way to make a magnetic field: by rubbing a nail with a magnet to line up the electron spin. You can essential “choreograph” the way an electron spins around the atom to increase the magnetic field of the material. This project is for advanced students.
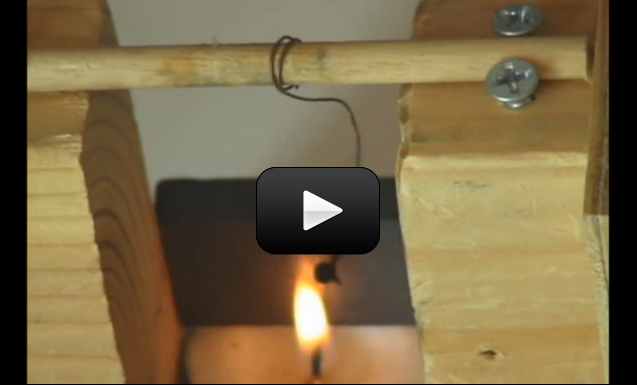

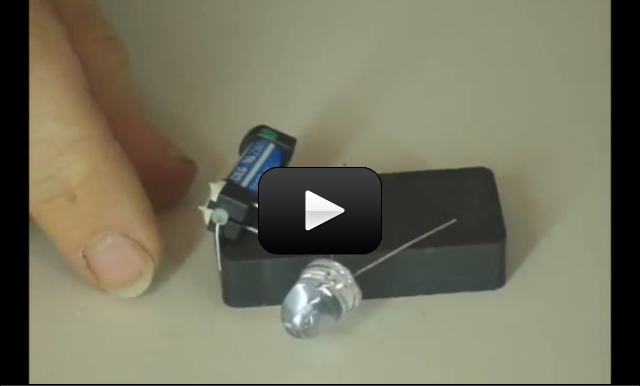
 Wouldn’t it be cool to have an alarm sound each time someone opened your door, lunch box, or secret drawer? It’s easy when you use a reed switch in your circuit! All you need to do it substitute this sensor for the
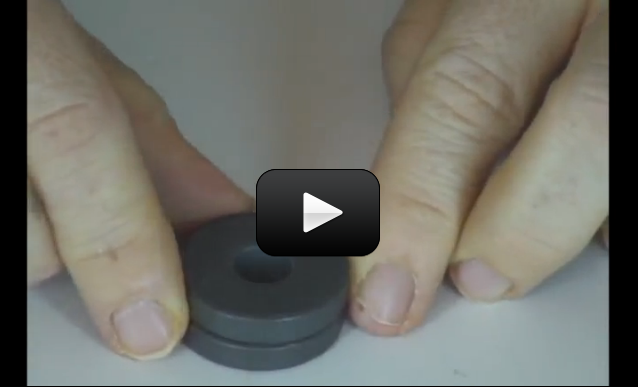


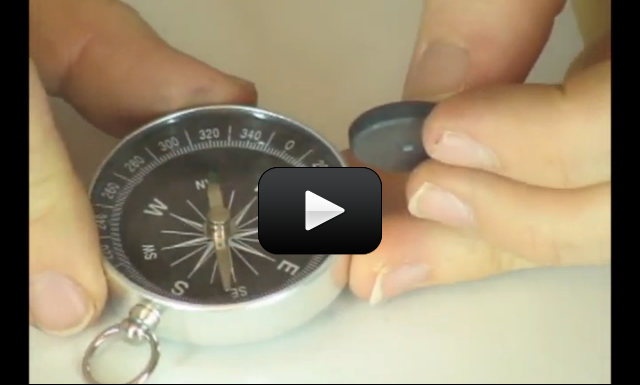

 The smallest thing around is the atom, which has three main parts – the core (nucleus) houses the protons and neutrons, and the electron zips around in a cloud around the nucleus.
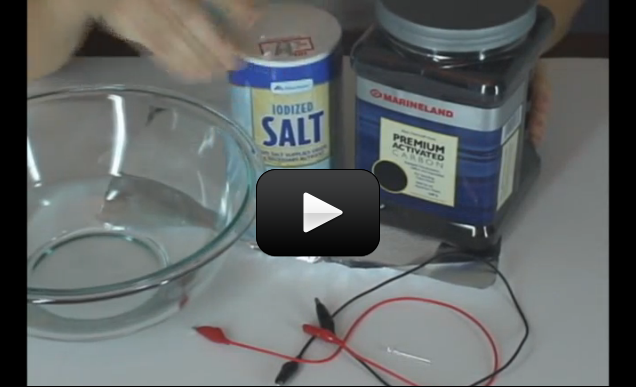
 It’s easy to use chemistry to generate electricity, once you understand the basics. With this experiment, you’ll use aluminum foil, salt, air, and a chemical from an aquarium to create an air battery. This experiment is for advanced students.
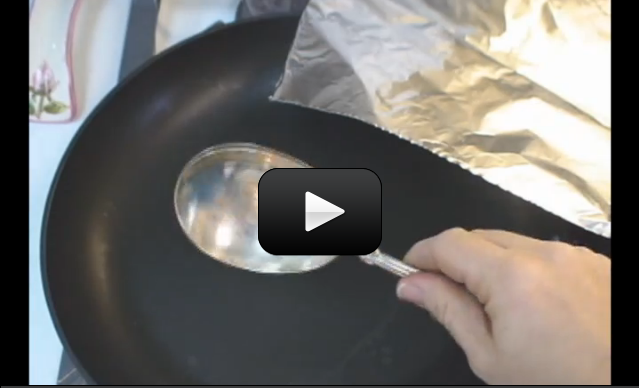
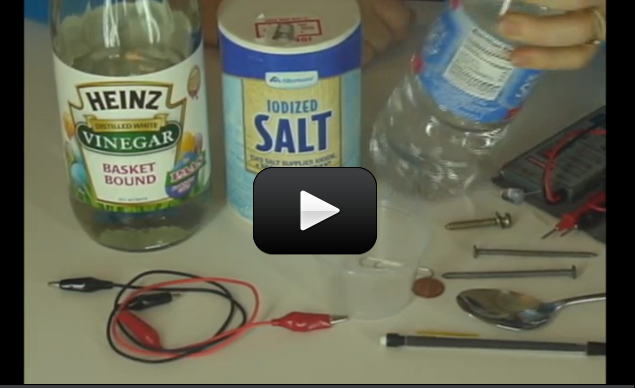
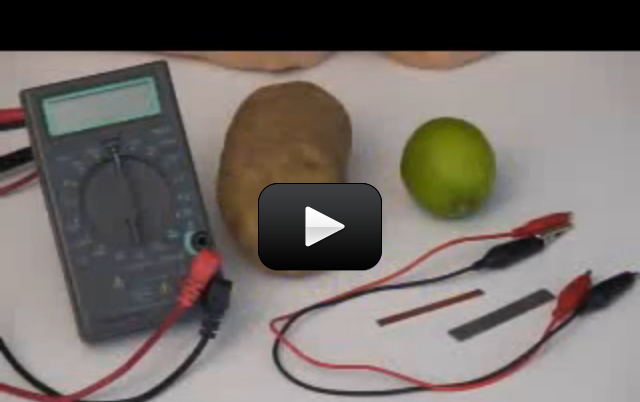
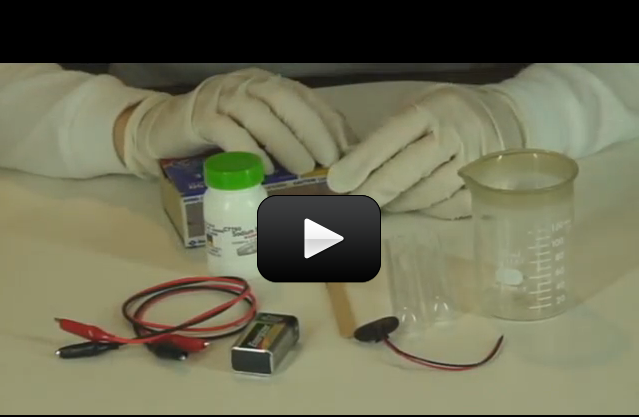
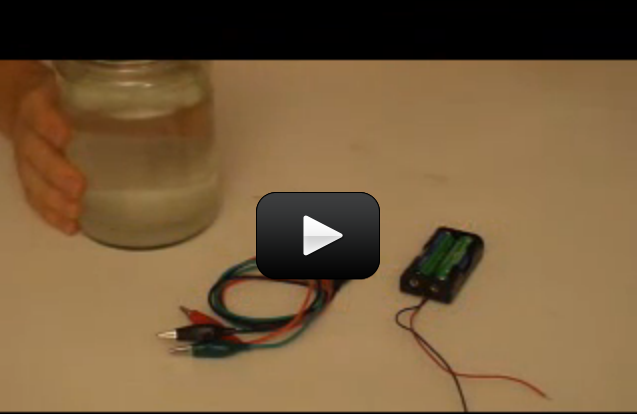
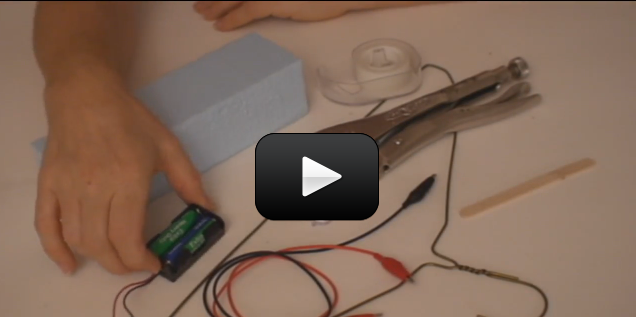
 Electrical circuits are used for all kinds of applications, from blenders to hair dryers to cars. And games! Here’s a quick and easy game using the principles of conductivity.