Gas forming reactions are also exchange reactions. The best example I can think of for this type of reaction is what happens when you put a piece of chalk in a cup of vinegar. The chalk, which is mostly CaCO3 (calcium carbonate) and vinegar (acetic acid) forms calcium chloride and carbonic acid, which isn’t stable and quickly turns into water and carbon dioxide. A faster version of this experiment is what happens when you take an effervescent tablet, like alka seltzer, and stick it in water, because the tablet is actually a solid form of baking soda and vinegar put together. What happens when you mix baking soda and vinegar together?


[am4show have=’p9;p52;p91;’ guest_error=’Guest error message’ user_error=’User error message’ ]


Lots of bubbles! Baking soda and vinegar is a gas forming exchange reaction.


There’s actually two reactions going – the first one is a double displacement where the vinegar reactions with the backing soda to make sodium acetate and carbonic acid, but the carbonic acid is unstable and breaks into carbon dioxide and water. The bubbles you see from this reaction are the carbon dioxide bubbles escaping., Since CO2 is heavier than air, it sits on the surface or overflows off the side of the container. If you add soap to this reaction, you’ll see the bubbles more clearly. If you warm up the vinegar first, the reaction will happen faster. The white sludge at the bottom os sodium acetate that’s left ver. Adults use this in making rubber tires, for curing headaches… that sort of thing.


[/am4show]


Click here to go to next lesson on Rubber Eggs.

The kinetic theory of gases assumes that all gases behave ideally, but we know that’s not really what happens in the real world. For example, real gas particles do occupy space and also attract each other, although these properties are more apparent at lower temperature because usually the particles have enough kinetic energy to zip by each other without worrying about the attractive or repulsive charges from other molecules. If the molecules move slow enough though, they do get affected by the push or pull of other molecules.


Also at high pressures, the molecules are so tightly packed together that they do start to have volume considerations that need to be addressed. So for a real gas, we can make calculations like this:


[am4show have=’p9;p52;p91;’ guest_error=’Guest error message’ user_error=’User error message’ ]


[/am4show]


Click here to go to next lesson on Gas Forming Reactions.

If you’ve ever owned a fish tank, you know that you need a filter with a pump. Other than cleaning out the fish poop, why else do you need a filter? (Hint: think about a glass of water next to your bed. Does it taste different the next day?)


There are tiny air bubbles trapped inside the water, and you can see this when you boil a pot of water on the stove. The experimental setup shown in the video illustrates how a completely sealed tube of water can be heated… and then bubbles come out one end BEFORE the water reaches a boiling point. The tiny bubbles smoosh together to form a larger bubble, showing you that air is dissolved in the water.


Materials:


  • test tube clamp
  • test tube
  • lighter (with adult help)
  • alcohol burner or votive candle
  • right-angle glass tube inserted into a single-hole stopper
  • regular tap water

[am4show have=’p8;p9;p18;p45;p82;p84;p91;p30;p57;’ guest_error=’Guest error message’ user_error=’User error message’ ]


Download Student Worksheet & Exercises


The filter pump in your fish tank ‘aerates’ the water. The simple act of letting water dribble like a waterfall is usually enough to mix air back in. Which is why flowing rivers and streams are popular with fish – all that fresh air getting mixed in must feel good! The constant movement of the river replaces any air lost and the fish stay happy (and breathing). Does it make sense that fish can’t live in stagnant or boiled water?


You don’t need the fancy equipment show in this video to do this experiment… it just looks a lot cooler. You can do this experiment with a pot of water on your stove and watch for the tiny bubbles before the water reaches 212oF.


[/am4show]


Click here to go to next lesson on Real Gases And Deviation From Ideal Gas Law.


We’re going to do an experiment where it will look like we can boil soda on command… but the truth is, it’s not really boiling in the first place! If you drink soda, save one for doing this experiment. Otherwise, get one that’s “diet” (without the sugar, it’s a lot easier to clean up).


[am4show have=’p9;p52;p91;’ guest_error=’Guest error message’ user_error=’User error message’ ]


Materials:


  • two beakers or two saucepans
  • test tube
  • test tube clamp
  • stove or alcohol burner with stand
  • ice
  • soda (cold!)
  • gloves
  • goggles


Advanced Students: Download your Worksheet Lab here!


Experiment:


  1. Use the saucepan to heat a jar full of water until boiling (be sure to put an inch of water in the pan also or you’ll crack the jar).
  2. Fill one of the beakers with mostly ice and a little water. This is your ice bath.
  3. Fill your test tube half full with soda, and set it in the beaker with the hot water. What happens?
  4. Use the test tube clamp to remove the test tube from the hot water and place it in the ice bath. What happens now after you wait a few minutes?
  5. After a bit, place the test tube back into the hot water. What happens after a few minutes?
  6. Repeat this process and notice how and when the soda bubbles, and when it doesn’t. What do you think is happening?

What’s going on? The boiling point of the soda is much higher than the boiling point of water (due to the sugar added to the solution), however it sure looks like it is boiling, doesn’t it? Soda (a liquid solvent) has carbon dioxide gas (a gaseous solute) dissolved in it. When you heat it up, the increase in temperature makes the carbon dioxide comes out of the solution. Lowering the temperature makes the gas dissolve into the liquid, because the solubility of the soda is increased (how much gas you can dissolve into the solution). Gases are less soluble in hot solvents than cold, which is the opposite for solid solutes. Said another way, you can dissolve more salt in hot water than cold, and dissolve more gas bubbles in cold water than hot.
[/am4show]


Click here to go to next lesson on Can Fish Drown?.

The kinetic theory of gases relates what’s going on with the motion of the tiny invisible molecules with the properties you can measure, like temperature and pressure. Kinetic means the study of motion, and for us, it’s the motion of the gas molecules.


[am4show have=’p9;p52;p91;’ guest_error=’Guest error message’ user_error=’User error message’ ]


[/am4show]


Click here to go to next lesson on Temperature Effects On Gas Solubility.

The “mean free path” is the average distance a gas molecule travels between collisions. If a molecule has a diameter “d”, then the effective cross section for a collision is “π d2“. This is used mostly with the Kinetic Theory of Gases, and is a good estimation of how particles move in a gas.
[am4show have=’p9;p52;p91;’ guest_error=’Guest error message’ user_error=’User error message’ ]


Also useful when describing the motions of the molecules in a gas (again using the Kinetic Molecular Theory) is the average velocity of the molecules. Since the gas molecules are constantly moving about, it would be ridiculously hard to individually account for each molecule’s individual speed and direction at any given time. Instead, we make use of statistics to get an overall average estimate of the motion of the particles using the “root mean square” technique applied to gases.


[/am4show]


Click here to go to next lesson on Kinetic Molecular Theory.


Graham’s law tells is how gases move through porous materials, like air in a balloon. Ever noticed how balloons don’t stay inflated forever? That’s because the gas diffuses through the balloon skin itself. And if you take a good look, helium balloons deflate the next day, whereas normal air balloons will keep for a few days. Small helium molecules effuse through the tiny holes in the balloon skin much faster than normal air does.
[am4show have=’p9;p52;p91;’ guest_error=’Guest error message’ user_error=’User error message’ ]


[/am4show]


Click here to go to next lesson on Mean Free Path.

Avogadro’s Law states that 1 mole of every gas occupies the same volume at the same temperature and pressure. The mass of the gas might be different… one mole of helium is going to weigh less than one mole of nitrogen, for example, but the number of helium gas molecules is exactly the same as the number of nitrogen molecules, and both of them will occupy the same amount of space (22.4L) at standard temperature and pressure. At room temperature and pressure, it’s slightly higher (24 L).
[am4show have=’p9;p52;p91;’ guest_error=’Guest error message’ user_error=’User error message’ ]


[/am4show]


Click here to go to next lesson on Graham’s Law.

Okay, so now I want you to imagine a room full of ping pong balls that can bounce all by themselves. They go zipping all over the place all on their own. Now take those ping pong balls and add energy to them so now they bounce twice as fast. Got it?


Now what happens if we take away energy from them? Do they bounce slower? Yup!


Okay, now get them back to their original bouncing speed. Now take the room and make it smaller, like half it’s size, but keep the ping pong ball speed the same. Do they hit the walls more or less frequently? More! Are they speeding up or slowing down? Speeding up!


[am4show have=’p9;p52;p91;’ guest_error=’Guest error message’ user_error=’User error message’ ]


Now take the room and expand it ten times it’s normal size. Do the balls hit the walls more or less now? Less! Do they still have the same speed? No, they should be slowing down, too.


So those ping pong balls are molecules, and when you add energy, you’re increasing the temperature so they fly around faster. When you increase the temperature, the molecules zip around faster and faster.


Dalton’s Law of partial pressures is related to the Ideal Gas law. Dalton’s Law states that in a mixture of non-reacting gases, like air, for example, the total pressure exerted is the sum of the partial pressures of each of the individual pressures. For air, you would simply sum up all the partial pressures of each of the individual gases of oxygen, nitrogen, argon, carbon dioxide, and water vapor to get the total air pressure.


[/am4show]


Click here to go to next lesson on Overview of the Ideal Gas Law.

Pure substances all behave about the same when they are gases. The Ideal Gas Law relates temperature, pressure, and volume of these gases in one simple statement: PV = nRT where P = pressure, V = volume, T = temperature, n = number of moles, and R is a constant.


When temperature increases, pressure and volume increase. Temperature is basically a speedometer for molecules. The faster they are wiggling and jiggling, the higher the temperature and the higher the thermal energy that object has. Pressure is how many pushes a surface feels from the motion of the molecules.


Materials: balloon, freezer, tape measure (optional)


[am4show have=’p8;p9;p10;p37;p91;’ guest_error=’Guest error message’ user_error=’User error message’ ]


Hold a balloon in your hands and try to stuff it into a cup. Why is this so hard? You’re decreasing the volume and therefore increasing the pressure inside the balloon. (Since a balloon is so stretchy, this is near impossible to do without laughing.) You are compressing the balloon and thus increasing both the pressure and temperature inside the balloon slightly.


Blow up a balloon and stick it in the freezer overnight.


What happened? The balloon will shrink a bit because there is less pressure pressing on the inside of the balloon surface, holding the shape of the balloon. When you decrease temperature, the pressure and volume decrease as well.


Learn more about this scientific principle in Unit 13.


[/am4show]


Click here to go to next lesson on Molar volume of gases and Avogadro’s Law.


This project is for advanced students.This Stirling Engine project is a very advanced project that requires skill, patience, and troubleshooting persistence in order to work right. Find yourself a seasoned Do-It-Yourself type of adult (someone who loves to fix things or tinker in the garage) before you start working on this project, or you’ll go crazy with nit-picky things that will keep the engine from operating correctly. This makes an excellent project for a weekend.


Developed in 1810s, this engine was widely used because it was quiet and could use almost anything as a heat source. This kind of heat engine squishes and expands air to do mechanical work. There’s a heat source (the candle) that adds energy to your system, and the result is your shaft spins (CD).


This engine converts the expansion and compression of gases into something that moves (the piston) and rotates (the crankshaft). Your car engine uses internal combustion to generate the expansion and compression cycles, whereas this heat engine has an external heat source.


This experiment is great for chemistry students learning about Charles’s Law, which is also known as the Law of Volumes, which describes how gases tend to expand when they are heated and can be mathematically written like this:


where V = volume, and T = temperature. So as temperature increases, volume also increases. In the experiment you’re about to do, you will see how heating the air causes the diaphragm to expand which turns the crank.


[am4show have=’p9;p49;p85;p88;p103;’ guest_error=’Guest error message’ user_error=’User error message’ ]


Here’s what you need:


  • three soda cans
  • old inner tube from a bike wheel
  • super glue and instrant dry
  • electrical wire (3- conductor solid wire)
  • 3 old CDs
  • one balloon
  • penny
  • nylon bushing (from hardware store)
  • alcohol burner (you can build one out of soda cans or Sterno canned heat)
  • fishing line (15lb. test or similar)
  • pack of steel wool
  • drill with 1/16″ bit
  • pliers
  • scissors
  • razor
  • wire cutters
  • electrical tape
  • push pin
  • permanent marker
  • Swiss army knife (with can opener option)
  • template

The Stirling heat engine is very different from the engine in your car. When Robert Stirling invented the first Stirling engine in 1816, he thought it would be much more efficient than a gasoline or diesel engine. However, these heat engines are used only where quiet engines are required, such as in submarines or in generators for sailboats.


Download Student Worksheet & Exercises


Here’s how a Stirling engine is different from the internal-combustion engine inside your car. For example, the gases inside a Stirling engine never leave the engine because it’s an external combustion engine. This heat engine does not have exhaust valves as there are no explosions taking place, which is why Stirling engines are quieter. They use heat sources that are outside the engine, which opens up a wide range of possibilities from candles to solar energy to gasoline to the heat from your hand.


There are lots of different styles of Stirling engines. In this project, we’ll learn about the Stirling cycle and see how to build a simple heat engine out of soda cans. The main idea behind the Stirling engine is that a certain volume of gas remains inside the engine and gets heated and cooled, causing the crankshaft to turn. The gases never leave the container (remember – no exhaust valves!), so the gas is constantly changing temperature and pressure to do useful work. When the pressure increases, the temperature also increases. And when the temperature of the gases decreases, the pressure also goes down. (How pressure and temperature are linked together is called the “Ideal Gas Law”.)


Some Stirling engines have two pistons where one is heated by an external heat source like a candle and the other is cooled by external cooling like ice. Other displacer-type Stirling engines has one piston and a displacer. The displacer controls when the gas is heated and cooled.


In order to work, the heat engine needs a temperature difference between the top and bottom of the cylinder. Some Stirling engines are so sensitive that you can simply use the temperature difference between the air around you and the heat from your hand. Our Stirling engine uses temperature difference between the heat from a candle and ice water.


The balloon at the top of the soda can is actually the ‘power piston’ and is sealed to the can. It bulges up as the gas expands. The displacer is the steel wool in the engine which controls the temperature of the air and allows air to move between the heated and cooled sections of the engine.


When the displacer is near the top of the cylinder, most of the gas inside the engine is heated by the heat source and gas expands (the pressure builds inside the engine, forcing the balloon piston up). When the displacer is near the bottom of the cylinder, most of the gas inside the engine cools and contracts. (the pressure decreases and the balloon piston is allowed to contract).


Since the heat engine only makes power during the first part of the cycle, there’s only two ways to increase the power output: you can either increase the temperature of the gas (by using a hotter heat source), or by cooling the gases further by removing more heat (using something colder than ice).


Since the heat source is outside the cylinder, there’s a delay for the engine to respond to an increase or decrease in the heat or cooling source. If you use only water to cool your heat engine and suddenly pop an ice cube in the water, you’ll notice that it takes five to fifteen seconds to increase speed. The reason is because it takes time for the additional heat (or removal of heat by cooling) to make it through the cylinder walls and into the gas inside the engine. So Stirling engines can’t change the power output quickly. This would be a problem when getting on the freeway!


In recent years, scientists have looked to this engine again as a possibility, as gas and oil prices rise, and exhaust and pollutants are a concern for the environment. Since you can use nearly any heat source, it’s easy to pick one that has a low-fume output to power this engine. Scientists and engineers are working on a model that uses a Stirling engine in conjunction with an internal-combustion engine in a hybrid vehicle… maybe we’ll see these on the road someday!


Exercises


  1. What is the primary input of energy for the Stirling engine?
  2. As Pressure increases in a gas, what happens to temperature?
    1. It increases
    2. Nothing
    3. It decreases
    4. It increases, then decreases
  3. What is the primary output of the Stirling engine?

[/am4show]


Click here to go to next lesson on Ideal Gas Law.

The triple point is where a molecule can be in all three states of matter at the exact same time, all in equilibrium. Imagine having a glass of liquid water happily together with both ice cubes and steam bubbles inside, forever! The ice would never melt, the liquid water would remain the same temperature, and the steam would bubble up. In order to do this, you have to get the pressure and temperature just right, and it’s different for every molecule.


The triple point of mercury happens at -38oF and 0.000000029 psi. For carbon dioxide, it’s 75psi and -70oF. So this isn’t something you can do with a modified bike pump and a refrigerator.


However, the triple point of water is 32oF and 0.089psi. The only place we’ve found this happening naturally (without any lab equipment) is on the surface of Mars.


Because of these numbers, we can get water to boil here on Earth while it stays at room temperature by changing the pressure using everyday materials. (If you have a vacuum pump, you can have the water boil at the freezing point of 32oF.)


Here’s what you need to do:


[am4show have=’p8;p9;p23;p50;p88;’ guest_error=’Guest error message’ user_error=’User error message’ ]


Materials:


  • plastic syringe (no needle)
  • room temperature water


Bonus Idea: Do this experiment first with water, then with carbonated water.


Why does that work? How did you get the pressure to decrease? Easy – when you pulled on the plunger and increased the volume inside the syringe. Since your finger covered the hole, no additional air was allowed in when you did this (which is why it was probably a little tough to do), so the number of molecules inside the syringe stayed the same, but the space they had to wiggle around got a lot bigger, meaning that the pressure decreased.


The air inside the syringe isn’t just plain old air… it has water vapor inside, too. And that’s not all – the water from your sink isn’t just plain old water, it has air bubbles mixed in with it. When you brought down the pressure (by pulling the plunger), you are forcing the air bubbles to come out of the water, which makes it boil. When you shove the plunger back in and increase the pressure, you’ll find that the air bubbles mix back into the water and disappears.


Did you try the soda water yet? Soda has carbon dioxide already mixed in for you, which is under pressure. You can release this pressure by opening the bottle (you’ll hear a PSSST!), which is the carbon dioxide bubbles coming out of the soda. Go ahead and try that now before reading further…


When you place the soda water into the syringe and decrease the pressure, the carbon dioxide comes out quickly Try tapping the syringe to make all the tiny bubbles combine into one larger bubble. When you increase the pressure (push the plunger back in), some of the bubbles will redissolve back into the soda.


If you’ve ever had a glass of hot water suddenly erupt in an explosion of bubbles, you’ve experienced superheated water (water that’s above it’s normal boiling point) that hasn’t been able to form bubbles yet. By adding a tea bag or simply just jiggling it around is usually enough to cause the bubbles to start, which often splatters HOT HOT water everywhere. (This isn’t something you want to try without adult help.)


[/am4show]


Click here to go to next lesson on Charles Law.

Here are the most important things about gases to remember:


  • Gases assume the shape and volume of their container.
  • Gases have lower densities than their solid or liquid phases.
  • Gases are more easily compressed than their solid or liquid phases.
  • Gases will mix completely and evenly when confined to the same volume.
  • All elements in Group VIII are gases. These gases are known as the noble gases.
  • Elements that are gases at room temperature and normal pressure are all nonmetals.

[am4show have=’p9;p52;p91;’ guest_error=’Guest error message’ user_error=’User error message’ ]


How do they make liquid helium, liquid oxygen, liquid nitrogen… atoms that are normally in the gases state?


The basic idea is that they compress the gas (remember the room full of ping pong balls? Now squish the room so it’s only half the size. Do the balls bounce faster or slower? Faster! So the temp increases.) When they compress the gas, it heats it up, so they cool it, then squish it even more to higher pressure and cool to near room temperature. They keep repeating this until it becomes a very high pressure, then finally they release the pressure (which is like suddenly expanding the squished room to the size of a football field), which makes the temperature drop way fast and the gas becomes extremely cold, condensing into a liquid.


[/am4show]


Click here to go to next lesson on Boyle’s Law.

A reagent is chemical compound that creates a reaction in another substance; the product of that chemical reaction is an indicator of the presence, absence, or concentration of another substance.
[am4show have=’p9;p52;p91;’ guest_error=’Guest error message’ user_error=’User error message’ ]


[/am4show]


Click here for Homework Problem Set #1

This experiment is for advanced students.


Sparks flying off in all directions…that’s fun. In this lab, we will show how easy it is to produce those shooting sparks. In a sparkler you buy at the store, the filings used are either iron or aluminum.


The filings are placed in a mixture that, when dry, adheres to the metal rod or stick that is used in making the sparkler. The different colors are created by adding different powdered chemicals to the mixture before it dries. When they burn, we get red, blue, white, and green.


[am4show have=’p9;p52;p91;’ guest_error=’Guest error message’ user_error=’User error message’ ]


Materials:


  • Card stock
  • Alcohol burner
  • Iron filings
  • Gloves

It’s tempting to use a handful of filings to produce a literal shower of sparks. The effect is actually better with small amounts. To accomplish anything with a large pile of filings would require you to blow REALLY hard to make a filing cloud that will combust well. A larger reaction means more sparks flying around. The amount of filings recommended in the lab is a safe amount. Increasing the amount used increases the danger. You could take an interesting, fun, and safe lab and transform it into something that burns the hair off your arms. Besides, burning hair doesn’t smell good.


Here’s what’s going on in this experiment:


Iron + Oxygen –> Iron Oxide


Iron and Oxygen are burned to produce Iron Oxide


This is the balanced chemical equation: 2Fe + O2 –> 2FeO


C3000: Experiment 54


Download Student Worksheet & Exercises


Handling iron filings is not dangerous. Minor things that can occur, such as: Iron filings can stain your skin gray; if there is a large filing in your container, rubbing your finger against it could give you a painful splinter.


Return unused filings to your container. Any surface these filings touch turns gray, so keep your filings corralled. Cleaning your work surface with a wet paper towel is the easiest way to clean up.


Discard any unburned iron powder that is coating the area around your alcohol burner into a trash container outside. It is not toxic, but still….don’t use chemicals or experiment residue as a snack. Never a good idea.


What is going on here? When you build a campfire at the campground, why doesn’t the grill spark and burn up? The grill is iron, the filings are iron, and there is always oxygen available in the air. What’s the deal here? Combustion needs two things, fuel and fire. Not enough of either and nothing will burn. But a woodstove is made up of a lot more iron by weight than that little scoop of filings. It has to do with surface area. Take an equal weight of solid iron and iron filings. Put a match to the solid iron and all it gets is hot. Blow the same weight of iron filings into the flame and POOF! The key is surface area. Surface area can affect the way a chemical reaction occurs, and in this case, whether or not it occurs at all.


To better understand the effect of surface area, eat some candy! Put a whole Lifesaver candy in your mouth. Suck, move your tongue all over it, swish it back and forth in your mouth. You are not allowed to bite or swallow it. How long does it take to completely dissolve? Do the same thing with another Lifesaver broken into pieces. Which dissolved faster? The same thing happens with the iron. The smaller the pieces, the easier it is for the iron to burn. When you blew iron filings into the air above the flame, you increased the surface area even more by increasing the air space between the particles. An increase in surface area always makes things happen faster. Granulated sugar dissolves faster than sugar cubes, and a piece of wood burns faster after you chop it into kindling. Pay attention and you will notice other situations where increasing surface area speeds up physical changes and chemical reaction times.


An additional experiment that you can try on your own is burning steel wool. Properly prepared ahead of time, steel wool will spark as it burns up. A great emergency fire starter is a 9V battery and steel wool. Fluff up the steel wool and touch a portion of it across the terminals of the battery. The steel wool will burn just like it did with a match.


Steel wool is just a ball of really long iron filings. If you fluff out the steel wool and light it, it burns easily. If you do try this, do it outside over the lawn or an area of dirt. At some point in the combustion you will want/need to drop the steel wool or get your fingers singed.


[/am4show]


Click here to go to next lesson on Limiting Reactants.


A lot of chemical reactions happen in a solution (it allows the chemicals to interact much more easily with each other when it is), so chemists define how much of the solute is in the solution by the term MOLARITY.


Molarity is a really convenient unit of concentration and it works like this. If I have 10 moles of solute in 10 liters of water, what’s the molarity? 10/10 = 1! So it’s a 1M solution. What if I have 20 moles in 10 liters? Then it’s a 2M solution. See how easy that is?


[am4show have=’p9;p52;p91;’ guest_error=’Guest error message’ user_error=’User error message’ ]


[/am4show]


Click here to go to next lesson on Iron Sparklers.

A lot of chemical reactions happen in a solution (it allows the chemicals to interact much more easily with each other when it is), so chemists define how much of the solute is in the solution by the term MOLARITY.


Molarity is a really convenient unit of concentration and it works like this. If I have 10 moles of solute in 10 liters of water, what’s the molarity? 10/10 = 1! So it’s a 1M solution. What if I have 20 moles in 10 liters? Then it’s a 2M solution. See how easy that is?


[am4show have=’p9;p52;p91;’ guest_error=’Guest error message’ user_error=’User error message’ ]


[/am4show]


Click here to go to next lesson on Balancing Chemical Equations.

No kidding! You’ll be able to show your friends this super-cool magic show chemistry trick with very little fuss (once you get the hang of it). This experiment is for advanced students. Before we start, here are a few notes about the setup to keep you safe and your nasal passages intact:

The chemicals required for this experiment are toxic! This is not an experiment to do with little kids or pets around, and you want to do the entire experiment outside or next to an open window for good ventilation, as the fumes from the sodium hydroxide/zinc solution should not be inhaled.


This experiment is not dangerous when you follow the steps I’ve outlined carefully. I’ll take you step by step and show you how to handle the chemicals, mix them properly, and dispose of the waste when you’re done.


Goggles and gloves are a MUST for this experiment, as the sodium hydroxide (in both liquid and solid form) is caustic and corrosive and will burn your skin on contact.


[am4show have=’p9;p45;p91′ guest_error=’Guest error message’ user_error=’User error message’ ]


Is it REAL gold?

No. But it’s very close in color, as is the ‘silver’. The basic idea behind the experiment is this: by cleaning the pennies in the first step, you clear off any oxide layers to expose the copper surface. When you dip it in the solution, a galvanization reaction starts (just like ‘galvanized nails’) covering the penny with a metallic silver zinc coating.


The torching process fuses the zinc and the copper together to make the gold colored brass coating. Be careful, though, as brass has a low melting temperature and if you leave it in the flame too long, you’ll burn off the brass coating.


Materials:


  • propane torch with adult help
  • shiny copper pennies
  • distilled white vinegar
  • Pyrex glass beaker
  • sodium hydroxide (solid)
  • zinc powder (dust)
  • alcohol burner
  • stand that fits over the alcohol burner
  • lighter with adult help
  • wire mesh screen
  • popsicle sticks
  • water
  • salt
  • disposable cup
  • gloves
  • goggles
  • tweezers or pliers


Download Student Worksheet & Exercises


The chemical reaction plates the copper on the penny with zinc (called galvanization). The zinc reacts with the hot sodium hydroxide solution to form soluble sodium zincate (Na2ZnO2), which is converted to metallic zinc when it hits the surface of the penny.


Heating the penny fuses the zinc and copper together to form an alloy called brass. The amounts of copper and zinc in brass can vary a lot, from 60-82% copper and 18-40% zinc.


DISPOSAL INSTRUCTIONS: If you simply wipe out the beaker with a paper towel and toss it in the trash, you run the risk of igniting your trash can because the combination of sodium hydroxide and zinc is very exothermic (lots of heat is generated).


Make sure to use plenty of water to remove the sodium hydroxide first before removing the metal. Sodium hydroxide will not harm the plumbing in the sink as it is also used as a drain cleaner (dissolves hair, etc.) but don’t get it on your hands! Vinegar will neutralize any residual sodium hydroxide.


[/am4show]


Click here to go to next lesson on Balancing Equations.

This experiment is for advanced students.


Who gets to burn something today? YOU get to burn something today!


You will be working with Zinc (Zn). Other labs in this kit allow us to burn metal, but there is a bit of a twist this time. We will be burning a powder.


Why a powder instead of a solid ribbon or foil as in the other labs? Have you heard of surface area being a factor in a chemical reaction? The more surface area there is to burn, the more dramatic the chemical change. So, with this fact in mind, a powder should burn faster or be more likely to burn than a large solid.


[am4show have=’p9;p52;p91;’ guest_error=’Guest error message’ user_error=’User error message’ ]


Zinc (Zn) is a metallic element. It is element #30 on the periodic table. Chemically, it is similar to magnesium, another element that we use in our experiments.


Brass is an alloy of zinc and copper. Brass has been an important metal since the 10th century B.C. Alchemists in the dark ages burned zinc in air, just like we will do, to make what they called “white snow”. Their “white snow is our zinc oxide.


Zinc is an important element in our lives. Zinc deficiency causes lack of proper growth, delayed physical maturation, and susceptibility to infection. Zinc deficiency contributes to the death of 800,000 children per year. Excess zinc in our bodies can cause problems for us as well.


Materials:


  • Alcohol burner
  • Lighter
  • Measuring spoon
  • Zinc powder (MSDS)
  • Porcelain tile work surface

Remember to dispose of your zinc oxide in the outside trash, and conduct your experiment in a well ventilated area. Fumes from this experiment are irritating and a little dangerous.


C3000: Experiment 53


Download Student Worksheet & Exercises


Here’s what’s going on in this experiment:


Zinc powder will burn in the presence of oxygen, producing interesting colors. The flame from burning zinc is blue, as the zinc undergoes a chemical change to become zinc oxide. Zinc oxide is thermochromic. That means that it changes colors depending on the temperature. When cool, ZnO is white. When heated, zinc oxide turns yellow, and as it cools, returns to become a white powder again. The color changes are caused by a small loss of oxygen at high temperatures, and a small gain of oxygen as it cools in air.


2Zn + O2 –> 2ZnO


Zinc powder burned in air reacts with the oxygen and turns into zinc oxide. Zinc oxide is used in sunscreen and to treat burns, cuts, and diaper rash.


Cleanup: Clean everything thoroughly after you are finished with the lab. After cleaning with soap and water, rinse thoroughly. Chemists use the rule of “three” in cleaning tools. After washing, chemists rinse out all visible soap and then rinse three times more.


Storage: Place all chemicals and cleaned tools, and glassware in their respective storage places.


Disposal: Dispose of all solid waste in the garbage.


[/am4show]


Click here to go to next lesson on Turning Copper Into Gold Here.


Elements are arranged so that the ones with similar chemical and physical properties are stacked in vertical groups, and there are 8 groups (see the numbers at the top?) with either an A or B after the number? I know they’re written in Roman… just remember that IV means four, and VI means six. Sometimes you’ll see them numbered 1-18 starting with hydrogen on the left.


[am4show have=’p9;p52;p91;’ guest_error=’Guest error message’ user_error=’User error message’ ]


[/am4show]


The rows are called periods. Now point to the metals… what colors are those? There are lots of them!


Click here to go to next lesson on Zinc Dust.

Let’s do a real example problem of how you’d do a calculation for figuring out how much oxygen you would need for the complete combustion of 454 grams of propane.
[am4show have=’p9;p52;p91;’ guest_error=’Guest error message’ user_error=’User error message’ ]


[/am4show]


Click here to go to next lesson on Periodic Table.

Mole means “heap” or “pile” and is a unit for measuring the amount of a pure substance. It’s a chemist’s dozen. It’s a lot bigger than 12 though. It’s 6.022 x 10^23. So if you had a mole of eggs, you’d have… that huge number at the bottom of the slide. The most confusing part is this…


[am4show have=’p9;p52;p91;’ guest_error=’Guest error message’ user_error=’User error message’ ]


[/am4show]


Click here to go to next lesson on Chemical Analysis on Weight.

Molecules are the building blocks of matter.

You've probably heard that before, right? But that does it mean? What does a molecule look like? How big are they?

While you technically can measure the size of a molecule, despite the fact it's usually too small to do even with a regular microscope, what you can't do is see an image of the molecule itself. The reason has to do with the limits of nature and wavelengths of light, not because our technology isn't there yet, or we're not smart enough to figure it out. Scientists have to get creative about the ways they do about measuring something that isn't possible to see with the eyes.

Here's a cool experiment you can do that will approximate the size of a molecule. Here's what you need:

[am4show have='p8;p9;p28;p55;p68;p101;p52;p91;' guest_error='Guest error message' user_error='User error message' ]

Materials:

  • liquid dish soap
  • chalk dust
  • medicine dropper
  • pie pan
  • ruler
  • water
  • calculator

Download student worksheet and exercises here!

  1. Place water in the pie pan and sprinkle in the chalk dust. You want a light, even coating on the surface.
  2. Place dish soap inside the medicine dropper and hold it up.
  3. Squeeze the medicine dropper carefully and slowly so that a single drop forms at the tip. Don't let it fall!
  4. Hold the ruler up and measure the drop. Record this in your data sheet.
  5. Hold the tip of the dropper over the pie pan near the surface and let it drop onto the water near the center of the pie pan.
  6. Watch it carefully as it spreads out to be one molecule thick!
  7. Quickly measure and record the diameter of the layer of the detergent on your data sheet.
  8. Use equations for sphere and cylinder volume to determine the height (which we assume to be one molecule thick) of the soap when it's spread out. That's the approximate width of the molecule!

[/am4show]

Click here to go to next lesson on Mole Concept.


Atoms are made of protons, neutrons, and electrons. The protons and the neutrons make up the nucleus (the center) of the atom. The electron lives outside the nucleus in an electron cloud and are way too small to see. Protons and neutrons are made up of smaller little particles, which are made of smaller little particles and so on. Atoms can have anywhere from only one proton and one electron (a hydrogen atom) to over 300 protons, neutrons and electrons in one atom. It is the number of protons that determines the kind of atom an atom is, or in other words, the kind of element that atom is. How many protons does Zinc have?
[am4show have=’p9;p52;p91;’ guest_error=’Guest error message’ user_error=’User error message’ ]


[/am4show]


Click here to go to next lesson on Measuring a Molecule.

If you have one element, like sulfur, which is S, and it’s a negative ion, just add “ide” to the end, like sulfide. Or if you have a carbon ion, it’s carbide. Nitrogen would be nitride, chlorine would be chloride.


If there’s more than one atom, especially if one of them is oxygen, then they have special names. The one with more oxygen atoms is the “ate” and the one with less is the “ite”. Sulfate has 4 oxygen atoms, and sulfite only has 3. Nitrate has three oxygen, and nitrite has only 2.


If there’s more than two ions, the one with the largest number of atoms gets the “per” and “ate”, like perchlorate. And the smallest one gets the “hypo” and “ite”, like hypochlorite.


[am4show have=’p9;p52;p91;’ guest_error=’Guest error message’ user_error=’User error message’ ]


[/am4show]


Click here to go to next lesson on Determination of atomic masses.

Matter that is made of only one kind of atom is an element, like helium. Helium likes to hang out in groups of two helium atoms.


An atom is the smallest particle of an element that still has its chemical properties. If you have a gold atom and you split it into smaller parts (which you can do), it won’t still act like it did chemically as it did when it was a whole atom.
[am4show have=’p9;p52;p91;’ guest_error=’Guest error message’ user_error=’User error message’ ]


[/am4show]


Click here to go to next lesson on Nomenclature and formulas of binary compounds.

When doing your experiments, you’ll often repeat an experiment again and again for various reasons. One reason is to make sure the experiment you’re doing is repeatable – it’s not just a one-time thing. You might also be checking to be sure you’ve done it right, or written down the amounts of chemicals correctly, or need to observe something you didn’t previously.


Precision measures how well your answers agree with each other from experiment to the next.


[am4show have=’p9;p52;p91;’ guest_error=’Guest error message’ user_error=’User error message’ ]


[/am4show]


Click here to go to next lesson on Significant Figures.

If you’ve ever burped, you know that it’s a lot easier to do after chugging an entire soda. Now why is that?


Soda is loaded with gas bubbles — carbon dioxide (CO2), to be specific. And at standard temperature (68oF) and pressure (14.7 psi), carbon dioxide is a gas. However, if you burped in Antarctica in the wintertime, it would begin to freeze as soon as it left your lips. The freezing temperature of CO2 is -109oF, and Antarctic winters can get down to -140oF. You’ve actually seen this before, as dry ice (frozen burps!).


Carbon dioxide has no liquid state at low pressures (75 psi or lower), so it goes directly from a block of dry ice to a smoky gas (called sublimation). It’s also acidic and will turn cabbage juice indicator from blue to pink. CO2 is colorless and odorless, just like water, but it can make your mouth taste sour and cause your nose to feel as if it’s swarming with wasps if you breathe in too much of it (though we won’t get anywhere near that concentration with our experiments).


The triple point of CO2 (the point at which CO2 would be a solid, a liquid, and a gas all at the same time) is around five times the pressure of the atmosphere (75 psi) and around -70oF. (What would happen if you burped then?)


What sound does a fresh bottle of soda make when you first crack it open? PSSST! What is that sound? It’s the CO2 (carbon dioxide) bubbles escaping. What is the gas you exhale with every breath? Carbon dioxide. Hmmm … it seems as if your soda is already pre-burped. Interesting.


We’ll actually be doing a few different experiments, but they all center around producing burps (carbon dioxide gas). The first experiment is more detective work in finding out where the CO2 is hiding. With the materials we’ve listed (chalk, tile, limestone, marble, washing soda, baking soda, vinegar, lemon juice, etc. …) and a muffin tin, you can mix these together and find the bubbles that form, which are CO2. (Not all will produce a reaction.) You can also try flour, baking powder, powdered sugar, and cornstarch in place of the baking soda. Try these substitutes for the vinegar: water, lemon juice, orange juice, and oil.


Materials:


  • baking soda
  • chalk
  • distilled white vinegar
  • washing soda
  • disposable cups and popsicle sticks

[am4show have=’p8;p9;p18;p45;p68;’ guest_error=’Guest error message’ user_error=’User error message’ ]


Download Student Worksheet & Exercises


The next video (below) is a BONUS video for you – can you find the items around your house so you can make your own scale? (If you generate a lot of CO2, you can simply use paper grocery bags suspended on both ends of a broom handle (disconnect the broom part first). Suspend the center of the broom handle from a length of string for pin-point accuracy.


The second part of this experiment (video below) compares the weight of air with the weight of carbon dioxide. Make sure your balance is free to move easily when the lightest touch (your breath) is applied to one of the scales. You can use grocery bags attached to the ends of a broom handle for a larger scale, or modify tiny cups with string and pencils (as shown in the video). Either one works, but you’ll want to be sure the bubbles are (mostly) popped before you pour. And pour carefully or you’ll slosh out the invisible CO2 gas.


You can create the CO2 gas in a variety of ways (the image at right shows dry ice submerged in water), including the standard vinegar and baking powder method. Here is another option: Open a 2-liter bottle of soda and quickly pour it into a big pitcher so that it foams up to the top of the container. Carefully pour the gas from the pitcher into the balance. What happens?


Fire extinguisher variation: You can create a fire extinguisher by “pouring” the CO2 gas onto a lit candle to snuff it out.


Materials:


  • baking soda
  • distilled white vinegar
  • two disposable cups
  • large container
  • two water bottles or stacks of books
  • two long pencils or skewers
  • string


[/am4show]


Click here to go to next lesson on Precision and Accuracy.


A fundamental concept in science is that mass is always conserved. Mass is a measure of how much matter (how many atoms) make up an object. Mass cannot be created or destroyed, it can only change form.


Materials: paper, lighter or matches with adult help


[am4show have=’p8;p9;p10;p37;p91;’ guest_error=’Guest error message’ user_error=’User error message’ ]


When you eat a banana, the matter is converted into energy. Ignite a sheet of paper and the paper molecules combine with oxygen through a chemical change and turn into smoke and ash.


Learn more about this concept in Unit 3.


[/am4show]


Click here to go to next lesson on Air Having Mass.

Ever wonder how the water draining down your sink gets clean again? Think about it: The water you use to clean your dishes is the same water that runs through the toilet. There is only one water pipe to the house, and that source provides water for the dishwasher, tub, sink, washing machine, toilet, fish tank, and water filter on the front of your fridge. And there’s only one drain from your house, too! How can you be sure what’s in the water you’re using?


This experiment will help you turn not only your coffee back into clear water, but the swamp muck from the back yard as well. Let’s get started.
[am4show have=’p8;p9;p80;p84;p101;p30;p57;’ guest_error=’Guest error message’ user_error=’User error message’ ]


  • clean play sand
  • alum (check the spice section of the grocery store)
  • distilled water
  • water sample (a cup of coffee with the ground put back in works great)
  • activated carbon (check an aquarium store)
  • cheese cloth
  • clear disposable cups
  • popsicles
  • medicine dropper or syringe (no needle)
  • funnel
  • 2 cotton balls
  • measuring spoon (1/4 tsp and 1/2 tsp)


Download Student Worksheet & Exercises


There are several steps you need to understand as we go along:


  • Aeration: Aerate water to release the trapped gas. You do this in the experiment by pouring the water from one cup to another.
  • Coagulation: Alum collects small dirt particles, forming larger, sticky particles called floc.
  • Sedimentation: The larger floc particles settle to the bottom of the cup.
  • Filtration: The smaller floc particles are trapped in the layer of sand and cotton.
  • Disinfection: A small amount of disinfectant is added to kill the remaining bacteria. This is for informational purposes only — we won’t be doing it in this experiment. (Bleach and kids don’t mix!)

Preparing the Sample

Make your “swamp muck” sample by filling a small pitcher with water, coffee, and the coffee grounds. Fill up another small pitcher with clean water. In a third small pitcher, pour a small scoop of charcoal carbon and cold water.


Fill one clear plastic cup half full of swamp muck. Stir in ½ teaspoon aluminum sulfate (also known as alum) and ¼ teaspoon calcium hydroxide (also known as lime; it’s nasty stuff to breathe in so keep it away from kids). You have just made floc, the heavy stuff that settles to the bottom.


Aside: For pH balance, you can add small amounts of lime to raise the pH (level 7 is optimal), if you have pH indicators on hand (find these at the pharmacy).


Stir it up and sniff — then don’t touch for 10 minutes as you make the filter.


Making the Filter

Grab a cotton ball and fluff it out HUGE. Then stuff it into the funnel. The funnel will take two or three balls. (Don’t stuff too hard, or nothing will get through!) Strain out the carbon granules from the pitcher, and put the black carbon water back into the pitcher. Place the funnel over a clean cup and pour the black water directly over the cotton balls. Run the dripped-out water back through the funnel a few times. Those cotton balls will turn gray-black! Discard all the carbon water.


Add a layer of sand over the top of the cotton balls. It should cover the balls entirely and come right up to the top of the funnel. Fill a third empty cup half-full of clean water from the pitcher. Drip (using a dropper) clean water into the funnel. (This gets the filter saturated and ready to filter.)


Showtime!

It’s time to filter the swamp muck. Without disturbing the sample, notice where the floc is… the dark, solid layer at the bottom. You’ve already filtered out the larger particles without using a filter! Using a dropper, take a sample from the layer above the floc (closer to the top of your container) and drip it into the funnel. If you’ve set up your experiment just right, you’ll see clear water drip out of your funnel.


Continue this process until the liquid starts to turn pale – which indicates that your filter is saturated and can’t filter out any more particles.


To dissect the filter and find out where the muck got trapped, invert the funnel over four layers of paper towel. Usually the blacker the cotton, the better the filter will work. Look for coffee grounds in the sand.


“Radioactive” Sample

Activate a disposable light stick. Break open the light stick (use gloves when handling the inner liquid), and using the dropper, add the liquid to the funnel. You can also drip the neon liquid by the drop into the swamp muck sample and pass it through your filter.


You can test out other types of “swamp muck” by mixing together other liquids (water, orange juice, etc.) and solids (citrus pulp, dirt, etc.). Stay away from carrot juice, grape juice, and beets — they won’t work with this type of filter.


[/am4show]


Click here to go to next lesson on Conservation of Mass.


Did you know that most people can’t crack an egg with only one hand without whacking it on something? The shell of an egg is quite strong! Try this over a sink and see if you can figure out the secret to cracking an egg in the palm of your hand…(Hint: the answer is below the video – check it out after you’ve tried it first!)


How can you tell if an egg is cooked or raw? Simply spin it on the counter and you’ll get a quick physics lesson in inertia…although you might not know it. A raw egg is all sloshy inside, and will spin slow and wobbly. A cooked egg is all one solid chunk, so it spins quickly. Remember the Chicken and the Clam experiment?


[am4show have=’p8;p9;p28;p55;p68;p101;’ guest_error=’Guest error message’ user_error=’User error message’ ]
Materials:


  • hard-boiled egg
  • glass
  • water
  • salt


Download Student Worksheet & Exercises
This experiment is all about density. Density is basically how tightly packed atoms are. Mathematically, density is mass divided by volume. In other words, it is how heavy something is, divided by how much space it takes up. If you think about atoms as marbles (which we know they’re not from the last lessons but it’s a useful model), then something is more dense if its marbles are jammed close together.


For example, take a golf ball and a ping pong ball. Both are about the same size or, in other words, take up the same volume. However, one is much heavier, has more mass, than the other. The golf ball has its atoms much more closely packed together than the ping pong ball and as such the golf ball is denser.


Here’s a riddle: Which is heavier, a pound of bricks or a pound of feathers? Well, they both weigh a pound so neither one is heavier! Now, take a look at it this way, which is denser, a pound of bricks or a pound of feathers? Aha! The pound of bricks is much denser since it takes up much less space. The bricks and the feathers weigh the same but the bricks take up a much smaller volume. The atoms in a brick are much more squooshed together then the atoms in the feathers.


Back to the experiment – have you ever noticed you how float a lot easier in the ocean than the lake? If so, then you already know how salt can affect the density of the water. Saltwater is more dense that regular water, and your body tissues contain water (among other things).


Did you know that thinner people are more dense than heavier people? For example, championship swimmers will sink and have to work harder to stay afloat, but the couch potato next door will float more easily in the water.
[/am4show]


Click here to go to next lesson on water purification.


Density is basically how tightly packed atoms are. (Mathematically, density is mass divided by volume.) For example, take a golf ball and a ping pong ball. Both are about the same size or, in other words, take up the same volume.


However, one is much heavier, has more mass, than the other. The golf ball has its atoms much more closely packed together than the ping pong ball and as such the golf ball is denser.


These are quick and easy demonstrations for density that use simple household materials:
[am4show have=’p8;p9;p13;p40;p68;’ guest_error=’Guest error message’ user_error=’User error message’ ]


Density Jar

You will need to find:


  • glass jar
  • water
  • vegetable oil
  • liquid dish soap
  • honey
  • corn syrup
  • molasses
  • rubbing alcohol
  • lamp oil (optional)

Fill a clear glass partway with water. Drizzle in cooking oil. What do you see happening? Try adding in liquid dish soap (make sure it’s a different color form the water and the oil for better visibility.)


What else can you add in? What about honey, corn syrup, molasses, rubbing alcohol, or lamp oil? Use a turkey baster to help you pour the liquids in very slowly so they don’t mix. You’ll get the best results if you start with the heaviest liquids.


Download Student Worksheet & Exercises


Hot & Cold Swirl

To clearly illustrate how hot and cold air don’t mix, find two identical glasses. Fill one glass to the brim with hot water. Add a drop or two of red food coloring and watch the patterns. Now fill the other glass to the top with very cold water and add drops of blue dye. Do you notice a difference in how the food coloring flows?


Get a thick sheet of heavy paper (index cards work well) and use it to cap the blue glass. Working quickly, invert the glass and stack it mouth-to-mouth with the red glass. This is the tricky part: When the glasses are carefully lined up, remove the card. Is it different if you invert the red glass over the blue?


[/am4show]


Click here to go to next lesson on Salty Eggs.


How many seconds in an hour?
How tall are you in centimeters?
How big is your house?


If it sounds confusing to convert miles to inches or years to seconds, then this video will show you how to convert them easily:
[am4show have=’p8;p9;p10;p37;p109;p95;’ guest_error=’Guest error message’ user_error=’User error message’ ]


[/am4show]


Click here to go to next lesson on Density.

If you’re going to do a chemistry experiment, you’re going to use chemicals. How much of each one you use is going to change the results you get, so it’s important to find a way to accurately measure out the same amount of chemical each time.


[am4show have=’p9;p52;p91;’ guest_error=’Guest error message’ user_error=’User error message’ ]


[/am4show]


Click here to go to next lesson on Converting Units.

One of the problems kids have is how to experiment with their great ideas without getting lost in the jumble of results. So often students will not have any clear ideas about what change caused which effect in their results!


They also have trouble communicating their ideas in a way that not only makes sense, but also is acceptable by science fairs or other technical competitions designed to get kids thinking like a real scientist. Kids constantly struggle to apply the scientific method to their science project in school, for scout badges, or any other type of report where it’s important that other folks know and understand their work.


In this video, I am going to walk you through all the steps of the scientific method by just doing it so you can really see it in action. I’ve taken an everyday topic in alternative energy and applied the scientific method to get a real answer to my question about solar cells.


The scientific method is widely used by formal science academia as well as scientific researchers. For most people, it’s a real jump to figure out not only how to do a decent project, but also how to go about formulating a scientific question and investigate answers methodically like a real scientist. Presenting the results in a meaningful way via “exhibit board”… well, that’s just more of a stretch that most kids just aren’t ready for. There isn’t a whole lot of useful information available on how to do it by the people who really know how.


This section is designed to show you how to do several cool projects (and one really nifty one at the end), walk you through the steps of theorizing, hypothesizing, experimentation, and iterating toward a conclusion the way a real engineer or scientist does. And we’ll also cover communicating your ideas to your audience using a display board and the oral presentation using top tips and tricks from real scientists.


Click here to read up on the method or start the experiments!

Click here to go to next lesson on Measuring Chemicals and Converting Units.

Gravimetric analysis is a technique through which the amount of the ion being analyzed can be determined through the measurement of mass. Gravimetric analysis depend on comparing the masses of two compounds containing the ion to be analyzed. Here’s an example:


A 3.46 g sample of limestone(CaCO3 ) was dissolved in 0.1M (HCl) solution like this:


[am4show have=’p9;p52;p91;’ guest_error=’Guest error message’ user_error=’User error message’ ]


CaCO3 (s) + 2HCl (aq) => Ca2+ (aq) + 2Cl – (aq) + CO2 (g) + H2O (l)


What is the mass (by percentage) of calcium in the original limestone sample?


[/am4show]


Click here for Homework Problem Set #2

If you had a choice between a glass of lemon juice or apple juice, most folks would pick the sweeter one – apple. Did you know that apples are loaded with malic acid, and are actually considered to be acidic? It’s just that there is so much more sugar in an apple than a lemon that your taste buds can be fooled. Here’s a scientific way (which is much more reliable) to tell how acidic something is.


Acids are sour tasting (like a lemon), bases are bitter (like unsweetened cocoa powder). Substances in the middle are more neutral, like water. Scientists use the pH (power of hydrogen, or potential hydrogen) scale to measure how acidic or basic something is. Hydrochloric acid registers at a 1, sodium hydroxide (drain cleaner) is a 14. Water is about a 7. pH levels tell you how acidic or alkaline (basic) something is, like dirt. If your soil is too acidic, your plants won’t attract enough hydrogen, and too alkaline attracts too many hydrogen ions. The right balance is usually somewhere in the middle (called ‘pH neutral’). Some plants change color depending on the level of acidity in the soil – hydrangeas turn pink in acidic soil and blue in alkaline soil.


There are many different kinds of acids: citric acid (in a lemon), tartaric acid (in white wine), malic acid (in apples), acetic acid (in vinegar), and phosphoric acid (in cola drinks). The battery acid in your car is a particularly nasty acid called sulfuric acid that will eat through your skin and bones. Hydrochloric acid is found in your stomach to help digest food, and nitric acid is used to make dyes in fabrics as well as fertilizer compounds.


[am4show have=’p8;p9;p18;p45;p101;’ guest_error=’Guest error message’ user_error=’User error message’ ]


Materials:


Here’s a video that shows you how to test several different things, including how to safely test stronger acids and bases, should you wish to test your own out.


Some things you can test (in addition to the ones in the video) include: Sprite, distilled white vinegar, baking soda, Vanish, laundry detergent, clear ammonia, powdered Draino, and Milk of Magnesia. DO NOT mix any of these together! Simply add a bit to each cup and test it with your pH strips. Here’s a quick video demonstration:


(Note – we didn’t list the chemicals on the shopping list as there were a LOT of stuff to get for only one experiment, so just sit back and watch!)


No pH strips? The chop up a head of red cabbage and whirl in a blender with water. Pass through a strainer (discard the solids), and pour this new ‘indicator’ into several cups. Add Sprite to one cup and watch for a color change. Add baking soda and watch for another color change. Continue down the line, adding only one chemical per cup into your cabbage juice.


Click here to view another version of this experiment: Chemical Matrix.


[/am4show]


Click here to go to next lesson on Gravimetric Calculations.

When an atom (like hydrogen) or molecule (like water) loses an electron (negative charge), it becomes an ion and takes on a positive charge. When an atom (or molecule) gains an electron, it becomes a negative ion. An electrolyte is any substance (like salt) that becomes a conductor of electricity when dissolved in a solvent (like water).


This type of conductor is called an ‘ionic conductor’ because once the salt is in the water, it helps along the flow of electrons from one clip lead terminal to the other so that there is a continuous flow of electricity.


This experiment is an extension of the Conductivity Tester experiment, only in this case we’re using water as a holder for different substances, like sugar and salt. You can use orange juice, lemon juice, vinegar, baking powder, baking soda, spices, cornstarch, flour, oil, soap, shampoo, and anything else you have around. Don’t forget to test out plain water for your ‘control’ in the experiment!


[am4show have=’p8;p9;p20;p47;p76;p91;p58;’ guest_error=’Guest error message’ user_error=’User error message’ ]


Here’s what you need:


  • 2 AA batteries
  • AA battery case
  • 2 alligator clips
  • LED
  • water
  • salt
  • glass jar (like a clean jam jar)


Download Student Worksheet & Exercises


Exercises


  1. Why does electricity flow through some solutions but not all of them?
  2. What is a salt?
  3. How are electrolytes used today in real life?
  4. Which substance was your top conductor?
  5. Which substance didn’t conduct anything at all?
  6. What happens if you mix an electrolyte and non-electrolyte together?

[/am4show]


Click here to go to next lesson on Acid-Base reactions.


Precipitate reactions are like watching a snow globe, but the snow appears out of nowhere.


For example, you can combine two liquid solutions that are totally clear and when you put them together, they each break apart into ions and then recombine in a way that looks like white snow in your test tube. Basically precipitate reactions make it possible to see the ions in a solution because they form a salt that’s not soluble – it doesn‘t dissolve in the solution. You can also get different colors of the precipitate snow, depending on which reactants you start out with. If you were to use potassium bromide (KBr) with silver nitrate, you’d find a yellowish snowstorm of silver bromide (AgBr).


[am4show have=’p9;p52;p91;’ guest_error=’Guest error message’ user_error=’User error message’ ]


[/am4show]


Click here to go to next lesson on Electrolytes

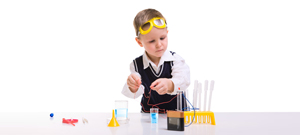
If you love the idea of mixing up chemicals and dream of having your own mad science lab one day, this one is for you. You are going to mix up each solid with each liquid in a chemical matrix.


In a university class, one of the first things you learn in chemistry is the difference between physical and chemical changes. An example of a physical change happens when you change the shape of an object, like wadding up a piece of paper. If you light the paper wad on fire, you now have a chemical change. You are rearranging the atoms that used to be the molecules that made up the paper into other molecules, such as carbon monoxide, carbon dioxide, ash, and so forth.


How can you tell if you have a chemical change? If something changes color, gives off light (such as the light sticks used around Halloween), or absorbs heat (gets cold) or produces heat (gets warm), it’s a chemical change.


What about physical changes? Some examples of physical changes include tearing cloth, rolling dough, stretching rubber bands, eating a banana, or blowing bubbles.


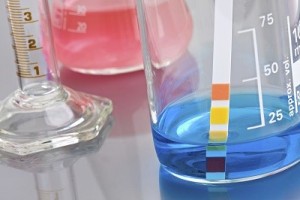
About this experiment: Your solutions will turn red, orange, yellow, green, blue, purple, hot, cold, bubbling, foaming, rock hard, oozy, and slimy, and they’ll crystallize and gel — depending on what you put in and how much!


This is the one set of chemicals that you can mix together without worrying about any lethal gases. I do recommend doing this OUTSIDE, as the alcohol and peroxide vapors can irritate you. Always have goggles on and gloves on your hands, and a hose handy in case of spills. Although these chemicals are not harmful to your skin, they can cause your skin to dry out and itch. Wear gloves (latex or similar) and eye protection (safety goggles), and if you’re not sure about an experiment or chemical, just don’t do it. (Skip the peroxide and cold pack if you have small kids.)


Materials:
• sodium tetraborate (borax, laundry aisle)
• sodium bicarbonate (baking soda, baking aisle)
• sodium carbonate (washing soda, laundry aisle)
• calcium chloride (AKA “DriEz” or “Ice Melt”)
• citric acid (spice section, used for preserving and pickling)
• ammonium nitrate (single-use disposable cold pack)
• isopropyl rubbing alcohol
• hydrogen peroxide
• acetic acid (distilled white vinegar)
• water
• liquid dish soap (add to water)
• muffin tin or disposable cups
• popsicle sticks for stirring and mixing
• tablecloths (one for the table, another for the floor)
• head of red cabbage (indicator)


[am4show have=’p8;p9;p18;p45;’ guest_error=’Guest error message’ user_error=’User error message’ ]


Download Student Worksheet & Exercises


Step 1: Cover your kitchen table with a plastic tablecloth (and possibly the floor). Place your chemicals on the table. A set of muffin cups make for an excellent chemistry experiment lab. (Alternatively, you can use empty plastic ice cube trays.) You will mix in these cups. Leave enough space in the cups for your chemicals to mix and bubble up — don’t fill them all the way when you do your experiments!


Step 2: Set out your liquid chemicals in easy-to-pour containers, such as water bottles (be sure to label them, as they all will look the same): alcohol, hydrogen peroxide, water, acetic acid, and dish soap (mixed with water). Set out small bowls (or zipper bags if you’re doing this with a crowd) of the powders with the tops of your water bottles as scoopers. The small scoopers regulate the amounts you need for a muffin-sized reaction. Label the powders, as they all look the same.


Step 3: Prepare the indicator by coarsely chopping the head of red cabbage and boiling the pieces for five minutes in a pot full of water. Carefully strain out all the pieces with a fine-mesh strainer; the reserved liquid is your indicator (it should be blue or purple).


When you add this indicator to different substances, you will see a color range: hot pink, tangerine orange, sunshine yellow, emerald green, ocean blue, velvet purple, and everything in between. Test out the indicator by adding drops of cabbage juice to something acidic, such as lemon juice, and see how different the color is when you add indicator to a base, such as baking soda mixed with water.


Have your indicator in a bottle by itself. An old soy sauce bottle with a built-in regulator that keeps the pouring to a drip is perfect. You can also use a bowl with a bulb syringe, but cross-contamination could be a problem. Or it could not be — depending on whether you want the kids to see the effects of cross-contamination during their experiments. (The indicator bowl will continually turn different colors throughout the experiment.)


Step 4: Start mixing it up! When I teach this class, I let them have at all the chemicals at once (even the indicator), and of course, this leads to a chaotic mix of everything. When the chaos settles down, and they start asking good questions, I reveal a second batch of chemicals they can use. (I have two identical sets of chemicals, knowing that the first set will get used up very quickly.)


Step 5: After the initial burst of enthusiasm, your kids will instinctively start asking better questions. They will want to know why their green goo is creeping onto the floor while someone else’s just bubbled up hot pink, seemingly mixed from the same stuff. Give them a chance to figure out a more systematic approach, and ask if they need help before you jump in to assist.


What’s happening with the indicator? An indicator is a compound that changes color when you dip it in different things, such as vinegar, alcohol, milk, or baking soda mixed with water. There are several extracts you can use from different substances. You’ll find that different indicators are affected differently by acids and bases. Some change color only with an acid, or only with a base. Turmeric, for example, is good only for bases. (You can prepare a turmeric indicator by mixing 1 teaspoon turmeric with 1 cup rubbing alcohol.)


Why does red cabbage work? Red cabbage juice has anthocyanin, which makes it an excellent indicator for these experiments. Anthocyanin is what gives leaves, stems, fruits, and flowers their colors. (Did you know that certain flowers, such as hydrangeas, are blue in acidic soil but turn pink when transplanted to a basic soil?) You’ll need to get the anthocyanin out of the cabbage and into a more useful form so you can use it as a liquid indicator.


Tip for Testing Chemical Reactions: Periodically hold your hand under the muffin cups to test the temperature. If it feels hot, it’s an exothermic reaction (giving off energy in the form of heat, light, explosions …). The chemical-bond energy is converted to thermal energy (heat) in these experiments. If it feels cold, you’ve made an endothermic reaction (absorbing energy, where the heat from the mixture converts to bond energy). Sometimes you’ll find that your mixture is so cold that it condenses the water outside the container (like water drops on the outside of an ice-cold glass of water on a hot day).


Variations for the Indicator: Red cabbage isn’t the only game in town. You can make an indicator out of many other substances, too. Here’s how to prepare different indicators:
• Cut the substance into smaller pieces. Boil the chopped substance for five minutes. Strain out the pieces and reserve the juice. Cap the juice (indicator) in a water bottle, and you’re ready to go.
• What different substances can you use? We’ve had the best luck with red cabbage, blueberries, red and green grapes, beets, cherries, and turmeric. You can make indicator paper strips using paper towels or coffee filters. Just soak the paper in the indicator, remove and let dry. When you’re ready to use one, dip it in partway so you can see the color change and compare it to the color it started out with.
• Use the indicator both before and after you mix up chemicals. You will be surprised and dazzled by the results!


Teaching Tips: You can make this lab more advanced by adding a postage scale (to measure the solids in exact measurements), small beakers and pipettes for the liquid measurements, and data sheets to record temperature, reactivity, and acid/base indicator levels. (Hint: Make the data sheet like a matrix, to be sure you get all the possible combinations.)


For the student: Your mission is to mix up solutions that:
• Generate heat (exothermic)
• Get ice-cold on their own (endothermic)
• Crystallize
• Are self-gelling
• Bubble up and spit
• Ooze creepy concoctions
• Are the most impressive (the ooohhhh-aaahhhhh factor).


For the parent: Your mission is to:
• Make sure everything in reach is covered with plastic tablecloths, drop cloths, or tarps
• Open all the windows and turn on the fans (or just do this experiment outside near the hose)
• Keep all small children and pets away
• Slap on a pair of rubber gloves
• Encourage the kids to try it and test it
• Remember that there are no such things as mistakes, only learning opportunities. (Don’t forget that we usually learn more from mistakes than we do when we’re successful!)


For the truly exceptional parent: Your mission is also to:
• Secretly get an identical second set of chemicals from the grocery store (see shopping list above) and hide them in a bin nearby
• Have all the chemicals out and ready for the kids to use
• Be sure the kids know your rules before you let them loose (no eating, running, or horseplay; all goggles must stay on; etc.)
• Have a bin full of water nearby for washing up
• Let the kids loose to experiment and play without expectation
• Play with the kids, get into the act (“Wow! It turned green! How did you do that?!” instead of “Well, I’m not going to clean THAT up.”)
• Expect kids to dump everything and mix it all together at the same time without much thought about what they are trying to accomplish
• When their supplies run out, pull out your second bin and smile
• Encourage the kids to try their ideas out
o When they ask, “Will this work?” you can reply
with confidence, “I don’t know — try it!”


Click here to view another version of this experiment: Acids & Bases.
[/am4show]


Click here to go to next lesson on Precipitation Reactions.


In order to mix up chemicals in the right amounts (so we get the right amount out of the reaction), we have to figure out how much of a chemical to put in in the first place. Sometimes chemists have this problem: they need for example 2.0 L of 1.5 M solution of Na2CO3 (sodium carbonate). They find a bottle of Na2CO3 on the shelf, some distilled water, and a 2.00L flask. How much Na2CO3 do they put in the flask with the water?


[am4show have=’p9;p52;p91;’ guest_error=’Guest error message’ user_error=’User error message’ ]


[/am4show]


Click here to go to next lesson on Chemical Matrix.

When an atom (like hydrogen) or molecule (like water) loses an electron (negative charge), it becomes an ion and takes on a positive charge. When an atom (or molecule) gains an electron, it becomes a negative ion. An electrolyte is any substance (like salt) that becomes a conductor of electricity when dissolved in a solvent (like water).


This type of conductor is called an ‘ionic conductor’ because once the salt is in the water, it helps along the flow of electrons from one clip lead terminal to the other so that there is a continuous flow of electricity.


This experiment is an extension of the Conductivity Tester experiment, only in this case we’re using water as a holder for different substances, like sugar and salt. You can use orange juice, lemon juice, vinegar, baking powder, baking soda, spices, cornstarch, flour, oil, soap, shampoo, and anything else you have around. Don’t forget to test out plain water for your ‘control’ in the experiment!


[am4show have=’p8;p9;p20;p47;p76;p91;p58;’ guest_error=’Guest error message’ user_error=’User error message’ ]


Here’s what you need:


  • 2 AA batteries
  • AA battery case
  • 2 alligator clips
  • LED
  • water
  • salt
  • glass jar (like a clean jam jar)


Download Student Worksheet & Exercises


Exercises


  1. Why does electricity flow through some solutions but not all of them?
  2. What is a salt?
  3. How are electrolytes used today in real life?
  4. Which substance was your top conductor?
  5. Which substance didn’t conduct anything at all?
  6. What happens if you mix an electrolyte and non-electrolyte together?

[/am4show]


Click here to go to next lesson on Molarity and preparation of solutions.

The kinetic theory of gases assumes that all gases behave ideally, but we know that’s not really what happens in the real world. For example, real gas particles do occupy space and also attract each other, although these properties are more apparent at lower temperature because usually the particles have enough kinetic energy to zip by each other without worrying about the attractive or repulsive charges from other molecules. If the molecules move slow enough though, they do get affected by the push or pull of other molecules.


Also at high pressures, the molecules are so tightly packed together that they do start to have volume considerations that need to be addressed. So for a real gas, we can make calculations like this:


[am4show have=’p9;p52;p91;’ guest_error=’Guest error message’ user_error=’User error message’ ]


[/am4show]


The kinetic theory of gases relates what’s going on with the motion of the tiny invisible molecules with the properties you can measure, like temperature and pressure. Kinetic means the study of motion, and for us, it’s the motion of the gas molecules.


[am4show have=’p9;p52;p91;’ guest_error=’Guest error message’ user_error=’User error message’ ]


[/am4show]


Atoms are held together by bonds, and bonds take energy, so an atom that is bonded has less energy than if it was free floating around on its own. Energy is required to break a bond (bond energy). Energy is released when a bond is created. (We’ll use this idea again later when we talk about Lewis Dot structures.) Each molecule has its own bond energy which you can look up in a table in your chemistry book. For example, C-H bonds take about 100kcal of energy to break 1 mol of C-H bonds, so you’ll find bond energies listed in kcal per mol. If you look up C-C bonds, you’ll find 80 kcal/mol. And a double C-C bond is 145 kcal per mol.


[am4show have=’p9;p52;p91;’ guest_error=’Guest error message’ user_error=’User error message’ ]


Here is a second video that shows more details and examples about the bond energies of atoms:


[/am4show]


This is a cool video from a Teacher’s Educational Channel in Europe I thought you might enjoy about the science of fireworks:


You can view the full video here: https://www.youtube.com/watch?v=3hNf8DRg5vQ


The “mean free path” is the average distance a gas molecule travels between collisions. If a molecule has a diameter “d”, then the effective cross section for a collision is “π d2“. This is used mostly with the Kinetic Theory of Gases, and is a good estimation of how particles move in a gas.
[am4show have=’p9;p52;p91;’ guest_error=’Guest error message’ user_error=’User error message’ ]


Also useful when describing the motions of the molecules in a gas (again using the Kinetic Molecular Theory) is the average velocity of the molecules. Since the gas molecules are constantly moving about, it would be ridiculously hard to individually account for each molecule’s individual speed and direction at any given time. Instead, we make use of statistics to get an overall average estimate of the motion of the particles using the “root mean square” technique applied to gases.


[/am4show]


Graham’s law tells is how gases move through porous materials, like air in a balloon. Ever noticed how balloons don’t stay inflated forever? That’s because the gas diffuses through the balloon skin itself. And if you take a good look, helium balloons deflate the next day, whereas normal air balloons will keep for a few days. Small helium molecules effuse through the tiny holes in the balloon skin much faster than normal air does.
[am4show have=’p9;p52;p91;’ guest_error=’Guest error message’ user_error=’User error message’ ]


[/am4show]


Avogadro’s Law states that 1 mole of every gas occupies the same volume at the same temperature and pressure. The mass of the gas might be different… one mole of helium is going to weigh less than one mole of nitrogen, for example, but the number of helium gas molecules is exactly the same as the number of nitrogen molecules, and both of them will occupy the same amount of space (22.4L) at standard temperature and pressure. At room temperature and pressure, it’s slightly higher (24 L).
[am4show have=’p9;p52;p91;’ guest_error=’Guest error message’ user_error=’User error message’ ]


[/am4show]


Gravimetric analysis is a technique through which the amount of the ion being analyzed can be determined through the measurement of mass. Gravimetric analysis depend on comparing the masses of two compounds containing the ion to be analyzed. Here’s an example:


A 3.46 g sample of limestone(CaCO3 ) was dissolved in 0.1M (HCl) solution like this:


[am4show have=’p9;p52;p91;’ guest_error=’Guest error message’ user_error=’User error message’ ]


CaCO3 (s) + 2HCl (aq) => Ca2+ (aq) + 2Cl – (aq) + CO2 (g) + H2O (l)


What is the mass (by percentage) of calcium in the original limestone sample?


[/am4show]


h2o2
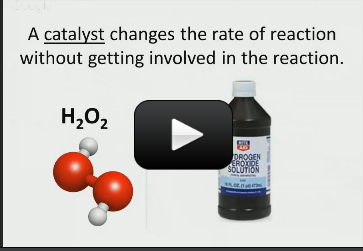
This experiment below is for advanced students. If you’ve ever wondered why hydrogen peroxide comes in dark bottles, it’s because the liquid reacts with sunlight to decompose from H2O2 (hydrogen peroxide) into H2O (water) and O2 (oxygen). If you uncap the bottle and wait long enough, you’ll eventually get a container of water (although this takes a LOOONG time to get all of the H2O2 transformed.)


Here’s a way to speed up the process and decompose it right before your eyes. For younger kids, you can modify this advanced-level experiment so it doesn’t involve flames. Here’s what you do:


[am4show have=’p9;p45;p91;’ guest_error=’Guest error message’ user_error=’User error message’ ]


Materials:


  • hydrogen peroxide
  • empty water bottle
  • balloon
  • charcoal piece

Want to do this experiment with a more dramatic flair?  Try speeding it up as shown in the video below.


IMPORTANT: DO NOT DRINK ANYTHING FROM THIS LAB!!


>
 
Pour hydrogen peroxide into an empty plastic water bottle. Add a scoop of activated charcoal (you can also smash regular charcoal with a hammer to get it to fit – the smaller the bits, the better it will work, but make sure you do NOT use charcoal pre-soaked in lighter fluid). Cap your bottle with a helium-quality latex balloon and set aside.  After several hours, you will have a balloon filled with oxygen.


[/am4show]


Click here for Homework Problem Set #3


A decomposition reaction breaks a complicated molecule into simpler ones usually by heating, but not always. In fact, if you leave a bottle of hydrogen peroxide on the counter, it decomposes into water (H2O) and oxygen (O2) without any heating at all. 2H2O  2O2 + 2H2


A very common type of decomposition is shown by the chemistry of metal carbonates. Calcium, one of the most abundant elements on earth, usually is locked up in limestone, called calcium carbonate. CaCO3. When heated to about 1000 degrees C, it decomposes to make lime (a solid metal oxide) and CO2 gas. Chemical engineers make more then 348 million tonnes of lime to make steel, cement and other chemicals.


[am4show have=’p9;p52;p91;’ guest_error=’Guest error message’ user_error=’User error message’ ]


[/am4show]


Click here to go to next lesson on Hydrogen Peroxide.

This experiment is for advanced students.


Sparks flying off in all directions…that’s fun. In this lab, we will show how easy it is to produce those shooting sparks. In a sparkler you buy at the store, the filings used are either iron or aluminum.


The filings are placed in a mixture that, when dry, adheres to the metal rod or stick that is used in making the sparkler. The different colors are created by adding different powdered chemicals to the mixture before it dries. When they burn, we get red, blue, white, and green.


[am4show have=’p9;p52;p91;’ guest_error=’Guest error message’ user_error=’User error message’ ]


Materials:


  • Card stock
  • Alcohol burner
  • Iron filings
  • Gloves

It’s tempting to use a handful of filings to produce a literal shower of sparks. The effect is actually better with small amounts. To accomplish anything with a large pile of filings would require you to blow REALLY hard to make a filing cloud that will combust well. A larger reaction means more sparks flying around. The amount of filings recommended in the lab is a safe amount. Increasing the amount used increases the danger. You could take an interesting, fun, and safe lab and transform it into something that burns the hair off your arms. Besides, burning hair doesn’t smell good.


Here’s what’s going on in this experiment:


Iron + Oxygen –> Iron Oxide


Iron and Oxygen are burned to produce Iron Oxide


This is the balanced chemical equation: 2Fe + O2 –> 2FeO


C3000: Experiment 54


Download Student Worksheet & Exercises


Handling iron filings is not dangerous. Minor things that can occur, such as: Iron filings can stain your skin gray; if there is a large filing in your container, rubbing your finger against it could give you a painful splinter.


Return unused filings to your container. Any surface these filings touch turns gray, so keep your filings corralled. Cleaning your work surface with a wet paper towel is the easiest way to clean up.


Discard any unburned iron powder that is coating the area around your alcohol burner into a trash container outside. It is not toxic, but still….don’t use chemicals or experiment residue as a snack. Never a good idea.


What is going on here? When you build a campfire at the campground, why doesn’t the grill spark and burn up? The grill is iron, the filings are iron, and there is always oxygen available in the air. What’s the deal here? Combustion needs two things, fuel and fire. Not enough of either and nothing will burn. But a woodstove is made up of a lot more iron by weight than that little scoop of filings. It has to do with surface area. Take an equal weight of solid iron and iron filings. Put a match to the solid iron and all it gets is hot. Blow the same weight of iron filings into the flame and POOF! The key is surface area. Surface area can affect the way a chemical reaction occurs, and in this case, whether or not it occurs at all.


To better understand the effect of surface area, eat some candy! Put a whole Lifesaver candy in your mouth. Suck, move your tongue all over it, swish it back and forth in your mouth. You are not allowed to bite or swallow it. How long does it take to completely dissolve? Do the same thing with another Lifesaver broken into pieces. Which dissolved faster? The same thing happens with the iron. The smaller the pieces, the easier it is for the iron to burn. When you blew iron filings into the air above the flame, you increased the surface area even more by increasing the air space between the particles. An increase in surface area always makes things happen faster. Granulated sugar dissolves faster than sugar cubes, and a piece of wood burns faster after you chop it into kindling. Pay attention and you will notice other situations where increasing surface area speeds up physical changes and chemical reaction times.


An additional experiment that you can try on your own is burning steel wool. Properly prepared ahead of time, steel wool will spark as it burns up. A great emergency fire starter is a 9V battery and steel wool. Fluff up the steel wool and touch a portion of it across the terminals of the battery. The steel wool will burn just like it did with a match.


Steel wool is just a ball of really long iron filings. If you fluff out the steel wool and light it, it burns easily. If you do try this, do it outside over the lawn or an area of dirt. At some point in the combustion you will want/need to drop the steel wool or get your fingers singed.


[/am4show]


Click here to go to next lesson on Decomposition Reactions.

This experiment is for advanced students.


Ever use soap? Sodium hydroxide (NaOH) is the main component in lye soap. NaOH is mixed with some type of fat (vegetable, pig, cow, etc).  Scent can be added for the ‘pretty’ factor and pumice or sand can be added for the manly “You’re coming off my hands and I’ll take no guff” factor. Lots of people still make their own soap and they enjoy doing it.


[am4show have=’p9;p52;’ guest_error=’Guest error message’ user_error=’User error message’ ]


One of the coolest uses for sodium hydroxide is in tissue digestion. By “tissue” we mean meat, bone, sinew…..meaning bodies! People who pick up dead animal (road kills) for the county dump their catch in barrels containing sodium hydroxide. The NaOH eats everything up and then the “sludge” is dumped in the landfill. They used NaOH to make them decompose. So this stuff is nasty and should never be touched with your bare hands!!


Materials:


  • Erlenmeyer flask
  • Alcohol burner
  • Lighter
  • Heating rod
  • Sodium carbonate (Na2CO3) (MSDS)
  • Calcium hydroxide (Ca(OH)2) (MSDS)
  • Measuring spoon
  • Water
  • Tripod stand
  • Wire screen
  • Chemistry stand
  • Test tube holder
  • Test tube rack
  • Test tube
  • Filter paper
  • Funnel
  • Stock bottle for NaOH storage (MSDS)

Don’t inhale any fumes from reactions or powder welling out of chemical containers, especially calcium hydroxide dust. We want to test our product to see if it is NaOH. It should turn red litmus blue.


We will perform a bunch of operations in this lab.


  1. Heating our calcium hydroxide / sodium carbonate mixture to create calcium carbonate and sodium hydroxide.
  2. Filter out the calcium carbonate to collect the sodium hydroxide.
  3. Test our sodium hydroxide product for the properties of NaOH.

C3000: Experiments 172-173


Download Student Worksheet & Exercises


Here’s what’s going on in this experiment:


Ca (OH)2 +     Na2CO3 –>  2NaOH     +     CaCO3


Calcium hydroxide and sodium carbonate are combined in water and heated to produce sodium hydroxide and calcium carbonate


This is a double replacement reaction because the calcium ion and the sodium ion have swapped places


Cleanup: We are going to clean everything thoroughly after we finish the lab. After cleaning with soap and water, rinse thoroughly. Chemists use the rule of “three” in cleaning glassware and tools. After washing, chemists rinse out all visible soap and then rinse three times more.


Storage: Place cleaned tools and glassware in their respective storage places.


Disposal: Liquids must be neutralized with vinegar, if a base, or baking soda, if an acid, before washing them down the drain. Before actually washing them down the drain check again with litmus paper to ensure that they have been neutralized. Solids are thrown in the trash.


[/am4show]


Click here to go to next lesson on Combustion Reactions.


Ammonia has been used by doctors, farmers, chemists, alchemists, weightlifters, and our families since Roman times. Doctors revive unconscious patients, farmers use it in fertilizer, alchemists tried to use it to make gold, weightlifters sniff it into their lungs to invigorate their respiratory system and clear their heads prior to lifting tremendous loads. At home, ammonia is used to clean up the ketchup you spilled on the floor and never cleaned up.


The ammonia molecule (NH3) is a colorless gas with a strong odor – it’s the smell of freshly cleaned floors and windows. Mom is not cleaning with straight ammonia (it’s gas at room temperature because it boils at -28oF, so the stuff she cleans with is actually ammonium hydroxide, a solution of ammonia and water).  Ammonia is found when plans and animals decompose, and it’s also in rainwater, volcanoes, your kidneys (to neutralize excess acid), in the ocean, some fertilizers, in  Jupiter’s lower cloud decks, and trace amounts are found in our own atmosphere (it’s lighter than air).


[am4show have=’p8;p9;p25;p52;’ guest_error=’Guest error message’ user_error=’User error message’ ]


Ammonia is a strong base – it combines with acids to form salts:


NH3 + HCl –> NH4Cl


But ammonia also can act as a weak acid. Remember, an acid is a proton donor, as in this reaction with lithium, where the ammonia molecule donated one hydrogen atom:


2 Li + 2 NH3 –> 2 LiNH2 + H2


In this experiment, we make a stink and then we see something that will make us go ooooooh… and aaaaw. How fun is that? But you need to follow the instructions carefully and perform your experiment safely. Promise?


Ammonia will be generated by the combination of ammonium chloride and sodium carbonate. The amount of ammonia generated in this experiment is not a large amount. However, you really should experience this particular stink.


Materials:


  • 3 test tubes and rack
  • sodium carbonate (MSDS)
  • ammonium chloride (MSDS)
  • copper sulfate (MSDS)
  • sodium hydrogen sulfate (NaHSO4) (MSDS) Sodium hydrogen sulfate is very toxic. Respect it, handle it carefully and responsibly. Do not take it for granted.
  • water
  • test tube stopper
  • measuring spoon
  • gloves, goggles

NOTE: Be very careful when handling the sodium hydrogen sulfate – it’s highly corrosive and dangerous when wet.  Handle this chemical only with gloves, and be sure to read over the MSDS before using.


A chemical reaction is going to occur when the ammonium chloride, sodium chloride, and another chemical reaction is going to occur when the copper sulfate is added. These compounds are the reactants in our chemical reaction, and the blue liquid, CuCl (copper chloride), at the end of the experiment, will be our product. This experiment displays two types of reactions, a decomposition reaction when we combine ammonium chloride and sodium chloride, and a double replacement reaction when we add copper sulfate to the mixture.


C1000: Experiments 19-21


Download Student Worksheet & Exercises


When we combine ammonium chloride and sodium carbonate, ammonia will be produced. We will add copper sulfate to that mixture, producing two chemical compounds with totally different properties from those exhibited by the original chemicals.


Two chemical reactions will occur in this experiment:


(1)   When you add ammonium chloride and sodium chloride to the water, a decomposition reaction will occur that produces ammonia gas, carbon dioxide gas, and sodium chloride dissolved in water. It is identified as a decomposition reaction because the reactants breakdown into elements or simpler compounds.


NaHCO3 + 2NH4Cl –> NH3 + CO2 + NaCl + 2H2O


sodium carbonate + ammonium chloride –> ammonia + carbon dioxide + sodium chloride + water


(2)   The next reaction takes place when copper sulfate is added to the sodium chloride and water. The products of this reaction are sodium sulfate and copper chloride (the blue color). This reaction is identified as a double replacement reaction due to the fact that the two reactants break apart and recombine, the reactants trading parts, recombining to form two other different compounds with properties completely different than those of the reactants.


NaCl + CuSO4 –> NaSO4 + CuCl


sodium chloride + copper sulfate –> sodium sulfate + copper chloride


Big suggestion here: All chemical vapors are best experienced by “wafting”, a procedure that brings the vapor to you, instead of sticking your nose in the test tube, bringing you to the vapors. Please get in the habit of smelling properly. If ammonia vapors can bring unconscious people back to consciousness, you should probably make sure you are sniffing safely.


Reminder: Always wash your hands or gloves, and your chemistry tools, when switching from one chemical to another to avoid contamination that could affect the experiment adversely.


Store: Put all chemicals away in their proper places to keep them organized and ready to be used again. All tools should be put away as well, but make sure hat they have been cleaned and dried before storing them. A rule of thumb in chemistry is always wash something three times.


Disposal: Pour liquids down the drain using plenty of water. Throw solid waste into the outside garbage to prevent filling the house with bad smells.


[/am4show]


Click here to go to next lesson on Sodium Hydroxide.


Displacement: There are several different types of displacement reactions, including single, double, and acid-base.
An example of a single substitution reaction (A + BC  AC + B) occurs when zinc combines with hydrochloric acid. The zinc replaces the hydrogen: Zn + 2 HCl  ZnCl2 + H2


[am4show have=’p9;p52;p91;’ guest_error=’Guest error message’ user_error=’User error message’ ]


A double displacement (metathesis) reaction has two compounds exchanging bonds to form new compounds (AB + CD –> AD + CB). Antacids like calcium hydroxide (CaOH) combine with stomach acid (HCl) to form calcium chloride salt (CaCl2) and water (H2O).
CaOH + HCl  CaCl2 + H2O


[/am4show]


Click here to go to next lesson on Ammonia.

This experiment is for advanced students.


Brimstone is another name for sulfur, and if you’ve ever smelled it burn…..whoa….I’m telling you ….you will see for yourself in this lab. It is quite a smell, for sure. Sulfur is element #6 on the periodic table. Sulfur is used in fertilizer, black powder, matches, and insecticides. In pioneer times sulfur was put into patent medicines and used as a laxative.


To further the evil reputation of sulfur, or brimstone, when sulfur is burned in a coal fired power plant, sulfur dioxide is produced. The sulfur is spewed into the air, where it is reacts with moisture in the air to form sulfuric acid. The clouds get full and need to let go of this sulfuric acid. Down comes the acid rain to wreak havoc on the masonry and plant life below.


[am4show have=’p9;p52;p91;’ guest_error=’Guest error message’ user_error=’User error message’ ]


Materials:


  • Goggles
  • Gloves
  • Measuring spoon
  • Sulfur (MSDS)
  • Alcohol burner
  • Lighter
  • Test tube of O2

Be careful when bending the ends of your measuring spoon. Bend them where you need them and leave them alone. Continuing to bend, straighten, and re-bend will weaken the metal and cause your measuring spoon to break. We will do this experiment to compare the flames produced by burning sulfur in air and oxygen


C3000: Experiments: 36,60


Download Student Worksheet & Exercises


Here’s what’s going on in this experiment:


S + O2 –> SO2


Sulfur and oxygen are heated and sulfur dioxide is produced. This is a synthesis reaction because the sulfur and the oxygen react and form a new substance, sulfur dioxide. We see the flame of sulfur dioxide burn in air. Small flame, little smoke. When the flame is left lit and placed in the oxygen, the flame flares up and lots of white smoke is generated. It appears that sulfur’s flame burns brighter and stronger in pure oxygen.


Cleanup: We are going to clean everything thoroughly after we finish the lab. After cleaning with soap and water, rinse thoroughly. Chemists use the rule of “three” in cleaning glassware and tools. After washing, chemists rinse out all visible soap and then rinse three times more.


Storage: Place cleaned tools and glassware in their respective storage places.


Disposal: Liquids can be washed down the drain. Solids are thrown in the trash.


[/am4show]


Click here to go to next lesson on Displacement Reactions.


This reaction happens when simple compounds come together to form a more complicated compound.


The iron (Fe) in a nail combines with oxygen (O2) to form rust, also called iron oxide (Fe2O3).
2Fe + O2  Fe2O3


We’re about to do a synthesis reaction with sulfur. Sulfur is element #6 on the periodic table. Sulfur is used in fertilizer, black powder, matches, and insecticides. In pioneer times sulfur was put into patent medicines and used as a laxative.
[am4show have=’p9;p52;p91;’ guest_error=’Guest error message’ user_error=’User error message’ ]


To further the evil reputation of sulfur, or brimstone, when sulfur is burned in a coal fired power plant, sulfur dioxide is produced. The sulfur is spewed into the air, where it is reacts with moisture in the air to form sulfuric acid. The clouds get full and need to let go of this sulfuric acid. Down comes the acid rain to wreak havoc on the masonry and plant life below.


In our experiment, sulfur and oxygen are heated and sulfur dioxide is produced. This is a synthesis reaction because the sulfur and the oxygen react and form a new substance, sulfur dioxide. We see the flame of sulfur dioxide burn in air. Small flame, little smoke. When the flame is left lit and placed in the oxygen, the flame flares up and lots of white smoke is generated. It appears that sulfur’s flame burns brighter and stronger in pure oxygen.


[/am4show]


Click here to go to next lesson on Burning Sulfur.

Using ocean water (or make your own with salt and water), you can generate enough power to light up your LEDs, sound your buzzers, and turn a motor shaft. We’ll be testing out a number of different materials such as copper, aluminum, brass, iron, silver, zinc, and graphite to find out which works best for your solution.


This project builds on the fruit battery we made in Unit 8. This experiment is for advanced students.


The basic idea of electrochemistry is that charged atoms (ions) can be electrically directed from one place to the other. If we have a glass of water and dump in a handful of salt, the NaCl (salt) molecule dissociates into the ions Na+ and Cl-.


When we plunk in one positive electrode and one negative electrode and crank up the power, we find that opposites attract: Na+ zooms over to the negative electrode and Cl- zips over to the positive. The ions are attracted (directed) to the opposite electrode and there is current in the solution.


[am4show have=’p9;p47;p75;p76;p58;’ guest_error=’Guest error message’ user_error=’User error message’ ]


Here’s what you need:


  • water
  • salt
  • vinegar (distilled white)
  • bleach IMPORTANT: WEAR GOGGLES!
  • glass container (like a cleaned out jam jar)
  • electrodes
  • real silverware (not stainless)
  • shiny nail (galvanized)
  • large paper clip
  • dull nail (iron)
  • wood screws (brass)
  • copper pennies minted before 1982 (or a short section of copper pipe)
  • graphite from inside a pencil (use a mechanical pencil refill)
  • 2 alligator wires
  • digital multimeter


Download Student Worksheet & Exercises


Here’s what you do:


  1. Fill a cup with water, adding a teaspoon of salt, a teaspoon of distilled white vinegar, and a few drops of bleach.  NOTE: BE very careful with bleach!  Cap it and store as soon as you’ve added it to the cup.
  2. Find two of the following materials: copper*, aluminum*, brass, iron, silver, zinc, graphite (* indicates the ones that are easiest to start with – use a copper penny and a piece of aluminum foil). Attach an alligator clip lead to each one and dunk into your cup. Make sure these two metals DO NOT TOUCH in the solution.
  3. You’ve just made a battery!  Test it with your digital volt meter and make a note of the voltage reading. Connect the multimeter in series to read the current (remove a clip from the metal and clip it to one test probe, and attach the other test probe to the metal. Make sure you’re reading AMPS, not VOLTS when you note the reading for current).
  4. Test out different combinations of materials and note which gives the highest voltage reading for you. Is it enough to light an LED? Buzzer? Motor?  What if you made two of these and connected them in series? Three? Four?

Electrochemistry studies chemical reactions that generate a voltage and vice versa (when a voltage drives a chemical reaction), called oxidation and reduction (redox) reactions. When electrons are transferred between molecules, it’s a redox process.


Fruit batteries use electrolytes (solution containing free ions, like salt water or lemon juice) to generate a voltage. Think of electrolytes as a material that dissolves in water to make a solution that conducts electricity. Fruit batteries also need electrodes made of conductive material, like metal. Metals are conductors not because electricity passes through them, but because they contain electrons that can move. Think of the metal wire like a hose full of water. The water can move through the hose. An insulator would be like a hose full of cement – no charge can move through it.


You need two different metals in this experiment that are close, but not touching inside the solution. If the two metals are the same, the chemical reaction doesn’t start and no ions flow and no voltage is generated – nothing happens.


Exercises


  1. Which combination gives the highest voltage?
  2. What happens if you use two strips of the same material?
  3. What would happen if we used non-metal strips?

[/am4show]


Click here to go to next lesson on Synthesis Reaction .


Sterling silver is an alloy (a solid solution) of silver and copper. In order to find the percent of silver, you have to break it apart from the copper, which will make it an ion floating around in a liquid. Then you will need to bond it to something that will make it turn back into a solid so you can measure it.


[am4show have=’p9;p52;p91;’ guest_error=’Guest error message’ user_error=’User error message’ ]


[/am4show]


Click here to go to next lesson on Salty Battery.


This experiment is for advanced students. We’re going to look at the strength of redox reactions using copper, zinc, and acids.


[am4show have=’p9;p52;’ guest_error=’Guest error message’ user_error=’User error message’ ]


Materials:


  • shiny steel nails or zinc strip
  • calcuim chloride
  • copper sulfate
  • 3 test tubes with stoppers
  • distilled water
  • distilled vinegar
  • safety goggles and gloves


  1. Shine up your nails or zinc strip.
  2. Create a solution of copper sulfate and water in a test tube and insert the nail and let it sit for a few minutes.
  3. To a second test tube, add water and calcium chloride. Insert the shiny nail in to this test tube,
  4. To the third test tube, insert distilled white vinegar and add a nail.
  5. Look carefully at each test tube and compare your results with the original nail to see if the solution reacted with the nail.

We’re going to get zinc to react with different molecules in solution. You’re looking for a reaction that either changes the color of the nail, the solution, or forms tiny bubbles on the surface of the nail.


For the calcium carbonate, you’ll find tiny bubbles up and down the nail. The calcium ions are reduced and zinc ions are oxidized. For the copper sulfate, the nail changed color dramatically!


[/am4show]


Click here to go to next lesson on How much silver?

This experiment is for advanced students. We’re going to look at the strength of redox reactions using copper, zinc, and acids.


[am4show have=’p9;p52;’ guest_error=’Guest error message’ user_error=’User error message’ ]


Materials:


  • shiny steel nails or zinc strip
  • calcuim chloride
  • copper sulfate
  • 3 test tubes with stoppers
  • distilled water
  • distilled vinegar
  • safety goggles and gloves


  1. Shine up your nails or zinc strip.
  2. Create a solution of copper sulfate and water in a test tube and insert the nail and let it sit for a few minutes.
  3. To a second test tube, add water and calcium chloride. Insert the shiny nail in to this test tube,
  4. To the third test tube, insert distilled white vinegar and add a nail.
  5. Look carefully at each test tube and compare your results with the original nail to see if the solution reacted with the nail.

We’re going to get zinc to react with different molecules in solution. You’re looking for a reaction that either changes the color of the nail, the solution, or forms tiny bubbles on the surface of the nail.


For the calcium carbonate, you’ll find tiny bubbles up and down the nail. The calcium ions are reduced and zinc ions are oxidized. For the copper sulfate, the nail changed color dramatically!


[/am4show]


Click here to go to next lesson on Redox and Single Replacement Reactions.


Your silver turns black because of the presence of sulfur in food. Here’s how the cleaning works: The tarnished spoon has silver sulfide on it, and when you put it in the solution, the silver sulfide combines with the baking soda and salt in the water solution to break apart into sulfur (which gets deposited on the foil) and silver (which goes back onto the spoon). Using the heat from your stove, you’ve just relocated the tarnish from the spoon to the foil. Just rinse clean and wipe dry!


[am4show have=’p9;p52;p91;’ guest_error=’Guest error message’ user_error=’User error message’ ]


The reaction between silver sulfide and aluminum takes place when the two are in contact while they are immersed in a baking soda solution. The reaction is faster when the solution is warm. The solution carries the sulfur from the silver to the aluminum. The aluminum sulfide may adhere to the aluminum foil, or it may form tiny, pale yellow flakes in the bottom of the pan. The silver and aluminum must be in contact with each other, because a small electric current flows between them during the reaction. This type of reaction, which involves an electric current, is called an electrochemical reaction. Reactions of this type are used in batteries to produce electricity.


[/am4show]


Click here to go to next lesson on Redox Reaction Experiment.


The oxidation number of an element is the charge the atom has


I. For an atom in its elemental form the oxidation number is zero.
II. For any monatomic ion the oxidation number equals the charge of the ion.
III. For nonmetals the oxidation number is usually negative.
a) Oxygen is usually -2 in all compounds.
b) Fluorine is -1 in all compounds.
c) Hydrogen is +1 when bonded to nonmetals and -1 when bonded to metals (metal hydrides).
IV. The sum of the oxidation numbers for all atoms is zero for neutral
compounds or equals the charge for polyatomic ions.


[am4show have=’p9;p52;p91;’ guest_error=’Guest error message’ user_error=’User error message’ ]


[/am4show]


Click here to go to next lesson on Grandma’s Silver.

We already talked about how matter is anything that takes up space, like air, kittens, your left armpit… Mass can exist in different states. What are they?


Solid, liquid and gas. You also know about two more additional states: what are they? Plasma and BEC! Can matter exist in more than one state at a time? Sure – ever had a glass of water? That has liquid water and solid water molecules (ice) at the same time!


[am4show have=’p9;p52;p91;’ guest_error=’Guest error message’ user_error=’User error message’ ]


[/am4show]


Click here to go to next lesson on Scientific method.

These are the scientific concepts students learn, separated by grade level according to both the national standards for science and Aurora’s personal experience in working with kids for nearly two decades. The scientific concepts are organized into categories within each grade level. You’ll find some areas span more than one grade level, so you will see some experiments listed for multiple grade levels.

PRE-K & K

Material properties, introduction to forces and motion, plants and animals, and basic principles of earth science.

First Grade

States of matter, weather, sound energy, light waves, and experimenting with the scientific method.

Second Grade

Chemical reactions, polymers, rocks and minerals, genetic traits, plant and animal life cycles, and Earth's resources.

Third Grade

Newton's law of motion, celestial objects, telescopes, measure the climate of the Earth and discover the microscopic world of life.

Fourth Grade

Electricity and magnetism, circuits and robotics, rocks and minerals, and the many different forms of energy.

Fifth Grade

Chemical elements and molecules, animal and plant biological functions, heat transfer, weather, planetary and solar astronomy.

Sixth Grade

Heat transfer, convetion currents, ecosystems, meteorology, simple machines, and alternative energy.

Seventh Grade

Cells, genetics, DNA, kinetic and potential, thermal energy, light and lasers, and biological structures.

Eighth Grade

Acceleration, forces projectile motion chemical reactions, deep space astronomy, and the periodic table.

High School (Advanced)

Alternative energy, astrophysics, robotics, chemistry, electronics, physics and more. For high school & advanced 5-8th students.

Teaching Resources

Tips and tricks to getting the science education results you want most for your students.

Science Fair Projects

Hovercraft, Light Speed, Fruit Batteries, Crystal Radios, R.O.V Underwater Robots and more!


Chemical Data & Safe Handling Information Sheet

What do I really need to know first? First of all, the chemicals in this set should be stored out of reach of pets and children. Grab the chemicals right now and stuff them in a safe place where accidents can’t happen. Do this NOW! If you haven't already done so, make sure to watch the introductory video for the Intermediate Chemistry and Advanced Chemistry lessons. They contain important information about the chemicals and lab equipment you'll be using. When you’re done storing your chemicals out of reach, watch this video: [am4show have='p8;p9;p25;p52;' guest_error='Guest error message' user_error='User error message' ]
[/am4show]

Click here to go to next lesson on Chemistry fundamentals.


This unit on Chemistry is chocked full of demonstrations and experiments for two big reasons. First, they're fun. But more importantly, the reason we do experiments in chemistry is to hone your observational skills. Chemistry experiments really speak for themselves, much better than I can ever put into words or show you on a video. And I'm going to hit you with a lot of these chemistry demonstrations to help you develop your observing techniques.

[am4show have='p8;p9;p11;p38;p72;p77;p92;' guest_error='Guest error message' user_error='User error message' ]


In most standard chemistry lessons, a teacher walks in and says, "Now I will demonstrate the insolubility of barium sulfate by mixing equal volumes of zero point one molar barium chloride and zero point one molar sodium sulfate and observe what happens." Anyone still awake?

In this unit, you'll be mixing up things that bubble, ooze, slither, spit, change color, crystallize, and fizz. (I think there's even one that belches.) And rather than announcing things in a dull and boring fashion, I'm just going to outline the steps and ask YOU to notice any and all changes, no matter how strange or weird. Or small. Even a tiny temperature difference can indicate something big is about to happen.

Click here to go to next lesson on Safety Information.


[/am4show]


This is a recording of a recent live class I did with an entire high school astronomy class. I’ve included it here so you can participate and learn, too!


Light is energy that can travel through space. How much energy light has determines what kind of wave it is. It can be visible light, x-ray, radio, microwave, gamma or ultraviolet. The electromagnetic spectrum shows the different energies of light and how the energy relates to different frequencies, and that’s exactly what we’re going to cover in class. We’re going to talk about light, what it is, how it moves, and it’s generated, and learn how astronomers study the differences in light to tell a star’s atmosphere from  millions of miles away.


I usually give this presentation at sunset during my live workshops, so I inserted slides along with my talk so you could see the pictures better. This video below is long, so I highly recommend doing this with friends and a big bowl of popcorn. Ready?


[am4show have=’p8;p9;p11;p38;p96;’ guest_error=’Guest error message’ user_error=’User error message’ ]


Materials:


  • Hair (one strand)
  • Tape
  • Pencil
  • Ruler or yardstick
  • Paper
  • Calculator
  • Red laser
  • Flashlight
  • Glass of water
  • Large chocolate bar
  • Microwave
  • Plate
  • Orange highlighter
  • Diffraction grating OR use an old CD
  • Print out this worksheet to fill in as we go along!


[/am4show]


This is a recording of a recent live teleclass I did with thousands of kids from all over the world. I've included it here so you can participate and learn, too!

We’re going to be mixing up dinosaur toothpaste, doing experiments with catalysts, discovering the 5 states of matter, and building your own chemistry lab station as we cover chemical kinetics, phase shifts, the states of matter, atoms, molecules, elements, chemical reactions, and much more. We’re also going to turn liquid polymers into glowing putty so you can amaze your friends when it totally glows in the dark. AND make liquids freeze by heating them up (no kidding) using a scientific principle called supercooling,

Materials:
  • Chemistry Worksheet
  • Aluminum pie plate
  • Bowl
  • Clear glue or white glue
  • Disposable cups
  • Goggles & gloves
  • Hydrogen peroxide
  • OPTIONAL: Instant reusable hand warmer (containing sodium acetate )
  • Liquid soap
  • Popsicle sticks
  • Scissors or pliers
  • Sodium tetraborate (also called “Borax”)
  • Water bottle
  • Yeast
  • Yellow highlighter
  • Optional: If you want to see your experiments glow in the dark, you'll need a fluorescent UV black light (about $10 from the pet store - look in cleaning supplies under "Urine-Off" for a fluorescent UV light). UV flashlights and UV LEDs will not work.
[am4show have='p8;p9;p10;p11;p38;p37;' guest_error='Guest error message' user_error='User error message' ]
[/am4show]

Wa-hoo! You’ve completed the entire Chemistry Course!


[am4show have=’p9;p52;p91;’ guest_error=’Guest error message’ user_error=’User error message’ ]


[/am4show]


Imagine a plate of spaghetti. The noodles slide around and don’t clump together, just like the long chains of molecules (called polymers) that make up slime. They slide around without getting tangled up. The pasta by itself (fresh from the boiling water) doesn’t hold together until you put the sauce on. Slime works the same way. Long, spaghetti-like chains of molecules (called polymers) don’t clump together until you add the sauce – something that cross-links the molecule strands (polymer) together.
[am4show have=’p9;p52;p91;’ guest_error=’Guest error message’ user_error=’User error message’ ]


Scientists call this a non-Newtonian fluid. You can also fill an empty water bottle or a plastic test tube half-full with this stuff and cap it. Notice that when you shake it hard, the slime turns into a solid and doesn’t slosh around the tube. When you rotate the tube slowly, it acts like a liquid.


About 80% of the organic chemistry industry is devoted to making synthetic polymers. If you’re planning to become a chemical engineer, your chances of working with polymers is pretty high! You find polymers everywhere – plastic bottles are made of polyethylene, frying pans coated with teflon, clothes made from polyester, shoes from synthetic materials. There are two main categories of polymers – natural and synthetic. The ones I just mentioned are synthetic, like PVC and polystyrene foam. Natural polymers include DNA and cellulose.


A colloid is a mixture where one substance is suspended throughout another. When we make slime, the borax is the colloid and the borax-water solution is the colloidal suspension (borax will somewhat settle out after a bit of time, but some of it still remains dispersed in the water.) When you add a polymer (the glue), it forms a gel network and you get slime!


[/am4show]


Potassium perchlorate is usually safer than chlorate salt, but it sometimes is hard to get it. In the past, the only supplier in the US makes ammonium perchlorate, the oxidizer that was used with the space shuttle booster rockets, and each shuttle launch required 1.5 million pounds of it, which was twice the annual consumption rate, so when there were a lot of shuttle launches, the fireworks market took a hit and it was near impossible to get any potassium perchlorate.
[am4show have=’p9;p52;p91;’ guest_error=’Guest error message’ user_error=’User error message’ ]


Fireworks also have finders, which hold the mixture together, usually dextrin (a kind of starch).


Binders aren’t stable and are usually added when the firework is ready to go.


Fireworks can have regulators (metals) added to control the speed of the reaction.
Reducing agents like sulfur and charcoal, are used to burn the oxygen and make the hot gases and control the reaction speed.


[/am4show]


Chemists want to control not only what comes out of a chemical reaction, but how fast the reaction occurs. For example, scientists are working to slow down the depletion rate of the ozone in the upper level of our atmosphere, so we stay protected from harmful UV rays.


The rate of the chemical reaction of a nail rusting is slow compared to how fast baking soda reacts with vinegar. Different factors affect the speed of the reaction, but the main idea is that the more collisions between particles, the faster the reaction will take place.
[am4show have=’p9;p52;p91;’ guest_error=’Guest error message’ user_error=’User error message’ ]


A catalyst can also slow down a reaction. A catalytic promoter increases the activity, and a catalytic poison (also known as a negative catalyst, or inhibitor) decreases the activity of a reaction.


Catalysts offer a different way for the reactants to become products, and sometimes this means the catalyst reacts during the chemical reaction to form intermediates. Since the catalyst is completely regenerated before the reaction is finished, it’s considered ‘not used’ in the overall reaction.


A catalytic converter, like the one you’ll find on cars, takes harmful molecules that come out of the engine like hydrocarbons, carbon monoxide, and nitrogen oxide and converts it into harmless molecules that don’t hurt the environment. The catalyst in these is usually platinum and palladium and it converts carbon monoxide to carbon dioxide, hydrocarbons into carbon dioxide and water, and nitrogen oxide into nitrogen and oxygen, stuff we use to breathe in our atmosphere. The picture of the one in the upper left is from a diesel engine, and the image in the lower right is the kind you’ll find under your car connected to the tailpipe.


[/am4show]


Hydrolysis is a chemical reaction that happens when a molecule splits into two parts when water is added. One part gains a hydrogen (H+) and the other gets the hydroxyl (OH–) group. The reaction in the experiment forms starch from glucose, and when we add water, it breaks down the amino acid components just like the enzymes do in your stomach when they digest food.


[am4show have=’p9;p52;p91;’ guest_error=’Guest error message’ user_error=’User error message’ ]


[/am4show]


Displacement: There are several different types of displacement reactions, including single, double, and acid-base.
An example of a single substitution reaction (A + BC  AC + B) occurs when zinc combines with hydrochloric acid. The zinc replaces the hydrogen: Zn + 2 HCl  ZnCl2 + H2


[am4show have=’p9;p52;p91;’ guest_error=’Guest error message’ user_error=’User error message’ ]


A double displacement (metathesis) reaction has two compounds exchanging bonds to form new compounds (AB + CD –> AD + CB). Antacids like calcium hydroxide (CaOH) combine with stomach acid (HCl) to form calcium chloride salt (CaCl2) and water (H2O).
CaOH + HCl  CaCl2 + H2O


[/am4show]


This reaction happens when simple compounds come together to form a more complicated compound.


The iron (Fe) in a nail combines with oxygen (O2) to form rust, also called iron oxide (Fe2O3).
2Fe + O2  Fe2O3


We’re about to do a synthesis reaction with sulfur. Sulfur is element #6 on the periodic table. Sulfur is used in fertilizer, black powder, matches, and insecticides. In pioneer times sulfur was put into patent medicines and used as a laxative.
[am4show have=’p9;p52;p91;’ guest_error=’Guest error message’ user_error=’User error message’ ]


To further the evil reputation of sulfur, or brimstone, when sulfur is burned in a coal fired power plant, sulfur dioxide is produced. The sulfur is spewed into the air, where it is reacts with moisture in the air to form sulfuric acid. The clouds get full and need to let go of this sulfuric acid. Down comes the acid rain to wreak havoc on the masonry and plant life below.


In our experiment, sulfur and oxygen are heated and sulfur dioxide is produced. This is a synthesis reaction because the sulfur and the oxygen react and form a new substance, sulfur dioxide. We see the flame of sulfur dioxide burn in air. Small flame, little smoke. When the flame is left lit and placed in the oxygen, the flame flares up and lots of white smoke is generated. It appears that sulfur’s flame burns brighter and stronger in pure oxygen.


[/am4show]


A combustion reaction gives off energy, usually in the form of heat and light.  The reaction itself includes oxygen combining with another compound to form water, carbon dioxide, and other products.


A campfire is an example of wood and oxygen combining to create ash, smoke, and other gases. Here’s the reaction for the burning of methane (CH4) which gives carbon dioxide (CO2) and water (H2O):
CH4 + 2 O2  CO2 + 2 H2O
[am4show have=’p9;p52;p91;’ guest_error=’Guest error message’ user_error=’User error message’ ]


We will be creating hydrogen gas by making a heterogeneous mixture of zinc powder and calcium hydroxide and heat it. The hydrogen bubbles into test tube in a water bath. When we mix our test tube of hydrogen with the air the room, the hydrogen burns…it actually explodes. Our amounts are small, but you will witness a cool, small, explosion.


[/am4show]


If you guessed that electrochemistry has to do with electricity and chemistry, you’re right! But you might wonder how they work together. Back in 1800, William Nicholson and Johann Ritter were the first ones to split water into hydrogen and oxygen using electrolysis. (Soon afterwards, Ritter went on to figure out electroplating.) They added energy in the form of an electric current into a cup of water and captured the bubbles forming into two separate cups, one for hydrogen and other for oxygen.
[am4show have=’p9;p52;p91;’ guest_error=’Guest error message’ user_error=’User error message’ ]


The chemical reaction inside electrochemical cells is also a redox reaction. Batteries (also known as galvanic or voltaic cells) use a spontaneous chemical reaction inside to create energy. The acid inside the battery reacts with the metal electrodes (the plus and minus ends of the battery) to provide electricity (energy).


Most metals oxidize – the corrosion itself is the oxidative deterioration. You can protect metals from corrosion (but not completely) by inhibiting the oxidant (when you paint the surface or even allow a thin layer of oxide to form then seal it to protect it. You can also make a coating layer that isn’t affected by water or oxygen and use that to coat the metal surface (like coating iron with sodium chromate).


[/am4show]


Chemical equilibrium is the condition that happens when the concentration of the reactants and products don’t have any net change over time. This doesn’t mean that the reaction stops, just that the producing and consuming of the molecules is in balance.


Most chemical reactions are reversible, just like phases changes. Do you remember the hot icicle experiment? Do you remember how to get it back to the starting point? You have to add energy to the solid sodium acetate to turn it back into a liquid, so it can turn back into a solid again. Then let that experiment sit for a bit (overnight or about 12 hours) and in the morning, you’ll have crystals growing on your pipe cleaner. Now if you want to reverse this reaction, all you have to do is add energy to the system and the crystals will dissolve back into the solution. You can heat it up in the microwave or in a pot of water on the stove, and the crystals will disappear.
[am4show have=’p9;p52;p91;’ guest_error=’Guest error message’ user_error=’User error message’ ]


When your reaction is in equilibrium, you can do things to disturb it, like increasing the temperature or adding more of something. The system will respond and shift to account for these changes.


[/am4show]


Plasma makes up a very large percentage of the matter in the universe. Not much of it is on Earth and the plasma that is here is very short lived or stuck in a tube. Plasma is basically what happens when you add enough energy to a gas that the atoms move and vibrate around so energetically that they smack into each other and rip electrons off each other, so you have positively charged atoms (called ions) that lost their electrons, and also the electrons themselves which are negatively charged, all zinging around in the gas.
[am4show have=’p9;p52;p91;’ guest_error=’Guest error message’ user_error=’User error message’ ]


This gives the gas electrical properties that gases don’t usually have, so it’s classified as a different state of matter, or known as “ionized gas” – it’s gas that is electrically charged. The stuff in florescent light bulbs is plasma. Plasma TV’s have plasma inside of them. Lightning and sparks are actually plasma!


[/am4show]


Solids
What makes the solids, liquids, gases etc. different is basically the energy (motion) of the atoms. From BEC, where they are so low energy that they are literally blending into one another, to plasma, where they are so high energy they can emit light. Solids are the lowest energy form of matter that exist in nature (BEC only happens under laboratory conditions).


In solids, the atoms and molecules are bonded (stuck) together in such a way that they can’t move easily. They hold their shape. That’s why you can sit in a chair. The solid molecules hold their shape and so they hold you up. The typical characteristics that solids tend to have are they keep their shape unless they are broken and that they do not flow.


[am4show have=’p9;p52;p91;’ guest_error=’Guest error message’ user_error=’User error message’ ]


Elasticity is what allows you to bounce a basketball and shoot a rubber band across the room. All solids have some elasticity. A rubber band has a lot of elasticity, a diamond on the other hand has very little elasticity. Elasticity is basically the ability of solids to be stretched, twisted or squashed and come back to its original shape. You can stretch a rubber band quite a bit and when you stop stretching it comes back to the way it was. A basketball actually squashes a bit when it hits the sidewalk and when it unsquashes it bounces back up. If you stretch, twist or squash something beyond its elastic limit it will break or deform.


Imagine taking a rubber band, for example, and stretching it so much that it breaks. You’ve stretched it beyond its elastic limit and it broke. Another example, would be taking a wire pipe cleaner. If you bend it just a bit, it will bend back to its original shape. If you go to far, it stays in the new shape. You have bent it beyond its elastic limit.


[/am4show]


A liquid has a definite volume (meaning that you can’t compress or squish it into a smaller space), but takes the shape of its container. Think of a water-filled balloon. When you smoosh one end, the other pops out. Liquids are generally incompressible, which is what hydraulic power on heavy duty machinery (like excavators and backhoes) is all about.


[am4show have=’p9;p52;p91;’ guest_error=’Guest error message’ user_error=’User error message’ ]


[/am4show]


Here are the most important things about gases to remember:


  • Gases assume the shape and volume of their container.
  • Gases have lower densities than their solid or liquid phases.
  • Gases are more easily compressed than their solid or liquid phases.
  • Gases will mix completely and evenly when confined to the same volume.
  • All elements in Group VIII are gases. These gases are known as the noble gases.
  • Elements that are gases at room temperature and normal pressure are all nonmetals.

[am4show have=’p9;p52;p91;’ guest_error=’Guest error message’ user_error=’User error message’ ]


How do they make liquid helium, liquid oxygen, liquid nitrogen… atoms that are normally in the gases state?


The basic idea is that they compress the gas (remember the room full of ping pong balls? Now squish the room so it’s only half the size. Do the balls bounce faster or slower? Faster! So the temp increases.) When they compress the gas, it heats it up, so they cool it, then squish it even more to higher pressure and cool to near room temperature. They keep repeating this until it becomes a very high pressure, then finally they release the pressure (which is like suddenly expanding the squished room to the size of a football field), which makes the temperature drop way fast and the gas becomes extremely cold, condensing into a liquid.


[/am4show]


By knowing the value of the bond energy, we can predict if a chemical reaction will be exothermic or endothermic. If the bonds in the products are stronger than the bonds in the reactants, then the products are more stable and the reaction will give off heat (exothermic).


Exothermic chemical reactions release energy as heat, light, electrical or sound (or all four). Usually when someone says it’s an exothermic reaction, they usually just mean energy is being released as heat.


Some release heat gradually (for example, a disposable hand-warmer), while others are more explosive (like burning magnesium). The energy comes from breaking the bonds within the chemical reaction.


[am4show have=’p9;p52;p91;’ guest_error=’Guest error message’ user_error=’User error message’ ]


Other chemical reactions will just sit there and do nothing, unless you add energy to it first. These types of reactions need to absorb energy in order to react, so you’ll notice a temperature drop when the reaction takes place (a disposable ice pack, for example, is a chemical reaction that takes place using the energy from the water, so it makes the water colder when it uses this energy).


[/am4show]


A molecule is the smallest unit of a compound that still has the compound’s properties attached to it. Molecules are made up of two or more atoms held together by covalent bonds.


In the space where electrons from different atoms interact with each other, chemical bonds form. The electrons in the outermost shell are the ones that form the bonds with other atoms.


When the atoms share the electron(s), a covalent bond is formed. Electrons aren’t perfect, though, and usually an electron is more attracted to one atom than another, which forms a polar covalent bond between atoms (like in water, H2O).


While it may seem a bit random right now, with a little bit of study, you’ll find you can soon understand how molecules are formed and the shapes they choose once you figure out the types of bonds that can form.


[am4show have=’p9;p52;p91;’ guest_error=’Guest error message’ user_error=’User error message’ ]


Let’s take an example:


Why does ice float? In the water molecule (H2O) is held together by polar covalent bonds. Water molecules are also attracted to each other by weak (hydrogen) bonds between the atoms. As water cools below 4°C, the hydrogen bonds forms a hexagonal crystal lattice (known as ‘ice’). The solid form of water is a larger structure than the liquid form, as the crystal structure has a hole in the center. In other words, ice takes up about 9% more space than liquid water, so a liter of ice weighs less than a liter water. By peeking into the molecules closely, you can explain why ice is one of the very few solids that is lighter than its liquid form.


Water is also a polar molecule, which happens because one end of the molecule has slightly more charge than the other end.


When two different kinds of atoms, like oxygen and hydrogen form a bond, one attracts the shared pair of electrons more strongly than the other. (When a bond forms between two of the same kind of atom do we assume the attraction is equal, so atoms like O2 and N2 are not polar).


[/am4show]


There are different kinds of bonds that can form in a molecule. When two atoms approach each other close enough for their electron clods to interact, the electrons of one repels the electrons in the other, and the same thing happens within the nucleus of the atoms. At the same time, each atom’s negatively charged electron is attracted to the other atom’s positively charged nucleus. If the atoms still come closer, the attractive forces offset the repulsive and the energy of the atom decreases and bonds are formed – the atom sticks together. When the energy decrease is small, the bonds are van der Waals. When the energy decrease is larger, we have chemical bonds, either ionic or covalent.


[am4show have=’p9;p52;p91;’ guest_error=’Guest error message’ user_error=’User error message’ ]


Ionic bonds generally involve metals from the left side of the periodic table that interact with nonmetals from the far right side. Look at your periodic table now – do you see the atoms near the rare gases? Those usually form ions. Covalent bonds form when elements lie closer to one anther in the periodic table. Most chemical bonds are somewhere between purely ionic and purely covalent.


Ionic compounds aren’t really real molecules. When ionic compounds are solids, they are really a structure of charged particles. When one atom accepts or donates an electron to another atom, an ionic bond is formed, like in table salt (NaCl). Do you see how there’s only 1 electron in sodium in the outermost shell? And notice how chlorine has seven, not 8 in the outermost shell? Chlorine wants to feel full (8), and sodium has only 1 out of the 8, so it donates it to chlorine. Not all atoms hold onto their valence electrons with equal strength.


[/am4show]


You’re going to try to determine what is happening during the flame test when you see different colors. Think about what particles are found in the chemicals you’re using, and why the different chemicals emit different colors of light? Where else have you seen colorful light emissions?


[am4show have=’p9;p52;p91;’ guest_error=’Guest error message’ user_error=’User error message’ ]


[/am4show]


Did you aim your razor slit at a light source such as a fluorescent light, neon sign, sunset, light bulb, computer screen, television, night light, candle, fireplace… ? Make sure that the diffraction grating does right up to your eye.  Move the spectrometer around until you can get the rainbow to be on the scale inside the tube.


Once you’ve got the hang of it, you might be wondering, wow – cool… but what am I looking at exactly? Ok – so those lines you saw inside the tube – those are spectral lines. Can you see how there are brighter lines? Which frequencies are those? Well we need a ruler to measure those. Can you see how if we lined up a ruler as could tell what the frequencies are?


[am4show have=’p9;p52;p91;’ guest_error=’Guest error message’ user_error=’User error message’ ]


What other light sources work? Use your spectrometer to look at computer screens, laptops, night lights, neon lights, candles, campfires, fluorescent lights, incandescent lights, LEDs, stoplights, street lights, and any other light sources you can find. When you walk down town at night and look at various “neon” signs.


[/am4show]


Energy can take one of two forms: matter and light (called electromagnetic radiation). Light is energy that can travel through space. When you feel the warmth of the sun on your arm, that’s energy from the sun that traveled through space as infrared radiation (heat). When you see a tree or a bird, that’s light from the sun that traveled as visible light (red, orange… the whole rainbow) reflecting and bouncing off objects to get to your eye. Light can travel through objects sometimes… like the glass in a window.


Light can take the form of either a wave or a particle, depending on what you’re doing with it. It’s like a reversible coat – fleece on the inside, windbreaker on the outside. It can adapt to whatever environment you put it in.
[am4show have=’p9;p52;p91;’ guest_error=’Guest error message’ user_error=’User error message’ ]


When Einstein aimed a red light at the metal sheet, nothing happened.  Even when he cranked the intensity (brightness) of the red light, still nothing happened.  So it was the energy of the light (wavelength, or color), not the number of photons (brightness or intensity) that made the electrons eject from the plate. This is called the ‘photoelectric effect’. A UV light makes ever more electrons jump off the plate!


[/am4show]