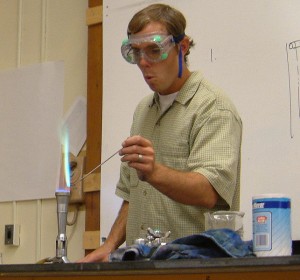
This is a recording of a recent live teleclass I did with thousands of kids from all over the world. I’ve included it here so you can participate and learn, too! (Click here if you’re looking for the more recent version that also includes Chemical Engineering.)


When you think of slime, do you imagine slugs, snails, and puppy kisses? Or does the science fiction film The Blob come to mind? Any way you picture it, slime is definitely slippery, slithery, and just plain icky — and a perfect forum for learning real science. But which ingredients work in making a truly slimy concoction, and why do they work? Let’s take a closer look…


Materials:


  • Sodium tetraborate (also called “Borax” – it’s a laundry whitener) – about 2 tablespoons
  • Clear glue or white glue (clear works better if you can find it) – about 1/2 cup
  • Yellow highlighter
  • Pliers or sharp razor (with adult help). (PREPARE: Use this to get the end off your highlighter before class starts so you can extract the ink-soaked felt inside. Leave the felt inside highlighter with the end loosely on (so it doesn’t dry out))
  • Resuable Instant Hand Warmer that contains sodium acetate (Brand Name: EZ Hand Warmer) – you’ll need two of these
  • Scissors
  • Glass half full of COLD water (PREPARE: put this in the fridge overnight)
  • Mixing bowl full of ice (PREPARE: leave in freezer)
  • Salt
  • Disposable aluminum pie place or foil-wrapped paper plate
  • Disposable cups for solutions (4-6)
  • Popsicle sticks for mixing (4-6)
  • Rubber gloves for your hands
  • Optional: If you want to see your experiments glow in the dark, you’ll need a fluorescent UV black light (about $10 from the pet store – look in cleaning supplies under “Urine-Off” for a fluorescent UV light). UV flashlights and UV LEDs will not work.

[am4show have=’p8;p9;p11;p38;p101;’ guest_error=’Guest error message’ user_error=’User error message’ ]


Key Concepts

If you’ve ever mixed together cornstarch and water, you know that you can get it to be both a liquid and a solid at the same time. (If you haven’t you should definitely try it! Use a 2:1 ratio of cornstarch:water.) The long molecular chains (polymers) are all tangled up when you scrunch them together (and the thing feels solid), but the polymers are so slick that as soon as you release the tension, they slide free (and drips between your fingers like a liquid).


Scientists call this a non-Newtonian fluid. You can also fill an empty water bottle or a plastic test tube half-full with this stuff and cap it. Notice that when you shake it hard, the slime turns into a solid and doesn’t slosh around the tube. When you rotate the tube slowly, it acts like a liquid.


Long, spaghetti-like chains of molecules (called polymers) don’t clump together until you cross-link the molecule strands (polymers) together into something that looks more like a fishnet. This is how we’re going to make slime.


What’s Going On?

Imagine a plate of spaghetti. The noodles slide around and don’t clump together, just like the long chains of molecules (called polymers) that make up slime. They slide around without getting tangled up. The pasta by itself (fresh from the boiling water) doesn’t hold together until you put the sauce on. Slime works the same way. Long, spaghetti-like chains of molecules don’t clump together until you add the sauce – something to cross-link the molecule strands together.


The borax mixture holds the glue mixture together in a gloppy, gelatinous mass. In more scientific terms, the sodium tetraborate cross-links the long polymer chains in the glue to form the slime.


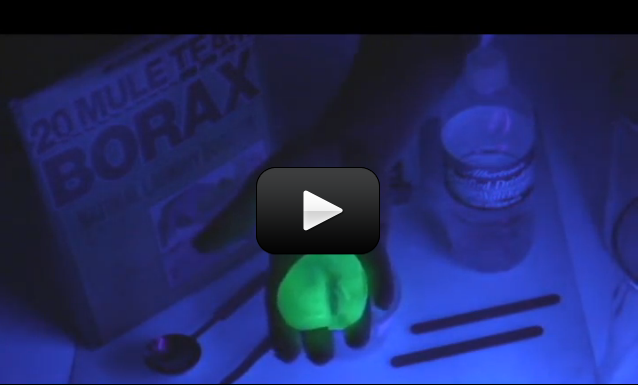
Why does the slime glow? Note that a black light emits high-energy UV light. You can’t see this part of the spectrum (just as you can’t see infrared light, found in the beam emitted from the remote control to the TV), which is why “black lights” were named that. Stuff glows because fluorescent objects absorb the UV light and then spit light back out almost instantaneously. Some of the energy gets lost during that process, which changes the wavelength of the light, which makes this light visible and causes the material to appear to glow.


Questions to Ask

  1. What happens when you freeze your slime? Is there a color change?
  2. How long does it take to thaw your slime in the microwave?
  3. Do you see the little bubbles in your slime?
  4. How many states of matter do you have in your slime now?
  5. Does this work with any laundry detergent, or just borax?
  6. What happens if you omit the water in the 50-50- glue-water mixture, and just use straight glue? (Hint – use the glow juice with the borax to keep the glowing feature.)
  7. Does your slime pick up newsprint from a newspaper?
  8. What other kinds of glue work well with this slime?

[/am4show]


Chemical Data & Safe Handling Information Sheet

What do I really need to know first? First of all, the chemicals in this set should be stored out of reach of pets and children. Grab the chemicals right now and stuff them in a safe place where accidents can’t happen. Do this NOW! When you’re done storing your chemicals out of reach, come back and download this Chemical Safety Sheet AND watch this video.


Click here to Download the Chemical Safety Information!

[/am4show]


This is one of those 'chemistry magic show' type of experiments to wow your friends and family. Here's the scoop: you take a cup of clear liquid, add it to another cup of clear liquid, stir for ten seconds, and you'll see a color change, a state change from liquid to solid, and you can pull a rubber-like bouncy ball right out of the cup.

If you have trouble locating the ingredients, you can order them online here:

  • Sodium Silicate (from Unit 3)
  • Ethyl Alcohol (check your pharmacy)
  • Disposable cups (at least two - and don't use your kitchen glassware, as you'll never get it clean again)
  • Popsicle sticks (again, use something disposable to stir with)


Download Student Worksheet & Exercises

1. In one cup, measure four tablespoons of sodium silicate solution (it should be a liquid). Sodium silicate can be irritating to the skin for some people, so wear rubber gloves when doing this experiment!

2. Measure 1 tablespoon of ethyl alcohol into a second cup. Ethyl alcohol is extremely flammable—cap it and keep out of reach when not in use.

3. Pour the alcohol into the sodium silicate solution and stir with a Popsicle stick.

4. You’ll see a color change (clear to milky-white) and a state change (liquid to a solid clump.

5. Using gloves, gather up the polymer ball and firmly squeeze it in your hands.

6. Compress it into the shape you want—is it a sphere, or do you prefer a dodecahedron?

7. Bounce it!

8. Be patient when squeezing the compound together. If it breaks apart and crumbles, gather up the pieces and firmly press together.

Store your bouncy ball in a Ziploc bag!

What’s Going On?

Silicones are water repellent, so you’ll find that food dye doesn’t color your bouncy ball. You’ll find silicone in greases, oils, hydraulic fluids, and electrical insulators.

The sodium silicate is a long polymer chain of alternating silicon and oxygen atoms. When ethanol (ethyl alcohol) is added, it bridges and connects the polymer chains together by cross-linking them.

Think of a rope ladder—the wooden rungs are the cross-linking agents (the ethanol) and the two ropes are the polymer chains (sodium silicate).

Safety information for Sodium Silicate: MSDS.

Questions to Ask

1. Before the reaction, what was the sodium silicate like? Was it a solid, liquid, or gas? What color was it? Was it slippery, grainy, viscous, etc.?

2. What was the ethanol like before the reaction?

3. How is the product (the bouncy ball) different from the two chemicals in the beginning?

4. Was the bouncy ball  the only molecule that was formed?

5.  Was this reaction a physical or chemical change?

Did you know? Silly putty is actually a mixture of silicone and chalk!


When you think of slime, do you imagine slugs, snails, and puppy kisses? Or does the science fiction film The Blob come to mind? Any way you picture it, slime is definitely slippery, slithery, and just plain icky — and a perfect forum for learning real science.


But which ingredients work in making a truly slimy concoction, and why do they work? Let’s take a closer look…


Imagine a plate of spaghetti. The noodles slide around and don’t clump together, just like the long chains of molecules (called polymers) that make up slime. They slide around without getting tangled up. The pasta by itself (fresh from the boiling water) doesn’t hold together until you put the sauce on. Slime works the same way. Long, spaghetti-like chains of molecules don’t clump together until you add the sauce … until you add something to cross-link the molecule strands together.


The sodium-tetraborate-and-water mixture is the “spaghetti” (the long chain of molecules, also known as a polymer), and the “sauce” is the glue-water mixture (the cross-linking agent). You need both in order to create a slime worthy of Hollywood filmmakers.


[am4show have=’p8;p9;p18;p45;p101;’ guest_error=’Guest error message’ user_error=’User error message’ ]


Materials:


  • popsicle sticks
  • water
  • disposable cups
  • borax (laundry whitener)
  • clear glue (or glue gel) or white glue
  • yellow highlighter
  • measuring spoons
  • scissors
  • UV black light


Download Student Worksheet & Exercises


To make this slime, combine ½ cup of water with 1 teaspoon of sodium tetraborate (also known as ‘Borax’) in a cup and stir with a popsicle stick.


In another cup, mix equal parts white glue and water. Add a glob of the glue mixture to the sodium tetraborate mixture. Stir for a second with a popsicle stick, then quickly pull the putty out of the cup and play with it until it dries enough to bounce on the table (3 to 5 minutes). Pick up an imprint from a textured surface or print from a newspaper, bounce and watch it stick, snap it apart quickly and ooze it apart slowly …


To make glowing slime, add one simple ingredient to make your slime glow under a UV light (or in sunlight)! You’ll need to extract the dye from the felt of a bright yellow highlighter pen and use the extract instead of water. (Simply cut open the pen and let water trickle over the felt into a cup: instant glow juice.) For the best slime results, substitute clear glue or glue gel for the white glue.


Don’t forget: You’ll need a long-wave UV source (also known as a “black light”) to make it glow (fluorescent lights tend to work better than incandescent bulbs or LEDs) – check the shopping list for where to get one. This slime will glow faintly in sunlight, because you get long-wave UV light from the sun — it’s just that you get all the other colors, too, making it hard to see the glow.


Is your slime a solid, a liquid, or a bubbly gas? The best slimes we’ve seen have all three states of matter simultaneously: solid chunks suspended in a liquidy form with gas bubbles trapped inside. Yeecccccch!!


What other stuff glows under a black light? Loads of stuff! There are a lot of everyday things that fluoresce (glow) when placed under a black light. Note that a black light emits high-energy UV light. You can’t see this part of the spectrum (just as you can’t see infrared light, found in the beam emitted from the remote control to the TV), which is why “black lights” were named that. Stuff glows because fluorescent objects absorb the UV light and then spit light back out almost instantaneously. Some of the energy gets lost during that process, which changes the wavelength of the light, which makes this light visible and causes the material to appear to glow. (More on this in Unit 9.)


How to Make Glow Juice

You can add glow juice in place of water in any experiment. Here’s how you make the glow juice by itself:


Moon Blob

moonblobThe most slippery substance on the planet, this dehydrated gel is a super-slippery, super long polymer chain of molecules that will actually climb up and out of your container if you don’t use a lid.  This slime is sensitive to light, temperature, and concentration (the amount of water you use) so if yours isn’t very responsive, check those three things.
Mixing this gel takes at least two days, and when you do it, make only a half recipe so you can make adjustments if yours isn’t quite right. We use ours on ‘Slip and Slides’ instead of water for a super-fun ride! (Hint – don’t try to stand, or you’ll break your arm when you crash!)


[/am4show]


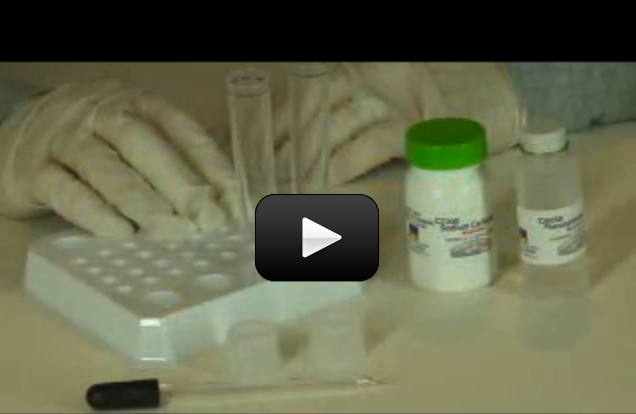
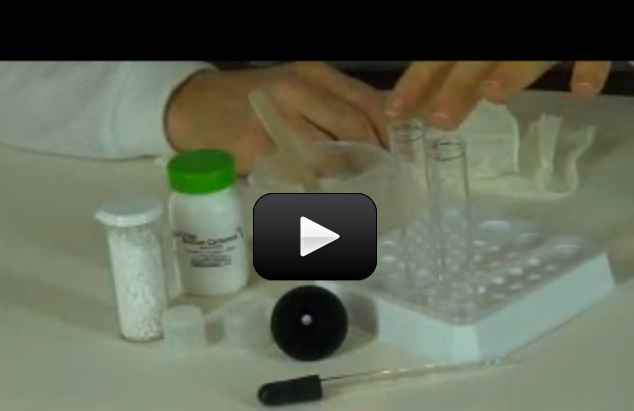
Phenolphthalein is a weak, colorless acid that changes color when it touches acidic (turns orange) or basic (turns pink/fuchsia) substances. People used to take it as a laxative (not recommended today, as ingesting high amounts may cause cancer). Use gloves when handling this chemical, as your skin  can absorb it on contact. I’ll show you how:


[am4show have=’p8;p9;p18;p45;p80;’ guest_error=’Guest error message’ user_error=’User error message’ ]
Materials:


  • 2 test tubes
  • sodium carbonate (washing soda)
  • phenolphthalien (liquid)
  • medicine dropper
  • water
  • test tube stoppers
  • gloves and goggles


Download Student Worksheet & Exercises


Sprinkle a tiny amount of sodium carbonate into the bottom of your test tube. Fill your test tube partway with water (the solution should still be clear). Add a few drops of phenolphthalein (which is clear inside the dropper), cap, and shake.


[/am4show]


You can use this as real ink by using it BEFORE you combine them together like this: dip a toothpick into the first solution (sodium ferrocyanide solution) and with the tip write onto a sheet of paper.


While the writing is drying, dip a piece of paper towel int other solution (ferric ammonium sulfate solution) and gently blot along where you wrote on the paper… and the color appears as blue ink. You can make your secret message disappear by wiping a paper towel dipped in a sodium carbonate solution.


You can also grow purple, gold, and red crystals with these chemicals… we’ll show you how!


Materials:


  • sodium ferrocyanide
  • ferric ammonium sulfate
  • 2 test tubes
  • distilled water
  • goggles and gloves
  • water

[am4show have=’p8;p9;p18;p45;p80;’ guest_error=’Guest error message’ user_error=’User error message’ ]


Download Student Worksheet & Exercises


CAUTION: Do not mix sodium ferrocyanide with any other chemical other than specified here, as it can produce hydrogen cyanide gas, which is lethal. Handle this chemical with care, wear gloves, and keep it locked away when not in use.


Measure out a tiny bit of sodium ferrocyanide into a test tube filled partway with water. You want to add enough of the crystals so that when you shake the solution (with the cap on), all of the crystals dissolve into the water and make a saturated solution.


Into a second test tube, dissolve another tiny bit of ferric ammonium sulfate in water, adding just enough to make a saturated solution. When you’re ready, pour one test tube into the other and note the change!


Bonus Experiment Idea! You can grow yellow-gold crystals by cooling off a cup of hot water. Here’s how: into a test tube, add 40 drops of hot water and 1 small spoon measure of sodium ferrocyanide. Suspend a small pebble attached to a thread into the test tube (this is your starter-seed for your crystals to attach to). If after a day or two your crystals aren’t growing, just reheat the solution and add a little bit more of the chemical. To grow purple crystals, use ferric ammonium sulfate instead of the sodium ferro-cyanide. You can also use 2 spoonfuls of cobalt chloride in a fresh test tube to grow red-colored crystals.


ANOTHER Bonus Experiment Idea!Mix 1/3 measure of ferric ammonium sulfate and 1/3 measure of sodium Ferro-cyanide in a glass 1/2 full of water. To another glass 1/2 full of water, add 5 drops of phenolphthalein solution. In an empty glass put 1 spoonful of sodium silicate powder and 2 spoonfuls of water. Pour the contents of these last two glasses into the first glass, stir and watch what happens.
[/am4show]


Dissolving calcium chloride is highly exothermic, meaning that it gives off a lot of heat when mixed with water (the water can reach up to 140oF, so watch your hands!). The energy released comes from the bond energy of the calcium chloride atoms, and is actually electromagnetic energy.


When you combine the calcium chloride and sodium carbonate solutions, you form the new chemicals sodium chloride (table salt) and calcium carbonate. Both of these new chemicals are solids and “fall out” of the solution, or precipitate. If you find that there is still liquid in the final solution, you didn’t have quite a saturation solution of one (or both) initial solutions.


[am4show have=’p8;p9;p18;p45;p91;’ guest_error=’Guest error message’ user_error=’User error message’ ]


Materials:


  • calcium chloride (AKA: “ice melt” or “Dri-EZ”)
  • sodium carbonate (AKA: “washing soda”)
  • two disposable cups
  • two test tubes with caps
  • medicine dropper
  • distilled water
  • goggles and gloves


Download Student Worksheet & Exercises


Mix up a saturated solution of calcium chloride in one test tube and a saturated solution of sodium carbonate in the other. Here’s how to do this:


Sprinkle 1 teaspoon of calcium chloride into a disposable cup. Add in a few tablespoons of water and stir, dissolving as much of the solid into the water as possible. Add more calcium chloride until you see bits of it at the bottom that refuse to dissolve. Now pour only the liquid into your test tube; the liquid is your saturated solution. Do the same for the sodium carbonate.


Do the test tubes feel hot or cold? Pour one test tube into another.


Instant solid.


Calcium chloride is hygroscopic (absorbs moisture), exothermic (releases heat when melted or dissolved), and deliquescent (dissolves in the moisture it absorbs and retains it for a long time).


[/am4show]


I mixed up two different liquids (potassium iodide and a very strong solution of hydrogen peroxide) to get a foamy result at a live workshop I did recently. See what you think!


Note: because of the toxic nature of this experiment, it’s best to leave this one to the experts.


Nurses will put hydrogen peroxide on a cut to kill germs. It’s also used in rocket fuel as an oxidizer. The hydrogen peroxide in your grocery store is a weak 3% solution. The hydrogen peroxide used here is 10X stronger than the grocery store variety. The KI (potassium iodide) is the catalyst in the experiment which speeds up the decomposition of the hydrogen peroxide. This is an exothermic reaction (gives off heat).


What state of matter is fire? Is it a liquid? I get that question a LOT, so let me clarify. The ancient scientists (Greek, Chinese… you name it) thought fire was a fundamental element. Earth, Air Water, and Fire (sometimes Space was added, and the Chinese actually omitted Air and substituted Wood and Metal instead) were thought to be the basic building blocks of everything, and named it an element. And it’s not a bad start, especially if you don’t have a microscope or access to the internet.


Today’s definition of an element comes from peeking inside the nucleus of an atom and counting up the protons. In a flame, there are lots of different molecules from NO, NO2, NO3, CO, CO2, O2, C… to name a few. So fire can’t be an element, because it’s made up of other elements. So, what is it?


[am4show have=’p8;p9;p18;p45;p91;p101;’ guest_error=’Guest error message’ user_error=’User error message’ ]


Fire is a combination of different gases and hot plasma. It’s a complicated exothermic (gives off heat) chemical reaction that releases a lot of heat and light (you can feel and see the flame). You need three things for a flame: oxygen, fuel, and a spark. When you take away one of these three, you snuff the flame and stop the chemical reaction. You start with fuel (usually contains carbon), and add oxygen to get carbon dioxide, carbon monoxide, nitric oxide, and many other gases and leftover ash. Most flames are hot enough to heat the gas mixture to create tiny bits of plasma within the flame, so fire is actually involved in two states of matter.


In this experiment, we’re going to see how you can protect a surface from burning using water. Are you ready?


Materials:


  • Shallow baking dish
  • Tongs
  • Rubbing Isopropyl Alcohol (50-91%)
  • Water (omit if using 50-70% alcohol)
  • Dollar bill
  • Fire extinguisher
  • Adult help


Download Student Worksheet & Exercises


What’s going on? Alcohol burns with a slightly blue and orange flame (as shown in the video). The secret to keeping the dollar bill from burning is the water you mixed in with the alcohol. Water has a high heat capacity, which means that the water absorbs the energy from the flame and keep the bill from catching on fire. If you dipped the dollar bill in pure 100% alcohol, the temperature would rise high enough on the bill to burn. The reason we chose a bill instead of regular paper is that the dollar bill is a combination of linen and paper, making it much stronger and absorbent for this experiment.


You need both the water and the alcohol for this experiment. The water, as it absorbs the energy from the flame, heats up to its boiling point and then vaporizes, keeping the bill cool enough to not catch on fire. The alcohol is the fuel needed to keep the flame going. It’s a delicate balance between the two, but here are a couple of variations you can try out:


  • You can change the color of the flame by adding in a sprinkling of salt (for yellow), boric acid (for green), or epsom salt (for white).
  • You can also try mixing different ratios of water to alcohol, using 50%, 70% and 91% isopropyl alcohol. You can also try ethyl alcohol (which is an entirely different molecule) but will react about the same with this experiment. Note that if you decrease the water content too much, you’re going to lose your dollar bill.

[/am4show]


h2o2This experiment below is for advanced students. If you’ve ever wondered why hydrogen peroxide comes in dark bottles, it’s because the liquid reacts with sunlight to decompose from H2O2 (hydrogen peroxide) into H2O (water) and O2 (oxygen). If you uncap the bottle and wait long enough, you’ll eventually get a container of water (although this takes a LOOONG time to get all of the H2O2 transformed.)
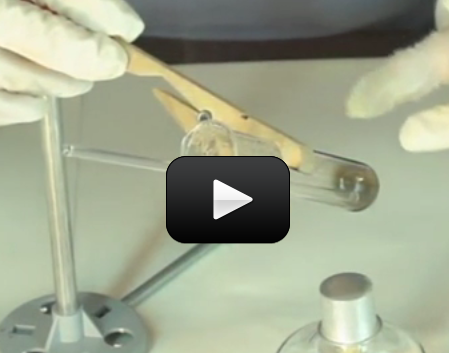
Here’s a way to speed up the process and decompose it right before your eyes. For younger kids, you can modify this advanced-level experiment so it doesn’t involve flames. Here’s what you do:


[am4show have=’p9;p45;p91;’ guest_error=’Guest error message’ user_error=’User error message’ ]


Materials:


  • hydrogen peroxide
  • empty water bottle
  • balloon
  • charcoal piece

Want to do this experiment with a more dramatic flair?  Try speeding it up as shown in the video below.


IMPORTANT: DO NOT DRINK ANYTHING FROM THIS LAB!!


Pour hydrogen peroxide into an empty plastic water bottle. Add a scoop of activated charcoal (you can also smash regular charcoal with a hammer to get it to fit – the smaller the bits, the better it will work, but make sure you do NOT use charcoal pre-soaked in lighter fluid). Cap your bottle with a helium-quality latex balloon and set aside.  After several hours, you will have a balloon filled with oxygen.


[/am4show]


This experiment is for advanced students.Have you ever taken a gulp of the ocean? Seawater can be extremely salty! There are large quantities of salt dissolved into the water as it rolled across the land and into the sea. Drinking ocean water will actually make you thirstier (think of eating a lot of pretzels). So what can you do if you’re deserted on an island with only your chemistry set?


Let me show you how to take the salt out of water with this easy setup.


[am4show have=’p9;p45;p68;p80;p82;’ guest_error=’Guest error message’ user_error=’User error message’ ]


Materials:


  • salt
  • water
  • alcohol burner
  • flask with one-hole stopper
  • stand with wire mesh screen
  • two 90-degree glass pipes
  • flexible tubing
  • ring stand with clamp
  • lighter with adult help


[/am4show]


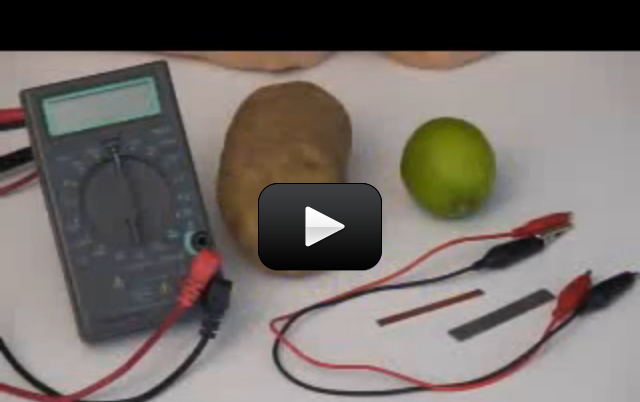
This experiment shows how a battery works using electrochemistry. The copper electrons are chemically reacting with the lemon juice, which is a weak acid, to form copper ions (cathode, or positive electrode) and bubbles of hydrogen.


These copper ions interact with the zinc electrode (negative electrode, or anode) to form zinc ions. The difference in electrical charge (potential) on these two plates causes a voltage.


Materials:


  • one zinc and copper strip
  • two alligator wires
  • digital multimeter
  • one fresh large lemon or other fruit

[am4show have=’p8;p9;p18;p45;p76;p91;p58;’ guest_error=’Guest error message’ user_error=’User error message’ ]


Download Student Worksheet & Exercises


Roll and squish the lemon around in your hand so you break up the membranes inside, without breaking the skin or leaking any juice. If you’re using non-membrane foods, such as an apple or potato, you are all ready to go.


Insert the copper and zinc strips into the lemon, making sure they do not contact each other inside. Clip one test wire to each metal strip using alligator wires to connect to the digital multimeter. Read and record your results.


What happens when you gently squeeze the lemon? Does the voltage vary over time?


You can try potatoes, apples, or any other fruit or vegetable containing acid or other electrolytes. You can use a galvanized nail and a copper penny (preferably minted before 1982) for additional electrodes.


If you want to light a light bulb, try using a low-voltage LED in the 1.7V or lower hooked up to several lemons connected in series. For comparison, you’ll need about 557 lemons to light a standard flashlight bulb.


What’s going on?


The basic idea of electrochemistry is that charged atoms (ions) can be electrically directed from one place to the other. If we have a glass of water and dump in a handful of salt, the NaCl (salt) molecule dissociates into the ions Na+ and Cl-.


When we plunk in one positive electrode and one negative electrode and crank up the power, we find that opposites attract: Na+ zooms over to the negative electrode and Cl- zips over to the positive. The ions are attracted (directed) to the opposite electrode and there is current in the solution.


Electrochemistry studies chemical reactions that generate a voltage and vice versa (when a voltage drives a chemical reaction), called oxidation and reduction (redox) reactions. When electrons are transferred between molecules, it’s a redox process.


Fruit batteries use electrolytes (solution containing free ions, like salt water or lemon juice) to generate a voltage. Think of electrolytes as a material that dissolves in water to make a solution that conducts electricity. Fruit batteries also need electrodes made of conductive material, like metal. Metals are conductors not because electricity passes through them, but because they contain electrons that can move. Think of the metal wire like a hose full of water. The water can move through the hose. An insulator would be like a hose full of cement – no charge can move through it.


You need two different metals in this experiment that are close, but not touching inside the solution. If the two metals are the same, the chemical reaction doesn’t start and no ions flow and no voltage is generated – nothing happens.


Exercises


  1.  What kinds of fruit make the best batteries?
  2.  What happens if you put one electrode in one fruit and one electrode in another?
  3.  What happens if you stick multiple electrode pairs around a piece of fruit, and connect them in series (zinc to copper to zinc to copper to zinc…etc.) and measure the voltage at the start and end electrodes?

[/am4show]


If you don’t have equipment lying around for this experiment, wait until you complete Unit 10 (Electricity) and then come back to complete this experiment. It’s definitely worth it!


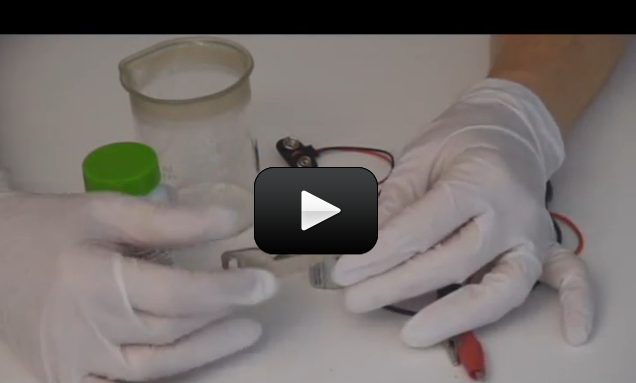
Electroplating was first figured out by Michael Faraday. The copper dissolves and shoots over to the key and gets stuck as a thin layer onto the metal key. During this process, hydrogen bubbles up and is released as a gas. People use this technique to add material to undersized parts, for place a protective layer of material on objects, to add aesthetic qualities to an object.


Materials:


  • one shiny metal key
  • 2 alligator clips
  • 9V battery clip
  • copper sulfate (MSDS)
  • one copper strip or shiny copper penny
  • one empty pickle jar
  • 9V battery

[am4show have=’p8;p9;p18;p45;p76;p80;’ guest_error=’Guest error message’ user_error=’User error message’ ]


Download Student Worksheet & Exercises


Place the copper sulfate in your jar and add a thin stream of water as you stir. Add enough water to make a saturated solution (dissolves most of the solids). Connect one alligator wire to the copper strip and the positive (red) wire from the clip lead. Connect the other alligator wire to the key and the negative (black) lead.


Place the copper strip and the key in the solution without touching each other. (If they touch, you’ll short your circuit and blow up your battery.) Let this sit for a few minutes… and notice what happens.


Clean up: Clean everything thoroughly after you are finished with the lab. After cleaning with soap and water, rinse thoroughly. Chemists use the rule of “three” in cleaning glassware and tools. Rinse three times, wash with soap, rinse three times.


Wipe off the electrodes. The solution and solids at the bottom of your cup cannot go in the trash. The liquid contains copper, a toxic heavy metal that needs proper disposal and safety precautions. Another chemical reaction needs to be performed to remove the heavy metal from the copper sulfate: Add a thumb sized piece of steel wool to the solution. The chemical reaction will pull out the copper out of the solution. The liquid can be washed down the drain. The solids cannot be washed down the drain, but they can be put in the trash. Use a little water to rinse the container free of the solids.


Place all chemicals, cleaned tools, and glassware in their respective storage places.


Dispose of all solid waste in the garbage. Liquids can be washed down the drain with running water. Let the water run awhile to ensure that they have been diluted and sent downstream.


Exercises


  1. Look at your key. What color is it?
  2.  Where did the copper on your key come from?
  3.  What happened when you added a second battery?
  4.  Which circuit (series or parallel) did the reaction accelerate faster with?

[/am4show]


This is the experiment that your audience will remember from your chemistry magic show. Here’s what happens – you call up six ‘helpers’ and hand each a seemingly empty test tube. Into each test tube, pour a little of the main gold-colored solution, say a few magic words, and their test tubes turn clear, black, pink, gold, yellow, and white. With a flourish, ask them to all pour their solutions back into yours and the final solution turns from inky black to clear. Voila!


I first saw a similar experiment when I was a kid, and I remembered it all the way through college, where I asked my professor how I could duplicate the experiment on my own. I was told that the chemicals used in that particular experiment were way too dangerous, and no substitute experiment was possible, especially for the color reversal at the end. I was determined to figure out an alternative. After two weeks of nothing but chemistry and experiment testing, I finally nailed it – and the best part is, you have most of these chemicals at the grocery store. (And the best part is, I can share it with you as I’ve eliminated the nasty chemicals so you don’t have to worry about losing an eyeball or a finger.)


NOTE: This experiment requires adult help, as it uses chemicals that are toxic if randomly mixed together.  Follow the instructions carefully, and do not mix random chemicals together.


Are you ready to mix up your own rainbow?


[am4show have=’p8;p9;p18;p45;p91;p101;’ guest_error=’Guest error message’ user_error=’User error message’ ]


Materials:


  • Iodine (non-clear, non-ammonia from the pharmacy)
  • Hydrogen peroxide (3% solution)
  • Vinegar (distilled white is best)
  • Cornstarch (tiny pinch) or one starch packing peanut
  • Water (distilled)
  • Sodium Thiosulfate
  • Sodium Carbonate (AKA: “washing soda“)
  • Phenolphthalein (keep this out of reach of kids) – this is optional
  • Disposable plastic cups (about eight)
  • Popsicle sticks
  • Gloves for your hands
  • Goggles for your face
  • Medicine droppers (at least four)


Download Student Worksheet & Exercises


[/am4show]


First discovered in 1886 by Hans Heinrich Landolt, the iodine clock reaction is one of the best classical chemical kinetics experiments. Here’s what to expect:  Two clear solutions are mixed. At first there is no visible reaction, but after a short time, the liquid suddenly turns dark blue.


Usually, this reaction uses a solution of hydrogen peroxide with sulfuric acid, but you can substitute a weaker (and safer) acid that works just as well:  acetic acid (distilled white vinegar). The second solution contains potassium iodide, sodium thiosulfate (crystals), and starch (we’re using a starch packing peanut, but you can also use plain old cornstarch). Combine one with the other to get the overall reaction, but note that there are actually two reactions happening simultaneously.


[am4show have=’p8;p9;p18;p45;p91;’ guest_error=’Guest error message’ user_error=’User error message’ ]


Materials:


  • sodium thiosulfate
  • potassium iodide
  • two plastic test tubes
  • packing peanut
  • disposable droppers
  • hydrogen peroxide
  • distilled white vinegar
  • distilled water
  • four disposable cups
  • popsicle sticks
  • clock
  • measuring spoons and cups
  • goggles and gloves


Download Student Worksheet & Exercises


In the first (slow) reaction, the triiodide ion is produced:


H2O2 + 3 I + 2 H+ ? I3 + 2 H2O


In the second (fast) reaction, triiodide is reconverted to iodide by the thiosulfate.


I3 + 2 S2O32- ? 3 I + S4O62-


After some time the solution always changes color to a very dark blue, almost black (the solution changes color due to the triiodide-starch complex).


Let’s get started! Rinse everything out very thoroughly with water three times, to ensure that nothing is contaminated before the experiment so you can get a clean start.  You can use droppers or measuring spoons (dedicated just to chemistry, not used for cooking) to measure your chemicals.  For droppers, make sure you’re using one dropper per chemical, and leave the dropper in the chemical when not in use to decrease the chances of cross-contamination.


Measure out 1 cup of distilled water and pour it into your first cup. Add ½ teaspoon sodium thiosulfate and stir until all the crystals are dissolved.  Touch the cup to feel the temperature change.  Is it hotter or colder?


Measure out 1 cup of distilled water into a new container.  Drop in the starch packing peanut and stir it around until it dissolves.  Packing peanuts can be made of cornstarch (as yours is, which is why it “melts” in water) or polystyrene (which melts in acetone, not water).


Into a third cup, measure out 1 cup of hydrogen peroxide.


Into the fourth cup, measure out 1 cup of distilled white vinegar.


Fill your plastic test tube with three parts starch (packing peanut) solution.  Add two parts distilled vinegar and two parts potassium iodide.  (Make sure you don’t cross-contaminate your chemicals — use clean measuring equipment each time.)  Your solution should be clear.


Into another plastic test tube, measure out three parts starch solution. Add two parts hydrogen peroxide and two parts sodium thiosulfate solution.  If the solution in the test tube is clear, you’re ready to move on to the next step.


Your next step is to pour one solution into the other and cap it, rocking it gently to mix the solution.  While you’re doing this, have someone clock the time from when the two solutions touch to when you see a major change.


What’s going on? There are actually two reactions going on at the same time.  When you combined the two solutions, the hydrogen peroxide (H2O2) combines with the iodide ions (I) to create triiodide (I3) and water (H2O). The sodium thiosulfate (S2O32) grabs the triiodide to form iodine, which is clear.  But the sodium thiosulfate eventually runs out, allowing the triiodide to accumulate (indicated by the solution changing color).  The time you measure is actually the time it takes to produce slightly more iodide ions than the sodium thiosulfate can wipe out.


By accelerating the first reaction, you can shorten the time it takes the solution to change color. There are a few ways to do this: You can decrease the pH (increasing H+ concentration), or increase the iodide or hydrogen peroxide. To lengthen the time delay, add more sodium thiosulfate.


[/am4show]


So this is probably the last chemical in your set you haven’t used… I had to really dig into my ‘bag of tricks’ to find something suitable for you to practice with.

Ammonium chloride is found near volcanoes and coal mines, as glue for plywood, in hair shampoo, in the electronics industry in solder, and also is fed to cows. It’s not typically experimented with in the chemistry lab, but since it’s in your set, I thought we’d play with it and see if you can figure out a few of its properties.


Use gloves and goggles when handling ammonium chloride, and make sure you have a fire extinguisher and a grown up handy!


[am4show have=’p8;p9;p18;p45;’ guest_error=’Guest error message’ user_error=’User error message’ ]
Magic Smoke: If you slowly sprinkle ammonium chloride into a flame, puffs of white smoke will appear. Or, you can make clouds of white smoke appear by heating half a teaspoon of ammonium chloride over a flame. You may have to extinguish the flame first, but you can still get it to work, so be careful!


Star Dust: In a glass or cup, dissolve 4 measures of ammonium chloride in two spoonfuls of water in a glass or cup. Sprinkle a little of this solution on a mirror, and, as the solution dries, beautiful crystals will appear.


[/am4show]


Mars is coated with iron oxide, which not only covers the surface but is also present in the rocks made by the volcanoes on Mars.


Today you get to perform a chemistry experiment that investigates the different kinds of rust and shows that given the right conditions, anything containing iron will eventually break down and corrode. When iron rusts, it’s actually going through a chemical reaction: Steel (iron) + Water (oxygen) + Air (oxygen) = Rust
Materials


  • Four empty water bottles
  • Four balloons
  • Water
  • Steel wool
  • Vinegar
  • Water
  • Salt

[am4show have=’p8;p9;p17;p44;p68;p80;p83;’ guest_error=’Guest error message’ user_error=’User error message’ ]


Download Student Worksheet & Exercises


  1. This lab is best done over two consecutive days. Plan to set up the experiment on the first day, and finish up with the observations on the next.
  2. Line up four empty bottles on the table.
  3. Label your bottles so you know which is which: Water, Water + Salt, Vinegar, Vinegar + Salt
  4. Fill two bottles with water.
  5. Fill two with vinegar.
  6. Add a tablespoon of salt to one of the water bottles.
  7. Add one tablespoon of salt to one of the vinegar bottles.
  8. Stuff a piece of steel wool into each bottle so it comes in contact with the liquid.
  9. Stretch a balloon across the mouth of each bottle.
  10. Let your experiment sit (overnight is best, but you can shorten this a bit if you’re in a hurry).
  11. The trick to getting this one to work is in what you expect to happen. The balloon should get shoved inside the bottle (not expand and inflate!). Check back over the course of a few hours to a few days to watch your progress.
  12. Fill in the data table.

What’s Going On?

Rust is a common name for iron oxide. When metals rust, scientists say that they oxidize, or corrode. Iron reacts with oxygen when water is present. The water can be liquid or the humidity in the air. Other types of rust happen when oxygen is not around, like the combination of iron and chloride. When rebar is used in underwater concrete pillars, the chloride from the salt in the ocean combines with the iron in the rebar and makes a green rust.


Mars has a solid core that is mostly iron and sulfur, and a soft pastel-like mantle of silicates (there are no tectonic plates). The crust has basalt and iron oxide. The iron is in the rocks and volcanoes of Mars, and Mars appears to be covered in rust.


When iron rusts, it’s actually going through a chemical reaction:
Steel (iron) + Water (oxygen) + Air (oxygen) = Rust


There are many different kinds of rust. Stainless steel has a protective coating called chromium (III) oxide so it doesn’t rust easily.


Aluminum, on the other hand, takes a long time to corrode because it’s already corroded — that is, as soon as aluminum is exposed to oxygen, it immediately forms a coating of aluminum oxide, which protects the remaining aluminum from further corrosion.


An easy way to remove rust from steel surfaces is to rub the steel with aluminum foil dipped in water. The aluminum transfers oxygen atoms from the iron to the aluminum, forming aluminum oxide, which is a metal polishing compound. And since the foil is softer than steel, it won’t scratch.


Exercises


  1. Why did one balloon get larger than the rest?
  2. Which had the highest pressure difference? Why?

[/am4show]


Hydrogen peroxide is used to fuel rockets, airplanes, and other vehicle engines. Chemistry teachers everywhere use it to demonstrate the power of a catalyst.

To speed up a reaction without altering the chemistry of the reaction involves adding a catalyst. A catalyst changes the rate of reaction but doesn’t get involved in the overall chemical changes.

For example, leaving a bottle of hydrogen peroxide outside in the sunlight will cause the hydrogen peroxide to decompose. However, this process takes a long time, and if you don’t want to wait, you can simply toss in a lump of charcoal to speed things along.

The carbon is a catalyst in the reaction, and the overall effect is that instead of taking two months to generate a balloon full of oxygen, it now only takes five minutes. The amount of charcoal you have at the end of the reaction is exactly the same as before it started.

A catalyst can also slow down a reaction. A catalytic promoter increases the activity, and a catalytic poison (also known as a negative catalyst, or inhibitor) decreases the activity of a reaction. Catalysts offer a different way for the reactants to become products, and sometimes this means the catalyst reacts during the chemical reaction to form intermediates. Since the catalyst is completely regenerated before the reaction is finished, it’s considered ‘not used’ in the overall reaction.

In this experiment, you'll see that there's a lot of oxygen hiding inside the peroxide - enough to really make things interesting and move around! You'll also find out what happens to soap when you bubble oxygen through it. Are you ready?

[am4show have='p8;p9;p101;' guest_error='Guest error message' user_error='User error message' ]
Materials:

  • hydrogen peroxide
  • yeast (the kind you'd use for baking bread)
  • liquid soap
  • shallow dish
  • water or soda bottle

The hydrogen is mixed with the soap first. The catalyst (yeast) causes the hydrogen peroxide to break down into oxygen and water. Since there's a lot of oxygen trapped in the peroxide, this decomposition happens very quickly and the oxygen rushes out of the container fast! As this happens, the water and soap mix together and turns into foam as the oxygen bubbles through trying to escape.

[/am4show]