Glow sticks generate light with very little heat, just like the glow you see from fireflies, jellyfish, and a few species of fungi. Chemiluminescence means light that comes from a chemical reaction. When this happens in animals and plants, it’s called bioluminescence.


In a glow stick, when you bend it to activate it, you’re breaking a little glass tube inside which contains hydrogen peroxide (H2O2). The tube itself is filled with another chemical (phenyl oxalate ester and a fluorescent dye) that is kept separate from the H2O2, because as soon as they touch, they begin to react. The dye in the light stick is what gives the light its color.


[am4show have=’p8;p9;p11;p38;p92;p18;p45;’ guest_error=’Guest error message’ user_error=’User error message’ ]


Materials:


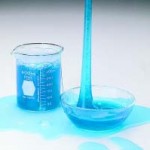
You’ll need a really dark room to see this reaction take place, as the amount of light it gives off is low, but it’s still there! Allow your eyes to adjust to the darkness for about 10 minutes, and you’ll definitely see a blue glow in the liquid.


The light comes from the copper sulfate reacting with the luminol, and will continue until one of the reactants is used up.


For advanced students, you can do this experiment with Cold Light.
[/am4show]


This is a recording of a recent live teleclass I did with thousands of kids from all over the world. I’ve included it here so you can participate and learn, too! (Click here if you’re looking for the more recent version that also includes Chemical Engineering.)


When you think of slime, do you imagine slugs, snails, and puppy kisses? Or does the science fiction film The Blob come to mind? Any way you picture it, slime is definitely slippery, slithery, and just plain icky — and a perfect forum for learning real science. But which ingredients work in making a truly slimy concoction, and why do they work? Let’s take a closer look…


Materials:


  • Sodium tetraborate (also called “Borax” – it’s a laundry whitener) – about 2 tablespoons
  • Clear glue or white glue (clear works better if you can find it) – about 1/2 cup
  • Yellow highlighter
  • Pliers or sharp razor (with adult help). (PREPARE: Use this to get the end off your highlighter before class starts so you can extract the ink-soaked felt inside. Leave the felt inside highlighter with the end loosely on (so it doesn’t dry out))
  • Resuable Instant Hand Warmer that contains sodium acetate (Brand Name: EZ Hand Warmer) – you’ll need two of these
  • Scissors
  • Glass half full of COLD water (PREPARE: put this in the fridge overnight)
  • Mixing bowl full of ice (PREPARE: leave in freezer)
  • Salt
  • Disposable aluminum pie place or foil-wrapped paper plate
  • Disposable cups for solutions (4-6)
  • Popsicle sticks for mixing (4-6)
  • Rubber gloves for your hands
  • Optional: If you want to see your experiments glow in the dark, you’ll need a fluorescent UV black light (about $10 from the pet store – look in cleaning supplies under “Urine-Off” for a fluorescent UV light). UV flashlights and UV LEDs will not work.

[am4show have=’p8;p9;p11;p38;p101;’ guest_error=’Guest error message’ user_error=’User error message’ ]


Key Concepts

If you’ve ever mixed together cornstarch and water, you know that you can get it to be both a liquid and a solid at the same time. (If you haven’t you should definitely try it! Use a 2:1 ratio of cornstarch:water.) The long molecular chains (polymers) are all tangled up when you scrunch them together (and the thing feels solid), but the polymers are so slick that as soon as you release the tension, they slide free (and drips between your fingers like a liquid).


Scientists call this a non-Newtonian fluid. You can also fill an empty water bottle or a plastic test tube half-full with this stuff and cap it. Notice that when you shake it hard, the slime turns into a solid and doesn’t slosh around the tube. When you rotate the tube slowly, it acts like a liquid.


Long, spaghetti-like chains of molecules (called polymers) don’t clump together until you cross-link the molecule strands (polymers) together into something that looks more like a fishnet. This is how we’re going to make slime.


What’s Going On?

Imagine a plate of spaghetti. The noodles slide around and don’t clump together, just like the long chains of molecules (called polymers) that make up slime. They slide around without getting tangled up. The pasta by itself (fresh from the boiling water) doesn’t hold together until you put the sauce on. Slime works the same way. Long, spaghetti-like chains of molecules don’t clump together until you add the sauce – something to cross-link the molecule strands together.


The borax mixture holds the glue mixture together in a gloppy, gelatinous mass. In more scientific terms, the sodium tetraborate cross-links the long polymer chains in the glue to form the slime.


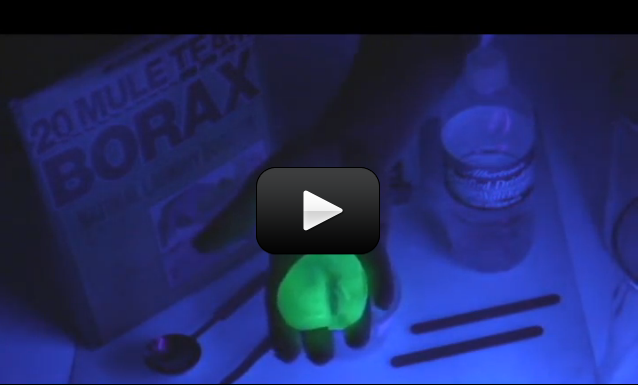
Why does the slime glow? Note that a black light emits high-energy UV light. You can’t see this part of the spectrum (just as you can’t see infrared light, found in the beam emitted from the remote control to the TV), which is why “black lights” were named that. Stuff glows because fluorescent objects absorb the UV light and then spit light back out almost instantaneously. Some of the energy gets lost during that process, which changes the wavelength of the light, which makes this light visible and causes the material to appear to glow.


Questions to Ask

  1. What happens when you freeze your slime? Is there a color change?
  2. How long does it take to thaw your slime in the microwave?
  3. Do you see the little bubbles in your slime?
  4. How many states of matter do you have in your slime now?
  5. Does this work with any laundry detergent, or just borax?
  6. What happens if you omit the water in the 50-50- glue-water mixture, and just use straight glue? (Hint – use the glow juice with the borax to keep the glowing feature.)
  7. Does your slime pick up newsprint from a newspaper?
  8. What other kinds of glue work well with this slime?

[/am4show]


When I was in 10th grade, my teammate and I designed what we thought was pretty clever: a superconductor roller coaster, which we imagined would float effortlessly above its magnetic track. Of course, our roller coaster was only designed on paper, because yttrium barium copper oxide ceramics had only just been discovered by top scientists.


Did you notice how it was smoking in the video? That’s because it was so cold! The usual problem with superconductors is that they need to be incredibly cold in order to exhibit superconductive properties.  Yttrium barium copper oxide (YBa2Cu3O7) was the first compound that used liquid nitrogen for cooling, making superconductors a lot less expensive to work with – you no longer needed a cryogenic lab in order to levitate objects above a magnet.


Recently, scientists have found a way to make an amazing superconductor by taking a single crystal sapphire wafer and coating it with a thin (~1µm thick) ceramic material (yttrium barium copper oxide). Normally, the ceramic layer has no interesting magnetic or electrical properties, but that’s when you’re looking at it at room temperature. If you cool this material below -185ºC (-301ºF), it turns out that the ceramic material becomes a superconductor, meaning that it conducts electricity without resistance, with no energy loss. Zero. That’s what makes it a ‘superconductor’.


To further understand superconductivity, it’s helpful to understand what normally happens to electricity as it flows through a wire. As you may know, energy cannot be created or destroyed, but can be changed from one form to another.


In the case of wires, some of the electrical energy is changed to heat energy. If you’ve ever touched a wire that had been in use for a while, and discovered it was hot, you’ve experienced this. The heat energy is a waste. It simply means that less electricity gets to its final destination.


This is why superconductivity is so cool (no pun intended.) By cooling things down to temperatures near absolute zero, which is as low as temperatures can get, you can create a phenomenon where electricity flows without having any of it converted to heat.


Why do superconductors float above magnets?

Scientists also figured out that superconductors and magnetic field really do not like each other. The Meissner effect happens when a superconductor expels all its magnetic fields from inside.


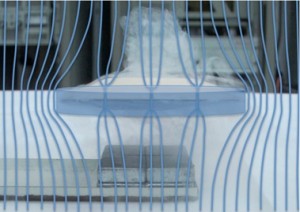
However, if you make your superconductor thin enough, you can get the magnetic field to penetrate in discrete quantities (this is real quantum physics now) called flux tubes (the blue lines that go through the disc).


Inside each of the magnetic flux tubes, the superconductivity is destroyed, but the superconductor tries to keep the magnetic tubes pinned in weak areas and any movement of the superconductor itself (like if you pushed it) causes the flux tubes to move, and this is what traps (or locks) the superconductor in midair.


If you’d like to experiment with superconductors yourself, check out this information.


Let’s see how much you’ve picked up with these experiments and the reading – answer as best as you can. (No peeking at the answers until you’re done!) Just relax and see what jumps to mind when you read the question. You can also print these out and jot down your answers in your science notebook.


[am4show have=’p8;p9;p18;p45;’ guest_error=’Guest error message’ user_error=’User error message’ ]


Molecules Exercises


  1. What does endothermic mean? (a) the study of bugs (b) when a chemical reaction gives off heat (c) when a chemical reaction absorbs heat (d) the study of chemical reactions
  2. Why does red cabbage work to indicate acid or bases?
  3. Where can you find acetic acid in your house right now?
  4. Turmeric needs to be mixed with what before it can be used as an indicator? (a) hydrogen peroxide (b) rubbing alcohol (c) acetic acid (d) cold water
  5. When the red cabbage indicator is added to acetic acid, it turns (a) pink (b) blue (c) green (d) purple (e) yellow
  6. What happens when you heat up your cobalt chloride painting?
  7. In the electrolysis experiment, which gas gives you the “POP!” ? (a) hydrogen (b) oxygen (c) nitrogen (d) sulfur hexafluoride
  8. If you splash chemicals in your eyes, what is the first thing you should do? (a) put on your safety goggles (b) scream (c) rinse with running water, like from the sink or hose (d) call poison control
  9. If your dog accidentally eats your chemicals, what should you do? (a) lock him up (b) take him to the vet (c) call poison control (d) palpate his abdomen
  10. Which of these are chemical changes? (a) setting a wad of paper on fire (b) chewing gum (c) eating raisins (d) initializing a cold pack
  11. Which of these are physical changes? (a) light sticks (b) splashing in a puddle (c) drinking water (d) making slime

Need answers?

[/am4show]


Let’s see how you did! If you didn’t get a few of these, don’t let it stress you out – it just means you need to play with more experiments in this area. We’re all works in progress, and we have our entire lifetime to puzzle together the mysteries of the universe!


Here’s printer-friendly versions of the exercises and answers for you to print out: Simply click here for printable questions and answers.


Answers:
[am4show have=’p8;p9;p18;p45;’ guest_error=’Guest error message’ user_error=’User error message’ ]


  1. What does endothermic mean? (a) the study of bugs (b) when a chemical reaction gives off heat (c) when a chemical reaction absorbs heat (d) the study of chemical reactions
  2. Why does red cabbage work to indicate acid or bases? Red cabbage contains a naturally occurring indicator, anthocyanin. Anthocyanin is what gives leaves, stems, fruits, and flowers their colors.
  3. Where can you find acetic acid in your house right now? In the cabinet in a bottle labeled ‘distilled white vinegar’.
  4. Turmeric needs to be mixed with what before it can be used as an indicator? (a) hydrogen peroxide (b) rubbing alcohol (c) acetic acid (d) cold water
  5. When the red cabbage indicator is added to acetic acid, it turns (a) pink (b) blue (c) green (d) purple (e) yellow
  6. What happens when you heat up your cobalt chloride painting? A concentrated solution of cobalt chloride is red at room temperature, blue when heated, and pale-to-clear when frozen.
  7. In the electrolysis experiment, which gas gives you the “POP!” ? (a) hydrogen (b) oxygen (c) nitrogen (d) sulfur hexafluoride
  8. If you splash chemicals in your eyes, what is the first thing you should do? (a) put on your safety goggles (b) scream (c) rinse with running water, like from the sink or hose (d) call poison control
  9. If your dog accidentally eats your chemicals, what should you do? (a) lock him up (b) take him to the vet (c) call poison control (d) palpate his abdomen
  10. Which of these are chemical changes? (a) setting a wad of paper on fire (b) chewing gum (c) eating raisins (d) initializing a cold pack
  11. Which of these are physical changes? (a) light sticks (b) splashing in a puddle (c) drinking water (d) making slime

[/am4show]


Let’s see how much you’ve picked up with these experiments and the reading – answer as best as you can. (No peeking at the answers until you’re done!) Just relax and see what jumps to mind when you read the question. You can also print these out and jot down your answers in your science notebook.


[am4show have=’p8;p9;p18;p45;’ guest_error=’Guest error message’ user_error=’User error message’ ]


  1. What are the most toxic chemicals in this unit? (a) sodium ferrocyanide & ferric ammonium sulfate (b) calcium hydroxide & calcium chloride (d) ammonium nitrate & copper sulfate (d) dihydrogen monoxide & sodium chloride
  2. What’s true about phenolphthalein? (a) it goes from clear to pink when mixed with bases (b) it’s impossible to spell (c) it is colorless in acidic solutions (d) soluble in water
  3. Sodium ferrocyanide (a) can create a lethal gas if misused (b) should be handled with care (c) is only used once in this entire manual (d) should never be mixed with anything other than ferric ammonium sulfate
  4. Which food do you expect to give the highest voltage for the fruit battery?
  5. What else can you use for the copper strip in the electroplating experiment? (a) copper pipe (b) copper flashing (c) steel pipe (d) galvanized nails
  6. How does increasing the hydrogen peroxide affect the rate of the iodine clock reaction?
  7. Why does hydrogen peroxide come in dark bottles?
  8. Which chemical turns coldest when added to water? (a) calcium chloride (b) aluminum sulfate (c) ammonium nitrate (d) citric acid
  9. A polymer is: (a) a long piece of spaghetti (b) an element on the periodic table (c) a long molecular chain (d) a plastic bag
  10. What does a cross-linking agent do?
  11. Which of the following are cross-linking agents? (a) calcium (b) borax (c) white glue (d) starch (e) bubble gum
  12. Which substance is both a solid and a liquid? (a) bubble gum (b) slime (c) cornstarch and water (d) last night’s dinner

Need answers?

[/am4show]


Let’s see how you did! If you didn’t get a few of these, don’t let it stress you out – it just means you need to play with more experiments in this area. We’re all works in progress, and we have our entire lifetime to puzzle together the mysteries of the universe!


Here’s printer-friendly versions of the exercises and answers for you to print out: Simply click here for printable questions and answers.


Answers:
[am4show have=’p8;p9;p18;p45;’ guest_error=’Guest error message’ user_error=’User error message’ ]


Chemical Kinetics Exercises


  1. What are the most toxic chemicals in this unit? (a) sodium ferrocyanide & ferric ammonium sulfate (b) calcium hydroxide & calcium chloride (d) ammonium nitrate & copper sulfate (d) dihydrogen monoxide & sodium chloride (this one is the chemical name for water and salt)
  2. What’s true about phenolphthalein? (a) it goes from clear to pink when mixed with bases (b) it’s impossible to spell (c) it is colorless in acidic solutions (d) soluble in water
  3. 3. Sodium ferrocyanide (a) can create a lethal gas if misused (b) should be handled with care (c) is only used once in this entire manual (d) should never be mixed with anything other than ferric ammonium sulfate
  4. Which food do you expect to give the highest voltage for the fruit battery? Very sour lemons.
  5. What else can you use for the copper strip in the electroplating experiment? (a) copper pipe (b) copper flashing (c) steel pipe (d) galvanized nails
  6. 6. How does increasing the hydrogen peroxide affect the rate of the iodine clock reaction? By accelerating the first reaction, you can shorten the time it takes the solution to change color. There are a few ways to do this: You can decrease the pH (increasing H+ concentration), or increase the iodide or hydrogen peroxide. (To lengthen the time delay, add more sodium thiosulfate.)
  7. Why does hydrogen peroxide come in dark bottles? Because it reacts with sunlight to turn into water and oxygen.
  8. Which chemical turns coldest when added to water? (a) calcium chloride (b) aluminum sulfate (c) ammonium nitrate (d) citric acid
  9. A polymer is: (a) a long piece of spaghetti (b) an element on the periodic table (c) a long molecular chain (d) a plastic bag
  10. What does a cross-linking agent do? Coagulates the polymers. (Turns the long polymer chains into something that looks more like a fishnet.)
  11. Which of the following are cross-linking agents? (a) calcium (b) borax (c) white glue (d) starch (e) bubble gum
  12. Which substance is both a solid and a liquid? (a) bubble gum (b) slime (c) cornstarch and water (d) last night’s dinner

[/am4show]


Chemical Data & Safe Handling Information Sheet

What do I really need to know first? First of all, the chemicals in this set should be stored out of reach of pets and children. Grab the chemicals right now and stuff them in a safe place where accidents can’t happen. Do this NOW! When you’re done storing your chemicals out of reach, come back and download this Chemical Safety Sheet AND watch this video.


Click here to Download the Chemical Safety Information!

[/am4show]


If you’ve ever burped, you know that it’s a lot easier to do after chugging an entire soda. Now why is that?


Soda is loaded with gas bubbles — carbon dioxide (CO2), to be specific. And at standard temperature (68oF) and pressure (14.7 psi), carbon dioxide is a gas. However, if you burped in Antarctica in the wintertime, it would begin to freeze as soon as it left your lips. The freezing temperature of CO2 is -109oF, and Antarctic winters can get down to -140oF. You’ve actually seen this before, as dry ice (frozen burps!).


Carbon dioxide has no liquid state at low pressures (75 psi or lower), so it goes directly from a block of dry ice to a smoky gas (called sublimation). It’s also acidic and will turn cabbage juice indicator from blue to pink. CO2 is colorless and odorless, just like water, but it can make your mouth taste sour and cause your nose to feel as if it’s swarming with wasps if you breathe in too much of it (though we won’t get anywhere near that concentration with our experiments).


The triple point of CO2 (the point at which CO2 would be a solid, a liquid, and a gas all at the same time) is around five times the pressure of the atmosphere (75 psi) and around -70oF. (What would happen if you burped then?)


What sound does a fresh bottle of soda make when you first crack it open? PSSST! What is that sound? It’s the CO2 (carbon dioxide) bubbles escaping. What is the gas you exhale with every breath? Carbon dioxide. Hmmm … it seems as if your soda is already pre-burped. Interesting.


We’ll actually be doing a few different experiments, but they all center around producing burps (carbon dioxide gas). The first experiment is more detective work in finding out where the CO2 is hiding. With the materials we’ve listed (chalk, tile, limestone, marble, washing soda, baking soda, vinegar, lemon juice, etc. …) and a muffin tin, you can mix these together and find the bubbles that form, which are CO2. (Not all will produce a reaction.) You can also try flour, baking powder, powdered sugar, and cornstarch in place of the baking soda. Try these substitutes for the vinegar: water, lemon juice, orange juice, and oil.


Materials:


  • baking soda
  • chalk
  • distilled white vinegar
  • washing soda
  • disposable cups and popsicle sticks

[am4show have=’p8;p9;p18;p45;p68;’ guest_error=’Guest error message’ user_error=’User error message’ ]


Download Student Worksheet & Exercises


The next video (below) is a BONUS video for you – can you find the items around your house so you can make your own scale? (If you generate a lot of CO2, you can simply use paper grocery bags suspended on both ends of a broom handle (disconnect the broom part first). Suspend the center of the broom handle from a length of string for pin-point accuracy.


The second part of this experiment (video below) compares the weight of air with the weight of carbon dioxide. Make sure your balance is free to move easily when the lightest touch (your breath) is applied to one of the scales. You can use grocery bags attached to the ends of a broom handle for a larger scale, or modify tiny cups with string and pencils (as shown in the video). Either one works, but you’ll want to be sure the bubbles are (mostly) popped before you pour. And pour carefully or you’ll slosh out the invisible CO2 gas.


You can create the CO2 gas in a variety of ways (the image at right shows dry ice submerged in water), including the standard vinegar and baking powder method. Here is another option: Open a 2-liter bottle of soda and quickly pour it into a big pitcher so that it foams up to the top of the container. Carefully pour the gas from the pitcher into the balance. What happens?


Fire extinguisher variation: You can create a fire extinguisher by “pouring” the CO2 gas onto a lit candle to snuff it out.


Materials:


  • baking soda
  • distilled white vinegar
  • two disposable cups
  • large container
  • two water bottles or stacks of books
  • two long pencils or skewers
  • string


[/am4show]


This is one of those 'chemistry magic show' type of experiments to wow your friends and family. Here's the scoop: you take a cup of clear liquid, add it to another cup of clear liquid, stir for ten seconds, and you'll see a color change, a state change from liquid to solid, and you can pull a rubber-like bouncy ball right out of the cup.

If you have trouble locating the ingredients, you can order them online here:

  • Sodium Silicate (from Unit 3)
  • Ethyl Alcohol (check your pharmacy)
  • Disposable cups (at least two - and don't use your kitchen glassware, as you'll never get it clean again)
  • Popsicle sticks (again, use something disposable to stir with)


Download Student Worksheet & Exercises

1. In one cup, measure four tablespoons of sodium silicate solution (it should be a liquid). Sodium silicate can be irritating to the skin for some people, so wear rubber gloves when doing this experiment!

2. Measure 1 tablespoon of ethyl alcohol into a second cup. Ethyl alcohol is extremely flammable—cap it and keep out of reach when not in use.

3. Pour the alcohol into the sodium silicate solution and stir with a Popsicle stick.

4. You’ll see a color change (clear to milky-white) and a state change (liquid to a solid clump.

5. Using gloves, gather up the polymer ball and firmly squeeze it in your hands.

6. Compress it into the shape you want—is it a sphere, or do you prefer a dodecahedron?

7. Bounce it!

8. Be patient when squeezing the compound together. If it breaks apart and crumbles, gather up the pieces and firmly press together.

Store your bouncy ball in a Ziploc bag!

What’s Going On?

Silicones are water repellent, so you’ll find that food dye doesn’t color your bouncy ball. You’ll find silicone in greases, oils, hydraulic fluids, and electrical insulators.

The sodium silicate is a long polymer chain of alternating silicon and oxygen atoms. When ethanol (ethyl alcohol) is added, it bridges and connects the polymer chains together by cross-linking them.

Think of a rope ladder—the wooden rungs are the cross-linking agents (the ethanol) and the two ropes are the polymer chains (sodium silicate).

Safety information for Sodium Silicate: MSDS.

Questions to Ask

1. Before the reaction, what was the sodium silicate like? Was it a solid, liquid, or gas? What color was it? Was it slippery, grainy, viscous, etc.?

2. What was the ethanol like before the reaction?

3. How is the product (the bouncy ball) different from the two chemicals in the beginning?

4. Was the bouncy ball  the only molecule that was formed?

5.  Was this reaction a physical or chemical change?

Did you know? Silly putty is actually a mixture of silicone and chalk!


When you think of slime, do you imagine slugs, snails, and puppy kisses? Or does the science fiction film The Blob come to mind? Any way you picture it, slime is definitely slippery, slithery, and just plain icky — and a perfect forum for learning real science.


But which ingredients work in making a truly slimy concoction, and why do they work? Let’s take a closer look…


Imagine a plate of spaghetti. The noodles slide around and don’t clump together, just like the long chains of molecules (called polymers) that make up slime. They slide around without getting tangled up. The pasta by itself (fresh from the boiling water) doesn’t hold together until you put the sauce on. Slime works the same way. Long, spaghetti-like chains of molecules don’t clump together until you add the sauce … until you add something to cross-link the molecule strands together.


The sodium-tetraborate-and-water mixture is the “spaghetti” (the long chain of molecules, also known as a polymer), and the “sauce” is the glue-water mixture (the cross-linking agent). You need both in order to create a slime worthy of Hollywood filmmakers.


[am4show have=’p8;p9;p18;p45;p101;’ guest_error=’Guest error message’ user_error=’User error message’ ]


Materials:


  • popsicle sticks
  • water
  • disposable cups
  • borax (laundry whitener)
  • clear glue (or glue gel) or white glue
  • yellow highlighter
  • measuring spoons
  • scissors
  • UV black light


Download Student Worksheet & Exercises


To make this slime, combine ½ cup of water with 1 teaspoon of sodium tetraborate (also known as ‘Borax’) in a cup and stir with a popsicle stick.


In another cup, mix equal parts white glue and water. Add a glob of the glue mixture to the sodium tetraborate mixture. Stir for a second with a popsicle stick, then quickly pull the putty out of the cup and play with it until it dries enough to bounce on the table (3 to 5 minutes). Pick up an imprint from a textured surface or print from a newspaper, bounce and watch it stick, snap it apart quickly and ooze it apart slowly …


To make glowing slime, add one simple ingredient to make your slime glow under a UV light (or in sunlight)! You’ll need to extract the dye from the felt of a bright yellow highlighter pen and use the extract instead of water. (Simply cut open the pen and let water trickle over the felt into a cup: instant glow juice.) For the best slime results, substitute clear glue or glue gel for the white glue.


Don’t forget: You’ll need a long-wave UV source (also known as a “black light”) to make it glow (fluorescent lights tend to work better than incandescent bulbs or LEDs) – check the shopping list for where to get one. This slime will glow faintly in sunlight, because you get long-wave UV light from the sun — it’s just that you get all the other colors, too, making it hard to see the glow.


Is your slime a solid, a liquid, or a bubbly gas? The best slimes we’ve seen have all three states of matter simultaneously: solid chunks suspended in a liquidy form with gas bubbles trapped inside. Yeecccccch!!


What other stuff glows under a black light? Loads of stuff! There are a lot of everyday things that fluoresce (glow) when placed under a black light. Note that a black light emits high-energy UV light. You can’t see this part of the spectrum (just as you can’t see infrared light, found in the beam emitted from the remote control to the TV), which is why “black lights” were named that. Stuff glows because fluorescent objects absorb the UV light and then spit light back out almost instantaneously. Some of the energy gets lost during that process, which changes the wavelength of the light, which makes this light visible and causes the material to appear to glow. (More on this in Unit 9.)


How to Make Glow Juice

You can add glow juice in place of water in any experiment. Here’s how you make the glow juice by itself:


Moon Blob

moonblobThe most slippery substance on the planet, this dehydrated gel is a super-slippery, super long polymer chain of molecules that will actually climb up and out of your container if you don’t use a lid.  This slime is sensitive to light, temperature, and concentration (the amount of water you use) so if yours isn’t very responsive, check those three things.


Mixing this gel takes at least two days, and when you do it, make only a half recipe so you can make adjustments if yours isn’t quite right. We use ours on ‘Slip and Slides’ instead of water for a super-fun ride! (Hint – don’t try to stand, or you’ll break your arm when you crash!)


[/am4show]


Phenolphthalein is a weak, colorless acid that changes color when it touches acidic (turns orange) or basic (turns pink/fuchsia) substances. People used to take it as a laxative (not recommended today, as ingesting high amounts may cause cancer). Use gloves when handling this chemical, as your skin  can absorb it on contact. I’ll show you how:


[am4show have=’p8;p9;p18;p45;p80;’ guest_error=’Guest error message’ user_error=’User error message’ ]
Materials:


  • 2 test tubes
  • sodium carbonate (washing soda)
  • phenolphthalien (liquid)
  • medicine dropper
  • water
  • test tube stoppers
  • gloves and goggles


Download Student Worksheet & Exercises


Sprinkle a tiny amount of sodium carbonate into the bottom of your test tube. Fill your test tube partway with water (the solution should still be clear). Add a few drops of phenolphthalein (which is clear inside the dropper), cap, and shake.


[/am4show]


You can use this as real ink by using it BEFORE you combine them together like this: dip a toothpick into the first solution (sodium ferrocyanide solution) and with the tip write onto a sheet of paper.


While the writing is drying, dip a piece of paper towel int other solution (ferric ammonium sulfate solution) and gently blot along where you wrote on the paper… and the color appears as blue ink. You can make your secret message disappear by wiping a paper towel dipped in a sodium carbonate solution.


You can also grow purple, gold, and red crystals with these chemicals… we’ll show you how!


Materials:


  • sodium ferrocyanide
  • ferric ammonium sulfate
  • 2 test tubes
  • distilled water
  • goggles and gloves
  • water

[am4show have=’p8;p9;p18;p45;p80;’ guest_error=’Guest error message’ user_error=’User error message’ ]


Download Student Worksheet & Exercises


CAUTION: Do not mix sodium ferrocyanide with any other chemical other than specified here, as it can produce hydrogen cyanide gas, which is lethal. Handle this chemical with care, wear gloves, and keep it locked away when not in use.


Measure out a tiny bit of sodium ferrocyanide into a test tube filled partway with water. You want to add enough of the crystals so that when you shake the solution (with the cap on), all of the crystals dissolve into the water and make a saturated solution.


Into a second test tube, dissolve another tiny bit of ferric ammonium sulfate in water, adding just enough to make a saturated solution. When you’re ready, pour one test tube into the other and note the change!


Bonus Experiment Idea! You can grow yellow-gold crystals by cooling off a cup of hot water. Here’s how: into a test tube, add 40 drops of hot water and 1 small spoon measure of sodium ferrocyanide. Suspend a small pebble attached to a thread into the test tube (this is your starter-seed for your crystals to attach to). If after a day or two your crystals aren’t growing, just reheat the solution and add a little bit more of the chemical. To grow purple crystals, use ferric ammonium sulfate instead of the sodium ferro-cyanide. You can also use 2 spoonfuls of cobalt chloride in a fresh test tube to grow red-colored crystals.


ANOTHER Bonus Experiment Idea!Mix 1/3 measure of ferric ammonium sulfate and 1/3 measure of sodium Ferro-cyanide in a glass 1/2 full of water. To another glass 1/2 full of water, add 5 drops of phenolphthalein solution. In an empty glass put 1 spoonful of sodium silicate powder and 2 spoonfuls of water. Pour the contents of these last two glasses into the first glass, stir and watch what happens.
[/am4show]


Dissolving calcium chloride is highly exothermic, meaning that it gives off a lot of heat when mixed with water (the water can reach up to 140oF, so watch your hands!). The energy released comes from the bond energy of the calcium chloride atoms, and is actually electromagnetic energy.


When you combine the calcium chloride and sodium carbonate solutions, you form the new chemicals sodium chloride (table salt) and calcium carbonate. Both of these new chemicals are solids and “fall out” of the solution, or precipitate. If you find that there is still liquid in the final solution, you didn’t have quite a saturation solution of one (or both) initial solutions.


[am4show have=’p8;p9;p18;p45;p91;’ guest_error=’Guest error message’ user_error=’User error message’ ]


Materials:


  • calcium chloride (AKA: “ice melt” or “Dri-EZ”)
  • sodium carbonate (AKA: “washing soda”)
  • two disposable cups
  • two test tubes with caps
  • medicine dropper
  • distilled water
  • goggles and gloves


Download Student Worksheet & Exercises


Mix up a saturated solution of calcium chloride in one test tube and a saturated solution of sodium carbonate in the other. Here’s how to do this:


Sprinkle 1 teaspoon of calcium chloride into a disposable cup. Add in a few tablespoons of water and stir, dissolving as much of the solid into the water as possible. Add more calcium chloride until you see bits of it at the bottom that refuse to dissolve. Now pour only the liquid into your test tube; the liquid is your saturated solution. Do the same for the sodium carbonate.


Do the test tubes feel hot or cold? Pour one test tube into another.


Instant solid.


Calcium chloride is hygroscopic (absorbs moisture), exothermic (releases heat when melted or dissolved), and deliquescent (dissolves in the moisture it absorbs and retains it for a long time).


[/am4show]


I mixed up two different liquids (potassium iodide and a very strong solution of hydrogen peroxide) to get a foamy result at a live workshop I did recently. See what you think!


Note: because of the toxic nature of this experiment, it’s best to leave this one to the experts.


Nurses will put hydrogen peroxide on a cut to kill germs. It’s also used in rocket fuel as an oxidizer. The hydrogen peroxide in your grocery store is a weak 3% solution. The hydrogen peroxide used here is 10X stronger than the grocery store variety. The KI (potassium iodide) is the catalyst in the experiment which speeds up the decomposition of the hydrogen peroxide. This is an exothermic reaction (gives off heat).


What state of matter is fire? Is it a liquid? I get that question a LOT, so let me clarify. The ancient scientists (Greek, Chinese… you name it) thought fire was a fundamental element. Earth, Air Water, and Fire (sometimes Space was added, and the Chinese actually omitted Air and substituted Wood and Metal instead) were thought to be the basic building blocks of everything, and named it an element. And it’s not a bad start, especially if you don’t have a microscope or access to the internet.


Today’s definition of an element comes from peeking inside the nucleus of an atom and counting up the protons. In a flame, there are lots of different molecules from NO, NO2, NO3, CO, CO2, O2, C… to name a few. So fire can’t be an element, because it’s made up of other elements. So, what is it?


[am4show have=’p8;p9;p18;p45;p91;p101;’ guest_error=’Guest error message’ user_error=’User error message’ ]


Fire is a combination of different gases and hot plasma. It’s a complicated exothermic (gives off heat) chemical reaction that releases a lot of heat and light (you can feel and see the flame). You need three things for a flame: oxygen, fuel, and a spark. When you take away one of these three, you snuff the flame and stop the chemical reaction. You start with fuel (usually contains carbon), and add oxygen to get carbon dioxide, carbon monoxide, nitric oxide, and many other gases and leftover ash. Most flames are hot enough to heat the gas mixture to create tiny bits of plasma within the flame, so fire is actually involved in two states of matter.


In this experiment, we’re going to see how you can protect a surface from burning using water. Are you ready?


Materials:


  • Shallow baking dish
  • Tongs
  • Rubbing Isopropyl Alcohol (50-91%)
  • Water (omit if using 50-70% alcohol)
  • Dollar bill
  • Fire extinguisher
  • Adult help


Download Student Worksheet & Exercises


What’s going on? Alcohol burns with a slightly blue and orange flame (as shown in the video). The secret to keeping the dollar bill from burning is the water you mixed in with the alcohol. Water has a high heat capacity, which means that the water absorbs the energy from the flame and keep the bill from catching on fire. If you dipped the dollar bill in pure 100% alcohol, the temperature would rise high enough on the bill to burn. The reason we chose a bill instead of regular paper is that the dollar bill is a combination of linen and paper, making it much stronger and absorbent for this experiment.


You need both the water and the alcohol for this experiment. The water, as it absorbs the energy from the flame, heats up to its boiling point and then vaporizes, keeping the bill cool enough to not catch on fire. The alcohol is the fuel needed to keep the flame going. It’s a delicate balance between the two, but here are a couple of variations you can try out:


  • You can change the color of the flame by adding in a sprinkling of salt (for yellow), boric acid (for green), or epsom salt (for white).
  • You can also try mixing different ratios of water to alcohol, using 50%, 70% and 91% isopropyl alcohol. You can also try ethyl alcohol (which is an entirely different molecule) but will react about the same with this experiment. Note that if you decrease the water content too much, you’re going to lose your dollar bill.

[/am4show]


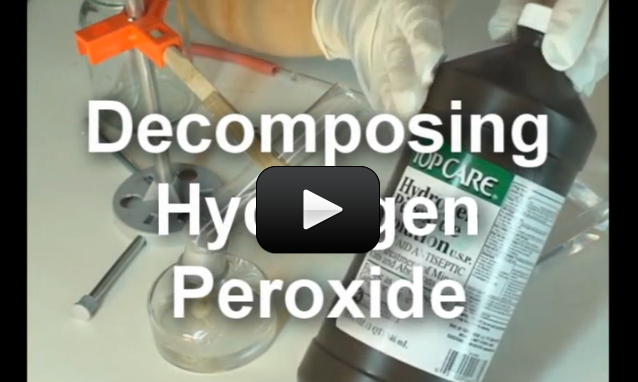
h2o2This experiment below is for advanced students. If you’ve ever wondered why hydrogen peroxide comes in dark bottles, it’s because the liquid reacts with sunlight to decompose from H2O2 (hydrogen peroxide) into H2O (water) and O2 (oxygen). If you uncap the bottle and wait long enough, you’ll eventually get a container of water (although this takes a LOOONG time to get all of the H2O2 transformed.)


Here’s a way to speed up the process and decompose it right before your eyes. For younger kids, you can modify this advanced-level experiment so it doesn’t involve flames. Here’s what you do:


[am4show have=’p9;p45;p91;’ guest_error=’Guest error message’ user_error=’User error message’ ]


Materials:


  • hydrogen peroxide
  • empty water bottle
  • balloon
  • charcoal piece

Want to do this experiment with a more dramatic flair?  Try speeding it up as shown in the video below.


IMPORTANT: DO NOT DRINK ANYTHING FROM THIS LAB!!


Pour hydrogen peroxide into an empty plastic water bottle. Add a scoop of activated charcoal (you can also smash regular charcoal with a hammer to get it to fit – the smaller the bits, the better it will work, but make sure you do NOT use charcoal pre-soaked in lighter fluid). Cap your bottle with a helium-quality latex balloon and set aside.  After several hours, you will have a balloon filled with oxygen.


[/am4show]


This experiment is for advanced students.Have you ever taken a gulp of the ocean? Seawater can be extremely salty! There are large quantities of salt dissolved into the water as it rolled across the land and into the sea. Drinking ocean water will actually make you thirstier (think of eating a lot of pretzels). So what can you do if you’re deserted on an island with only your chemistry set?


Let me show you how to take the salt out of water with this easy setup.


[am4show have=’p9;p45;p68;p80;p82;’ guest_error=’Guest error message’ user_error=’User error message’ ]


Materials:


  • salt
  • water
  • alcohol burner
  • flask with one-hole stopper
  • stand with wire mesh screen
  • two 90-degree glass pipes
  • flexible tubing
  • ring stand with clamp
  • lighter with adult help


[/am4show]


If you’ve ever owned a fish tank, you know that you need a filter with a pump. Other than cleaning out the fish poop, why else do you need a filter? (Hint: think about a glass of water next to your bed. Does it taste different the next day?)


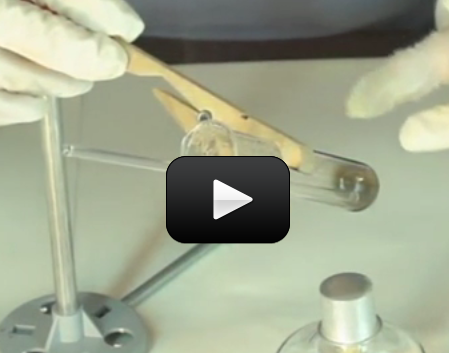
There are tiny air bubbles trapped inside the water, and you can see this when you boil a pot of water on the stove. The experimental setup shown in the video illustrates how a completely sealed tube of water can be heated… and then bubbles come out one end BEFORE the water reaches a boiling point. The tiny bubbles smoosh together to form a larger bubble, showing you that air is dissolved in the water.


Materials:


  • test tube clamp
  • test tube
  • lighter (with adult help)
  • alcohol burner or votive candle
  • right-angle glass tube inserted into a single-hole stopper
  • regular tap water

[am4show have=’p8;p9;p18;p45;p82;p84;p91;p30;p57;’ guest_error=’Guest error message’ user_error=’User error message’ ]


Download Student Worksheet & Exercises


The filter pump in your fish tank ‘aerates’ the water. The simple act of letting water dribble like a waterfall is usually enough to mix air back in. Which is why flowing rivers and streams are popular with fish – all that fresh air getting mixed in must feel good! The constant movement of the river replaces any air lost and the fish stay happy (and breathing). Does it make sense that fish can’t live in stagnant or boiled water?


You don’t need the fancy equipment show in this video to do this experiment… it just looks a lot cooler. You can do this experiment with a pot of water on your stove and watch for the tiny bubbles before the water reaches 212oF.


[/am4show]


If you had a choice between a glass of lemon juice or apple juice, most folks would pick the sweeter one – apple. Did you know that apples are loaded with malic acid, and are actually considered to be acidic? It’s just that there is so much more sugar in an apple than a lemon that your taste buds can be fooled. Here’s a scientific way (which is much more reliable) to tell how acidic something is.


Acids are sour tasting (like a lemon), bases are bitter (like unsweetened cocoa powder). Substances in the middle are more neutral, like water. Scientists use the pH (power of hydrogen, or potential hydrogen) scale to measure how acidic or basic something is. Hydrochloric acid registers at a 1, sodium hydroxide (drain cleaner) is a 14. Water is about a 7. pH levels tell you how acidic or alkaline (basic) something is, like dirt. If your soil is too acidic, your plants won’t attract enough hydrogen, and too alkaline attracts too many hydrogen ions. The right balance is usually somewhere in the middle (called ‘pH neutral’). Some plants change color depending on the level of acidity in the soil – hydrangeas turn pink in acidic soil and blue in alkaline soil.


There are many different kinds of acids: citric acid (in a lemon), tartaric acid (in white wine), malic acid (in apples), acetic acid (in vinegar), and phosphoric acid (in cola drinks). The battery acid in your car is a particularly nasty acid called sulfuric acid that will eat through your skin and bones. Hydrochloric acid is found in your stomach to help digest food, and nitric acid is used to make dyes in fabrics as well as fertilizer compounds.


[am4show have=’p8;p9;p18;p45;p101;’ guest_error=’Guest error message’ user_error=’User error message’ ]


Materials:


Here’s a video that shows you how to test several different things, including how to safely test stronger acids and bases, should you wish to test your own out.


Some things you can test (in addition to the ones in the video) include: Sprite, distilled white vinegar, baking soda, Vanish, laundry detergent, clear ammonia, powdered Draino, and Milk of Magnesia. DO NOT mix any of these together! Simply add a bit to each cup and test it with your pH strips. Here’s a quick video demonstration:


(Note – we didn’t list the chemicals on the shopping list as there were a LOT of stuff to get for only one experiment, so just sit back and watch!)


No pH strips? The chop up a head of red cabbage and whirl in a blender with water. Pass through a strainer (discard the solids), and pour this new ‘indicator’ into several cups. Add Sprite to one cup and watch for a color change. Add baking soda and watch for another color change. Continue down the line, adding only one chemical per cup into your cabbage juice.


Click here to view another version of this experiment: Chemical Matrix.


[/am4show]


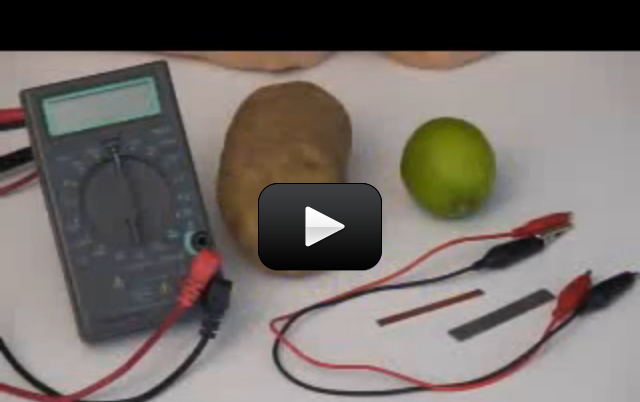
This experiment shows how a battery works using electrochemistry. The copper electrons are chemically reacting with the lemon juice, which is a weak acid, to form copper ions (cathode, or positive electrode) and bubbles of hydrogen.


These copper ions interact with the zinc electrode (negative electrode, or anode) to form zinc ions. The difference in electrical charge (potential) on these two plates causes a voltage.


Materials:


  • one zinc and copper strip
  • two alligator wires
  • digital multimeter
  • one fresh large lemon or other fruit

[am4show have=’p8;p9;p18;p45;p76;p91;p58;’ guest_error=’Guest error message’ user_error=’User error message’ ]


Download Student Worksheet & Exercises


Roll and squish the lemon around in your hand so you break up the membranes inside, without breaking the skin or leaking any juice. If you’re using non-membrane foods, such as an apple or potato, you are all ready to go.


Insert the copper and zinc strips into the lemon, making sure they do not contact each other inside. Clip one test wire to each metal strip using alligator wires to connect to the digital multimeter. Read and record your results.


What happens when you gently squeeze the lemon? Does the voltage vary over time?


You can try potatoes, apples, or any other fruit or vegetable containing acid or other electrolytes. You can use a galvanized nail and a copper penny (preferably minted before 1982) for additional electrodes.


If you want to light a light bulb, try using a low-voltage LED in the 1.7V or lower hooked up to several lemons connected in series. For comparison, you’ll need about 557 lemons to light a standard flashlight bulb.


What’s going on?


The basic idea of electrochemistry is that charged atoms (ions) can be electrically directed from one place to the other. If we have a glass of water and dump in a handful of salt, the NaCl (salt) molecule dissociates into the ions Na+ and Cl-.


When we plunk in one positive electrode and one negative electrode and crank up the power, we find that opposites attract: Na+ zooms over to the negative electrode and Cl- zips over to the positive. The ions are attracted (directed) to the opposite electrode and there is current in the solution.


Electrochemistry studies chemical reactions that generate a voltage and vice versa (when a voltage drives a chemical reaction), called oxidation and reduction (redox) reactions. When electrons are transferred between molecules, it’s a redox process.


Fruit batteries use electrolytes (solution containing free ions, like salt water or lemon juice) to generate a voltage. Think of electrolytes as a material that dissolves in water to make a solution that conducts electricity. Fruit batteries also need electrodes made of conductive material, like metal. Metals are conductors not because electricity passes through them, but because they contain electrons that can move. Think of the metal wire like a hose full of water. The water can move through the hose. An insulator would be like a hose full of cement – no charge can move through it.


You need two different metals in this experiment that are close, but not touching inside the solution. If the two metals are the same, the chemical reaction doesn’t start and no ions flow and no voltage is generated – nothing happens.


Exercises


  1.  What kinds of fruit make the best batteries?
  2.  What happens if you put one electrode in one fruit and one electrode in another?
  3.  What happens if you stick multiple electrode pairs around a piece of fruit, and connect them in series (zinc to copper to zinc to copper to zinc…etc.) and measure the voltage at the start and end electrodes?

[/am4show]


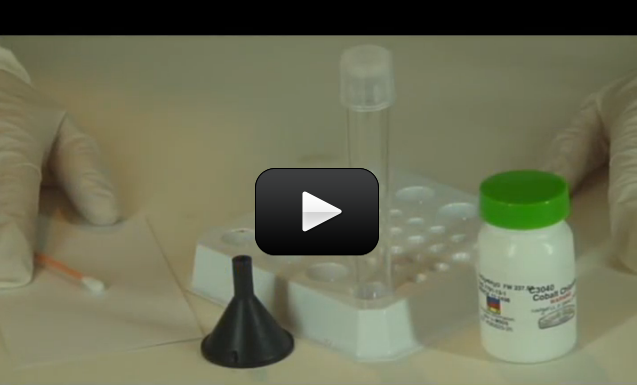
Cobalt chloride (CoCl2) has a dramatic color change when combined with water, making it a great water indicator. A concentrated solution of cobalt chloride is red at room temperature, blue when heated, and pale-to-clear when frozen. The cobalt chloride we’re using is actually cobalt chloride hexahydrate, which means that each CoCl2 molecule also has six water molecules (6H2O) stuck to it.


[am4show have=’p8;p9;p18;p45;p68;p80;’ guest_error=’Guest error message’ user_error=’User error message’ ]
For this experiment you’ll need:


  • cobalt chloride
  • cotton swab
  • goggles
  • test tube with stopper
  • index card
  • distilled water
  • hair dryer


Download Student Worksheet & Exercises


Fill your test tube partway with water and add 1 teaspoon of cobalt chloride. Cap and shake until the solids dissolve. Continue to add cobalt chloride, 1 teaspoon at a time, until you cannot dissolve any more into your solution. (You have just made a saturated solution.)


Using your cotton swab like a paintbrush, dip into the solution (your “paint”) and write on the index card. Use a hair dryer to blow across the solution. (Be careful not to scorch the paper!) What happens? Stick it in the freezer. Now what happens? What if you blow dry it after it comes out of the freezer? What else can you come up with? What happens if you spritz it with water?


What’s Going On? The cobalt changes color when hydrated/dehydrated – think of it as an indicator for water. It should be red when you first mix it, but blue when hit with the hair dryer. It doesn’t react to acids and bases the way the anthocyanin (in red cabbage juice) or universal indicator does, but rather with humidity.


Bonus Experiment Idea! You can grow red crystals by cooling off a cup of hot water. Here’s how: into a test tube, add 40 drops of hot water and 2 small spoon measure of cobalt chloride. Suspend a small pebble attached to a thread into the test tube (this is your starter-seed for your crystals to attach to). If after a day or two your crystals aren’t growing, just reheat the solution and add a little bit more of the chemical.


ANOTHER Bonus Experiment Idea! By soaking a strip of tissue or crepe paper (it’s got to be thin) in the cobalt chloride solution, you can create your own weather forecaster! Simply let dry and when it turns blue, you’re in for blue skies and pink means it’s going to rain. (It’s basically a humidity gauge.)


[/am4show]


If you don’t have equipment lying around for this experiment, wait until you complete Unit 10 (Electricity) and then come back to complete this experiment. It’s definitely worth it!


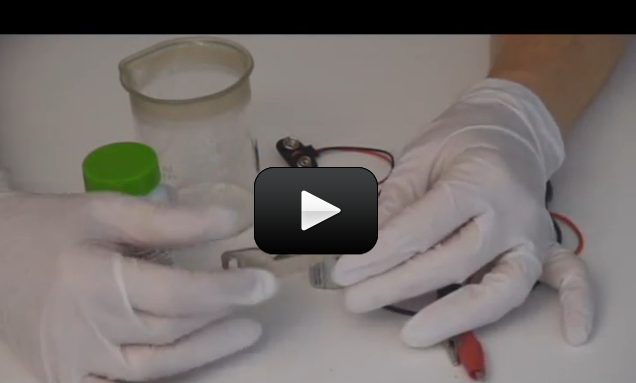
Electroplating was first figured out by Michael Faraday. The copper dissolves and shoots over to the key and gets stuck as a thin layer onto the metal key. During this process, hydrogen bubbles up and is released as a gas. People use this technique to add material to undersized parts, for place a protective layer of material on objects, to add aesthetic qualities to an object.


Materials:


  • one shiny metal key
  • 2 alligator clips
  • 9V battery clip
  • copper sulfate (MSDS)
  • one copper strip or shiny copper penny
  • one empty pickle jar
  • 9V battery

[am4show have=’p8;p9;p18;p45;p76;p80;’ guest_error=’Guest error message’ user_error=’User error message’ ]


Download Student Worksheet & Exercises


Place the copper sulfate in your jar and add a thin stream of water as you stir. Add enough water to make a saturated solution (dissolves most of the solids). Connect one alligator wire to the copper strip and the positive (red) wire from the clip lead. Connect the other alligator wire to the key and the negative (black) lead.


Place the copper strip and the key in the solution without touching each other. (If they touch, you’ll short your circuit and blow up your battery.) Let this sit for a few minutes… and notice what happens.


Clean up: Clean everything thoroughly after you are finished with the lab. After cleaning with soap and water, rinse thoroughly. Chemists use the rule of “three” in cleaning glassware and tools. Rinse three times, wash with soap, rinse three times.


Wipe off the electrodes. The solution and solids at the bottom of your cup cannot go in the trash. The liquid contains copper, a toxic heavy metal that needs proper disposal and safety precautions. Another chemical reaction needs to be performed to remove the heavy metal from the copper sulfate: Add a thumb sized piece of steel wool to the solution. The chemical reaction will pull out the copper out of the solution. The liquid can be washed down the drain. The solids cannot be washed down the drain, but they can be put in the trash. Use a little water to rinse the container free of the solids.


Place all chemicals, cleaned tools, and glassware in their respective storage places.


Dispose of all solid waste in the garbage. Liquids can be washed down the drain with running water. Let the water run awhile to ensure that they have been diluted and sent downstream.


Exercises


  1. Look at your key. What color is it?
  2.  Where did the copper on your key come from?
  3.  What happened when you added a second battery?
  4.  Which circuit (series or parallel) did the reaction accelerate faster with?

[/am4show]


I have tried for years to make whole wheat bread from scratch, but my loaves usually wound up as hockey pucks or door stops. Although my house always smelled great, my family could never choke down the crumbs of my latest creation. That’s when I enrolled in a bread-making class. Guess what I found out?
[am4show have=’p8;p9;p18;p45;’ guest_error=’Guest error message’ user_error=’User error message’ ]
A good baker is a lot like a good scientist – they both make mistakes, but they also both know how to correct their problems through careful observation. I learned that my short, squatty, rock-hard loaves had a few issues I wasn’t aware of. By making small adjustments to my methods, I was able to make a mouth-watering, chewy, moist, airy loaf of whole wheat bread without spending all day in the kitchen. Oh.. and I didn’t even use a mixer! (But you can if you want to.) After asking the teacher about a million questions (she was very patient), I finally figured out what went wrong. Here’s what I learned in my baking class:


First, you have to start with good flour. The cheap stuff I bought had so low protein content that it never got to the elastic-stretchy stage bread needs in order to rise. I used a mix of red flour (14% protein, all whole wheat) and gold flour (12% protein, often called white whole wheat) when I made the good bread. If you use good flour, you don’t need to add gluten to it (which is really what the high protein content is already doing for you).


Make sure your flour is stone-ground. If it’s not, then the process of going from kernel-to-flour heated up the flour too much and killed most of the nutrients. Stone-ground flour ensures that the flour didn’t get too hot (due to friction) – did you know that it can get over 450 degrees when they process flour?


I have always been a bit of a fanatic about always making sure my foods have whole wheat when possible. I grew up thinking that white flour should be avoided at all costs. So you can imagine my surprise when my baking teacher said that whole wheat flour is mostly white flour! Turns out that the wheat kernel is mostly ‘white flour’, and when they grind the kernel into flour, millers sift out the ‘whole wheat’ part that has all the nutrients in it. To make the flour ‘whole wheat’, they just mix the nutrient-rich part back in.  But you’ve still got the white flour part, too.


For whole wheat bread, it’s best to make it in two mixing stages. The first stage (called the ‘sponge’) gives the flour, water, yeast, and honey time to develop together before adding the bulk of the flour and the rest of the ingredients.  By using the whole wheat flour (with the higher protein content) in this first stage, you give it extra time to soften up so it can develop the long gluten strands when you knead it later.


I also hadn’t kneaded it enough for long enough. I figured a few shoves and pushes here and there out to do the trick.  But yeasted breads aren’t anything like quick breaks like muffins and banana bread where you don’t want to mix too much.  Yeast breads, and especially the whole wheat breads, must have lots of motion and stretching to develop those elastic protein bands inside.


The other important thing I learned is that bread is supposed to be sticky. As in slightly less than stick-to-the-table sticky. I was adding too much flour and my loaf dried out way too much during the rising and baking stages.  I needed more water in my loaf to keep it moist until it was baked. It was also too difficult to add water to the dough once I started kneading it, so I learned to skimp a bit on the flour, since that’s a lot easier to add if I needed it.


So after only a few hours, I had a very nice pile of whole wheat dough that I soon made into cinnamon rolls, cranberry-walnut loaf, dinner rolls, and monkey bread. My kids were impressed. Here’s the dough recipe I used so you can try it out for yourself – and many thanks to my baking instructor!


Whole Wheat Bread Recipe

  • 2 1/2 cups of warm water (100-105 oF)
  • 2 tablespoons yeast (I used Saf instant)
  • 3/4 cup honey at room temperature (did you know since honey is a natural preservative it never goes bad?)
  • 2 1/2 cups whole wheat flour (stone ground and high-protein content – I used Red Flour by Bob’s Red Mill or King Aurthur is great)

Mix these ingredients fully (your hand is your best tool) until all the lumps are gone.  You will probably smell the yeast coming to life right away, so don’t mix for more than a few minutes.  Cover it with a damp towel if it’s dry where you live, and stick it in an unheated oven with the light on for 1.5-2 hours. If it’s a warm day, use less time, but not less than 1 hour. You’ve just created the sponge.


Take the sponge out and place it on the counter. Preheat your oven (make sure there’s nothing in it!) to 350oF and spray a loaf pan (or use parchment).


To your sponge, add:

  • 1 tablespoon yeast
  • 3 1/2 cups gold flour (stone ground, high-protein – I used Gold Flour, which is a white-whole-wheat version with 12% protein)
  • 1 tablespoon salt (don’t skimp on this like I did, or your bread will rise too much and taste horrible)

Knead by hand (you can never over-knead by hand) until it’s soft and pliable, usually 6-10 minutes. If you’re using a mixer, make sure the dough hook actually cuts through and into the dough – the best hooks are heavy and corkscrew in design. The flat hook that comes with the standard kitchen-aid mixer will only push the dough around and not knead it at all. Be careful not to over-knead the dough in your mixer. (Getting the feel of the dough when it’s ready is something I learned to do in the class.)


Form it into your loaf pan (make sure it just touches the ends or it will mountain up on top). Let it rise for 20-40 minutes in a warm, draft-free spot. The bread is done with it reaches 180oF inside (use a thermometer – all the bakers do). Turn it out of the pan right away to cool on a wire rack so the bottom doesn’t get soggy.


Enjoy your bread! This bread will last a week on the counter. If you’re not going to eat it all before that, double-bag it and stick it in the freezer.


To make cinnamon rolls, simply combine butter, cinnamon, and brown sugar (use a 1:16 ratio for cinnamon and sugar) and sprinkle on a rolled out rectangle. Roll up, slice carefully without squashing it (use a bread knife and a sawing motion), and let rise and bake.


[/am4show]


This is the experiment that your audience will remember from your chemistry magic show. Here’s what happens – you call up six ‘helpers’ and hand each a seemingly empty test tube. Into each test tube, pour a little of the main gold-colored solution, say a few magic words, and their test tubes turn clear, black, pink, gold, yellow, and white. With a flourish, ask them to all pour their solutions back into yours and the final solution turns from inky black to clear. Voila!


I first saw a similar experiment when I was a kid, and I remembered it all the way through college, where I asked my professor how I could duplicate the experiment on my own. I was told that the chemicals used in that particular experiment were way too dangerous, and no substitute experiment was possible, especially for the color reversal at the end. I was determined to figure out an alternative. After two weeks of nothing but chemistry and experiment testing, I finally nailed it – and the best part is, you have most of these chemicals at the grocery store. (And the best part is, I can share it with you as I’ve eliminated the nasty chemicals so you don’t have to worry about losing an eyeball or a finger.)


NOTE: This experiment requires adult help, as it uses chemicals that are toxic if randomly mixed together.  Follow the instructions carefully, and do not mix random chemicals together.


Are you ready to mix up your own rainbow?


[am4show have=’p8;p9;p18;p45;p91;p101;’ guest_error=’Guest error message’ user_error=’User error message’ ]


Materials:


  • Iodine (non-clear, non-ammonia from the pharmacy)
  • Hydrogen peroxide (3% solution)
  • Vinegar (distilled white is best)
  • Cornstarch (tiny pinch) or one starch packing peanut
  • Water (distilled)
  • Sodium Thiosulfate
  • Sodium Carbonate (AKA: “washing soda“)
  • Phenolphthalein (keep this out of reach of kids) – this is optional
  • Disposable plastic cups (about eight)
  • Popsicle sticks
  • Gloves for your hands
  • Goggles for your face
  • Medicine droppers (at least four)


Download Student Worksheet & Exercises


[/am4show]


If you love the idea of mixing up chemicals and dream of having your own mad science lab one day, this one is for you. You are going to mix up each solid with each liquid in a chemical matrix.


In a university class, one of the first things you learn in chemistry is the difference between physical and chemical changes. An example of a physical change happens when you change the shape of an object, like wadding up a piece of paper. If you light the paper wad on fire, you now have a chemical change. You are rearranging the atoms that used to be the molecules that made up the paper into other molecules, such as carbon monoxide, carbon dioxide, ash, and so forth.


How can you tell if you have a chemical change? If something changes color, gives off light (such as the light sticks used around Halloween), or absorbs heat (gets cold) or produces heat (gets warm), it’s a chemical change.


What about physical changes? Some examples of physical changes include tearing cloth, rolling dough, stretching rubber bands, eating a banana, or blowing bubbles.


About this experiment: Your solutions will turn red, orange, yellow, green, blue, purple, hot, cold, bubbling, foaming, rock hard, oozy, and slimy, and they’ll crystallize and gel — depending on what you put in and how much!


This is the one set of chemicals that you can mix together without worrying about any lethal gases.  I do recommend doing this OUTSIDE, as the alcohol and peroxide vapors can irritate you. Always have goggles on and gloves on your hands, and a hose handy in case of spills. Although these chemicals are not harmful to your skin, they can cause your skin to dry out and itch. Wear gloves (latex or similar) and eye protection (safety goggles), and if you’re not sure about an experiment or chemical, just don’t do it. (Skip the peroxide and cold pack if you have small kids.)


Materials:
• sodium tetraborate (borax, a laundry whitener)
• sodium bicarbonate (baking soda)
• sodium carbonate (washing soda)
• calcium chloride (also known as “DriEz” or “Ice Melt”)
• ammonium nitrate (single-use disposable cold pack)
• isopropyl rubbing alcohol
• hydrogen peroxide
• acetic acid (distilled white vinegar)
• water
• liquid dish soap (add to water)
• muffin tin or disposable cups
• popsicle sticks for stirring and mixing
• tablecloths (one for the table, another for the floor)
• head of red cabbage (indicator)


[am4show have=’p8;p9;p11;p38;p92;p18;p45;’ guest_error=’Guest error message’ user_error=’User error message’ ]


Download Student Worksheet & Exercises


Step 1: Cover your kitchen table with a plastic tablecloth (and possibly the floor). Place your chemicals on the table. A set of muffin cups make for an excellent chemistry experiment lab. (Alternatively, you can use empty plastic ice cube trays.) You will mix in these cups. Leave enough space in the cups for your chemicals to mix and bubble up — don’t fill them all the way when you do your experiments!


Step 2: Set out your liquid chemicals in easy-to-pour containers, such as water bottles (be sure to label them, as they all will look the same): alcohol, hydrogen peroxide, water, acetic acid, and dish soap (mixed with water). Set out small bowls (or zipper bags if you’re doing this with a crowd) of the powders with the tops of your water bottles as scoopers. The small scoopers regulate the amounts you need for a muffin-sized reaction. Label the powders, as they all look the same.


Step 3: Prepare the indicator by coarsely chopping the head of red cabbage and boiling the pieces for five minutes in a pot full of water. Carefully strain out all the pieces with a fine-mesh strainer; the reserved liquid is your indicator (it should be blue or purple).


When you add this indicator to different substances, you will see a color range: hot pink, tangerine orange, sunshine yellow, emerald green, ocean blue, velvet purple, and everything in between. Test out the indicator by adding drops of cabbage juice to something acidic, such as lemon juice, and see how different the color is when you add indicator to a base, such as baking soda mixed with water.


Have your indicator in a bottle by itself. An old soy sauce bottle with a built-in regulator that keeps the pouring to a drip is perfect. You can also use a bowl with a bulb syringe, but cross-contamination could be a problem. Or it could not be — depending on whether you want the kids to see the effects of cross-contamination during their experiments. (The indicator bowl will continually turn different colors throughout the experiment.)


Step 4: Start mixing it up! When I teach this class, I let them have at all the chemicals at once (even the indicator), and of course, this leads to a chaotic mix of everything. When the chaos settles down, and they start asking good questions, I reveal a second batch of chemicals they can use. (I have two identical sets of chemicals, knowing that the first set will get used up very quickly.)


Step 5: After the initial burst of enthusiasm, your kids will instinctively start asking better questions. They will want to know why their green goo is creeping onto the floor while someone else’s just bubbled up hot pink, seemingly mixed from the same stuff. Give them a chance to figure out a more systematic approach, and ask if they need help before you jump in to assist.


What’s happening with the indicator? An indicator is a compound that changes color when you dip it in different things, such as vinegar, alcohol, milk, or baking soda mixed with water. There are several extracts you can use from different substances. You’ll find that different indicators are affected differently by acids and bases. Some change color only with an acid, or only with a base. Turmeric, for example, is good only for bases. (You can prepare a turmeric indicator by mixing 1 teaspoon turmeric with 1 cup rubbing alcohol.)


Why does red cabbage work? Red cabbage juice has anthocyanin, which makes it an excellent indicator for these experiments. Anthocyanin is what gives leaves, stems, fruits, and flowers their colors. (Did you know that certain flowers, such as hydrangeas, are blue in acidic soil but turn pink when transplanted to a basic soil?) You’ll need to get the anthocyanin out of the cabbage and into a more useful form so you can use it as a liquid indicator.


Tip for Testing Chemical Reactions: Periodically hold your hand under the muffin cups to test the temperature. If it feels hot, it’s an exothermic reaction (giving off energy in the form of heat, light, explosions …). The chemical-bond energy is converted to thermal energy (heat) in these experiments. If it feels cold, you’ve made an endothermic reaction (absorbing energy, where the heat from the mixture converts to bond energy). Sometimes you’ll find that your mixture is so cold that it condenses the water outside the container (like water drops on the outside of an ice-cold glass of water on a hot day).


Variations for the Indicator: Red cabbage isn’t the only game in town. You can make an indicator out of many other substances, too. Here’s how to prepare different indicators:
• Cut the substance into smaller pieces. Boil the chopped substance for five minutes. Strain out the pieces and reserve the juice. Cap the juice (indicator) in a water bottle, and you’re ready to go.
• What different substances can you use? We’ve had the best luck with red cabbage, blueberries, red and green grapes, beets, cherries, and turmeric. You can make indicator paper strips using paper towels or coffee filters. Just soak the paper in the indicator, remove and let dry. When you’re ready to use one, dip it in partway so you can see the color change and compare it to the color it started out with.
• Use the indicator both before and after you mix up chemicals. You will be surprised and dazzled by the results!


Teaching Tips: You can make this lab more advanced by adding a postage scale (to measure the solids in exact measurements), small beakers and pipettes for the liquid measurements, and data sheets to record temperature, reactivity, and acid/base indicator levels. (Hint: Make the data sheet like a matrix, to be sure you get all the possible combinations.)


For the student: Your mission is to mix up solutions that:
• Generate heat (exothermic)
• Get ice-cold on their own (endothermic)
• Crystallize
• Are self-gelling
• Bubble up and spit
• Ooze creepy concoctions
• Are the most impressive (the ooohhhh-aaahhhhh factor).


For the parent: Your mission is to:
• Make sure everything in reach is covered with plastic tablecloths, drop cloths, or tarps
• Open all the windows and turn on the fans (or just do this experiment outside near the hose)
• Keep all small children and pets away
• Slap on a pair of rubber gloves
• Encourage the kids to try it and test it
• Remember that there are no such things as mistakes, only learning opportunities. (Don’t forget that we usually learn more from mistakes than we do when we’re successful!)


For the truly exceptional parent: Your mission is also to:
• Secretly get an identical second set of chemicals from the grocery store (see shopping list above) and hide them in a bin nearby
• Have all the chemicals out and ready for the kids to use
• Be sure the kids know your rules before you let them loose (no eating, running, or horseplay; all goggles must stay on; etc.)
• Have a bin full of water nearby for washing up
• Let the kids loose to experiment and play without expectation
• Play with the kids, get into the act (“Wow! It turned green! How did you do that?!” instead of “Well, I’m not going to clean THAT up.”)
• Expect kids to dump everything and mix it all together at the same time without much thought about what they are trying to accomplish
• When their supplies run out, pull out your second bin and smile
• Encourage the kids to try their ideas out
o When they ask, “Will this work?” you can reply
with confidence, “I don’t know — try it!”


Click here to view another version of this experiment: Acids & Bases.
[/am4show]


When you chill helium, nothing changes until it gets extremely cold. It remains a gas until it reaches a temperature below 5 Kelvin (-267.960 Celsius, -450.3280 Fahrenheit) at a pressure of 2.24 atm (227kPa).


1908 Heike Onnes cooled helium to below 5 Kelvin. At this temperature helium turns into a liquid. He could not solidify it by cooling it further because helium does not have a triple point temperature where solid, liquid, and gas phases are in equilibrium with one another. In 1906, solid helium was created by subjecting helium to a pressure of 25 atmospheres at a temperature below 1K.


At temperatures close to absolute zero, helium does not exhibit any viscosity. This makes helium, under those conditions, something called a superfluid.


[am4show have=’p8;p9;p11;p38;p92;’ guest_error=’Guest error message’ user_error=’User error message’ ]


As a substance freezes, its movement slows down. In the frozen state, most substances become solid. The electron orbitals condense as the atom cools, and the density increases. Helium does not solidify. As it reaches temperatures close to absolute zero, helium behaves as a superfluid that flows with no viscosity. Viscosity is a term that refers to a substance’s resistance to flow. Something that is thick has a high viscosity, like honey, and something that is thin has a low viscosity, like water.


[/am4show]


First discovered in 1886 by Hans Heinrich Landolt, the iodine clock reaction is one of the best classical chemical kinetics experiments. Here’s what to expect:  Two clear solutions are mixed. At first there is no visible reaction, but after a short time, the liquid suddenly turns dark blue.


Usually, this reaction uses a solution of hydrogen peroxide with sulfuric acid, but you can substitute a weaker (and safer) acid that works just as well:  acetic acid (distilled white vinegar). The second solution contains potassium iodide, sodium thiosulfate (crystals), and starch (we’re using a starch packing peanut, but you can also use plain old cornstarch). Combine one with the other to get the overall reaction, but note that there are actually two reactions happening simultaneously.


[am4show have=’p8;p9;p18;p45;p91;’ guest_error=’Guest error message’ user_error=’User error message’ ]


Materials:


  • sodium thiosulfate
  • potassium iodide
  • two plastic test tubes
  • packing peanut
  • disposable droppers
  • hydrogen peroxide
  • distilled white vinegar
  • distilled water
  • four disposable cups
  • popsicle sticks
  • clock
  • measuring spoons and cups
  • goggles and gloves


Download Student Worksheet & Exercises


In the first (slow) reaction, the triiodide ion is produced:


H2O2 + 3 I + 2 H+ ? I3 + 2 H2O


In the second (fast) reaction, triiodide is reconverted to iodide by the thiosulfate.


I3 + 2 S2O32- ? 3 I + S4O62-


After some time the solution always changes color to a very dark blue, almost black (the solution changes color due to the triiodide-starch complex).


Let’s get started! Rinse everything out very thoroughly with water three times, to ensure that nothing is contaminated before the experiment so you can get a clean start.  You can use droppers or measuring spoons (dedicated just to chemistry, not used for cooking) to measure your chemicals.  For droppers, make sure you’re using one dropper per chemical, and leave the dropper in the chemical when not in use to decrease the chances of cross-contamination.


Measure out 1 cup of distilled water and pour it into your first cup. Add ½ teaspoon sodium thiosulfate and stir until all the crystals are dissolved.  Touch the cup to feel the temperature change.  Is it hotter or colder?


Measure out 1 cup of distilled water into a new container.  Drop in the starch packing peanut and stir it around until it dissolves.  Packing peanuts can be made of cornstarch (as yours is, which is why it “melts” in water) or polystyrene (which melts in acetone, not water).


Into a third cup, measure out 1 cup of hydrogen peroxide.


Into the fourth cup, measure out 1 cup of distilled white vinegar.


Fill your plastic test tube with three parts starch (packing peanut) solution.  Add two parts distilled vinegar and two parts potassium iodide.  (Make sure you don’t cross-contaminate your chemicals — use clean measuring equipment each time.)  Your solution should be clear.


Into another plastic test tube, measure out three parts starch solution. Add two parts hydrogen peroxide and two parts sodium thiosulfate solution.  If the solution in the test tube is clear, you’re ready to move on to the next step.


Your next step is to pour one solution into the other and cap it, rocking it gently to mix the solution.  While you’re doing this, have someone clock the time from when the two solutions touch to when you see a major change.


What’s going on? There are actually two reactions going on at the same time.  When you combined the two solutions, the hydrogen peroxide (H2O2) combines with the iodide ions (I) to create triiodide (I3) and water (H2O). The sodium thiosulfate (S2O32) grabs the triiodide to form iodine, which is clear.  But the sodium thiosulfate eventually runs out, allowing the triiodide to accumulate (indicated by the solution changing color).  The time you measure is actually the time it takes to produce slightly more iodide ions than the sodium thiosulfate can wipe out.


By accelerating the first reaction, you can shorten the time it takes the solution to change color. There are a few ways to do this: You can decrease the pH (increasing H+ concentration), or increase the iodide or hydrogen peroxide. To lengthen the time delay, add more sodium thiosulfate.


[/am4show]


So this is probably the last chemical in your set you haven’t used… I had to really dig into my ‘bag of tricks’ to find something suitable for you to practice with.
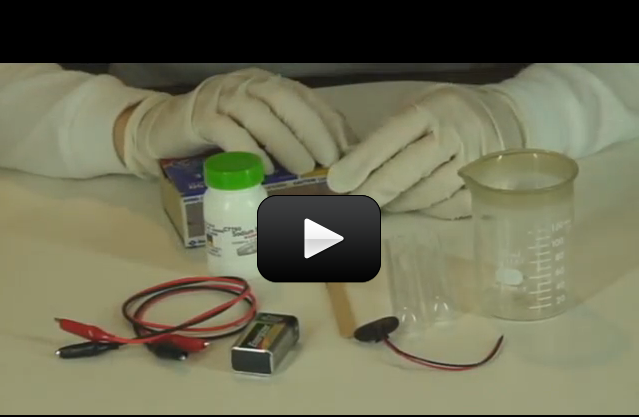
Ammonium chloride is found near volcanoes and coal mines, as glue for plywood, in hair shampoo, in the electronics industry in solder, and also is fed to cows. It’s not typically experimented with in the chemistry lab, but since it’s in your set, I thought we’d play with it and see if you can figure out a few of its properties.


Use gloves and goggles when handling ammonium chloride, and make sure you have a fire extinguisher and a grown up handy!


[am4show have=’p8;p9;p18;p45;’ guest_error=’Guest error message’ user_error=’User error message’ ]
Magic Smoke: If you slowly sprinkle ammonium chloride into a flame, puffs of white smoke will appear. Or, you can make clouds of white smoke appear by heating half a teaspoon of ammonium chloride over a flame. You may have to extinguish the flame first, but you can still get it to work, so be careful!


Star Dust: In a glass or cup, dissolve 4 measures of ammonium chloride in two spoonfuls of water in a glass or cup. Sprinkle a little of this solution on a mirror, and, as the solution dries, beautiful crystals will appear.


[/am4show]


Why study chemistry? Baking is chemistry. Cars use chemistry to zip down the street. Your body converts food into energy using chemistry. Everything you see, touch, taste, and smell is a chemical.


Studying chemistry is like peeking under the hood of a racecar – you know you put gas in and it goes, but that’s all you can tell from the outside. Chemistry gets you into the inner workings on the molecular level. Are you ready? This video will get you started on the right foot for your study into chemical kinetics:


[am4show have=’p8;p9;p18;p45;’ guest_error=’Guest error message’ user_error=’User error message’ ]


[/am4show]


Soon you’ll be able to explain everyday things, like why baking soda and vinegar bubble, why only certain chemicals grow crystals, what fire really is made of, how to transform copper into gold, and how to make cold light. Once you wrap your head around these basic chemistry ideas (like acids, polymers, and kinetics), you can make better choices about the products you use everyday like pain relievers, cold compresses, and getting a loaf of bread to rise. Are your ready? This video will get you started with your lesson in molecules:


[am4show have=’p8;p9;p18;p45;’ guest_error=’Guest error message’ user_error=’User error message’ ]


[/am4show]


Mars is coated with iron oxide, which not only covers the surface but is also present in the rocks made by the volcanoes on Mars.


Today you get to perform a chemistry experiment that investigates the different kinds of rust and shows that given the right conditions, anything containing iron will eventually break down and corrode. When iron rusts, it’s actually going through a chemical reaction: Steel (iron) + Water (oxygen) + Air (oxygen) = Rust
Materials


  • Four empty water bottles
  • Four balloons
  • Water
  • Steel wool
  • Vinegar
  • Water
  • Salt

[am4show have=’p8;p9;p17;p44;p68;p80;p83;’ guest_error=’Guest error message’ user_error=’User error message’ ]


Download Student Worksheet & Exercises


  1. This lab is best done over two consecutive days. Plan to set up the experiment on the first day, and finish up with the observations on the next.
  2. Line up four empty bottles on the table.
  3. Label your bottles so you know which is which: Water, Water + Salt, Vinegar, Vinegar + Salt
  4. Fill two bottles with water.
  5. Fill two with vinegar.
  6. Add a tablespoon of salt to one of the water bottles.
  7. Add one tablespoon of salt to one of the vinegar bottles.
  8. Stuff a piece of steel wool into each bottle so it comes in contact with the liquid.
  9. Stretch a balloon across the mouth of each bottle.
  10. Let your experiment sit (overnight is best, but you can shorten this a bit if you’re in a hurry).
  11. The trick to getting this one to work is in what you expect to happen. The balloon should get shoved inside the bottle (not expand and inflate!). Check back over the course of a few hours to a few days to watch your progress.
  12. Fill in the data table.

What’s Going On?

Rust is a common name for iron oxide. When metals rust, scientists say that they oxidize, or corrode. Iron reacts with oxygen when water is present. The water can be liquid or the humidity in the air. Other types of rust happen when oxygen is not around, like the combination of iron and chloride. When rebar is used in underwater concrete pillars, the chloride from the salt in the ocean combines with the iron in the rebar and makes a green rust.


Mars has a solid core that is mostly iron and sulfur, and a soft pastel-like mantle of silicates (there are no tectonic plates). The crust has basalt and iron oxide. The iron is in the rocks and volcanoes of Mars, and Mars appears to be covered in rust.


When iron rusts, it’s actually going through a chemical reaction:
Steel (iron) + Water (oxygen) + Air (oxygen) = Rust


There are many different kinds of rust. Stainless steel has a protective coating called chromium (III) oxide so it doesn’t rust easily.


Aluminum, on the other hand, takes a long time to corrode because it’s already corroded — that is, as soon as aluminum is exposed to oxygen, it immediately forms a coating of aluminum oxide, which protects the remaining aluminum from further corrosion.


An easy way to remove rust from steel surfaces is to rub the steel with aluminum foil dipped in water. The aluminum transfers oxygen atoms from the iron to the aluminum, forming aluminum oxide, which is a metal polishing compound. And since the foil is softer than steel, it won’t scratch.


Exercises


  1. Why did one balloon get larger than the rest?
  2. Which had the highest pressure difference? Why?

[/am4show]


Hydrogen peroxide is used to fuel rockets, airplanes, and other vehicle engines. Chemistry teachers everywhere use it to demonstrate the power of a catalyst.

To speed up a reaction without altering the chemistry of the reaction involves adding a catalyst. A catalyst changes the rate of reaction but doesn’t get involved in the overall chemical changes.

For example, leaving a bottle of hydrogen peroxide outside in the sunlight will cause the hydrogen peroxide to decompose. However, this process takes a long time, and if you don’t want to wait, you can simply toss in a lump of charcoal to speed things along.

The carbon is a catalyst in the reaction, and the overall effect is that instead of taking two months to generate a balloon full of oxygen, it now only takes five minutes. The amount of charcoal you have at the end of the reaction is exactly the same as before it started.

A catalyst can also slow down a reaction. A catalytic promoter increases the activity, and a catalytic poison (also known as a negative catalyst, or inhibitor) decreases the activity of a reaction. Catalysts offer a different way for the reactants to become products, and sometimes this means the catalyst reacts during the chemical reaction to form intermediates. Since the catalyst is completely regenerated before the reaction is finished, it’s considered ‘not used’ in the overall reaction.

In this experiment, you'll see that there's a lot of oxygen hiding inside the peroxide - enough to really make things interesting and move around! You'll also find out what happens to soap when you bubble oxygen through it. Are you ready?

[am4show have='p8;p9;p101;' guest_error='Guest error message' user_error='User error message' ]
Materials:

  • hydrogen peroxide
  • yeast (the kind you'd use for baking bread)
  • liquid soap
  • shallow dish
  • water or soda bottle

The hydrogen is mixed with the soap first. The catalyst (yeast) causes the hydrogen peroxide to break down into oxygen and water. Since there's a lot of oxygen trapped in the peroxide, this decomposition happens very quickly and the oxygen rushes out of the container fast! As this happens, the water and soap mix together and turns into foam as the oxygen bubbles through trying to escape.

[/am4show]


This experiment is just for advanced students. If you guessed that this has to do with electricity and chemistry, you’re right! But you might wonder how they work together. Back in 1800, William Nicholson and Johann Ritter were the first ones to split water into hydrogen and oxygen using electrolysis. (Soon afterward, Ritter went on to figure out electroplating.) They added energy in the form of an electric current into a cup of water and captured the bubbles forming into two separate cups, one for hydrogen and other for oxygen.

This experiment is not an easy one, so feel free to skip it if you need to. You don’t need to do this to get the concepts of this lesson but it’s such a neat and classical experiment (my students love it) so you can give it a try if you want to. The reason I like this is because what you are really doing in this experiment is ripping molecules apart and then later crashing them back together.

Have fun and please follow the directions carefully. This could be dangerous if you’re not careful. The image shown here is using graphite from two pencils sharpened on both ends, but the instructions below use wire.  Feel free to try both to see which types of electrodes provide the best results.

[am4show have='p8;p9;p11;p38;p92;p40;p76;p91;p58;' guest_error='Guest error message' user_error='User error message' ]

You will need:

  • 2 test tubes or thin glass or plastic something closed at one end. I do not recommend anything wider than a half inch in diameter.
  • 2 two wires, one needs to be copper, at least 12 inches long. Both wires need to have bare ends.
  • 1 cup
  • sodium sulfate OR salt
  • Water
  • One 9 volt battery
  • Long match or a long thin piece of wood (like a popsicle stick) and a match
  • Rubber bands
  • Masking tape

Download Student Worksheet & Exercises
1. Fill the cup with water.

2. Put a tablespoon of salt or sodium sulfate into the water and stir it up. (The salt allows the electricity to flow better through the water.)

2. Put one wire into the test tube and rubber band it to the test tube so that it won’t come out (see picture).

3. Use the masking tape to attach both wires to the battery. Make sure the wire that is in the test tube is connected to the negative (-) pole of the battery and that the other is connected to the positive (+) pole. Don’t let the bare parts of the different wires touch. They could get very hot if they do.

4. Fill the test tube to the brim with the salt water.

5. This is the tricky part. Put your finger over the test tube, turn it over and put the test tube, open side down, into the cup of water. (See picture.)

6. Now put the other wire into the water. Be careful not to let the bare parts of the wires touch.

7. You should see bubbles rising into the test tube. If you don’t see bubbles, check the other wire. If bubbles are coming from the other wire either switch the wires on the battery connections or put the wire that is bubbling into the test tube and remove the other. If you see no bubbles check the connections on the battery.

8. When the test tube is half full of gas (half empty of salt water depending on how you look at it) light the long match or the wooden stick. Then take the test tube out of the water and let the water drain out. Holding the test tube with the open end down, wait for five seconds and put the burning stick deep into the test tube (the flame will probably go out but that’s okay). You should hear an instant pop and see a flash of light. If you don’t, light the stick again and try it another time. For some reason, it rarely works the first time but usually does the second or third.

A water molecule, as you saw before, is two hydrogen atoms and one oxygen atom. The electricity encouraged the oxygen to react with the copper wire leaving the hydrogen atoms with no oxygen atom to hang onto. The bubbles you saw were caused by the newly released hydrogen atoms floating through the test tube in the form of hydrogen gas. Eventually that test tube was part way filled with nothing but pure hydrogen gas.

But how do you know which bubbles are which? You can tell the difference between the two by the way they ignite (don’t’ worry – you’re only making a tiny bit of each one, so this experiment is completely safe to do with a grown up).

It takes energy to split a water molecule. (On the flip side, when you combine oxygen and hydrogen together, it makes water and a puff of energy. That’s what a fuel cell does.) Back to splitting the water molecule - as the electricity zips through your wires, the water molecule breaks apart into smaller pieces: hydrogen ions (positively charged hydrogen) and oxygen ions (negatively charged oxygen). Remember that a battery has a plus and a minus charge to it, and that positive and negative attract each other.

So, the positive hydrogen ions zip over to the negative terminal and form tiny bubbles right on the wire. Same thing happens on the positive battery wire. After a bit of time, the ions form a larger gas bubble. If you stick a cup over each wire, you can capture the bubbles and when you’re ready, ignite each to verify which is which.

If the match burns brighter, the gas is oxygen. If you hear a POP!, the gas is hydrogen. Oxygen itself is not flammable, so you need a fuel in addition to the oxygen for a flame. In one case, the fuel is hydrogen, and hence you hear a pop as it ignites. In the other case, the fuel is the match itself, and the flame glows brighter with the addition of more oxygen.

When you put the match to it, the energy of the heat causes the hydrogen to react with the oxygen in the air and “POP”, hydrogen and oxygen combine to form what? That’s right, more water. You have destroyed and created water! (It’s a very small amount of water so you probably won’t see much change in the test tube.)

The chemical equations going on during this electrolysis process look like this:

A reduction reaction is happening at the negatively charged cathode. Electrons from the cathode are sticking to the hydrogen cations to form hydrogen gas:

2 H+(aq) + 2e- --> H2(g)

2 H2O(l) + 2e- --> H2(g) + 2 OH-(aq)

The oxidation reaction is occurring at the positively charged anode as oxygen is being generated:

2 H2O(l)  --> O2(g) + 4 H+(aq) + 4e-

4 OH-(aq) --> O2(g) + 2 H2O(l) + 4 e-

Overall reaction:

2 H2O(l)  --> 2 H2(g) + O2(g)

Note that this reaction creates twice the amount of hydrogen than oxygen molecules. If the temperature and pressure for both are the same, you can expect to get twice the volume of hydrogen to oxygen gas (This relationship between pressure, temperature, and volume is the Ideal Gas Law principle.)

This is the idea behind vehicles that run on sunlight and water.  They use a solar panel (instead of a 9V battery) to break apart the hydrogen and oxygen and store them in separate tanks, then run them both back together through a fuel cell, which captures the energy (released when the hydrogen and oxygen recombine into water) and turns the car's motor. Cool, isn't it?

Note: We're going to focus on Alternative Energy in Unit 12 and create all sorts of various energy sources including how to make your own solar battery, heat engine, solar & fuel cell vehicles (as described above), and more!

Exercises

  1. Why are bubbles forming?
  2. Did bubbles form at both wires, or only one? What kind of bubbles are they?
  3. What would happen if you did this experiment with plain water? Would it work? Why or why not?
  4. Which terminal (positive or negative) produced the hydrogen gas?
  5. Did the reaction create more hydrogen or more oxygen?

[/am4show]