Getting Started
This is an introduction to the microscope, and we’re going to not only how to use a microscope but also cover the basics of optics, slide preparation, and why we can see things that are invisible to the naked eye. Microscopes are basically two lenses put together to make things appear larger.
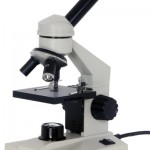
The first thing you need to do is select a compound microscope. While you can do these lessons without one, it’s really a totally different experience doing it with a scope. Cheap microscopes are going to frustrate you beyond belief, so here are the ones we recommend that will last your kids through college. You’ll want one with the optional mechanical stage (instead of stage clips), fine and coarse adjustment knobs, and at least three objectives. Click here for our microscope equipment recommendations.
If you’ve just purchased a microscope, keep it in its packaging until you watch the videos in this section. We’ll show you how to handle it, store it, and where not to touch. Your first job is to start collecting as many interesting windowsill insects as you can find.
[am4show have='p8;p9;p11;p38;p72;p77;p92;' guest_error='Guest error message' user_error='User error message' ]
Here are the scientific techniques we're going to cover:
- The compound microscope is really just a set of lenses stacked so they work together to make things look bigger.
- We will learn how to sketch what you see at the eyepiece.
- Appropriate mounting techniques for specimens including wet and dry mounts.
- Handling issues when specimens are hard to see: using staining (like Lugol’s stain or dark iodine) to add contrast and bring it into view. Protoslo can be used when specimens move too fast to view.
- Heat fixes are used when the specimens move all over the place when stained (like yeast). By drying out the specimen and fixing it to the slide, you can easily stain it several times to bring out the contrast and view the structure. (Very good for viewing bacteria.)
- How to keep specimens for a longer time (like a couple of months) using superglue.
By the end of the labs in this unit, students will be able to:
- Properly handle and care for a compound microscope.
- Identify the parts and optics of a microscope.
- Prepare a slide for observation using various slide preparation techniques.
- Differentiate observation from inference (interpretation) and know scientists’ explanations come partly from what they observe and partly from how they interpret their observations.
- Measure and estimate the weight, length and volume of objects.
- Formulate and justify predictions based on cause-and-effect relationships.
- Conduct multiple trials to test a prediction and draw conclusions about the relationships between predictions and results.
- Construct and interpret graphs from measurements.
- Follow a set of written instructions for a scientific investigation.
[/am4show]