Silly as our application for this experiment may sound, we use this system to keep pens handy near the shopping list on the fridge.  It’s saved us from many pen-searches over the years! We install these at various places around the house (by the telephone, fridge, front door, anywhere that you usually need a pen at the last minute), and have even seen them at the counters of local video-rental stores. [am4show have='p8;p9;p11;p38;p92;p14;p41;p88;p92;' guest_error='Guest error message' user_error='User error message' ]
Download Student Worksheet Troubleshooting: It’s important to note that the weight needs to slide freely both up and down the length of the cord (which is why fishing line is a great choice – the surface of the line is very low friction). Another important tip: the weights you use must weigh more than the object at the end of the string plus the force of friction in the lines (and the pulley).  Hollow, metal objects work great like nuts (for bolts). You’ll need to practice to find just the right balance point: where the pen flies up to its resting position when you let go of the pen. This is a great addition to any tree house or playground structure!  Hang a loop of rope from a tree branch (don't forget to thread the pulleys onto the rope before you tie the knot!  Connect one pulley to the basket handle made from a circle of short rope.  Tie a length of rope to the basket handle, then up through one tree pulley, down through the basket pulley, and up through the second tree pulley. Thread a 6" length of PVC pipe onto the end and tie the rope back onto itself to form a handle. [/am4show]

trebuchet23This experiment is for Advanced Students. For ages, people have been hurling rocks, sticks, and other objects through the air. The trebuchet came around during the Middle Ages as a way to break through the massive defenses of castles and cities. It’s basically a gigantic sling that uses a lever arm to quickly speed up the rocks before letting go. A trebuchet is typically more accurate than a catapult, and won’t knock your kid’s teeth out while they try to load it.


Trebuchets are really levers in action. You’ll find a fulcrum carefully positioned so that a small motion near the weight transforms into a huge swinging motion near the sling. Some mis-named trebuchets are really ‘torsion engines’, and you can tell the difference because the torsion engine uses the energy stored in twisted rope or twine (or animal sinew) to launch objects, whereas true trebuchets use heavy counterweights.


[am4show have=’p8;p9;p11;p38;p41;p88;p92;p103;’ guest_error=’Guest error message’ user_error=’User error message’ ]


This is a serious wood-construction project. If you have access to scrap wood and basic tools (and glue!), you have everything you need to build this project. You will need to find heavy objects (like rocks or marbles) for the weights.


We want kids to discover that science isn’t in the special parts that come with a kit, but rather in the imagination and skill of the kid building it. We strive to avoid parts that are specially made just for a kit, molded plastic pieces, etc. and instead use parts that any kid could buy from the store. This means that kids can feel free to change things around, use their own ideas to add improvements and whatever else their imagination can come up with. So on this note, let’s get started.


WARNING: This project requires the use of various hand tools. These tools should only be used with adult supervision, and should not be used by children under 12 years of age.


Tools you’ll need:


  •   Hammer
  •   Electric drill with ¼” bit
  •   Hot glue gun & glue sticks
  •   Measuring tape or ruler
  •   Hand saw & clamp (or miter box)
  •   Scissors
  •   Screwdriver (flathead) or wood chisel

Materials:


  • 7 pieces of ½” x ½” x 24″ pieces of wood stock
  • 2 pieces of ¾” x 24″ wood
  • 1 piece of 3″ x 24″ wood
  • 18″ Wooden dowel
  • Screw eye
  • Nails
  • String
  • Clear tube
  • Rubber mesh

Note: wood pieces may be slightly larger or smaller than specified. Just use your best judgment when sizing.


From ½” x ½” x 24″ pieces of wood stock cut:


  • 3 pieces 5″ long
  • 2 pieces 9″ long
  • 3 pieces 3-1/2″ long
  • 4 pieces 5-1/2″ long

From the dowel cut:


  • 2 pieces 7″ long
  • 1 piece 4″ long

From the 3″ x 24″ flat piece of wood cut:


  • 2 pieces 3″ long (one of these has a 1″ square notch in it)
  • 2 pieces 5″ long
  • 1 piece 4-1/2″ long

AND…


  • String should be cut into 2 pieces 14-16″ long
  • The pouch is cut from the rubber mesh and is 5″ x 1-1/2″

Advanced Students: Download your Student Worksheet Lab here!


[/am4show]


We’re going to practice measuring and calculating real life stuff (because science isn’t just in a textbook, is it?) When I taught engineering classes, most students had never analyzed real bridges or tools before – they only worked from the textbook. So let’s jump out of the words and into action, shall we? This experiment is for Advanced Students.


Before we start, make sure you’ve worked your way through this experiment first!


[am4show have=’p8;p9;p11;p38;p41;p85;p88;p92;’ guest_error=’Guest error message’ user_error=’User error message’ ]
For this experiment, you need:


  1. Meter or yard stick
  2. A stopwatch or timer
  3. Object

Here’s what you do:


Download Student Worksheet & Exercises


1. Grab your 100 gram object, put it on a table.


2. Now lift it off the table straight up until you lift it one meter (one yard).


3. Start the timer and at the same time start lifting the object up and down 20 times.


4. Stop the timer when you’re done with the 20 lifts.


So, do you have the power of the Dodge Viper? Hmmm, probably not but let’s take a look.


First of all figure out how much work you did. Work = force x distance so take the force you used and multiply that by the distance you moved it. In this case, you can multiply 1 Newton x 20 meters and get 20 Joules of work.


Now figure out how much power you used. Power is work divided by time so take your work (20 Joules) and divide it by how much time it took you to do that work.


For example, if you lifted the block 20 times (doing 20 Joules of work) in 5 seconds, you did 20 Joules/5 seconds = 4 Watts of power. To convert Watts to horsepower we multiply by .001 so in this example, you did 4 x .001 = .004 horsepower. Not exactly vroom vroom!


Exercises


  1. What is work?
    1. Force divided by distance
    2. Force times distance
    3. Energy required for power
    4. Kinetic and potential energy
  2. What is power?
    1. Work divided by time
    2. Work multiplied by time
    3. Energy used in an exercise
    4. Calories over time
  3. How do we measure work? Name one unit.
  4. How do we measure power? Name one unit.

[/am4show]


This experiment is for Advanced Students. We’re going to really get a good feel for energy and power as it shows up in real life. For this experiment, you need:


  • Something that weighs about 100 grams or 4 ounces, or just grab an apple.
  • A meter or yard stick

This might seem sort of silly but it’s a good way to get the feeling for what a Joule is and what work is.
[am4show have=’p8;p9;p11;p38;p41;p85;p88;p92;’ guest_error=’Guest error message’ user_error=’User error message’ ]


Download Student Worksheet & Exercises


1. Grab your 100 gram object, put it on a table.


2. Now lift it off the table straight up until you lift it one meter (one yard).


3. Lift it up and down 20 times.


A 100 gram object takes about one Newton of force to lift. Since it took one Newton of force to lift that object, how much work did we do? Remember work = force x distance so in this case work = 1 Newton x 20 meters or work = 20 Joules.


You may ask “but didn’t we move it 40 meters, 20 meters up and 20 down?” That’s true, but work is moving something against a force. When you moved the object down you were moving the object with a force, the force of gravity. Only in lifting it up, are you actually moving it against a force and doing work. Four Joules are about 1 calories so we did 5 calories of work.


“Wow, I can lift an apple 20 times and burn 5 calories! Helloooo weight loss!” Well…not so fast there Richard Simmons. When we talk about calories in nutrition we are really talking about kilo calories. In other words, every calorie in that potato chip is really 1000 calories in physics. So as far as diet and exercise goes, lifting that apple actually only burned .005 calories of energy,…rats.


It is interesting to think of calories as the unit of energy for humans or as the fuel we use. The average human uses about 2000 calories (food calories that is, 2,000,000 actual calories) a day of energy. Running, jumping, sleeping, eating all uses calories/energy. Running 15 minutes uses 225 calories. Playing soccer for 15 minutes uses 140 calories. (Remember those are food calories, multiply by 1000 to get physics calories). This web site has a nice chart for more information: Calories used in exercise.


Everything we eat refuels that energy tank. All food has calories in it and our body takes those calories and converts them to calories/energy for us to use. How did the food get the energy in it? From the sun! The sun’s energy gives energy to the plants and when the animals eat the plants they get the energy from the sun as well.


So, if you eat a carrot or a burger you are getting energy from the sun! Eating broccoli gives you about 50 calories. Eating a hamburger gives you about 450 calories! We use energy to do things and we get energy from food. The problem comes when we eat more energy than we can use. When we do that, our body converts the energy to fat, our body’s reserve fuel tank. If you use more energy then you’ve taken in, then your body converts fat to energy. That’s why exercise and diet can help reduce your weight.


Let’s take the concept of work a little bit farther. If Bruno carries a 15 pound bowling ball up a 2 meter (6 foot) flight of stairs, how much work does he do on the bowling ball? It takes 66 Newtons of force to lift a 15 pound bowling ball 1 meter. Remember work = force x distance.


So, work = 66 Newtons x 2 meters. In this case, Bruno does 132 Joules of work on that bowling ball. That’s interesting, but what if we wanted to know how hard poor Bruno works? If he took a half hour to go up those stairs he didn’t work very hard, but if he did it in 1 second, well then Bruno’s sweating!


That’s the concept of power. Power is to energy like miles per hour is to driving. It is a measure of how much energy is used in a given span of time. Mathematically it’s Power = work/time. Power is commonly measured in Watts or Horsepower. Let’s do a little math and see how hard Bruno works.


In both cases mentioned above Bruno, does 132 Joules of work, but in the first case he does the work in 30 minutes (1800 seconds) and in the last case he does it in 1 second. Let’s first figure out Bruno’s power in Watts. A Watt is 1 Joule/second so:


For the half hour Bruno’s Power = 132 Joules/1800 seconds = .07 Watts


For the second Bruno’s Power = 132 joules/1 second = 132 Watts


You can see that the faster you exert energy the more power you use. Another term for power is horsepower. You may have heard the term horsepower in car ads. The more powerful car can exert more energy faster, getting the car moving faster. A Dodge Viper has 450 horsepower which can accelerate a 3,300 pound car from 0 to 60 mph in 4.1 seconds…WOW!


One horsepower is 745 Watts or one Watt is .001 horsepower. So converting Watts to horsepower poor Bruno exerts:


.07 x .001 = .00007 horsepower over the half hour


132 x .001 = .132 horsepower over the second (not exactly a Dodge Viper!)


Exercises


  1. If something has a weight of 2 Newtons and is moved half a meter, how many Joules of energy are used? Show your work.
  2. What is the source of all this energy we’re working with here?
  3. It doesn’t count as work when you move the apple back down. Why not?

[/am4show]


We’re going to use everyday objects to build a simple machine and learn how to take data. Sadly, most college students have trouble with these simple steps, so we’re getting you a head start here. The most complex science experiments all have these same steps that we’re about to do… just on a grander (and more expensive) scale. We’re going to break each piece down so you can really wrap your head around each step. Are you ready to put your new ideas to the test?


This experiment is for Advanced Students.


[am4show have=’p8;p9;p11;p38;p41;p75;p85;p88;p92;’ guest_error=’Guest error message’ user_error=’User error message’ ]
You need:


  • A wooden ruler or a paint stick for the lever
  • Many pennies, quarters, or washers (many little somethings of the same mass)
  • A spool, eraser, pencil (anything that can be your fulcrum)
  • A ruler (to be your um….ruler)
  • Paper cups
  • Optional: A scale that can measure small amounts of mass (a kitchen scale is good)

Download Student Worksheet & Exercises


1. Tape one paper cup to each end of lever. (This allows for an easy way to hold the pennies on the lever.)


2. Set your fulcrum on the table and put your lever (ruler or paint stick) on top of it. Try to get the ruler to balance on the fulcrum.


3. Put five pennies on one side of your lever.


4. Now, put pennies, one at a time on the other side of your lever, this is your effort. Keep adding pennies until you get your lever to come close to balancing. Try to keep your fulcrum in the same place on your lever. You may even want to tape it there.


5. Count the pennies on the effort side and count the pennies on the load side. If you have a scale, you can weigh them as well. With the fulcrum in the middle you should see that the pennies/mass on both sides of the lever are close to equal.


6. This part’s a little tricky. Measure how high the lever was moved. On the load side, measure how far the lever moved up and on the effort side measure how far the lever moved down. Be sure to do the measuring at the very ends of the lever.


7. Write your results in your science journal as shown in the video.


8. Remove the pennies and do it all over again, this time move the fulcrum one inch (two centimeters) closer to the load side.


9. Continue moving the fulcrum closer to the load until it gets too tough to do. You’ll probably be able to get it an inch or two (two to four centimeters) from the load.


10. If you didn’t use a scale feel free to stop here. Don’t worry about the “work in” and “work out” parts of the table. Take a look at your table and check out your results. Can you draw any conclusions about the distance the load moved, the distance the effort moved, and the amount of force required to move it?


11. If you used a scale to get the masses you can find out how much work you did. Remember that work=force x distance. The table will tell you how to find work for the effort side (work in) and for the load side (work out). You can multiply what you have or if you’d like to convert to Joules, which is a unit of work, feel free to convert your distance measurements to meters and your mass measurements to Newtons. Then you can multiply meters times Newtons and get Joules which is a unit of work.


1 inch = .025 meters


1 cm = .01 meter


1 ounce =0.278 Newtons


1 gram = 0.0098 Newtons


By taking a look at your data and by all the other work we did this lesson, you can see the beautiful switcheroo of simple machines. Simple machines sacrifice distance for force. With the lever, the farther you had to push the lever, the less force had to be used to move the load.


The work done by the effort is the same as the work done on the load. By doing a little force/distance switcheroo, moving the load requires much less force to do the work. In other words, it’s much easier. Anything that makes work easier gets a thumbs up by me! Hooray for simple machines!


Exercises


  1. What is work?
    1. Force against an object
    2. Force over distance
    3. 9 hours and sweat
    4. Energy applied to an object
  2. What is the unit we use to measure energy?
    1. Newton
    2. Watt
    3. Joule
    4. Horsepower
  3. Describe a first class lever using one example.

[/am4show]


When people mention the word “hydraulics”, they could be talking about pumps, turbines, hydropower, erosion, or river channel flow.  The term “hydraulics” means using fluid power, and deals with machinesand devices that use liquids to move, lift, drive, and shove things around. Liquids behave in certain ways: they are incompressible, meaning that you can’t pack the liquid into a tighter space than it already is occupying. If you've ever filled a tube partway with water and moved it around, you've probably noticed that the water level will remain the same on either side of the tube. However, if you add pressure to one end of the tube (by blowing into the tube), the water level will rise on the opposite side. If you decrease the pressure (by blowing across the top of one side), the water level will drop on the other side. In physics, this is defined through Pascal's law, which tells us how the pressure applied to one surface can be transmitted to the other surface. As liquids can't be squished, whatever happens on one surface affects what occurs on the other.  Examples of this effect include siphons, water towers, and dams. Scuba divers know that as they dive 30 feet underwater, the pressure doubles. This effect is also show in hydraulics - and more importantly, in the project we're about to do! But first, let's understand what's happening with liquids and pressure: Here’s an example: If you fill a glass full to the brim with water, you reach a point where for every drop you add on top, one drop will fall out.  You simply can’t squish any more water molecules into the glass without losing at least the same amount. Excavators, jacks, and the brake lines in your car use hydraulics to lift huge amounts of weight, and the liquid used to transfer the force is usually oil at 10,000 psi. Air, however, is compressible.  When car tires are inflated, the hose shoves more and more air inside the tire, increasing the pressure (amount of air molecules in the tire).  The more air you stuff into the tire, the higher the pressure rises.  When machines use air to lift, move, spin, or drill, it’s called “pneumatics”. Air tools use compressed air or pure gases for pneumatic power, usually pressurized to 80-100 psi. Different systems require either hydraulics or pneumatics.  The advantage to using hydraulics lies in the fact that liquids are not compressible. Hydraulic systems minimize the “springy-ness” in a system because the liquid doesn’t absorb the energy being transferred, and the working fluids can handle much heavier loads than compressible gases.  However, oil is flammable, very messy, and requires electricity to power the machines, making pneumatics the best choice for smaller applications, including air tools (to absorb excessive forces without injuring the user). We're going to build our own hydraulic-pneumatic machine.  Here's what you need to do: [am4show have='p8;p9;p11;p38;p14;p41;p75;p88;p92;' guest_error='Guest error message' user_error='User error message' ] Materials:
  • plastic cup
  • 20 tongue-depressor-size popsicle sticks
  • 6 syringes (anything in the 3-10mL size range will work)
  • 6 brass fasteners
  • 5’ of flexible tubing (diameter sized to fit over the nose of your syringes)
  • four wheels (use film canister lids, yogurt container lids, milk jug lids, etc.)
  • 4 rubber bands
  • two naked (unwrapped) straws
  • skewers that fit inside your straws
  • hot glue gun (with glue sticks)
  • sharp scissors or razor (get adult help)
  • drill with small drill bits (you’ll be drilling a hole large enough to fit the stem of a brass fastener)
earthmover Let’s play with these different ideas right now and really “feel” the difference between hydraulics and pneumatics. Connect two syringes with a piece of flexible tubing.  Cut the tubing into three equal-sized pieces and use one to experiment with.  Shove the plunger on one syringe to the “empty”, and leave the other in the “filled” position before connecting the tubing.  What happens when you push or lift one of the plungers? Is it quick to respond, or is there “slop” in the system? Now remove both plungers and, leaving the tubing attached, fill the system with water to the brim on both ends (this is a good bath-time activity!).  Keep the open ends of the syringes at the same level as you fill them.  What happens if you lower one of the syringes? What happens when you raise it back up?  Is there now air in your system? Fill your syringe-tube system up with water again, keeping the plungers at the same height as you work.  Insert one of the plungers into one of the syringes and play with the levels of the syringes again, lifting one and lowering the other.  Now what happens, or doesn’t happen? Why does that work? Because both syringes are open to the atmosphere, they both have equal amounts of air pressure pushing down on the surface of the water.  When you raise one syringe higher than the other, you have increased the elevation head of higher syringe, which works to equalize the water levels in the two syringes (thus shoving water out of the lower syringe).  Elevation head is due to the fluid’s weight (gravitational force) acting on the fluid and is related to the potential energy of the raised syringe (which increased with elevation). Now connect your plungers into a fully hydraulic system:  Push the plunger all the way down to expel the water from one of the syringes (water should leak all over the place from the open syringe).  Now add the second plunger to the open syringe and push the plunger down halfway.  What happens?  You have just made a hydraulic system! Are you ready to build it into a three-axis machine?  Then click the play button below:
  Download Student Worksheet [/am4show]

This isn't strictly a 'levers' experiment, but it's still a cool demonstration about simple machines, specifically how pulleys are connected with belts. Take a rubber band and a roller skate (not in-line skates, but the old-fashioned kind with a wheel at each corner.) Lock the wheels on one side together by wrapping the rubber band around one wheel then the other.  Turn one wheel and watch the other spin. Now crisscross the rubber band belt by removing one side of the rubber band from a wheel, giving it a half twist, and replacing it back on the wheel.  Now when you turn one wheel, the other should spin the opposite direction. Here's a quick video on what to expect: [am4show have='p8;p9;p11;p38;p14;p41;p88;p92;' guest_error='Guest error message' user_error='User error message' ]
Download Student Worksheet [/am4show]

Parts of the Lever

Levers, being simple machines, have only three simple parts. The load, the effort, and the fulcrum. Let’s start with the load. The load is basically what it is you’re trying to lift. The books in the last experiment where the load. Now for the effort. That’s you. In the last experiment, you were putting the force on the lever to lift the load. You were the effort. The effort is any kind of force used to lift the load. Last for the fulcrum. It is the pivot that the lever turns on. The fulcrum, as we’ll play with a bit more later, is the key to the effectiveness of the lever. There are three types of levers. Their names are first-class, second-class and third-class. I love it when it’s that simple. Kind of like Dr. Seuss’s Thing One and Thing Two. The only difference between the three different levers is where the effort, load and fulcrum are. [am4show have='p8;p9;p11;p38;p14;p41;p88;p92;' guest_error='Guest error message' user_error='User error message' ] Are you ready for some 'vintage Aurora' video? We thought you'd want to check out one of the first videos she ever made (in her basement with the auto-focus stuck in the ON position). Enjoy!
Download Student Worksheet & Exercises Advanced students: Download your First, Second, and Third Class Levers"

First-Class Lever

A first-class lever is a lever in which the fulcrum is located in between the effort and the load. This is the lever that you think of whenever you think of levers. The lever you made in Experiment 1 is a first-class lever. Examples of first-class levers are the see-saw, a hammer (when it’s used to pull nails), scissors (take a look, it’s really a double lever!), and pliers (same as the scissors, a double lever).

First Class Lever Experiment

For this experiment, you'll need:
  1. A nice strong piece of wood. 3 to 8 feet long would be great if you have it.
  2. A brick , a thick book or a smaller piece of wood (for the fulcrum)
  3. Books, gallons of water or anything heavy that’s not fragile
Be careful with this. Don’t use something that’s so heavy someone will get hurt. Also, be sure not to use something so heavy that you break the wooden lever. Last but not least, be sure to keep your head and face away from the lever. I’ve seen folks push down on the lever and then let go. The lever comes up fast and can pop you pretty hard. 1. Put your fulcrum on the ground. 2. Put your lever on the fulcrum. Try to get your fulcrum close to the middle of the lever. 3. Put some weight on one end of the lever. 4. Now push down on the other side of the lever. Try to remember how hard (how much force) you needed to use to lift the heavy object. 5. Move the fulcrum under the lever so that it is closer to the heavy object. 6. Push down on the other side of the lever again. Can you tell the difference in the amount of force? 7. Move the fulcrum closer still to the heavy object. Feel a difference now? 8. Feel free to experiment with this. Move the fulcrum farther away and closer to the object. What conclusions can you draw? What you may have found, was that the closer the fulcrum is to the heavy object, the less force you needed to push with to get the object to move. Later we will look at this in greater detail, but first let me tell you about the other types of levers.  

Second-Class Lever

The second-class lever is a little strange. In a second-class lever, the load is between the fulcrum and the effort. A good example of this, is a wheel-barrow. The wheel is the fulcrum, the load sits in the wheel-barrow bucket and the effort is you. Some more examples would be a door (the hinge is the fulcrum), a stapler, and a nut-cracker.

Second-class Lever Experiment

You need:
  1. A nice strong piece of wood. 3 to 8 feet long would be great if you have it.
  2. A brick, a thick book or a smaller piece of wood (for the fulcrum)
  3. Books, gallons of water or anything heavy that’s not fragile
Again, be careful with this. Don’t use something that’s so heavy someone will get hurt. Also, be sure not to use something so heavy that you break the wooden lever. Last but not least, be sure to keep your head and face away from the lever. I’ve seen folks push down on the lever and then let go. The lever comes up fast and can pop you pretty hard. 1. Put your fulcrum, the book or the brick, whatever you’re using on a nice flat spot. 2. Put the end of your lever on the fulcrum. 3. Put the books or gallon jugs or whatever you’re using for a load, in the middle of the lever. 4. Now, put yourself (the effort) on the opposite end of the lever from the fulcrum. 5. Lift 6. Experiment with the load. Move it towards the fulcrum and lift. Then move it toward the effort and lift. Where is it harder(takes more force) to lift the load, near the fulcrum or far? Where does the load lift the greatest distance, near the fulcrum or far?

Third-Class Lever

This fellow is the oddest of all. The third-class lever has the effort between the load and the fulcrum. Imagine Experiment 1 but this time the fulcrum is at one end of the board, the books are on the other end and you’re in the middle. Kind of a strange way to lift books huh? A few examples of this are tweezers, fishing rods (your elbow or wrist is the fulcrum), your jaw (the teeth crush the load which would be your hamburger), and your arm (the muscle connects between your elbow (fulcrum) and your load( the rest of your arm or whatever you’re lifting)). Your skeletal and muscular system are, in fact, a series of levers!

Third-class Lever Experiment

You need:
  1. A nice strong piece of wood. 3 to 8 feet long would be great if you have it.
  2. A brick , a thick book or a smaller piece of wood (for the fulcrum)
  3. Books, gallons of water or anything heavy that’s not fragile
Again, be careful with this. Don’t use something that’s so heavy someone will get hurt. Also, be sure not to use something so heavy that you break the wooden lever. Last but not least, be sure to keep your head and face away from the lever. I’ve seen folks push down on the lever and then let go. The lever comes up fast and can pop you pretty hard. 1. Put your fulcrum on the ground in a nice flat place. 2. Put your lever on the fulcrum so that the fulcrum is at the very end of the lever. 3. Put your load on the lever at the end farthest from the fulcrum. 4. Now, put yourself (the effort) in the middle of the lever. 5. Lift. You may need someone to hold down the lever on the fulcrum 6. Experiment with the effort (you). Move towards the fulcrum and lift the load Then move toward the load and lift. Where is it harder(takes more force) to lift the load, near the fulcrum or far? Where does the load lift the greatest distance, near the fulcrum or far? We’ve had a lot of fun levering this and levering that but now we have to get to the point of all this simple machine stuff. Work equals force times distance, right? Well, what have you been doing all this time with these levers? You’ve been moving something (the load) a distance against a force (gravity). You’ve been doing work. You’ve been exerting energy. See how it all ties in nicely? In experiment 1,2 and 3, I wanted you to notice how much force you exerted and how much the load moved. You may have noticed that when the force was small (it was very easy to lift) the load moved a very small distance. On the other hand, when the force was large (hard to lift), the load moved a greater distance. Let me point your attention to one more thing and then we’ll play with this. When the force used to lift the load was small, you moved the lever a large distance. When the force used to lift the load was great you moved the lever a small distance. Remember, work=force x distance. There is work done on both sides of the lever. The effort (you in this case) pushes the lever a distance against a force...work is done. The load also moves a distance against a force so there too...work is done. Now, here’s the key to this that I hope you can see in the next experiment. Work in is equal to work out. The work you do on one side of the lever (work in), is equal to the work that happens to the load (work out). Let’s do a quick bit of math for an example. Phillip wants to move a 10 kg (22 lb.)box. He uses a lever and notices that when he lifts the box .1meter (4 inches) item10he has to push the lever down 1 meter with a force of 1 kg. Now let’s do some math. (Officially we should convert kilograms (a unit of mass) to Newtons (a unit of force) so that we can work in Joules which is a unit of work. However, we’ll do it this way so you can see the relationship more easily.) Phillip’s work (the work in) = 1 kg x 1 m = 1 Work on the bowling ball (the work out) = 10 kg x .1 m = 1 Work in equals work out! Later in this energy unit, you’ll learn about energy efficiency. At that point, you’ll see that you never get all the energy you want from the energy you put in. Some is lost to sound and some to heat. A lever is incredibly efficient but you may still see, in your measurements, that the energy in is greater than the energy you get out.

For Advanced Students:

[/am4show][am4show have='p9;p41;' guest_error='Guest error message' user_error='User error message' ] Speaking of your measurements...let’s make some. Open up your science journal and record the type of lever, weight, and location information for your different trial runs. Take a look at your data - can you figure out how much weight you'd need to lift your parents? Let's see if we can figure this out. For a 10' long beam with the fulcrum in the exact center, you can lift as much as you weigh. For example, if you weigh 100 pounds, you can lift some sitting on the other end, as long as they weigh 100 pounds or less. If you slide the beam and move the fulcrum so that the longer end is on your side, you can lift more than you weigh. So if there's 7 feet of beam on Alice's side and only 3 feet on Bob's end, you can easily figure this out with a little math (and principles of torque). Here's what you do: (Alice's Weight) * (Distance from Alice to the Fulcrum) = (Alice's Lifting Ability) * (Distance from Bob to the Fulcrum) If Alice weighs 100 pounds and when standing on the 7-foot end of the see saw, she barely can lift Bob, let's find out how much Bob weighs. (100 pounds) (7 feet) = (Alice's Lifting Ability) * (3 feet) 700 / 3 = Alice's Lifting Ability, and since she can just barely lift Bob... Bob weighs 233 pounds! Now can you figure out how much lever arm distance you need to lift your parents? If Mom and Dad together weigh 300 pounds, and you have a 10' long beam and you weigh 100 pounds, let's find the fulcrum distance you'd need to lift them. Let's put your algebra to use here: Let's make 'x' the distance from you to the fulcrum. This makes the distance from your parents to the fulcrum 10' - x. (If you're 4 feet from the fulcrum, that means your parents are 6', right?) (100 pounds) (x) = (300 pounds) (10' - x) 100 x = 3000 - 300 x 400 x = 3000 x = 3000 / 400 Solve for x and you'll find that the distance from you to the fulcrum is 7.5 feet! Exercises Answer the questions below:
  1. What is the best definition for a simple machine?
    1. A machine with less than three parts
    2. A machine with a simple name
    3. A machine that changes the direction or amount of a force
    4. A machine that helps you do work quickly
  2. What are the three parts of a lever? Circle all that apply:
    1. Fulcrum
    2. Weight
    3. Load
    4. Effort
  3. Name two examples of levers that you could find in your house:
  4. What are the types of levers called?
    1. Three tiers
    2. First, second, and third class
    3. Poor, rich, and middle
    4. Forty-five and ninety-nine percenters
    [/am4show]

What’s an inclined plane? Jar lids, spiral staircases, light bulbs, and key rings. These are all examples of inclined planes that wind around themselves.  Some inclined planes are used to lower and raise things (like a jack or ramp), but they can also used to hold objects together (like jar lids or light bulb threads).


Here’s a quick experiment you can do to show yourself how something straight, like a ramp, is really the same as a spiral staircase.


[am4show have=’p8;p9;p11;p38;p14;p41;p151;p75;p85;p88;p92;’ guest_error=’Guest error message’ user_error=’User error message’ ]


Here’s what you need to find:


  • sheet of paper
  • short dowel or cardboard tube from a coat hanger
  • tape
  • ruler

Cut a right triangle out of paper so that the two sides of the right angle are 11” and 5 ½” (the hypotenuse – the side opposite the right angle – will be longer than either of these). Find a short dowel or use a cardboard tube from a coat-hanger.  Roll the triangular paper around the tube beginning at the short side and roll toward the triangle point, keeping the base even as it rolls.


Notice that the inclined plane (hypotenuse) spirals up as a tread as you roll. Remind you of screw threads?  Those are inclined planes. If you have trouble figuring out how to do this experiment, just watch the video clip below:


Download Student Worksheet & Exercises


Inclined planes are simple machines. It’s how people used to lift heavy things (like the top stones for a pyramid).


Here’s another twist on the inclined plane: a wedge is a double inclined plane (top and bottom surfaces are inclined planes). You have lots of wedges at home: forks, knives, and nails just name a few.


When you stick a fork in food, it splits the food apart. You can make a simple wedge from a block of wood and drive it under a heavy block (like a tree stump or large book) with a kid on top.


Exercises


  1. What is one way to describe energy?
    1. The amount of atoms moving around at any given moment
    2. Electrons flowing from one area to another
    3. The ability to do work
    4. The square root of the speed of an electron
  2. Work is when something moves when:
    1. Force is applied
    2. Energy is used
    3. Electrons are lost or gained
    4. A group of atoms vibrate
  3. Name two simple machines:
  4. Name one example of a simple machine:

[/am4show]


This is a satisfyingly simple activity with surprising results. Take a tennis ball and place it on top of a basketball… then release both at the same time.


Instant ball launcher!


You’ll find the top ball rockets off skyward while the lower ball hit the floor flat (without bouncing much, if at all). Now why is that? It’s easier to explain than you think…


Remember momentum? Momentum can be defined as inertia in motion. Something must be moving to have momentum. Momentum is how hard it is to get something to stop or to change directions. A moving train has a whole lot of momentum. A moving ping pong ball does not. You can easily stop a ping pong ball, even at high speeds. It is difficult, however, to stop a train even at low speeds.


Mathematically, momentum is mass times velocity, or Momentum=mv.


One of the basic laws of the universe is the conservation of momentum.  When objects smack into each other, the momentum that both objects have after the collision, is equal to the amount of momentum the objects had before the crash. Once the two balls hit the ground, all the larger ball’s momentum transferred to the smaller ball (plus the smaller ball had its own momentum, too!) and thus the smaller ball goes zooming to the sky.


Materials:


  • two balls, one significantly larger than the other

[am4show have=’p8;p9;p11;p38;p39;p72;p92;p95;’ guest_error=’Guest error message’ user_error=’User error message’ ]


Download Student Worksheet & Exercises


Do you see how using a massive object as the lower ball works to your advantage here?  What if you shrink the smaller ball even more, to say bouncy-ball size?  Momentum is mass times by velocity, and since you aren’t going to change the velocity much (unless you try this from the roof, which has its own issues), it’s the mass that you can really play around with to get the biggest change in your results. So for momentum to be conserved, after impact, the top ball had to have a much greater velocity to compensate for the lower ball ‘s velocity going to zero.


You can also try a small bouncy ball (about the size of a quarter) and a larger bouncy ball (tennis-ball size) and rest the small one on top of the large one. Hold upright as high as you can, then release. If the balls stay put (the small one stays on top of the larger) at impact, the energy transfer will create a SUPER high bounce for the small ball. (Note how high the larger ball bounces when dropped.)


What happens if you try THREE?


Read more about impulse here.


Exercises 


  1. What is the mathematical formula for momentum?
  2.  Explain momentum in words.
  3.  What happens to the momentum of the bottom ball in this experiment?

[/am4show]


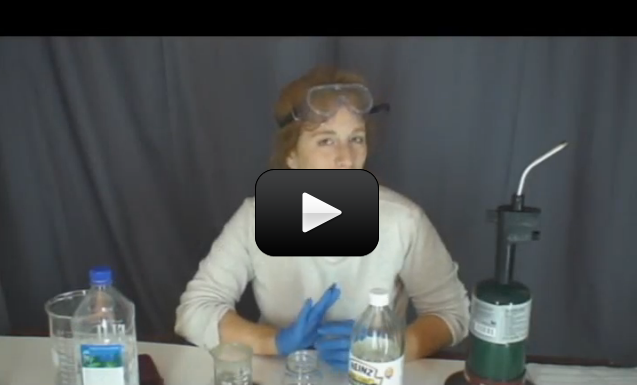
This experiment is for advanced students.It’s time for the last lesson of mechanics. After all this time, you now have a good working knowledge of the rules that govern almost all movement on this planet and beyond!! This lesson we get to learn about things crashing into one another!! Isn’t physics fun?! We are going to learn about impulse and momentum.
[am4show have=’p8;p9;p11;p38;p39;p92;’ guest_error=’Guest error message’ user_error=’User error message’ ]


Here’s what you need:


  • two pennies
  • you
  • a wall
  • wagon and a skateboard
  • friends

Momentum

Momentum can be defined as inertia in motion. Something must be moving to have momentum. Momentum is how hard it is to get something to stop or to change directions. A moving train has a whole lot of momentum. A moving ping pong ball does not. You can easily stop a ping pong ball, even at high speeds. It is difficult, however, to stop a train even at low speeds. Mathematically, momentum is mass times velocity, or Momentum=mv. The heavier something is and/or the faster it’s moving the more momentum it has. The more momentum something has, the more force it takes to get it to change velocity and the more force it can apply if it hits something.


Impulse

Now let’s discuss impulse. Impulse is a measure of force and time. Remember, force is a push or a pull, right? Well, impulse is how much force is applied for how much time. Mathematically it’s impulse equals force x time or impulse = Ft.


Think about baseball. When you hit a baseball, do you just smack it with the bat or do you follow through with the swing? You follow through right? Do you see how impulse relates to your baseball swing? If you follow through with your swing, the bat stays in contact with the ball for a longer period of time. This causes the ball to go farther. Follow through is important in golf, bowling, tennis and many sports for the same reason. The longer the force is imparted, the farther and faster your ball will go.


More About Impulse and Momentum

Ok, let’s add impulse and momentum together and see what we get. Impulse changes momentum. If an object puts an impulse on another object, the momentum of both objects will change. If you continue to push on your stalled car, you will change the momentum of the car right? If you are riding your bike while not paying any attention and crash into the back of a parked car, you will put an impulse on the car and you and the car’s momentum will change. (As a kid, I did this pretty often. That’s what you get when you ride and wonder at the same time. Believe me when I tell you that my momentum changed a lot more than the car’s did!!)


In fact, there is a mathematical formula about this impulse and momentum thing. Impulse = change in momentum or Ft = change in mv. Force x time = mass x velocity. Does that sound familiar to anyone? It’s awfully similar to Newton’s second law (F=ma) isn’t it? In fact it’s the same thing.


**Alert, alert serious math here, feel free to skip this.**

F t = m v


Now if we divide both sides by “t” we get F=mv/t. Another way to say v is d/t (distance over time).


So now we have F=m(d/t)/t.


Those two “t’s” together are the same as t2 and d/t2 is a (acceleration). So what we have now is F=ma!


This Ft = mv is very important, in fact, it can save your life. Seat belts, air bags, crumple zones and other car safety features are based on this formula. When you want to shrink the force of impact, you want to increase the time the impact takes. This is called the collision time. The longer the collision time the longer it takes your momentum to come to zero. Here’s the math.


If you are in a 1000 kg vehicle moving at 30 km/h your momentum is 1000 x 30 or 30,000. Now, lets say you hit a brick wall so your momentum goes from 30,000 to 0 in .5 seconds.


Ft=mv so F(.5) = 30,000 so F= 60,000N! (N is for Newton which is a unit of force. It takes about 1 Newton to lift an apple so this car hits with the force of 60,000 apples! Talk about apple sauce!)


That’s gonna leave a mark! Now lets say that instead of hitting a brick wall you hit a mound of hay and so the impact takes 3 seconds.


Now the formula looks like this: F(3)=30,000 or F= 10,000N.


See the difference, 60,000N versus 10,000N of force. All those safety features, seat belts, helmets, air bags, are designed to increase how long it takes your momentum to come to zero. Newton’s laws to the rescue! Let’s do a couple of experiments here to help this information have more impact (pun intended!).


Quick Momentum Experiment

1. Find a wall.


2. Hit it with your bare fist. Take it easy, just hit it with enough force that you feel the impact.


3. Now put a pillow in front of the wall and hit it with about the same force as you hit it before.


4. With the pillow in front of the wall, you can hit it a little harder if you like but again, don’t go nuts!


What did the pillow do? It slowed the time of impact. Remember our formula Ft=mv. When the momentum of your moving fist struck the wall directly, the momentum was cut to zero instantly and so you felt enough force to hurt a bit. When the pillow was in the way it took longer for your momentum to come to zero. So you could hit the pillow fairly hard without feeling much force. Basically a bike helmet is like a pillow for you head. It slows the time of impact, so when you fall off your bike, there is much less force on your head. Just be glad your mom doesn’t make you wear a pillow on your head!


So let’s go back to momentum for a minute. Momentum is inertia in motion. It is how much force it takes to get something to slow down or change direction. One more concept I’d like to give you this month, is conservation of momentum. This is basically momentum equals momentum or mathematically mv=mv. (Momentum is mass times velocity.) When objects collide, the momentum that both objects have after the collision, is equal to the amount of momentum the objects had before the collision. Let’s take a look at this with this experiment.


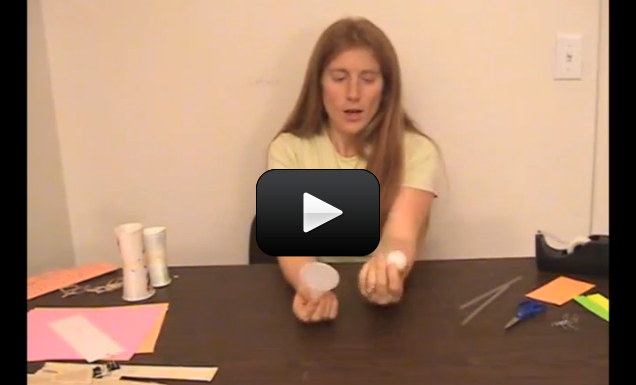
Another Quick Momentum Experiment

1. Put one penny on the table.


2. Put another penny on the table about 6 inches away from the first one.


3. Now, slide one penny fairly fast towards the first penny.


4. What you want to have happen, is that the moving penny strikes (or gives impulse to) the stationary penny head on. The moving penny should stop and the stationary penny will move.


5. Now, try that with other coins. Make big ones hit small ones and vice versa. It’s also fun to put a line of 5 coins all touching one another. Then strike the end of the line with a moving penny.


This is conservation of momentum. If you were able to strike the penny head on, you should have seen that the penny that was moving, stopped, and the penny that was stationary moved with about the same speed of the original moving penny. Conservation of momentum is mv = mv. Once the moving penny struck the other, all the moving penny’s momentum transferred to the second penny. Since the pennies weighed the same, the v (velocity) of the first penny is transferred to the second penny and the second penny moves with the same velocity as the first penny. What happens if you use a quarter and a penny? Make the quarter strike the penny. That penny should really zip! Again mv=mv. The mass of the quarter is much greater then the mass of the penny. So for momentum to be conserved, after impact, the penny had to have a much greater velocity to compensate for its lower mass.


Mathematically it would look like this (the masses are not accurate to make the math easier to see.)


After collision Mass of Quarter x Velocity of Quarter = Mass of Penny x Velocity of Penny


5g x 10m/s = 1g x v


50 = 1 x v


50/1 = v


50m/s = v


or 5g x 10m/s = 1g x 50 m/s


50 momentum = 50 momentum


After the collision, the penny is moving at 50 m/s, 5 times faster then the quarter was moving because the penny is 5 times lighter then the quarter.


And ANOTHER Quick Momentum Experiment

wtdcorkDo this experiment again, but this time make the cork heavier. I wrapped mine in duct tape and then jammed a roll of electrical tape on the end. If you wanted to tape a golf ball to the cork or tape a bunch of change to it it would work as well. Just try to make the cork a good bit heavier than it was in the first place.


This is a great example of impulse as well as conservation of momentum. The impulse (Ft) is the baking soda and vinegar gas mixture creating enough pressure to force the cork off the bottle. According to Newton’s Third Law, the force from that impulse has an equal and opposite reaction, so the bus goes one way and the cork goes the other. Now take that information and combine it with what you now know about conservation of momentum. The impulse is equal for the cork and the bus, so which one is going to have more velocity due to it’s lighter mass? The cork. mv=mv. Just like the penny and the quarter, the lighter cork will go farther than the heavier bus. Now if you make the cork heavier and try it again, what will you see? Now the bus moves farther but the cork moves less far. Again, conservation of momentum, mv = mv.


Yet ANOTHER Easy Momentum Activity

1. Put the wagon and the skateboard close to one another.


2. Have one person sit on the skateboard while the other sits on the wagon.


3. Make sure the wheels are straight on the wagon and that the sidewalk is relatively free of stuff in the way.


4. Have one person give a good shove to the other person. Usually, it is easier for the person on the skateboard to push on the wagon. If this is true with your setup, then do it that way. Otherwise, do whatever is easiest.


5. Feel free to add more people or weight to the wagon and try it again.


Can you see how this and the one before it are really showing the same concept? Who went farther and faster? The lighter person on the lighter vehicle right? The impulse of the push was the same for both vehicles, so both vehicles had the same momentum. Momentum is mass and velocity so if the mass for both vehicles was the same, the speed would be the same. If the mass of one was more then the mass of the other, then the heavier one would move more slowly then the lighter one.


Highlights for Momentum & Impulse

Impulse is the amount of time a force is put on an object. How hard and how long something gets pushed or pulled.
Ft = Impulse. Impulse affects the momentum of an object.


Momentum is inertia in motion, how hard it is to get something to change directions or speed. Momentum = mv.


Conservation of momentum; mv = mv. If something hits something else the momentum of the objects before the collision will equal the momentum of the objects after the collision.


Here is another experiment in momentum: Newton’s Second Law.


Advanced students: Download your Momentum lab here.


Download Student Worksheet & Exercises


Exercises 


  1. What is momentum?
  2. What is impulse?
  3. What is the conservation of momentum?

[/am4show]


Rockets shoot skyward with massive amounts of thrust, produced by chemical reaction or air pressure. Scientists create the thrust force by shoving a lot of gas (either air itself, or the gas left over from the combustion of a propellant) out small exit nozzles. This experiment and activity is for Grades 9-12.


According to the universal laws of motion, for every action, there is equal and opposite reaction. If flames shoot out of the rocket downwards, the rocket itself will soar upwards. It’s the same thing if you blow up a balloon and let it go—the air inside the balloon goes to the left, and the balloon zips off to the right (at least, initially, until the balloon neck turns into a thrust-vectored nozzle, but don’t be concerned about that just now).


[am4show have=’p8;p9;p11;p38;p92;’ guest_error=’Guest error message’ user_error=’User error message’ ]


A rocket has a few parts different from an airplane. One of the main differences is the absence of wings. Rockets utilize fins, which help steer the rocket, while airplanes use wings to generate lift. Rocket fins are more like the rudder of an airplane than the wings.


Another difference is the how rockets get their speed. Airplanes generate thrust from a rotating blade, whereas rockets get their movement by squeezing down a high-energy gaseous flow and squeezing it out a tiny exit hole.


If you’ve ever used a garden hose, you already know how to make the water stream out faster by placing your thumb over the end of the hose. You’re decreasing the amount of area the water has to exit the hose, but there’s still the same amount of water flowing out, so the water compensates by increasing its velocity. This is the secret to converging rocket nozzles—squeeze the flow down and out a small exit hole to increase velocity.


There comes a point, however, when you can’t get any more speed out of the gas, no matter how much you squeeze it down. This is called “choking” the flow. When you get to this point, the gas is traveling at the speed of sound (around 700 mph, or Mach 1). Scientists found that if they gradually un-squeeze the flow in this choked state, the flow speed actually continues to increase. This is how we get rockets to move at supersonic speeds or above Mach 1.


f18-1This image (at left) is a real picture of an aircraft as it breaks the sound barrier. This aircraft is passing the speed at which sounds travel. The white cloud you see in the photo is related to the shock waves that are forming around the craft as it moves into supersonic speeds. Because the aircraft is moving through air, which is a gas, the gas can compress and results in a shock wave. You can think of a shock wave as big pressure front. In this photo, the pressure is condensing water vapor in the air, hence the cloud. There are lots of things on earth that break the sound barrier – bullets and bullwhips, for example. The loud crack from a whip is the tip zipping faster than the speed of sound.


The rockets we’re about to build get their thrust by generating enough pressure and releasing that pressure very quickly. Here’s what you need to do:


[amprotect=3,4,8,10,18,20,30,32,37,41,44,15,unit2p,52,grade8c]
You’ll need to find:


  • empty 2L soda bottle
  • razor
  • car tire valve
  • bicycle pump

Modify an empty soda bottle into a rocket that launches from your hand! Important: DO NOT USE water bottles as they will burst. You MUST use a bottle that was made to hold contents under pressure.


Clamp the soda bottle cap in a vice. Using a razor blade, strip threads from the cap until you can untwist the cap completely from the bottle with one wrist movement. You’ll have to cut off approximately one full turn of threads from open end, which will make it easier to get the cap off quickly without allowing too much air pressure to leak out. It also makes this experiment more dangerous and prone to accidents as now the cap will comes off a lot easier. Be careful!


Drill a hole that matches the size of the car tire valve into the center of the cap, again using the vice to hold it still. A ½-inch spade bit works best. Next insert the valve through cap so when it’s screwed on, you can easily pressurize the bottle with a bicycle pump. To the bottle, add water , screw on the valve-cap, and pump up the pressure using the bicycle pump or air compressor until the bottle feels rock-solid.


NOTE: Bottles tend to burst above 70 psi and after extended use, so replace the bottles after 7-10 shots. As they get banged around on landing, they start forming fissures that lead to bursting under pressure. If you are using an air compressor rather than a bicycle pump, be sure to keep your air compressor set to a maximum of 70 psi.


waterrocket-b1Hold the bottle bottoms-up at an angle, grasp the cap, and begin to untwist slowly… until the water begins to drip out and leaks like a faucet. Now untwist the cap fully in one motion, and the bottle will fly a hundred feet or more, leaving you drenched and awed. Make sure you’ve got about a football field-sized launch area.


What’s happening?

This rocket uses HIGH pressure to soar skyward. Think of a balloon; when you release the end of a balloon, the air inside the balloon travels one direction and the balloon zooms in the opposite direction (initially, anyway). The Water Rocket shoots water in one direction (toward you) and launches in the other (away from you).


Why is there water in the rocket?

The water is in there to provide you with both a visual of what’s going on (when the water leaks out, you know it’s time to untwist the cap FAST), as well as giving you a time-delay to get the cap off. Try launching it without water (just pressurize the bottle) and see if you’re fast enough to launch it.


waterrocket-aTroubleshooting: The first time kids do this experiment, they are often so surprised it works that they drop the bottle on the ground OR they grasp it so tight that they forget to let the rocket go. With practice, you will be able to launch them consistently skyward.


ALWAYS USE SAFETY GOGGLES or a FACE SHIELD!

Be sure to transport the charged bottle with the valve-side down, in case the valve tears free from the bottle.


How far did your rocket go? Tell us in the comment field! (DON’T FORGET YOUR SAFETY GOGGLES!!)
[/amprotect]


[/am4show]


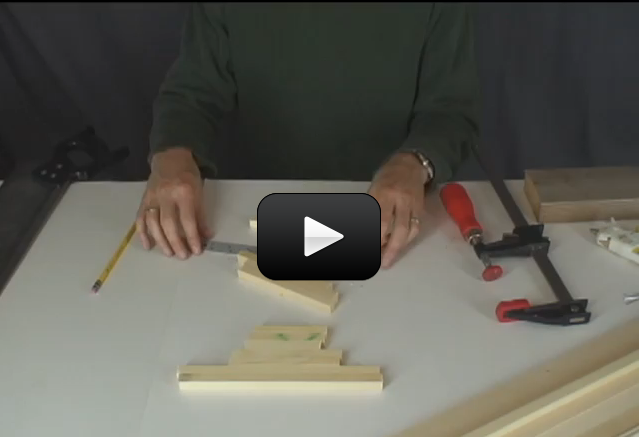
This is a quick and easy demonstration of how to teach Newton’s laws with minimal fuss and materials. All you need is a wagon, a rock, and some friends. We’re going to do a few totally different experiments using the same materials, though, so keep up with the changes as you read through the experiment.


Remember that Newton covers a few different ideas. First, there’s the idea that objects in motion will stay going they way they’re headed, unless something gets in the way. Then there’s the resistance to motion (objects at rest tend to stay put), as well as force being proportional to how fast you can get something to move (acceleration). And lastly, there’s the idea that forces happen in pairs – if you shoot something one direction, you’re going to feel a kick in the opposite direction. Ready to see these ideas in action? Let’s go…


[am4show have=’p8;p9;p11;p38;p12;p39;p92;’ guest_error=’Guest error message’ user_error=’User error message’ ]


Here’s what you need:


  • wagon
  • a rock
  • friends

Part 1: Newton’s First Law (& Inertia)

Let’s really figure out what this ‘inertia’ thing from Newton’s first law is all about using the wagon and friends. Here’s what you need to do:


1. Pull the wagon down the sidewalk.


2. Try to stop as quickly as you can. Be careful. You could get run over by the wagon if you’re not careful.


3. Put a friend in the wagon and repeat steps 1 and 2.


4. Put another friend in the wagon and repeat steps 1 and 2.


5. Again…pretty easy huh?!


You may have noticed that the more friends (the more weight) you had in the wagon the harder it was to get moving and the harder it was to stop. This is inertia. The more weight something has the more inertia it has and the harder it is to get it to go and to stop!


Quiz question: Will a lighter or heaver race car with the same engine win a short-distance race (like the quarter-mile)? Tell me in the comments below what you think!


Advanced students: Download your First Law Lab here. (This is the first of TWO advanced labs!)


Download Student Worksheet & Exercises


Part 2: Newton’s Second Law

Now we’re going to experiment with Newton’s Second Law that deals with force, mass, and acceleration. Are you ready?


1. Start with an empty wagon…


2. Pull it and try to get it to go as fast as it can, as fast as you can. In other words, get it to accelerate.


3. Now add weight. Put something in the wagon that weighs at least 50 lbs. or so (a nice, solid kid comes to mind)


4. Pull it again and get it to go as fast as it can as fast as you can.


5. Add more weight and do it again.


6. Keep adding weight until you have a very difficult time getting it to accelerate.


So what happened here? Force equals mass x acceleration. The mass was the wagon. The force was you pulling. The acceleration was how fast you could get it to speed up. The heavier you got the wagon (the more mass there was) the harder (the more force) you had to pull to get the wagon to move (to accelerate).


Part 3: Newton’s Third Law

Now let’s work with Newton’s Third Law: for every action, there is an equal and opposite reaction. If this next experiment doesn’t work don’t worry about it. You need a fairly low friction skateboard or wagon to make this work, so that’s why it’s here last. You need: A skateboard or a wagon, the heaviest thing you can throw safely, and a sidewalk.


1. Sit in the wagon or on the skateboard (please do not stand up).


2. Throw the heavy thing as hard as you can. Please be careful not to hit anybody or anything.


At this point, you should know what should happen, so what do you think? If you said that the throw forward would move you backward, you’re right! Next time you’re in a small canoe, toss the rock and see what happens to you and your boat. (Any guesses?)


Advanced students: Download your Newton’s Wagon Advanced Lab here (This is the second of TWO advanced labs!)


In this next experiment, we are going to combine the concepts of Newton’s Second Law, acceleration and terminal velocity to explore Newton’s Second a little further. Are you ready?


Exercises 


  1. What is inertia?
  2. What is Newton’s First Law?
  3. Will a lighter or heavier race car with the same engine win a short-distance race (like the quarter-mile)?
  4. What concept does Newton’s Second Law of Motion deal with?
  5. What is momentum?
  6. What is the equation for Newton’s Second Law?
  7. What is Newton’s Third law?
  8. Give three examples of forces in pairs.
  9. A rope is attached to a wall. You pick up the rope and pull with all you’ve got. A scientist walks by and adds a force meter to the rope and measures you’re pulling with 50 Newtons. How much force does the wall experience?
  10. Can rockets travel in space if there’s nothing to push off of? Explain your answer.

[/am4show]


bus
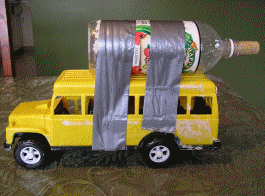
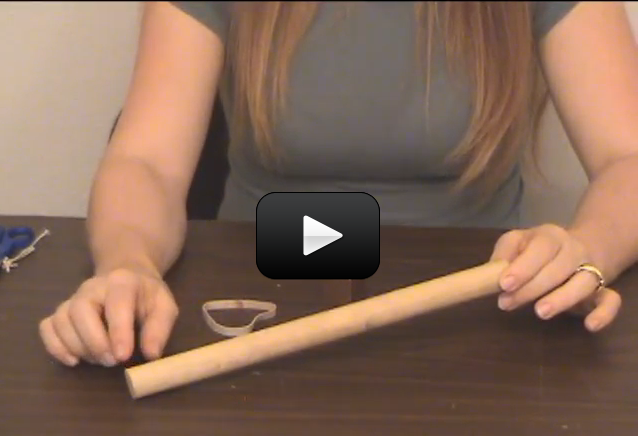
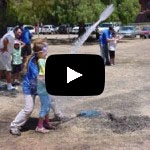
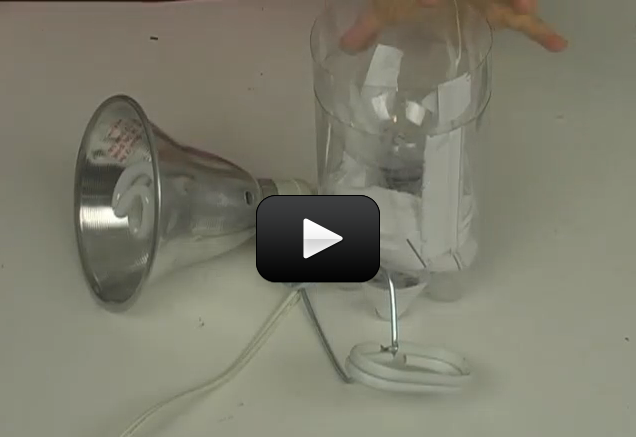
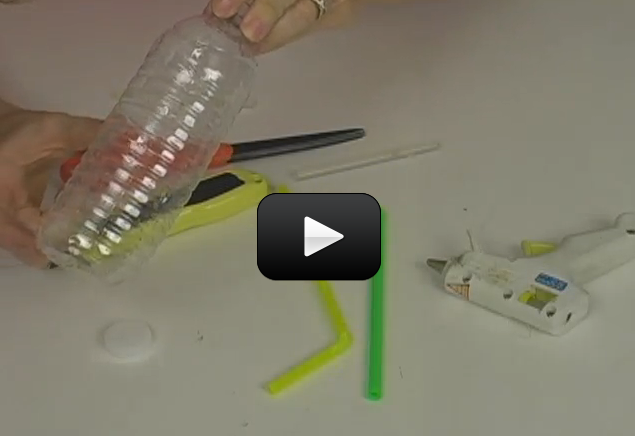
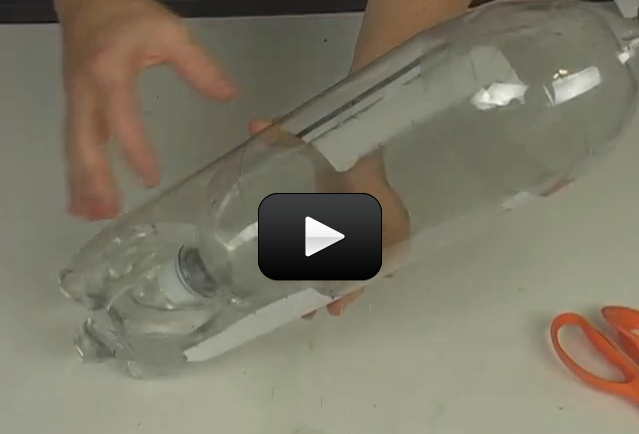
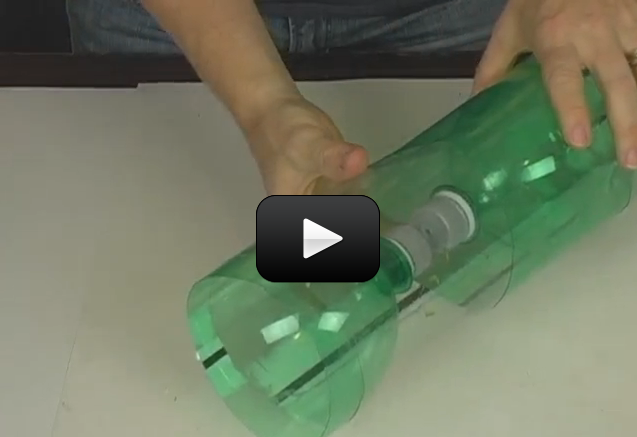
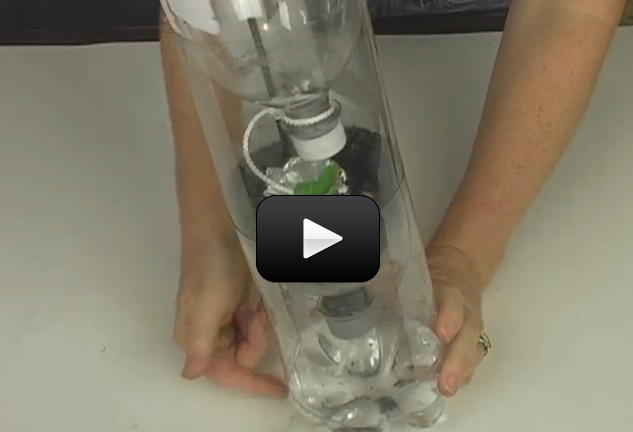
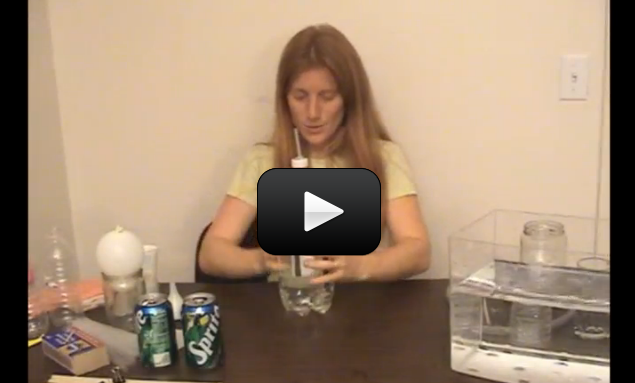
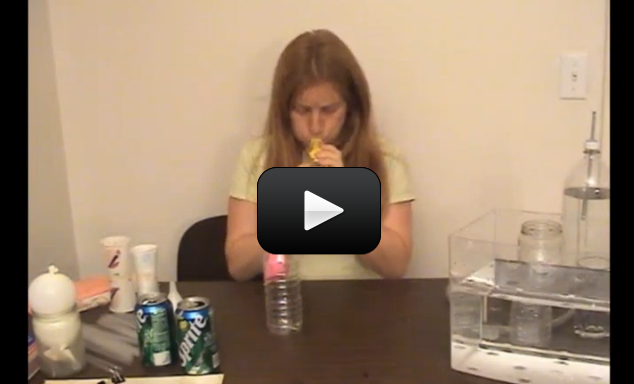
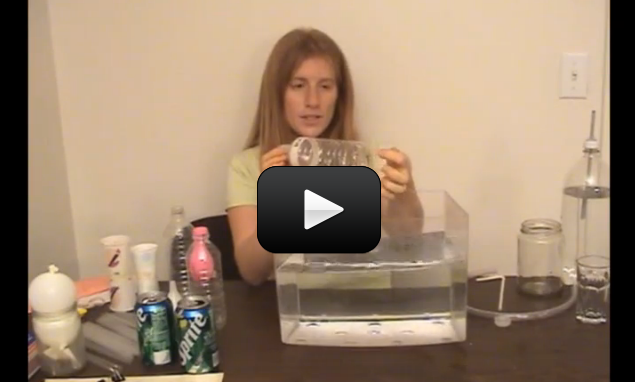
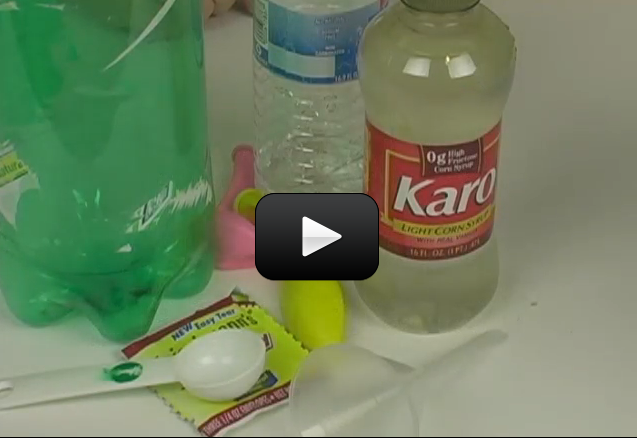
Let's take a good look at Newton's Laws in motion while making something that flies off in both directions. This experiment will pop a cork out of a bottle and make the cork fly go 20 to 30 feet, while the vehicle moves in the other direction! This is an outdoor experiment. Be careful with this, as the cork comes out with a good amount of force. (Don’t point it at anyone or anything, even yourself!) 
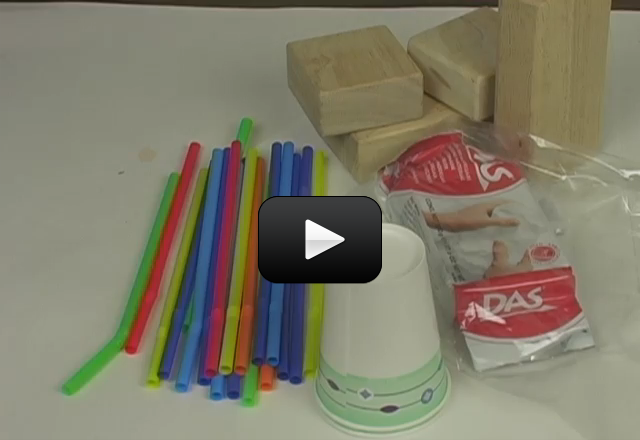
Here's what you need to find: [am4show have='p8;p9;p11;p38;p12;p39;p109;p92;' guest_error='Guest error message' user_error='User error message' ]
  • toy car
  • baking soda and vinegar (OR alka-seltzer and water)
  • tape
  • container with a tight-fitting lid (I don't recommend glass containers... see if you can find a plastic one like a film canister or a mini-M&M container.)
There are two ways to do this experiment. You can either strap the bottle to the top of a toy car and use baking soda and vinegar, OR use effervescent tablets (like generic brands of alka seltzer) with this modified pop rocket (which you can strap to a toy car, or add wheels to the film canister itself by poking wooden skewers through milk jug lids for wheels and sliding the skewer through a straw to make the axle). Both work great, and you can even do both! This is an excellent demonstration in Newton's Third Law, inertia, and how stuff works differently here than in outer space. Here's what you do: 1. Strap the bottle to the top of the toy car or bus with the duct tape. You want the opening of the bottle to be at the back of the vehicle. 2. Put about one inch of vinegar into the bottle. 3. Shove a wad of paper towel as far into the neck of the bottle as you can. Make sure the wad is not too tight. It needs to stick into the neck of the bottle but not too tightly. 4. Pour baking soda into the neck of the bottle. Fill the bottle from the wad of paper all the way to the top of the bottle. 5. Now put the cork into the bottle fairly tightly. (Make sure the corkscrew didn't go all the way through the cork, or you'll have leakage issues.) 6. Now tap the whole contraption hard on the ground outside to force the wad of paper and the baking soda into the bottle. 7. Give the bottle a bit of a shake. 8. Set it down and watch. Do not stand behind the bus where the cork will shoot. 9. In 20 seconds or less, the cork should come popping off of the bottle. What you should see is the cork firing off the bottle and going some 10 or 20 feet. The vehicle should also move forward a foot or two. This is Newton’s Third law in action. One force fired the cork in one direction. Another force, equal and opposite, moved the car in the other direction. Why did the car not go as far as the cork? The main reason is the car is far heavier then the cork. F=ma. The same force could accelerate the light cork a lot more than the heavier car. Download Student Worksheet [/am4show]

This is a recording of a recent live teleclass I did with thousands of kids from all over the world. I’ve included it here so you can participate and learn, too!


We’re going to cover energy and motion by building roller coasters and catapults! Kids build a working catapult while they learn about the physics of projectile motion and storing elastic potential energy. Let’s discover the mysterious forces at work behind the thrill ride of the world’s most monstrous roller coasters, as we twist, turn, loop and corkscrew our way through g-forces, velocity, acceleration, and believe it or not, move through orbital mechanics, like satellites. We’ll also learn how to throw objects across the room in the name of science… called projectile motion. Are you ready for a fast and furious physics class?


[am4show have=’p8;p9;p11;p38;p92;p100;’ guest_error=’Guest error message’ user_error=’User error message’ ]


Materials:


    • click for worksheet
    • marbles
    • masking tape
    • 3/4″ pipe foam insulation (NOT neoprene and NOT the kind with built-in adhesive tape)
    • 9 popsicle sticks
    • 4 rubber bands
    • one plastic spoon
    • ping pong ball
    • hot glue gun with glue sticks

Key Concepts

Centripetal means ‘center-seeking’. It’s the force that points toward the center of the circle you’re moving on. When you swing the bucket around your head, the bottom of the bucket is making the water turn in a circle and not fly away. Your arm is pulling on the handle of the bucket, keeping it turning in a circle and not fly away. That’s centripetal force. Centrifugal force is equal and opposite to centripetal force. Centrifugal means ‘center-fleeing’, so it’s a force that’s in the opposite direction. The car pushing on you is the centripetal force.The push of your weight on the door is the REACTIVE centrifugal force, meaning that it’s only there when something’s happening. It’s not a real force that goes around pushing and pulling on its own.


What’s Going On?

Engines used to use an automatic feedback system called a centrifugal governor to regulate the speed. For example, if you’re mowing the lawn and you hit a dry patch with no grass, the blades don’t suddenly spin wildly faster… they get adjusted automatically by a feedback system so maintains the same speed for the blades, so matter how thick or thin the grass that your cutting is. You’ll find these also in airplanes to automatically adjust the pitch (or angle) of the propeller as it moves through the air. The pilot sets the intended speed, and the airplane has a governor that helps adjust the angle the blades make with the air to maintain this speed automatically, because the air density changes with altitude. It’s really important to know how much centrifugal force people experience, whether its in cars or roller coasters! In fact roller coaster loops used to be circular, but now they use clothoid loops instead to keep passengers happy during their ride so they don’t need nearly the acceleration that they’d need for a circular loop (which means less g-force so passengers don’t black out).


Here are more roller coaster maneuvers you can try out:


Loops: Swing the track around in a complete circle and attach the outside of the track to chairs, table legs, and hard floors with tape to secure in place. Loops take a bit of speed to make it through, so have your partner hold it while you test it out before taping. Start with smaller loops and increase in size to match your entrance velocity into the loop. Loops can be used to slow a marble down if speed is a problem.


Camel-Backs: Make a hill out of track in an upside-down U-shape. Good for show, especially if you get the hill height just right so the marble comes off the track slightly, then back on without missing a beat.


Whirly-Birds: Take a loop and make it horizontal. Great around poles and posts, but just keep the bank angle steep enough and the marble speed fast enough so it doesn’t fly off track.


Corkscrew: Start with a basic loop, then spread apart the entrance and exit points. The further apart they get, the more fun it becomes. Corkscrews usually require more speed than loops of the same size.


Jump Track: A major show-off feature that requires very rigid entrance and exit points on the track. Use a lot of tape and incline the entrance (end of the track) slightly while declining the exit (beginning of new track piece).


Troubleshooting

Marbles will fly everywhere, so make sure you have a lot of extras! If your marble is not following your track, look very carefully for the point of departure – where it flies off. For instance, when the marble flies off the track, you can step back and say:


“Hmmm… did the marble go to fast or too slow?”


“Where did it fly off?”


“Wow – I’ll bet you didn’t expect that to happen. Now what are you going to try?”


Become their biggest fan by cheering them on, encouraging them to make mistakes, and try something new (even if they aren’t sure if it will work out).


Questions to Ask

  1. Does the track change position with the weight of the marble, making it fly off course? (You can make the track more rigid by taping it to a surface.)
  2. Is the marble jumping over the track wall? (You can increase your bank angle – the amount of twist the track makes along its length.)
  3. How can you make your marble zip through two loops at once?
  4. How could you increase your marble speed?
  5. Where would you put a tunnel? (Leave one piece of track uncut to use as a tunnel.)

[/am4show]


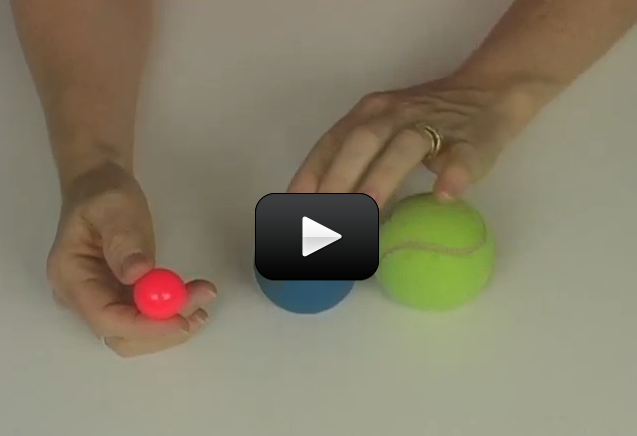
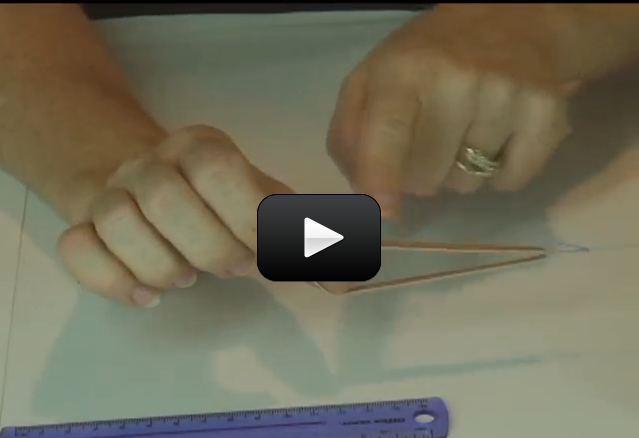
Every wonder why you have to wear a seat belt or wear a helmet? Let's find out (safely) by experimenting with a ball. You will need to find:
  • a car
  • a licensed driver
  • a ball
[am4show have='p8;p9;p11;p38;p12;p39;p92;' guest_error='Guest error message' user_error='User error message' ] 1. Next time you go for a ride bring a tennis ball with you in the car. 2. Sit in the back seat and put the tennis ball in the seat next to you. 3. Now watch the ball carefully as the car moves. See how it moves around the seat? (Try not to let it get on the floor and roll around. It might roll under the pedals and that would be bad.) 4. Pretty easy huh? As the car moves forward at 20 mph, everything in the car is moving forward at 20 mph. Everything in the car has the same inertia. If the car were to stop suddenly, everything in the car that’s not bolted down, still moves forward at 20 mph until it hits something. An object at rest tends to stay at rest, an object in motion tends to stay in motion. Right? So, if the car stops quickly, the tennis ball continues to move forward until it hits something. If the car turns, the ball continues to go in the direction it was going a second ago, so it rolls around the seat. What would happen if the car stopped suddenly and you weren’t wearing a seat belt? Yup, you’d fly forward at whatever speed the car was going until you crashed into something in the car. See now why seat belts are your best friend? Download Student Worksheet [/am4show]

hovercraftHovercraft transport people and their stuff across ice, grass, swamp, water, and land. Also known as the Air Cushioned Vehicle (ACV), these machines use air to greatly reduce the sliding friction between the bottom of the vehicle (the skirt) and the ground. This is a great example of how lubrication works – most people think of oil as the only way to reduce sliding friction, but gases work well if done right.


In this case, the readily-available air is shoved downward by the hover motor and the skirt traps the air and keeps it inside, thus lifting the vehicle slightly. The thruster motor’s job is to propel the craft forward. Most hovercraft use either two motors (one on each side) for steering, or just one with a rudder that can deflect the flow (as your project does).


The first hovercraft were thought about in the 1800s, but it wasn’t until the 1950s that real ones were first tested. Today, the military use them for patrolling hard-to-drive areas, scientists use them for swamp research studies, and businesses use them to transport toys and food across rough and icy areas. Scientists are already planning future ACVs to use magnetic levitation in addition to the air power… but it’s still on the drawing board.


Are you ready to make your own? We have TWO different models to choose from. Click this link for the Easy Balloon-Powered Model, or keep reading below for the advanced version.
[am4show have=’p8;p9;p11;p38;p92;’ guest_error=’Guest error message’ user_error=’User error message’ ]
You will need:


  • 1 wood skewer
  • 1 wood popsicle stick
  • 1 straw
  • 16 oz. styrofoam cup (the kind used for sodas). Note that waxed paper cups will not work!
  • 1 foam hamburger container (the one in the video is 5.5″ square and 3″ high when closed)
  • 1 foam meat tray (the one in the video is approx. 10″x12″x1″ – it does not need to be these exact dimensions – try a few different sizes out to see what happens! You can get them for free if you ask for a clean one from your butcher.
  • 2 3V DC motors (one smaller, one larger)
  • 2  propellers (the ones in the video are 3″ diameter, so check your local hobby store and get a variety to test out) – read comments below for ideas on where to get props!
  • 9V battery clip with wires
  • 9V battery (get a good kind, like Duracell or Energizer)
  • 9V battery holder (looks like a “C”) OR use tape to attach the battery to your hovercraft
  • a couple of extra wires (speaker wire, alligator clips, etc.)
  • 1 SPST switch

Download Student Worksheet & Exercises


  1. First, we’ll work to make the hovercraft hover. Start by finding the center of the Styrofoam meat tray. This will be your base.
  2. Use the ruler to measure the diameter of your cup to make sure it’s 3.5 inches. If it measures correctly, use the cup and pen to draw a circle in the middle of the tray
  3. Carefully cut out the circle, supporting the bottom of the foam.
  4. Cut your skewer into three pieces, making sure they are longer than the cut-out circle is wide.
  5. Use the hot glue gun to attach the lip of the round motor onto the skewer pieces, keeping them as parallel as possible.
  6. Gently attach the skewers onto the foam.
  7. Attach a propeller onto the shaft of the motor which is now attached to the skewers and foam tray.
  8. Now we will work with the takeout container. Open it and cut it in half and place one half to the side.
  9. Check the diameter of the bottom of the foam cup to ensure it’s about 2 ¼ inches. Then you can trace it with a pen on the top of the hamburger container half.
  10. Cut out the circle and discard it.
  11. Using the slide switch as a guide, cut out a small rectangle in the front for the switch. Reinforce it with hot glue, being careful to NOT get hot glue in the switch. Make sure it still slides back and forth.
  12. Rest the hamburger half on top – we aren’t going to attach it just yet.
  13. Find the small motor and look for the small contacts (they are very small and fragile – they are copper and look a little like foil). Gently bend them up a little in the back.
  14. Hot glue the motor onto the end of the popsicle stick with the shaft pointing away from the stick and the contacts pointing up.
  15. Use hot glue to secure the stick across the top of the hole in the hamburger box.
  16. Attach a propeller and give it a spin to make sure it will spin.
  17. Find the 9-volt battery clip and hot glue the bottom of it onto the middle of the popsicle stick.
  18. Cut your wire into two equal length pieces. Remove the insulation from the ends (about ¾ of an inch to an inch – get adult help if you need it). Twist the exposed wires together. Do this for both wires.
  19. If you aren’t going to solder the project, you’ll need to cut off the metal ends of the 9 volt battery clip’s wires and strip the wire insulation. Twist these wires together as well.
  20. Now we’ll work on wiring the inside motor. Take the end of one wire and put it halfway through one of the posts. Bend it up and twist it around itself very well to ensure it’s connected well. Do this with the other wire and connection.
  21. One of these wires will go to the switch. Thread the wire through a tab and twist it around itself.
  22. Attach the black wire from your 9-volt battery clip to the other tab on the switch.
  23. Thread your remaining wires (the red one from the battery clip and the remaining red wire from the first, hovering motor) up through the hamburger tray to attach them to the second motor. This is the thruster motor.
  24. Now that everything is wired, glue the hamburger tray to the bottom tray by placing hot glue at each of the four corners and pressing down gently.
  25. To test, grab your 9-volt battery. Check to make sure everything is wired correctly – the hovercraft should hover, not be sucked down to the table, and you should feel air blowing if you hold your hand in front of the thruster motor. Switch the appropriate wires if you note any issues during testing.
  26. Now we’ll build a shroud around the thruster motor. You’ll need the cup, the last piece of wooden skewer, the straw, and the remaining big piece of foam. Measure about halfway down the cup and cut it all the way around – essentially cutting it in half. You’ll be using the top of the cup – the cuff-like portion. It should fit around the propeller.
  27. Starting on the cut side of the foam, cut out a rectangle to use as a shim. Hot glue the rectangle down to the hovercraft. Then hot glue the cup cuff down to the rectangle.
  28. If the propeller is hitting the Styrofoam, you can move the cup around and hot glue as needed to make sure there is room for movement.
  29. Make a vein from a rectangular piece of Styrofoam that fits inside the cup cuff.
  30. Glue the straw onto the long end of this piece and trim the straw down. The wooden skewer should fit right through the straw.
  31. Push the wooden skewer down through the top of the cup. Pierce the bottom of the cup but DO NOT pierce the bottom of the hovercraft.
  32. Put the straw and Styrofoam piece in, and then thread the skewer back down through the straw.
  33. Troubleshooting: make sure the bottom of the hovercraft – the tray’s lip – is as smooth as possible. You can sand it down lightly if you need to. You’ll need a clean, smooth, flat surface to hover on as well! You might also double check the motor directions. If necessary, you can lightly weigh down the front of the hovercraft to balance out the weight from the back.
  34. Modification: Once the hovercraft is operational, you can hot glue foam tubing to the bottom to make a water hovercraft. However, it will no longer work on land!

Exercises:


1.  What happens if you use a larger meat tray?


2.  Add another 9V battery?


3.  se a 12VDC motor for the 3VDC motor?


4.  Remove the battery pack entirely and add longer wires so you can hold the battery in your hand as the hovercraft zooms down the hallway?


[/am4show]


Stand on a cookie sheet or cutting board which is placed on the floor (find a smooth floor with no carpet). Ask someone to gently push you across the floor. Notice how much friction they feel as they try to push you.


Want to make this job a bit easier?


Here’s what you need:


[am4show have=’p8;p9;p11;p38;p92;’ guest_error=’Guest error message’ user_error=’User error message’ ]


  • two boards (about 12″ x 12″, or whatever you have handy)
  • 4-10 dowels (or round, not hexagonal, pencils)
  • handful of marbles

Now place three or four dowels parallel about six inches apart between the board and the floor. Smooth wooden pencils can work in a pinch, as can the hard cardboard tubes from coat-hangers. Ask someone to push you. Is there a direction you still can’t travel easily? Now let’s add another direction to your motion…


Replace the dowels with marbles. What happens? Why do the marbles make you do in all directions? What direction(s) did the dowels roll you in?


Download Student Worksheet & Exercises


BONUS EXPERIMENT IDEA! To really drive this point home, you can make your own low-friction ball bearings: Get two cans (with a deep groove in the rim, such as paint cans) and stack them. Turn one (still on top of the other) and notice the resistance (friction) you feel. Now sandwich marbles all along the rim between the cans. Place a heavy book on top and note how easily it turns around. Oil the marbles (you can spray with cooking spray, but it is a bit messy) and it turns more easily yet.


Exercises 


  1. Why do the marbles make you go in all directions?
  2. What direction(s) did the dowels roll you in?

[/am4show]


expfrictionFind a smooth, cylindrical support column, such as those used to support open-air roofs for breezeways and outdoor hallways (check your local public school or local church). Wind a length of rope one time around the column, and pull on one end while three friends pull on the other in a tug-of-war fashion. Experiment with the number of friends and the number of winds around the column. Can you hold your end with just two fingers against an entire team of football players? You bet! [am4show have='p8;p9;p11;p38;p92;' guest_error='Guest error message' user_error='User error message' ] Here's what you need:
  • nylon long rope (10 feet or longer)
  • column or pillar (as talked about in the video)
  • at least two people, but more is better
What’s going on? This is a great example of what “exponential growth” truly means. There is friction between the rope and the support column – you can feel it as you tug on the rope. With every additional turn around the pole, the amount of friction increases (exponentially grows), until it skyrockets so much the rope feels as if it’s welded to the pole.
Download Student Worksheet & Exercises Einstein himself stated that “exponential growth” was the eighth wonder of the world! Exercises 
  1. How much money would you earn on Day 20 if I gave you one penny on Day 1, and doubled it every day after so Day 2 you received 2 pennies, and Day 3 you got 4 pennies?
  2.  Why do you think this experiment with friction works? Does it work with a flat surface the same way as a curved surface?
[/am4show]

Friction is everywhere! Imagine what the world would be like without friction! Everything you do, from catching baseballs to eating hamburgers, to putting on shoes, friction is a part of it. If you take a quick look at friction, it is quite a simple concept of two things rubbing together.


However, when you take a closer look at it, it’s really quite complex. What kind of surfaces are rubbing together? How much of the surfaces are touching? And what’s the deal with this stick and slip thing anyway? Friction is a concept that’s many scientists are spending a lot of time on. Understanding friction is very important in making engines and machines run more efficiently and safely.


Here’s what you need:


[am4show have=’p8;p9;p11;p38;p92;’ guest_error=’Guest error message’ user_error=’User error message’ ]


  • 2 Business card magnets (those thin flat magnets that are the size of business cards)
  • Fingers

Download Student Worksheet & Exercises


1. Take two business card magnets and stick them together black side to black side. They should be together so that the pictures (or whatever’s on the magnets) are on the outside like two pieces of bread on a sandwich.


2. Now grab the sides of the magnets and drag one to the right and the other to the left so that they still are magnetically stuck together as they slide over one another.


Did you notice what happened as they slid across one another? They stuck and slipped didn’t they? This is a bit like friction. As two surfaces slide across one another, they chemically bond and then break apart. Bond and break, bond and break as they slide. The magnets magnetically “bonded” together and then broke apart as you slide them across on another. (The chemical bonds don’t work quite like the magnetic “bonds” but it gives a decent model of what’s happening.) There are many mysteries and discoveries to be uncovered with this concept. Go out and make some!


Exercises 


  1. What is the difference between static and kinetic friction? Which one is always greater?
  2. Design an experiment where you can observe and/or measure the difference between static and kinetic friction.

[/am4show]


There’s a couple of misconceptions that I’d like to make sure get cleared up here a bit. I don’t want to go into too much detail but I want to make sure to mention these as they may be important as you go deeper into your physics education. First, friction is not a fundamental force. Friction is actually caused by the elemental force of electro-magnetism between two objects. Secondly, friction isn’t “caused” by the roughness or smoothness of an object. Friction is caused by two objects, believe it or not, chemically bonding to one another. Scientists call it “stick and slip”. Think about it this way. When you pull the wood in this experiment, notice that the force needed to get the board moving was more then the force was to keep it moving. The surface you were pulling the board on never got any rougher or smoother, it stayed pretty much the same. So why was it harder to get the board moving? When the board is just sitting there, the chemical bonds between the board and the surface can be quite strong. When the board is moving however, the bonds are much weaker. Here's what you need: [am4show have='p8;p9;p11;p38;p92;' guest_error='Guest error message' user_error='User error message' ]
  • A 6 inch long piece of 2 x 4 wood, or a heavy book
  • A string
  • A spring scale or a rubber band and a ruler.
  • Paper
  • Pen
  • 5 or so different surfaces, table tops, carpet, chairs, etc.
 
  Download your worksheet here! 1. Write the different surfaces that you chose on a piece of paper. 2. Make a hypothesis. On a scale from 1 to 5 (or however many surfaces you chose) rate the surfaces you picked. 1 is low friction and 5 would be high friction. Write your ranking next to the surfaces on the paper. 3. Take your block or your book and attach a string to it. 4. Place your block on the surface to be tested. 5. If you have a spring scale, attach it to the string and carefully pull on your block until it just moves. What you will probably see, is that you will keep pulling and pulling until suddenly your block moves. Try to record the number that the scale said just before the block moved. It takes a little bit of practice to read that number so keep trying. 6. If you don’t have a spring scale, tie a rubber band to the string. Now put a ruler with the first inch at the end of the rubber band farthest from the block. Now pull on the rubber band holding it next to the ruler. When the block moves, record the number on the ruler where the end of the rubber band was. In other words, you are measuring how far the rubber band stretches before the board moves. 7. Remember, with the scale or the rubber band, this takes some getting used to so try not to get frustrated. 8. Write down your results next to your hypothesis. 9. The higher the number, the more friction there is between your board and the surface the board is on. In other words, the harder you had to pull to get the board moving, the more friction there is between the board and the surface. 10. Now analyze your data and see how the data matches your hypothesis. Which surface really had the most friction and which had the least. Write numbers 1 to 5 (or however many surfaces you chose) next to the results. 11. How did the data correlate with your hypothesis? Any surprises? You’ve probably noticed with this experiment that the kind of surfaces rubbing together make a huge difference. Flat, hard, smooth surfaces will have much less friction than a rubber, soft, or rough surface. Muddy, wet or icy surfaces will often have even less friction. So, if you remember what we talked about with shoes and tires, the job of the tread on a shoe and a tire is to cut through the lower friction water or mud and get down to the higher friction road or dry ground. Something else I’d like you to notice is that friction acts differently depending on what something is doing. If you have ever had to push something heavy like a refrigerator you may have noticed that it was harder to get it to move than it was to keep it moving. This is because there are two types of friction; static friction and kinetic friction. Static friction happens when something is resting on something else and not moving. Kinetic friction is when one thing is moving on something else. Static friction is usually greater than kinetic friction. This means that it is harder to get your fridge moving than to keep it moving. You may have noticed this during “What a Drag” (if not, go ahead and play with it some more). When you first got the board to move, your scale had measurements much higher than when it was actually moving. It was harder to get it moving than to keep it moving. For the advanced students, here's a way to calculate the amount of force you're pulling with by figuring out how 'spring-y' your rubber band is... [/am4show][am4show have='p9;p38;' guest_error='Guest error message' user_error='User error message' ]
Advanced Students: Download your Friction Lab here. [/am4show]

Now let’s talk about the other ever present force on this Earth, and that’s friction. Friction is the force between one object rubbing against another object. Friction is what makes things slow down.


Without friction things would just keep moving unless they hit something else. Without friction, you would not be able to walk. Your feet would have nothing to push against and they would just slide backward all the time like you’re doing the moon walk.


Friction is a very complicated interaction between pressure and the type of materials that are touching one another. Let’s do a couple of experiments to get the hang of what friction is.
Here’s what you need:


[am4show have=’p8;p9;p11;p38;p92;’ guest_error=’Guest error message’ user_error=’User error message’ ]


  • About 5 different shoes
  • A board, or a tray, or a large book at least 15 inches long and no more then 2 feet long.
  • A ruler
  • Paper
  • Pencil
  • A partner

Download Student Worksheet & Exercises


1. Put the board (or whatever you’re using) on the table.


2. Put the shoe on the board with the back of the shoe touching the back of the board.


3. Have a partner hold the ruler upright (so that the12 inches end is up and the 1 inch end is on the table) at the back of the board.


4. Slowly lift the back of the board leaving the front of the board on the table. (You’re making a ramp with the board). Eventually the shoe will begin to slide.


5. Stop moving the board when the shoe slides and measure the height that the back of the board was lifted to.


6. Look at the 5 shoes you chose and test them. Before you do, make a hypothesis for which shoe will have the most friction. Make a hypothesis. On a scale from 1 to 5 (or however many shoes you’re using) rate the shoes you picked. 1 is low friction and 5 would be high friction. Write the hypothesis next to a description of the shoes on a piece of paper. The greater the friction the higher the ramp has to be lifted. Test all of the shoes.


7. Analyze the shoes. Do the shoes with the most friction show any similarities? Are the bottoms made out of the same type of material? What about the shoes with very little friction?


Any surprises with which shoe had the most or least friction? Compare the shoe with the most friction and the shoe with the least friction. Do you notice anything? Usually, the shoe that has the most friction has more shoe surface touching the board then most of the other shoes.


Also, often the shoe with the least friction, has the least amount of shoe touching the board. Since friction is all about two things rubbing together, the more surface that’s rubbing, the more friction you get. A tire on you car should have treads but a race car tire will be absolutely flat with no treads at all. Why?


The race car doesn’t have to worry about rain or wetness so it wants every single bit of the tire to be touching the surface of the track. That way, there is as much friction as possible between the tire and the track. The tire on your car has treads to cut through mud and water to get to the nice firm road underneath. The treads actually give you less friction on a flat dry road!


Some of you might have used a skateboard shoe for your experiment. Notice, that the skateboard shoe has quite a flat bottom compared to most other shoes. This is because a skateboarder wants as much of his or her shoe to touch the board at all times.


Exercises 


  1. What is friction?
  2. What is static friction?
  3. What is kinetic friction?

[/am4show]


Hovercraft transport people and their stuff across ice, grass, swamp, water, and land. Also known as the Air Cushioned Vehicle (ACV), these machines use air to greatly reduce the sliding friction between the bottom of the vehicle (the skirt) and the ground. This is a great example of how lubrication works – most people think of oil as the only way to reduce sliding friction, but gases work well if done right. In this case, the readily-available air is shoved downward by the pressure inside of balloon. This air flows down through the nozzle and out the bottom, under the CD, lifting it slightly as it goes and creating a thin layer for the CD to float on. Although this particular hovercraft only has a 'hovering' option, I'm sure you can quickly figure out how to add a 'thruster' to make it zoom down the table! (Hint - you will need to add a second balloon!) Here's what you need: [am4show have='p8;p9;p11;p38;p10;p37;p151;p92;' guest_error='Guest error message' user_error='User error message' ]
  • 7-9" balloon
  • water bottle with a sport-top (see video for a visual - you can also use the top from liquid dish soap)
  • old CD
  • paper cup (or index card)
  • thumbtack
  • hot glue gun
  • razor with adult help
 
Download Student Worksheet here. There's air surrounding us everywhere, all at the same pressure of 14.7 pounds per square inch (psi). You feel the same force on your skin whether you're on the ceiling or the floor, under the bed or in the shower. An interesting thing happens when you change a pocket of air pressure - things start to move. This difference in pressure causes movement that creates winds, tornadoes, airplanes to fly, and the air to rush out of a full balloon. An important thing to remember is that higher pressure always pushes stuff around. While lower pressure does not "pull," we think of higher pressure as a "push". The stretchy balloon has a higher pressure inside than the surrounding air, and the air is allowed to escape out the nozzle which is attached to the water bottle cap through tiny holes (so the whole balloon doesn't empty out all at once and flip over your hovercraft!) The steady stream of air flows under the CD and creates a cushion of air, raising the whole hovercraft up slightly... which makes the hovercraft easy to slide across a flat table. Want to make an advanced model Hovercraft using wires, motors, and leftovers from lunch? Then click here. [/am4show] [am4show have='p9;p39;' guest_error='Guest error message' user_error='User error message' ] Advanced students: Download your Hovercraft Lab here. [/am4show]

You have just taken in a nice bunch of information about the wild world of gravity. This next section is for advanced students, who want to go even deeper. There’s a lot of great stuff here but there’s a lot of math as well. If you’re not a math person, feel free to pass this up. You’ll still have a nice understanding of the concept. However, I’d recommend giving it a try. There are some fun things to do and if you’re not careful, you might just end up enjoying it!


Here’s what you need:


[am4show have=’p8;p9;p11;p38;p38;p92;’ guest_error=’Guest error message’ user_error=’User error message’ ]


  • ball
  • pencil, paper
  • stopwatch
  • yardstick or tape measure

Download Student Worksheet & Exercises


Okay, let’s see where we can go here. Gravity accelerates all things equally…what does that mean? All things accelerate at 32 feet per second squared due to gravity. In metric, it accelerates 9.8 meters per second squared.


What that means is, every second something falls, its speed increases by 32 feet/second or 9.8 meters/second. Believe it or not, that’s about 22 miles per hour!! Gravity will accelerate something from 0 to 60 mph in about 3 seconds. Faster then all but the fastest sports cars!


So what is acceleration anyway? Well speed is the amount of distance something travels in a certain amount of time. Five miles per hour, for example, tells you that something can travel five miles in an hour. Acceleration is how much the speed changes over time. So acceleration would be miles per hour per hour or feet per second per second.


Acceleration is a rate of change of speed or, in other words, how fast is the speed is changing. Feet per second per second is the same as ft/s/s which is the same as ft/s². (I told you we were going deeper!) Let’s say you’re riding your bicycle at a positive acceleration (your getting faster) of 5 ft/s².


That means in 1 second you’re moving at a speed of 5 ft/s.


After 2 seconds you’re moving at a speed of 10 ft/s.


After 3 seconds you’re now clipping along at 15 ft/s (about 10 mph).


gravity1So you can see that as long as you accelerate, you will be getting faster and faster. The formula for this is v=at where v is velocity, a is acceleration and t is time. (We will be doing more with acceleration in a future lesson.)


If we want to find out how fast something is going after it has been dropped, we use the formula v=gt. The letter “v” stands for velocity (which basically means speed.) “g” stands for the gravitational constant and “t” stands for time.


If we want to find out how fast a golf ball is dropping after it falls for 3 seconds we multiply 3 seconds by 32 feet/second squared and that equals 96 feet/second. So, if I dropped a golf ball off a building, it would be going 96 feet per second after 3 seconds of dropping.


The formula looks like this when we fill in the numbers:


v=3s x 32 ft/s²


If we do more math, we’ll see that after one second something will be item7going 32 ft/s, after 2 seconds it will be going 64 ft/s, after 3 seconds 96 ft/s after 4 seconds 128 ft/s. Get it? Anything dropped will be going that speed after that many seconds because gravity accelerates all things equally (air resistance will effect these numbers so you won’t get exactly the numbers in practice that you will mathematically).


All right, lets go even deeper. We now know how to calculate how fast something will be going if it is dropped, but what happens if we throw it up? Well, which way does gravity go? Down right? Gravity accelerates all things equally so, gravity will slow things down as they travel up by 32 ft/s². If a ball is thrown up at 64 ft/s how long will it travel upwards? Well, since it is negatively accelerating (in physics there’s no such thing as deceleration) after the first second the ball will be traveling at 32 ft/s and after 2 seconds the ball will come to a stop, turn around in midair, and begin to accelerate downwards at 32 ft/s². Using this, you can tell how fast you can throw by using nothing more then a timer. Let’s try it.


For this experiment, you will need:


– A ball (a tennis ball or baseball would be perfect)


– A stopwatch


– Pencil and paper


– A friend


– A calculator


1. Go outside and pick one person to be the thrower and another to be the timer.
2. Have the timer say “Ready, Set, Go!” and at go he or she should start the stopwatch.
3. When the timer says go, the thrower should toss the ball as high as he or she can.
4. The timer should stop the stopwatch when the ball hits the ground.
5. Write down the time that the ball was in the air.
6. Let each person take a couple of turns as timer and thrower.
7. Now, come back inside and do a bit of math.


Ok, let’s see how you did. Let’s say you threw the ball into the air and it took 3 seconds to hit the ground. The first thing you have to do is divide 3 in half. Why? Because your ball traveled 1.5 seconds up and 1.5 seconds down! (By the way, this isn’t completely accurate because of two things. One, air resistance and two, the ball falls a little father then it rises because of the height of the thrower.) Now, take your formula and figure out the speed of the throw.


v=gt,


so v=32 ft/s² x 1.5 sec or


v = 48 ft/s.


So, if that’s how fast it left your hand…how fast was it going when it hit the ground? Yup, 48 ft/s. It has to be going the same speed because it had just as much time to speed up as it had to slow down, 1.5 seconds. Try that with your time and see how fast your throw was.


Ok, hold your breath, just a little deeper now. Let’s talk about distance. If something starts from rest you can tell how far it drops by how long it has dropped. This formula is d=1/2gt² or distance equals one half the gravitational constant multiplied by time squared. Let’s try it. If I drop a ball and it drops 3 seconds how far has it dropped?


d=1/2 32ft/s² x (3s)² or


d = 16 ft/s x 9s² or


d=144 ft So it has dropped 144 ft.


Now try this with your time. What’s the first thing you have to do? Divide your time in half again, right. It took your ball half the time to go up and half the time to come down. Now plug your numbers into 1/2gt² and find out how high you threw your ball! Is Major League Baseball in your future?!


Advanced students: Download your Fast Ball Lab here.


Exercises 


  1. Is gravity a speed, velocity, or acceleration?
  2. Does gravity pull equally on all things?
  3. Does gravity accelerate all objects equally?
  4. How is acceleration different from speed and velocity?

[/am4show]


This is a recording of a recent live teleclass I did with thousands of kids from all over the world. I’ve included it here so you can participate and learn, too!


Blast your imagination with this super-popular class on rocketry! Kids learn about fin design, hybrid and solid-state rocketry, and how rockets make it into space without falling out of orbit. This class is taught by a real live rocket scientist (me!). We’ll launch rockets during the class, too!


[am4show have=’p8;p9;p11;p38;p92;p95;’ guest_error=’Guest error message’ user_error=’User error message’ ]
Materials:


  • straw
  • paperclip
  • rubber band
  • index card
  • popsicle stick
  • scissors
  • masking tape
  • water
  • alka-seltzer tablets (generic brands work fine)
  • film canister or small container with tight-fitting lid
  • OPTIONAL: Small toy car

Below you will find an older version of the same teleclass. We are making a different experiment during class, so the materials you will need are a little different:


Materials:


  • 2L soda bottle
  • 1/2″ PVC pipe
  • duct tape
  • pen or pencil
  • index cards
  • sheets of paper
  • bicycle inner tube

Key Concepts

A rocket has a few parts different from an airplane. One of the main differences is the absence of wings. Rockets utilize fins, which help steer the rocket, while airplanes use wings to generate lift. Rocket fins are more like the rudder of an airplane than the wings.


Another difference is the how rockets get their speed. Airplanes generate thrust from a rotating blade, whereas rockets get their movement by squeezing down a high-energy gaseous flow and squeezing it out a tiny exit hole. If you’ve ever used a garden hose, you already know how to make the water stream out faster by placing your thumb over the end of the hose. You’re decreasing the amount of area the water has to exit the hose, but there’s still the same amount of water flowing out, so the water compensates by increasing its velocity. This is the secret to rocket nozzles – squeeze the flow down and out a small exit hole to increase velocity.


The rockets we’re about to build get their thrust by generating enough pressure and releasing that pressure very quickly. You will generate pressure both by pumping and by chemical reaction, which generates gaseous products.


What’s Going On?

For every action, there is equal and opposite reaction. If flames shoot out of the rocket downwards, the rocket itself will soar upwards. It’s the same thing if you blow up a balloon and let it go-the air inside the balloon goes to the left, and the balloon zips off to the right (at least, initially).


Your rocket generates a high pressure by squeezing the air into a very small space and using Bernoulli’s Principles in action! As you stomp on the rocket, the air pressure leaves the bottle pretty quickly, pushing the paper rocket out of the way as it zooms out of the tube. By narrowing the exit diameter, you allow the air to speed up as it exits, creating a higher launch for your rocket.


You can modify your rocket body design. Add more fins, tilt the fins at a angle, or try no fins at all! You can add a more steeply slanted  nose. You can cut the rocket body in half or make it twice as long.  There’s so many things you can test out, change, or modify with this simple activity! You can also add canards (glider-type wings) to either side of the rocket body right under the nose and turn it into a glider when it starts to fall back to Earth!


Questions to Ask

  1. Does it matter how many fins you use?
  2. What happens if there’s an air leak in the system?
  3. How can you make the rocket fly even higher? Name three different ways.
  4. Is the center of pressure before or aft of the center of gravity on your rocket?
  5. For stable flight, how many fins do you ideally need?
  6. How can you make the rocket spin as it launches?

[/am4show]


This is a recording of a recent live teleclass I did with thousands of kids from all over the world. I’ve included it here so you can participate and learn, too!


Soar, zoom, fly, twirl, and gyrate with these amazing hands-on classes which investigate the world of flight. Students created flying contraptions from paper airplanes and hangliders to kites! Topics we will cover include: air pressure, flight dynamics, and Bernoulli’s principle.


Materials:


  • 5 sheets of 8.5×11” paper
  • 2 index cards
  • 2 straws
  • 2 small paper clips
  • Scissors, tape
  • Optional: ping pong ball and a small funnel

[am4show have=’p8;p9;p11;p38;p93;’ guest_error=’Guest error message’ user_error=’User error message’ ]


Key Concepts

While the kids are playing with the experiments see if you can get them to notice these important ideas. When they can explain these concepts back to you (in their own words or with demonstrations), you’ll know that they’ve mastered the lesson.


  1. Air pressure is all around us. Air pushes downward and creates pressure on all things.
  2. Air pressure changes all the time.
  3. Higher pressure always pushes.
  4. The faster air travels over a surface, the less time it has to push down on that surface and create pressure. Fast moving air creates low pressure regions. (Bernoulli’s Law).
  5. The four fundamental forces on an airplane are lift, weight, thrust, and drag.

What’s Going On?

There’s air surrounding us everywhere, all at the same pressure of 14.7 pounds per square inch (psi). You feel the same force on your skin whether you’re on the ceiling or the floor, under the bed or in the shower.


An interesting thing happens when you change a pocket of air pressure – things start to move. This difference in pressure causes movement that creates winds, tornadoes, airplanes to fly, and some of the experiments we’re about to do together.


An important thing to remember is that higher pressure always pushes stuff around. While lower pressure does not “pull,” we think of higher pressure as a “push”. The higher pressure inside a balloon pushes outward and keeps the balloon in a round shape.


Weird stuff happens with fast-moving air particles. When air moves quickly, it doesn’t have time to push on a nearby surface, such as an airplane wing. The air just zooms by, barely having time to touch the surface, so not much air weight gets put on the surface. Less weight means less force on the area. You can think of “pressure” as force on a given area or surface. Therefore, a less or lower pressure region occurs wherever there is fast air movement.


There’s a reason airplane wings are rounded on top and flat on the bottom. The rounded top wing surface makes the air rush by faster than if it were flat. When you put your thumb over the end of a gardening hose, the water comes out faster when you decrease the size of the opening. The same thing happens to the air above the wing: the wind rushing by the wing has less space now that the wing is curved, so it zips over the wing faster, and creates a lower pressure area than the air at the bottom of the wing.


The Wright brothers figured how to keep an airplane stable in flight by trying out a new idea, watching it carefully, and changing only one thing at a time to improve it. One of their biggest problems was finding a method for generating enough speed to get off the ground. They also took an airfoil (a fancy word for “airplane wing”), turned it sideways, and rotated it around quickly to produce the first real propeller that could generate an efficient amount of thrust to fly an aircraft.  Before the Wright brothers perfected the airfoil, people had been using the same “screw” design created by Archimedes in 250 BC.  This twist in the propeller was such a superior design that modern propellers are only 5% more efficient than those created a hundred years ago by the two brilliant Wright brothers.


Questions to Ask

When you’ve worked through most of the experiments ask your kids these questions and see how they do:


  1. Higher pressure does which? (a) pushes (b) pulls (c) decreases temperature (d) meows (e) causes winds, storms, and airplanes to fly
  2. The tips on the edge of a paper airplane wing provide more lift by: (a) flapping a lot
    (b) destroying wingtip vortices that kill lift (c) getting stuck in a tree more easily (d) decreasing speed
  3. In the ping pong ball and funnel experiment, the ball stayed in the funnel was because:         (a) you couldn’t blow hard enough (b) you glued it into the funnel (c) the ball had a hole in it  (d) the fast blowing caused a low-pressure region around the ball, causing the surrounding atmospheric pressure to be a higher pressure, thus pushing the ball into the funnel
  4. If your plane takes a nose dive, you should try (a) changing the elevators by pinching the edges (b) change the dihedral angle (c) change how you throw it (d) all of the above
  5. What are the four forces that act on every airplane in flight?
  6. Draw a quick sketch of your plane viewed from the front with a positive dihedral.
  7. If you were designing your own “Flying Paper Machine Kit”, what would be inside the box?
  8. What’s the one thing you need to remember about higher pressure?
  9. What keep an airplane from falling?
  10. Where is the low pressure area on an airplane wing?

Answers:


1 (a, e) 2 (b) 3 (d) 4 (d) 5 (lift, weight, thrust, drag) 8 (higher pressure pushes) 9 (lift) 10 (top surface)


[/am4show]


This roof can support over 400 times its own weight, and you don’t need tape! One of the great things about net forces is that although the objects can be under tremendous force, nothing moves! For every push, there’s an equal and opposite pull (or set of pulls) that cancel each other out.


This barrel roof is an excellent example of how to the forces all cancel out and the roof stands strong (hopefully!) If you have trouble with this experiment, just use cardstock or other heavy weight paper instead of regular copy paper.


Here’s what you need:
[am4show have=’p8;p9;p11;p38;p72;p92;’ guest_error=’Guest error message’ user_error=’User error message’ ]


  • Print out this template.
  • Scissors
  • 2 pencils
  • Thread
  • Flat book or light clipboard
  • Extra paper to load the roof

Watch the video:


Download Student Worksheet & Exercises


Exercises 


  1. What is Newton’s Third Law?
  2. What kind of groups do forces come in?
  3. What is another name for Newton’s Third Law?

[/am4show]


What keeps building from toppling over in the wind? Why are some earthquake-proof and others not? We’re going to look at how engineers design buildings and bridges while making our own.


Here’s what you need:
[am4show have=’p8;p9;p11;p38;p72;p92;’ guest_error=’Guest error message’ user_error=’User error message’ ]


  • Index cards
  • Blocks
  • Straws
  • Clay
  • Disposable cups

Watch the video:


Download Student Worksheet Exercises


Exercises 


  1. What are three different kinds of forces?
  2.  Using only blocks, what kind of wall design is the weakest?
  3.  Why does the bridge seem stronger when a card is arched underneath?

[/am4show]


This experiment is for advanced students.


Who gets to burn something today? YOU get to burn something today!


You will be working with Zinc (Zn). Other labs in this kit allow us to burn metal, but there is a bit of a twist this time. We will be burning a powder.


Why a powder instead of a solid ribbon or foil as in the other labs?  Have you heard of surface area being a factor in a chemical reaction? The more surface area there is to burn, the more dramatic the chemical change. So, with this fact in mind, a powder should burn faster or be more likely to burn than a large solid.


[am4show have=’p8;p9;p11;p38;p92;p52;p91;’ guest_error=’Guest error message’ user_error=’User error message’ ]


Zinc (Zn) is a metallic element. It is element #30 on the periodic table. Chemically, it is similar to magnesium, another element that we use in our experiments.


Brass is an alloy of zinc and copper. Brass has been an important metal since the 10th century B.C. Alchemists in the dark ages burned zinc in air, just like we will do, to make what they called “white snow”. Their “white snow is our zinc oxide.


Zinc is an important element in our lives. Zinc deficiency causes lack of proper growth, delayed physical maturation, and susceptibility to infection. Zinc deficiency contributes to the death of 800,000 children per year. Excess zinc in our bodies can cause problems for us as well.


Materials:


  • Alcohol burner
  • Lighter
  • Measuring spoon
  • Zinc powder (MSDS)
  • Porcelain tile work surface

Remember to dispose of your zinc oxide in the outside trash, and conduct your experiment in a well ventilated area. Fumes from this experiment are irritating and a little dangerous.


C3000: Experiment 53

Download Student Worksheet & Exercises


Here’s what’s going on in this experiment:


Zinc powder will burn in the presence of oxygen, producing interesting colors. The flame from burning zinc is blue, as the zinc undergoes a chemical change to become zinc oxide. Zinc oxide is thermochromic. That means that it changes colors depending on the temperature. When cool, ZnO is white. When heated, zinc oxide turns yellow, and as it cools, returns to become a white powder again. The color changes are caused by a small loss of oxygen at high temperatures, and a small gain of oxygen as it cools in air.


2Zn + O2 –> 2ZnO


Zinc powder burned in air reacts with the oxygen and turns into zinc oxide. Zinc oxide is used in sunscreen and to treat burns, cuts, and diaper rash.


Cleanup: Clean everything thoroughly after you are finished with the lab. After cleaning with soap and water, rinse thoroughly. Chemists use the rule of “three” in cleaning tools. After washing, chemists rinse out all visible soap and then rinse three times more.


Storage: Place all chemicals and cleaned tools, and glassware in their respective storage places.


Disposal: Dispose of all solid waste in the garbage.


[/am4show]


What state of matter is fire? Is it a liquid? I get that question a LOT, so let me clarify. The ancient scientists (Greek, Chinese… you name it) thought fire was a fundamental element. Earth, Air Water, and Fire (sometimes Space was added, and the Chinese actually omitted Air and substituted Wood and Metal instead) were thought to be the basic building blocks of everything, and named it an element. And it’s not a bad start, especially if you don’t have a microscope or access to the internet.


Today’s definition of an element comes from peeking inside the nucleus of an atom and counting up the protons. In a flame, there are lots of different molecules from NO, NO2, NO3, CO, CO2, O2, C… to name a few. So fire can’t be an element, because it’s made up of other elements. So, what is it?


[am4show have=’p8;p9;p11;p38;p92;p18;p45;p91;p101;’ guest_error=’Guest error message’ user_error=’User error message’ ]


Fire is a combination of different gases and hot plasma. It’s a complicated exothermic (gives off heat) chemical reaction that releases a lot of heat and light (you can feel and see the flame). You need three things for a flame: oxygen, fuel, and a spark. When you take away one of these three, you snuff the flame and stop the chemical reaction. You start with fuel (usually contains carbon), and add oxygen to get carbon dioxide, carbon monoxide, nitric oxide, and many other gases and leftover ash. Most flames are hot enough to heat the gas mixture to create tiny bits of plasma within the flame, so fire is actually involved in two states of matter.


In this experiment, we’re going to see how you can protect a surface from burning using water. Are you ready?


Materials:


  • Shallow baking dish
  • Tongs
  • Rubbing Isopropyl Alcohol (50-91%)
  • Water (omit if using 50-70% alcohol)
  • Dollar bill
  • Fire extinguisher
  • Adult help

Download Student Worksheet & Exercises


What’s going on? Alcohol burns with a slightly blue and orange flame (as shown in the video). The secret to keeping the dollar bill from burning is the water you mixed in with the alcohol. Water has a high heat capacity, which means that the water absorbs the energy from the flame and keep the bill from catching on fire. If you dipped the dollar bill in pure 100% alcohol, the temperature would rise high enough on the bill to burn. The reason we chose a bill instead of regular paper is that the dollar bill is a combination of linen and paper, making it much stronger and absorbent for this experiment.


You need both the water and the alcohol for this experiment. The water, as it absorbs the energy from the flame, heats up to its boiling point and then vaporizes, keeping the bill cool enough to not catch on fire. The alcohol is the fuel needed to keep the flame going. It’s a delicate balance between the two, but here are a couple of variations you can try out:


  • You can change the color of the flame by adding in a sprinkling of salt (for yellow), boric acid (for green), or epsom salt (for white).
  • You can also try mixing different ratios of water to alcohol, using 50%, 70% and 91% isopropyl alcohol. You can also try ethyl alcohol (which is an entirely different molecule) but will react about the same with this experiment. Note that if you decrease the water content too much, you’re going to lose your dollar bill.

[/am4show]


No kidding! You’ll be able to show your friends this super-cool magic show chemistry trick with very little fuss (once you get the hang of it). This experiment is for advanced students. Before we start, here are a few notes about the setup to keep you safe and your nasal passages intact:

The chemicals required for this experiment are toxic! This is not an experiment to do with little kids or pets around, and you want to do the entire experiment outside or next to an open window for good ventilation, as the fumes from the sodium hydroxide/zinc solution should not be inhaled.


This experiment is not dangerous when you follow the steps I’ve outlined carefully. I’ll take you step by step and show you how to handle the chemicals, mix them properly, and dispose of the waste when you’re done.


Goggles and gloves are a MUST for this experiment, as the sodium hydroxide (in both liquid and solid form) is caustic and corrosive and will burn your skin on contact.


[am4show have=’p8;p9;p11;p38;p92;p45;p91;’ guest_error=’Guest error message’ user_error=’User error message’ ]


Is it REAL gold?

No. But it’s very close in color, as is the ‘silver’. The basic idea behind the experiment is this: by cleaning the pennies in the first step, you clear off any oxide layers to expose the copper surface. When you dip it in the solution, a galvanization reaction starts (just like ‘galvanized nails’) covering the penny with a metallic silver zinc coating.


The torching process fuses the zinc and the copper together to make the gold colored brass coating. Be careful, though, as brass has a low melting temperature and if you leave it in the flame too long, you’ll burn off the brass coating.


Materials:


  • propane torch with adult help
  • shiny copper pennies
  • distilled white vinegar
  • Pyrex glass beaker
  • sodium hydroxide (solid)
  • zinc powder (dust)
  • alcohol burner
  • stand that fits over the alcohol burner
  • lighter with adult help
  • wire mesh screen
  • popsicle sticks
  • water
  • salt
  • disposable cup
  • gloves
  • goggles
  • tweezers or pliers

Download Student Worksheet & Exercises


The chemical reaction plates the copper on the penny with zinc (called galvanization). The zinc reacts with the hot sodium hydroxide solution to form soluble sodium zincate (Na2ZnO2), which is converted to metallic zinc when it hits the surface of the penny.


Heating the penny fuses the zinc and copper together to form an alloy called brass. The amounts of copper and zinc in brass can vary a lot, from 60-82% copper and 18-40% zinc.


DISPOSAL INSTRUCTIONS: If you simply wipe out the beaker with a paper towel and toss it in the trash, you run the risk of igniting your trash can because the combination of sodium hydroxide and zinc is very exothermic (lots of heat is generated).


Make sure to use plenty of water to remove the sodium hydroxide first before removing the metal. Sodium hydroxide will not harm the plumbing in the sink as it is also used as a drain cleaner (dissolves hair, etc.) but don’t get it on your hands!  Vinegar will neutralize any residual sodium hydroxide.


[/am4show]


This experiment is for advanced students. Potassium permanganate (KMnO4) in water turns an intense, deep, purple. It is important in the film industry for aging props and clothing to make them look much older than they are. Also, artists use it in bone carving. People who carve antlers and bone use KMnO4 to darken the surface of the bone to make it look aged. They make the carving, soak it in potassium permanganate, then carve more, and repeat. The end result is a carving that has a light golden brown color. More dipping will darken the carving even more. Potassium permanganate is going to undergo a chemical change with this activity. In this experiment, we will be able to witness several indicators of chemical change. Color changes, bubbles from gas generation, temperature change, and color disappearance are all indicators of chemical changes. [am4show have='p8;p9;p11;p38;p92;p52;p91;' guest_error='Guest error message' user_error='User error message' ] Examples of chemical color changes we might be familiar with are autumn leaves changing color and a half eaten apple quickly turning brown. Physical changes can mimic the indicators of chemical change, so we will need to always think through what we observe and then decide whether it is a physical or chemical change. Physical changes that mimic chemical changes can be color and temperature. The key is that physical changes are changes in state (solid, liquid, gas, sublimation) or changes in the condition of the material. In our pursuit of science knowledge, we will observe many physical and chemical changes. We need to be able to identify them accurately to really understand what is happening in an experiment. Materials:
  • 3% Hydrogen peroxide (KMnO4) (MSDS)
  • Test tube rack
  • 2 test tubes
  • Potassium permanganate (KMnO4) (MSDS)
  • Sodium hydrogen sulfate (NaHSO4) (MSDS) Sodium hydrogen sulfate is very toxic. Respect it, handle it carefully and responsibly. Do not take it for granted.
  • Measuring syringe
  • Water
  • Measuring spoon
  • Solid rubber stopper
NOTE: Be very careful when handling the sodium hydrogen sulfate – it’s highly corrosive and dangerous when wet. Handle this chemical only with gloves, and be sure to read over the MSDS before using. Always cap your chemicals after use and set them aside where they won’t get in the way. Your lab area should always be clear, clean, and uncluttered. Water and a fire extinguisher should be within arm’s reach. Always clean equipment before using any of it on another chemical. Potassium permanganate is going to undergo a chemical reaction that will turn the deep violet or purple solution clear. It is a very cool experiment and looks like a lot of fun.

C3000: Experiment

Download Student Worksheet & Exercises Here’s what’s going on in this experiment: KMnO4 + NaHSO4 + H2O2 = MnSO4 + O2 + NaOH + KOH Potassium permanganate is added to sodium hydroxide, and then hydrogen peroxide is added and quickly capped. MnSO4 + O2 + NaOH + KOH The product of the reaction is manganese sulfate, oxygen, sodium hydroxide, and potassium hydroxide. The remaining chemicals are all clear, so the desired result is obtained. Cleanup: Clean everything thoroughly after you are finished with the lab. After cleaning with soap and water, rinse thoroughly. Chemists use the rule of “three” in cleaning glassware and tools. After washing, chemists rinse out all visible soap and then rinse three times more. Storage: Place cleaned tools and glassware in their respective storage places. Disposal: Liquids can be washed down the drain

Click here for Homework Problem Set #14

[/am4show]

This experiment is for advanced students.


Ever use soap? Sodium hydroxide (NaOH) is the main component in lye soap. NaOH is mixed with some type of fat (vegetable, pig, cow, etc). Scent can be added for the ‘pretty’ factor and pumice or sand can be added for the manly “You’re coming off my hands and I’ll take no guff” factor. Lots of people still make their own soap and they enjoy doing it.


[am4show have=’p8;p9;p11;p38;p92;p52;p91;’ guest_error=’Guest error message’ user_error=’User error message’ ]


One of the coolest uses for sodium hydroxide is in tissue digestion. By “tissue” we mean meat, bone, sinew…..meaning bodies! People who pick up dead animal (road kills) for the county dump their catch in barrels containing sodium hydroxide. The NaOH eats everything up and then the “sludge” is dumped in the landfill. They used NaOH to make them decompose. So this stuff is nasty and should never be touched with your bare hands!!


Materials:


  • Erlenmeyer flask
  • Alcohol burner
  • Lighter
  • Heating rod
  • Sodium carbonate (Na2CO3) (MSDS)
  • Calcium hydroxide (Ca(OH)2) (MSDS)
  • Measuring spoon
  • Water
  • Tripod stand
  • Wire screen
  • Chemistry stand
  • Test tube holder
  • Test tube rack
  • Test tube
  • Filter paper
  • Funnel
  • Stock bottle for NaOH storage (MSDS)

Don’t inhale any fumes from reactions or powder welling out of chemical containers, especially calcium hydroxide dust. We want to test our product to see if it is NaOH. It should turn red litmus blue.


We will perform a bunch of operations in this lab.


  1. Heating our calcium hydroxide / sodium carbonate mixture to create calcium carbonate and sodium hydroxide.
  2. Filter out the calcium carbonate to collect the sodium hydroxide.
  3. Test our sodium hydroxide product for the properties of NaOH.

C3000: Experiments

Download Student Worksheet & Exercises


Here’s what’s going on in this experiment:


Ca (OH)2 + Na2CO3 –> 2NaOH + CaCO3


Calcium hydroxide and sodium carbonate are combined in water and heated to produce sodium hydroxide and calcium carbonate


This is a double replacement reaction because the calcium ion and the sodium ion have swapped places


Cleanup: We are going to clean everything thoroughly after we finish the lab. After cleaning with soap and water, rinse thoroughly. Chemists use the rule of “three” in cleaning glassware and tools. After washing, chemists rinse out all visible soap and then rinse three times more.


Storage: Place cleaned tools and glassware in their respective storage places.


Disposal: Liquids must be neutralized with vinegar, if a base, or baking soda, if an acid, before washing them down the drain. Before actually washing them down the drain check again with litmus paper to ensure that they have been neutralized. Solids are thrown in the trash.


[/am4show]


In this lab, we’re going to investigate the wonders of electrochemistry. Electrochemistry became a new branch of chemistry in 1832, founded by Michael Faraday. Michael Faraday is considered the “father of electrochemistry”. The knowledge gained from his work has filtered down to this lab. YOU will be like Michael Faraday. I imagined he would have been overjoyed to do this lab and see the results. You are soooo lucky to be able to take an active part in this experiment. Here’s what you’re going to do…


You will be “creating” metallic copper from a solution of copper sulfate and water, and depositing it on a negative electrode. Copper is one of our more interesting elements. Copper is a metal, and element 29 on your periodic table. It conducts heat and electricity very well.


Many things around you are made of copper. Copper wire is used in electrical wiring. It has been used for centuries in the form of pipes to distribute water and other fluids in homes and in industry. The Statue of Liberty is a wonderful example of how beautiful 180,000 pounds of copper can be. Yes, it is made of copper, and no, it doesn’t look like a penny…..on the surface. The green color is copper oxide, which forms on the surface of copper exposed to air and water. The oxide is formed on the surface and does not attack the bulk of the copper. You could say that copper oxide protects the copper.


[am4show have=’p8;p9;p11;p38;p92;p25;p52;p91;’ guest_error=’Guest error message’ user_error=’User error message’ ]


Our bodies use copper to our advantage, but in a proper form that is not toxic. Too much copper will make you sick and could kill you. Remember…don’t eat your chemistry set!


Materials:


  • Carbon rod (MSDS)
  • Copper sulfate (CuSo4) (MSDS)
  • Aluminum foil
  • 9V battery with clip
  • 2 wires
  • Disposable cup
  • Water

You are going to make a saturated solution of copper sulfate (CuSO4) in water. Pour a measuring spoon of granulated copper sulfate in the measuring cup of water. Stir well. Continue adding a spoonful and stirring until no more crystals will go into solution. The solution is saturated when no more crystals will dissolve and there are undissolved crystals at the bottom of the container.


C1000: Experiment

Download Student Worksheet & Exercises


Here’s what’s going on in this experiment:


CuSO4 + H2O (Copper sulfate is added to water)


CuSO4 + H2O –> Cu2+ + SO42- (Copper sulfate plus water yields positively charged carbon ion and negatively charged sulfate ion)


When mixed with water, copper sulfate dissociates into copper and sulfate ions. Notice that the ions, now separated, take on negative and positive charges.


Next, 9V of electricity is passed through the solution with an electrode of carbon and an electrode of aluminum foil inserted into the solution. As electricity flows from one electrode to another, the copper ions, being positively charged, are attracted to the negative electrode. You can confirm this in two ways. One, if litmus paper, held close to an electrode, turns blue, that is the negative electrode. The other way is to just follow the negative lead from the battery to the negative electrode.


As the process moves along, the negative electrode gains copper ions. Evidence of this is seen on the surface of the electrode.


Here’s the breakdown of the entire process:

When the copper sulfate (CuSO4) mixed with water (H2O), the copper sulfate dissociated:


CuSO4 –> Cu2+ + SO42-


When power is added to the solution, the copper ions move toward the negative cathode (carbon rod) and take electrons from it, forming solid copper right on the electrode:


Cu2++ 2e –> Cu(s)


On the positive anode (the aluminum foil), you’ll see bubbles instead of a solid forming. The anode attracted electrons from the water molecule to form oxygen bubbles:


6H2O –> O2 + 4H3O+ + 4e


Let’s put these two reactions together to get the overall reaction of:


2Cu2+ + 6H2O –> 2Cu + O2 + 4H3O+


Note the difference between galvanic cells and electrolytic cells: galvanic use spontaneous chemical reactions (like in a car battery) to generate electricity, and electrolytic cells use electricity to make the chemical reaction to occur and move electrons to move in a way they would go on their own (like in this experiment).


Clean up: Clean everything thoroughly after you are finished with the lab. After cleaning with soap and water, rinse thoroughly. Chemists use the rule of “three” in cleaning glassware and tools. Rinse three times, wash with soap, rinse three times.


Wipe off the carbon rod to remove the copper. The aluminum goes in the trash, but the solution and solids at the bottom cannot. The liquid contains copper, a toxic heavy metal that needs proper disposal and safety precautions. Another chemical reaction needs to be performed to remove the heavy metal from the copper sulfate. Add a thumb sized piece of steel wool to the solution. The chemical reaction will pull out the copper out of the solution. The liquid can be washed down the drain. The solids cannot be washed down the drain, but they can be put in the trash. Use a little water to rinse the container free of the solids.


Place all chemicals, cleaned tools, and glassware in their respective storage places.


Dispose of all solid waste in the garbage. Liquids can be washed down the drain with running water. Let the water run awhile to ensure that they have been diluted and sent downstream.


Going Further

Here is a link to information about making your own geode (crystal lined rock) of copper sulfate crystals:


http://chemistry.about.com/od/growingcrystals/ht/geode.htm


[/am4show]


If we don’t have salt, we die. It’s that simple. The chemical formula for salt is NaCl. Broken down, we have Na (sodium) and Cl (chlorine). Either one of these can be fatal in sufficient quantities. When chemically combined, these two deadly elements become table salt. What once could kill now keeps us alive. Isn’t chemistry awesome?


Chlorine, element 17, is called a halogen as are all the elements in the 17th row. All halogens have similar chemical properties. They are highly reactive nonmetals, and react easily with most metals. Sodium is a metal, and is bonded with sodium in the table salt used in this lab. Besides being found in salt, chlorine has many uses in our world such as killing bacteria in our water, making plastic, cleaning products, and the list goes on. A very useful chemical, and is among the top ten chemicals produced in the United States. Ever since its discovery in 1774, chlorine has been very useful. It is found in nature in sodium chloride, but in very small concentrations. Seawater, the most abundant source of chlorine, has a concentration of only 19g of chlorine per liter.


[am4show have=’p8;p9;p11;p38;p92;p25;p52;p91;’ guest_error=’Guest error message’ user_error=’User error message’ ]
Although chlorine is abundant in nature (about 2% of the mass of the ocean is chloride ions), scientists have developed a safe way to make chlorine. Chlorine has been manufactured for a hundred years through different processes: Membrane Cell, Diaphragm Cell, and Mercury Cell processes. In the first two processes, salt water (NaCl + H2O) and caustic soda (NaOH) are used along with a power supply to generate chlorine and hydrogen gas.


Molecules that contain chlorine that find their way into the upper atmosphere can destroy the ozone layer. The ozone-oxygen cycle is a chemical process that transforms the harmful UV light (240-310nm) from the sun into heat. The oxygen and ozone molecules are constantly being switched back and forth as the sun’s UV breaks down the ozone and the oxygen molecules reacts with other oxygen atoms.


This reaction converts UV radiation into thermal energy which heats up the atmosphere (this reaction happens slowly):


O3 –> O2 + O


If two free oxygen atoms meet, they form a new oxygen molecule:


2O –> O2


If this new molecule meets another free oxygen, it creates another ozone molecule:


O2 + O –> O3


If an ozone and an oxygen molecule meet, they form two oxygen, and this process removes ozone from the atmosphere. This process is very slow, however, so the naturally occurring reaction of:


O3 + O –> 2O2


is nothing to worry about. It’s when this reaction gets sped up by catalysts that we have to pay close attention. There are many catalysts that can speed up the removal of ozone, such as chlorine, bromine, and nitric oxide (NO3). And since they are catalysts in the reaction (meaning they simply speed up the reaction without getting used), they can do this over and over again before they move out of the atmosphere completely. One chlorine atom can speed up (catalyze) tens of thousands of ozone removal reactions before it moves out of the stratosphere. Scary, huh?


CFCs (chlorofluorocarbons) such as aerosols, refrigerants (R-12), and solvents have been banned because of their damaging effect on the atmosphere. When sunlight hits a CFC, it splits off a chlorine ion:


CCl3F –> CCl2F + Cl


This free chlorine ion catalyzes the ozone into oxygen:


O3 + O + Cl –> 2 O2 + Cl


The chlorine we’re going to generate in our experiment is a minuscule amount. Even so, it is still a good idea to perform this experiment in an area with good ventilation or outdoors.


Remember to wear your gloves and goggles. True, the amount of chlorine produced is small and pretty harmless. But there are several factors that make it prudent to wear your protection. Not everyone has the same sensitivity to chemicals. Even in this lab, a person could get their skin irritated to some degree. Eyes are very sensitive organs, and I know I don’t want any amount of chlorine contacting my eyes.


Here’s what you’re going to need to do this experiment:


Materials:


  • 9V battery clip
  • carbon rod
  • wires
  • disposable cup
  • salt
  • water
  • aluminum foil
  • gloves, goggles

We will be observing a decomposition reaction. A decomposition reaction separates a substance into two or more substances that may differ from each other and from the original substance.


ZcQr –> Zc + Qr


When separated, the free elements to the right of the equation become ions, one positively charged and one negatively charged.


A very important concept to learn in this lab is that charged particles (ions) will move toward either a positive or negative electrode. The ions that move toward the anode (positive terminal) are anions, and the ones that move toward the cathode (negative) are cations.


Decomposition of any kind is the breaking down of the whole into smaller parts that were once part of the whole.


Download Student Worksheet & Exercises


Here’s what’s going on in this experiment:


An electrical charge is passing through a saturated solution of salt (NaCl). It will sit there and just be salt unless that electrical charge is imposed on it. The electrical charge excites the molecules, and causes the molecules of salt to decompose, to pull apart, to break into simpler parts. These ions are negatively and positively charged. Negatively charges particles have more electrons than protons and seek a balance. In order to have an electric current, you need to have positive and negative electrodes. Opposites attract, so the negative ions move to the positive electrode and the positive ions are attracted to the negative electrode.


NaCl –> Na+ + Cl


Sodium chloride decomposes into sodium and chlorine ions.


The anode (positive, carbon rod) soaks up free electrons, which get pumped to the cathode (negative, aluminum foil) and released into the solution. If you press litmus paper against the aluminum strip, you’ll find it’s blue (basic), and red when pressed to the anode (carbon rod). The bubbles on the carbon rod are made of chlorine. The chlorine ions in the solution are attracted to the positive pole (carbon rod) and quickly combine to form chlorine gas:


2Cl –> Cl2


The sodium ions move toward the aluminum foil and split the water molecule into ions:


H2O –> H+ + OH


The hydrogen ions are converted into hydrogen gas:


2H+ –> H2


The sodium ions (Na+) that remain in the solution combine with the OH- ions to create sodium hydroxide which turns the litmus paper blue:


Na+ + OH –> NaOH


The main concept I want you to understand with this experiment is that charged particles (ions) will move toward either a positive or negative electrode. The ions that move toward the anode (positive terminal) are anions, and the ones that move toward the cathode (negative) are cations.


Before you dispose of the solution, try this variation on the experiment: remove the foil and hold a salt-water filled test tube (filled to the top with salt water and capped with a gloved thumb and submerged into the solution). Place the cathode wire into the tube and you’ll see bubbles rising up into the tube. What type of gas is it? (Hint: wait until the tube is nearly full before removing it and using a match to test.)


For C3000 Students: Use this experiment as the basis for Experiment 123.


Cleanup: Clean everything thoroughly after you are finished with the lab. After cleaning with soap and water, rinse thoroughly. Chemists use the rule of “three” in cleaning glassware and tools. After washing, chemists rinse out all visible soap and then rinse three times more.


Storage: Place all chemicals, cleaned tools, and glassware in their respective storage places.


Disposal: Dispose of all solid waste in the garbage. Liquids can be washed down the drain with running water. Let the water run awhile to ensure that they have been diluted and sent downstream.


[/am4show]


Magnesium is one of the most common elements in the Earth’s crust. This alkaline earth metal is silvery white, and soft. As you perform this lab, think about why magnesium is used in emergency flares and fireworks. Farmers use it in fertilizers, pharmacists use it in laxatives and antacids, and engineers mix it with aluminum to create the BMW N52 6-cylinder magnesium engine block. Photographers used to use magnesium powder in the camera’s flash before xenon bulbs were available.


Most folks, however, equate magnesium with a burning white flame. Magnesium fires burn too hot to be extinguished using water, so most firefighters use sand or graphite.


We’re going to learn how to (safely) ignite a piece of magnesium in the first experiment, and next how to get energy from it by using it in a battery in the second experiment. Are you ready?


[am4show have=’p8;p9;p11;p38;p92;p25;p52;p80;p91;’ guest_error=’Guest error message’ user_error=’User error message’ ]


Materials:


  • magnesium strip (MSDS)
  • matches with adult help
  • tile or concrete surface (something non-flammable)
  • gloves, goggles

Burning magnesium produces ultraviolet light. This isn’t good for your eyes, and the brightness of the flame is another danger for your eyes. Avoid looking directly into the flame.


Burning magnesium is so hot that if it gets on your skin it will burn to it and not come off. As difficult as burning magnesium is to put out, avoid letting the burning metal come in contact with you or anything else that might catch fire.


As explained later in this lab, magnesium burns in carbon dioxide. Therefore, a CO2 fire extinguisher won’t work to put it out. Water won’t work, CO2 won’t work. It takes a dry chemical fire extinguisher to put it out, or just wait for it to burn up completely on its own.


Magnesium is a metal, and in this experiment, you’ll find that some metals can burn. The magnesium in this first experiment combines with the oxygen in the air to produce a highly exothermic reaction (gives off heat and light). The ash left from this experiment is magnesium oxide:


2Mg (s) + O2 (g) –> 2Mg O (s)


Not all the magnesium from this experiment turned directly into the ash on the table – some of it transformed into the smoke that escaped into the air.


Caution: Do NOT look directly at the white flame (which also contains UV), and do NOT inhale the smoke from this experiment!


C3000: Experiment 52

Download Student Worksheet & Exercises


Here’s what’s going on in this experiment:


As you burn your magnesium, you will get your very own fireworks show….a little one, but still cool.


2Mg + O2 –> 2MgO


Magnesium burned in oxygen yields magnesium oxide. Because the temperature of burning magnesium is so high, small amounts of magnesium react with nitrogen in the air and produce magnesium nitride.


3Mg + N2 –> 2Mg3N2


Magnesium plus nitrogen yield magnesium nitride.  Magnesium will also burn in a beaker of dry ice instead of in air (oxygen).


2Mg + CO2 –> 2MgO + C


Magnesium burned in carbon dioxide yields magnesium oxide and carbon (ash, charcoal, etc.)


Cleanup: Rinse off and pat dry the rest of the magnesium strip.


Storage: Place everything back in its proper place in your chemistry set.


Disposal: Dispose of all solid waste in the garbage.


Magnesium Battery

Now let’s see how to make a battery using magnesium, table salt, copper wire, and sodium hydrogen sulfate (AKA sodium bisulfate).


Materials:


  • magnesium strip
  • test tube and rack
  • light bulb (from a flashlight)
  • 2 pieces of wire
  • measuring cup of water
  • salt (sodium chloride)
  • copper wire (no insulation, solid core)
  • measuring spoon
  • sodium hydrogen sulfate (NaHSO4) (MSDS) Sodium hydrogen sulfate is very toxic. Respect it, handle it carefully and responsibly. Do not take it for granted.
  • gloves, goggles

NOTE: Be very careful when handling the sodium hydrogen sulfate – it’s highly corrosive and dangerous when wet.  Handle this chemical only with gloves, and be sure to read over the MSDS before using.

C1000: Experiment 75
C3000: Experiment 295

We’re going to do another electrolysis experiment, but this time using magnesium instead of zinc. In the previous electrolysis experiment, we used electrical energy to start a chemical reaction, but this time we’re going to use chemical energy to generate electricity.  Using two electrodes, magnesium and copper, we can create a voltaic cell.


TIP: Use sandpaper to scuff up the surfaces of the copper and magnesium so they are fresh and oxide-free for this experiment.  And do this experiment in a DARK room.


How cool is it to generate electricity from a few strips of metal and salt water? Pretty neat! This is the way carbon-core batteries work (the super-cheap brands labeled ‘Heavy Duty’ are carbon-zinc or ‘dry cell’ batteries). However, in dry cell batteries scientists use a crumbly paste instead of a watery solution (hence the name) by mixing in additives.


In this chemical reaction, when the magnesium metal enters into the solution, it leaves 2 electrons behind and turns into a magnesium ion:


Oxidation: Mg (s) –> Mg2+(aq) + 2e


The magnesium strip takes on a negative charge (cathode), and the copper strip takes on a positive charge (anode).  The copper strip snatches up the electrons:


Reduction: Cu2+(aq) + 2e –> Cu (s)


and you have a flow of electrons that run through the wire from surplus (cathode) to shortage (anode), which lights up the bulb.


Note: You can substitute a zinc strip or aluminum strip for the magnesium strip and a carbon rod (from a pencil) for the copper wire.


Going further: You can expand on this experiment by substituting copper sulfate and a salt bridge to make a voltaic cell from two half-cells in Experiment 16.5 of the Illustrated Guide to Home Chemistry Experiments.


[/am4show]


This experiment is for advanced students.


In industry, hydrogen peroxide is used in paper making to bleach the pulp before they form it into paper. Biologists, when preparing bones for display, use peroxide to whiten the bones.


At home, 3% peroxide combined with ammonium hydroxide is used to give dark-haired people their desired blonde moment. Peroxide is also used on wounds to clean them and remove dead tissue. Peroxide slows the flow from small blood vessels and oozing in wounds as well.


[am4show have=’p8;p9;p11;p38;p92;p52;p91;’ guest_error=’Guest error message’ user_error=’User error message’ ]


Peroxide is a chemical produced in a Bombardier Beetle, and it squirts its irritating load into the face or onto the lips of a predator. Zebra fish produce peroxide after their skin is damaged. This action acts as a signal to produce an abundance of white cells to fight any infection and assist in the healing.


Scientists believe that healing can occur in humans in the same way. Future experiments may prove them right. It is also believed that people who have asthma have elevated levels of peroxide in their lungs, levels much higher than people without asthma.


Hydrogen peroxide can also help an animal that has eaten poison. A small amount of it can be put down the animal’s throat to induce vomiting and clear the poison out of their body as much as possible. Did your dog get too close to a skunk? There is no real “cure” other than a lot of time outside to air out, but peroxide mixed with hand soap is pretty good at removing the stink. Then, how you remove that stink from yourself…..another problem.


Materials:


  • 2 test tubes
  • Burner
  • Lighter
  • Chemistry stand
  • Test tube holder
  • Glass jar
  • Water pan
  • Water
  • Rubber tubing
  • 90o glass tubing
  • 3% Hydrogen peroxide (H2O2) (MSDS)

Hydrogen peroxide comes in a dark bottle because sunlight will slowly decompose hydrogen peroxide in the same way that we are doing with the exception that our way is much quicker.


When finished heating hydrogen peroxide, if you leave everything together, water will climb the tubing and attempt to enter the hot test tube. Cold water and hot peroxide are not safely compatible. To avoid this, remove the stopper from the test tube and set it aside while the solution cools.


Wait until all the equipment is cool enough to touch before disassembling for cleaning and storage.


When heating the test tube, be careful. Don’t heat in one place for too long. Move the flame of the burner around periodically to heat the reaction area of the test tube uniformly.


Don’t boil the peroxide too vigorously. If boiling gets too wild, remove the burner form the test tube until it calms down, then move it back to heat again.


At all times, keep the flame and peroxide apart…well apart.


Hydrogen peroxide is going to get broken down, is going to decompose, into the base elements of hydrogen and oxygen.


C3000: Experiment

Download Student Worksheet & Exercises


Here’s what’s going on in this experiment:


Hydrogen peroxide (H2O2) breaks down with heat. A decomposition reaction occurs where hydrogen peroxide breaks down into its component elements, H2 and O2


2H2O2 –> 2H2O + O2


2 molecules of hydrogen peroxide are heated, creating a chemical decomposition reaction, producing 2 molecules of water and 1 molecule of oxygen.


Cleanup: Clean everything thoroughly after you are finished with the lab. After cleaning with soap and water, rinse thoroughly. Chemists use the rule of “three” in cleaning glassware and tools. After washing, chemists rinse out all visible soap and then rinse three times more.


Storage: Place cleaned tools and glassware in their respective storage places.


Disposal: Liquids can be washed down the drain


Going further: Elephant’s Toothpaste

A really fun experiment with hydrogen peroxide is making Elephant’s toothpaste. It requires an adult helper, and is fun for the kid and the adult.


Materials:


  • Empty 20 or 24 ounce plastic bottle
  • 3 % hydrogen peroxide
  • Liquid dish soap
  • Warm water
  • Food coloring
  • One packet or 2 1/2 ounces of yeast
  • One really big container to contain the big mess – laundry tub, bathtub, etc.

This video below is a demonstration of the Elephant Toothpaste experiment using much nastier chemicals than the ones I’ve mentioned above… the hot gas generated is actually oxygen. Enjoy!


Procedure:


  • Dissolve the yeast in a little warm water and stir well. Use just enough water to make a pourable liquid. Let it sit for about 5 minutes while you prepare the rest of the experiment.
  • Pour 1/2 cup of hydrogen peroxide, 1/4 cup of dish soap and a little bit of food coloring in the bottle. Swirl to mix and put the bottle in the middle of your large pot, container or sink.
  • Pour the yeast solution into the bottle. A funnel can help, but be prepared to pour fairly quickly and remove it again because the reaction will start as soon as you start pouring.
  • Stand back and watch the fun!

[/am4show]


WARNING!! THIS EXPERIMENT IS PARTICULARLY DANGEROUS!! (No kidding.) This experiment is for advanced students.


We’ve created a video that shows you how to safely do this experiment, although if you’re nervous about doing this one, just watch the video and skip the actual experiment.


The gas you generate with this experiment is lethal in large doses, so you MUST do this experiment outdoors. We’ll be making a tiny amount to show how the chemical reactions of chlorine and hydrogen work.


[am4show have=’p8;p9;p11;p38;p92;p52;’ guest_error=’Guest error message’ user_error=’User error message’ ]


Hydrochloric acid is a strong acid. It is highly corrosive, which means that this acid will destroy or irreversibly damage another substance it comes in contact with. Simple terms….it is pretty nasty, so take special care when working with or around it.


HCl is used in processing leather, cleaning products, and in the food industry. We are most familiar with HCl in the form of Gastric Acid. HCl is in gastric acid and is one of the main ingredients in our stomach to aid in digestion of our food. In our lab we will produce hydrogen chlorine gas and add water to turn change it into hydrochloric acid.


Materials:


  • Glass jar
  • 900 bend glass tubing
  • One-hole rubber stopper
  • Chemistry stand
  • Wire mesh
  • 2 Test tubes
  • Test tube clamp
  • Alcohol burner
  • Lighter
  • Tripod stand
  • Sodium hydrogen sulfate (MSDS) Sodium hydrogen sulfate is very toxic. Respect it, handle it carefully and responsibly. Do not take it for granted.
  • Salt
  • One-hole cork
  • Medicine dropper
  • Water
  • Solid rubber stopper

NOTE: Be very careful when handling the sodium hydrogen sulfate – it’s highly corrosive and dangerous when wet. Handle this chemical only with gloves, and be sure to read over the MSDS before using.


Perform this experiment outdoors. If that is not a possibility, and you must do it inside, open doors and windows to provide lots of ventilation. Hydrogen chlorine gas inhalation can be fatal, but we are only producing a very small amount.


There are many steps in this lab, so go slow and steady. Read the lab over several times so you are sure what is going on and what is happening next.


When we shake the sodium hydrogen sulfate and the salt together in a stoppered test tube, we are trying to produce a heterogeneous mixture. Heterogeneous is a scientific word that means substance are mixed all together to be as one. A sample taken from one spot in the mixture should be the same as a sample taken from any other spot in the mixture.


At some point in this lab, we need to point the test tube containing the reaction slightly down. This is so the hydrogen chlorine gas can flow downhill. The gas is denser than air, so it will sink to the bottom of anything air filled…..like a room or a test tube.


Hydrogen chloride gas is poisonous – DO NOT INHALE!


When the medicine dropper / cork tool is placed in the water, water will be sucked up into the test tube. The water combines with the hydrogen chlorine gas to create hydrochloric acid.


A double replacement chemical reaction will take place in this experiment. A free hydrogen ion (+) and a free sodium ion (+) will be produced. Because their charges are alike, they cannot bond, but they can take each other’s place. The spots they each left are negatively charged after the hydrogen and sodium have departed. Opposites attract, and they reorganize into a double replacement reaction.


C3000: Experiment

Download Student Worksheet & Exercises


Here’s what’s going on in this experiment:


NaCl + NaHSO4 –> HCl + Na2SO4


Salt is combined with sodium hydrogen sulfate and heated to produce hydrochloric acid and sodium sulfate


Cleanup: We are going to clean everything thoroughly after we finish the lab. After cleaning with soap and water, rinse thoroughly. Chemists use the rule of “three” in cleaning glassware and tools. After washing, chemists rinse out all visible soap and then rinse three times more.


Storage: Place cleaned tools and glassware in their respective storage places.


Disposal: Our HCl needs to be neutralized before disposal. Put a bit of baking soda into the test tube. The contents should bubble as the neutralization is taking place. After neutralization, the liquid is safe, and can be washed down the drain. Solids are thrown in the trash.


[/am4show]


WARNING!! THIS EXPERIMENT IS PARTICULARLY DANGEROUS!! (No kidding.) This experiment is for advanced students.


We’ve created a video that shows you how to safely do this experiment, although if you’re nervous about doing this one, just watch the video and skip the actual experiment.


Bromine is a particularly nasty chemical, so be sure to very carefully follow the steps we’ve outlined in the video. You MUST do this experiment outdoors. We’ll be making a tiny amount to show how the chemical reactions involving bromine work.


[am4show have=’p8;p9;p11;p38;p92;p52;p91;’ guest_error=’Guest error message’ user_error=’User error message’ ]


Isn’t it interesting how many ways we can use the same techniques and, by just changing a few chemicals, we can learn about so many different chemical reactions? This lab is similar in technique to the Generating Hydrochloric Acid lab. Using the same techniques, we will produce hydrogen bromide.


Hydrogen bromide (HBr) was used as a sedative in the late 1800s and early 1900s. Once they found out how poisonous it really was  (after enough people became blind and/or dead), someone had the wonderful idea that maybe we shouldn’t use it anymore. It was also used to control epilepsy until the substitute Phenobarbital came on the scene in 1911. HBr is still used to treat epilepsy in dogs. In cats HBr causes inflammation of the lungs and makes for a very unhappy cat.


Materials:


  • Alcohol burner
  • Lighter
  • Wire screen
  • Tripod stand
  • Glass jar
  • Rubber tubing
  • 900 Glass tubing
  • One-hole rubber stopper
  • Chemistry stand
  • Test tube holder
  • Test tube
  • Potassium bromide (KBr) (MSDS)
  • Sodium hydrogen sulfate (NaHSO4) (MSDS) Sodium hydrogen sulfate is very toxic. Respect it, handle it carefully and responsibly. Do not take it for granted.
  • Burette
  • Water
  • Sodium carbonate (Na2CO3) (MSDS)
  • Silver nitrate (AgNO3) (MSDS)

NOTE: Be very careful when handling the sodium hydrogen sulfate – it’s highly corrosive and dangerous when wet.  Handle this chemical only with gloves, and be sure to read over the MSDS before using.


Maintain good and proper lab techniques. We are working with some nasty stuff in this lab. We need to perform this lab outdoors if possible, or indoors with lots of ventilation. The reaction advances in stages:


  • Bubbles in the burette tell us the reaction is occurring.
  • Brown streaks will appear in the water contained in the glass jar as gas collects there.
  • Brown vapor will begin to appear in the test tube. When the reaction is complete, the test tube will contain lots of brown vapor.

After we produce HBr, we will perform a number of tests to see if it is an acid or a base.


  1. Test contents of test tube with blue litmus paper. Red color change indicates an acid.
  2. Add baking soda to the HBr. Bubbles and the solution turning white. HBr is an acid in this test because it is obviously reacting with a base.
  3. If a magnesium strip placed in the HBr corrodes, or starts to dissolve, then HBr is an acid.
  4. With the addition of silver nitrate to the HBr, if a white cloudiness occurs and crystals form in the bottom of the test tube, then HBr is an acid.

C3000: Experiments 134-138

Download Student Worksheet & Exercises


Here’s what’s going on in this experiment:


KBr    +    NaHSO4 –>    HBr    +    KNaSO4


Potassium bromide and sodium hydrogen sulfate, when heated, produce hydrogen bromide and potassium sodium sulfate.


Cleanup: We are going to clean everything thoroughly after we finish the lab. After cleaning with soap and water, rinse thoroughly. Chemists use the rule of “three” in cleaning glassware and tools. After washing, chemists rinse out all visible soap and then rinse three times more.


Storage: Place cleaned tools and glassware in their respective storage places.


Disposal: Liquids can be washed down the drain. Solids are thrown in the trash.


[/am4show]


This experiment is for advanced students.


Zinc and Hydrogen are important elements for all of us. Zinc (Zn) metal is element #30 on the periodic table. Lack of zinc in our diets will delay growth of our bodies and can kill.


Hydrogen gas (H) is element #1 on the periodic table. Hydrogen was discovered in the 1500s. In a pure state, hydrogen combustion (in small quantities) is interesting. In large amounts, mixed with oxygen, the explosion can be devastating.


[am4show have=’p8;p9;p11;p38;p92;p52;p91;’ guest_error=’Guest error message’ user_error=’User error message’ ]


We are going to perform an experiment that generates a small amount of hydrogen gas, with a correspondingly small explosion. Hydrogen is violently flammable in air, but by itself….not so much. Hydrogen is lighter than air, so has been used in airships, or blimps. The Hindenburg, a German airship filled with hydrogen, burned up quickly on May 6, 1937 while tied to a mooring mast.


Currently, hydrogen is being thought of as the “fuel of the future” for our cars and other vehicles. Most the Earth’s our hydrogen is contained in water (H2O). Most of the experimentation has been in producing hydrogen through electrolysis. That proves very expensive to produce and transport. Until a cheaper alternative appears, hydrogen (H2) is not a practical alternative.


Scientists are lately giving a lot of attention to a process that will produce hydrogen cheaply and easily.  That method is to heat zinc powder in the presence of air (oxygen). It can be achieved at low temperatures, little cost, and little danger – perfect for a hydrogen fuel cell in our car. Don’t go filling your tank with it right away, though. Engineers still need to work some bugs out. It will happen soon, so be patient. (And remember, you saw it first in your chemistry set!)


Materials:


  • Gloves
  • Goggles
  • Chemistry stand
  • Zinc (Zn) powder (MSDS)
  • Measuring spoon
  • 4 test tubes
  • Test tube holder
  • Alcohol burner
  • Lighter
  • One-hole rubber stopper
  • Rubber tubing
  • 900 bend glass tubing
  • Water
  • Measuring syringe
  • Stirring rod
  • Clear pan

Important! Dispose of the Zinc (Zn) left in the test tube in the outside trash. Accidentally ingesting (and it should only be accidental) of Zinc (Zn) or Zinc Chloride (ZnCl), will harm you or animals. It will not be one of your best days. Call 911 if this happens.


After you have finished your experiment, be careful of the hot test tube containing the zinc compound. The test tube is very hot, and there will be a difference in pressure between the water tank and the test tube. Because the test tube has been heated, the pressure is less than atmospheric pressure.


As it cools, the water in the tank, which is at atmospheric pressure (the pressure of the air in the room) is higher than in the test tube. The test tube’s low pressure is looking to suck something, anything, up the glass tube. The water, sitting there at normal air pressure, notices the need. Water climbs up the tube  in response to the test tube’s request.


At the conclusion of the experiment, with the heat off, the test tube starts to cool and water then donates some stuff to equalize the pressure. If allowed to , that cool water hits that hot zinc, or hot test tube, and the test tube could explode and the zinc could quickly react, blowing out the stopper and spewing hot zinc all over you.


Here is the safety information for the products in this chemical reaction:


You first put zinc powder and water together in the end of the horizontally held test tube. But why place a pile of, dry zinc, laying in the test tube near the wet zinc? We want to create a chemical reaction with zinc and water. Wet zinc powder in the end of the test tube allows the dry zinc to come in contact with water when they are both heated without the powder actually getting wet. This way the reaction occurs faster and more efficiently. We don’t have to wait any longer than necessary this way.


C3000: Experiments 67-69

Download Student Worksheet & Exercises


Here’s what’s going on in this experiment:


In this experiment we are causing a single replacement reaction to occur between zinc powder and water. In a replacement reaction, a compound breaks down into its elemental parts in the first stage of the chemical reaction. A new compound is created as the elements search about for something to bond with to satisfy their needs to gain or give up electrons.


Zn + H2O –> ZnO + H2


Zinc powder reacts with water under the influence of heat to become zinc oxide and hydrogen gas. The new compound is called zinc oxide (ZnO).


Cleanup: Clean everything thoroughly after you are finished with the lab. After cleaning with soap and water, rinse thoroughly. Chemists use the rule of “three” in cleaning glassware and tools. After washing, chemists rinse out all visible soap and then rinse three more times. Dry them before putting them away.


Storage: Place all chemicals, cleaned tools, and glassware in their respective storage places.


Disposal: Dispose of all solid waste in the outside garbage. Liquids can be washed down the drain with running water. Let the water run awhile to ensure that they have been diluted and sent downstream.


[/am4show]


This experiment shows how a battery works using electrochemistry. The copper electrons are chemically reacting with the lemon juice, which is a weak acid, to form copper ions (cathode, or positive electrode) and bubbles of hydrogen.


These copper ions interact with the zinc electrode (negative electrode, or anode) to form zinc ions. The difference in electrical charge (potential) on these two plates causes a voltage.


Materials:


  • one zinc and copper strip
  • two alligator wires
  • digital multimeter
  • one fresh large lemon or other fruit

[am4show have=’p8;p9;p11;p38;p92;p18;p45;p76;p91;p58;’ guest_error=’Guest error message’ user_error=’User error message’ ]


Download Student Worksheet & Exercises


Roll and squish the lemon around in your hand so you break up the membranes inside, without breaking the skin or leaking any juice. If you’re using non-membrane foods, such as an apple or potato, you are all ready to go.


Insert the copper and zinc strips into the lemon, making sure they do not contact each other inside. Clip one test wire to each metal strip using alligator wires to connect to the digital multimeter. Read and record your results.


What happens when you gently squeeze the lemon? Does the voltage vary over time?


You can try potatoes, apples, or any other fruit or vegetable containing acid or other electrolytes. You can use a galvanized nail and a copper penny (preferably minted before 1982) for additional electrodes.


If you want to light a light bulb, try using a low-voltage LED in the 1.7V or lower hooked up to several lemons connected in series. For comparison, you’ll need about 557 lemons to light a standard flashlight bulb.


What’s going on?


The basic idea of electrochemistry is that charged atoms (ions) can be electrically directed from one place to the other. If we have a glass of water and dump in a handful of salt, the NaCl (salt) molecule dissociates into the ions Na+ and Cl-.


When we plunk in one positive electrode and one negative electrode and crank up the power, we find that opposites attract: Na+ zooms over to the negative electrode and Cl- zips over to the positive. The ions are attracted (directed) to the opposite electrode and there is current in the solution.


Electrochemistry studies chemical reactions that generate a voltage and vice versa (when a voltage drives a chemical reaction), called oxidation and reduction (redox) reactions. When electrons are transferred between molecules, it’s a redox process.


Fruit batteries use electrolytes (solution containing free ions, like salt water or lemon juice) to generate a voltage. Think of electrolytes as a material that dissolves in water to make a solution that conducts electricity. Fruit batteries also need electrodes made of conductive material, like metal. Metals are conductors not because electricity passes through them, but because they contain electrons that can move. Think of the metal wire like a hose full of water. The water can move through the hose. An insulator would be like a hose full of cement – no charge can move through it.


You need two different metals in this experiment that are close, but not touching inside the solution. If the two metals are the same, the chemical reaction doesn’t start and no ions flow and no voltage is generated – nothing happens.


Exercises


  1.  What kinds of fruit make the best batteries?
  2.  What happens if you put one electrode in one fruit and one electrode in another?
  3.  What happens if you stick multiple electrode pairs around a piece of fruit, and connect them in series (zinc to copper to zinc to copper to zinc…etc.) and measure the voltage at the start and end electrodes?

[/am4show]


When an atom (like hydrogen) or molecule (like water) loses an electron (negative charge), it becomes an ion and takes on a positive charge. When an atom (or molecule) gains an electron, it becomes a negative ion. An electrolyte is any substance (like salt) that becomes a conductor of electricity when dissolved in a solvent (like water).


This type of conductor is called an ‘ionic conductor’ because once the salt is in the water, it helps along the flow of electrons from one clip lead terminal to the other so that there is a continuous flow of electricity.


This experiment is an extension of the Conductivity Tester experiment, only in this case we’re using water as a holder for different substances, like sugar and salt. You can use orange juice, lemon juice, vinegar, baking powder, baking soda, spices, cornstarch, flour, oil, soap, shampoo, and anything else you have around. Don’t forget to test out plain water for your ‘control’ in the experiment!


[am4show have=’p8;p9;p11;p38;p92;p20;p47;p76;p91;p58;’ guest_error=’Guest error message’ user_error=’User error message’ ]


Here’s what you need:


  • 2 AA batteries
  • AA battery case
  • 2 alligator clips
  • LED
  • water
  • salt
  • glass jar (like a clean jam jar)

Download Student Worksheet & Exercises


Exercises


  1. Why does electricity flow through some solutions but not all of them?
  2. What is a salt?
  3. How are electrolytes used today in real life?
  4. Which substance was your top conductor?
  5. Which substance didn’t conduct anything at all?
  6. What happens if you mix an electrolyte and non-electrolyte together?

[/am4show]


This experiment is just for advanced students. If you guessed that this has to do with electricity and chemistry, you’re right! But you might wonder how they work together. Back in 1800, William Nicholson and Johann Ritter were the first ones to split water into hydrogen and oxygen using electrolysis. (Soon afterward, Ritter went on to figure out electroplating.) They added energy in the form of an electric current into a cup of water and captured the bubbles forming into two separate cups, one for hydrogen and other for oxygen.


This experiment is not an easy one, so feel free to skip it if you need to. You don’t need to do this to get the concepts of this lesson but it’s such a neat and classical experiment (my students love it) so you can give it a try if you want to. The reason I like this is because what you are really doing in this experiment is ripping molecules apart and then later crashing them back together.


Have fun and please follow the directions carefully. This could be dangerous if you’re not careful. The image shown here is using graphite from two pencils sharpened on both ends, but the instructions below use wire.  Feel free to try both to see which types of electrodes provide the best results.


[am4show have=’p8;p9;p11;p38;p92;p40;p76;p91;p58;’ guest_error=’Guest error message’ user_error=’User error message’ ]


You will need:


  • 2 test tubes or thin glass or plastic something closed at one end. I do not recommend anything wider than a half inch in diameter.
  • 2 two wires, one needs to be copper, at least 12 inches long. Both wires need to have bare ends.
  • 1 cup
  • sodium sulfate OR salt
  • Water
  • One 9 volt battery
  • Long match or a long thin piece of wood (like a popsicle stick) and a match
  • Rubber bands
  • Masking tape

Download Student Worksheet & Exercises
1. Fill the cup with water.


2. Put a tablespoon of salt or sodium sulfate into the water and stir it up. (The salt allows the electricity to flow better through the water.)


2. Put one wire into the test tube and rubber band it to the test tube so that it won’t come out (see picture).


3. Use the masking tape to attach both wires to the battery. Make sure the wire that is in the test tube is connected to the negative (-) pole of the battery and that the other is connected to the positive (+) pole. Don’t let the bare parts of the different wires touch. They could get very hot if they do.


4. Fill the test tube to the brim with the salt water.


5. This is the tricky part. Put your finger over the test tube, turn it over and put the test tube, open side down, into the cup of water. (See picture.)


6. Now put the other wire into the water. Be careful not to let the bare parts of the wires touch.


7. You should see bubbles rising into the test tube. If you don’t see bubbles, check the other wire. If bubbles are coming from the other wire either switch the wires on the battery connections or put the wire that is bubbling into the test tube and remove the other. If you see no bubbles check the connections on the battery.


8. When the test tube is half full of gas (half empty of salt water depending on how you look at it) light the long match or the wooden stick. Then take the test tube out of the water and let the water drain out. Holding the test tube with the open end down, wait for five seconds and put the burning stick deep into the test tube (the flame will probably go out but that’s okay). You should hear an instant pop and see a flash of light. If you don’t, light the stick again and try it another time. For some reason, it rarely works the first time but usually does the second or third.


A water molecule, as you saw before, is two hydrogen atoms and one oxygen atom. The electricity encouraged the oxygen to react with the copper wire leaving the hydrogen atoms with no oxygen atom to hang onto. The bubbles you saw were caused by the newly released hydrogen atoms floating through the test tube in the form of hydrogen gas. Eventually that test tube was part way filled with nothing but pure hydrogen gas.


But how do you know which bubbles are which? You can tell the difference between the two by the way they ignite (don’t’ worry – you’re only making a tiny bit of each one, so this experiment is completely safe to do with a grown up).


It takes energy to split a water molecule. (On the flip side, when you combine oxygen and hydrogen together, it makes water and a puff of energy. That’s what a fuel cell does.) Back to splitting the water molecule – as the electricity zips through your wires, the water molecule breaks apart into smaller pieces: hydrogen ions (positively charged hydrogen) and oxygen ions (negatively charged oxygen). Remember that a battery has a plus and a minus charge to it, and that positive and negative attract each other.


So, the positive hydrogen ions zip over to the negative terminal and form tiny bubbles right on the wire. Same thing happens on the positive battery wire. After a bit of time, the ions form a larger gas bubble. If you stick a cup over each wire, you can capture the bubbles and when you’re ready, ignite each to verify which is which.


If the match burns brighter, the gas is oxygen. If you hear a POP!, the gas is hydrogen. Oxygen itself is not flammable, so you need a fuel in addition to the oxygen for a flame. In one case, the fuel is hydrogen, and hence you hear a pop as it ignites. In the other case, the fuel is the match itself, and the flame glows brighter with the addition of more oxygen.


When you put the match to it, the energy of the heat causes the hydrogen to react with the oxygen in the air and “POP”, hydrogen and oxygen combine to form what? That’s right, more water. You have destroyed and created water! (It’s a very small amount of water so you probably won’t see much change in the test tube.)


The chemical equations going on during this electrolysis process look like this:


A reduction reaction is happening at the negatively charged cathode. Electrons from the cathode are sticking to the hydrogen cations to form hydrogen gas:


2 H+(aq) + 2e –> H2(g)


2 H2O(l) + 2e –> H2(g) + 2 OH(aq)


The oxidation reaction is occurring at the positively charged anode as oxygen is being generated:


2 H2O(l)  –> O2(g) + 4 H+(aq) + 4e


4 OH(aq) –> O2(g) + 2 H2O(l) + 4 e-


Overall reaction:


2 H2O(l)  –> 2 H2(g) + O2(g)


Note that this reaction creates twice the amount of hydrogen than oxygen molecules. If the temperature and pressure for both are the same, you can expect to get twice the volume of hydrogen to oxygen gas (This relationship between pressure, temperature, and volume is the Ideal Gas Law principle.)


This is the idea behind vehicles that run on sunlight and water.  They use a solar panel (instead of a 9V battery) to break apart the hydrogen and oxygen and store them in separate tanks, then run them both back together through a fuel cell, which captures the energy (released when the hydrogen and oxygen recombine into water) and turns the car’s motor. Cool, isn’t it?


Note: We’re going to focus on Alternative Energy in Unit 12 and create all sorts of various energy sources including how to make your own solar battery, heat engine, solar & fuel cell vehicles (as described above), and more!


Exercises


  1. Why are bubbles forming?
  2. Did bubbles form at both wires, or only one? What kind of bubbles are they?
  3. What would happen if you did this experiment with plain water? Would it work? Why or why not?
  4. Which terminal (positive or negative) produced the hydrogen gas?
  5. Did the reaction create more hydrogen or more oxygen?

[/am4show]


Electricity. Chemistry. Nothing in common, have nothing to do with each other. Wrong! Electrochemistry has been a fact since 1774. Once electricity was applied to particular solutions, changes occurred that scientists of the time did not expect.


In this lab, we will discover some of the same things that Farraday found over 300 years ago. We will be there as things tear apart, particles rush about, and the power of attraction is very strong. We’re not talking about dancing, we’re talking about something much more important and interesting….we’re talking about ELECTROCHEMISTRY!


[am4show have=’p8;p9;p11;p38;p92;p25;p52;p91;’ guest_error=’Guest error message’ user_error=’User error message’ ]


Materials:


  • Test tube rack
  • 9V battery clip
  • 9V battery
  • Flashlight lamp
  • Gloves
  • Electrical wires
  • Aluminum foil
  • Water
  • Sugar
  • Salt
  • Sodium carbonate (MSDS)
  • Measuring spoon

When the salt sodium chloride (NaCl) mixes with water, it separates into its positively (Na+) and negatively (Cl-) charged particles (ions). When a substance mixes with water and separates into its positive and negative parts, it’s called a ‘salt’.


Salts can be any color of the rainbow, from the deep orange of potassium dichromate to the vivid purple of potassium permanganate to the inky black of manganese dioxide. Did you know that MSG (monosodium glutamate) is a salt? Most salts are not consumable, as in the lead poisoning you’d get if you ingested lead diacetate.


If you pass a current through the solution of salt and water, opposites attract: the positive ions are attracted tot he negative pole and the negative ions go toward the positive pole. These migrations ions allow electricity to flow, which is why ‘salt’ solutions conduct electricity.


C1000: Experiments 66-70

Download Student Worksheet & Exercises


Here’s what’s going on in this experiment:


Our experiment uses a saturated solution of table salt that is just sitting in a container minding its own business. That just won’t do! We must intervene. Our 9V battery pushes its voltage through the saltwater. That electric current tears the sodium from the chlorine. These positively and negatively charged ions rush about, looking for something they are attracted to. Opposites attract, so positively charged sodium ions find spending time with the negative electrode a treat. They are very happy together. Negatively charged chlorine ions are attracted to the positive electrode. The match is wonderful, and the negativity and the positivity somehow enjoy the time spent with each other.


NaCl –> Na+ + Cl


Sodium chloride decomposes into sodium and chlorine ions


Cleanup: Clean everything thoroughly after you are finished with the lab. After cleaning with soap and water, rinse thoroughly. Chemists use the rule of “three” in cleaning glassware and tools. After washing, chemists rinse out all visible soap and then rinse three times more.


Storage: Place all chemicals, cleaned tools, and glassware in their respective storage places.


Disposal: Dispose of all solid waste in the garbage. Liquids can be washed down the drain with running water. Let the water run awhile to ensure that they have been diluted and sent downstream.


[/am4show]


Always have a FIRE EXTINGUISHER and ADULT HELP handy when performing fire experiments. NO EXCEPTIONS.

This video will show you how to transform the color of your flames. For a campfire, simply sprinkle the solids into your flames (make sure they are ground into a fine powder first) and you'll see a color change. DO NOT do this experiment inside your house - the fumes given off by the chemicals are not something you want in your home! One of the tricks to fire safety is to limit your fuel. The three elements you need for a flame are: oxygen, spark, and fuel.  To extinguish your flames, you'll have to either wait for the fuel to run out or smother the flames to cut off the oxygen. When you limit your fuel, you add an extra level of safety to your activities and a higher rate of success to your eyebrows. Here's what we're going to do: first, make your spectrometer: you can make the simple spectrometer or the more-advanced calibrated spectrometer. Next, get your chemicals together and build your campfire. Finally, use your spectrometer to view your flames. [am4show have='p8;p9;p11;p38;p92;p25;p52;p91;p101;' guest_error='Guest error message' user_error='User error message' ]
Download Student Worksheet & Exercises

This experiment is at your own risk!  You MUST get an experienced adult to help you with this activity.

  • Boric Acid or placing a copper pipe directly in the fire will give you GREEN flames
  • Borax (sodium tetraborate) gives a YELLOW-GREEN flame
  • Epsom salts (magnesium sulfate) will give you WHITE-PURPLE flames
  • Table salt (sodium chloride) will give you YELLOW flames
  • Washing soda (sodium carbonate) will give you YELLOW-GREEN flames
  • Calcium Chloride (Ice Melt, Dri-Ez) will give an ORANGE flame (make sure it says 'Calcium Chloride' - there are a lot of other types of molecules used to melt ice!)
  • Potassium Chloride (Nu Salt) will give you RAINBOW flames
  • RED flames are made with strontium, which isn't something you want kids to be playing with.

How to Tell Which Elements are Burning

Once you've got the hang of how to make colored flames, your next step is to create a spectroscope.  When you aim your nifty little device at the flames, you'll be able to split the light into its spectra and see which elements are burning.  For example, if you were to view hydrogen burning with your spectroscope, you'd see the bottom appear in your spectrometer: Notice how one fits into the other, like a puzzle.  When you put the two together, you've got the entire spectrum. What's the difference between the two? The upper picture (absorption spectrum of hydrogen) is what astronomers see when they use their spectrometers on distant stars when looking through the earth's atmosphere (a cloud of gas particles). The lower picture (emission spectrum of hydrogen) is what you'd see if you were looking directly at the source itself. Note - Do NOT use your spectrometer to look at the sun! When astronomers look at stars, they have computers look for them - they aren't putting their eye on the end of a tube.

What about other elements?

Each element has it's own special 'signature', unique as a fingerprint, it leaves behind when it burns. This is how we can tell what's on fire in a campfire. For example, here's what you'd see for the following elements: Just get the feel for how the signature changes depending on what you're looking at.  For example, a green campfire is going to look a lot different from a regular campfire, as you're burning several elements in addition to just carbon. When you look at your campfire with your spectroscope, you're going to see all the signatures at the same time.  Imagine superimposing all four sets of spectral lines above (carbon, neon, magnesium, and nitrogen) into one single spectrum... it's going to look like a mess!  It takes a lot of hard work to untangle it and figure out which lines belong to which element.  Thankfully these days, computers are more than happy to chug away and figure most of it out for us. Here's the giant rainbow of absorption lines astronomers see when they point their instruments at the sun: Do you see all the black lines? Those are called emission lines, and since astronomers have to look through a lot of atmosphere to view the sun, there's a lot of the spectrum missing (shown by the black lines), especially corresponding to water vapor. The water absorbs certain wavelengths of light, which corresponds to the black lines. Click here for more information on Spectra of the Elements. You'll find a lot of great detail by clicking on the spectrum you want to know about. Go ahead and check out the different spectral lines with your colored campfires. Have fun! [/am4show]

Ammonia has been used by doctors, farmers, chemists, alchemists, weightlifters, and our families since Roman times. Doctors revive unconscious patients, farmers use it in fertilizer, alchemists tried to use it to make gold, weightlifters sniff it into their lungs to invigorate their respiratory system and clear their heads prior to lifting tremendous loads. At home, ammonia is used to clean up the ketchup you spilled on the floor and never cleaned up.


The ammonia molecule (NH3) is a colorless gas with a strong odor – it’s the smell of freshly cleaned floors and windows. Mom is not cleaning with straight ammonia (it’s gas at room temperature because it boils at -28oF, so the stuff she cleans with is actually ammonium hydroxide, a solution of ammonia and water). Ammonia is found when plants and animals decompose, and it’s also in rainwater, volcanoes, your kidneys (to neutralize excess acid), in the ocean, some fertilizers, in Jupiter’s lower cloud decks, and trace amounts are found in our own atmosphere (it’s lighter than air).


[am4show have=’p8;p9;p11;p38;p92;p25;p52;p91;’ guest_error=’Guest error message’ user_error=’User error message’ ]


Ammonia is a strong base – it combines with acids to form salts:


NH3 + HCl –> NH4Cl


But ammonia also can act as a weak acid. Remember, an acid is a proton donor, as in this reaction with lithium, where the ammonia molecule donated one hydrogen atom:


2 Li + 2 NH3 –> 2 LiNH2 + H2


In this experiment, we make a stink and then we see something that will make us go ooooooh…and aaaaw. How fun is that? But you need to follow the instructions carefully and perform your experiment safely. Promise?


Ammonia will be generated by the combination of ammonium chloride and sodium carbonate. The amount of ammonia generated in this experiment is not a large amount. However, you really should experience this particular stink.


Materials:


  • 3 test tubes and rack
  • sodium carbonate (MSDS)
  • ammonium chloride (MSDS)
  • copper sulfate (MSDS)
  • sodium hydrogen sulfate (NaHSO4) (MSDS) Sodium hydrogen sulfate is very toxic. Respect it, handle it carefully and responsibly. Do not take it for granted.
  • water
  • test tube stopper
  • measuring spoon
  • gloves, goggles

NOTE: Be very careful when handling the sodium hydrogen sulfate – it’s highly corrosive and dangerous when wet. Handle this chemical only with gloves, and be sure to read over the MSDS before using.


A chemical reaction is going to occur when the ammonium chloride, sodium chloride, and another chemical reaction is going to occur when the copper sulfate is added. These compounds are the reactants in our chemical reaction, and the blue liquid, CuCl (copper chloride), at the end of the experiment, will be our product. This experiment displays two types of reactions, a decomposition reaction when we combine ammonium chloride and sodium chloride, and a double replacement reaction when we add copper sulfate to the mixture.


C1000: Experiments

Download Student Worksheet & Exercises


When we combine ammonium chloride and sodium carbonate, ammonia will be produced. We will add copper sulfate to that mixture, producing two chemical compounds with totally different properties from those exhibited by the original chemicals.


Two chemical reactions will occur in this experiment:


(1) When you add ammonium chloride and sodium chloride to the water, a decomposition reaction will occur that produces ammonia gas, carbon dioxide gas, and sodium chloride dissolved in water. It is identified as a decomposition reaction because the reactants breakdown into elements or simpler compounds.


NaHCO3 + 2NH4Cl –> NH3 + CO2 + NaCl + 2H2O


sodium carbonate + ammonium chloride –> ammonia + carbon dioxide + sodium chloride + water


(2) The next reaction takes place when copper sulfate is added to the sodium chloride and water. The products of this reaction are sodium sulfate and copper chloride (the blue color). This reaction is identified as a double replacement reaction due to the fact that the two reactants break apart and recombine, the reactants trading parts, recombining to form two other different compounds with properties completely different than those of the reactants.


NaCl + CuSO4 —> NaSO4 + CuCl


sodium chloride + copper sulfate –> sodium sulfate + copper chloride


Big suggestion here: All chemical vapors are best experienced by “wafting”, a procedure that brings the vapor to you, instead of sticking your nose in the test tube, bringing you to the vapors. Please get in the habit of smelling properly. If ammonia vapors can bring unconscious people back to consciousness, you should probably make sure you are sniffing safely.


Reminder: Always wash your hands or gloves, and your chemistry tools, when switching from one chemical to another to avoid contamination that could affect the experiment adversely.


Store: Put all chemicals away in their proper places to keep them organized and ready to be used again. All tools should be put away as well, but make sure hat they have been cleaned and dried before storing them. A rule of thumb in chemistry is always wash something three times.


Disposal: Pour liquids down the drain using plenty of water. Throw solid waste into the outside garbage to prevent filling the house with bad smells.


[/am4show]


This is a recording of a recent live teleclass I did with thousands of kids from all over the world. I’ve included it here so you can participate and learn, too!


We’re going to be mixing up dinosaur toothpaste, doing experiments with catalysts, discovering the 5 states of matter, and building your own chemistry lab station as we cover chemical kinetics, phase shifts, the states of matter, atoms, molecules, elements, chemical reactions, and much more. We’re also going to turn liquid polymers into glowing putty so you can amaze your friends when it totally glows in the dark. AND make liquids freeze by heating them up (no kidding) using a scientific principle called supercooling,


Materials:


  • Chemistry Worksheet
  • Aluminum pie plate
  • Bowl
  • Clear glue or white glue
  • Disposable cups
  • Goggles & gloves
  • Hydrogen peroxide
  • OPTIONAL: Instant reusable hand warmer (containing sodium acetate )
  • Liquid soap
  • Popsicle sticks
  • Scissors or pliers
  • Sodium tetraborate (also called “Borax”)
  • Water bottle
  • Yeast
  • Yellow highlighter
  • Optional: If you want to see your experiments glow in the dark, you’ll need a fluorescent UV black light (about $10 from the pet store – look in cleaning supplies under “Urine-Off” for a fluorescent UV light). UV flashlights and UV LEDs will not work.

[am4show have=’p8;p9;p11;p38;p92;p37;’ guest_error=’Guest error message’ user_error=’User error message’ ]


[/am4show]


This is a recording of a recent live teleclass I did with thousands of kids from all over the world. I’ve included it here so you can participate and learn, too!


We’re ready to deal with the topic you’ve all been waiting for! Join me as we find out what happens to stars that wander too close, how black holes collide, how we can detect super-massive black holes in the centers of galaxies, and wrestle with question: what’s down there, inside a black hole?


Materials:


  • marble
  • metal ball (like a ball bearing) or a magnetic marble
  • strong magnet
  • small bouncy ball
  • tennis ball and/or basketball
  • two balloons
  • bowl
  • 10 pennies
  • saran wrap (or cup open a plastic shopping bag so it lays flat)
  • aluminum foil (you’ll need to wrap inflated balloons with the foil, so make sure you have plenty of foil)
  • scissors

[am4show have=’p8;p9;p11;p38;p92;p96;’ guest_error=’Guest error message’ user_error=’User error message’ ]


Key Concepts

What’s a black hole made of? Black holes are make of nothing but space and time, and they are the strangest things in nature.  It’s BLACK because does not emit or reflect light.  Black holes are the darkest black in the universe – no matter how powerful of a light you shine on it, even if it’s a million watt flashlight, no light ever bounces back, because its truly a ‘hole’ in space.


And a HOLE means nothing entering can escape. Anything that crosses the edge is swallowed forever. Scientists think of black holes as the edge of space, like a one-way exit door.


Biggest myth about black holes: Black holes are not vacuum cleaners with infinite sized bags. They do not roam around the universe sucking up everything they can find. They will grow gradually as stars and matter falls into them, but they do not seek out prey like predators. It just sits there with its mouth open, waiting for dinner.


Here’s an example of what a black hole is: If you take a ball and toss it up in the air, does it come back down to you? Sure! Toss it up even higher now… and it still comes back, right? What if you toss it up so fast that it exceeds the escape velocity of earth? (7 miles per second) Will it ever come back? No. The escape velocity depends on the gravitational pull of an object. The escape velocity of the sun is 400 miles per second. A black hole is an object that has an escape velocity greater than the speed of light. That’s exactly what a black hole is.


So, a black hole is a region where gravity is so strong that any light that tries to escape gets dragged back.  Because nothing can travel faster than light, everything else gets dragged back too!


Another interesting fact about black holes is that they are a place where gravity is so intense that time stops. This means that an object that falls into a black hole will never reappear, because they are frozen in time.


I often hear the question – how big are black holes? There’s no limit to the size of a black hole – it can be as large or as small as you can imagine it to be (and then some!). The more massive a black hole is, the more space it will take up, and the larger the radius of the event horizon. One of the largest and heaviest black holes is actually the super massive black hole at the center of our own Milky Way galaxy, about 30,000 light years away. Don’t worry, since it’s so far away and it’s not actively feeding.


Black holes are believed to be able to evaporate. Steven Hawking suggested that black holes aren’t exactly all black, but they emit a tiny bit of radiation, which comes directly from the black hole’s mass. This means as the black hole emits radiation, it loses mass, and shrinks.


If you’re looking for black holes, the nearest one is called V4641 Sgr and it’s 1,600 light years away in the Sagittarius arm of the Milky Way.  This is actually a rare type of black hole called a micro quasar. Click here for a downloadable Map of Black Holes.


One of the biggest misconceptions about black holes is that they are thought to be giant vacuum cleaners with infinitely large bags. Actually, they don’t go around vacuuming up all the matter they find. (If they did, they would eventually inhale all the matter in the universe and there’s be nothing left but black holes.) In fact, black holes can’t suck up all the matter because each black hole has its very own event horizon, which means that matter has to first cross that horizon in order to be eaten by the black hole. If it doesn’t go past that horizon, then it will not be sucked into the black hole.


Still crazy for black holes? Download the Exploring Black Holes PDF poster file and also try playing the Black Hole Space Travel game, which was developed by a team of NASA scientists. Enjoy!


Questions to Ask

  1. What are three different ways to detect a black hole?
  2. How many ways can a black hole kill you? Can you name them?
  3. What happens if you get close to a black hole, but not close enough to get sucked in? (Remember your magnet-marble experiment!)
  4. What if you watch someone get sucked in? What does it look like?
  5. What’s the most interesting thing you learned from the video about black holes?
  6. Why does a supernova explode? (Remember your two-ball experiment?)
  7. What causes a black hole to form?
  8. Does a black hole search for its next victim?
  9. Where is the closest super-massive black hole?
  10. What is gravitational lensing and why does it work? (Remember your marble-bowl experiment!)

[/am4show]


This is a recording of a recent live teleclass I did with thousands of kids from all over the world. I’ve included it here so you can participate and learn, too


Our solar system includes rocky terrestrial planets (Mercury, Venus, Earth, and Mars), gas giants (Jupiter and Saturn), ice giants (Uranus and Neptune), and assorted chunks of ice and dust that make up various comets and asteroids.


Did you know you can take an intergalactic star tour without leaving your seat? To get you started on your astronomy adventure, I have a front-row seat for you in a planetarium-style star show. I usually give this presentation at sunset during my live workshops, so I inserted slides along with my talk so you could see the pictures better. This video below is long, so I highly recommend doing this with friends and a big bowl of popcorn. Ready?
[am4show have=’p8;p9;p11;p38;p92;p96;’ guest_error=’Guest error message’ user_error=’User error message’ ]
Materials:


  • Two balls, one larger than the other (like a soccer and a tennis ball, or bouncy ball and tennis ball)
  • Print out this worksheet to fill in as we go along!

Download the Black Hole Explorer Game. This was created by a team of scientists, you can use this set of instructions to build your own black hole board game. It plays two different ways: competitively and cooperatively. Black Hole Explorer was created for NASA by the Harvard-Smithsonian Center for Astrophysics.


This is a PDF download, so you’ll need Adobe Acrobat Reader to view the file. It’s fun, easy, and totally free for your family and students to enjoy!


Key Concepts

The solar system is the place that is affected by the gravity our sun. Our solar system includes rocky terrestrial planets (Mercury, Venus, Earth, and Mars), gas giants (Jupiter and Saturn), ice giants (Uranus and Neptune), and assorted chunks of ice and dust that make up various comets and asteroids. The eight planets follow a near-circular orbit around the sun, and many have moons.


Two planets (Ceres and Pluto) have been reclassified after astronomers found out more information about their neighbors. Ceres is now an asteroid in the Asteroid Belt between Mars and Jupiter. Beyond Neptune, the Kuiper Belt holds the chunks of ice and dust, like comets and asteroids as well as larger objects like dwarf planets Eris and Pluto.


Beyond the Kuiper belt is an area called the Oort Cloud, which holds an estimated 1 trillion comets. The Oort Cloud is so far away that it’s only loosely held in orbit by our sun, and constantly being pulled gravitationally by passing stars and the Milky Way itself. The Voyager Spacecraft are beyond the heliosphere (the region influenced gravitationally by our sun) but has not reached the Oort Cloud.


Our solar system belongs to the Milky Way galaxy. Galaxies are stars that are pulled and held together by gravity. Globular clusters are massive groups of stars held together by gravity, using housing between tens of thousands to millions of stars. Some galaxies are sparse while others are packed so dense you can’t see through them. Galaxies also like to hang out with other galaxies (called galaxy clusters ), but not all galaxies belong to clusters, and not all stars belong to a galaxy.


After a star uses up all its fuel, it can either fizzle or explode. Planetary nebulae are shells of gas and dust feathering away. Neutron stars are formed from stars that go supernova, but aren’t big and fat enough to turn into a black hole. Pulsars are spinning neutron stars with their poles aimed our way. Neutron stars with HUGE magnetic fields are known as magnetars. Black holes are the leftovers of a BIG star explosion. There is nothing to keep it from collapsing, so it continues to collapse forever. It becomes so small and dense that the gravitational pull is so great that light itself can’t escape.


The sun holds 99% of the mass of our solar system. The sun’s equator takes about 25 days to rotate around once, but the poles take 34 days. You may have heard that the sun is a huge ball of burning gas. But the sun is not on fire, like a candle. You can’t blow it out or reignite it. So, where does the energy come from?


The nuclear reactions deep in the core transforms 600 million tons per second of hydrogen into helium. This gives off huge amounts of energy which gradually works its way from the 15 million-degree Celsius temperature core to the 15,000 degree Celsius surface.


Active galaxies have very unusual behavior. There are several different types of active galaxies, including radio galaxies (edge-on view of galaxies emitting jets), quasars (3/4 view of the galaxy emitting jets), blazars (aligned so we’re looking straight down into the black hole jet), and others. Our own galaxy, the Milky Way, has a super-massive black hole at its center, which is currently quiet and dormant.


Dying stars blow off shells of heated gas that glow in beautiful patterns. William Hershel (1795) coined the term ‘planetary nebula’ because the ones he looked at through 18th century telescopes looked like planets. They actually have nothing to do with planets – they are shells of dust feathering away.


When a star uses up its fuel, the way it dies depends on how massive it was to begin with. Smaller stars simply fizzle out into white dwarfs, while larger stars can go supernova. A recent supernova explosion was SN 1987. The light from Supernova 1987A reached the Earth on February 23, 1987 and was close enough to see with a naked eye from the Southern Hemisphere.


Questions to Ask

  1. What’s your favorite part about Jupiter?
  2. Which planet is NOW your favorite (after listening to the slide show presentation)?
  3. What happened to the stars in the last slide of the show?
  4. How many moons around Jupiter or Saturn can you see with binoculars?
  5. What’s the difference between a galaxy and a black hole?
  6. How many Earths fit inside the sun?

[/am4show]


This is a recording of a recent live class I did with an entire high school astronomy class. I’ve included it here so you can participate and learn, too!


Light is energy that can travel through space. How much energy light has determines what kind of wave it is. It can be visible light, x-ray, radio, microwave, gamma or ultraviolet. The electromagnetic spectrum shows the different energies of light and how the energy relates to different frequencies, and that’s exactly what we’re going to cover in class. We’re going to talk about light, what it is, how it moves, and it’s generated, and learn how astronomers study the differences in light to tell a star’s atmosphere from  millions of miles away.


I usually give this presentation at sunset during my live workshops, so I inserted slides along with my talk so you could see the pictures better. This video below is long, so I highly recommend doing this with friends and a big bowl of popcorn. Ready?


[am4show have=’p8;p9;p11;p38;p92;p96;’ guest_error=’Guest error message’ user_error=’User error message’ ]


Materials:


  • Hair (one strand)
  • Tape
  • Pencil
  • Ruler or yardstick
  • Paper
  • Calculator
  • Red laser
  • Flashlight
  • Glass of water
  • Large chocolate bar
  • Microwave
  • Plate
  • Orange highlighter
  • Diffraction grating OR use an old CD
  • Print out this worksheet to fill in as we go along!

[/am4show]


This is a beefier-version of the Electric Eye that will be be able to turn on a buzzer instead of a LED by increasing the voltage in the circuit. This type of circuit is a light-actuated circuit. When a beam of light hits the sensor (the “eye”), a buzzer sounds. Use this to indicate when a door closes or drawer closes… your suspect will never know what got triggered.
[am4show have=’p8;p9;p11;p38;p92;p99;p108;’ guest_error=’Guest error message’ user_error=’User error message’ ]
Materials:


  • Red laser (cheap dollar store kind works well)
  • 9V Battery
  • Three alligator clip leads
  • Buzzer (3-6V)
  • CdS Cell


Download Student Worksheet & Exercises


Exercises


  1. How is this circuit different from the Electric Eye experiment we did previously?
  2.  Name three other light sources that work to activate your circuit.

[/am4show]


Today you get to concentrate light, specifically the heat, from the Sun into a very small area. Normally, the sunlight would have filled up the entire area of the lens, but you’re shrinking this down to the size of the dot.


Magnifying lenses, telescopes, and microscopes use this idea to make objects appear different sizes by bending the light. When light passes through a different medium (from air to glass, water, a lens…) it changes speed and usually the angle at which it’s traveling. A prism splits incoming light into a rainbow because the light bends as it moves through the prism. A pair of eyeglasses will bend the light to magnify the image.


Materials


  • Sunlight
  •  Glass jar
  • Nail that fits in the jar
  •   12” thread
  •   Hair from your head
  • 12” string
  • 12” fishing line
  • 12” yarn
  •  Paperclip
  • Magnifying glass
  •  Fire extinguisher
  •  Adult help

[am4show have=’p8;p9;p11;p38;p92;p17;p44;p90;p89;’ guest_error=’Guest error message’ user_error=’User error message’ ]


Download Student Worksheet & Exercises


  1. You’re going to concentrate the power of the Sun on a flammable surface.
  2. Please do this on a fireproof surface! This experiment will damage tables, counters, carpets, and floors. Do this experiment on a fireproof surface, like concrete or blacktop.
  3. Hold the magnifier above the leaf and bring it down toward the leaf until you see a bright spot form on its surface. Adjust it until you see the light as bright and as concentrated as possible. First, you’ll notice smoke, then a tiny flame as the leaf burns.
  4. You are concentrating the light, specifically the heat, from the Sun into a very small area. Normally, the sunlight would have filled up the entire area of the lens, but you’re shrinking this down to the size of the dot that’s burning the leaf.
  5. Thermoelectric power plants use this principle to power entire cities by using this principle of concentrating the heat from the Sun.
  6. Never look through anything that has lenses in it at the Sun, including binoculars or telescopes, otherwise what’s happening to the leaf right now is going to happen to your eyeball.
  7. Now for the next part of the lab, do not use water bottles – you want something that doesn’t melt, like a glass jar from the pickles or the mayo.
  8. Remove the lid and punch a hole in the center. Use a drill with a ¼” drill bit or smaller, or a hammer and nail.
  9. Screw the lid on the jar.
  10. Tie one end of the thread to the paperclip.
  11. Poke the other end of the thread inside the hole on the lid.
  12. Unscrew the lid and tie a nail to the other end of the thread. You want the nail to be hanging above the bottom of the jar by an inch or two, so adjust the height as needed.
  13. Bring your jar outside.
  14. Question: Without breaking the glass or removing the lid, how can you get the nail to drop to the bottom of the jar?

What’s Going On?

Magnifying lenses, telescopes, and microscopes use this idea to make objects appear different sizes by bending the light. When light passes through a different medium (from air to glass, water, a lens…) it changes speed and usually the angle at which it’s traveling. A prism splits incoming light into a rainbow because the light bends as it moves through the prism. A pair of eyeglasses will bend the light to magnify the image.


Exercises


  1. What happened to the leaf? Why?
  2. How did you get the nail to drop?
  3. Which material ignited the quickest?

[/am4show]


This is a recording of a recent live class I did with an entire high school astronomy class. I’ve included it here so you can participate and learn, too!


Light is energy that can travel through space. How much energy light has determines what kind of wave it is. It can be visible light, x-ray, radio, microwave, gamma or ultraviolet. The electromagnetic spectrum shows the different energies of light and how the energy relates to different frequencies, and that’s exactly what we’re going to cover in class. We’re going to talk about light, what it is, how it moves, and it’s generated, and learn how astronomers study the differences in light to tell a star’s atmosphere from  millions of miles away.


I usually give this presentation at sunset during my live workshops, so I inserted slides along with my talk so you could see the pictures better. This video below is long, so I highly recommend doing this with friends and a big bowl of popcorn. Ready?


[am4show have=’p8;p9;p11;p38;p92;p96;’ guest_error=’Guest error message’ user_error=’User error message’ ]


Materials:


  • Hair (one strand)
  • Tape
  • Pencil
  • Ruler or yardstick
  • Paper
  • Calculator
  • Red laser
  • Flashlight
  • Glass of water
  • Large chocolate bar
  • Microwave
  • Plate
  • Orange highlighter
  • Diffraction grating OR use an old CD
  • Print out this worksheet to fill in as we go along!


[/am4show]


This is a recording of a recent live teleclass I did with thousands of kids from all over the world. I’ve included it here so you can participate and learn, too!


This class is all about Light Waves, Lasers and Holograms! This is a newly updated version of the older Light Waves and Lasers teleclass here.


We’re going to learn about the wild world of light that has baffled scientists for over a century. You’ll be twisting and bending light as we learn about refraction, reflection, absorption, and transmission using lenses, lasers, mirrors, and optical filters with everyday stuff like gummy bears, paperclips, pencils and water!


We’re going to learn how to build a projection hologram out of piece of old plastic, make a laser microscope so you can see tiny little microscopic creatures, bend laser light to follow any path you want without using mirrors, and finally understand how glow in the dark toys really work on the subatomic level. Are you ready?


Materials:


  • Pencil
  • Paper
  • Clothespin
  • Paperclip
  • Rubber band
  • Gummy bears
  • Red laser
  • Flashlight
  • Old CD
  • Scissors
  • Pliers
  • Glass of water
  • Clear Plastic Film

[am4show have=’p8;p9;p11;p38;p92;p99;’ guest_error=’Guest error message’ user_error=’User error message’ ]


Click here to download the worksheet for this class!


[/am4show]


This is a recording of a recent live teleclass I did with thousands of kids from all over the world. I’ve included it here so you can participate and learn, too!


You’ll discover how to boil water at room temperature, heat up ice to freeze it, make a fire water balloon, and build a real working steam boat as you learn about heat energy. You’ll also learn about thermal energy, heat capacity, and the laws of thermodynamics.


Materials:


  • cup of ice water
  • cup of room temperature water
  • cup of hot water (not scalding or boiling!)
  • tea light candle and lighter (with adult help)
  • balloon (not inflated)
  • syringe (without the needle)
  • block of foam
  • copper tubing (¼” diameter and 12” long)
  • bathtub or sink
  • scissors or razor
  • fat marker (to be used to wrap things around, not for writing)

[am4show have=’p8;p9;p11;p38;p92;’ guest_error=’Guest error message’ user_error=’User error message’ ]


Key Concepts

The terms hot, cold, warm etc. describe what physicists call thermal energy. Thermal energy is how much the molecules are moving inside an object. The faster molecules move, the more thermal energy that object has.


There are three different scales for measuring temperature. Fahrenheit, Celsius and Kelvin. (There’s also a fourth temperature scale for absolute Fahrenheit called Rankine.) Temperature is basically a speedometer for molecules. The faster they are wiggling and jiggling, the higher the temperature and the higher the thermal energy that object has. Your skin, mouth and tongue are antennas which can sense thermal energy.


There are four states of matter: Solid, liquid, gas and plasma. Solids have strong, stiff bonds between molecules that hold the molecules in place. Liquids have loose, stringy bonds between molecules that hold molecules together but allow them some flexibility. Gasses have no bonds between the molecules. Plasma is similar to gas but the molecules are very highly energized. Materials can change from one state to another depending on the temperature and the bonds. Changing from a solid to a liquid is called melting. Changing from a liquid to a gas is called boiling, evaporating, or vaporizing. Changing from a gas to a liquid is called condensation. Changing from a liquid to a solid is called freezing. All materials have given points at which they change from state to state. Melting point is the temperature at which a material changes from solid to liquid.  Boiling point is the temperature at which a material changes from liquid to gas. Condensation point is the temperature at which a material changes from gas to liquid. Freezing point is the temperature at which a material changes from liquid to gas.


What’s Going On?

Heat is the movement of thermal energy from one object to another. Heat can only flow from an object of a higher temperature to an object of a lower temperature (this is the First Law of Thermodynamics). Heat is movement of thermal energy from one object to another. When an object absorbs heat it does not necessarily change temperature.  Objects release heat as they freeze and condense. Objects absorb heat as they evaporate and melt. Freezing points, melting points, boiling points and condensation points are the “speed limits” of the phases. Once the molecules reach that speed they must change state.


Heat capacity is how much heat an object can absorb before its temperature increases. Specific heat is how much heat energy a mass of a material must absorb before it increases 1°C. Heat capacity is influenced by the specific heat of the material and/or the amount of the material. Each material has its own specific heat. The higher a material’s specific heat is, the more heat it must absorb before its temperature increases. A larger amount of something will have a higher heat capacity then a smaller amount of something. Water has a very high heat capacity.


Questions:

  1. True or False: Water is poor at absorbing heat energy.
  2. True or False: A molecule that heats up will move faster.
  3. True or False: A material will be less dense at lower temperatures.
  4. For gases, if we increase the temperature, what happens to the pressure and the volume?
  5. What is specific heat?
  6. What is heat?
  7. Does heat flow from cold to hot? Give an example.
  8. What do the our body sense, heat flow or temperature? Are they the same thing?
  9. How can we boil room temperature water without heating up the water?

Answers:


  1. False.
  2. True.
  3. False. (Usually.)
  4. If we increase the temperature, the pressure increases and the volume decreases. This is called the Ideal Gas Law (remember the ping pong balls from the teleclass?)
  5. Specific heat is how much heat energy a mass of a material must absorb before it increases 1°C.
  6. Heat is the movement of thermal energy from one object to another.
  7. No. Heat flows from hot to cold. (This is the First Law of Thermodynamics.) A hot cup of coffee left out on a cold morning will eventually cool to the surrounding air temperature.
  8. Heat flow. No they are not the same thing. Temperature is a measure of how much energy the molecules have.
  9. By increasing the pressure by decreasing the volume, we can force the bubbles out of the water and it will boil. Boiling is when the liquid water turns into a gas, NOT when the liquid water heats up. Boiling can happen at many different temperatures when you change the pressure.

[/am4show]


Physics of Motion Intro Class

This is a recording of a recent live teleclass I did with thousands of kids from all over the world. I've included it here so you can participate and learn, too! We're going to cover energy and motion by building roller coasters and catapults! Kids build a working catapult while they learn about the physics of projectile motion and storing elastic potential energy. Let's discover the mysterious forces at work behind the thrill ride of the world’s most monstrous roller coasters, as we twist, turn, loop and corkscrew our way through g-forces, velocity, acceleration, and believe it or not, move through orbital mechanics, like satellites. We’ll also learn how to throw objects across the room in the name of science… called projectile motion. Are you ready for a fast and furious physics class?
Materials:
  • click for worksheet
  • marbles
  • masking tape
  • 9 popsicle sticks
  • 4 rubber bands
  • one plastic spoon
  • ping pong ball
  • hot glue gun with glue sticks
  • 3/4" pipe foam insulation (NOT neoprene and NOT the kind with built-in adhesive tape)

Key Concepts

Centripetal means ‘center-seeking’. It’s the force that points toward the center of the circle you’re moving on. When you swing the bucket around your head, the bottom of the bucket is making the water turn in a circle and not fly away. Your arm is pulling on the handle of the bucket, keeping it turning in a circle and not fly away. That’s centripetal force. Centrifugal force is equal and opposite to centripetal force. Centrifugal means ‘center-fleeing’, so it’s a force that’s in the opposite direction. The car pushing on you is the centripetal force.The push of your weight on the door is the REACTIVE centrifugal force, meaning that it’s only there when something’s happening. It’s not a real force that goes around pushing and pulling on its own.

What's Going On?

Engines used to use an automatic feedback system called a centrifugal governor to regulate the speed. For example, if you’re mowing the lawn and you hit a dry patch with no grass, the blades don’t suddenly spin wildly faster… they get adjusted automatically by a feedback system so maintains the same speed for the blades, so matter how thick or thin the grass that your cutting is. You’ll find these also in airplanes to automatically adjust the pitch (or angle) of the propeller as it moves through the air. The pilot sets the intended speed, and the airplane has a governor that helps adjust the angle the blades make with the air to maintain this speed automatically, because the air density changes with altitude. It’s really important to know how much centrifugal force people experience, whether its in cars or roller coasters! In fact roller coaster loops used to be circular, but now they use clothoid loops instead to keep passengers happy during their ride so they don’t need nearly the acceleration that they’d need for a circular loop (which means less g-force so passengers don’t black out).

Building the Experiment:

Here are more roller coaster maneuvers you can try out: Loops: Swing the track around in a complete circle and attach the outside of the track to chairs, table legs, and hard floors with tape to secure in place. Loops take a bit of speed to make it through, so have your partner hold it while you test it out before taping. Start with smaller loops and increase in size to match your entrance velocity into the loop. Loops can be used to slow a marble down if speed is a problem. Camel-Backs: Make a hill out of track in an upside-down U-shape. Good for show, especially if you get the hill height just right so the marble comes off the track slightly, then back on without missing a beat. Whirly-Birds: Take a loop and make it horizontal. Great around poles and posts, but just keep the bank angle steep enough and the marble speed fast enough so it doesn't fly off track. Corkscrew: Start with a basic loop, then spread apart the entrance and exit points. The further apart they get, the more fun it becomes. Corkscrews usually require more speed than loops of the same size. Jump Track: A major show-off feature that requires very rigid entrance and exit points on the track. Use a lot of tape and incline the entrance (end of the track) slightly while declining the exit (beginning of new track piece).

Troubleshooting

Marbles will fly everywhere, so make sure you have a lot of extras! If your marble is not following your track, look very carefully for the point of departure – where it flies off. For instance, when the marble flies off the track, you can step back and say: “Hmmm… did the marble go to fast or too slow?” “Where did it fly off?” “Wow – I'll bet you didn't expect that to happen. Now what are you going to try?” Become their biggest fan by cheering them on, encouraging them to make mistakes, and try something new (even if they aren't sure if it will work out).

Questions to Ask

  1. Does the track change position with the weight of the marble, making it fly off course? (You can make the track more rigid by taping it to a surface.)
  2. Is the marble jumping over the track wall? (You can increase your bank angle - the amount of twist the track makes along its length.)
  3. How can you make your marble zip through two loops at once?
  4. How could you increase your marble speed?
  5. Where would you put a tunnel? (Leave one piece of track uncut to use as a tunnel.)

As you walk around your neighborhood, you probably see many other people, as well as some birds flying around, maybe some fish swimming down a local stream, and perhaps even a lizard darting behind a bush or a frog sitting contently on top of a pond. Most likely, you know that all of these living things are animals, but they are even more closely related than that.


[am4show have=’p8;p9;p11;p38;p92;p28;p55;p153;p86;p87;’ guest_error=’Guest error message’ user_error=’User error message’ ]


Tide pools are best observed undisturbed. But, they’re too shallow to snorkel… So how to can we explore them without removing their inhabitants? With an Aquascope! Aquascopes are very cheap and easy to make. With only a coffee can, some plastic food rap, and a couple of other items you can make a window into the world of tide-pools! In principle, aquascopes allow us to take a glass-bottom-boat tour of the rich ecosystems of tide pools. The plastic acts as the glass, while the coffee can allows us to break the distorting surface of the water.


Here’s a video to get you started:


Download Student Worksheet & Exercises


Here’s what you need:


  • milk or juice jug
  • plastic wrap
  • scissors
  • rubber band

Here’s the steps to make the waterscope:


  1. Clean out your jug first. Then cut the bottom and top off without cutting off the handle.
  2. Cover the opening at the bottom with your plastic wrap, securing it in place with the rubber band. Use tape if you need extra support to hold the plastic wrap in place. The window needs to be water-tight.
  3. Place the waterscope in the water, bottom-side down. You’ll be able to see all kinds of interesting creatures through your scope!
  4. Try to keep your scope still so the animals won’t be afraid to come close to you so you can have a good peek at their world.   The aquascope works the same way snorkel goggles work—except you don’t have to get wet!

Why this works: You can’t see clearly underwater with just your eyes for a couple of reasons. One is the thickness of the lens on your eye, but the main one is the index of refraction of water is different than that of air. Light rays bend when they travel from one medium to another of different density (refer to the Disappearing Beaker experiment for more on this topic). The amount that the light bends depends on refractive index of each substance along with the shape. The eye focuses images on the retina, and our eyes are built for viewing in air. Water has approximately the same refractive index as the cornea which effectively eliminating the cornea’s focusing properties. This is why you see a blurred image underwater. The eyes are focusing the image them far behind the retina instead of on the retina. The waterscope puts a layer of air between your eyes and the water (the same way goggles do) so you can view underwater without blurred vision.


Troubleshooting: The key to the aquascope is the taught plastic wrap. If it’s loose, or if there are holes, it won’t work as well. Make sure that the plastic wrap is securely fastened to the can, and is stretched tight. If you find your waterscope leaks, use a stronger rubber band to secure your plastic wrap in place. You can alternatively use strong waterproof tape or hot glue to secure it in place, but use the rubber band first so you can stretch the film tightly over the open end.


Exercises


  1. What is the term for light rays bending?
  2. Why is underwater vision blurred?
  3. How can we focus vision underwater?

[/am4show]


Unsurprisingly, often the most interesting critters found in soil are the hardest to find! They’re small, fast, and used to avoiding things that search for them. So, how do we find and study these tiny insects? With a Berlese Funnel (Also called the Tullgren funnel)!


[am4show have=’p8;p9;p11;p38;p92;p28;p55;p86;p87;’ guest_error=’Guest error message’ user_error=’User error message’ ]


The funnel separates the insects from the soil with heat. A light bulb heats the soil at one end of a funnel and causes the insects to migrate, through mesh, to a preservative liquid at the other end of the funnel. Originally Antonio Berlese used a hot water bottle to provide the heat. Later, Albert Tullgren modified the funnel to work with a light bulb. Thus, we now call it the Berlese Funnel, the Tullgren Funnel, or the Berlese-Tullgren Funnel.


Download Student Worksheet & Exercises


An ultraviolet lamp used to attract night flying insects. The simplest set up is to hang a white sheet on a line and hang a portable black light on one side of the sheet. Insects will land on the sheet and can be tallied, identified or collected.


To make a larger, more permanent model, here’s what you need:


  • 1 gallon tractor funnel.
  • Clothespins.
  • A light fixture that fits on top of the funnel and has a reflective interior.
  • A bucket that has a smaller diameter than the top of the funnel. The funnel needs to be suspended from the bucket so the insects can fall into the jar.
  • A clean jam-jar.
  • Rubbing alcohol.
  • ¼ inch wire mesh.
  • Light bulb. The wattage has to be high enough to heat the soil, but not so high that it will light the funnel on fire. Best to do it by trial and error with lots of supervision.
  • Soil. The best will be from a compost pile.

Here’s how you make the funnel:


  1. Cut a large hole in the side of the bucket. This will allow you to retrieve the jar without disassembling the apparatus. Naturally, the hole should be larger than the jar.
  2. Fit the wire mesh so that it covers the bottom third of the funnel.
  3. Fit the funnel on top of the bucket.
  4. Fit the light fixture (with the light bulb in it) on top of the funnel with the clothespin.
  5.  Place the jar underneath the funnel (with or without the rubbing alcohol depending on if you want the specimens dead or alive).

How to use the funnel: Simply turn on the light and wait. Check the vial every fifteen minutes or so for an hour. After you have finished remember to turn off the light! Also, remember that some of the specimens may be very small and best observed under a microscope. For the best results do it in the morning or on a cold day.


How the funnel works:  Figure 1 shows the funnel in action. The light (G) creates heat. The insects in the soil don’t like heat, so they move from the soil (D) through the funnel (C) into the jar (B). The jar is filled with rubbing alcohol (A) preserves the specimens. The wire (not shown in the figure) keeps most of the soil from falling into the jar.


Troubleshooting: What if there still aren’t any bugs after an hour? If this happens, don’t panic. Ask yourself these questions:


  • Is the light strong enough? If the light is not strong enough (i.e. generating enough heat), then the soil will not get hot enough to push the insects into the jar. The funnel works by creating a gradient of heat which the bugs move down into the jar. If the light isn’t creating that gradient, no critters will feel like moving.
  • Is it hot today? If the sun is out and making everything hot, then the light will not make enough of a difference in heat—there will not be a heat gradient to move down. If so, don’t worry; just try again the next morning.
  • Is there a problem with the funnel? Is the nozzle of the funnel too far from the mouth of the jar? Make sure that the specimens are falling into the jar and not around it. Is the mesh wire too fine? You want mesh that will keep most of the soil in the funnel, but not so fine that it will stop the bugs from getting through.
  • Lastly, are there any bugs in the soil? Not just any dirt will do for this project. You need soil rich with life! The best place to find this type of soil is near/in a compost pile (after it has become soil).

Exercises


  1. Why are some insects difficult to find in soil?
  2.  Why does the Berlese Funnel work to find insects?
  3.  What if the insects do not respond to the heat lamp in your experiment?
  4.  What types of insects were you able to find using the Funnel?

[/am4show]


Some insects are just too small! Even if we try to carefully pick them up with forceps, they either escape or are crushed. What to do?


Answer: Make an insect aspirator! An insect aspirator is a simple tool scientists use to collect bugs and insects that are too small to be picked up manually. Basically it’s a mini bug vacuum!


[am4show have=’p8;p9;p11;p38;p92;p28;p55;p153;p65;p69;p86;p87;’ guest_error=’Guest error message’ user_error=’User error message’ ]


Download Student Worksheet & Exercises


Here’s what we’ll need:


  • A small vial or test tube with a (snug fitting) two-holed rubber stopper.
  • Two short pieces of stiff plastic tubing. We’ll call them tube A and tube B.
  • Fine wire mesh (very small holes because this is what will stop the bugs from going into your mouth!)
  • A cotton ball.
  • One to two feet of flexible rubber tubing.
  • Duct tape or a rubber band.

Here’s how we make it:


  • Insert the tube A and Tube B into the stopper such that the stopper is in the middle of both pieces.
  • Bend both A and B plastic tubing 90 degrees away from each other. Their ends should be pointing away from each other.
  • Cut a square of mesh large enough to the end of the plastic tubing. Tape (or rubber-band) the mesh over bottom of tube A only. Remember, if you cover both of the tubes the bugs won’t be able to enter the aspirator.
  • Insert a small amount of cotton ball into the other side of tube A (not enough to block airflow, just enough to help filter the dust and particles entering the vial.
  • Cut another piece of mesh and cover the other end of Tube A. Secure that mesh with another piece of tape/rubber band.
  •  Fit the rubber tubing over the top of tube B (the bent side).
  • Fit the stopper into the vial/test tube.

How it works: To use the aspirator, hold the end of the rubber tubing near the insects you want to collect, and suck through the top of tube A. The vacuum you create sucks the insects into the vial/test tub (make sure they can fit in the tube!).


Troubleshooting: The bugs aren’t being pulled into the vial! In that case the suction may not be strong enough. Remove the cotton ball and try again. If it still is not working check to make sure the aspirator is air-tight (is the stopper fitting snuggly into the vial? Are there cracks/holes around or in the plastic tubes?).


TIP: I kept eating bugs! Make sure your wire mesh is very fine (the holes are smaller than the bugs you’re trying to collect). Otherwise you may be ordering a lunch you don’t want!


Exercises


  1. Why don’t we use a large vacuum to suck up the bugs?
  2.  Why do we need a small mesh covering on the end of the straw that we suck on?
  3.  Why do we need to be careful about catching ants?
  4.  What insects did you catch that you rarely see?
  5.  What familiar insects did you catch? (answers may vary).

[/am4show]


The way animals and plants behave is so complicated because it not only depends on climate, water availability, competition for resources, nutrients available, and disease presence but also having the patience and ability to study them close-up.


We’re going to build an eco-system where you’ll farm prey stock for the predators so you’ll be able to view their behavior. You’ll also get a chance to watch both of them feed, hatch, molt, and more! You’ll observe closely the two different organisms and learn all about the way they live, eat, and are eaten.


[am4show have=’p8;p9;p11;p38;p92;p28;p55;p153;p65;p69;p78;p86;p87;’ guest_error=’Guest error message’ user_error=’User error message’ ]


This experiment comes in two parts. The materials you need for both parts are:


  • four 2-liter soda bottles, empty and clean
  • 2 bottle caps
  • one plastic lid that fits inside the soda bottle
  • small piece of fruit to feed fruit flies
  • aluminum foil
  • plastic container with a snap-lid (like an M&M container or film can)
  • scissors and razor with adult help
  • tape
  • ruler
  • predators: spiders OR praying mantis OR carnivorous plants (if you’re using carnivorous plants, make sure you do this Carnivorous Greenhouse experiment first so you know how to grow them successfully)
  • soil, twigs, small plants

Fruit Fly Trap

In order to build this experiment, you first need prey. We’re going to make a fruit fly trap to start your prey farm, and once this is established, then you can build the predator column. Here’s what you need to do to build the prey farm:


Download Student Worksheet & Exercises


Did you know that fruit flies don’t really eat fruit? They actually eat the yeast that growing on the fruit. Fruit flies actually bring the yeast with them on the pads of their feet and spread the yeast to the fruit so that they can eat it. You can tell if a fruit fly has been on your fuit because yeast has begun to spread on the skin.


When you have enough fruit flies to transfer to the predator-prey column, put the entire fruit fly trap in the refrigerator for a half hour to slow the flies down so you can move them.


If you find you’ve got way too many fruit flies, you might want to trap them instead of breed them. Remove the foil buckets every 4-7 days or when you see larvae on the fruit, and replace with fresh ones and toss the fruit away. Don’t toss the larvae in the trash, or you’ll never get rid of them from your trash area! Put them down the drain with plenty of water.


Predator-Prey Column

You can use carnivorous plants, small spiders, or praying mantises. If you use plants, choose venus flytraps, sundews, or butterworts and make sure your soil is boggy and acidic. You can add a bit of activated charcoal to the soil if you need to change the pH. Since the plants like warm, humid environments, keep the soil moist enough for water to fog up the inside on a regular basis. You know you’ve got too much moisture inside if you find algae on the plants and dirt. (If this happens, poke a couple of air holes.) Don’t forget to only use distilled water for the carnivorous plants!


Keep the column out of direct sunlight so you don’t cook your plants and animals.


Exercises


  1. What shape is the head of the mantis?
  2.  How many eyes does a praying mantis have?
  3.  How else has the mantis head evolved to stalk their prey?
  4.  How does a praying mantis hold its food?
  5.  Do fruit flies eat fruit?
  6.  How do predators and prey change over time?

[/am4show]


How does salt affect plant growth, like when we use salt to de-ice snowy winter roads? How does adding fertilizer to the soil help or hurt the plants? What type of soil best purifies the water? All these questions and more can be answered by building a terrarium-aquarium system to discover how these systems are connected together.


[am4show have=’p8;p9;p11;p38;p92;p28;p55;p153;p65;p78;p86;p87;’ guest_error=’Guest error message’ user_error=’User error message’ ]


Here’s what you need:


  • two 2-liter soda bottles, empty and clean
  • two bottle caps
  • scissors and razor with adult help
  • tape
  • water, soil, and plants

Here’s what you do:


Download Student Worksheet & Exercises


Water drips off the roof of your house, down your driveway, over your toothbrush and down the sink, through farm fields, and into rivers, lakes and oceans. While traveling, this water picks up litter, nutrients, salts, oil, and also gets purified by running through soil. All of this has an affect on fish and animals that live in the oceans. The question is, how does it affect the marine ecosystem? That’s what this experiment will help you discover.


Land and aquatic plants are excellent indicators of changes in your terraqua system. By using fast-germinating plats, you’ll see the changes in a relatively short about of time. You can also try grass seeds (lawn mixes are good, too), as well as radishes and beans. Pick seeds that have a life cycle of less than 45 days.


How to Care for your TAC (Terra-Aqua Column) EcoSystem:

  1. Keep the TAC out of direct sunlight.
  2. Keep your cotton ball very wet using only distilled water. Your plants and triops are very sensitive to the kind of water you use.
  3. Feed your triops once they hatch (see below for instructions)
  4. Keep an eye on plant and algae growth  (see below for tips)

About the plants and animals in your TAC:


  1. Carnivorous plans are easy to grow in your TAC, as they prefer warm, boggy conditions, so here are a few tips: keep the TAC out of direct sunlight but in a well-lit room. Water should condense on the sides of the column, but if lots of black algae start growing on the soil and leaves, poke more air holes! Water your soil with distilled water, or you will burn the roots of your carnivorous plants.  Trim your plants if they crowd your TAC.
  2. If you run out of fruit flies, place a few slices of banana or melon in an aluminum cup or milk jig lid at the bottom of a soda bottle (which has the top half cut off). Invert the top half and place it upside down into the bottom part so it looks like a funnel and seal with tape so the flies can’t escape.  Make a hole in the cap small enough so only one fly can get through. The speed of a fruit fly’s life cycle (10-14 days) depends on the temperature range (75-80 degrees). Transfer the flies to your TAC. If you have too many fruit flies, discard the fruit by putting it outside (away from your trash cans) or flush it down the toilet.
  3. You can’t feed a praying mantis too much, and they must have water at all times. You can place 2-3 baby mantises in a TAC at one time with the fruit flies breeding below. When a mantis molts, it can get eaten by live crickets, so don’t feed if you see it begin to molt. When you see wings develop, they are done fully mature. Adult mantises will need crickets, houseflies, and roaches in addition to fruit flies.
  4. Baby triops will hatch in your TAC aquarium. The first day they do not need food. Crush a green and brown pellet and mix together. Feed your triop half of this mixture on the 2nd and the other half on the 4th day (no food on day 3). After a week, feed one pellet per day, alternating between green and brown pellets. You can also feed them shredded carrot or brine shrimp to grow them larger. If you need to add water (or if the water is too muddy), you can replace half the water with fresh, room temperature distilled water. You can add glowing beads when your triop is 5 days old so you can see them swimming at night (poke these through the access hole).

Exercises


  1.  What three things do plants need to survive?
  2.  What two things do animals need to survive?
  3.  Does salt affect plants? How?

[/am4show]


Mass and energy are conserved. This means you can’t create or destroy them, but you can change their location or form.


Most people don’t understand that the E energy term means all the energy transformations, not just the nuclear energy.


The energy could be burning gasoline, fusion reactions (like in the sun), metabolizing your lunch, elastic energy in a stretched rubber band… every kind of energy stored in the mass is what E stands for.


For example, if I were to stretch a rubber band and somehow weigh it in the stretched position, I would find it weighed slightly more than in the unstretched position.


Why? How can this be? I didn’t add any more particles to the system – I simply stretched the rubber band. I added energy to the system, which was stored in the electromagnetic forces inside the rubber band, which add to the mass of the object (albeit very slightly). Read more about this in Unit 7: Lesson 3.


[am4show have=’p8;p9;p11;p38;p92;p27;p54;p69;p86;p87;’ guest_error=’Guest error message’ user_error=’User error message’ ]


For plants, this means that energy from captured sunlight, combined with carbon dioxide and water, both of which have mass, make the plant heavier. Let’s find out how Einstein would have planted a garden while thinking about his big ideas.


Materials:


  • scale for weighing your plant
  • pot with soil
  • plant (not potted yet)
  • water
  • time
  • notebook and pencil to record your findings


Download Student Worksheet & Exercises


  1. Prepare a pot with dirt. Add a measured amount (like 1 cup) of water to dampen the soil. Weigh the pot filled with soil (but no plant).
  2. Add a plant to the pot and weigh the whole thing.
  3. Subtract the weight you found in step 1 from step 2 to find out how much the plant weighs.
  4. You’ll be weighing your pot each day. Weigh the plant before watering (water it the same amount each day) and write it down in your notebook . If you’re giving it water and sunlight, the plant should be getting heavier.
  5. Where does this mass come from? You can’t create mass, and yet the plant is getting heavier. How?

You and I get heavier when we eat food. You aren’t giving the plant food, but it is getting food. How? Where does its food come from? The energy from the sun is changed to sugars during photosynthesis, increasing the mass of the plant.


Exercises


  1. Where does this mass come from? You can’t create mass, and yet the plant is getting heavier. How?
  2. Can energy be created?
  3. Can energy be destroyed?

[/am4show]


What grows in the corner of your windowsill? In the cracks in the sidewalk? Under the front steps? In the gutter at the bottom of the driveway? Specifically, how  doe these animals build their homes and how much space do they need? What do they eat? Where do fish get their food? How do ants find their next meal?


These are hard questions to answer if you don’t have a chance to observe these animals up-close. By building an eco-system, you’ll get to observe and investigate the habits and behaviors of your favorite animals. This column will have an aquarium section, a decomposition chamber with fruit flies or worms, and a predator chamber, with water that flows through all sections. This is a great way to see how the water cycle, insects, plants, soil, and marine animals all work together and interact.


[am4show have=’p8;p9;p11;p38;p92;p28;p55;p65;p78;p86;p87;’ guest_error=’Guest error message’ user_error=’User error message’ ]


Here’s what you need:


  • four (or more) 2-liter soda bottles, empty and clean and with caps
  • scissors
  • tape
  • razor with adult help
  • ruler
  • soil
  • water
  • plants or seeds
  • compost or organic/food scraps
  • spiders, snails, fruit flies, etc

Here’s what you do:


Download Student Worksheet & Exercises


You can easily incorporate the Water Cycle Column, the Terraqua Column, the Predator-Prey Column, Worm Column, and the Fruit Fly Trap into your Eco-Column. If you want to make your Eco-Column more permanent, seal it together with silicone sealant, making sure you have enough drainage holes and air holes in the right places first.


Exercises


  1. What are parts of the eco system?
  1. Give an example of each.
  1. What do decomposers do?
  1. How do fruit flies breed?
  1. How does the precipitation funnel function in this eco column?

[/am4show]


Here we’re going to discuss the differences between three types of worms; flatworms, roundworms, and segmented worms. The word “worm” is not, in fact, a scientific name. It’s an informal way of classifying animals with long bodies and no appendages (no including snakes). They are bilaterally symmetrical (the right and left sides mirror each other). Worms live in salt and fresh water, on land, and inside other organisms as parasites.

The differences between the three types of worms we will discuss depend on the possession of a body cavity and segments. Flatworms have neither a body cavity nor segments. Roundworms only have a body cavity, and segmented worms have both a body cavity and segments.

Flatworms (Phylum Platyhelminthes) have incomplete digestive systems. That means that their digestive system has only one opening. The gas exchange occurs on the surface of their bodies. There are no blood vessels or nervous systems in flatworms. Some are non-parasitic, like the Sea flat worm, and some are parasitic, like the tapeworm.

[am4show have='p8;p9;p11;p38;p92;p28;p55;p78;p86;p87;' guest_error='Guest error message' user_error='User error message' ]

Roundworms (Phylum Nematoda) have body cavities—as contrasted with flatworms which do not. The body cavity allows roundworms to have complete digestive tracts (both a mouth and an anus). The mouth and anus are connected by a gut—where the food is digested. They also have a simple nervous system and brain.
Roundworms can be parasites of plants and animals. In dogs they are often know to cause heart problems. In humans roundworm parasites can sometimes cause a swelling disease called elephantitis.

Annelids or Segmented Worms (Phylum Annalida) the most developed of the three, have both a body cavity and segments. Their body cavity helps give them structure—it serves as a hydroskeleton. By “segmented” it’s meant that they are divided into repeating units. They can be non-parasitic (i.e. earthworms) or parasitic (i.e. leeches). Interestingly, the giant red leech only eats giant earthworms.

Worm Column

If you're fascinated by worms but frustrated that you can't see them do their work underground, then this worm column is just the ticket for you. By using scrap materials from the recycling bin, you'll be able to create a transparent worm farm. here's what you need:

  • two 2-liter soda bottles, empty and clean
  • one brown paper grocery bag
  • 20 red worms
  • newspaper, old leaves, peat moss, and/or straw for worm bedding
  • last night's dinner, organic scraps, plant material for worm food

Here's what you do:

Download Student Worksheet & Exercises

Things to Compare with your Worms:

  1. Look at the worms under the magnifying glass.
  2. Measure the lengths of the worms.
  3. Make note of:
    1. The outer layer of the worms: Is it hard? Is it segmented? What are other observations that can be made?
    2. Do they have legs?
    3. Do they have antenna?
    4. What are the main differences?
    5. What are the main similarities?

Garden Worm Tower

Here's how you can make your own worm tower right in your garden:

Build your own worm farm and watch them turn food scraps into soil!

Materials:

  • 2 polystyrene boxes with lids the same size. (Let’s call them Bin A and Bin B.)
  • A sheet of insect screen to fit the bottom of the boxes
  • Newspaper clippings
  • Garden soil
  • Food scraps (half-eaten fruits and veggies, stale biscuits and cakes, crushed egg shells, coffee grounds)
  • Water
  • Worms (Either “Tiger”, “reds”, or “blues”; ask for them at your local garden store)

Build the farm:

  1. Punch evenly spaced holes in the bottom of Bin A.
  2. Place the insect screen on the bottom of Bin A (this is so that the worms don’t fall out).
  3. Fill Bin A ¾ full with wet newspaper clippings.
  4. Add a layer of garden soil to Bin A.
  5. Add the worms.
  6. Place Bin A in Bin B. Make sure there’s enough room in Bin B when Bin A’s placed in it to collect the worm pee and waste. Be sure to empty and clean Bin B every couple days.
  7. Add food to bin A! Start off small. You don’t want to over-feed the worms. Start out with a couple scraps in the corner and see how long it takes for them to disappear—that should give you a good idea of how much to feed your worms.


Earthworm Dissection

You can dissect a earthworm right at home using this inexpensive earthworm specimen and simple dissection tools!

Exercises

  1. What are three types of worms?
  2.  What are the characteristics of each?
  3.  What are the elements of a complete digestive system?
  4.  What are some benefits of worms in gardening?

[/am4show]


When birds and animals drink from lakes, rivers, and ponds, how pure it is? Are they really getting the water they need, or are they getting something else with the water?


This is a great experiment to see how water moves through natural systems. We’ll explore how water and the atmosphere are both polluted and purified, and we’ll investigate how plants and soil help with both of these. We’ll be taking advantage of capillary action by using a wick to move the water from the lower aquarium chamber into the upper soil chamber, where it will both evaporate and transpire (evaporate from the leaves of plants) and rise until it hits a cold front and condenses into rain, which falls into your collection bucket for further analysis.


Sound complicated? It really isn’t, and the best part is that it not only uses parts from your recycling bin but also takes ten minutes to make.


[am4show have=’p8;p9;p11;p38;p92;p28;p55;p65;p86;p87;’ guest_error=’Guest error message’ user_error=’User error message’ ]


Here’s what you need:


  • three 2-liter soda bottles, empty and clean
  • razor with adult help
  • scissors
  • tape
  • ruler
  • 60 cm heavy cotton string
  • soil
  • water
  • ice
  • plants
  • drill and drill bits
  • fast-growing plant seeds (radish, grass, turnips, Chinese cabbage, moss, etc.)

Here’s what you do:


Download Student Worksheet & Exercises


Make sure your wicks are thoroughly soaked before adding the soil and plants! You can either add ice cubes to the top chamber or fill it carefully with water and freeze the whole thing solid. If you’re growing plants from seeds, leave the top chamber off until they have sprouted.


You can add a strip of pH paper both inside and outside your soil chamber to test the difference in pH as you introduce different conditions. You can check out the Chemical Matrix Experiment and the Acid-Base Experiment also!) What happens if you light a match, blow it out, and then drop it in the soil chamber? (Hint – you’ve just made acid rain!)


Do you think salt travels with the water? What if you add salt to the aquarium chamber? Will it rain salty water? You can place a bit of moss in the collection bucket to indicate how pure the water is (don’t drink it – that’s never a good idea).


Exercises


  1. Do you think salt travels with the water?
  2. What if you add salt to the aquarium chamber? Will it rain salty water?
  3. What happens if you light a match, blow it out, and then drop it in the soil chamber? (Hint – you’ve just made acid rain!)

[/am4show]


Art and science meet in a plant press. Whether you want to include the interesting flora you find in your scientific journal, or make a beautiful handmade greeting card, a plant press is invaluable. They are very cheap and easy to make, too!


[am4show have=’p8;p9;p11;p38;p92;p27;p54;p153;p65;p78;p86;’ guest_error=’Guest error message’ user_error=’User error message’ ]


Here’s what you need:


  • Newspaper
  • Cardboard
  • Belt buckle or large, strong rubber bands
  • Sheets of paper


Download Student Worksheet & Exercises


Here’s how you make it:


  1. Cut the cardboard into square pieces.
  2. Cut or fold the sheets of newspaper into squares the same size as the cardboard.
  3. Place 4 sheets of newspaper between each piece of cardboard. You can also use white copy paper.
  4. Place the plants you want to press in between the newspaper.
  5. If you want, you can sandwich the plant press with the wood planks for added pressure.
  6. Bind it tightly with the rubber bands or a belt buckle.
  7. Leave it in a dry place for two to four days.

How does it work? The pressure from the rubber band/string pushes the water from the plants. The water is then absorbed by the newspaper. Since the pressure is the key to the press, it’s important not to open the press for at least two days (more is better).


Troubleshooting: The press works by pushing the moisture out of the plants, so any way moisture can stay in (or get back in) to the plants will make the press less effective. First, storing the press in a dry place is essential. If the press is left in a moist area not only will in not work, but it will grow mold and ruin the press and the plants. Conversely, if the pressure is not great enough, the moisture will not be pressed out. Thus make sure that the plants fit in the press, are bound tightly, and that the press is stored in a dry area for at very least two days.


Exercises


  1. Draw and describe the functions of the following plant parts: root, stem.
  2. What two major processes happen at the leaf?
  3. Why are flowers necessary?
  4. Do all plants have roots, stems, leaves and flowers?

[/am4show]


This is a recording of a recent live teleclass I did with thousands of kids from all over the world. I’ve included it here so you can participate and learn, too!


We’re going to cover energy and motion by building roller coasters and catapults! Kids build a working catapult while they learn about the physics of projectile motion and storing elastic potential energy. Let’s discover the mysterious forces at work behind the thrill ride of the world’s most monstrous roller coasters, as we twist, turn, loop and corkscrew our way through g-forces, velocity, acceleration, and believe it or not, move through orbital mechanics, like satellites. We’ll also learn how to throw objects across the room in the name of science… called projectile motion. Are you ready for a fast and furious physics class?


[am4show have=’p8;p9;p11;p38;p92;p11;p38;p100;’ guest_error=’Guest error message’ user_error=’User error message’ ]


Materials:


    • click for worksheet
    • marbles
    • masking tape
    • 3/4″ pipe foam insulation (NOT neoprene and NOT the kind with built-in adhesive tape)
    • 9 popsicle sticks
    • 4rubber bands
    • one plastic spoon
    • ping pong ball
    • hot glue gun with glue sticks

Key Concepts

Centripetal means ‘center-seeking’. It’s the force that points toward the center of the circle you’re moving on. When you swing the bucket around your head, the bottom of the bucket is making the water turn in a circle and not fly away. Your arm is pulling on the handle of the bucket, keeping it turning in a circle and not fly away. That’s centripetal force. Centrifugal force is equal and opposite to centripetal force. Centrifugal means ‘center-fleeing’, so it’s a force that’s in the opposite direction. The car pushing on you is the centripetal force.The push of your weight on the door is the REACTIVE centrifugal force, meaning that it’s only there when something’s happening. It’s not a real force that goes around pushing and pulling on its own.


What’s Going On?

Engines used to use an automatic feedback system called a centrifugal governor to regulate the speed. For example, if you’re mowing the lawn and you hit a dry patch with no grass, the blades don’t suddenly spin wildly faster… they get adjusted automatically by a feedback system so maintains the same speed for the blades, so matter how thick or thin the grass that your cutting is. You’ll find these also in airplanes to automatically adjust the pitch (or angle) of the propeller as it moves through the air. The pilot sets the intended speed, and the airplane has a governor that helps adjust the angle the blades make with the air to maintain this speed automatically, because the air density changes with altitude. It’s really important to know how much centrifugal force people experience, whether its in cars or roller coasters! In fact roller coaster loops used to be circular, but now they use clothoid loops instead to keep passengers happy during their ride so they don’t need nearly the acceleration that they’d need for a circular loop (which means less g-force so passengers don’t black out).


Here are more roller coaster maneuvers you can try out:


Loops: Swing the track around in a complete circle and attach the outside of the track to chairs, table legs, and hard floors with tape to secure in place. Loops take a bit of speed to make it through, so have your partner hold it while you test it out before taping. Start with smaller loops and increase in size to match your entrance velocity into the loop. Loops can be used to slow a marble down if speed is a problem.


Camel-Backs: Make a hill out of track in an upside-down U-shape. Good for show, especially if you get the hill height just right so the marble comes off the track slightly, then back on without missing a beat.


Whirly-Birds: Take a loop and make it horizontal. Great around poles and posts, but just keep the bank angle steep enough and the marble speed fast enough so it doesn’t fly off track.


Corkscrew: Start with a basic loop, then spread apart the entrance and exit points. The further apart they get, the more fun it becomes. Corkscrews usually require more speed than loops of the same size.


Jump Track: A major show-off feature that requires very rigid entrance and exit points on the track. Use a lot of tape and incline the entrance (end of the track) slightly while declining the exit (beginning of new track piece).


Troubleshooting

Marbles will fly everywhere, so make sure you have a lot of extras! If your marble is not following your track, look very carefully for the point of departure – where it flies off. For instance, when the marble flies off the track, you can step back and say:


“Hmmm… did the marble go to fast or too slow?”


“Where did it fly off?”


“Wow – I’ll bet you didn’t expect that to happen. Now what are you going to try?”


Become their biggest fan by cheering them on, encouraging them to make mistakes, and try something new (even if they aren’t sure if it will work out).


Questions to Ask

  1. Does the track change position with the weight of the marble, making it fly off course? (You can make the track more rigid by taping it to a surface.)
  2. Is the marble jumping over the track wall? (You can increase your bank angle – the amount of twist the track makes along its length.)
  3. How can you make your marble zip through two loops at once?
  4. How could you increase your marble speed?
  5. Where would you put a tunnel? (Leave one piece of track uncut to use as a tunnel.)

[/am4show]


The curved shape of the magnifying lens causes light rays to bend and focus on an image. When we look through the lens, we can use it to make writing or some other object appear larger. However, the magnifying lens can also be used to make something smaller. The light from the bulb is bent and focused on the wall when the lens is held far from the lamp and close to the wall. The image is much brighter than the surroundings. This is because all the light falling on the surface of the lens is concentrated into a much smaller area.


When sunlight is concentrated by passing it through a lens, the result can be an intensely bright and not spot of light. Even a small magnifying glass can increase the intensity of the sun enough to set wood and paper on fire. We are using a light bulb rather than sunlight for this experiment because concentrated sunlight Can be very harmful to your eyes. NEVER LOOK AT A CONCENTRATED IMAGE OF THE SUN.


The United States Department of Energy’s National Renewable Energy Laboratory in Colorado uses solar energy to operate a special furnace. This high-temperature solar furnace uses a lens to concentrate sunlight. A heliostat (a device used to track the motion of the sun across the sky) is used so that the image reflected from a mirror is always directed at the same spot. The lens is used to concentrate sunlight from a mirror to an area about the size of a penny. This concentrated sunlight has the energy of 20,000 suns shining in one spot.


In less than half a second, the temperature can be raised to 1,720° C (3,128° F) which is hot enough to melt sand. This high-temperature solar furnace is being used to harden steel and to make ceramic materials that must be heated to extremely high temperatures.


Concentrated sunlight also has been used to purify polluted ground water. The ultraviolet radiation in sunlight can break down organic pollutants into carbon dioxide, water, and harmless chlorine ions. This procedure has been successfully carried out at the Lawrence Livermore Laboratory in California. In the laboratory, up to 100,000 gallons of contaminated water could be treated in one day.
[am4show have=’p8;p9;p11;p38;p92;p22;p49;p84;p85;’ guest_error=’Guest error message’ user_error=’User error message’ ]
Materials


  • Lamp with a single incandescent bulb
  • Magnifying lens


Download Student Worksheet & Exercises


Procedure


The results of this experiment may be easiest to observe if done at night in a dark room.


Ask an adult to remove the lamp shade from a lamp that uses a single incandescent bulb. An incandescent bulb is the type that gets quite hot when used. Turn on the lamp. Turn off all the other lights in the room.


Stand about two feet from the wall that is the greatest distance from the lamp. There should be nothing between you and the lamp bulb. Place the magnifying glass on the wall so that the lens is flat against the wall. Now, slowly move the lens away from the wall and toward the light. Keep the lens parallel to the surface of the wall. As you move the lens outward, watch the wall.


Observations


Does an image of the lamp appear on the wall? How bright is this image? How big is this image?


Discussion


You should see an upside down image of the light bulb appear as you move the magnifying lens away from the wall. The image should be much brighter than the area around it and much smaller than the size of the real bulb. The image may be only about the size of your fingernail or smaller.


Other Things to Try


Trace the exact size and shape of the magnifying lens on a piece of paper. Cut out this piece of paper and tape in on the wall. Focus the image of the lamp on this piece of paper and copy the bulb image on the paper. Compare the size of the bulb image to the size of the piece of paper. How much bigger is the lens than the focused image of the bulb? Use this ratio of sizes to estimate the increase in the brightness of the image.


Can you explain why the image of the bulb is upside down when it is projected on the wall? See if you can find information about optics in a book or encyclopedia that could help you explain this reversal of the image.


Repeat this experiment using two magnifying lenses. Observe the effect of moving the positions of the two lenses relative to each other and the wall.


Exercises Answer the questions below:


  1. Name three uses for solar energy:
  2. What type of heat energy is transmitted by the sun?
    1. Conduction
    2. Convection
    3. Plasma
    4. Radiation
  3. Circle the following phenomena influenced by the sun:
    1. Pressure
    2. Climate
    3. Weather
    4. Wind

[/am4show]


This is a recording of a recent live teleclass I did with thousands of kids from all over the world. I’ve included it here so you can participate and learn, too!


You’ll discover how to boil water at room temperature, heat up ice to freeze it, make a fire water balloon, and build a real working steam boat as you learn about heat energy. You’ll also learn about thermal energy, heat capacity, and the laws of thermodynamics.


Materials:


  • cup of ice water
  • cup of room temperature water
  • cup of hot water (not scalding or boiling!)
  • tea light candle and lighter (with adult help)
  • balloon (not inflated)
  • syringe (without the needle)
  • block of foam
  • copper tubing (¼” diameter and 12” long)
  • bathtub or sink
  • scissors or razor
  • fat marker (to be used to wrap things around, not for writing)

[am4show have=’p8;p9;p11;p38;p92;’ guest_error=’Guest error message’ user_error=’User error message’ ]


Key Concepts

The terms hot, cold, warm etc. describe what physicists call thermal energy. Thermal energy is how much the molecules are moving inside an object. The faster molecules move, the more thermal energy that object has.


There are three different scales for measuring temperature. Fahrenheit, Celsius and Kelvin. (There’s also a fourth temperature scale for absolute Fahrenheit called Rankine.) Temperature is basically a speedometer for molecules. The faster they are wiggling and jiggling, the higher the temperature and the higher the thermal energy that object has. Your skin, mouth and tongue are antennas which can sense thermal energy.


There are four states of matter: Solid, liquid, gas and plasma. Solids have strong, stiff bonds between molecules that hold the molecules in place. Liquids have loose, stringy bonds between molecules that hold molecules together but allow them some flexibility. Gasses have no bonds between the molecules. Plasma is similar to gas but the molecules are very highly energized. Materials can change from one state to another depending on the temperature and the bonds. Changing from a solid to a liquid is called melting. Changing from a liquid to a gas is called boiling, evaporating, or vaporizing. Changing from a gas to a liquid is called condensation. Changing from a liquid to a solid is called freezing. All materials have given points at which they change from state to state. Melting point is the temperature at which a material changes from solid to liquid.  Boiling point is the temperature at which a material changes from liquid to gas. Condensation point is the temperature at which a material changes from gas to liquid. Freezing point is the temperature at which a material changes from liquid to gas.


What’s Going On?

Heat is the movement of thermal energy from one object to another. Heat can only flow from an object of a higher temperature to an object of a lower temperature (this is the First Law of Thermodynamics). Heat is movement of thermal energy from one object to another. When an object absorbs heat it does not necessarily change temperature.  Objects release heat as they freeze and condense. Objects absorb heat as they evaporate and melt. Freezing points, melting points, boiling points and condensation points are the “speed limits” of the phases. Once the molecules reach that speed they must change state.


Heat capacity is how much heat an object can absorb before its temperature increases. Specific heat is how much heat energy a mass of a material must absorb before it increases 1°C. Heat capacity is influenced by the specific heat of the material and/or the amount of the material. Each material has its own specific heat. The higher a material’s specific heat is, the more heat it must absorb before its temperature increases. A larger amount of something will have a higher heat capacity then a smaller amount of something. Water has a very high heat capacity.


Questions:

  1. True or False: Water is poor at absorbing heat energy.
  2. True or False: A molecule that heats up will move faster.
  3. True or False: A material will be less dense at lower temperatures.
  4. For gases, if we increase the temperature, what happens to the pressure and the volume?
  5. What is specific heat?
  6. What is heat?
  7. Does heat flow from cold to hot? Give an example.
  8. What do the our body sense, heat flow or temperature? Are they the same thing?
  9. How can we boil room temperature water without heating up the water?

Answers:


  1. False.
  2. True.
  3. False. (Usually.)
  4. If we increase the temperature, the pressure increases and the volume decreases. This is called the Ideal Gas Law (remember the ping pong balls from the teleclass?)
  5. Specific heat is how much heat energy a mass of a material must absorb before it increases 1°C.
  6. Heat is the movement of thermal energy from one object to another.
  7. No. Heat flows from hot to cold. (This is the First Law of Thermodynamics.) A hot cup of coffee left out on a cold morning will eventually cool to the surrounding air temperature.
  8. Heat flow. No they are not the same thing. Temperature is a measure of how much energy the molecules have.
  9. By increasing the pressure by decreasing the volume, we can force the bubbles out of the water and it will boil. Boiling is when the liquid water turns into a gas, NOT when the liquid water heats up. Boiling can happen at many different temperatures when you change the pressure.

[/am4show]


When two blocks of the Earth slip past each other suddenly, that’s what we call an earthquake! From a physics point of view, earthquakes are a release of the elastic potential energy that builds up. Most energy is released as heat, not as shaking, during an earthquake. 90% of all earthquakes happen along the Ring of Fire, which is the active zone that surrounds the Pacific Ocean.


[am4show have=’p8;p9;p11;p38;p92;p30;p57;p79;p70;’ guest_error=’Guest error message’ user_error=’User error message’ ]


The Earth has four main layers: the hard skin on the surface is the crust which extends only 30 miles; the hot magma section is a soupy mass of rock that extends approximately 1800 miles; and the core which is made out of two parts: the hot liquid metal outer core surrounds the solid nickel -iron inner core.


The plates on the crust float on magma, which is a lot like the consistency tar. The crust has seven main tectonic plates that slide around and can either slide apart from each other (called a normal fault that is usually found on the sea floor), collide into each other (called a thrust fault), or move in opposite directions (strike-slip fault) at different speeds. Where the plates are sliding apart on the sea floor, the temperature of the water can rise over 1200oF. Scientists measure the speeds of the plates moving from 1 to 10 inches per year.


There are three different waves that travel through the planet when an earthquake happens. The first waves are the compression-type “P-waves” (primary waves), which travel through the entire planet, including liquid water and solid rock. Most people don’t notice the P-waves, but they do notice the secondary “S-waves”, which follow 60-90 seconds after the P-waves. Following the S-waves are the surface waves, which are like when you wave a bed sheet up and down.


Earthquakes are detected and measured by many different types of instruments, like strain gauges, creep meters, tilt sensors, seismometers, x-ray imagery, and more. These detectors aren’t perfect, though. Earthquake detectors not only discover earthquakes but also glacier movement, nuclear explosions, meteor impacts, and volcano eruptions!


After you watch the video, click the link to do your seismology calculations to figure out both the epicenter and the magnitude of four different earthquakes:


If you’d like to measure the Earth’s Magnetic Pulse, you can do that here.


[/am4show]


This is a recording of a recent live class I did with an entire high school astronomy class. I’ve included it here so you can participate and learn, too!


Light is energy that can travel through space. How much energy light has determines what kind of wave it is. It can be visible light, x-ray, radio, microwave, gamma or ultraviolet. The electromagnetic spectrum shows the different energies of light and how the energy relates to different frequencies, and that’s exactly what we’re going to cover in class. We’re going to talk about light, what it is, how it moves, and it’s generated, and learn how astronomers study the differences in light to tell a star’s atmosphere from  millions of miles away.


I usually give this presentation at sunset during my live workshops, so I inserted slides along with my talk so you could see the pictures better. This video below is long, so I highly recommend doing this with friends and a big bowl of popcorn. Ready?


[am4show have=’p8;p9;p11;p38;p92;p96;’ guest_error=’Guest error message’ user_error=’User error message’ ]


Materials:


  • Hair (one strand)
  • Tape
  • Pencil
  • Ruler or yardstick
  • Paper
  • Calculator
  • Red laser
  • Flashlight
  • Glass of water
  • Large chocolate bar
  • Microwave
  • Plate
  • Orange highlighter
  • Diffraction grating OR use an old CD
  • Print out this worksheet to fill in as we go along!


[/am4show]


If you’ve ever owned a fish tank, you know that you need a filter with a pump. Other than cleaning out the fish poop, why else do you need a filter? (Hint: think about a glass of water next to your bed. Does it taste different the next day?)


There are tiny air bubbles trapped inside the water, and you can see this when you boil a pot of water on the stove. The experimental setup shown in the video illustrates how a completely sealed tube of water can be heated… and then bubbles come out one end BEFORE the water reaches a boiling point. The tiny bubbles smoosh together to form a larger bubble, showing you that air is dissolved in the water.


Materials:


  • test tube clamp
  • test tube
  • lighter (with adult help)
  • alcohol burner or votive candle
  • right-angle glass tube inserted into a single-hole stopper
  • regular tap water

[am4show have=’p8;p9;p11;p38;p92;p18;p45;p82;p84;p91;p30;p57;’ guest_error=’Guest error message’ user_error=’User error message’ ]


Download Student Worksheet & Exercises


The filter pump in your fish tank ‘aerates’ the water. The simple act of letting water dribble like a waterfall is usually enough to mix air back in. Which is why flowing rivers and streams are popular with fish – all that fresh air getting mixed in must feel good! The constant movement of the river replaces any air lost and the fish stay happy (and breathing). Does it make sense that fish can’t live in stagnant or boiled water?


You don’t need the fancy equipment show in this video to do this experiment… it just looks a lot cooler. You can do this experiment with a pot of water on your stove and watch for the tiny bubbles before the water reaches 212oF.


[/am4show]


An average can of soda at room temperature measures 55 psi before you ever crack it open. (In comparison, most car tires run on 35 psi, so that gives you an idea how much pressure there is inside the can!)


If you heat a can of soda, you’ll run the pressure over 80 psi before the can ruptures, soaking the interior of your house with its sugary contents. Still, you will have learned something worthwhile: adding energy (heat) to a system (can of soda) causes a pressure increase. It also causes a volume increase (kaboom!).
How about trying a safer variation of this experiment using water, an open can, and implosion instead of explosion?


Materials – An empty soda can, water, a pan, a bowl, tongs, and a grown-up assistant.


NOTE: If you can get a hold of one, use a beer can – they tend to work better for this experiment. But you can also do this with a regular old soda can. And no, I am not suggesting that kids should be drinking alcohol! Go ask a parent to find you one – and check the recycling bin.


[am4show have=’p8;p9;p11;p38;p92;p93;p30;p57;p84;’ guest_error=’Guest error message’ user_error=’User error message’ ]


Prepare an ice bath by putting about ½” of ice water in a shallow dish. With an adult, place a few tablespoons of water in an empty soda or beer can and place the can upright in a skillet on the stove. When the can emits a think trickle of steam, grab the can with tongs and quickly invert it into the ice dish. CRACK!


Troubleshooting: The trick to making this work is that the can needs to be full of hot steam, which is why you only want to use a tablespoon or two of water in the bottom of the can. It’s alright if a bit of water is still at the bottom of the can when you flip it into the ice bath. In fact, there should be some water remaining or you’ll superheat the steam and eventually melt the can. You want enough water in the ice bath to completely submerge the top of the can.


Always use tongs when handling the heated can and make sure you completely submerge the top of the can in the icy water. The water needs to seal the hole in the top of the can so the steam doesn’t escape. Be prepared for a good, loud CRACK! when you get it right.


Why does this work? By heating up the water in the can, you’re changing the state of water from a liquid to a has (called water vapor), which drives out the air, leaving the steam inside. When inverted and cooled, the steam condenses to a small volume of liquid water (much smaller than if it was just hot air). The molecules in water vapor are a lot further apart than when they are in a liquid state. Since the air inside the can has been replaced by the steam, when it cools quickly, it creates a lower air pressure region in the can, so the air pressure surrounding the outside of the can rapidly crushes the can.


If you look really carefully as it condenses, you’ll see cold water from the bowl zoom into the can, just like when you suck water through a straw. The vacuum created int he can by the condensing steam creates a lower pressure, which pushes water into the can itself. When you suck from a straw, you’re creating a lower air pressure region in your mouth so that the surrounding air pressure pushes liquid up the straw to equalize the pressure.


Remember, high pressure always pushes!


[/am4show]


You’re about to play with one of the first methods of underwater breathing developed for scuba divers hundreds of years ago.! Back then, scientists would invert a very large clear, bell-shaped jar over a diver standing on a platform, then lower the whole thing into the water. Everyone thought this was a great idea, until the diver ran out of breathable air…


Materials: 12″ flexible tubing, two clear plastic cups, bathtub


[am4show have=’p8;p9;p11;p38;p92;p93;p30;p57;p84;’ guest_error=’Guest error message’ user_error=’User error message’ ]


Part I: Fill the tub and climb in. Plunge one cup underwater so it fills completely with water. While the cup is underwater, point its mouth downward. Insert one end of the tubing into the cup and blow hard into the other end. The water is forced out of the cup!


Part II: While still in the tub, invert one cup (mouth downwards) and plunge it into the tub so that air gets trapped inside the cup. Place the second cup in the water so it fills with water. Invert the water-filled cup while underwater and position it above the first cup so when you tilt the first cup to release the air bubbles, they get trapped inside the second cup. Here you see that air takes space, because in both variations of this experiment the air forced the water out of the cups.


[/am4show]


When air moves, the air pressure decreases. This creates a lower air pressure pocket right between the cans relative to the surrounding air. Because higher pressure pushes, the cans clink together. Just remember – whenever there’s a difference in pressure, the higher pressure pushes.


You will need about 25 straws and two empty soda cans or other lightweight containers


[am4show have=’p8;p9;p11;p38;p92;p82;p84;p93;p30;p57;’ guest_error=’Guest error message’ user_error=’User error message’ ]


Lay a row of straws parallel to each other on a smooth tabletop. Place two empty soda cans on the straws about an inch apart. Lower your nose to the cans and blow hard through the space between the two cans.


Clink! They should roll toward each other and touch!


[/am4show]


While this isn’t actually an air-pressure experiment but more of an activity in density, really, it’s still a great visual demonstration of why Hot Air Balloons rise on cold mornings.


Imagine a glass of hot water and a glass of cold water sitting on a table, side by side. Now imagine you have a way to count the number of water molecules in each glass. Which glass has more water molecules?


The glass of cold water has way more molecules… but why? The cold water is more dense than the hot water. Warmer stuff tends to rise because it’s less dense than colder stuff and that’s why the hot air balloon in experiment 1.10 floated up to the sky.


Clouds form as warm air carrying moisture rises within cooler air. As the warm, wet air rises, it cools and begins to condense, releasing energy that keeps the air warmer than its surroundings. Therefore, it continues to rise. Sometimes, in places like Florida, this process continues long enough for thunderclouds to form. Let’s do an experiment to better visualize this idea.


[am4show have=’p8;p9;p11;p38;p92;p82;p84;p93;p30;p57;’ guest_error=’Guest error message’ user_error=’User error message’ ]


Materials: Two identical tall glasses, hot water, cold water, red and blue food dye, and an index card larger enough to cover the opening of the glasses


Fill two identical water glasses to the brim: one with hot water, the other with cold water. Put a few drops of blue dye in the cold water, a few drops of red dye in the hot water. Place the index card over the mouth of the cold water and invert the glass over the glass of hot water. Line up the openings of both glasses, and slowly remove the card.


Troubleshooting: Always invert the cold glass over the hot glass using an index card to hold the cold water in until you’ve aligned both glasses. You can also substitute soda bottles for water glasses and slide a washer between the two bottles to decrease the flow rate between the bottles so the effect lasts longer.


[/am4show]


Lots of science toy companies will sell you this experiment, but why not make your own? You’ll need to find a loooooong bag, which is why we recommend a diaper genie. A diaper genie is a 25′ long plastic bag, only both ends are open so it’s more like a tube. You can get three 8-foot bags out of one pack.


Kids have a tendency to shove the bag right up to their face and blow, cutting off the air flow from the surrounding air into the bag. When they figure out this experiment and perform it correctly, this is one of those oooh-ahhh experiments that will leave your kids with eyes as big as dinner plates.


Here’s what you do:


[am4show have=’p8;p9;p11;p38;p92;p82;p84;p93;p30;p57;’ guest_error=’Guest error message’ user_error=’User error message’ ]


Cut an eight-foot section of the diaper genie bag and knot one of the ends. Hold the other end open, take a deep breath, and blow. How many breaths does it take for you to fill up the entire bag with air? Try this now…


After you know how many breaths it takes, do you think you can fill the bag with only ONE breath? The answer is YES! Hold the bag about eight inches from the face and blow long and steady into the bag. As soon as you run out of air, close the end of the bag and slide your hand along the length (toward the knotted end) until you have an inflated blimp.


Troubleshooting: If the bag tears open, use packing tape to mend it.


What’s going on? When you blow air past your lips, a pocket of lower air pressure forms in front of your face. The stronger you blow, the lower the air pressure pocket. The air surrounding this lower pressure region is now at a higher pressure than the surrounding air, which causes things to shift and move. When you blow into the bag (keeping the bag a few inches from your face), you build a lower pressure area at the mouth of the bag, and the surrounding air rushes forward and into the bag.


Substitution Tip: If you can’t locate a diaper genie, you can string together plastic sheets from garbage bags, using lightweight tape to secure the seams. You’ll need to make a 8-12” diameter by eight-foot long tube and close one end. When kids get their eight-foot bag inflated in just one breath, ask them: “Did you really have that much air in your lungs?”


[/am4show]


About 400 years ago, Leonardo da Vinci wanted to fly… so he studied the only flying things around at that time: birds and insects. Then he did what any normal kid would do—he drew pictures of flying machines!


Centuries later, a toy company found his drawing for an ornithopter, a machine that flew by flapping its wings (unlike an airplane, which has non-moving wings). The problem (and secret to the toy’s popularity) was that with its wing-flapping design, the ornithopter could not be steered and was unpredictable: It zoomed, dipped, rolled, and looped through the sky. Sick bags, anyone?


Hot air balloons that took people into the air first lifted off the ground in the 1780s, shortly after Leonardo da Vinci’s plans for the ornithopter took flight. While limited seating and steering were still major problems to overcome, let’s get a feeling for what our scientific forefathers experienced as we make a balloon that can soar high into the morning sky.


Materials: A lightweight plastic garbage bag, duct or masking tape, a hand-held hair dryer. And a COLD morning.


Here’s what you do:


[am4show have=’p8;p9;p11;p38;p92;p82;p84;p93;p30;p57;’ guest_error=’Guest error message’ user_error=’User error message’ ]


Shake out a garbage bag to its maximum capacity. Using duct or masking tape, reduce the opening until it is almost-closed leaving only a small hole the size of the hair dryer nozzle. Use the hair dryer to inflate the bag, heating the air inside, but make sure you don’t melt the bag! When the air is at its warmest, release your hold on the bag while at the same time you switch off the hair dryer. The bag should float upwards and stay there for a while.


Troubleshooting: This experiment works best on cold, windless mornings. If it’s windy outside, try a cool room. The greater the temperature difference between the hot air inside the garbage bag versus the cold, still air, the faster the bag rises. The only other thing to watch for is that you’ve taped the mouth of the garbage bag securely so the hot air doesn’t seep out. Be sure the opening you leave is only the diameter of your hair dryer’s nozzle.


Want to go BIGGER? Then try the 60-foot solar tube!
[/am4show]


Where’s the pressure difference in this trick?


At the opening of the glass. The water inside the glass weighs a pound at best, and, depending on the size of the opening of the glass, the air pressure is exerting 15-30 pounds upward on the bottom of the card. Guess who wins? Tip, when you get good at this experiment, try doing it over a friend’s head!


Materials: a glass, and an index card large enough to completely cover the mouth of the glass.


[am4show have=’p8;p9;p11;p38;p92;p82;p84;p93;p100;p30;p57;’ guest_error=’Guest error message’ user_error=’User error message’ ]


Fill a glass one-third with water. Cover the mouth with an index card and over a sink invert the glass while holding the card in place. Remove your hand from the card. Voila! Because atmospheric air pressure is pushing on all sides of both the glass and the card, the card defies gravity and “sticks” to the bottom of the glass. Recall that higher pressure pushes and when you have a difference in pressure, things move. This same pressure difference causes storms, winds, and the index card to stay in place.


[/am4show]


As you blow into the funnel, the air under the ball moves faster than the other air surrounding the ball, which generates an area of lower air pressure. The pressure under the ball is therefore lower than the surrounding air which is, by comparison, at a higher pressure. This higher pressure pushes the ball back into the funnel, no matter how hard you blow or which way you hold the funnel. The harder you blow, the more stuck the ball becomes. Cool.


Materials: A funnel and a ping pong ball


[am4show have=’p8;p9;p11;p38;p92;p82;p84;p93;p30;p57;’ guest_error=’Guest error message’ user_error=’User error message’ ]


Insert a ping pong ball into a funnel. Place the stem of the funnel between your lips and tilt your head back so ball stays inside. Blow a strong, long stream of air into the funnel.


[/am4show]


As you blow air into the bottle, the air pressure increases inside the bottle. This higher pressure pushes on the water, which gets forced up and out the straw (and up your nose!).


Materials: small lump of clay, water, a straw, and one empty 2-liter soda bottle.


[am4show have=’p8;p9;p11;p38;p92;p82;p84;p93;p30;p57;’ guest_error=’Guest error message’ user_error=’User error message’ ]


Fill a 2-liter soda water bottle full of water and seal it with a lump of clay wrapped around a long straw so that the straw is secured to the mouth of the bottle. (The straw should be partly submerged in the water.) Blow hard into the straw. Splash!


[/am4show]


Fire eats air, or in more scientific terms, the air gets used up by the flame and lowers the air pressure inside the jar. The surrounding air outside the jar is now at a higher pressure than the air inside the jar and it pushes the balloon into the jar. Remember: Higher pressure pushes!


Materials: a balloon, one empty glass jar, scrap of paper towel , matches with an adult


[am4show have=’p8;p9;p11;p38;p92;p93;p30;p57;p84;’ guest_error=’Guest error message’ user_error=’User error message’ ]


Blow up a balloon so that it is just a bit larger than the opening of the jar and can’t be easily shoved in. With an adult, light the small wad of paper towel on fire and drop it into the jar. Place the balloon on top. When the fire goes out, lift the balloon. The jar goes with it!


[/am4show]


This experiment illustrates that air really does take up space! You can’t inflate the balloon inside the bottle without the holes, because it’s already full of air. When you blow into the bottle with the holes, air is allowed to leak out making room for the balloon to inflate. With the intact bottle, you run into trouble because there’s nowhere for the air already inside the bottle to go when you attempt to inflate the balloon.


You’ll need to get two balloons, one tack, and two empty water bottles.


[am4show have=’p8;p9;p11;p38;p92;p82;p93;p30;p57;p84;’ guest_error=’Guest error message’ user_error=’User error message’ ]


Poke a balloon into a water bottle and stretch the balloon’s neck covering the mouth of the bottle from the inside. Repeat with the other bottle. Using the tack, poke several small holes in the bottom of one of the water bottles. Putting your mouth to the neck of each bottle, try to inflate the balloons.


A cool twist on this activity is to drill a larger hole in the bottle (say, large enough to be covered up by your thumb) and inflate the balloon inside the bottle with hole open, then plug up the hole with your thumb. The balloon will remain inflated even though its neck is not tied! Where is the higher pressure region now?


[/am4show]


Fill the bathtub and climb in. Grab your water bottle and tack and poke several holes into the lower half the water bottle. Fill the bottle with water and cap it. Lift the bottle above the water level in the tub and untwist the cap. Water should come streaming out. Close the cap and the water streams should stop. Open the cap and when the water streams out again, can you “pinch” two streams together using your fingers?


Materials: A tack, and a plastic water bottle with cap, and bathtub


[am4show have=’p8;p9;p11;p38;p92;p93;p30;p57;p84;’ guest_error=’Guest error message’ user_error=’User error message’ ]


What’s happening? First, you’re getting clean. Second, you’re playing with pressure again. Watch the water level when you uncap the bottle. As the water streams out, the water level in the bottle moves downward. Notice how the space for air increases in the top of the bottle as the water line moves down. (The air comes in through the mouth of the bottle.) When you cap on the bottle, there’s no place for air to enter the bottle. The water line wants to move down, but since there’s no incoming air to equalize the pressure, the flow of water through the holes stops. Technically speaking, there’s a small decrease in pressure in the air pocket in the top of the bottle and therefore the air outside the bottle has a higher pressure that keeps the water in the bottle. Higher pressure pushes!


[/am4show]


Yeast is a simple living organism that can break down sugars into ethyl alcohol (ethanol) and carbon dioxide. The process by which yeast breaks down sugars into ethyl alcohol and carbon dioxide is called fermentation.


The tiny gas bubbles rising in the liquid mixture in the bottle are carbon dioxide gas bubbles that are made during the fermentation. The balloon on the bottle expands and becomes inflated because it traps the carbon dioxide gas being produced.


The ethyl alcohol that is made during fermentation stays in the liquid mixture. When fermentation is finished, the liquid mixture usually contains about 13 percent ethyl alcohol. The rest of the liquid is mostly water.


The ethyl alcohol can be concentrated by a process called distillation. During distillation, the liquid fermentation mixture is heated to change the ethyl alcohol and some of the water into a vapor. The vapor is then cooled to change it back into a liquid. This distilled liquid contains 95 percent ethyl alcohol and 5 percent water. The remaining water can be removed by special distillation methods to give pure ethyl alcohol.


In some areas of the United States, ethyl alcohol is blended with gasoline to make a motor fuel known as gasohol. About 8 percent of the gasoline sold in the United States is gasohol.


Gasohol burns more cleanly than pure gasoline. This results in fewer pollutants being released into the air. The use of gasohol as a motor fuel is particularly important in cities that have a lot of smog.


Corn syrup is a mixture of simple and complex sugars and water. It is made by breaking down the starch in corn into sugars. The process is called digestion. In this experiment you changed the sugars in corn syrup using yeast. Much of the ethyl alcohol used to prepare gasohol is made by fermenting corn and corn sugar.


Over one billion gallons of ethyl alcohol are made each year by fermentation of sugars from grains such as corn. Ethyl alcohol is a renewable energy source when it is made by fermenting grains such as corn. This is because the grains, such as corn, are easily grown.


[am4show have=’p8;p9;p11;p38;p92;p22;p49;p70;p84;’ guest_error=’Guest error message’ user_error=’User error message’ ]


Materials


  • One package of yeast
  • Balloon
  • Water
  • Measuring spoons
  • Corn syrup
  • Measuring cup
  • Empty, two-liter plastic drink bottle
  •  Funnel (optional)
  • Sink or bucket


 Procedure


Remove the paper label from around an empty, two-liter, plastic drink bottle. Add two cups of water and one package of yeast to the bottle. Swirl the bottle to mix the water and yeast.


Next, add one-quarter cup of corn syrup to the bottle. You may want to use a small funnel to help you add the corn syrup to the bottle. Swirl the bottle to mix the contents.


Place a deflated balloon over the neck of the bottle. Make sure the balloon fits securely over the neck. Place the bottle in a sink or bucket. Check the bottle and balloon after two hours, and then again after four hours. Finally, check the bottle and balloon after twenty-four hours.


When you have finished with the experiment, pour the contents of the bottle down the sink. Then rinse the bottle and sink with water.


Observations


What color is the yeast mixture? Does the balloon start to inflate after an hour or two? Can you see gas bubbles rising to the surface of the yeast mixture? Does the balloon grow larger with time?


Discussion


You should find that soon after you mix together the yeast, water, and corn syrup, changes start to take place in the bottle. You should notice that a foam forms on top of the liquid mixture. You should also see tiny gas bubbles rising to the surface of the liquid. Also, you should notice that the balloon begins to inflate and become large.


Other Things to Try


Repeat this experiment using one tablespoon of table sugar instead of corn syrup. You should find that yeast can also ferment table sugar into ethyl alcohol and carbon dioxide. Table sugar is made from sugar cane and sugar beets. Since sugar cane and sugar beets are renewable plants, ethyl alcohol made from fermenting sugar from these plant products is another renewable energy source.


[/am4show]


A peanut is not a nut, but actually a seed. In addition to containing protein, a peanut is rich in fats and carbohydrates. Fats and carbohydrates are the major sources of energy for plants and animals.


The energy contained in the peanut actually came from the sun. Green plants absorb solar energy and use it in photosynthesis. During photosynthesis, carbon dioxide and water are combined to make glucose. Glucose is a simple sugar that is a type of carbohydrate. Oxygen gas is also made during photosynthesis.


The glucose made during photosynthesis is used by plants to make other important chemical substances needed for living and growing. Some of the chemical substances made from glucose include fats, carbohydrates (such as various sugars, starch, and cellulose), and proteins.


Photosynthesis is the way in which green plants make their food, and ultimately, all the food available on earth. All animals and nongreen plants (such as fungi and bacteria) depend on the stored energy of green plants to live. Photosynthesis is the most important way animals obtain energy from the sun.


Oil squeezed from nuts and seeds is a potential source of fuel. In some parts of the world, oil squeezed from seeds-particularly sunflower seeds-is burned as a motor fuel in some farm equipment. In the United States, some people have modified diesel cars and trucks to run on vegetable oils.


Fuels from vegetable oils are particularly attractive because, unlike fossil fuels, these fuels are renewable. They come from plants that can be grown in a reasonable amount of time.
[am4show have=’p8;p9;p11;p38;p92;p22;p49;p70;p75;p84;’ guest_error=’Guest error message’ user_error=’User error message’ ]
Materials


  • Shelled peanut
  • Small pair of pliers
  • Match or lighter
  • Sink


Download Student Worksheet & Exercises


Procedure


ASK AN ADULT TO HELP YOU WITH THIS EXPERIMENT. DO NOT DO THIS EXPERIMENT BY YOURSELF. The fuel from the peanut can flare up and burn for a longer time than expected.


Close the drain in the kitchen sink. Fill the sink with water until the bottom of the sink is just covered.


Using a small pair of pliers, hold the peanut over the sink containing water. Ask an adult to hold the flame of a lit match or lighter directly under the peanut. When the peanut starts to burn, the lit match or lighter can be removed.


Allow the peanut to burn for one minute. MAKE SURE AN ADULT REMAINS PRESENT AND MAKE SURE TO HOLD THE PEANUT OVER THE SINK. To extinguish the burning peanut, drop it into the water. After you have extinguished the peanut, allow it to cool and then examine it carefully.


Observations


How long does it take for the peanut to start to burn? Does the peanut burn with a clean flame or a sooty flame? What color is the flame? What color does the peanut turn when it burns? Did the size of the peanut change after it has burned for several minutes?


Discussion


You should find that the peanut ignites and burns after a lit match or lighter is held under it for a few seconds. Although you only let the peanut burn for one minute as a safety measure, the peanut would burn for many minutes.


In this experiment, when the peanut burns, the stored energy in the fats and carbohydrates of the peanut is released as heat and light. When you eat peanuts, the stored energy in the fats and carbohydrates of the peanut is used to fuel your body.


Other Things to Try


Hold one end of a piece of uncooked spaghetti in a pair of pliers. Ask an adult to hold the flame of a lit match or lighter under the other end of the spaghetti. When the spaghetti starts to burn, place it in an aluminum pie pan that is in the sink. Make sure to extinguish the burning spaghetti with water when you are finished with the experiment. How does the burning of the spaghetti compare with the burning of the peanut?


Exercises 


  1. What is the process called where plants get food from the sun?
    1. Osteoporosis
    2. Photosynthesis
    3. Chlorophyll
    4. Metamorphosis
  2. Where does all life on the planet get its food?
  3. List two ways that we could use the energy in a peanut:

[/am4show]


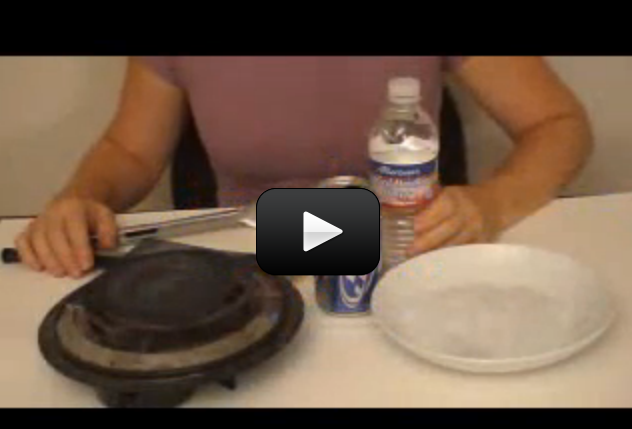
Fossil fuels, which include petroleum, natural gas, and coal, supply nearly 90 percent of the energy needs of the United States and other industrialized nations. Because of their high demand, these nonrenewable energy resources are rapidly being consumed. Coal supplies are expected to last about a thousand years.


We must find other sources of energy to meet the increasing fuel demands of modern society. Important alternate sources of energy include: solar, wind, biomass, hydroelectric, geothermal, nuclear, and tidal energy.


One of the benefits of using alternate sources of energy is that many of them are “clean.” This means that they do not cause pollution. Also, many alternative energy sources are renewable energy sources. They are replaced naturally-such as plant life-or are readily available – such as the sun and wind. In addition, the use of renewable forms of energy will allow us to stretch out our current supply of fossil fuels so they will last longer.


In this chapter you will learn how biomass, or organic matter, can be an important energy source. Plants are the most important biomass energy source. Plant material can be burned directly-as with wood-or it can be converted into a fuel by other means. In the experiments that follow you will explore: how water can be heated by composting grass, how a peanut burns, and how corn syrup can be made into ethyl alcohol.
[am4show have=’p8;p9;p11;p38;p92;p22;p49;p70;p84;’ guest_error=’Guest error message’ user_error=’User error message’ ]
Materials


  • Freshly cut grass clippings
  • Cooking thermometer (optional)
  • Empty two-liter plastic drink bottle
  • Rake
  • Water
  • Styrofoam cup

Procedure


Ask an adult to help you collect freshly cut grass clippings. You will need enough grass clippings to fill about two large grocery bags. Rake the grass clippings into a pile on a shady spot in the yard. In some parts of the country you will only be able to do this in the spring and summer months when grass grows.


Fill a two-liter plastic bottle with cold water. Starting at the top of the pile dig a hole down into the grass clippings just large enough for the plastic bottle. Place the plastic bottle in the hole, and then fill around it with grass clippings. The top of the plastic bottle should stick out of the pile of grass clippings slightly.


Check the water in the bottle after it has been in the pile of grass clipping for at least twenty-four hours. If you have a cooking thermometer, place it in the bottle for thirty seconds and then read the temperature on the thermometer. If you do not have a cooking thermometer, carefully remove the bottle of water from the pile of grass clippings. Feel the sides of the plastic bottle. CAUTION-THE BOTTLE MAY BE VERY WARM, SO AVOID BURNING YOURSELF. Pour some of the water into a Styrofoam cup and look for water vapor rising from the cup. Place the bottle back into the pile of grass clippings and check it again each day for several days.


Observations


After twenty-four hours in the grass clippings, is the water in the plastic bottle warm when you check it? If you check the water with a thermometer, what is the temperature of the water?


When you pour some of the water into a Styrofoam cup, do you see water vapor rising from the cup?


How many days does the water remain warm?


Does the pile of grass clippings become smaller after a few days? What does the pile of grass clippings look like when the water is no longer warm?


Discussion


The water in the plastic bottle should be warm after the bottle has been in the pile of grass clippings for twenty-four hours. The heat that warms the water comes from the pile of grass clippings, which is decomposing or composting.


The decomposition of dead plant and animal material is nature’s way of recycling important chemical substances. Complex chemical substances in dead plant and animal material are broken down into simple chemical substances during the process. These simpler chemical substances then become nutrients for living plants and soil animals.


Heat is given off during the decomposition process. The more material that is decomposing, the more heat is produced. In this experiment, a large amount of heat is given off by the decomposing grass clippings. This is because you started with a large pile of grass clippings, and grass clippings decompose quickly.


A pile of decomposing grass clippings can reach a temperature of over 71°C (160°F). The water in the bottle may absorb enough heat from the decomposing grass to reach a temperature as high as 60°C (140°F) after a day or two. For comparison, most household hot water heaters are set to deliver hot water with a temperature between 54°C (130°F) and 71°C (160°F).


Other Things to Try


How much water can you heat with composting grass clippings? To find out, repeat this experiment with a one-gallon plastic milk jug filled with water. Does the water in the jug become warm?


Repeat this experiment, but remove the bottle of water from the pile of grass clippings after twenty-four hours. Fill a second two-liter plastic bottle with cold water from a sink faucet and place it into the pile of grass clippings. Does the water in this bottle become warm after a couple of hours?


Is there a minimum amount of grass clippings that are needed to make enough heat to heat the water in a two-liter plastic bottle? To find out, surround a two-liter plastic bottle filled with water with just enough grass clippings to cover it. Does the water become warm after twenty-four hours?
[/am4show]


This is a recording of a recent live teleclass I did with thousands of kids from all over the world. I've included it here so you can participate and learn!

Discover the world of clean, renewable energy that scientists are developing today! Explore how they are harnessing the energy of tides and waves, lean how cars can run on just sunlight and water, tour a hydroelectric power plant, visit the largest wind farms on the planet, and more! You’ll learn how streets are being designed to generate electricity, how teenagers are making jet fuel from pond scum in their garage, and how 70 million tons of salt can provide free, clean energy 24 hours a day forever! During class, you’ll learn how to bake solar cookies, magni-fry marshmallows and do the experiment with light Einstein won a Nobel prize for that is the basis of all photovoltaic energy today.

Materials:

  • One cup each: hot (not boiling), cold, and room temperature water
  • Cardboard box, shoebox size or larger.
  • Aluminum foil
  • Plastic wrap (like Saran wrap or Cling wrap)
  • Hot glue, razor, scissors, tape
  • Wooden skewers (BBQ-style)
  • Black construction paper
  • Cookie dough (your favorite kind!)
  • Chocolate, large marshmallows, & graham crackers if you want to make s’mores! If not, try just the large marshmallow.
  • Large page magnifier (also called a Fresnel lens, found at drug stores or places that also sell reading glasses, or at Amazon.com)

[am4show have='p8;p9;p11;p38;p92;p97;' guest_error='Guest error message' user_error='User error message' ]


What's Going On?

For the main experiment:

The Fresnel ("FRAY-nell") lens is a lot like a magnifying glass. Convex lenses (like a handheld magnifier) are thicker in the middle - you can actually feel it with your fingers. A Fresnel lens was first used in the 1800s to focus the beam in a lighthouse. It has lots of ridges you can feel with your fingers. It's basically a series of magnifying lenses stacked together in rings (like in a tree trunk) to magnify an image.

The Fresnel lens in this project is focusing the incoming sunlight much more powerfully than a regular hand held magnifier. But focusing the light is only part of the story with your roaster. The other part is how your food cooks as the light hits it. If your food is light-colored, it's going to cook slower than darker (or charred) food. Notice how the burnt spots on your food heat up more quickly!

The best thing about Fresnel lenses is that they are lightweight, so they can be very large (which is why light houses used these designs). Fresnel lenses curve to keep the focus at the same point, no matter close your light source is.

Questions to Ask

  • What other kinds of food can you roast with your setup?
  • Does a white marshmallow or chocolate-covered marshmallow cook faster? Why?
  • Does it matter what angle you point your roaster at?
  • Will it work with an indoor light?
  • Why do you need the foil? Can you skip it?
  • Do we have to use a Fresnel lens? What about a handheld magnifier - would that work?

[/am4show]


Greetings and welcome to the study of astronomy! This first lesson is simply to get you excited and interested in astronomy so you can decide what it is that you want to learn about astronomy later on.


We’re going to cover a lot in this presentation, including: the Sun, an average star, is the central and largest body in the solar system and is composed primarily of hydrogen and helium.


The solar system includes the Earth, Moon, Sun, seven other planets and their satellites (moons) and smaller objects such as asteroids and comets. The structure and composition of the universe can be learned from the study of stars and galaxies. Galaxies are clusters of billions of stars, and may have different shapes. The Sun is one of many stars in our own Milky Way galaxy. Stars may differ in size, temperature, and color.


Materials


  • Popcorn
  • Pencil

[am4show have=’p8;p9;p11;p38;p92;p17;p44;p90;p73;p83;’ guest_error=’Guest error message’ user_error=’User error message’ ]


Download Student Worksheet & Exercises


Before watching the video, print out your worksheet so you can jot things down as you listen. Then grab your pencil (and a handful of popcorn) and fill it in as you go along, or simply enjoy the show and fill it out at the end.


What’s Going On?

Astrophysics is the branch of astronomy that deals with the physics of the universe. Astronomers study celestial objects (things like stars, planets, moons, asteroids, comets, galaxies, and so forth) that exist outside Earth’s atmosphere. It’s the one field of study that combines the most science, engineering and technology areas in one fell swoop. Astronomy is also one of the oldest sciences on the planet.


Early astronomers tracked the movement of the stars so accurately that in most cases, we’ve only made minor adjustments to their data. Although Galileo wasn’t the first person to look through a telescope, he was the first to point it at the stars. Originally, astronomy was used for celestial navigation and was involved with the making of calendars, but nowadays it’s mostly classified in the field called astrophysics.


Questions to Answer:


  1. What happened to Pluto?
  2.  How does the Sun make energy?
  3.  Which planet is your favorite and why?
  4.  How many moons around Jupiter and Saturn can you see with binoculars?
  5.  What’s the difference between a galaxy and a black hole?
  6.  How many Earths can fit inside the Sun?

[/am4show]


This is a recording of a recent live teleclass I did with thousands of kids from all over the world. I’ve included it here so you can participate and learn, too


Our solar system includes rocky terrestrial planets (Mercury, Venus, Earth, and Mars), gas giants (Jupiter and Saturn), ice giants (Uranus and Neptune), and assorted chunks of ice and dust that make up various comets and asteroids.


Did you know you can take an intergalactic star tour without leaving your seat? To get you started on your astronomy adventure, I have a front-row seat for you in a planetarium-style star show. I usually give this presentation at sunset during my live workshops, so I inserted slides along with my talk so you could see the pictures better. This video below is long, so I highly recommend doing this with friends and a big bowl of popcorn. Ready?
[am4show have=’p8;p9;p11;p38;p92;p96;’ guest_error=’Guest error message’ user_error=’User error message’ ]
Materials:


  • Two balls, one larger than the other (like a soccer and a tennis ball, or bouncy ball and tennis ball)
  • Print out this worksheet to fill in as we go along!


Download the Black Hole Explorer Game. This was created by a team of scientists, you can use this set of instructions to build your own black hole board game. It plays two different ways: competitively and cooperatively. Black Hole Explorer was created for NASA by the Harvard-Smithsonian Center for Astrophysics.


This is a PDF download, so you’ll need Adobe Acrobat Reader to view the file. It’s fun, easy, and totally free for your family and students to enjoy!


Key Concepts

The solar system is the place that is affected by the gravity our sun. Our solar system includes rocky terrestrial planets (Mercury, Venus, Earth, and Mars), gas giants (Jupiter and Saturn), ice giants (Uranus and Neptune), and assorted chunks of ice and dust that make up various comets and asteroids. The eight planets follow a near-circular orbit around the sun, and many have moons.


Two planets (Ceres and Pluto) have been reclassified after astronomers found out more information about their neighbors. Ceres is now an asteroid in the Asteroid Belt between Mars and Jupiter. Beyond Neptune, the Kuiper Belt holds the chunks of ice and dust, like comets and asteroids as well as larger objects like dwarf planets Eris and Pluto.


Beyond the Kuiper belt is an area called the Oort Cloud, which holds an estimated 1 trillion comets. The Oort Cloud is so far away that it’s only loosely held in orbit by our sun, and constantly being pulled gravitationally by passing stars and the Milky Way itself. The Voyager Spacecraft are beyond the heliosphere (the region influenced gravitationally by our sun) but has not reached the Oort Cloud.


Our solar system belongs to the Milky Way galaxy. Galaxies are stars that are pulled and held together by gravity. Globular clusters are massive groups of stars held together by gravity, using housing between tens of thousands to millions of stars. Some galaxies are sparse while others are packed so dense you can’t see through them. Galaxies also like to hang out with other galaxies (called galaxy clusters ), but not all galaxies belong to clusters, and not all stars belong to a galaxy.


After a star uses up all its fuel, it can either fizzle or explode. Planetary nebulae are shells of gas and dust feathering away. Neutron stars are formed from stars that go supernova, but aren’t big and fat enough to turn into a black hole. Pulsars are spinning neutron stars with their poles aimed our way. Neutron stars with HUGE magnetic fields are known as magnetars. Black holes are the leftovers of a BIG star explosion. There is nothing to keep it from collapsing, so it continues to collapse forever. It becomes so small and dense that the gravitational pull is so great that light itself can’t escape.


The sun holds 99% of the mass of our solar system. The sun’s equator takes about 25 days to rotate around once, but the poles take 34 days. You may have heard that the sun is a huge ball of burning gas. But the sun is not on fire, like a candle. You can’t blow it out or reignite it. So, where does the energy come from?


The nuclear reactions deep in the core transforms 600 million tons per second of hydrogen into helium. This gives off huge amounts of energy which gradually works its way from the 15 million-degree Celsius temperature core to the 15,000 degree Celsius surface.


Active galaxies have very unusual behavior. There are several different types of active galaxies, including radio galaxies (edge-on view of galaxies emitting jets), quasars (3/4 view of the galaxy emitting jets), blazars (aligned so we’re looking straight down into the black hole jet), and others. Our own galaxy, the Milky Way, has a super-massive black hole at its center, which is currently quiet and dormant.


Dying stars blow off shells of heated gas that glow in beautiful patterns. William Hershel (1795) coined the term ‘planetary nebula’ because the ones he looked at through 18th century telescopes looked like planets. They actually have nothing to do with planets – they are shells of dust feathering away.


When a star uses up its fuel, the way it dies depends on how massive it was to begin with. Smaller stars simply fizzle out into white dwarfs, while larger stars can go supernova. A recent supernova explosion was SN 1987. The light from Supernova 1987A reached the Earth on February 23, 1987 and was close enough to see with a naked eye from the Southern Hemisphere.


Questions to Ask

  1. What’s your favorite part about Jupiter?
  2. Which planet is NOW your favorite (after listening to the slide show presentation)?
  3. What happened to the stars in the last slide of the show?
  4. How many moons around Jupiter or Saturn can you see with binoculars?
  5. What’s the difference between a galaxy and a black hole?
  6. How many Earths fit inside the sun?

[/am4show]