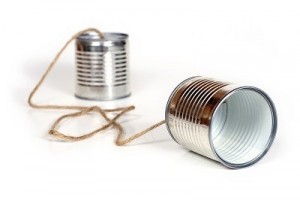
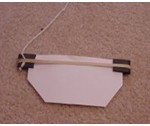
telephoneThis is the experiment that all kids know about… if you haven’t done this one already, put it on your list of fun things to do. (See the tips & tricks at the bottom for further ideas!)


We’re going to break this into two steps – the first part of the experiment will show us why we need the cups and can’t just hook a string up to our ear.  Are you ready?


[am4show have=’p8;p9;p11;p38;p92;p16;p43;p64;’ guest_error=’Guest error message’ user_error=’User error message’ ]


You need:


  • Table
  • Spoon (or whatever is handy)
  • Partner

1. Sit at a table.


2. Have your partner sit at the other end of the table.


3. Have your partner very lightly scratch the table with the spoon.


4. Listen to see if you can hear it.


5. While your partner is scratching, put your ear on the table. Do you hear a difference in the sound?


6. Switch roles so your partner gets a chance to try.


Did you notice how you could hear the soft spoon-scratching sound (I love a good alliteration) quite clearly when your head was on the table? The sound waves moved quickly through the table so they lost little of the loudness and quality of the original sound. When sound travels through the air, the sound energy gets dispersed (spread out) much more than through the table, so the sound does not travel as far nor as clearly. This next one is an oldie but a goodie!


A Couple Cups of Conversation


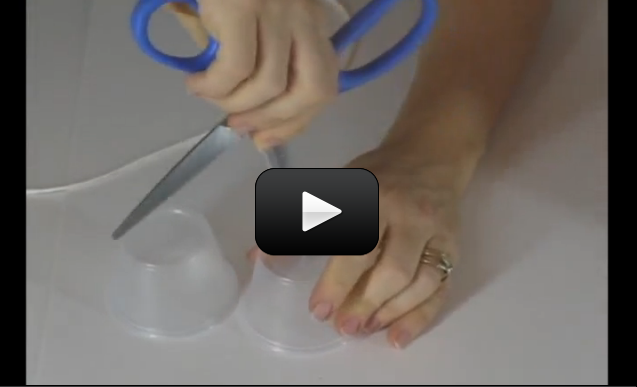
1. Using the scissors or a nail poke a hole in the middle of the bottom of both cups. Get an adult to help you with this. Since this isn’t biology, no bleeding allowed!


2. Thread an end of the string through the hole in the bottom of the cup and tie a big knot in it to keep it from sliding through the hole.


3. Do the same thing with the other cup so that when you are done you have a cup attached to both ends of the string.


4. Take one of the cups for yourself and hand the other cup to your partner. Walk apart from one another until the string is fairly taut.


5. Have your partner hold the cup up to his or her ear while you whisper into your cup.


6. Can your partner hear you? If not, see if you can stretch the string a little more.


7. Switch roles and try again.


The string being a solid and having tightly packed molecules allows the sound wave to move quickly and clearly through it. You can talk very quietly in one cup and yet your partner can still hear you fairly well.


Tips & Tricks

You can try different types of cups (foam, plastic, metal (like tin foil), paper…) and also change the sizes of the cups – is bigger or smaller better?  You can also change the connection between the cups – have you tried yarn, wool, string, nylon fishing line, rope, clothesline, or a braided combination?  You can also stick a slinky in place of the string of ‘space phones’.


[/am4show]


Kazoo

Cut a piece of tissue paper the same length as a plastic comb (make sure the comb’s teeth are close together). Fold the tissue paper in half, wrapping it around the teeth of the comb.  Place it lightly between your lips and hummm… you’ll feel an odd vibrational effect on your lips as your kazoo makes a sound! You can try different papers, including waxed paper, parchment, tracing paper, and more!


Poppers

Cut the neck off a small balloon (balloons made for water bombs work well) and stretch it over the opening of a film canister. Pinch the drum head and pull up before you release – POP! You can change the pitch by adjusting the stretch of the drum head.
[am4show have=’p8;p9;p11;p38;p92;p16;p43;p64;’ guest_error=’Guest error message’ user_error=’User error message’ ]


Bobby Pin Strummer

Straighten three bobby pins. (A bobby pin, when straightened, has two different sides – a smooth side and a rippled side.) Wrap a rubber band tightly around the base of an empty tin can. Slip a clothespin under the rubber band, jaw-end first so it clamps onto the rim. Place three clothespins around the rim of the soup can equally spread apart (about 120 degrees apart). Clamp the rippled end of a bobby pin into each clothespin, so that your contraction now looks like a can with three legs. Strum each pin, one at a time. What happens if you clamp the pins at different heights?


What’s happening? Plucking the pins is just like plucking the string of a guitar, and when you change the heights, you’re changing the pitch. When the pin is shorter, it tends to vibrate faster, thus giving you a higher pitch.


String Test

Push the end of a length of string and a length of light thread through one hole punched in the bottom of a can. Tie the ends inside the can to a paperclip so they stay put. The can should have two different strings coming out of the bottom. Place the can near your ear as you strum each strand (hold the light taut while you pluck it – you may need an extra set of hands.) Can you make the pitch go both high and then low? What other types of string (yarn, thread, clothesline, heavy string, steel cable, fishing line, etc. ) can you use?


What’s going on? When you pluck the string, it starts vibrating (moving back and forth really fast). The vibration in the string starts the bottom of the cup vibrating, which starts the air inside the cup vibrating, too! The cup helps focus those vibrations (sounds) to your ear.


Styro-Phone

Make yourself an old-fashioned telephone by punching a small hole in the bottom of two cups (foam, paper, tin soup cans… is there a difference?) and threading string into each one. Tie the end of the string inside the cup to a paper clip so the string stays put. Does the string need to be tight, or does it work when its loose? How can you go around corners?


What’s going on? When you talk into the cup, you are making the air molecules bang around (vibrate), and some of them bang into the end with the string, which also picks up the vibration. The vibration continues along that string and into the receiver cup, which focuses the sound so you can hear it. The cup channels your voice into the other person’s ear.


Variation: Cut the phones apart and tie each end to a slinky and test it out (we call these “Space Phones”, and after you try it, you’ll see why). What happens when you bang the slinky into different things (like walls, metal chairs, wood tables, or the floor)?


Mystery Pitch

Blow across the mouth of an empty soda or water bottle to make a whistling sound. Add a little water and try again. Add more water and try again. Add more water. What happens if you use a glass bottle?


Place an empty glass under the sink faucet and tap the side of it with a fork and listen to the sound. Slowly fill the glass with water while you continue to tap. What happens if you use a spoon? Knife? Whisk? Wooden spoon?


Which of the experiments above (adding water to the bottle or removing water from the bottle) increases the pitch and which decreases the pitch?


Sonic Rulers

Hold one end of a ruler tightly on the table, overhanging half the length off the table. Pluck the free end and listen… (lift and let go… WHAP!) What if you make the free end of the ruler shorter? Longer? Wood? Plastic? Metal? Two rulers? Stacked? Side-by-side?


Sneaky Clocks

Place an alarm clock (the kind that ticks) or a timer that is ringing on a table and listen. Now place your ear on the table. Fill a zipper bag of water and press it between you and the clock to hear the difference. Next, place the clock in a closed metal can (like a cookie tin or coffee can). What about a paper bag? A glass jar? A newspaper-filled shoebox?


Shoebox Guitar

You can illustrate the vibrating string principle using a guitar string – when you pluck the string, your ears pick up a sound. If you have extra rubber bands, wrap them around an open shoebox to make a shoebox guitar.  You can also cut a hole in the lid (image left) and use wooden pencils to lift the rubber band off the surface of the shoebox.
[/am4show]


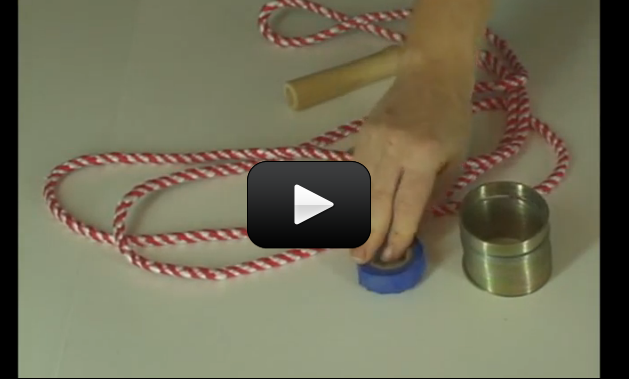
Since we can’t see soundwaves as they move through the air, we’re going to simulate one with rope and a friend. This will let you see how a vibration can create a wave. You’ll need at least 10 feet of rope (if you have 25 or 50 feet it’s more fun), a piece of tape (colored if you have it), a slinky, and a partner. Are you ready?


[am4show have=’p8;p9;p11;p38;p92;p16;p43;p64;p75;’ guest_error=’Guest error message’ user_error=’User error message’ ]


1. Give one end of the rope to your partner.


2. Stretch the rope out so that it is a bit slack.


3. Now move your hand up and down. Feel free to do it several times in a row. Your partner should keep his or her hands as still as possible.


4. Watch the waves move from your hand to the other end of the rope.


5. Now let your partner create waves.


6. If you wish, you can try to time your vibrations and create waves with specific frequencies. A frequency of one Hertz is fairly easy to do (one rope shake per second). Can you create rope waves of higher frequencies? You may find that your arm gets tired pretty quickly!


Your hand is the vibrating particle. As your hand vibrated up and down, you moved the particles of the rope up and down. As those particles of rope vibrated, they vibrated the particles next to them. As they vibrated, they vibrated the particles next to them and so on and so forth. So the wave moved from your hand across the room. Did your hands move across the room. Nope, but the wave you created with your vibrating hand did.


This is the way energy travels. Why is the rope wave energy? Because the particles moved a distance against a force. Work was done on the particles. In fact, when you shook the rope, your energy from your body moved across the room with the wave and was transferred (moved to) your partner. Your partner’s hands could feel the energy you put into the rope in the first place. The work you did on the rope was transferred by the rope wave and did work on your partners hand. You have moved energy across the room!


Now… let’s add another element to this experiment…


Transverse Waves

1. Put a piece of (colored if possible) tape in about the middle of the rope.


2. Tie your rope to something or let your friend hold on to one end of it.


3. Now pull the rope so that it is a bit slack but not quite touching the floor.


4. Vibrate your arm. Move your arm up and down once and watch what happens.


5. Now, vibrate your arm a bunch of times (not too fast) and see the results. Notice the action of the tape in the middle of the rope.
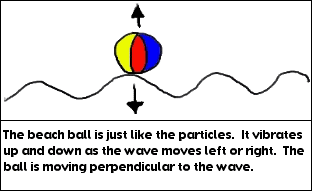

transvWhat you’ve done is create a transverse wave. With a transverse wave, if the particle (in this case your hand) moves up and down, the wave will move to the left and/or right of the particle. The word perpendicular means that if one thing is up and down, the other thing is left and right. A transverse wave is a wave where the particle moves perpendicular to the medium. The medium is the material that’s in the wave. The medium in this case is the rope.


For example, in a water wave, the medium is the water. Your hand moved up and down, but the wave created by your hand moved across the room, not up. The wave moved perpendicular to the motion of your hand. Did you take a look at the tape? The tape represents a particle in the wave. Notice that it too, was going up and down. It was not moving along the wave. In any wave the particles vibrate, they do not move along the wave.


Longitudinal Waves

Now that you’ve seen a transverse wave, let’s take a look at a longitudinal wave. Here’s what you do:


1. Put a piece of tape on one slinky wire in the middle or so of the slinky.


2. Let your friend hold on to one end of the slinky or anchor the slinky to a chair or table.


3. Now stretch the slinky out, but not too far.


4. Quickly push the slinky toward your friend, or the table, and then pull it back to its original position. Did you see the wave?


5. Now do it again, back and forth several times and watch where the slinky is bunched up and where it’s spread out.


6. Notice the tape. What is it doing?
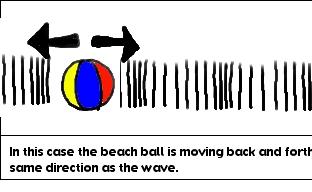

longitudinalHere you made a longitudinal wave. A longitudinal wave is where the particle moves parallel to the medium. In other words, your hand vibrated in the same direction (parallel to the direction) the wave was moving in. Your vibrating hand created a wave that was moving in the same direction as the hand was moving in. Did you take a look at the tape? The tape was moving back and forth in the same direction the wave was going.


Do you see the difference between a transverse wave and a longitudinal wave? In a transverse waves the particles vibrate in a different direction (perpendicular) to the wave. In a longitudinal wave the particles vibrate in the same direction (parallel) to the wave.


What’s the Difference between Amplitude and Wavelength?

Here’s an easy way to get a feel for amplitude:


1. Put a piece of tape in about the middle of the rope.


2. Tie your rope to something or let your friend hold on to one end of it.


3. Now pull the rope so that it is a bit slack but not quite touching the floor.


4. Your friend should hold their hands as still as possible.


5. Vibrate your hand but only move it up and down about a foot or so. Have your partner pay attention to how that feels when the wave hits him or her.


6. Now, vibrate your hand but now move it up and down 2 or 3 feet. How does that feel to your partner?


7. Have your partner do the vibrating now and see what you feel.


You created two different amplitude waves. The first wave had a smaller amplitude than the second wave. What you and your partner should have felt was more energy the second time. The wave should have hit your hand with more energy when the wave had more amplitude.


Here’s a great way to visualize wavelength:


1. Tie your rope to something or let your friend hold on to it.


2. Now pull the rope so that it is a bit slack but not quite touching the floor.


3. Your friend should hold their hands as still as possible.


4. Now begin vibrating your hand fairly slowly. In this case, it works better if you move your hand in a circle.


5. Try to make a wavelength with the rope. In other words it will look like you’re playing jump rope.


6. Now try a one and a half wavelengths.


7. Can you get two or more wavelengths? You’ve really got to get your hand moving to get it.


waves


In this image, the left wave is ONE wavelength, the middle is 1.5 wavelegnths, and the right is TWO wavelengths.  See the difference?


Did you notice how the frequency of your hand determined the wavelength of the rope? The faster your hand, moved the more wavelengths you could get.
[/am4show]


Think of your ears as ‘sound antennas’.  There’s a reason you have TWO of these – and that’s what this experiment is all about.  You can use any noise maker (an electronic timer with a high pitched beep works very well), a partner, a blindfold (not necessary but more fun if you have one handy), and earplugs (or use your fingers to close the little flap over your ear – don’t stick your fingers IN your ears!).


[am4show have=’p8;p9;p11;p38;p92;p16;p43;p64;’ guest_error=’Guest error message’ user_error=’User error message’ ]


Here’s what you need:


  • noisemaker
  • partner
  • you
  • blindforld
  • earplugs


Download Student Worksheet & Exercises


1. Sit or stand in the middle of a room.


2. Close your eyes or put on the blind fold.


3. Have your partner walk to another part of the room as quietly as possible.


4. Have your partner make the noisemaker make a noise.


5. With your eyes still closed, point to where you think the sound came from.


6. Try it several times and then let your partner have a turn.


How well did you do? Probably pretty well. Your ears are very good at determining where sounds are coming from. The reason your ears are so good at detecting the direction of a sound is due to the fact that sound hits one ear slightly before it hits the other ear. You brain does an amazing bit of quick math to make its best guess as to where the sound is coming from and how far away it is. Let’s do a little more with this.


1. Sit or stand in the middle of a room.


2. Close your eyes or put on the blindfold.


3. Have your partner walk to another part of the room as quietly as possible.


4. Have you partner move the sound maker around the room like before, but this time make sure your partner makes the sound directly in front of you, behind you and over your head as well.


5. With your eyes still closed, point to where you think the sound came from.


6. Try it several times and then let your partner have a turn.


Did you get fooled this time? This works sometimes, but not always. What I hope happened was when the noisemaker was above your head, directly in front of you or directly behind you, you had trouble determining where the sound was coming from. Can you guess why this might have happened? Your ears are placed directly across from one another. If a noise happens directly in front of you, it hits your both ears at the exact same time. Your brain has no clues as to where the sound is coming from if the sound hits both ears at the same time so it makes its best guess. In this case, its best guess may be wrong. Let’s try one more thing here.


1. Sit or stand in the middle of a room.


2. Close your eyes or put on the blindfold.


3. Put an ear plug in one of your ears. If you don’t have one, use your finger to cover your ear. Be very careful not to put your finger into your ear. Just use your finger to cover the hole in your ear.


4. Have your partner walk to another part of the room as quietly as possible.


5. Have your partner make the noisemaker make a noise. This will work best if the noise is not too loud.


6. With your eyes still closed, point to where you think the sound came from.


7. Try it several times and then let your partner try to find the sound.


How did you do with just one ear? Did you get fooled a little more often this time? Your brain has fewer clues to work with so it does the best it can with what it has.


Exercises 


  1. How do your two ears work together to determine the location of a sound?
  2. Does it matter what frequency (how high or low) the sound is? Are some frequencies easier to detect than others with only one ear?

[/am4show]


In this experiment you will be adjusting the length of string of a pendulum until you get a pendulum that has a frequency of .5 Hz, 1 Hz and 2 Hz. Remember, a Hz is one vibration (or in this case swing) per second. So .5 Hz would be half a swing per second (swing one way but not back to the start). 1 Hz would be one full swing per second. Lastly, 2 Hz would be two swings per second. A swing is the same as a vibration so the pendulum must move away from where you dropped it and then swing back to where it began for it to be one full swing/vibration.


[am4show have=’p8;p9;p11;p38;p92;p16;p43;p64;p75;’ guest_error=’Guest error message’ user_error=’User error message’ ]


You’ll need:


  • 3 Foot Long String
  • A Weight that can be tied to the end of the string
  • A Timer or Stopwatch
  • Masking Tape
  • A Table or Chair
  • A Partner is helpful


Advanced students: Download your What is Frequency?


1. Tie your weight (the official name of the weight on the end is bob. Personally I’ve always preferred the name Shirley, but Bob it is.) to the end of the 3 foot string. If you’ve done the gravity lesson in the Mechanics set of lessons you’ll remember that the weight of the bob doesn’t matter. Gravity accelerates all things equally, so your pendulum will swing at the same speed no matter what the weight of the bob.


2. Tape the string to a table or chair or door jam. Make sure it can swing freely at about 3 feet of length.


3. I would recommend starting with 1 Hz. It tends to be the easiest to find. Then try .5 Hz and then 2 Hz.


4. The easiest way I’ve found to do this is to start the pendulum swinging and at the same time start the timer. Count how many swings you get in ten seconds.


5. Now, adjust the string. Make it longer or shorter and try again. When you get 10 swings in 10 seconds you got it! That’s one swing per second. You should be able to get quite close to one swing per second which is 1 Hz.


6. Now try to get .5 Hz. In this case you will get 5 swings in ten seconds when you find it. (A little hint, the string is pretty long here.)


7. Now speed things up a bit and see if you can get 2 Hz. Be prepared to count quick. That’s 2 swings a second or 20 swings in 10 seconds! (Another little hint, the string is quite short for this one.)


Did you get all three different frequency pendulums? It takes a while but my classes found it rather fun. You’ve created three different frequencies. 2 Hz being the fastest frequency. That was pretty fast right? Can you imagine something going at 10 Hz? 100 Hz? 1,000,000 Hz? I told you things were moving at outrageous speeds!


[/am4show]


This is a recording of a recent live teleclass I did with thousands of kids from all over the world. I’ve included it here so you can participate and learn, too!


Sound is a form of energy, and is caused by something vibrating. So what is moving to make sound energy?


Molecules. Molecules are vibrating back and forth at fairly high rates of speed, creating waves. Energy moves from place to place by waves. Sound energy moves by longitudinal waves (the waves that are like a slinky). The molecules vibrate back and forth, crashing into the molecules next to them, causing them to vibrate, and so on and so forth. All sounds come from vibrations.


Materials:


  • 1 tongue-depressor size popsicle stick
  • Three 3″ x 1/4″ rubber bands
  • 2 index cards
  • 3 feet of string (or yarn)
  • scissors
  • tape or hot glue

[am4show have=’p8;p9;p11;p38;p92;p100;’ guest_error=’Guest error message’ user_error=’User error message’ ]


What’s Going On?

Do you remember where all waves come from? Vibrating particles. Waves come from vibrating particles and are made up of vibrating particles.


Here’s rule one when it comes to waves…. the waves move, the particles don’t. The wave moves from place to place. The wave carries the energy from place to place. The particles however, stay put. Here’s a couple of examples to keep in mind.


If you’ve ever seen a crowd of people do the ‘wave’ in the stands of a sporting event you may have noticed that the people only vibrated up and down. They did not move along the wave. The wave, however, moved through the stands.


Another example would be a duck floating on a wavy lake. The duck is moving up and down (vibrating) just like the water particles but he is not moving with the waves. The waves move but the particles don’t. When I talk to you, the vibrating air molecules that made the sound in my mouth do not travel across the room into your ears. (Which is especially handy if I’ve just eaten an onion sandwich!) The energy from my mouth is moved, by waves, across the room.


Questions to Ask

  • Does the shape of the index card matter?
  • What happens if you change the number of rubber bands?
  • What if you use a different thickness rubber band?
  • What happens if you make the string longer or shorter?
  • can you make a double by stacking two together?
  • Can you get a second or third harmonic by swinging it around faster?
  • Why do you need the index card at all?

[/am4show]


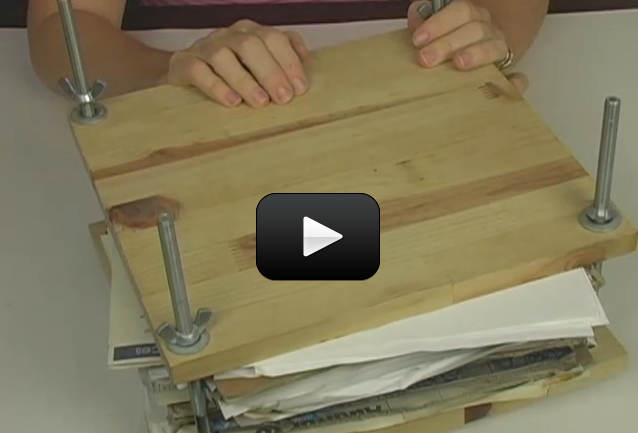
Art and science meet in a plant press. Whether you want to include the interesting flora you find in your scientific journal, or make a beautiful handmade greeting card, a plant press is invaluable. They are very cheap and easy to make, too!


[am4show have=’p8;p9;p11;p38;p92;p27;p54;p153;p65;p78;p86;’ guest_error=’Guest error message’ user_error=’User error message’ ]


Here’s what you need:


  • Newspaper
  • Cardboard
  • Belt buckle or large, strong rubber bands
  • Sheets of paper


Download Student Worksheet & Exercises


Here’s how you make it:


  1. Cut the cardboard into square pieces.
  2. Cut or fold the sheets of newspaper into squares the same size as the cardboard.
  3. Place 4 sheets of newspaper between each piece of cardboard. You can also use white copy paper.
  4. Place the plants you want to press in between the newspaper.
  5. If you want, you can sandwich the plant press with the wood planks for added pressure.
  6. Bind it tightly with the rubber bands or a belt buckle.
  7. Leave it in a dry place for two to four days.

How does it work? The pressure from the rubber band/string pushes the water from the plants. The water is then absorbed by the newspaper. Since the pressure is the key to the press, it’s important not to open the press for at least two days (more is better).


Troubleshooting: The press works by pushing the moisture out of the plants, so any way moisture can stay in (or get back in) to the plants will make the press less effective. First, storing the press in a dry place is essential. If the press is left in a moist area not only will in not work, but it will grow mold and ruin the press and the plants. Conversely, if the pressure is not great enough, the moisture will not be pressed out. Thus make sure that the plants fit in the press, are bound tightly, and that the press is stored in a dry area for at very least two days.


Exercises


  1. Draw and describe the functions of the following plant parts: root, stem.
  2. What two major processes happen at the leaf?
  3. Why are flowers necessary?
  4. Do all plants have roots, stems, leaves and flowers?

[/am4show]


The way animals and plants behave is so complicated because it not only depends on climate, water availability, competition for resources, nutrients available, and disease presence but also having the patience and ability to study them close-up.


We’re going to build an eco-system where you’ll farm prey stock for the predators so you’ll be able to view their behavior. You’ll also get a chance to watch both of them feed, hatch, molt, and more! You’ll observe closely the two different organisms and learn all about the way they live, eat, and are eaten.


[am4show have=’p8;p9;p11;p38;p92;p28;p55;p153;p65;p69;p78;p86;p87;’ guest_error=’Guest error message’ user_error=’User error message’ ]


This experiment comes in two parts. The materials you need for both parts are:


  • four 2-liter soda bottles, empty and clean
  • 2 bottle caps
  • one plastic lid that fits inside the soda bottle
  • small piece of fruit to feed fruit flies
  • aluminum foil
  • plastic container with a snap-lid (like an M&M container or film can)
  • scissors and razor with adult help
  • tape
  • ruler
  • predators: spiders OR praying mantis OR carnivorous plants (if you’re using carnivorous plants, make sure you do this Carnivorous Greenhouse experiment first so you know how to grow them successfully)
  • soil, twigs, small plants

Fruit Fly Trap

In order to build this experiment, you first need prey. We’re going to make a fruit fly trap to start your prey farm, and once this is established, then you can build the predator column. Here’s what you need to do to build the prey farm:


Download Student Worksheet & Exercises


Did you know that fruit flies don’t really eat fruit? They actually eat the yeast that growing on the fruit. Fruit flies actually bring the yeast with them on the pads of their feet and spread the yeast to the fruit so that they can eat it. You can tell if a fruit fly has been on your fuit because yeast has begun to spread on the skin.


When you have enough fruit flies to transfer to the predator-prey column, put the entire fruit fly trap in the refrigerator for a half hour to slow the flies down so you can move them.


If you find you’ve got way too many fruit flies, you might want to trap them instead of breed them. Remove the foil buckets every 4-7 days or when you see larvae on the fruit, and replace with fresh ones and toss the fruit away. Don’t toss the larvae in the trash, or you’ll never get rid of them from your trash area! Put them down the drain with plenty of water.


Predator-Prey Column

You can use carnivorous plants, small spiders, or praying mantises. If you use plants, choose venus flytraps, sundews, or butterworts and make sure your soil is boggy and acidic. You can add a bit of activated charcoal to the soil if you need to change the pH. Since the plants like warm, humid environments, keep the soil moist enough for water to fog up the inside on a regular basis. You know you’ve got too much moisture inside if you find algae on the plants and dirt. (If this happens, poke a couple of air holes.) Don’t forget to only use distilled water for the carnivorous plants!


Keep the column out of direct sunlight so you don’t cook your plants and animals.


Exercises


  1. What shape is the head of the mantis?
  2.  How many eyes does a praying mantis have?
  3.  How else has the mantis head evolved to stalk their prey?
  4.  How does a praying mantis hold its food?
  5.  Do fruit flies eat fruit?
  6.  How do predators and prey change over time?

[/am4show]


As you walk around your neighborhood, you probably see many other people, as well as some birds flying around, maybe some fish swimming down a local stream, and perhaps even a lizard darting behind a bush or a frog sitting contently on top of a pond. Most likely, you know that all of these living things are animals, but they are even more closely related than that.


[am4show have=’p8;p9;p11;p38;p92;p28;p55;p153;p86;p87;’ guest_error=’Guest error message’ user_error=’User error message’ ]


Tide pools are best observed undisturbed. But, they’re too shallow to snorkel… So how to can we explore them without removing their inhabitants? With an Aquascope! Aquascopes are very cheap and easy to make. With only a coffee can, some plastic food rap, and a couple of other items you can make a window into the world of tide-pools! In principle, aquascopes allow us to take a glass-bottom-boat tour of the rich ecosystems of tide pools. The plastic acts as the glass, while the coffee can allows us to break the distorting surface of the water.


Here’s a video to get you started:


Download Student Worksheet & Exercises


Here’s what you need:


  • milk or juice jug
  • plastic wrap
  • scissors
  • rubber band

Here’s the steps to make the waterscope:


  1. Clean out your jug first. Then cut the bottom and top off without cutting off the handle.
  2. Cover the opening at the bottom with your plastic wrap, securing it in place with the rubber band. Use tape if you need extra support to hold the plastic wrap in place. The window needs to be water-tight.
  3. Place the waterscope in the water, bottom-side down. You’ll be able to see all kinds of interesting creatures through your scope!
  4. Try to keep your scope still so the animals won’t be afraid to come close to you so you can have a good peek at their world.   The aquascope works the same way snorkel goggles work—except you don’t have to get wet!

Why this works: You can’t see clearly underwater with just your eyes for a couple of reasons. One is the thickness of the lens on your eye, but the main one is the index of refraction of water is different than that of air. Light rays bend when they travel from one medium to another of different density (refer to the Disappearing Beaker experiment for more on this topic). The amount that the light bends depends on refractive index of each substance along with the shape. The eye focuses images on the retina, and our eyes are built for viewing in air. Water has approximately the same refractive index as the cornea which effectively eliminating the cornea’s focusing properties. This is why you see a blurred image underwater. The eyes are focusing the image them far behind the retina instead of on the retina. The waterscope puts a layer of air between your eyes and the water (the same way goggles do) so you can view underwater without blurred vision.


Troubleshooting: The key to the aquascope is the taught plastic wrap. If it’s loose, or if there are holes, it won’t work as well. Make sure that the plastic wrap is securely fastened to the can, and is stretched tight. If you find your waterscope leaks, use a stronger rubber band to secure your plastic wrap in place. You can alternatively use strong waterproof tape or hot glue to secure it in place, but use the rubber band first so you can stretch the film tightly over the open end.


Exercises


  1. What is the term for light rays bending?
  2. Why is underwater vision blurred?
  3. How can we focus vision underwater?

[/am4show]


Some insects are just too small! Even if we try to carefully pick them up with forceps, they either escape or are crushed. What to do?


Answer: Make an insect aspirator! An insect aspirator is a simple tool scientists use to collect bugs and insects that are too small to be picked up manually. Basically it’s a mini bug vacuum!


[am4show have=’p8;p9;p11;p38;p92;p28;p55;p153;p65;p69;p86;p87;’ guest_error=’Guest error message’ user_error=’User error message’ ]


Download Student Worksheet & Exercises


Here’s what we’ll need:


  • A small vial or test tube with a (snug fitting) two-holed rubber stopper.
  • Two short pieces of stiff plastic tubing. We’ll call them tube A and tube B.
  • Fine wire mesh (very small holes because this is what will stop the bugs from going into your mouth!)
  • A cotton ball.
  • One to two feet of flexible rubber tubing.
  • Duct tape or a rubber band.

Here’s how we make it:


  • Insert the tube A and Tube B into the stopper such that the stopper is in the middle of both pieces.
  • Bend both A and B plastic tubing 90 degrees away from each other. Their ends should be pointing away from each other.
  • Cut a square of mesh large enough to the end of the plastic tubing. Tape (or rubber-band) the mesh over bottom of tube A only. Remember, if you cover both of the tubes the bugs won’t be able to enter the aspirator.
  • Insert a small amount of cotton ball into the other side of tube A (not enough to block airflow, just enough to help filter the dust and particles entering the vial.
  • Cut another piece of mesh and cover the other end of Tube A. Secure that mesh with another piece of tape/rubber band.
  •  Fit the rubber tubing over the top of tube B (the bent side).
  • Fit the stopper into the vial/test tube.

How it works: To use the aspirator, hold the end of the rubber tubing near the insects you want to collect, and suck through the top of tube A. The vacuum you create sucks the insects into the vial/test tub (make sure they can fit in the tube!).


Troubleshooting: The bugs aren’t being pulled into the vial! In that case the suction may not be strong enough. Remove the cotton ball and try again. If it still is not working check to make sure the aspirator is air-tight (is the stopper fitting snuggly into the vial? Are there cracks/holes around or in the plastic tubes?).


TIP: I kept eating bugs! Make sure your wire mesh is very fine (the holes are smaller than the bugs you’re trying to collect). Otherwise you may be ordering a lunch you don’t want!


Exercises


  1. Why don’t we use a large vacuum to suck up the bugs?
  2.  Why do we need a small mesh covering on the end of the straw that we suck on?
  3.  Why do we need to be careful about catching ants?
  4.  What insects did you catch that you rarely see?
  5.  What familiar insects did you catch? (answers may vary).

[/am4show]


How does salt affect plant growth, like when we use salt to de-ice snowy winter roads? How does adding fertilizer to the soil help or hurt the plants? What type of soil best purifies the water? All these questions and more can be answered by building a terrarium-aquarium system to discover how these systems are connected together.


[am4show have=’p8;p9;p11;p38;p92;p28;p55;p153;p65;p78;p86;p87;’ guest_error=’Guest error message’ user_error=’User error message’ ]


Here’s what you need:


  • two 2-liter soda bottles, empty and clean
  • two bottle caps
  • scissors and razor with adult help
  • tape
  • water, soil, and plants

Here’s what you do:


Download Student Worksheet & Exercises


Water drips off the roof of your house, down your driveway, over your toothbrush and down the sink, through farm fields, and into rivers, lakes and oceans. While traveling, this water picks up litter, nutrients, salts, oil, and also gets purified by running through soil. All of this has an affect on fish and animals that live in the oceans. The question is, how does it affect the marine ecosystem? That’s what this experiment will help you discover.


Land and aquatic plants are excellent indicators of changes in your terraqua system. By using fast-germinating plats, you’ll see the changes in a relatively short about of time. You can also try grass seeds (lawn mixes are good, too), as well as radishes and beans. Pick seeds that have a life cycle of less than 45 days.


How to Care for your TAC (Terra-Aqua Column) EcoSystem:

  1. Keep the TAC out of direct sunlight.
  2. Keep your cotton ball very wet using only distilled water. Your plants and triops are very sensitive to the kind of water you use.
  3. Feed your triops once they hatch (see below for instructions)
  4. Keep an eye on plant and algae growth  (see below for tips)

About the plants and animals in your TAC:


  1. Carnivorous plans are easy to grow in your TAC, as they prefer warm, boggy conditions, so here are a few tips: keep the TAC out of direct sunlight but in a well-lit room. Water should condense on the sides of the column, but if lots of black algae start growing on the soil and leaves, poke more air holes! Water your soil with distilled water, or you will burn the roots of your carnivorous plants.  Trim your plants if they crowd your TAC.
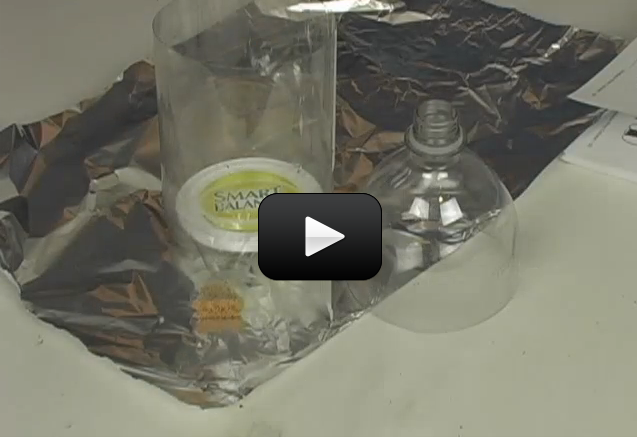
  2. If you run out of fruit flies, place a few slices of banana or melon in an aluminum cup or milk jig lid at the bottom of a soda bottle (which has the top half cut off). Invert the top half and place it upside down into the bottom part so it looks like a funnel and seal with tape so the flies can’t escape.  Make a hole in the cap small enough so only one fly can get through. The speed of a fruit fly’s life cycle (10-14 days) depends on the temperature range (75-80 degrees). Transfer the flies to your TAC. If you have too many fruit flies, discard the fruit by putting it outside (away from your trash cans) or flush it down the toilet.
  3. You can’t feed a praying mantis too much, and they must have water at all times. You can place 2-3 baby mantises in a TAC at one time with the fruit flies breeding below. When a mantis molts, it can get eaten by live crickets, so don’t feed if you see it begin to molt. When you see wings develop, they are done fully mature. Adult mantises will need crickets, houseflies, and roaches in addition to fruit flies.
  4. Baby triops will hatch in your TAC aquarium. The first day they do not need food. Crush a green and brown pellet and mix together. Feed your triop half of this mixture on the 2nd and the other half on the 4th day (no food on day 3). After a week, feed one pellet per day, alternating between green and brown pellets. You can also feed them shredded carrot or brine shrimp to grow them larger. If you need to add water (or if the water is too muddy), you can replace half the water with fresh, room temperature distilled water. You can add glowing beads when your triop is 5 days old so you can see them swimming at night (poke these through the access hole).

Exercises


  1.  What three things do plants need to survive?
  2.  What two things do animals need to survive?
  3.  Does salt affect plants? How?

[/am4show]


Most weather stations have anemometers to measure wind speed or wind pressure. The kind of anemometer we’re going to make is the same one invented back in 1846 that measures wind speed. Most anemometers use three cups, which is not only more accurate but also responds to wind gusts more quickly than a four-cup model.


Some anemometers also have an aerovane attached, which enables scientists to get both speed and direction information. It looks like an airplane without wings – with a propeller at the front and a vane at the back.


Other amemometers don’t have any moving parts – instead they measure the resistance of a very short, thin piece of tungsten wire. (Resistance is how much a substance resists the flow of electrical current. Copper has a low electrical resistance, whereas rubber has a very high resistance.) Resistance changes with the material’s temperature, so the tungsten wire is heated and placed in the airflow. The wind flowing over the wire cools it down and increases the resistance of the wire, and scientists can figure out the wind speed.


[am4show have=’p8;p9;p11;p38;p92;p71;p84;p100;p30;p57;’ guest_error=’Guest error message’ user_error=’User error message’ ]


Scientists also use sonic anemometers, which use ultrasonic waves to detect wind speed. The great thing about sonic anemometers is that they can measure speed in all three directions, which is great for studying wind that is not all moving in the same direction (like gusts and hurricanes).


Sonic anemometers send a sound wave from one side to the other and measure the time it takes to travel. Which means that these can also be used as thermometers, as temperature will also change the speed of sound. Since there are no moving parts, you’ll find these types of anemometers in harsh conditions, like on a buoy or in the desert, where salt disintegrates and dust gets in the way of the cup-style anemometer. The big drawback to sonic anemometers is water (like dew or rain): if the transducers get wet, it changes the speed of sound and gives an error in the reading.


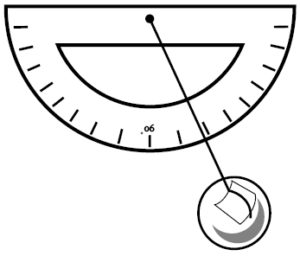
The quickest anemometer to make is to attach the end of a string (about 12″ long) to a ping pong ball. Suspend the string in the wind, like from a fan or hair dryer (use the ‘cool’ setting). Since the ball is so lightweight, it’s quite responsive to wind speed.


Add a protractor flipped upside down (so you can measure the angle of the string). Use the measurements below to figure out the wind speed. For example, mark the 90o angle with “0 mph”. This is your ping pong ball at rest in no wind. Use the numbers below to make the rest:


Angle Wind Speed
degrees mph
90 0
80 8
70 12
60 15
50 18
40 21
30 26
20 33

Now let’s make a four-cup anemometer. Here’s what you need to do:


Materials:


  • four lightweight cups
  • two sticks or popsicle sticks
  • tape or hot glue
  • tack or pin
  • pencil with eraser on top
  • block of foam (optional)


How steady was the wind that you measured? If you place your anemometer next to a door or a window, is there wind? How fast? Where could you place your anemometer so you can quickly read it each day?


By making two anemometers, one that you already know what the wind speed is, you can easily figure out how to calibrate the other. For example, how fast do the cups fly around when the ping pong ball anemometer indicates 12 mph? Can you see each cup, or are they a blur? You’ll get a feel for how to read the four-cup model by eye once you’ve had practice.


[/am4show]


Temperature is a way of talking about, measuring, and comparing the thermal energy of objects.


[am4show have=’p8;p9;p11;p38;p92;p23;p50;p151;p152;p71;p84;p88;p30;p57;’ guest_error=’Guest error message’ user_error=’User error message’ ]


The words “hot” , “cold”, “warm” and so forth describe what scientists call thermal energy. Thermal energy is how much the molecules are moving inside an object. The faster molecules move, the more thermal energy it has.


Objects that have molecules moving very quickly are said to have high thermal energy or high temperature. Like a cloud of steam, for example. The higher the temperature, the faster the molecules are moving inside that steam cloud.


Temperature is just a speedometer for molecules. The speed of the molecules in ice cream is way slower than it is in a hot shower.


If everything is made of molecules, and these molecules are speeding up and slowing down, what do you think happens if they change speed a lot? Do you think my kitchen table will start vibrating across the room if the table somehow gets too hot?


No, probably not, my table will not start jumping around the room, no matter how hot it gets.  It would melt down into a mush first! But some interesting things do happen when molecules change speeds.


There are three common states of matter – I bet you know what they are already: solid, liquid, and gas.  Water is really special because it can a solid, liquid or gas state pretty normal temperatures. You don’t need a mad scientist lab to get it to go into any of these three states.


Water is one of the only substances that expands instead of shrinks when it freezes. It’s also a polar molecule, meaning that if you stick a static charge next to it, like a balloon you rubbed on your head, you can get the water to move.


Imagine an icicle. The water is in a solid state when it’s an icicle. It’s holding its shape. The molecules in the water are held together by strong, stiff bonds. These bonds hold the water molecules in a tight pattern called a matrix. This matrix holds the water molecules in a crystalline pattern.


Can you imagine breaking off an icicle and sticking it in a tea kettle on the stove? Now, let’s pretend to turn on the heat. The heat is transferred from the stove to the kettle to the icicle.


What happens to our icicle?


As the icicle absorbs the heat, the molecules begin to vibrate faster (the temperature is increasing). When the molecules vibrate at a certain speed (they gain enough thermal energy) they stretch those strong, stiff matrix crystalline bonds enough that the bonds become more like rubber bands or springs and they stretch and get all loose-goosey.


That’s when the icicle becomes liquid. There are still bonds between the molecules, but they are a bit loose, allowing the molecules to move and flow around each other.


The act of changing from a solid to a liquid is called melting. The temperature at which a substance changes from a solid to a liquid is called its melting point. For water, that point is 32° F or 0° C. (Remember those numbers from the slide with all the temperature scales?)


Now if we continue heating, we see our icicle go from solid to completely liquid, and now we notice bubbling. What’s going on now?


Now the temperature is at 212° F or 100° C and the water is going from a liquid state to a gaseous state. This means that the loosey goosey bonds that connected the molecules before have been stretched as far as they go, can’t hold on any longer and “POW!” they snap.


Those water molecules no longer have any bonds and are free to roam aimlessly around the room (think toddlers). Gas molecules move at very quick speeds as they bounce, jiggle, crash and zip around any container they are in (kind of like toddles on sugar). The act of changing from a liquid to a gas is called evaporation or boiling and the temperature at which a substance changes from a liquid to a gas is called its boiling point.


Now if we turn off the stove, what do you think happens?


Our gaseous water molecules get close to something cool, they will combine and turn from gaseous to liquid state.  This is what happens to your bathroom mirror during a shower or bath. The gaseous water molecules that are having fun bouncing and jiggling around the bathroom get close to the mirror. The mirror is colder than the air. As the gas molecules get close they slow down due to loss of temperature. If they slow enough, they form loosey goosey bonds with other gas molecules and change from gas to liquid state.


The act of changing from gas to liquid is called condensation. The temperature at which molecules change from a gas to a liquid is called the condensation point. Clouds are made of hundreds of billions of tiny little droplets of liquid water that have condensed onto particles of some sort of dust.


Now let’s turn the heat down a bit more and see what happens. Imagine we stick the tea kettle in the freezer. As the temperature drops and the molecules continue to slow, the bonds between the molecules can pull them together tighter and tighter.


Eventually the molecules will fall into a matrix, a pattern, and stick together quite tightly. This would be the solid state. The act of changing from a liquid to a solid is called freezing and the temperature at which it changes is called (say it with me now) freezing point.


Think about this for a second – is the freezing point and melting point of an object at the same temperature? Does something go from solid to liquid or from liquid to solid at the same temperature?


If you said yes, you’re right!


The freezing point of water and the melting point of water are both 32° F or 0° C. The temperature is the same. It just depends on whether it is getting hotter or colder as to whether the water is freezing or melting.


The boiling and condensation point is also the same point.


Crazy Temperatures

Let’s do an experiment. Fill one glass with hot water (not boiling), another with ice water, and a third with room temperature water. Place a finger in the hot water and a finger in the ice cold water for a minute or two. Then stick both fingers in the room temperature cup.


How does that feel?


Did it seem that each finger detected a different temperature when placed in the room temperature cup? Weird! So what gives?


Materials:


  • 3 cups of water (see video)
  • your hands


Download Student Worksheet & Exercises


Your skin contains temperature sensors that work by detecting the direction heat flow (in or out of your body), not temperature directly. These sensors change temperature depending on their surroundings. So when you heated up one finger, and then placed it in cooler water, the heat flowed out of your body, telling your brain it was getting cooler. The ice water finger was detecting a heat flow into your body… and presto! You have one confused brain.


In order for heat to flow, you need to have a temperature difference. Did you notice how your fingers weren’t good thermometers with this experiment? This is why scientists had to invent the thermometer, because the human body isn’t designed to detect temperature, only heat flow. 


[/am4show]


Also known as an udometer or pluviometer or ombrometer, or just plan old ‘rain cup’, this device will let you know how much water came down from the skies. Folks in India used bowls to record rainfall and used to estimate how many crops they would grow and thus how much tax to collect!


These devices reports in “millimeters of rain” or “”centimeters of rain” or even inches of rain”.  Sometimes a weather station will collect the rain and send in a sample for testing levels of pollutants.


While collecting rain may seem simple and straightforward, it does have its challenges! Imagine trying to collect rainfall in high wind areas, like during a hurricane. There are other problems, like trying to detect tiny amounts of rainfall, which either stick to the side of the container or evaporate before they can be read on the instrument. And what happens if it rains and then the temperature drops below freezing, before you’ve had a chance to read your gauge? Rain gauges can also get clogged by snow, leaves, and bugs, not to mention used as a water source for birds.


So what’s a scientist to do?


Press onward, like all great scientists! And invent a type of rain gauge that will work for your area. We’re going to make a standard cylinder-type rain gauge, but I am sure you can figure out how to modify it into a weighing precipitation type (where you weigh the amount in the bottle instead of reading a scale on the side), or a tipping bucket type (where a funnel channels the rain to a see-saw that tips when it gets full with a set amount of water) , or even a buried-pit bucket (to keep the animals out).
[am4show have=’p8;p9;p11;p38;p92;p71;p84;p100;p30;p57;’ guest_error=’Guest error message’ user_error=’User error message’ ]
Materials:


  • two water bottles
  • scissors
  • rainy day (or use water)


[/am4show]


French physicist Blaise Pascal. He developed work on natural and applied sciences as well being a skilled mathematician and religious philosopher.

A barometer uses either a gas (like air) or a liquid (like water or mercury) to measure pressure of the atmosphere. Scientists use barometers a lot when they predict the weather, because it’s usually a very accurate way to predict quick changes in the weather.


Barometers have been around for centuries – the first one was in the 1640s!


At any given momen, you can tell how high you are above sea level by measure the pressure of the air. If you measure the pressure at sea level using a barometer, and then go up a thousand feet in an airplane, it will always indicate exactly 3.6 kPa lower than it did at sea level.


Scientists measure pressure in “kPa” which stands for “kilo-Pascals”. The standard pressure is 101.3 kPa at sea level, and 97.7 kPa 1,000 feet above sea level. In fact, every thousand feet you go up, pressure decreases by 4%. In airplanes, pilots use this fact to tell how high they are. For 2,000 feet, the standard pressure will be 94.2 kPa. However, if you’re in a low front, the sea level pressure reading might be 99.8 kPa, but 1000 feet up it will always read 3.6 kPa lower, or 96.2 kPa.


[am4show have=’p8;p9;p11;p38;p92;p71;p84;p100;p30;p57;’ guest_error=’Guest error message’ user_error=’User error message’ ]
Materials:


  • balloon
  • straw or stick
  • water glass or clean jam jar
  • index card
  • tape


At standard pressure, depending on the kind of barometer you have, you’ll find they all read one of these: 101.3 kPa; 760 mmHg (millimeters of mercury, or “torr”); 29.92 inHg (inches of mercury); 14.7 psi (pounds per square inch); 1013.25 millibars/hectopascal. They are all different unit systems that all say the same thing.


Just like you can have 1 dollar or four quarters or ten dimes or 20 nickels or a hundred pennies, it’s still the same thing.


Why does water boil differently at sea level than it does on a mountain top?


It takes longer to cook food at high altitude because water boils at a lower temperature. Water boils at 212oF at standard atmospheric pressure. But at elevations higher than 3,500 feet, the boiling point of water is decreased.


The boiling point is defined when the temperature of the vapor pressure is equal to the atmospheric pressure. Think of vapor pressure as the pressure made by the water molecules hitting the inside of the container above the liquid level. But since the saucepan of water is not sealed, but rather open to the atmosphere, the vapor simply expands to the atmosphere and equals out. Since the pressure is lower on a mountaintop than at sea level, this pressure is lower, and hence the boiling point is lowered as well.


[/am4show]


Hygrometers measure how much water is in the air, called humidity. If it's raining, it's 100% humidity. Deserts and arid climates have low humidity and dry skin. Humidity is very hard to measure accurately, but scientists have figured out ways to measure how much moisture is absorbed by measuring the change in temperature (as with a sling psychrometer), pressure, or change in electrical resistance (most common).

The dewpoint is the temperature when moist air hits the water vapor saturation point. If the temperature goes below this point, the water in the air will condense and you have fog. Pilots look for temperature and dewpoint in their weather reports to tell them if the airport is clear, or if it''s going to be 'socked in'. If the temperature stays above the dewpoint, then the airport will be clear enough to land by sight. However, if the temperature falls below the dewpoint, then they need to land by instruments, and this takes preparation ahead of time.

A sling psychrometer uses two thermometers (image above), side by side. By keeping one thermometer wet and the other dry, you can figure out the humidity using a humidity chart.  Such as the one on t page two of this page. The psychrometer works because it measures wet-bulb and dry-bulb temperatures by slinging the thermometers around your head. While this sounds like an odd thing to do, there's a little sock on the bottom end of one of the thermometers which gets dipped in water. When air flows over the wet sock, it measures the evaporation temperature, which is lower than the ambient temperature, measured by the dry thermometer.

Scientists use the difference between these two to figure out the relative humidity. For example, when there's no difference between the two, it's raining (which is 100% humidity). But when there's a 9oC temperature difference between wet and dry bulb, the relative humidity is 44%. If there's 18oC difference, then it's only 5% humidity.

You can even make your own by taping two identical thermometers to cardboard, leaving the ends exposed to the air. Wrap a wet piece of cloth or tissue around the end of one and use a fan to blow across both to see the temperature difference!

One of the most precise are chilled mirror dewpoint hygrometers, which uses a chilled mirror to detect condensation on the mirror's surface. The mirror's temperature is controlled to match the evaporation and condensation points of the water, and scientists use this temperature to figure out the humidity.

We're going to make a very simple hygrometer so you get the hand of how humidity can change daily. Be sure to check this instrument right before it rains. This is a good instrument to read once a day and log it in your weather data book.

[am4show have='p8;p9;p11;p38;p92;p71;p84;p100;p30;p57;' guest_error='Guest error message' user_error='User error message' ]
Materials:

  • single hair
  • index card
  • tack
  • cardboard
  • tape
  • scissors
  • dime


This device works because human hair changes length with humidity, albeit small. We magnify this change by using a lever arm (the arrow and mark the different places on the cardboard to indicate levels of humidity. Does all hair behave the same way? Does it matter if you use curly or straight hair, or even the color of the hair? Does gray work better than blonde?

[/am4show]


First invented in the 1600s, thermometers measure temperature using a sensor (the bulb tip) and a scale. Temperature is a way of talking about, measuring, and comparing the thermal energy of objects. We use three different kinds of scales to measure temperature. Fahrenheit, Celsius, and Kelvin. (The fourth, Rankine, which is the absolute scale for Fahrenheit, is the one you’ll learn about in college.)


Mr. Fahrenheit, way back when (18th century) created a scale using a mercury thermometer to measure temperature. He marked 0° as the temperature ice melts in a tub of salt. (Ice melts at lower temperatures when it sits in salt. This is why we salt our driveways to get rid of ice). To standardize the higher point of his scale, he used the body temperature of his wife, 96°.


As you can tell, this wasn’t the most precise or useful measuring device. I can just imagine Mr. Fahrenheit, “Hmmm, something cold…something cold. I got it! Ice in salt. Good, okay there’s zero, excellent. Now, for something hot. Ummm, my wife! She always feels warm. Perfect, 96°. ” I hope he never tried to make a thermometer when she had a fever.


Just kidding, I’m sure he was very precise and careful, but it does seem kind of weird. Over time, the scale was made more precise and today body temperature is usually around 98.6°F.


Later, (still 18th century) Mr. Celsius came along and created his scale. He decided that he was going to use water as his standard. He chose the temperature that water freezes at as his 0° mark. He chose the temperature that water boils at as his 100° mark. From there, he put in 100 evenly spaced lines and a thermometer was born.


Last but not least Mr. Kelvin came along and wanted to create another scale. He said, I want my zero to be ZERO! So he chose absolute zero to be the zero on his scale.


Absolute zero is the theoretical temperature where molecules and atoms stop moving. They do not vibrate, jiggle or anything at absolute zero. In Celsius, absolute zero is -273 ° C. In Fahrenheit, absolute zero is -459°F (or 0°R). It doesn’t get colder than that!


As you can see, creating the temperature scales was really rather arbitrary:


“I think 0° is when water freezes with salt.”
“I think it’s just when water freezes.”
“Oh, yea, well I think it’s when atoms stop!”


Many of our measuring systems started rather arbitrarily and then, due to standardization over time, became the systems we use today. So that’s how temperature is measured, but what is temperature measuring?


Temperature is measuring thermal energy which is how fast the molecules in something are vibrating and moving. The higher the temperature something has, the faster the molecules are moving. Water at 34°F has molecules moving much more slowly than water at 150°F. Temperature is really a molecular speedometer.


Let’s make a quick thermometer so you can see how a thermometer actually works:


[am4show have=’p8;p9;p11;p38;p92;p100;p30;p57;’ guest_error=’Guest error message’ user_error=’User error message’ ]


Materials:


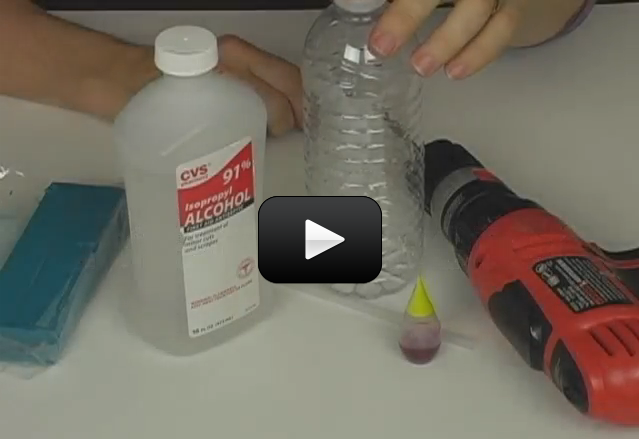
  • plastic bottle
  • straw
  • hot glue or clay
  • water
  • food coloring
  • rubbing alcohol
  • index card and pen


When something feels hot to you, the molecules in that something are moving very fast. When something feels cool to you, the molecules in that object aren’t moving quite so fast. Believe it or not, your body perceives how fast molecules are moving by how hot or cold something feels. Your body has a variety of antennae to detect energy. Your eyes perceive certain frequencies of electromagnetic waves as light. Your ears perceive certain frequencies of longitudinal waves as sound. Your skin, mouth and tongue can perceive thermal energy as hot or cold. What a magnificent energy sensing instrument you are!


[/am4show]


The shell of chicken eggs are made mostly of calcium carbonate (CaCO3), which which reacts with distilled white vinegar (try placing a raw egg in a glass of vinegar overnight). The shell has over 15,000 tiny little mores that allows air and moisture to pass through, and a protective outer coating to keep out harmful things like dust and bacteria.

We're going to peek inside of an egg and discover the transparent protein membrane (made of the same protein your hair is made up of: keratin) and also peek in the air space that forms when the egg cools and contracts (gets smaller). Can you find the albumen (the egg white)? It's made up of mostly water with about 40 different proteins.

[am4show have='p8;p9;p28;p55;p65;p86;p87;' guest_error='Guest error message' user_error='User error message' ]

The chalaze are the thin rope-like strands that anchor the yolk in the center of the egg. The more prominent they are, the fresher the egg you've got. The yolk itself is more protein than water compared with the white. That's where you'll find all the fat, lecithin, and minerals. The exact shade of color of the yolk is going to depend on the hen that actually laid it.

Materials:

  • bowl
  • chicken egg
  • spoon
  • toothpick

Here's what you do:

[/am4show]

Download Egg Dissection Lab here for older grades (5-12th) and here for younger grades (K-4).

Click here to go to part 16:Clam Dissection


Your voice is a vibration, and you can feel it when you place a hand on your throat when you speak. As long as there are molecules around, sound will be traveling though them by smacking into each other.


That’s why if you put an alarm clock inside a glass jar and remove the air, there’s no sound from the clock. There’s nothing to transfer the vibrational energy to – nothing to smack into to transfer the sound. It’s like trying to grab hold of fog – there’s nothing to hold on to.


[am4show have=’p8;p9;p11;p38;p92;p16;p43;p151;p64;p75;p100;’ guest_error=’Guest error message’ user_error=’User error message’ ]


Here’s what you need:


  • two tongue depressors
  • three rubber bands, one at least 1/4″ wide
  • paper
  • tape


Download Student Worksheet & Exercises


What’s going on? The rubber band vibrates as you blow across the rubber band and you get a great sound. You can change the pitch by sliding the cuffs (this does take practice).


Troubleshooting: This project is really a variation on the Buzzing Hornets, but instead of using wind to vibrate the string, you use your breath. The rubber band still vibrates, and you can change the vibration (pitch) by moving the cuffs closer together or further apart. If the cuffs don’t slide easily, just loosen the rubber bands on the ends. You can also make additional harmonicas with different sizes of rubber bands, or even stack three harmonicas on top of each other to get unusual sounds.


If you can’t get a sound, you may have clamped down too hard on the ends. Release some of the pressure by untwisting the rubber bands on the ends and try again. Also – this one doesn’t work well if you spit too much – wet surfaces keep the rubber band from vibrating.


Exercises


  1. What is sound?
  2. What is energy?
  3. What is moving to make sound energy?

[/am4show]


hornet1Sound is everywhere. It can travel through solids, liquids, and gases, but it does so at different speeds. It can rustle through trees at 770 MPH (miles per hour), echo through the ocean at 3,270 MPH, and resonate through solid rock at 8,600 MPH.
Sound is made by things vibrating back and forth, whether it’s a guitar string, drum head, or clarinet. The back and forth motion of an object (like the drum head) creates a sound wave in the air that looks a lot like a ripple in a pond after you throw a rock in. It radiates outward, vibrating it’s neighboring air molecules until they are moving around, too. This chain reaction keeps happening until it reaches your ears, where your “sound detectors” pick up the vibration and works with your brain to turn it into sound.


You can illustrate this principle using a guitar string – when you pluck the string, your ears pick up a sound. If you have extra rubber bands, wrap them around an open shoebox to make a shoebox guitar. You can also cut a hole in the lid (image left) and use wooden pencils to lift the rubber band off the surface of the shoebox.


[am4show have=’p8;p9;p11;p38;p92;p16;p43;p151;p64;p75;p100;’ guest_error=’Guest error message’ user_error=’User error message’ ]


Materials:


  • index card
  • rubber band
  • 3′ string
  • small piece of craft foam sheet OR a second index card
  • hot glue and glue sticks
  • tape


Download Student Worksheet & Exercises


Why is this happening? When you sling the hornet around, wind zips over the rubber band and causes it to vibrate like a guitar string… and the sound is focused (slightly) by the card. The card really helps keep the contraption at the correct angle to the wind so it continues to make the sound.


Troubleshooting: Most kids forget to put on the rubber band, as they get so excited about finishing this project that they grab the string and start slinging it around… and wonder why it’s so silent! Make sure they have a fat enough rubber band (about 3.5” x ¼ “ – or larger) or they won’t get a sound.


Variations include: multiple rubber bands, different sizes of rubber bands, and trying it without the index card attached. The Buzzing Hornet works because air zips past the rubber band, making it vibrate, and the sound gets amplified just a bit by the index card.


Exercises 


  1. What effect does changing the length of the string have on the pitch?
  2. What vibrates in this experiment to create sound?
  3. Why do we use an index card?

[/am4show]


What’s an inclined plane? Jar lids, spiral staircases, light bulbs, and key rings. These are all examples of inclined planes that wind around themselves.  Some inclined planes are used to lower and raise things (like a jack or ramp), but they can also used to hold objects together (like jar lids or light bulb threads).


Here’s a quick experiment you can do to show yourself how something straight, like a ramp, is really the same as a spiral staircase.


[am4show have=’p8;p9;p11;p38;p92;p14;p41;p151;p75;p85;p88;’ guest_error=’Guest error message’ user_error=’User error message’ ]


Here’s what you need to find:


  • sheet of paper
  • short dowel or cardboard tube from a coat hanger
  • tape
  • ruler

Cut a right triangle out of paper so that the two sides of the right angle are 11” and 5 ½” (the hypotenuse – the side opposite the right angle – will be longer than either of these). Find a short dowel or use a cardboard tube from a coat-hanger.  Roll the triangular paper around the tube beginning at the short side and roll toward the triangle point, keeping the base even as it rolls.


Notice that the inclined plane (hypotenuse) spirals up as a tread as you roll. Remind you of screw threads?  Those are inclined planes. If you have trouble figuring out how to do this experiment, just watch the video clip below:


Download Student Worksheet & Exercises


Inclined planes are simple machines. It’s how people used to lift heavy things (like the top stones for a pyramid).


Here’s another twist on the inclined plane: a wedge is a double inclined plane (top and bottom surfaces are inclined planes). You have lots of wedges at home: forks, knives, and nails just name a few.


When you stick a fork in food, it splits the food apart. You can make a simple wedge from a block of wood and drive it under a heavy block (like a tree stump or large book) with a kid on top.


Exercises


  1. What is one way to describe energy?
    1. The amount of atoms moving around at any given moment
    2. Electrons flowing from one area to another
    3. The ability to do work
    4. The square root of the speed of an electron
  2. Work is when something moves when:
    1. Force is applied
    2. Energy is used
    3. Electrons are lost or gained
    4. A group of atoms vibrate
  3. Name two simple machines:
  4. Name one example of a simple machine:

[/am4show]


We’re going to build monster roller coasters in your house using just a couple of simple materials. You might have heard how energy cannot be created or destroyed, but it can be transferred or transformed (if you haven’t that’s okay – you’ll pick it up while doing this activity).


Roller coasters are a prime example of energy transfer: You start at the top of a big hill at low speeds (high gravitational potential energy), then race down a slope at break-neck speed (potential transforming into kinetic) until you bottom out and enter a loop (highest kinetic energy, lowest potential energy). At the top of the loop, your speed slows (increasing your potential energy), but then you speed up again and you zoom near the bottom exit of the loop (increasing your kinetic energy), and you’re off again!


Here’s what you need:


[am4show have=’p8;p9;p11;p38;p92;p15;p42;p151;p75;p85;p88;p100;’ guest_error=’Guest error message’ user_error=’User error message’ ]


  • marbles
  • masking tape
  • 3/4″ pipe foam insulation (NOT neoprene and NOT the kind with built-in adhesive tape)

To make the roller coasters, you’ll need foam pipe insulation, which is sold by the six-foot increments at the hardware store. You’ll be slicing them in half lengthwise, so each piece makes twelve feet of track. It comes in all sizes, so bring your marbles when you select the size. The ¾” size fits most marbles, but if you’re using ball bearings or shooter marbles, try those out at the store. (At the very least you’ll get smiles and interest from the hardware store sales people.) Cut most of the track lengthwise (the hard way) with scissors. You’ll find it is already sliced on one side, so this makes your task easier. Leave a few pieces uncut to become “tunnels” for later roller coasters.


Read for some ‘vintage Aurora’ video? This is one of the very first videos ever made by Supercharged Science:


Download Student Worksheet & Exercises


Tips & Tricks

Loops Swing the track around in a complete circle and attach the outside of the track to chairs, table legs, and hard floors with tape to secure in place. Loops take a bit of speed to make it through, so have your partner hold it while you test it out before taping. Start with smaller loops and increase in size to match your entrance velocity into the loop. Loops can be used to slow a marble down if speed is a problem.


Camel-Backs Make a hill out of track in an upside-down U-shape. Good for show, especially if you get the hill height just right so the marble comes off the track slightly, then back on without missing a beat.


Whirly-Birds Take a loop and make it horizontal. Great around poles and posts, but just keep the bank angle steep enough and the marble speed fast enough so it doesn’t fly off track.


Corkscrew Start with a basic loop, then spread apart the entrance and exit points. The further apart they get, the more fun it becomes. Corkscrews usually require more speed than loops of the same size.


Jump Track A major show-off feature that requires very rigid entrance and exit points on the track. Use a lot of tape and incline the entrance (end of the track) slightly while declining the exit (beginning of new track piece).


Pretzel The cream of the crop in maneuvers. Make a very loose knot that resembles a pretzel. Bank angles and speed are the most critical, with rigid track positioning a close second. If you’re having trouble, make the pretzel smaller and try again. You can bank the track at any angle because the foam is so soft. Use lots of tape and a firm surface (bookcases, chairs, etc).


Troubleshooting Marbles will fly everywhere, so make sure you have a lot of extras! If your marble is not following your track, look very carefully for the point of departure – where it flies off.


-Does the track change position with the weight of the marble, making it fly off course? Make the track more rigid by taping it to a surface.
-Is the marble jumping over the track wall? Increase your bank angle (the amount of twist the track makes along its length).
-Does your marble just fall out of the loop? Increase your marble speed by starting at a higher position. When all else fails and your marble still won’t stay on the track, make it a tunnel section by taping another piece on top the main track. Spiral-wrap the tape along the length of both pieces to secure them together.


HOT TIPS for ULTRA-COOL PARENTS: This lab is an excellent opportunity for kids to practice their resilience, because we guarantee this experiment will not work the first several times they try it. While you can certainly help the kids out, it’s important that you help them figure it out on their own. You can do this by asking questions instead of rushing in to solve their problems. For instance, when the marble flies off the track, you can step back and say:


“Hmmm… did the marble go to fast or too slow?”


“Where did it fly off?”


“Wow – I’ll bet you didn’t expect that to happen. Now what are you going to try?”


Become their biggest fan by cheering them on, encouraging them to make mistakes, and try something new (even if they aren’t sure if it will work out).


Check out this cool roller coaster from one of our students!


Exercises 


  1. What type of energy does a marble have while flying down the track of a roller coaster?
  2. What type of energy does the marble have when you are holding it at the top of the track?
  3. At the top of a camel back hill, which is higher for the marble, kinetic or potential energy?
  4. At the top of an inverted loop, which energy is higher, kinetic or potential energy?

Click here to go to next lesson on Including Friction in your Calculations.

[/am4show]


When you drop a ball, it falls 16 feet the first second you release it. If you throw the ball horizontally, it will also fall 16 feet in the first second, even though it is moving horizontally… it moves both away from you and down toward the ground. Think about a bullet shot horizontally. It travels a lot faster than you can throw (about 2,000 feet each second). But it will still fall 16 feet during that first second. Gravity pulls on all objects (like the ball and the bullet) the same way, no matter how fast they go.


What if you shoot the bullet faster and faster? Gravity will still pull it down 16 feet during the first second, but remember that the surface of the Earth is round. Can you imagine how fast we’d need to shoot the bullet so that when the bullet falls 16 feet in one second, the Earth curves away from the bullet at the same rate of 16 feet each second?


Answer: that bullet needs to travel nearly 5 miles per second. (This is also how satellites stay in orbit – going just fast enough to keep from falling inward and not too fast that they fly out of orbit.)


Catapults are a nifty way to fire things both vertically and horizontally, so you can get a better feel for how objects fly through the air. Notice when you launch how the balls always fall at the same rate – about 16 feet in the first second.  What about the energy involved?


When you fire a ball through the air, it moves both vertically and horizontally (up and out). When you toss it upwards, you store the (moving) kinetic energy as potential energy, which transfers back to kinetic when it comes whizzing back down. If you throw it only outwards, the energy is completely lost due to friction.


The higher you pitch a ball upwards, the more energy you store in it. Instead of breaking our arms trying to toss balls into the air, let’s make a simple machine that will do it for us. This catapult uses elastic kinetic energy stored in the rubber band to launch the ball skyward.


[am4show have=’p8;p9;p11;p38;p92;p15;p42;p151;p75;p85;p88;p92;’ guest_error=’Guest error message’ user_error=’User error message’ ]


Here’s what you need:


  • 9 tongue-depressor size popsicle sticks
  • four rubber bands
  • one plastic spoon
  • ping pong ball or wadded up ball of aluminum foil (or something lightweight to toss, like a marshmallow)
  • hot glue gun with glue sticks


Download Student Worksheet & Exercises


catapult1What’s going on? We’re utilizing the “springy-ness” in the popsicle stick to fling the ball around the room. By moving the fulcrum as far from the ball launch pad as possible (on the catapult), you get a greater distance to press down and release the projectile. (The fulcrum is the spot where a lever moves one way or the other – for example, the horizontal bar on which a seesaw “sees” and “saws”.)
Troubleshooting: These simple catapults are quick and easy versions of the real thing, using a fulcrum instead of a spring so kids don’t knock their teeth out. After making the first model, encourage kids to make their own “improvements” by handing them additional popsicle sticks, spoons, and glue sticks (for the hot glue guns).


If they get stuck, you can show them how to vary their models: glue a second (or third, fourth, or fifth) spoon onto the first spoon for multi-ammunition throws, increase the number of popsicle sticks in the fulcrum from 7 to 13 (or more?), and/or use additional sticks to lengthen the lever arm. Use ping pong balls as ammo and build a fort from sheets, pillows, and the backside of the couch.


Want to make a more advanced catapult? 

This catapult requires a little more time, materials, and effort than the catapult design above, but it’s totally worth it. This device is what most folks think of when you say ‘catapult’. I’ve shown you how to make a small model – how large can you make yours?


This project lends itself well to taking data and graphing your results: you and your child can jot down the distance traveled along with time aloft with further calculations for high school students for velocity and acceleration. My university students would also calculate statistics, percent error, and more. My students also mapped out the material properties of the ‘cantilevered beam’ as well as model the popsicle stick as a spring (to determine the spring constant (k) for your calculations from Hooke’s Law). You can take this project as far as you want, depending on the interest and ability of kids.


Materials:


  • plastic spoon
  • 14 popsicle sticks
  • 3 rubber bands
  • wooden clothespin
  • straw
  • wood skewer or dowel
  • scissors
  • hot glue gun


Try different ball weights (ping pong, foil crumpled into a ball, whiffle balls, marshmallows, etc) and chart out the results: make a data table that shows what ball you tried and how far it went. You can also use a stopwatch to time how long your ball was in the air.


You can also graph your results: make a chart where you plot each data point on a graph that has distance on the vertical axis and time on the horizontal axis.


Advanced Teaching Tips: For high school and college-level physics classes, you can easily incorporate these launchers into your calculations for projectile motion. Offer students different ball weights (ping pong, foil crumpled into a ball, and whiffle balls work well) and chart out the results.


Exercises Answer the questions below:


  1. How is gravity related to kinetic energy?
    1. Gravity creates kinetic energy in all systems.
    2. Gravity explains how potential energy is created.
    3. Gravity pulls an object and helps its potential energy convert into kinetic energy.
    4. None of the above
  2. If you could use your catapult to launch your ball of foil into orbit, how high would it have to go?
    1. Above the atmosphere
    2. High enough to slingshot around the moon
    3. High enough so that when it falls, the earth curves away from it
    4. High enough so that it is suspended in empty space
  3. Where is potential energy the greatest on the catapult?

[/am4show]


Mathematically speaking, this particular flying object shouldn't be able to fly.  What do you think about that?

Why can this thing fly? It doesn’t even LOOK like a plane! When I teach at the university, this is the plane that mathematically isn’t supposed to be able to fly! There are endless variations to this project—you can change the number of loops and the size of loops, you can tape two of these together, or you can make a whole pyramid of them. Just be sure to have fun!

It's actually a bit complicated to explain how this thing flies when "mathematically" it isn't supposed to, but here goes: there are FOUR forces at work with your flying machine. Gravity is always pulling it down, but air pressure keeps it up (called lift). The way real airplane wings generate lift is by having a curved surface on the top which decreases the air pressure, and since higher pressure pushes, the wing generates lift by moving through the air. (If this idea doesn't make sense, be sure to watch this video first!)

Ok, but what about a flat wing?

If you drop a regular sheet of paper, it flutters to the ground. If you wad it up first, you’ll find it falls much faster. The air under the falling paper needs to get out of the way as gravity pulls the paper, which is a lot easier when the paper is wadded into a ball.

For a flat wing (like on a paper airplane) to glide through the air, it needs to be balanced between gravity and the air resistance holding it up. In order for a glider to fly, the center of pressure needs to be behind the center of gravity (learn more about center of pressure and center of gravity in the third video below). By adding paper clips to your paper airplane, you move the center of gravity and center of pressure around to find the perfect balance.

When designing airplanes, engineers pay attention to details, such as the position of two important points: the center of gravity and the center of pressure (also called the center of lift). On an airplane, if the center of gravity and center of pressure points are reversed, the aircraft’s flight is unstable and it will somersault into chaos. The same is true for rockets and missiles!

Let’s find the center of gravity on your airplane. Grab your flying machine and sharpened pencil. You can find the ‘center of gravity’ by balancing your airplane on the tip of a pencil. Label this point “CG” for Center of Gravity.

Materials:

  • sheet of paper
  • hair dryer
  • pencil with a sharp tip

We're going to make a paper airplane first, and then do a couple of wind tunnel tests on it.

For the project, all you need is a sheet of paper and five minutes... this is one my favorite fliers that we make with our students!

Find the Center of Pressure (CP) by doing the opposite: Using a blow-dryer set to low-heat so you don’t scorch your airplane, blast a jet of air up toward the ceiling. Put your airplane in the air jet and, using a pencil tip on the top side of your plane, find the point at which the airplane balances while in the airstream. Label this point “CP” for Center of Pressure. (Which one is closest to the nose?)

Besides paying attention to the CG and CP points, aeronautical engineers need to figure out the static and dynamic stability of an airplane, which is a complicated way of determining whether it will fly straight or oscillate out of control during flight. Think of a real airplane and pretend you’ve got one balanced on your finger. Where does it balance? Airplanes typically balance around the wings (the CG point). Ever wonder why the engines are at the front of small airplanes? The engine is the heaviest part of the plane, and engineers use this weight for balance, because the tail (elevator) is actually an upside-down wing that pushes the tail section down during flight.

When we use math to add up the forces (the pull of gravity would be the weight, for example), it works out that there isn’t enough lift generated by thrust to overcome the weight and drag. When I say, “mathematically speaking...” I mean that the numbers don’t work out quite right. When this happens in science for real scientists, it usually means that they don’t fully understand something yet. There are a number of ‘unsolved’ mysteries still in science.. maybe you’ll be able to help us figure them out?

[am4show have='p8;p9;p93;' guest_error='Guest error message' user_error='User error message' ]
[/am4show]


Hovercraft transport people and their stuff across ice, grass, swamp, water, and land. Also known as the Air Cushioned Vehicle (ACV), these machines use air to greatly reduce the sliding friction between the bottom of the vehicle (the skirt) and the ground. This is a great example of how lubrication works – most people think of oil as the only way to reduce sliding friction, but gases work well if done right.


In this case, the readily-available air is shoved downward by the pressure inside of balloon. This air flows down through the nozzle and out the bottom, under the CD, lifting it slightly as it goes and creating a thin layer for the CD to float on.


Although this particular hovercraft only has a ‘hovering’ option, I’m sure you can quickly figure out how to add a ‘thruster’ to make it zoom down the table! (Hint – you will need to add a second balloon!)


Here’s what you need:


[am4show have=’p8;p9;p11;p38;p92;’ guest_error=’Guest error message’ user_error=’User error message’ ]


  • 7-9″ balloon
  • water bottle with a sport-top (see video for a visual – you can also use the top from liquid dish soap)
  • old CD
  • paper cup (or index card)
  • thumbtack
  • hot glue gun
  • razor with adult help


Download Student Worksheet here.


There’s air surrounding us everywhere, all at the same pressure of 14.7 pounds per square inch (psi). You feel the same force on your skin whether you’re on the ceiling or the floor, under the bed or in the shower. An interesting thing happens when you change a pocket of air pressure – things start to move.


This difference in pressure causes movement that creates winds, tornadoes, airplanes to fly, and the air to rush out of a full balloon. An important thing to remember is that higher pressure always pushes stuff around. While lower pressure does not “pull,” we think of higher pressure as a “push”.


The stretchy balloon has a higher pressure inside than the surrounding air, and the air is allowed to escape out the nozzle which is attached to the water bottle cap through tiny holes (so the whole balloon doesn’t empty out all at once and flip over your hovercraft!) The steady stream of air flows under the CD and creates a cushion of air, raising the whole hovercraft up slightly… which makes the hovercraft easy to slide across a flat table.


Want to make an advanced model Hovercraft using wires, motors, and leftovers from lunch? Then click here.


[/am4show]


[am4show have=’p8;p9;p11;p38;p92;’ guest_error=’Guest error message’ user_error=’User error message’ ]


Advanced students: Download your Hovercraft Lab here.


[/am4show]


Indoor Rain Clouds

Making indoor rain clouds demonstrates the idea of temperature, the measure of how hot or cold something is. Here's how to do it:

Take two clear glasses that fit snugly together when stacked. (Cylindrical glasses with straight sides work well.)

Fill one glass half-full with ice water and the other half-full with very hot water (definitely an adult job – and take care not to shatter the glass with the hot water!). Be sure to leave enough air space for the clouds to form in the hot glass.

Place the cold glass directly on top of the hot glass and wait several minutes. If the seal holds between the glasses, a rain cloud will form just below the bottom of the cold glass, and it actually rains inside the glass! (You can use a damp towel around the rim to help make a better seal if needed.)

Materials:
  • glass of ice water
  • glass of hot water (see video)
  • towel
  • adult help
[am4show have='p8;p9;p11;p38;p92;' guest_error='Guest error message' user_error='User error message' ]

Download Student Worksheet & Exercises

Bottling Clouds

On a stormy, rainy afternoon, try bottling clouds — using the refrigerator! Here's what you do: Place an empty, clean 2-liter soda bottle in the fridge overnight. Take it out and get an adult to light a match, letting it burn for a few seconds, then drop it into the bottle. Immediately cap the bottle and watch what happens (you should see smoke first, then clouds forming inside). Squeeze the sides of the bottle. The clouds should disappear. When you release the bottle, the clouds should reappear. Materials:
  • 2L soda bottle
  • rubbing alcohol
  • bicycle pump
  • car tire valve (drill a 1/2 inch hole through a 2L soda bottle cap and pull the valve gently through with pliers)

Advanced Idea: You can substitute rubbing alcohol and a bicycle pump for the matches to make a more solid-looking cloud.  Swirl a bit of rubbing alcohol around inside the bottle, just enough to coat the insides, and then pour it out.  Cap your bottle with a rubber stopper fitted with a needle valve (so the valve is poking out of the bottle), and apply your pump.  Increase the pressure inside the bottle (keep a firm hand on the stopper or you'll wind up firing it at someone) with a few strokes and pull out the stopper quickly.  You should see a cloud form inside.

What's going on? Invisible water vapor is all around us, all the time, but they normally don't stick together. When you squeezed the sides of the bottle, you increased the pressure and squeezed the molecules  together.  Releasing the bottle decreases the pressure, which causes the temperature to drop. When it cools inside, the water molecules stick to the smoke molecules, making a visible cloud inside your bottle.

Did you know that most drops of water actually form around a dust particle?  Up in the sky, clouds come together when water vapor condenses into liquid water drops or ice crystals. The clouds form when warm air rises and the pressure is reduced (as you go up in altitude). The clouds form at the spot where the temperature drops below the dew point.

The alcohol works better than the water because it evaporates faster than water does, which means it moves from liquid to vapor more easily (and vividly) than regular old water.

Questions to ask:
  • How many times can you repeat this?
  • Does it matter what size the bottle is?
  • What if you don’t chill the bottle?
  • What if you freeze the bottle instead?
Exercises
  1. Which combination made it rain the best? Why did this work?
  2. Draw your experimental diagram, labeling the different components:
  3. Add in labels for the different phases of matter. Can you identify all three states of matter in your experiment?
[/am4show]

Temperature is a way of talking about, measuring, and comparing the thermal energy of objects.


[am4show have=’p8;p9;p11;p38;p92;’ guest_error=’Guest error message’ user_error=’User error message’ ]


The words “hot” , “cold”, “warm” and so forth describe what scientists call thermal energy. Thermal energy is how much the molecules are moving inside an object. The faster molecules move, the more thermal energy it has.


Objects that have molecules moving very quickly are said to have high thermal energy or high temperature. Like a cloud of steam, for example. The higher the temperature, the faster the molecules are moving inside that steam cloud.


Temperature is just a speedometer for molecules. The speed of the molecules in ice cream is way slower than it is in a hot shower.


If everything is made of molecules, and these molecules are speeding up and slowing down, what do you think happens if they change speed a lot? Do you think my kitchen table will start vibrating across the room if the table somehow gets too hot?


No, probably not, my table will not start jumping around the room, no matter how hot it gets.  It would melt down into a mush first! But some interesting things do happen when molecules change speeds.


There are three common states of matter – I bet you know what they are already: solid, liquid, and gas.  Water is really special because it can be a solid, liquid or gas state at pretty normal temperatures. You don’t need a “mad scientist lab” to get it to go into any of these three states.


Water is one of the only substances that expands instead of shrinks when it freezes. It’s also a polar molecule, meaning that if you stick a static charge next to it, like a balloon you rubbed on your head, you can get the water to move.


Imagine an icicle. The water is in a solid state when it’s an icicle. It’s holding its shape. The molecules in the water are held together by strong, stiff bonds. These bonds hold the water molecules in a tight pattern called a matrix. This matrix holds the water molecules in a crystalline pattern.


Can you imagine breaking off an icicle and sticking it in a tea kettle on the stove? Now, let’s pretend to turn on the heat. The heat is transferred from the stove to the kettle to the icicle.


What happens to our icicle?


As the icicle absorbs the heat, the molecules begin to vibrate faster (the temperature is increasing). When the molecules vibrate at a certain speed (they gain enough thermal energy) they stretch those strong, stiff matrix crystalline bonds enough that the bonds become more like rubber bands or springs and they stretch and get all loose-goosey.


That’s when the icicle becomes liquid. There are still bonds between the molecules, but they are a bit loose, allowing the molecules to move and flow around each other.


The act of changing from a solid to a liquid is called melting. The temperature at which a substance changes from a solid to a liquid is called its melting point. For water, that point is 32° F or 0° C. (Remember those numbers from the slide with all the temperature scales?)


Now if we continue heating, we see our icicle go from solid to completely liquid, and now we notice bubbling. What’s going on now?


Now the temperature is at 212° F or 100° C and the water is going from a liquid state to a gaseous state. This means that the loosey goosey bonds that connected the molecules before have been stretched as far as they go, can’t hold on any longer and “POW!” they snap.


Those water molecules no longer have any bonds and are free to roam aimlessly around the room (think toddlers). Gas molecules move at very quick speeds as they bounce, jiggle, crash and zip around any container they are in (kind of like toddles on sugar). The act of changing from a liquid to a gas is called evaporation or boiling and the temperature at which a substance changes from a liquid to a gas is called its boiling point.


Now if we turn off the stove, what do you think happens?


Our gaseous water molecules get close to something cool, they will combine and turn from gaseous to liquid state.  This is what happens to your bathroom mirror during a shower or bath. The gaseous water molecules that are having fun bouncing and jiggling around the bathroom get close to the mirror. The mirror is colder than the air. As the gas molecules get close they slow down due to loss of temperature. If they slow enough, they form loosey goosey bonds with other gas molecules and change from gas to liquid state.


The act of changing from gas to liquid is called condensation. The temperature at which molecules change from a gas to a liquid is called the condensation point. Clouds are made of hundreds of billions of tiny little droplets of liquid water that have condensed onto particles of some sort of dust.


Now let’s turn the heat down a bit more and see what happens. Imagine we stick the tea kettle in the freezer. As the temperature drops and the molecules continue to slow, the bonds between the molecules can pull them together tighter and tighter.


Eventually the molecules will fall into a matrix, a pattern, and stick together quite tightly. This would be the solid state. The act of changing from a liquid to a solid is called freezing and the temperature at which it changes is called (say it with me now) freezing point.


Think about this for a second – is the freezing point and melting point of an object at the same temperature? Does something go from solid to liquid or from liquid to solid at the same temperature?


If you said yes, you’re right!


The freezing point of water and the melting point of water are both 32° F or 0° C. The temperature is the same. It just depends on whether it is getting hotter or colder as to whether the water is freezing or melting.


The boiling and condensation point is also the same point.


Crazy Temperatures

Here’s an experiment you can do to baffle your senses: Fill one glass with hot water (not boiling), another with ice water, and a third with room temperature water. Place a finger in the hot water and a finger in the ice cold water for a minute or two. Then stick both fingers in the room temperature cup.


How does that feel?


Did it seem that each finger detected a different temperature when placed in the room temperature cup? Weird! So what gives?


Materials:


  • 3 cups of water (see video)
  • your hands


Download Student Worksheet & Exercises


Your skin contains temperature sensors that work by detecting the direction heat flow (in or out of your body), not temperature directly. These sensors change temperature depending on their surroundings. So when you heated up one finger, and then placed it in cooler water, the heat flowed out of your body, telling your brain it was getting cooler. The ice water finger was detecting a heat flow into your body… and presto! You have one confused brain.


In order for heat to flow, you need to have a temperature difference. Did you notice how your fingers weren’t good thermometers with this experiment? This is why scientists had to invent the thermometer, because the human body isn’t designed to detect temperature, only heat flow. 


[/am4show]


Going Further


We are all made of trillions of cells, and each cell as a job to do, like detecting light, sensing touch, carry oxygen, digest food… there are over 200 different jobs just in your own body alone for cells to do! DNA are the instructions that tell cells what their job is.


Find the full DNA experiment here.

Click here to go to part 15:Dissecting a Chicken Egg


If you were an astrobiologist, you would be working with space scientists and marine biologists also, because you would need to understand how life works here on earth in extreme environments in order to help you understand what you find out there in space.


Click here to go to Part 12: Cells


Osmosis is how water moves through a membrane. A carrot is made up of cells surrounded by cell membranes. The cell membrane’s job is to keep the cell parts protected. Water can pass through the membrane, but most things can’t.


Find the full Carrot Osmosis experiment here.

Click here to go to Part 14: DNA


Animals, plants and other living things look different, and contain many different kinds of cells, but when you get down to it, all of us are just a bunch of cells – and that makes cells pretty much the most important thing when it comes to life!

[am4show have='p8;p9;p11;p38;p72;p77;p92;' guest_error='Guest error message' user_error='User error message' ]

Molecules are the building blocks of matter. You’ve probably heard that before, right? But that does it mean? What does a molecule look like? How big are they? Let’s find out.

While you technically can measure the size of a molecule, despite the fact it’s usually too small to do even with a regular microscope, what you can’t do is see an image of the molecule itself. The reason has to do with the limits of nature and wavelengths of light, not because our technology isn’t there yet, or we’re not smart enough to figure it out. Scientists have to get creative about the ways they do about measuring something that isn’t possible to see with the eyes.

Here’s what you do:

Step 1: Place water in the pie pan and sprinkle in the chalk dust. You want a light, even coating on the surface.

Step 2: Place dish soap inside the medicine dropper and hold it up.

Step 3: Squeeze the medicine dropper carefully and slowly so that a single drop forms at the tip. Don’t let it fall!

Step 4: Hold the ruler up and measure the drop. Record this in your data sheet.

Step 5: Hold the tip of the dropper over the pie pan near the surface and let it drop onto the water near the center of the pie pan.

Step 6: Watch it carefully as it spreads out to be one molecule thick!

Step 7: Quickly measure and record the diameter of the layer of the detergent on your data sheet.

Step 8: Use equations for sphere and cylinder volume to determine the height (which we assume to be one molecule thick) of the soap when it’s spread out. That’s the approximate width of the molecule!

What you've done in this experiment is taken a small sphere of soap, and made it flatten itself out to a disk that is one molecule thick. The chalk dust is only there so that you can actually see this happening. When you let the drop hit the surface of the water, due to the structure of the molecules, they repel each other as much as possible. Because of this, we can easily measure the thickness of the soap disk on the surface. The total volume of the drop does not change during the experiment (the act of releasing the drop doesn't change how much soap is in the drop). So the volume of the spherical soap is the same as the volume.

Find the full Measuring the Size of a Molecule experiment here.

Click here to go to Part 13: Osmosis

[/am4show]


Ecology studies nature and how the whole ecosystem works. An ecosystem is a community of interacting living things in their environment.

[am4show have='p8;p9;p11;p38;p72;p77;p92;' guest_error='Guest error message' user_error='User error message' ]
Find the full Terra Aqua experiment here.

Click here to go to Part 11: Astrobiology

[/am4show]
A virus is like when you catch a cold or the chicken pox – the virus uses the cells in your body to make copies of itself so it can spread throughout your body. Bacteria on the other hand, are living microorganisms, most of which don’t harm people at all (there are exceptions, like when they cause strep throat and tuberculosis).

Find the full Laser Microscope experiment here.

Click here to go to Part 9: Bioluminescence

Find the full Laser Microscope experiment here.

There’s a special way scientists classify and name all living things – it’s called “taxonomy”. All living things are divided into the following groups, called kingdoms. All kingdoms are made up of smaller groups which are made of even smaller groups, and so on. A series of groups within one system is called a hierarchy. It’s how you find your serving spoon in a drawer with a million other silverware pieces – it makes it easy and fast to find out about what you want.


Click here to go to Part 8: Viruses & Bacteria


Here’s a neat experiment you can do to measure the rate of photosynthesis of a plant, and it’s super-simple and you probably have most of what you need to do it right now at home!


You basically take small bits of a leaf like spinach, stick it in a cup of water that has extra carbon dioxide in it, and shine a light on it. The plant will take the carbon dioxide from the water and the light from the lamp and make oxygen bubbles that stick to it and lift it to the surface of the water, like a kid holding a bunch of helium balloons. And you time how long this all takes and you have the rate of photosynthesis for your leaf.

Click here to go to Part 7: Taxonomy


Acids are sour tasting (like a lemon), bases are bitter (like unsweetened cocoa powder). Substances in the middle are more neutral, like water. Scientists use the pH (power of hydrogen, or potential hydrogen) scale to measure how acidic or basic something is. Hydrochloric acid registers at a 1, sodium hydroxide (drain cleaner) is a 14. Water is about a 7. pH levels tell you how acidic or alkaline (basic) something is, like dirt. If your soil is too acidic, your plants won't attract enough hydrogen, and too alkaline attracts too many hydrogen ions. The right balance is usually somewhere in the middle (called 'pH neutral'). Some plants change color depending on the level of acidity in the soil - hydrangeas turn pink in acidic soil and blue in alkaline soil.

Some things you can test (in addition to the ones in the video) include: Sprite, distilled white vinegar, baking soda, Vanish, laundry detergent, clear ammonia, powdered Draino, and Milk of Magnesia. DO NOT mix any of these together! Simply add a bit to each cup and test it with your pH strips. Here's a quick video demonstration:


Click here to go to Part 6: Bonus Content: Measuring Photosynthesis


There are many different kinds of acids: citric acid (in a lemon), tartaric acid (in white wine), malic acid (in apples), acetic acid (in vinegar), and phosphoric acid (in cola drinks). The battery acid in your car is a particularly nasty acid called sulfuric acid that will eat through your skin and bones. Hydrochloric acid is found in your stomach to help digest food, and nitric acid is used to make dyes in fabrics as well as fertilizer compounds.

Botany (plant biology) studies the nature of plants and their environment. Take a look at some of the things you get to study when you’re a botanist!

[am4show have='p8;p9;p11;p38;p72;p77;p92;' guest_error='Guest error message' user_error='User error message' ]
 

Click here to go to Part 6: Botany 2

Find the full Gummy Bear experiment here.
[/am4show]
If you’ve ever watched a bird take off, you know it flaps its wings first, then somehow lifts itself off the ground. Some birds need to get a running start, and overs can just hover straight up. What about an airplane – how does an airplane take off? Does it need to flap its wings? Let's find out!

[am4show have='p8;p9;p11;p38;p72;p77;p92;' guest_error='Guest error message' user_error='User error message' ]
[/am4show]

Click here to go to Part 5: Botany 1

You can learn more about airfoils here, and if you want to learn how to fly a real airplane, go here.

Entomologists study insects, including what they look like and how they react and behave, and also the environment they like to live in.

[am4show have='p8;p9;p11;p38;p72;p77;p92;' guest_error='Guest error message' user_error='User error message' ]


Click here to go to Part 4: Birds & Flight

[/am4show]


(Where's Part 1? You just watched it above in the "What is Biology" section!) Scientists don’t just classify things based on how they look. For example, alligators and crocodiles both look similar, and how they look actually depends on which part of the world they came from. [am4show have='p8;p9;p11;p38;p72;p77;p92;' guest_error='Guest error message' user_error='User error message' ]

Click here to go to Part 3: Entomology

[/am4show]

Dissection in biology provides a hands-on education above and beyond reading a textbook. By seeing, touching and exploring different organs, muscles and tissues inside an animal and seeing how they work together allows you to really understand your own body and appreciate the amazing world around us. And it's not hard  - you can dissect a clam right at home using this inexpensive clam specimen with a dissection guide and simple dissection tools! Many doctors, surgeons and veterinarians report that their first fascination with the body started with a biology dissection class.

Materials:

[am4show have='p8;p9;p28;p55;p153;p65;p78;p86;p87;' guest_error='Guest error message' user_error='User error message' ]


Procedure:

  1. Place clams, one at a time, into boiling water; just long enough that they are easily opened.
  2. Take the clams out and snip the abductor muscles so the clams lie flat.
  3. Refer to diagrams (click on links above) and locate the following:
    1. Abductor muscles
    2. Gills
    3. Mantel
    4. Excurrent siphon
    5. Incurrent siphon
    6. Stomach
    7. Foot
    8. Mouth
    9. Intestine

Questions to Consider:

  1. Is it easier to see the parts in the diagram or the real clam? Why?
  2. Do the skewers enter more easily into the incurrent siphon or the excurrent siphon? Why?
  3. Where do the siphons end?
  4. Measure the diameter of the clam, the size of their stomach, and the size of their gills, on several clams.
    1. Are they all the same?
    2. How great are the distances?
    3. Can this data be graphed?

[/am4show]

Click here to go to part 17:Earthworm Dissection


Entomologists study insects, including what they look like and how they react and behave, and also the environment they like to live in.


Scientists don’t just classify things based on how they look. For example, alligators and crocodiles both look similar, and how they look actually depends on which part of the world they came from.


Content coming soon!


[am4show have=’p8;p9;p22;p49;p75;p84;p58;’ guest_error=’Guest error message’ user_error=’User error message’ ]


[/am4show]


Click here to go to next lesson on Redox reactions

Let’s get more practice with Henry’s Law, partial pressures, mole fraction, and weight percent with these sample calculations:
[am4show have=’p9;p59;’ guest_error=’Guest error message’ user_error=’User error message’ ]


[/am4show]


Click  here for the next lesson in Colligative Properties Part 2.

Osmosis is how cells allow water to pass through in and out of the cell through a special membrane using a bit of chemistry. Here is how they do it…


[am4show have=’p9;p59;’ guest_error=’Guest error message’ user_error=’User error message’ ]


The carrot itself is a type of root—it is responsible for conducting water from the soil to the plant. The carrot is made of cells. Cells are mostly water, but they are filled with other substances too (organelles, the nucleus, etc).


We’re going to do two experiments on a carrot: first we’re going to figure out how to move water into the cells of a carrot. Second, we’ll look at how to move water within the carrot and trace it. Last, we’ll learn how to get water to move out of the carrot. And all this has to do with cells!


Osmosis is how water moves through a membrane. A carrot is made up of cells surrounded by cell membranes. The cell membrane’s job is to keep the cell parts protected. Water can pass through the membrane, but most things can’t.


And water always moves through cell membranes towards higher chemical concentrations. For example, a carrot sitting in salt water causes the water to move into the salty water. The water moves because it’s trying to equalize the amount of water on both the inside and outside of the membrane. The act of salt will draw water out of the carrot, and as more cells lose water, the carrot becomes soft and flexible instead of crunchy and stiff.


You can reverse this process by sticking the carrot into fresh water. The water in the cup can diffuse through the membrane and into the carrot’s cells. If you tie a string around the carrot, you’ll be able to see the effect more clearly! Here’s what you do:


Download Student Worksheet & Exercises


In this experiment we will see the absorption of water by a carrot. Make note of differences between the carrot before the experiment, and the carrot afterward.


Materials


  • 2 carrots
  • Sharp knife (be careful!)
  • Cutting board
  • Glass
  • Water
  • Food coloring

Procedure :


Step 1: Cut the tip off of a carrot (with adult supervision).


Step 2: Place the carrot in a glass half full of water


Step 3: Place the carrot somewhere where it can get some sunshine.


Step 4: Observe the carrot over several days.


What’s going on?

When surrounded by pure water, the concentration of water outside the carrot cells is greater than the concentration inside. Osmosis makes water move from greater concentrations to lesser concentrations. This is why the carrot grows in size—it fills with water!


Procedure:

Step 1: Re-do the four steps above in a new cup, and this time put several (10-12) drops of food coloring into the water.


Step 2: With the help of an adult, cut the carrot in half length-wise.


What’s going on?

Carrots are roots. They conduct water from the soil to the plant. If we were to repeat this experiment several times—first cutting the carrot at half a day, then one day, then one day and a half, etc—we would see the movement of the water up the root.


Experiment #2: Water moving OUT of the carrot via osmosis

In this experiment we answer the question “what if the concentration of water is greater inside the carrot?”


Materials


  • Large carrot
  • 3 tablespoons of salt
  • Two glasses
  • String
  • water

Procedure

Step 1: Snap the carrot in half and tie a piece of string around each piece of carrot (make sure they’re tied tightly).


Step 2: Place each half in a glass half full of warm water.


Step 3: In one of the glasses, dissolve the salt.


Step 4: Leave overnight.


Step 5: The next morning pull on the strings. What do you observe?


What’s going on?

The salt-water carrot shrunk while the non-salt-water carrot bloated!


This is because of osmosis. Carrots are made up of cells. Cells are full of water. When the concentration of water outside the cell is greater than the concentration of water inside the cell, the water flows into the cell. This is why the non-salt-water carrot bloated—the concentration was greater outside the cell than inside. The concentration of water was greater inside the salt-water carrot than outside (because there was so much salt!) so the water flowed out of the cell. This made the salt-water carrot shrink.


Questions to Ask:

  1. What happens if you try different vegetables besides carrots?
  2. How do you think this relates to people? Do we really need to drink 8 glasses of water a day?
  3. What happens (on the osmosis scale) if humans don’t drink water?
  4. Use your compound microscope to look at a sample and draw the cells (both before and after taking a bath in the solution) in your science journal.
  5. What did you expect to happen to the string? What really happened to the string?
  6. Which solution made the carrot rubbery? Why?
  7. Did you notice a change in the cell size, shape, or other feature when soaked in salt water? (Check your journal!)
  8. Why did we bother tying a string? Would a rubber band have worked?
  9. What would happen to a surfer who spent all day in the ocean without drinking water?
  10. What do you expect to happen to human blood cells if they were placed in a beaker of salt water?

[/am4show]


Click here for the next lesson on Colligative Properties Part 1.

Let’s do some sample calculations for the energy of a system that include enthalpy and specific heat.


[am4show have=’p9;p59;’ guest_error=’Guest error message’ user_error=’User error message’ ]


[/am4show]


Click here to download the Homework Problem Set #7.

[am4show have=’p9;p59;’ guest_error=’Guest error message’ user_error=’User error message’ ]


[/am4show]


Click here for next lesson on Properties of log and ln.

[am4show have=’p9;p59;’ guest_error=’Guest error message’ user_error=’User error message’ ]


[/am4show]


Click here for next lesson on Rate Law Part 2

[am4show have=’p9;p59;’ guest_error=’Guest error message’ user_error=’User error message’ ]


[/am4show]


Click here for next lesson in the Arrhenius Equation.

[am4show have=’p9;p59;’ guest_error=’Guest error message’ user_error=’User error message’ ]


[/am4show]


Click  here for next lesson in Half-Life.

[am4show have=’p9;p59;’ guest_error=’Guest error message’ user_error=’User error message’ ]


[/am4show]


Click here for the next lesson on Rate Law Part 1

This is an introduction to the microscope, and we’re going to not only how to use a microscope but also cover the basics of optics, slide preparation, and why we can see things that are invisible to the naked eye. Microscopes are basically two lenses put together to make things appear larger.


[am4show have=’p8;p9;p26;p53;p74;p86;p87;’ guest_error=’Guest error message’ user_error=’User error message’ ]


The first thing you need to do is select a compound microscope(While you can do this lesson without one, it’s really a totally different experience doing it with a scope.) Cheap microscopes are going to frustrate you beyond belief, so here are the ones we recommend that will last your kids through college. You’ll want one with the optional mechanical stage (instead of stage clips), fine and coarse adjustment knobs, and at least three objectives. Click on the shopping list to see what we think are the best deals for the dollar.


If you’ve just purchased a microscope, keep it in its packaging until you watch the videos in this lesson. We’ll show you how to handle it, store it, and where not to touch.  Your first job is to start collecting as many interesting windowsill insects as you can find.


[/am4show]


Supercooling a liquid is a really neat way of keeping the liquid a liquid below the freezing temperature. Normally, when you decrease the temperature of water below 32oF, it turns into ice. But if you do it gently and slowly enough, it will stay a liquid, albeit a really cold one!


In nature, you’ll find supercooled water drops in freezing rain and also inside cumulus clouds. Pilots that fly through these clouds need to pay careful attention, as ice can instantly form on the instrument ports causing the instruments to fail. More dangerous is when it forms on the wings, changing the shape of the wing and causing the wing to stop producing lift. Most planes have de-icing capabilities, but the pilot still needs to turn it on.


We’re going to supercool water, and then disturb it to watch the crystals grow right before our eyes! While we’re only going to supercool it a couple of degrees, scientists can actually supercool water to below -43oF!


[am4show have=’p8;p9;p82;p84;p91;p101;p30;p57;’ guest_error=’Guest error message’ user_error=’User error message’ ]


Materials:


  • water
  • glass
  • bowl
  • ice
  • salt


Download Student Worksheet & Exercises


Don’t mix up the idea of supercooling with “freezing point depression”. Supercooling is when you keep the solution a liquid below the freezing temperature (where it normally turns into a solid) without adding anything to the solution. “Freezing point depression” is when you lay salt on the roads to melt the snow – you are lowering the freezing point by adding something, so the solution has a lower freezing point than the pure solvent.


Here’s an image of how the shape of the ice crystals are affected by magnetism:


[/am4show]


Click here to go to next lesson on Colloids and Polymers


This is a recording of a recent live teleclass I did with thousands of kids from all over the world. I’ve included it here so you can participate and learn, too! Learn about the world of rocks, crystals, gems, fossils, and minerals by moving beyond just looking at pretty stones and really being able to identify, test, and classify samples and specimens you come across using techniques that real field experts use. While most people might think of a rock as being fun to climb or toss into a pond, you will now be able to see the special meaning behind the naturally occurring material that is made out of minerals by understanding how the minerals are joined together, what their crystalline structure is like, and much more.


Materials:


[am4show have=’p8;p9;p11;p38;’ guest_error=’Guest error message’ user_error=’User error message’ ]


[/am4show]


NEW


OLD


First Law of Thermodynamics: Energy is conserved. Energy is the ability to do work. Work is moving something against a force over a distance. Force is a push or a pull, like pulling a wagon or pushing a car. Energy cannot be created or destroyed, but can be transformed.


Materials: ball, string


[am4show have=’p8;p9;p10;p37;p88;’ guest_error=’Guest error message’ user_error=’User error message’ ]


Roll a ball down a hill. The amount of energy the ball had while at rest at the top of the hill (potential energy) turns into kinetic energy while it zips to the bottom.


You can also swing on a swing and see this effect happen over and over again: when you’re at the highest point of your swing, you have the highest potential energy but zero kinetic energy (your speed momentarily goes to zero as you change direction). At the lowest point of your swing (when you’re moving the fastest), all your potential energy has turned into kinetic energy. Why do you eventually stop? The reason you eventually slow down and stop instead of swinging back and forth forever is that you have air resistance and friction where the chain is suspended from the bar.


Learn more about this scientific principle in Unit 4 and Unit 5 and Unit 13.
[/am4show]


Click here to go to next lesson on Combustion.


A battery is a device that produces electrical energy from a chemical reaction. Another name for a battery is voltaic cell. Voltaic means to make electricity.


Most batteries contain two or more different chemical substances. The different chemical substances are usually separated from each other by a barrier. One side of the barrier is the positive terminal of the battery and the other side of the barrier is the negative terminal. When the positive and negative terminals of a battery are connected to a circuit, a chemical reaction takes place between the two different chemical substances that produces a flow of electrons (electricity).


When a battery is producing electricity, one of the chemical substances in the battery loses electrons. These electrons are then gained by the other chemical substance.


A battery is designed so that the electrons lost by one chemical substance are made to flow through a circuit, such as a flashlight lamp, before being gained by the other chemical substance. A battery will produce a flow of electrons until all of the chemical substances involved in the chemical reaction are completely used.


[am4show have=’p8;p9;p22;p49;p75;p84;p58;’ guest_error=’Guest error message’ user_error=’User error message’ ]


Materials


  • Earphone or headset  for a portable radio
  • Small piece of aluminum foil
  • Tomato juice
  • New, shiny penny
  • Two wires with alligator clips on each end of  the wires
  • Plate
  • AA-size battery
  • Spoon


Download Student Worksheet & Exercises


Procedure


Examine the metal shaft of the part of the earphone or headset that is inserted into a portable radio. You will notice that just below the tip of the shaft there is a plastic spacer. Clip on one of the wires below this spacer. Then clip on the other wire above this spacer.


To test that the wires are properly connected to the earphone or headset, take the unconnected ends of the two wires and touch them to an AA-size battery. One wire should touch the positive end of the battery, while the other is touching the negative end of the battery. Place the earphone or headset to your ear. If your connections are made correctly, you should hear a crackling sound in the earphone or headset. If you do not hear a crackling sound, check your connections carefully.


Place a small piece of aluminum foil, about five inches (13 centimeters) square, on a small plate. Using a spoon, make a puddle of tomato juice on the aluminum foil. The puddle of tomato juice should be slightly larger than a penny. Next, place a new, shiny penny face down in the puddle of tomato juice.


Using the alligator clip, attach one of the wires connected to the earphone to one of the edges of the aluminum foil. Take the end of the other wire and touch the alligator clip to the penny. Move the alligator clip over the penny.


Observations


Do you hear a crackling sound when you touch the alligator clips to the penny in the puddle of tomato juice? What do you hear when you move the alligator clip over the penny? What do you hear when you stop touching the penny with the alligator clip?


Discussion


In this experiment you made a simple battery with a penny, aluminum foil, and tomato juice. You completed a circuit with your battery by touching one of the wires attached to the earphone or headset to the penny, while touching the other wire to the aluminum foil. When you completed the circuit, a flow of electrons was produced by your battery. The crackling sound you heard was caused by the earphone or headset converting electrical energy from your battery into sound energy.


In your battery, the aluminum in the aluminum foil loses electrons. The other part of the reaction is more complex. Either the acid in the tomato juice or copper ions (that form when the copper metal in the penny reacts with the acid in the tomato juice) gain the electrons lost by the aluminum.


The main types of batteries are known as primary and secondary batteries. Dry cell batteries, like the ones used in flashlights and portable radios, are primary batteries. Another important primary battery is the mercury battery. Mercury batteries are typically small and flat. They are used to power cameras, watches, hearing aids, and calculators.


An advantage of primary batteries is that they are generally inexpensive. One disadvantage is that they cannot be recharged. When the chemical substances in the primary batteries are used up, the battery is dead.


Lead storage batteries and nickel-cadmium (NiCad) batteries are examples of secondary batteries. Car batteries are lead storage batteries. Flashlight batteries that are rechargeable are NiCad batteries. Secondary batteries are more expensive than primary batteries. However, unlike primary batteries, lead storage batteries and NiCad batteries can be recharged repeatedly.


Other Things to Try


Repeat this experiment using other coins such as a dime, nickel, or quarter. Do any of these coins cause a louder crackling sound in the earphone or headset?


Repeat this experiment using a nail instead of a coin. Can you make a battery with other juices? To find out, repeat this experiment with other juices such as lemon and orange juice. What do you observe?


Exercises 


  1. Fill in the blank: A battery produces ___________________ energy from _________________________ energy.
  2. Another name for a battery is:
    1. Solar array
    2. Voltaic cell
    3. Nuclear reactor
    4. Fusion cell
  3. As one chemical loses electrons, what happens to the other chemical?
    1. It loses electrons
    2. It gains electrons
    3. Nothing
    4. It decomposes
  4. When will a battery run out?
    1. When its batteries run out
    2. When its chemicals are used up
    3. When all the electrons are gone
    4. When the bunny stops drumming

[/am4show]


Click here to go to next lesson on Electrochemistry Analysis

In this lab, we’re going to investigate the wonders of electrochemistry. Electrochemistry became a new branch of chemistry in 1832, founded by Michael Faraday. Michael Faraday is considered the "father of electrochemistry". The knowledge gained from his work has filtered down to this lab. YOU will be like Michael Faraday. I imagined he would have been overjoyed to do this lab and see the results. You are soooo lucky to be able to take an active part in this experiment. Here's what you're going to do...

You will be “creating” metallic copper from a solution of copper sulfate and water, and depositing it on a negative electrode. Copper is one of our more interesting elements. Copper is a metal, and element 29 on your periodic table. It conducts heat and electricity very well.

Many things around you are made of copper. Copper wire is used in electrical wiring. It has been used for centuries in the form of pipes to distribute water and other fluids in homes and in industry. The Statue of Liberty is a wonderful example of how beautiful 180,000 pounds of copper can be. Yes, it is made of copper, and no, it doesn’t look like a penny…..on the surface. The green color is copper oxide, which forms on the surface of copper exposed to air and water. The oxide is formed on the surface and does not attack the bulk of the copper. You could say that copper oxide protects the copper.

[am4show have='p8;p9;p25;p52;p91;' guest_error='Guest error message' user_error='User error message' ] Our bodies use copper to our advantage, but in a proper form that is not toxic. Too much copper will make you sick and could kill you. Remember…don’t eat your chemistry set! Materials:
  • Carbon rod (MSDS)
  • Copper sulfate (CuSo4) (MSDS)
  • Aluminum foil
  • 9V battery with clip
  • 2 wires
  • Disposable cup
  • Water
You are going to make a saturated solution of copper sulfate (CuSO4) in water. Pour a measuring spoon of granulated copper sulfate in the measuring cup of water. Stir well. Continue adding a spoonful and stirring until no more crystals will go into solution. The solution is saturated when no more crystals will dissolve and there are undissolved crystals at the bottom of the container.

C1000: Experiment


Download Student Worksheet & Exercises

Here’s what’s going on in this experiment:

CuSO4 + H2O (Copper sulfate is added to water)

CuSO4 + H2O --> Cu2+ + SO42- (Copper sulfate plus water yields positively charged carbon ion and negatively charged sulfate ion)

When mixed with water, copper sulfate dissociates into copper and sulfate ions. Notice that the ions, now separated, take on negative and positive charges.

Next, 9V of electricity is passed through the solution with an electrode of carbon and an electrode of aluminum foil inserted into the solution. As electricity flows from one electrode to another, the copper ions, being positively charged, are attracted to the negative electrode. You can confirm this in two ways. One, if litmus paper, held close to an electrode, turns blue, that is the negative electrode. The other way is to just follow the negative lead from the battery to the negative electrode.

As the process moves along, the negative electrode gains copper ions. Evidence of this is seen on the surface of the electrode.

Here's the breakdown of the entire process:


When the copper sulfate (CuSO4) mixed with water (H2O), the copper sulfate dissociated:

CuSO4 --> Cu2+ + SO42-

When power is added to the solution, the copper ions move toward the negative cathode (carbon rod) and take electrons from it, forming solid copper right on the electrode:

Cu2++ 2e- --> Cu(s)
On the positive anode (the aluminum foil), you'll see bubbles instead of a solid forming. The anode attracted electrons from the water molecule to form oxygen bubbles:

6H2O --> O2 + 4H3O+ + 4e- Let's put these two reactions together to get the overall reaction of: 2Cu2+ + 6H2O --> 2Cu + O2 + 4H3O+

Note the difference between galvanic cells and electrolytic cells: galvanic use spontaneous chemical reactions (like in a car battery) to generate electricity, and electrolytic cells use electricity to make the chemical reaction to occur and move electrons to move in a way they would go on their own (like in this experiment).

Clean up: Clean everything thoroughly after you are finished with the lab. After cleaning with soap and water, rinse thoroughly. Chemists use the rule of “three” in cleaning glassware and tools. Rinse three times, wash with soap, rinse three times.

Wipe off the carbon rod to remove the copper. The aluminum goes in the trash, but the solution and solids at the bottom cannot. The liquid contains copper, a toxic heavy metal that needs proper disposal and safety precautions. Another chemical reaction needs to be performed to remove the heavy metal from the copper sulfate. Add a thumb sized piece of steel wool to the solution. The chemical reaction will pull out the copper out of the solution. The liquid can be washed down the drain. The solids cannot be washed down the drain, but they can be put in the trash. Use a little water to rinse the container free of the solids.

Place all chemicals, cleaned tools, and glassware in their respective storage places.

Dispose of all solid waste in the garbage. Liquids can be washed down the drain with running water. Let the water run awhile to ensure that they have been diluted and sent downstream.

Going Further

Here is a link to information about making your own geode (crystal lined rock) of copper sulfate crystals:

http://chemistry.about.com/od/growingcrystals/ht/geode.htm [/am4show]

Click here for Potassium Permanganate


Magnesium is one of the most common elements in the Earth’s crust. This alkaline earth metal is silvery white, and soft. As you perform this lab, think about why magnesium is used in emergency flares and fireworks. Farmers use it in fertilizers, pharmacists use it in laxatives and antacids, and engineers mix it with aluminum to create the BMW N52 6-cylinder magnesium engine block. Photographers used to use magnesium powder in the camera’s flash before xenon bulbs were available.


Most folks, however, equate magnesium with a burning white flame. Magnesium fires burn too hot to be extinguished using water, so most firefighters use sand or graphite.


We’re going to learn how to (safely) ignite a piece of magnesium in the first experiment, and next how to get energy from it by using it in a battery in the second experiment. Are you ready?


[am4show have=’p8;p9;p25;p52;p80;p91;’ guest_error=’Guest error message’ user_error=’User error message’ ]


Materials:


  • magnesium strip (MSDS)
  • matches with adult help
  • tile or concrete surface (something non-flammable)
  • gloves, goggles

Burning magnesium produces ultraviolet light. This isn’t good for your eyes, and the brightness of the flame is another danger for your eyes. Avoid looking directly into the flame.


Burning magnesium is so hot that if it gets on your skin it will burn to it and not come off. As difficult as burning magnesium is to put out, avoid letting the burning metal come in contact with you or anything else that might catch fire.


As explained later in this lab, magnesium burns in carbon dioxide. Therefore, a CO2 fire extinguisher won’t work to put it out. Water won’t work, CO2 won’t work. It takes a dry chemical fire extinguisher to put it out, or just wait for it to burn up completely on its own.


Magnesium is a metal, and in this experiment, you’ll find that some metals can burn. The magnesium in this first experiment combines with the oxygen in the air to produce a highly exothermic reaction (gives off heat and light). The ash left from this experiment is magnesium oxide:


2Mg (s) + O2 (g) –> 2Mg O (s)


Not all the magnesium from this experiment turned directly into the ash on the table – some of it transformed into the smoke that escaped into the air.


Caution: Do NOT look directly at the white flame (which also contains UV), and do NOT inhale the smoke from this experiment!


C3000: Experiment 52


Download Student Worksheet & Exercises


Here’s what’s going on in this experiment:


As you burn your magnesium, you will get your very own fireworks show….a little one, but still cool.


2Mg + O2 –> 2MgO


Magnesium burned in oxygen yields magnesium oxide. Because the temperature of burning magnesium is so high, small amounts of magnesium react with nitrogen in the air and produce magnesium nitride.


3Mg + N2 –> 2Mg3N2


Magnesium plus nitrogen yield magnesium nitride.  Magnesium will also burn in a beaker of dry ice instead of in air (oxygen).


2Mg + CO2 –> 2MgO + C


Magnesium burned in carbon dioxide yields magnesium oxide and carbon (ash, charcoal, etc.)


Cleanup: Rinse off and pat dry the rest of the magnesium strip.


Storage: Place everything back in its proper place in your chemistry set.


Disposal: Dispose of all solid waste in the garbage.


Magnesium Battery

Now let’s see how to make a battery using magnesium, table salt, copper wire, and sodium hydrogen sulfate (AKA sodium bisulfate).


Materials:


  • magnesium strip
  • test tube and rack
  • light bulb (from a flashlight)
  • 2 pieces of wire
  • measuring cup of water
  • salt (sodium chloride)
  • copper wire (no insulation, solid core)
  • measuring spoon
  • sodium hydrogen sulfate (NaHSO4) (MSDS) Sodium hydrogen sulfate is very toxic. Respect it, handle it carefully and responsibly. Do not take it for granted.
  • gloves, goggles

NOTE: Be very careful when handling the sodium hydrogen sulfate – it’s highly corrosive and dangerous when wet.  Handle this chemical only with gloves, and be sure to read over the MSDS before using.

C1000: Experiment 75
C3000: Experiment 295


We’re going to do another electrolysis experiment, but this time using magnesium instead of zinc. In the previous electrolysis experiment, we used electrical energy to start a chemical reaction, but this time we’re going to use chemical energy to generate electricity.  Using two electrodes, magnesium and copper, we can create a voltaic cell.


TIP: Use sandpaper to scuff up the surfaces of the copper and magnesium so they are fresh and oxide-free for this experiment.  And do this experiment in a DARK room.


How cool is it to generate electricity from a few strips of metal and salt water? Pretty neat! This is the way carbon-core batteries work (the super-cheap brands labeled ‘Heavy Duty’ are carbon-zinc or ‘dry cell’ batteries). However, in dry cell batteries scientists use a crumbly paste instead of a watery solution (hence the name) by mixing in additives.


In this chemical reaction, when the magnesium metal enters into the solution, it leaves 2 electrons behind and turns into a magnesium ion:


Oxidation: Mg (s) –> Mg2+(aq) + 2e


The magnesium strip takes on a negative charge (cathode), and the copper strip takes on a positive charge (anode).  The copper strip snatches up the electrons:


Reduction: Cu2+(aq) + 2e –> Cu (s)


and you have a flow of electrons that run through the wire from surplus (cathode) to shortage (anode), which lights up the bulb.


Note: You can substitute a zinc strip or aluminum strip for the magnesium strip and a carbon rod (from a pencil) for the copper wire.


Going further: You can expand on this experiment by substituting copper sulfate and a salt bridge to make a voltaic cell from two half-cells in Experiment 16.5 of the Illustrated Guide to Home Chemistry Experiments.


[/am4show]


Click here to go to next lesson on Making Copper

This experiment shows how a battery works using electrochemistry. The copper electrons are chemically reacting with the lemon juice, which is a weak acid, to form copper ions (cathode, or positive electrode) and bubbles of hydrogen.


These copper ions interact with the zinc electrode (negative electrode, or anode) to form zinc ions. The difference in electrical charge (potential) on these two plates causes a voltage.


Materials:


  • one zinc and copper strip
  • two alligator wires
  • digital multimeter
  • one fresh large lemon or other fruit

[am4show have=’p8;p9;p18;p45;p76;p91;p58;’ guest_error=’Guest error message’ user_error=’User error message’ ]


Download Student Worksheet & Exercises


Roll and squish the lemon around in your hand so you break up the membranes inside, without breaking the skin or leaking any juice. If you’re using non-membrane foods, such as an apple or potato, you are all ready to go.


Insert the copper and zinc strips into the lemon, making sure they do not contact each other inside. Clip one test wire to each metal strip using alligator wires to connect to the digital multimeter. Read and record your results.


What happens when you gently squeeze the lemon? Does the voltage vary over time?


You can try potatoes, apples, or any other fruit or vegetable containing acid or other electrolytes. You can use a galvanized nail and a copper penny (preferably minted before 1982) for additional electrodes.


If you want to light a light bulb, try using a low-voltage LED in the 1.7V or lower hooked up to several lemons connected in series. For comparison, you’ll need about 557 lemons to light a standard flashlight bulb.


What’s going on?


The basic idea of electrochemistry is that charged atoms (ions) can be electrically directed from one place to the other. If we have a glass of water and dump in a handful of salt, the NaCl (salt) molecule dissociates into the ions Na+ and Cl-.


When we plunk in one positive electrode and one negative electrode and crank up the power, we find that opposites attract: Na+ zooms over to the negative electrode and Cl- zips over to the positive. The ions are attracted (directed) to the opposite electrode and there is current in the solution.


Electrochemistry studies chemical reactions that generate a voltage and vice versa (when a voltage drives a chemical reaction), called oxidation and reduction (redox) reactions. When electrons are transferred between molecules, it’s a redox process.


Fruit batteries use electrolytes (solution containing free ions, like salt water or lemon juice) to generate a voltage. Think of electrolytes as a material that dissolves in water to make a solution that conducts electricity. Fruit batteries also need electrodes made of conductive material, like metal. Metals are conductors not because electricity passes through them, but because they contain electrons that can move. Think of the metal wire like a hose full of water. The water can move through the hose. An insulator would be like a hose full of cement – no charge can move through it.


You need two different metals in this experiment that are close, but not touching inside the solution. If the two metals are the same, the chemical reaction doesn’t start and no ions flow and no voltage is generated – nothing happens.


Exercises


  1.  What kinds of fruit make the best batteries?
  2.  What happens if you put one electrode in one fruit and one electrode in another?
  3.  What happens if you stick multiple electrode pairs around a piece of fruit, and connect them in series (zinc to copper to zinc to copper to zinc…etc.) and measure the voltage at the start and end electrodes?

[/am4show]


Click here to go to next lesson on Magnesium Battery

Mars is coated with iron oxide, which not only covers the surface but is also present in the rocks made by the volcanoes on Mars.


Today you get to perform a chemistry experiment that investigates the different kinds of rust and shows that given the right conditions, anything containing iron will eventually break down and corrode. When iron rusts, it’s actually going through a chemical reaction: Steel (iron) + Water (oxygen) + Air (oxygen) = Rust
Materials


  • Four empty water bottles
  • Four balloons
  • Water
  • Steel wool
  • Vinegar
  • Water
  • Salt

[am4show have=’p8;p9;p17;p44;p68;p80;p83;’ guest_error=’Guest error message’ user_error=’User error message’ ]


Download Student Worksheet & Exercises


  1. This lab is best done over two consecutive days. Plan to set up the experiment on the first day, and finish up with the observations on the next.
  2. Line up four empty bottles on the table.
  3. Label your bottles so you know which is which: Water, Water + Salt, Vinegar, Vinegar + Salt
  4. Fill two bottles with water.
  5. Fill two with vinegar.
  6. Add a tablespoon of salt to one of the water bottles.
  7. Add one tablespoon of salt to one of the vinegar bottles.
  8. Stuff a piece of steel wool into each bottle so it comes in contact with the liquid.
  9. Stretch a balloon across the mouth of each bottle.
  10. Let your experiment sit (overnight is best, but you can shorten this a bit if you’re in a hurry).
  11. The trick to getting this one to work is in what you expect to happen. The balloon should get shoved inside the bottle (not expand and inflate!). Check back over the course of a few hours to a few days to watch your progress.
  12. Fill in the data table.

What’s Going On?

Rust is a common name for iron oxide. When metals rust, scientists say that they oxidize, or corrode. Iron reacts with oxygen when water is present. The water can be liquid or the humidity in the air. Other types of rust happen when oxygen is not around, like the combination of iron and chloride. When rebar is used in underwater concrete pillars, the chloride from the salt in the ocean combines with the iron in the rebar and makes a green rust.


Mars has a solid core that is mostly iron and sulfur, and a soft pastel-like mantle of silicates (there are no tectonic plates). The crust has basalt and iron oxide. The iron is in the rocks and volcanoes of Mars, and Mars appears to be covered in rust.


When iron rusts, it’s actually going through a chemical reaction:
Steel (iron) + Water (oxygen) + Air (oxygen) = Rust


There are many different kinds of rust. Stainless steel has a protective coating called chromium (III) oxide so it doesn’t rust easily.


Aluminum, on the other hand, takes a long time to corrode because it’s already corroded — that is, as soon as aluminum is exposed to oxygen, it immediately forms a coating of aluminum oxide, which protects the remaining aluminum from further corrosion.


An easy way to remove rust from steel surfaces is to rub the steel with aluminum foil dipped in water. The aluminum transfers oxygen atoms from the iron to the aluminum, forming aluminum oxide, which is a metal polishing compound. And since the foil is softer than steel, it won’t scratch.


Exercises


  1. Why did one balloon get larger than the rest?
  2. Which had the highest pressure difference? Why?

[/am4show]


Click here to go to next lesson on Fruit Battery

Never polish your tarnished silver-plated silverware again! Instead, set up a ‘silverware carwash’ where you earn a nickel for every piece you clean. (Just don’t let grandma in on your little secret!)


We’ll be using chemistry and electricity together (electrochemistry) to make a battery that reverses the chemical reaction that puts tarnish on grandma’s good silver.  It’s safe, simple, and just needs a grown-up to help with the stove.


[am4show have=’p8;p9;p20;p47;p76;’ guest_error=’Guest error message’ user_error=’User error message’ ]


Here’s what you need:


  • stove (with adult help)
  • skillet
  • aluminum foil
  • water
  • baking soda
  • salt
  • real silverware (not stainless)


Download Student Worksheet & Exercises


You can safely dip it into a self-polishing solution:


  1. In a saucepan lined with aluminum foil, heat a solution of 1 cup water, 1 teaspoon baking soda, and 1 teaspoon salt.
  2. When your solution bubbles, place the tarnished silverware directly on the foil. (Try a piece that’s really tarnished to see the cleaning effects the best.)

What’s happening? This is a very simple battery, believe it or not! The foil is the negative charge, the silverware is the positive, and the water-salt-baking-soda solution is the electrolyte.


Your silver turns black because of the presence of sulfur in food. Here’s how the cleaning works: The tarnished fork (silver sulfide) combines with some of the chemicals in the water solution to break apart into sulfur (which gets deposited on the foil) and silver (which goes back onto the fork). Using electricity, you’ve just relocated the tarnish from the fork to the foil. Just rinse clean and wipe dry.


Toss the foil in the trash (or recycling) when you’re done, and the liquids go down the drain.


Exercises


  1. Where is the electrolyte in this experiment?
  2. Where does the black stuff that was originally on the silverware go?
  3. Where’s the electricity in this experiment?
  4. Where would you place your DMM probes to measure the generated voltage?

[/am4show]


Click here to go to next lesson on Batteries storing energy

If you don’t have equipment lying around for this experiment, wait until you complete Unit 10 (Electricity) and then come back to complete this experiment. It’s definitely worth it!


Electroplating was first figured out by Michael Faraday. The copper dissolves and shoots over to the key and gets stuck as a thin layer onto the metal key. During this process, hydrogen bubbles up and is released as a gas. People use this technique to add material to undersized parts, for place a protective layer of material on objects, to add aesthetic qualities to an object.


Materials:


  • one shiny metal key
  • 2 alligator clips
  • 9V battery clip
  • copper sulfate (MSDS)
  • one copper strip or shiny copper penny
  • one empty pickle jar
  • 9V battery

[am4show have=’p8;p9;p18;p45;p76;p80;’ guest_error=’Guest error message’ user_error=’User error message’ ]


Download Student Worksheet & Exercises


Place the copper sulfate in your jar and add a thin stream of water as you stir. Add enough water to make a saturated solution (dissolves most of the solids). Connect one alligator wire to the copper strip and the positive (red) wire from the clip lead. Connect the other alligator wire to the key and the negative (black) lead.


Place the copper strip and the key in the solution without touching each other. (If they touch, you’ll short your circuit and blow up your battery.) Let this sit for a few minutes… and notice what happens.


Clean up: Clean everything thoroughly after you are finished with the lab. After cleaning with soap and water, rinse thoroughly. Chemists use the rule of “three” in cleaning glassware and tools. Rinse three times, wash with soap, rinse three times.


Wipe off the electrodes. The solution and solids at the bottom of your cup cannot go in the trash. The liquid contains copper, a toxic heavy metal that needs proper disposal and safety precautions. Another chemical reaction needs to be performed to remove the heavy metal from the copper sulfate: Add a thumb sized piece of steel wool to the solution. The chemical reaction will pull out the copper out of the solution. The liquid can be washed down the drain. The solids cannot be washed down the drain, but they can be put in the trash. Use a little water to rinse the container free of the solids.


Place all chemicals, cleaned tools, and glassware in their respective storage places.


Dispose of all solid waste in the garbage. Liquids can be washed down the drain with running water. Let the water run awhile to ensure that they have been diluted and sent downstream.


Exercises


  1. Look at your key. What color is it?
  2.  Where did the copper on your key come from?
  3.  What happened when you added a second battery?
  4.  Which circuit (series or parallel) did the reaction accelerate faster with?

[/am4show]


Click here to go to next lesson on Electrochemical cells and voltage

This experiment is just for advanced students. If you guessed that this has to do with electricity and chemistry, you’re right! But you might wonder how they work together. Back in 1800, William Nicholson and Johann Ritter were the first ones to split water into hydrogen and oxygen using electrolysis. (Soon afterward, Ritter went on to figure out electroplating.) They added energy in the form of an electric current into a cup of water and captured the bubbles forming into two separate cups, one for hydrogen and other for oxygen.


This experiment is not an easy one, so feel free to skip it if you need to. You don’t need to do this to get the concepts of this lesson but it’s such a neat and classical experiment (my students love it) so you can give it a try if you want to. The reason I like this is because what you are really doing in this experiment is ripping molecules apart and then later crashing them back together.


Have fun and please follow the directions carefully. This could be dangerous if you’re not careful. The image shown here is using graphite from two pencils sharpened on both ends, but the instructions below use wire.  Feel free to try both to see which types of electrodes provide the best results.


[am4show have=’p9;p40;p76;p91;p58;’ guest_error=’Guest error message’ user_error=’User error message’ ]


You will need:


  • 2 test tubes or thin glass or plastic something closed at one end. I do not recommend anything wider than a half inch in diameter.
  • 2 two wires, one needs to be copper, at least 12 inches long. Both wires need to have bare ends.
  • 1 Cup
  • Water
  • One 9 volt battery
  • Long match or a long thin piece of wood (like a popsicle stick) and a match
  • Rubber bands
  • Masking tape
  • Salt


Download Student Worksheet & Exercises
1. Fill the cup with water.


2. Put a tablespoon or so of salt into the water and stir it up. (The salt allows the electricity to flow better through the water.)


2. Put one wire into the test tube and rubber band it to the test tube so that it won’t come out (see picture).


3. Use the masking tape to attach both wires to the battery. Make sure the wire that is in the test tube is connected to the negative (-) pole of the battery and that the other is connected to the positive (+) pole. Don’t let the bare parts of the different wires touch. They could get very hot if they do.


4. Fill the test tube to the brim with the salt water.


5. This is the tricky part. Put your finger over the test tube, turn it over and put the test tube, open side down, into the cup of water. (See picture.)


6. Now put the other wire into the water. Be careful not to let the bare parts of the wires touch.


7. You should see bubbles rising into the test tube. If you don’t see bubbles, check the other wire. If bubbles are coming from the other wire either switch the wires on the battery connections or put the wire that is bubbling into the test tube and remove the other. If you see no bubbles check the connections on the battery.


8. When the test tube is half full of gas (half empty of salt water depending on how you look at it) light the long match or the wooden stick. Then take the test tube out of the water and let the water drain out. Holding the test tube with the open end down, wait for five seconds and put the burning stick deep into the test tube (the flame will probably go out but that’s okay). You should hear an instant pop and see a flash of light. If you don’t, light the stick again and try it another time. For some reason, it rarely works the first time but usually does the second or third.


A water molecule, as you saw before, is two hydrogen atoms and one oxygen atom. The electricity encouraged the oxygen to react with the copper wire leaving the hydrogen atoms with no oxygen atom to hang onto. The bubbles you saw were caused by the newly released hydrogen atoms floating through the test tube in the form of hydrogen gas. Eventually that test tube was part way filled with nothing but pure hydrogen gas.


But how do you know which bubbles are which? You can tell the difference between the two by the way they ignite (don’t’ worry – you’re only making a tiny bit of each one, so this experiment is completely safe to do with a grown up).


It takes energy to split a water molecule. (On the flip side, when you combine oxygen and hydrogen together, it makes water and a puff of energy. That’s what a fuel cell does.) Back to splitting the water molecule – as the electricity zips through your wires, the water molecule breaks apart into smaller pieces: hydrogen ions (positively charged hydrogen) and oxygen ions (negatively charged oxygen). Remember that a battery has a plus and a minus charge to it, and that positive and negative attract each other.


So, the positive hydrogen ions zip over to the negative terminal and form tiny bubbles right on the wire. Same thing happens on the positive battery wire. After a bit of time, the ions form a larger gas bubble. If you stick a cup over each wire, you can capture the bubbles and when you’re ready, ignite each to verify which is which.


If the match burns brighter, the gas is oxygen. If you hear a POP!, the gas is hydrogen. Oxygen itself is not flammable, so you need a fuel in addition to the oxygen for a flame. In one case, the fuel is hydrogen, and hence you hear a pop as it ignites. In the other case, the fuel is the match itself, and the flame glows brighter with the addition of more oxygen.


When you put the match to it, the energy of the heat causes the hydrogen to react with the oxygen in the air and “POP”, hydrogen and oxygen combine to form what? That’s right, more water. You have destroyed and created water! (It’s a very small amount of water so you probably won’t see much change in the test tube.)


The chemical equations going on during this electrolysis process look like this:


A reduction reaction is happening at the negatively charged cathode. Electrons from the cathode are sticking to the hydrogen cations to form hydrogen gas:


2 H+(aq) + 2e –> H2(g)


2 H2O(l) + 2e –> H2(g) + 2 OH(aq)


The oxidation reaction is occurring at the positively charged anode as oxygen is being generated:


2 H2O(l)  –> O2(g) + 4 H+(aq) + 4e


4 OH(aq) –> O2(g) + 2 H2O(l) + 4 e-


Overall reaction:


2 H2O(l)  –> 2 H2(g) + O2(g)


Note that this reaction creates twice the amount of hydrogen than oxygen molecules. If the temperature and pressure for both are the same, you can expect to get twice the volume of hydrogen to oxygen gas (This relationship between pressure, temperature, and volume is the Ideal Gas Law principle.)


This is the idea behind vehicles that run on sunlight and water.  They use a solar panel (instead of a 9V battery) to break apart the hydrogen and oxygen and store them in separate tanks, then run them both back together through a fuel cell, which captures the energy (released when the hydrogen and oxygen recombine into water) and turns the car’s motor. Cool, isn’t it?


Note: We’re going to focus on Alternative Energy in Unit 12 and create all sorts of various energy sources including how to make your own solar battery, heat engine, solar & fuel cell vehicles (as described above), and more!


Exercises


  1. Why are bubbles forming?
  2. Did bubbles form at both wires, or only one? What kind of bubbles are they?
  3. What would happen if you did this experiment with plain water? Would it work? Why or why not?
  4. Which terminal (positive or negative) produced the hydrogen gas?
  5. Did the reaction create more hydrogen or more oxygen?

[/am4show]


Click here to go to next lesson on Electroplating


Electricity. Chemistry. Nothing in common, have nothing to do with each other. Wrong! Electrochemistry has been a fact since 1774. Once electricity was applied to particular solutions, changes occurred that scientists of the time did not expect.


In this lab, we will discover some of the same things that Farraday found over 300 years ago. We will be there as things tear apart, particles rush about, and the power of attraction is very strong. We’re not talking about dancing, we’re talking about something much more important and interesting….we’re talking about ELECTROCHEMISTRY!


[am4show have=’p8;p9;p25;p52;’ guest_error=’Guest error message’ user_error=’User error message’ ]


Materials:


  • Test tube rack
  • 9V battery clip
  • 9V battery
  • Flashlight lamp
  • Gloves
  • Electrical wires
  • Aluminum foil
  • Water
  • Sugar
  • Salt
  • Sodium carbonate (MSDS)
  • Measuring spoon

When the salt sodium chloride (NaCl) mixes with water, it separates into its positively (Na+) and negatively (Cl-) charged particles (ions). When a substance mixes with water and separates into its positive and negative parts, it’s called a ‘salt’.


Salts can be any color of the rainbow, from the deep orange of potassium dichromate to the vivid purple of potassium permanganate to the inky black of manganese dioxide. Did you know that MSG (monosodium glutamate) is a salt? Most salts are not consumable, as in the lead poisoning you’d get if you ingested lead diacetate.


If you pass a current through the solution of salt and water, opposites attract: the positive ions are attracted tot he negative pole and the negative ions go toward the positive pole. These migrations ions allow electricity to flow, which is why ‘salt’ solutions conduct electricity.


C1000: Experiments


Download Student Worksheet & Exercises


Here’s what’s going on in this experiment:


Our experiment uses a saturated solution of table salt that is just sitting in a container minding its own business. That just won’t do! We must intervene. Our 9V battery pushes its voltage through the saltwater. That electric current tears the sodium from the chlorine. These positively and negatively charged ions rush about, looking for something they are attracted to. Opposites attract, so positively charged sodium ions find spending time with the negative electrode a treat. They are very happy together. Negatively charged chlorine ions are attracted to the positive electrode. The match is wonderful, and the negativity and the positivity somehow enjoy the time spent with each other.


NaCl –> Na+ + Cl


Sodium chloride decomposes into sodium and chlorine ions


Cleanup: Clean everything thoroughly after you are finished with the lab. After cleaning with soap and water, rinse thoroughly. Chemists use the rule of “three” in cleaning glassware and tools. After washing, chemists rinse out all visible soap and then rinse three times more.


Storage: Place all chemicals, cleaned tools, and glassware in their respective storage places.


Disposal: Dispose of all solid waste in the garbage. Liquids can be washed down the drain with running water. Let the water run awhile to ensure that they have been diluted and sent downstream.


[/am4show]


Click here to go to next lesson on Electrolysis

If you guessed that electrochemistry has to do with electricity and chemistry, you’re right! But you might wonder how they work together. Back in 1800, William Nicholson and Johann Ritter were the first ones to split water into hydrogen and oxygen using electrolysis. (Soon afterwards, Ritter went on to figure out electroplating.) They added energy in the form of an electric current into a cup of water and captured the bubbles forming into two separate cups, one for hydrogen and other for oxygen.
[am4show have=’p9;p52;p91;’ guest_error=’Guest error message’ user_error=’User error message’ ]


The chemical reaction inside electrochemical cells is also a redox reaction. Batteries (also known as galvanic or voltaic cells) use a spontaneous chemical reaction inside to create energy. The acid inside the battery reacts with the metal electrodes (the plus and minus ends of the battery) to provide electricity (energy).


Most metals oxidize – the corrosion itself is the oxidative deterioration. You can protect metals from corrosion (but not completely) by inhibiting the oxidant (when you paint the surface or even allow a thin layer of oxide to form then seal it to protect it. You can also make a coating layer that isn’t affected by water or oxygen and use that to coat the metal surface (like coating iron with sodium chromate).


[/am4show]


Click here to go to next lesson on More on Electrochemistry

This is a cool video from a Teacher’s Educational Channel in Europe I thought you might enjoy about the science of fireworks:


You can view the full video here.


Click here to go to your next lesson in Electrochemistry.

Charcoal crystals uses evaporation to grow the crystals, which will continue to grow for weeks afterward.  You’ll need a piece of very porous material, such as a charcoal briquette, sponge, or similar object to absorb the solution and grow your crystals as the liquid evaporates.  These crystals are NOT for eating, so be sure to keep your growing garden away from young children and pets! This project is exclusively for advanced students, as it more involves toxic chemicals than just salt and sugar.


[am4show have=’p9;p40;p79;’ guest_error=’Guest error message’ user_error=’User error message’ ]


The materials you will need for this project:


  • Charcoal Briquettes (or pieces of sponge or brick or porous rock)
  • Distilled Water
  • Uniodized Salt
  • Ammonia (Keep this out of reach of children!)
  • Laundry Bluing
  • Food Coloring (optional)
  • Pie Plate (glass or tin)
  • Measuring Spoons
  • Disposable Cup
  • Popsicle Stick


Download worksheet and exercises


The first thing you’ll need to whip up a batch of solution, then you’ll start growing your garden.  Here’s how you do it:


1. Into a disposable cup, stir together (use a popsicle stick to mix it up, not your good silverware) 1 cup of water, 1 tablespoon of ammonia, 1/2 cup of laundry bluing, and 1/2 cup of salt (non-iodized).


2. Place your charcoal or sponge in a pie tin and pour your solution from step 1 over it.


3. Wait impatiently for a few days to one week.  As the liquid evaporates, the salts are left behind, forming your crystals.


4. Continue to add more solution (to replace the evaporated solution) to keep your crystals growing.  Think of it as ‘watering’ (with your special solution) your crystals, which are growing in your ‘soil’ (sponge).


5. You can dot the sponge with drops of food coloring to grow different colors in your garden.


Questions to Consider…

Why do you think you needed ammonia and ‘laundry bluing’ for this experiment?  What is ‘laundry bluing’, anyway?  Why do the crystals form just on the porous object and not the glass/metal pie plate?   Let us know in the comment field below what you think:


[/am4show]


Click here to go to next lesson on Science of Fireworks


Potassium perchlorate is usually safer than chlorate salt, but it sometimes is hard to get it. In the past, the only supplier in the US makes ammonium perchlorate, the oxidizer that was used with the space shuttle booster rockets, and each shuttle launch required 1.5 million pounds of it, which was twice the annual consumption rate, so when there were a lot of shuttle launches, the fireworks market took a hit and it was near impossible to get any potassium perchlorate.
[am4show have=’p9;p52;p91;’ guest_error=’Guest error message’ user_error=’User error message’ ]


Fireworks also have finders, which hold the mixture together, usually dextrin (a kind of starch).


Binders aren’t stable and are usually added when the firework is ready to go.


Fireworks can have regulators (metals) added to control the speed of the reaction.
Reducing agents like sulfur and charcoal, are used to burn the oxygen and make the hot gases and control the reaction speed.


[/am4show]


Click here to go to next lesson on Charcoal Crystals


Second Law of Thermodynamics: Heat flows from hot to cold. Heat is the movement of thermal energy from one object to another. Heat can only flow from an object of a higher temperature to an object of a lower temperature. Heat can be transferred from one object to another through conduction, convection and radiation.


Temperature is basically a speedometer for molecules. The faster they are wiggling and jiggling, the higher the temperature and the higher the thermal energy that object has. Your skin, mouth and tongue are antennas which can sense thermal energy. When an object absorbs heat it does not necessarily change temperature.


Materials: hot cup of cocoa


[am4show have=’p8;p9;p10;p37;p88;’ guest_error=’Guest error message’ user_error=’User error message’ ]


Leave a cup of hot coffee out on a cold morning. Does the coffee get warmer or cooler over time? Your coffee gets cooler, as heat travels from the coffee to the cool morning.


Learn more about this scientific principle in Unit 13.


[/am4show]


Click here to go to next lesson on Fireworks


First Law of Thermodynamics: Energy is conserved. Energy is the ability to do work. Work is moving something against a force over a distance. Force is a push or a pull, like pulling a wagon or pushing a car. Energy cannot be created or destroyed, but can be transformed.


Materials: ball, string


[am4show have=’p8;p9;p10;p37;p88;’ guest_error=’Guest error message’ user_error=’User error message’ ]


Roll a ball down a hill. The amount of energy the ball had while at rest at the top of the hill (potential energy) turns into kinetic energy while it zips to the bottom.


You can also swing on a swing and see this effect happen over and over again: when you’re at the highest point of your swing, you have the highest potential energy but zero kinetic energy (your speed momentarily goes to zero as you change direction). At the lowest point of your swing (when you’re moving the fastest), all your potential energy has turned into kinetic energy. Why do you eventually stop? The reason you eventually slow down and stop instead of swinging back and forth forever is that you have air resistance and friction where the chain is suspended from the bar.


Learn more about this scientific principle in Unit 4 and Unit 5 and Unit 13.
[/am4show]


Click here to go to next lesson on Thermodynamics: Second law


What do you do if you don’t know the concentration of a solution? We use a method called titration to determine how many moles are present in the solution of an acid or a base by neutralizing it. A titration curve is when you graph out the pH as you drop it in the solution.


[am4show have=’p9;p52;p91;’ guest_error=’Guest error message’ user_error=’User error message’ ]


[/am4show]


Click here to go to next lesson on pH and solubility

This experiment is for advanced students. All chemical reactions are equilibrium reactions. This experiment is really cool because you’re going to watch how a chemical reaction resists a pH change.


[am4show have=’p9;p52;’ guest_error=’Guest error message’ user_error=’User error message’ ]


Materials:


  • baking soda
  • universal indicator
  • distilled white vinegar
  • 3 test tubes with stoppers
  • distilled water
  • medicine droppers
  • clear soda
  • safety goggles and gloves


  1. First add water to a test tube and then add 10 drops of universal indicator and shake it up.
  2. Compare the color with your color chart and find the pH number. Set aside.
  3. Into a second test tube, add baking soda and water. Shake it up again!
  4. Add 10 drops universal indicator and shake the second test tube up again.
  5. Compare the second test tube with the pH chart to find the number.
  6. Using your medicine dropper, place soda to the second test be and look for a color change.
  7. Keep adding dropper-fulls of soda until you get the pH to match the first test tube (7).
  8. Add two drops of distilled white vinegar and look for a color change. Add more drops as needed.
  9. What happened?

We had two solutions that were both around 7. When we added an acid to one of them, the pH should have decreased. But why when we added the acid to the baking soda-carbonated soda solution, did it not change at all? That’s because it’s a buffer solution, which resists changes in pH.


[/am4show]


Click here to go to next lesson on Titrations and pH curves

Cobalt chloride (CoCl2) has a dramatic color change when combined with water, making it a great water indicator. A concentrated solution of cobalt chloride is red at room temperature, blue when heated, and pale-to-clear when frozen. The cobalt chloride we’re using is actually cobalt chloride hexahydrate, which means that each CoCl2 molecule also has six water molecules (6H2O) stuck to it.

[am4show have='p8;p9;p18;p45;p68;p80;' guest_error='Guest error message' user_error='User error message' ] For this experiment you'll need:
  • cobalt chloride
  • cotton swab
  • goggles
  • test tube with stopper
  • index card
  • distilled water
  • hair dryer


Download Student Worksheet & Exercises

Fill your test tube partway with water and add 1 teaspoon of cobalt chloride. Cap and shake until the solids dissolve. Continue to add cobalt chloride, 1 teaspoon at a time, until you cannot dissolve any more into your solution. (You have just made a saturated solution.)

Using your cotton swab like a paintbrush, dip into the solution (your “paint”) and write on the index card. Use a hair dryer to blow across the solution. (Be careful not to scorch the paper!) What happens? Stick it in the freezer. Now what happens? What if you blow dry it after it comes out of the freezer? What else can you come up with? What happens if you spritz it with water?

What's Going On? The cobalt changes color when hydrated/dehydrated – think of it as an indicator for water. It should be red when you first mix it, but blue when hit with the hair dryer. It doesn’t react to acids and bases the way the anthocyanin (in red cabbage juice) or universal indicator does, but rather with humidity.

Bonus Experiment Idea! You can grow red crystals by cooling off a cup of hot water. Here's how: into a test tube, add 40 drops of hot water and 2 small spoon measure of cobalt chloride. Suspend a small pebble attached to a thread into the test tube (this is your starter-seed for your crystals to attach to). If after a day or two your crystals aren't growing, just reheat the solution and add a little bit more of the chemical.

ANOTHER Bonus Experiment Idea! By soaking a strip of tissue or crepe paper (it's got to be thin) in the cobalt chloride solution, you can create your own weather forecaster! Simply let dry and when it turns blue, you're in for blue skies and pink means it's going to rain. (It's basically a humidity gauge.)

[/am4show]

Click here to go to next lesson on Potassium Hexacynoferrate