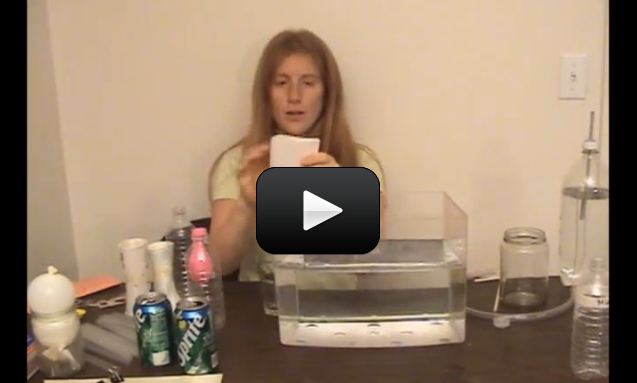
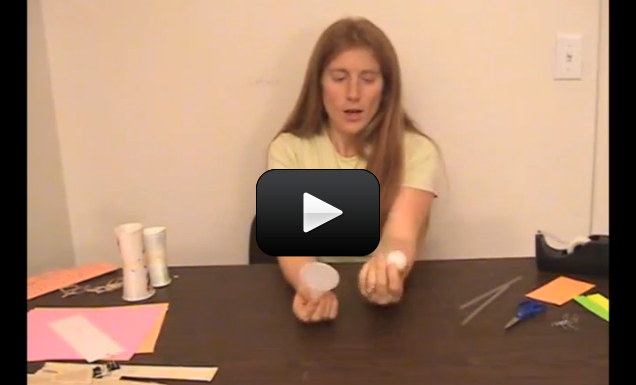
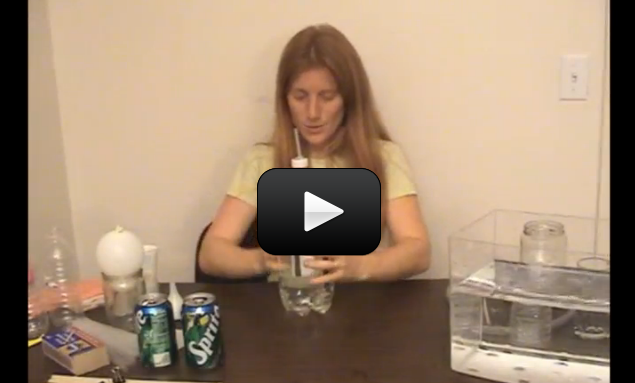
Most weather stations have anemometers to measure wind speed or wind pressure. The kind of anemometer we’re going to make is the same one invented back in 1846 that measures wind speed. Most anemometers use three cups, which is not only more accurate but also responds to wind gusts more quickly than a four-cup model.


Some anemometers also have an aerovane attached, which enables scientists to get both speed and direction information. It looks like an airplane without wings – with a propeller at the front and a vane at the back.


Other amemometers don’t have any moving parts – instead they measure the resistance of a very short, thin piece of tungsten wire. (Resistance is how much a substance resists the flow of electrical current. Copper has a low electrical resistance, whereas rubber has a very high resistance.) Resistance changes with the material’s temperature, so the tungsten wire is heated and placed in the airflow. The wind flowing over the wire cools it down and increases the resistance of the wire, and scientists can figure out the wind speed.


[am4show have=’p8;p9;p11;p38;p92;p71;p84;p100;p30;p57;’ guest_error=’Guest error message’ user_error=’User error message’ ]


Scientists also use sonic anemometers, which use ultrasonic waves to detect wind speed. The great thing about sonic anemometers is that they can measure speed in all three directions, which is great for studying wind that is not all moving in the same direction (like gusts and hurricanes).


Sonic anemometers send a sound wave from one side to the other and measure the time it takes to travel. Which means that these can also be used as thermometers, as temperature will also change the speed of sound. Since there are no moving parts, you’ll find these types of anemometers in harsh conditions, like on a buoy or in the desert, where salt disintegrates and dust gets in the way of the cup-style anemometer. The big drawback to sonic anemometers is water (like dew or rain): if the transducers get wet, it changes the speed of sound and gives an error in the reading.


The quickest anemometer to make is to attach the end of a string (about 12″ long) to a ping pong ball. Suspend the string in the wind, like from a fan or hair dryer (use the ‘cool’ setting). Since the ball is so lightweight, it’s quite responsive to wind speed.


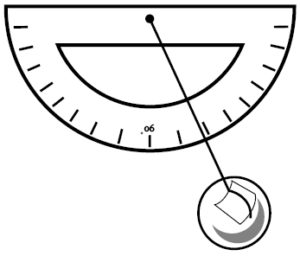
Add a protractor flipped upside down (so you can measure the angle of the string). Use the measurements below to figure out the wind speed. For example, mark the 90o angle with “0 mph”. This is your ping pong ball at rest in no wind. Use the numbers below to make the rest:


Angle Wind Speed
degrees mph
90 0
80 8
70 12
60 15
50 18
40 21
30 26
20 33

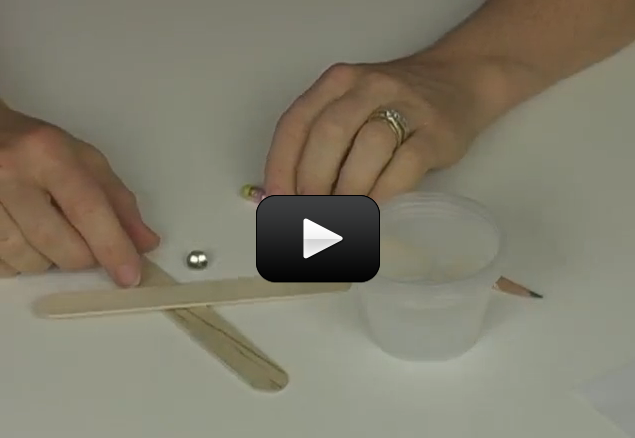
Now let’s make a four-cup anemometer. Here’s what you need to do:


Materials:


  • four lightweight cups
  • two sticks or popsicle sticks
  • tape or hot glue
  • tack or pin
  • pencil with eraser on top
  • block of foam (optional)


How steady was the wind that you measured? If you place your anemometer next to a door or a window, is there wind? How fast? Where could you place your anemometer so you can quickly read it each day?


By making two anemometers, one that you already know what the wind speed is, you can easily figure out how to calibrate the other. For example, how fast do the cups fly around when the ping pong ball anemometer indicates 12 mph? Can you see each cup, or are they a blur? You’ll get a feel for how to read the four-cup model by eye once you’ve had practice.


[/am4show]


Hygrometers measure how much water is in the air, called humidity. If it's raining, it's 100% humidity. Deserts and arid climates have low humidity and dry skin. Humidity is very hard to measure accurately, but scientists have figured out ways to measure how much moisture is absorbed by measuring the change in temperature (as with a sling psychrometer), pressure, or change in electrical resistance (most common).

The dewpoint is the temperature when moist air hits the water vapor saturation point. If the temperature goes below this point, the water in the air will condense and you have fog. Pilots look for temperature and dewpoint in their weather reports to tell them if the airport is clear, or if it''s going to be 'socked in'. If the temperature stays above the dewpoint, then the airport will be clear enough to land by sight. However, if the temperature falls below the dewpoint, then they need to land by instruments, and this takes preparation ahead of time.

A sling psychrometer uses two thermometers (image above), side by side. By keeping one thermometer wet and the other dry, you can figure out the humidity using a humidity chart. Such as the one on page two of this document. The psychrometer works because it measures wet-bulb and dry-bulb temperatures by slinging the thermometers around your head. While this sounds like an odd thing to do, there's a little sock on the bottom end of one of the thermometers which gets dipped in water. When air flows over the wet sock, it measures the evaporation temperature, which is lower than the ambient temperature, measured by the dry thermometer.

Scientists use the difference between these two to figure out the relative humidity. For example, when there's no difference between the two, it's raining (which is 100% humidity). But when there's a 9oC temperature difference between wet and dry bulb, the relative humidity is 44%. If there's 18oC difference, then it's only 5% humidity.

You can even make your own by taping two identical thermometers to cardboard, leaving the ends exposed to the air. Wrap a wet piece of cloth or tissue around the end of one and use a fan to blow across both to see the temperature difference!

One of the most precise are chilled mirror dewpoint hygrometers, which uses a chilled mirror to detect condensation on the mirror's surface. The mirror's temperature is controlled to match the evaporation and condensation points of the water, and scientists use this temperature to figure out the humidity.

We're going to make a very simple hygrometer so you get the hand of how humidity can change daily. Be sure to check this instrument right before it rains. This is a good instrument to read once a day and log it in your weather data book.

[am4show have='p8;p9;p11;p38;p92;p71;p84;p100;p30;p57;' guest_error='Guest error message' user_error='User error message' ]
Materials:

  • single hair
  • index card
  • tack
  • cardboard
  • tape
  • scissors
  • dime


This device works because human hair changes length with humidity, albeit small. We magnify this change by using a lever arm (the arrow and mark the different places on the cardboard to indicate levels of humidity. Does all hair behave the same way? Does it matter if you use curly or straight hair, or even the color of the hair? Does gray work better than blonde?

[/am4show]


First invented in the 1600s, thermometers measure temperature using a sensor (the bulb tip) and a scale. Temperature is a way of talking about, measuring, and comparing the thermal energy of objects. We use three different kinds of scales to measure temperature. Fahrenheit, Celsius, and Kelvin. (The fourth, Rankine, which is the absolute scale for Fahrenheit, is the one you’ll learn about in college.)


Mr. Fahrenheit, way back when (18th century) created a scale using a mercury thermometer to measure temperature. He marked 0° as the temperature ice melts in a tub of salt. (Ice melts at lower temperatures when it sits in salt. This is why we salt our driveways to get rid of ice). To standardize the higher point of his scale, he used the body temperature of his wife, 96°.


As you can tell, this wasn’t the most precise or useful measuring device. I can just imagine Mr. Fahrenheit, “Hmmm, something cold…something cold. I got it! Ice in salt. Good, okay there’s zero, excellent. Now, for something hot. Ummm, my wife! She always feels warm. Perfect, 96°. ” I hope he never tried to make a thermometer when she had a fever.


Just kidding, I’m sure he was very precise and careful, but it does seem kind of weird. Over time, the scale was made more precise and today body temperature is usually around 98.6°F.


Later, (still 18th century) Mr. Celsius came along and created his scale. He decided that he was going to use water as his standard. He chose the temperature that water freezes at as his 0° mark. He chose the temperature that water boils at as his 100° mark. From there, he put in 100 evenly spaced lines and a thermometer was born.


Last but not least Mr. Kelvin came along and wanted to create another scale. He said, I want my zero to be ZERO! So he chose absolute zero to be the zero on his scale.


Absolute zero is the theoretical temperature where molecules and atoms stop moving. They do not vibrate, jiggle or anything at absolute zero. In Celsius, absolute zero is -273 ° C. In Fahrenheit, absolute zero is -459°F (or 0°R). It doesn’t get colder than that!


As you can see, creating the temperature scales was really rather arbitrary:


“I think 0° is when water freezes with salt.”
“I think it’s just when water freezes.”
“Oh, yea, well I think it’s when atoms stop!”


Many of our measuring systems started rather arbitrarily and then, due to standardization over time, became the systems we use today. So that’s how temperature is measured, but what is temperature measuring?


Temperature is measuring thermal energy which is how fast the molecules in something are vibrating and moving. The higher the temperature something has, the faster the molecules are moving. Water at 34°F has molecules moving much more slowly than water at 150°F. Temperature is really a molecular speedometer.


Let’s make a quick thermometer so you can see how a thermometer actually works:


[am4show have=’p8;p9;p11;p38;p92;p71;p84;p100;p30;p57;’ guest_error=’Guest error message’ user_error=’User error message’ ]


Materials:


  • plastic bottle
  • straw
  • hot glue or clay
  • water
  • food coloring
  • rubbing alcohol
  • index card and pen


When something feels hot to you, the molecules in that something are moving very fast. When something feels cool to you, the molecules in that object aren’t moving quite so fast. Believe it or not, your body perceives how fast molecules are moving by how hot or cold something feels. Your body has a variety of antennae to detect energy. Your eyes perceive certain frequencies of electromagnetic waves as light. Your ears perceive certain frequencies of longitudinal waves as sound. Your skin, mouth and tongue can perceive thermal energy as hot or cold. What a magnificent energy sensing instrument you are!


[/am4show]


One of the most remarkable images of our planet has always been how dynamic the atmosphere is a photo of the Earth taken from space usually shows swirling masses of white wispy clouds, circling and moving constantly. So what are these graceful puffs that can both frustrate astronomers and excite photographers simultaneously?


Clouds are frozen ice crystals or white liquid water that you can see with your eyes. Scientists who study clouds go into a field of science called nephology, which is a specialized area of meteorology. Clouds don’t have to be made up of water – they can be any visible puff and can have all three states of matter (solid, liquid, and gas) existing within the cloud formation. For example, Jupiter has two cloud decks: the upper are water clouds, and the lower deck are ammonia clouds.


We’re going to learn how to build a weather instrument that will record whether (weather?) the day was sunny or cloudy using a very sensitive piece of paper. Are you ready?


[am4show have=’p8;p9;p11;p38;p92;p71;p84;p100;p30;p57;’ guest_error=’Guest error message’ user_error=’User error message’ ]


Materials:


  • Sun print paper or other paper sensitive to light
  • Film canister or soup can
  • Drill with drill bit
  • Scissors
  • Sunlight


The paper from a sun print kit has a very special coating that makes the paper react to light. Most sun print kits use set of light-sensitive chemicals such as potassium ferricyanide and ferric ammonium citrate to make a cyanotype solution. The paper changes color when exposed to UV light. In fact, you can try exposing the paper to different colors and see which changes the paper the most over a set amount of time!


The last step of this chemical process is to ‘set’ the reaction by washing it in plain water – this keeps the image on the paper so it doesn’t all disappear when you hang it on the wall. After the paper dries, the area exposed to UV light turns blue, and everything shaded turns white.


You can use sun print paper to test how well your sunblock works – just smear your favorite sunscreen over a sheet (or put a couple dabs of each kind) and see how well the paper stays protected: if it turns white, the light is getting through. If it stays blue, the sunscreen blocked the light!


[/am4show]


Did you know that supercooled liquids need to heat up in order to freeze into a solid? It’s totally backwards, I know…but it’s true! Here’s the deal:


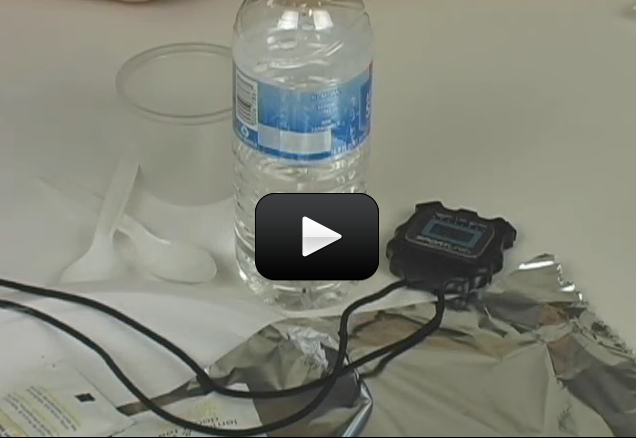
A supercooled liquid is a liquid that you slowly and carefully bring down the temperature below the normal freezing point and still have it be a liquid. We did this in our Instant Ice experiment.


Since the temperature is now below the freezing point, if you disturb the solution, it will need to heat up in order to go back up to the freezing point in order to turn into a solid.


When this happens, the solution gives off heat as it freezes. So instead of cold ice, you have hot ice. Weird, isn’t it?


Sodium acetate is a colorless salt used making rubber, dying clothing, and neutralizing sulfuric acid (the acid found in car batteries) spills. It’s also commonly available in heating packs, since the liquid-solid process is completely reversible – you can melt the solid back into a liquid and do this experiment over and over again!


The crystals melt at 136oF (58oC), so you can pop this in a saucepan of boiling water (wrap it in a towel first so you don’t melt the bag) for about 10 minutes to liquify the crystals.


[am4show have=’p8;p9;p11;p38;p92;p82;p84;p91;p101;p30;p57;’ guest_error=’Guest error message’ user_error=’User error message’ ]


Materials:


  • Sodium Acetate
  • Disposable aluminum pie plate


Download Student Worksheet & Exercises


You have seen this stuff before – when you combined baking soda and vinegar in a cup, the white stuff at the bottom of the cup left over from the reaction is sodium acetate. (No white stuff? Then it’s mixed in solution with the water. If you heat the solution and boil off all the water, you’ll find white crystals in the bottom of your pan.) The bubbles released from the baking soda-vinegar reaction are carbon dioxide.


[/am4show]


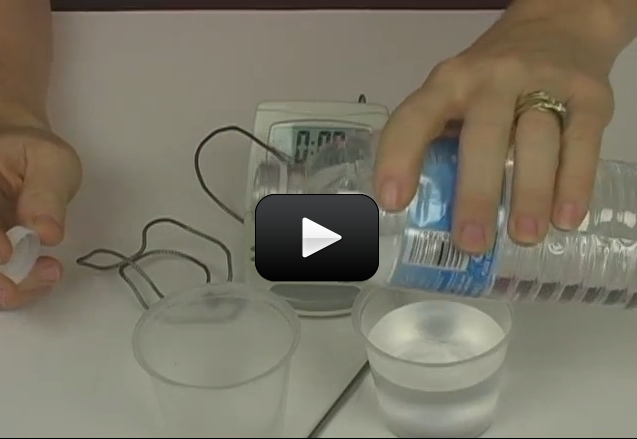
Supercooling a liquid is a really neat way of keeping the liquid a liquid below the freezing temperature. Normally, when you decrease the temperature of water below 32oF, it turns into ice. But if you do it gently and slowly enough, it will stay a liquid, albeit a really cold one!


In nature, you’ll find supercooled water drops in freezing rain and also inside cumulus clouds. Pilots that fly through these clouds need to pay careful attention, as ice can instantly form on the instrument ports causing the instruments to fail. More dangerous is when it forms on the wings, changing the shape of the wing and causing the wing to stop producing lift. Most planes have de-icing capabilities, but the pilot still needs to turn it on.


We’re going to supercool water, and then disturb it to watch the crystals grow right before our eyes! While we’re only going to supercool it a couple of degrees, scientists can actually supercool water to below -43oF!


[am4show have=’p8;p9;p11;p38;p92;p82;p84;p91;p101;p30;p57;’ guest_error=’Guest error message’ user_error=’User error message’ ]


Materials:


  • water
  • glass
  • bowl
  • ice
  • salt


Download Student Worksheet & Exercises


Don’t mix up the idea of supercooling with “freezing point depression”. Supercooling is when you keep the solution a liquid below the freezing temperature (where it normally turns into a solid) without adding anything to the solution. “Freezing point depression” is when you lay salt on the roads to melt the snow – you are lowering the freezing point by adding something, so the solution has a lower freezing point than the pure solvent.


[/am4show]


Rene Descartes (1596-1650) was a French scientist and mathematician who used this same experiment show people about buoyancy. By squeezing the bottle, the test tube (diver) sinks and when released, the test tube surfaces. You can add hooks, rocks, and more to your set up to make this into a buoyancy game!
[am4show have=’p8;p9;p11;p38;p92;p93;p30;p57;p84;’ guest_error=’Guest error message’ user_error=’User error message’ ]


The test tube sinks because the when you squeeze the bottle, you increase the pressure of the water and this forces water up into the test tube, which then compresses the air inside the tube. When this happens, it adds enough mass to cause it to sink. Releasing the squeeze on the bottle means that you decrease the pressure and the water is forced back out of the tube.


[/am4show]


The United States has large reserves of coal, natural gas, and crude oil which is used to make gasoline. However, the United States uses the energy of millions of barrels of crude oil every day, and it must import about half its crude oil from other countries.


Burning fossil fuels (oil, coal, gasoline, and natural gas) produces carbon dioxide gas. Carbon dioxide is one of the main greenhouse gases that may contribute to global warming. In addition, burning coal and gasoline can produce pollution molecules that contribute to smog and acid rain.


Using renewable energy-such as solar, wind, water, biomass, and geothermal-could help reduce pollution, prevent global warming, and decrease acid rain. Nuclear energy also has these advantages, but it requires storing radioactive wastes generated by nuclear power plants. Currently, renewable energy produces only a small part of the energy needs of the


United States. However, as technology improves, renewable energy should become less expensive and more common.


Hydropower (water power) is the least expensive way to produce I electricity. The sun causes water to evaporate. The evaporated water falls to the earth as rain or snow and fills lakes. Hydropower uses water stored in lakes behind dams. As water flows through a dam, the falling water turns turbines that run generators to produce electricity.


Currently, geothermal energy (heat inside the earth), biomass (energy from plants), solar energy (light from concentrated sunlight), and wind are being used to generate electricity. For example, in California there are more than sixteen thousand (16,000) wind turbines that generate enough power to supply a city the size of San Francisco with electricity.


In addition to producing more energy, we can also help meet our energy needs through conservation. Conservation means using less energy and using it more efficiently.


In the following experiments, you will use wind to do work, examine how batteries can store energy, and see how insulation can save energy.
[am4show have=’p8;p9;p11;p38;p92;p70;p22;p49;p84;p85;p30;p57;’ guest_error=’Guest error message’ user_error=’User error message’ ]


Materials


  • Pinwheel (can be purchased or madefrom construction paper)
  • Paper clips
  • Tape
  • Small shoe box  (children’s size)
  • Electric fan
  • Lightweight string  (about 4 feet long)
  • Plastic straw (longer than the width of the shoe box)
  • Hole punch


Download Student Worksheet & Exercises


Procedure


In this activity, you will try to use the energy in the wind to lift a set of six paper clips. You will first need to construct your windmill.


Use a hole punch to punch holes in the opposite sides across the width of a small, cardboard shoe box. Use the narrow sides of the box so the two holes are less than six inches (15 centimeters) apart. Make sure the holes are directly opposite each other. Place a plastic straw through the two holes. You may need to use the hole punch to enlarge the holes so the straw can rotate within the holes. The ends of the straw should extend out either side of the box.


Use the blades from a purchased pinwheel, or cut and fold a square piece of construction paper into the shape of a pinwheel. Next you will need to attach the pinwheel blades to one end of the straw. Partially unfold a small paper clip and insert the larger end into the straw. Push the straightened end of the paper clip through the center of the pinwheel. Bend this end of the paper clip and tape it to the outside of the pinwheel.


Set the electric fan on a table or countertop. Hold the shoe box so that the pinwheel is free to turn. HAVE AN ADULT PLUG IN AND TURN ON THE FAN. Move the windmill box to direct the breeze from the fan toward the blades of the pinwheel. Move the box until you find the best angle of the fan to the pinwheel so that the pinwheel turns freely and rapidly.


Turn off the fan. Now tape one end of the string to the side of the straw with no pinwheel just outside the box, and wrap the string around the straw a few times. Tie the other end of the string to a paper clip. Attach five other paper clips to the paper clip tied to the string. Allow the string to hang down so that the paper clips on the end of the string rest on the floor.


Now, you will test to see if your windmill can convert wind power to do work and lift the paper clips off the ground. Turn on the fan and hold the box where you did before to make the pinwheel turn.


Observations


Does the windmill turn the straw? Does the string wrap around the straw as the straw turns? What happens to the paper clips?


Discussion


You should observe the straw shaft turning as the wind from the fan is directed toward the blades of the pinwheel. As the pinwheel turns, it should wrap the string around the straw and lift the paper clips into the air. Your windmill converts the energy of the wind to work and lifts the weight of the paper clips. If your windmill is not working, then examine all the parts.


Compare your setup to the drawing, and see if any changes need to be made in your construction.


One way to store the energy produced by a windmill is to lift a weight. When the weight is allowed to fall, work can be produced. Weights in a grandfather clock are used to store energy and can run a clock for a week or longer. A windmill’s energy can be used to pump water to a storage area at a higher elevation. Later, this water can be allowed to fall through a turbine which turns a generator and produces electricity.


Electricity can also be produced directly from wind power. The shaft, or rod to which the windmill blades are attached, can be used to turn a generator. A generator or dynamo is used to convert mechanical energy into electrical energy. Power conversion units can change the direct current that wind generates to an alternating current. The alternating current can be fed directly into utility lines and used in our homes.


The sun is the original source of wind power. Without the sun to heat the earth, there would be no wind. The energy of the sun heats the earth, but all parts of the earth are not at the same temperature. These differences in temperature are responsible for global and local patterns of wind. For example, during the day a constant wind blows from the sea toward the land along coastal regions. Air above the hotter land rises and cooler, heavier air above the ocean moves in to take its place.


The power of the wind can be harnessed to do work. For at least 4,000 years, the wind has been used to move sailing ships. The wind has enough power to move ships across oceans and around the world.


For at least 1,000 years, windmills have been used for pumping water and turning


stones to grind grain. Millions of windmills have been used on the plains of America, Africa, and Australia to pump water from deep wells for livestock and humans.


In this century, windmills or wind engines have been used to generate electricity. Over 15,000 wind engines were installed in California in the 1980s. These wind engines have the capability to produce up to 1.5 billion watts of electricity. In California in 1987, wind was used to produce as much electricity as the city of San Francisco uses in an entire year.


Other Things to Try


Repeat this experiment and find the maximum weight you can lift with your windmill. Try more paper clips or try a heavier weight such as a pen.


List some of the problems associated with using windmills. What happens when the wind is blowing too gently? What happens if the wind blows strongly, such as in a storm? Do you think the area where you live is windy enough for wind engines to produce electricity?


Exercises


  1. Name three sources of renewable energy:
  2. What does the sun have to do with wind?
  3. Name three examples of wind power in historical or current usage:

[/am4show]


Temperature is a measure of the average hotness of an object. The hotter an object, the higher its temperature. As the temperature is raised, the atoms and molecules in an object move faster. The molecules in hot water move faster than the molecules in cold water. Remember that the heat energy stored in an object depends on both the temperature and the amount of the substance. A smaller amount of water will have less heat energy than a larger amount of water at the same temperature.


Increasing the temperature of a large body of water is one way to store heat energy for later use. A large container filled with salt water, called brine, may be used to absorb heat energy during the day when it is warm. This energy will be held in the salt water until the night when it is cooler. This stored heat energy can be released at night to warm a house or building. This is one way to store the sun’s heat energy until it is needed.


Solar ponds are used to store energy from the sun. Temperatures close to 100°C (212°F) have been achieved in solar ponds. Solar ponds contain a layer of fresh water above a layer of salt water. Because the salt water is heavier, it remains at the bottom of the pond-even as it gets quite hot. A black plastic bottom helps absorb solar energy from sunlight. The water on top serves to insulate and trap the heat in the pond.


In a fresh water pond, as the water on the bottom is heated from sunlight, the hot water becomes lighter and rises to the top of the pond. This convection or movement of hot water to the top tends to carry away excess heat. However, in a salt water pond, there is no convection so heat is trapped. In Israel a series of salt water, solar ponds were developed around the Dead Sea. The heat stored in these solar ponds has been used to run turbines and generate electricity.
[am4show have=’p8;p9;p11;p38;p92;p70;p22;p49;p84;p85;p30;p57;’ guest_error=’Guest error message’ user_error=’User error message’ ]
Materials


  • Two paper cups
  • Measuring cups
  • Hot water
  • Watch or clock
  • Sink
  • Refrigerator (with freezer compartment)


Download Student Worksheet & Exercises


Procedure


Turn on the hot water faucet of a sink and wait several minutes until the water is hot. Be careful not to burn yourself with this hot water. Add one-fourth cup of this hot water to the first paper cup. Add one cup of hot water to the second paper cup. Place both of these cups in the freezer compartment of a refrigerator.


After thirty minutes check the water in each cup.  Return the cups to the freezer compartment and check them again after fifteen minutes. Keep checking the cups each fifteen minutes until the water in one of the cups is frozen.


Observations


Does the water in the cups freeze at the same time? Does the water in one of the cups freeze first? How long does it take for the water to freeze?


Discussion


You will probably observe that the smaller amount of water in the first cup freezes prior to the larger amount of water in the second cup. Both cups were filled with the same hot water. However, even though the water in both cups was at the same temperature, they did not freeze at the same time. The amount of heat energy stored by the water depends on both the temperature and the amount of water.


We expect that the more heat energy stored in the cup, the longer it takes the water in the cup to freeze. Since one cup of water has more heat energy than one-fourth cup of water, it takes the larger amount of water longer to freeze.


Other Things to Try


Place one-half cup of hot tap water in one cup.  Place one-half cup of cool tap water in a second cup. Put both cups in the freezer compartment of a refrigerator and check them every fifteen minutes until the water freezes solid. Which cup of water do you think has more heat energy? Which cup of water do you think will freeze first?


Place one cup of water in one paper cup and one-fourth cup of water in a second paper cup. Put both cups in the freezer of a refrigerator and leave overnight. The next day remove both cups of frozen water. Set the two cups out in the room. Observe the time it takes each piece of ice to melt. Which piece of ice do you think will melt first? Which piece will require more heat energy to cause it to melt?


Exercises


  1. What type of heat transfer is at work in a solar pond?
    1. Kinetic
    2. Conduction
    3. Potential
    4. Convection
    5. Radiation
  2. What units do we use to measure energy?
    1. Kilowatts
    2. Joules
    3. Newtons
    4. Kilowatt-hours
  3. Draw a diagram of a solar pond in the space below:

[/am4show]


Without the sun, there would be no life on Earth. The sun warms the earth, generates wind, and carries water into the air to produce rain and snow. The energy of the sun provides sunlight for all the plant life on our planet, and through plants provides energy for all animals.


The sun is like a giant furnace in which hydrogen nuclei (atoms without electrons) are constantly smashed together to form helium nuclei. This process is called nuclear fusion. In this process, 3.6 billion kilograms (8 billion pounds) of matter are converted to pure energy every second. The temperature in the sun exceeds 15 million degrees.


Nuclear fusion is one kind of energy. Other forms of energy include: mechanical energy, heat, electrical energy, chemical energy, and light. Mechanical energy is the energy of organized motion, such as a turning wheel. Heat is the energy of random motion, such as a cup of hot water. Electrical energy is the energy of moving charged particles or electrons, such as a current in a wire. Chemical energy is the energy stored in bonds that hold atoms together. Light is any form of electromagnetic waves, such as X rays, microwaves, radio waves, ultraviolet light, or visible light.


Energy can be converted from one from to another. For example, the nuclear energy of the sun is converted to light, which goes through space to the earth. Solar collectors of mirrors can be used to focus some of that light to heat water to steam. This steam can be used to turn a turbine, which can power a generator to produce electricity.


Most of our energy needs are met by burning fossil fuels such as coal, oil, gasoline, and natural gas. The chemical energy stored in these substances is released by burning these fuels. When fossil fuels burn, they combine with oxygen in the air and produce heat and light.


Fossil fuels are not renewable. When they are used up, they are gone forever. However, renewable energy sources such as wind, sun, geothermal, biomass and water power are renewable. They can be used over and over to generate the energy to run our society.


Tremendous amounts of renewable energy are available. For example, the solar energy that falls on just the road surfaces in the United States is equal to the entire energy needs of the country. Although there are sufficient amounts of renewable energy, we must improve our methods of collecting, concentrating, and converting renewable energy into useful forms.


In the following experiments, you will learn something about the amount of energy the sun produces at the earth’s surface and how heat energy can be stored.
[am4show have=’p8;p9;p11;p38;p92;p22;p49;p70;p84;p30;p57;’ guest_error=’Guest error message’ user_error=’User error message’ ]


Materials


    • Water
    • Disposable, aluminum pie pan
    • Paint brush
    • Measuring cups
    • Watch or clock
    • Newspaper
    • Black paint or spray paint (flat, not shiny)


Procedure


Go outside and spread out a sheet of newspaper. Place an aluminum pie pan on the newspaper. Carefully bend one spot on the edge of the pie pan to make a spout shape. This will allow you to more easily pour water out of the pan. Have an adult help you paint the inside of the aluminum pie pan. You can use a brush and a can of paint or spray paint. Be sure not to get the paint on anything except the disposable pie pan and the newspaper. After painting, set the pie pan where the paint can dry overnight.


You will need to do the rest of this experiment on a warm, sunny day. You do not want the pie pan to be in the shade. Set the aluminum pie pan in a warm, sunny spot. The sun will need to constantly shine on the pie pan. The black color of the pie pan allows it to absorb, rather than reflect, solar energy. You will need to begin the experiment about


11:00 A.M., so the solar heating will be done when the sun is high in the sky.


Add exactly one cup of water to the pie pan. Wait four hours while the sun is shining on the pan of water. After exactly four hours of sunshine, carefully pour the remaining water from the pie pan into a one-half or one-fourth measuring cup. Use these measuring cups to estimate the amount of remaining water to the nearest one-eighth of a cup.


Observations


Is the amount of water in the pie pan less than when you began the experiment? How much water is left in the pie pan after four hours of sunlight?


Discussion


You will probably observe that the amount of water in the pie pan is less after four hours of sunlight exposure. Where did the water go? As the sunlight shines on the dark surface of the painted pie pan, solar energy is absorbed and heats the pan and the water. This energy causes a portion of the water to evaporate. As water evaporates, it leaves the liquid form and goes into the air as a gas (water vapor). You will probably find that some, but not all, of the water evaporated.


Scientists use the unit of joule as a measure of energy. However, you may find it helpful to think in units of dietary calories instead of joules. One dietary calorie is equal to 4,184 joules of energy. One cup of breakfast cereal with one-half cup of milk would have about 240 dietary calories, or approximately 1,000,000 joules of energy. Although the earth receives only a tiny portion of the total energy output of the sun, the earth has a constant supply of 173 million billion (173,000,000,000,000,000) watts of solar power. A watt is a unit of power equal to a joule of energy used per second. For comparison, a typical light bulb to run a lamp in your home might require 100 watts of power. A million watts could supply the energy needs of about 500 average American homes.


Use the table below to determine the solar energy required to evaporate a certain amount of water. The amount of water remaining in the pan will allow you to determine how much energy was used, how much power was used, and the amount of power per area.


Your results will probably be in the middle range of this table. For example, if one-half of your water evaporated, then the water remaining would be one-half cup. Thus, the energy used to evaporate this water would be 289,000 joules of energy. This energy would give a power of 20 watts, and a power per area of 800 watts per square meter (watts / meter2).


Solar Energy Required to Evaporate Water


Water Remaining


(cup)


Water Evaporated (cup)


Energy


Used


(joules)


Power


Used


(watts)


Power per


Area


(watts / meter2)


1


0


0


0


0


7/8


1/8


72,250


5


200


3/4


1/4


144,500


10


400


5/8


3/8


216,750


15


600


1/2


1/2


289,000


20


800


3/8


5/8


361,250


25


1000


1/4


3/4


433,500


30


1200


1/8


7/8


505,750


35


1400


0


1


578,000


40


1600


The following procedure was used to generate the numbers in the Table. It is known that it takes 578,000 joules of energy to evaporate one cup of water. This known energy per cup is multiplied by the fraction of a cup that was evaporated. This gives the solar energy used to evaporate the water in the pie pan. The energy is divided by the number of seconds in four hours (14,400 seconds). This gives the power of the solar energy striking the pie pan, since a watt is equal to a joule per second. Finally, the power (in watts) is divided by the surface area of the pie pan (0.025 square meters) to give the power per area.


When the sun is overhead, the intensity of solar energy can be as much as 1,000 watts per square meter. If all of this energy could be converted to electricity, one square meter of sunshine would be enough to run ten 100-watt light bulbs. However, our current solar cells that convert sunlight to electricity are able to change only about 15 percent of the light to electricity.


You can see from this experiment that there is tremendous energy available from our sun. Most of this energy warms our planet or is reflected back into space. Among other things, the remaining portion of energy powers our water cycle, producing rain and snow, or provides plants with the energy they need to live.


Scientists and engineers are learning more about trapping solar energy and converting it to useful power. It has been estimated that all forms of potentially available renewable energy (wind, water, biomass, and direct solar) have an energy equivalent to 80 trillion barrels of oil. In other words, one year of renewable solar energy is 5,000 times greater than the current yearly energy needs of the United States. In comparison, it has been estimated that all the remaining coal, oil, natural gas, and other potential nonrenewable energy reserves of the United States are equal to about 8 trillion barrels of oil.


Since we do not yet know how to use a significant portion of this renewable energy, much work remains to be done. In the remainder of this book you will learn more about our current ability to use renewable energy and the promise it may hold for the future.


Other Things to Try


Repeat this experiment using different amounts of water on different days and compare the solar power you find.


Repeat this experiment in the late afternoon, when the sun is lower in the sky. How do your result compare to this experiment?
[/am4show]

Scientists do experiments here on Earth to better understand the physics of distant worlds. We’re going
to simulate the different atmospheres and take data based on the model we use.


Each planet has its own unique atmospheric conditions. Mars and Mercury have very thin atmospheres, while Earth has a decent atmosphere (as least, we like to think so). Venus’s atmosphere is so thick and dense (92 times that of the Earth’s) that it heats up the planet so it’s the hottest rock around. Jupiter and Saturn are so gaseous that it’s hard to tell where the atmosphere ends and the planet starts, so scientists define the layers based on the density and temperature changes of the gases. Uranus and Neptune are called ice giants because of the amounts of ice in their atmospheres.


Materials


  • 4 thermometers
  • 3 jars or water bottles
  • Plastic wrap or clear plastic baggie
  • Wax paper
  • Stopwatch

[am4show have=’p8;p9;p11;p38;p92;p17;p44;p83;p84;p30;p57;’ guest_error=’Guest error message’ user_error=’User error message’ ]


Download Student Worksheet & Exercises


  1. Place one thermometer in direct sunlight. This is like the atmosphere of Mercury and Mars.
  2. Place a second thermometer in a jar and cap it. Place this in sunlight. This is the Earth’s, Jupiter’s and Saturn’s atmosphere.
  3. Line the second jar with wax or tissue paper. Place the third thermometer in the jar and cap it. Place it next to the other two in sunlight. This is the atmosphere on Venus.
  4. Insert the fourth thermometer into a plastic baggie, insert it into the bottle and cap it. Make sure the baggie is loose. This is Neptune and Uranus.
  5. Record your data observations in the table, taking data every couple of minutes.

What’s Going On?

Venus is hot enough to melt cannonballs and crush any spaceship that tries to land on the surface. Carbon dioxide is a “greenhouse gas,” meaning that some wavelengths of light can pass through it, but specifically not infrared light, which is also known as heat. Light from the Sun either bounces off the upper cloud layers and back into space, or penetrates the clouds and strikes the surface of Venus, warming up the land. The ground radiates the heat back out, but the carbon dioxide atmosphere is so dense and thick that it traps and keeps the heat down on the surface of the planet. Think of rolling up your windows in your car on a hot day.


The heat is so intense on Venus that the carbon normally locked into rocks sublimated (turned straight from solid to gas) and added to the carbon in the atmosphere, to make even more carbon dioxide.


Mercury doesn’t have much of an atmosphere, which is just like a bare thermometer. There’s nothing to hold onto the heat that strikes the surface. Mars is in a similar situation.


Earth’s atmosphere is simulated by placing the thermometer in a bottle. The Earth has a cloud layer that keeps some of the heat on the planet, but most of it does get radiated back into space. When the clouds are in at night, the planet stays warmer than when it’s clear (and cold).


Venus’s heavy, dense carbon dioxide atmosphere is simulated by using the waxed paper. Venus is the hottest planet in our solar system because of the runaway greenhouse effect that traps most of the heat that makes it through the atmosphere, bouncing it back down to the surface. The average temperature of Venus is over 900oF.


Jupiter and Saturn’s atmospheres are thinner layers of hydrogen and helium than deeper in the core.


Uranus and Neptune are called ice giants because of the amounts of ice in their atmospheres. Their atmospheres are also made of mostly hydrogen and helium.


Exercises


  1. Which atmosphere reached the highest temperature?
  2. Each of the jars received the same amount of energy from the Sun. Why is this not quite like the real solar system?

[/am4show]


The solar cell you are using for this experiment is made from the element silicon. Silicon solar cells consist of two thin wafers of treated silicon that are sandwiched together. The treated silicon is made by first melting extremely pure silicon in a special furnace. Tiny amounts of other elements are added which produce either a small positive or negative electrical charge.


Usually boron is added to produce a positive charge and phosphorus is added to produce a negative charge. The addition of these other elements to pure silicon to produce an electrical charge is called doping.


After being doped, the molten silicon is allowed to cool. As it cools, the doped silicon grows into a large crystal from which very thin wafers are cut. A wafer cut from a large crystal of silicon doped with boron is called the positive or P-layer because it has a positive charge. A wafer cut from a large crystal of silicon doped with phosphorous is called the negative or N-layer.


To make a solar cell, a positive wafer (P-layer) and a negative wafer (N-layer) are sandwiched together. This causes the P-layer to develop a slight positive charge, and the N-layer to develop a slight negative charge. The solar cell is connected to a circuit by wires leading from the P-layer and the N-layer. When light falls on the surface of the cell, electrons are made to move from one layer to the other. Thus, a current of electricity flows through the circuit.


The first solar cells provided electrical power for space satellites and vehicles. Satellites and space vehicles are still big users of solar cells. Solar cells are now being used to provide electrical power for calculators and similar devices, weather stations in remote areas, oil-drilling platforms, and remote communication relay stations.


The best silicon cells convert only a small portion of the sunlight striking the cells into electricity. The efficiency of solar cells is about 15 percent. This means that 15 percent of the sunlight that strikes the cell is converted into electrical energy. The sunlight that is not converted into electricity either reflects off the surface of the cell or is converted into heat energy.
[am4show have=’p8;p9;p11;p38;p92;p22;p49;p75;p84;’ guest_error=’Guest error message’ user_error=’User error message’ ]
Materials


  • Silicon solar cell
  • Two wires with alligator clips on each end of the wires
  • Earphone or headset for a portable radio
  • AA-size battery


Download Student Worksheet & Exercises


Procedure


For this experiment you will need a silicon solar cell. Small silicon solar cells are inexpensive and can be purchased at many electronic supply stores.


This experiment should be done on a bright, sunny day.


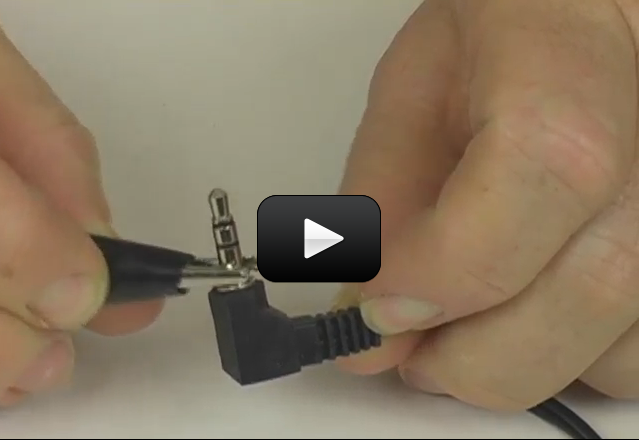
Examine the metal shaft on the part of the earphone or headset that is inserted into a portable radio. You will notice that just above the tip of the shaft there is a plastic spacer. Clip on one of the wires below this spacer. Then clip on the other wire above this spacer.


To test that the wires are properly connected to the earphone or headset, take the unconnected ends of the two wires and touch them to an AA-size battery. One wire should touch the positive end of the battery, while the other should touch the negative end of the battery.  Place the earphone or headset to your ear. If your connections are made correctly, you should hear a crackling sound in the earphone or headset. If you do not hear a crackling sound, check your connections carefully.


Take the earphone or headset, with wires attached, and the solar cell outside into the sunshine. Ask a friend to join you. Your friend can help you hold the solar cell.


Place the earphone or headset to your ear. Ask your friend to hold one of the flat sides of the solar cell facing the sun. The two flat sides of the solar cell are different. In this experiment, you will determine which flat side must face the sun for the cell to generate electricity.


While your friend holds one of the flat sides of the solar cell facing· the sun, you hold one of the alligator clips on the side of the cell facing the sun. At the same time touch the other alligator clip to the opposite side of the cell. As you hold the alligator clips to the cell, avoid blocking the sunlight striking the solar cell.


Ask your friend to turn the solar cell over so that the side that was not facing the sun before now does. Touch a clip to the two sides of the solar cell.


After determining which side of the solar cell needs to face the sun to make a crackling sound in your earphone or headset, ask your friend to hold that side toward the sun. Touch the two alligator clips to each side of the solar cell. Move the alligator clip touching the bottom of the solar cell around the bottom side to keep making the crackling sound in your earphone or headset. Next block the sunlight striking the solar cell.


Observations


Describe the difference between the two sides of the solar cell. Which side must be facing the sun to cause crackling in the earphone or headset when you touch the clips to the solar cell? What happens to the crackling sound when you block the sunlight from striking the solar cell?


Discussion


When you examine your silicon solar cell, you will notice that the two flat sides of the cell are different. One side should have a silvery color, while the other side should appear dark. You should determine in this experiment that one side of the solar cell needs to face the sun for you to hear a strong crackling sound in the earphone or headset. The crackling sound is electricity, generated by the solar cell, passing through the earphone or headset.


Other Things to Try


Repeat this experiment on a cloudy day. Do you still hear a crackling sound in the earphone or headset? If you do hear a crackling sound, is it quieter than on a bright, sunny day?


Is there enough light in a room to cause the solar cell to make electricity? Try it yourself and see.


Exercises


  1. If two electrodes become activated by a current, which way will the ions flow?
    1. To the electrode of the same charge
    2. To the electrode of the opposite charge
    3. None of the above
  2. What type of energy source is the solar panel most closely related to?
    1. Biofuel
    2. Chemical battery
    3. Nuclear reactor
    4. Plant energy
  3. The solar cell’s efficiency is not very good. How much of its energy is converted into electricity?
    1. 50 %
    2. 80%
    3. 30%
    4. Less than all of these
  4. Name one common use for solar cells:

[/am4show]


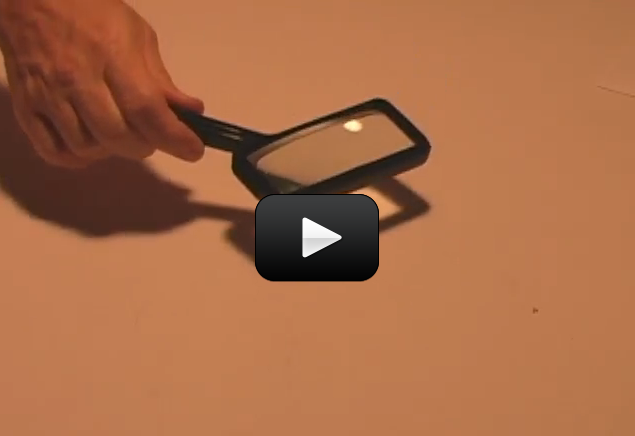
The curved shape of the magnifying lens causes light rays to bend and focus on an image. When we look through the lens, we can use it to make writing or some other object appear larger. However, the magnifying lens can also be used to make something smaller. The light from the bulb is bent and focused on the wall when the lens is held far from the lamp and close to the wall. The image is much brighter than the surroundings. This is because all the light falling on the surface of the lens is concentrated into a much smaller area.


When sunlight is concentrated by passing it through a lens, the result can be an intensely bright and not spot of light. Even a small magnifying glass can increase the intensity of the sun enough to set wood and paper on fire. We are using a light bulb rather than sunlight for this experiment because concentrated sunlight Can be very harmful to your eyes. NEVER LOOK AT A CONCENTRATED IMAGE OF THE SUN.


The United States Department of Energy’s National Renewable Energy Laboratory in Colorado uses solar energy to operate a special furnace. This high-temperature solar furnace uses a lens to concentrate sunlight. A heliostat (a device used to track the motion of the sun across the sky) is used so that the image reflected from a mirror is always directed at the same spot. The lens is used to concentrate sunlight from a mirror to an area about the size of a penny. This concentrated sunlight has the energy of 20,000 suns shining in one spot.


In less than half a second, the temperature can be raised to 1,720° C (3,128° F) which is hot enough to melt sand. This high-temperature solar furnace is being used to harden steel and to make ceramic materials that must be heated to extremely high temperatures.


Concentrated sunlight also has been used to purify polluted ground water. The ultraviolet radiation in sunlight can break down organic pollutants into carbon dioxide, water, and harmless chlorine ions. This procedure has been successfully carried out at the Lawrence Livermore Laboratory in California. In the laboratory, up to 100,000 gallons of contaminated water could be treated in one day.
[am4show have=’p8;p9;p11;p38;p92;p22;p49;p84;p85;’ guest_error=’Guest error message’ user_error=’User error message’ ]
Materials


  • Lamp with a single incandescent bulb
  • Magnifying lens


Download Student Worksheet & Exercises


Procedure


The results of this experiment may be easiest to observe if done at night in a dark room.


Ask an adult to remove the lamp shade from a lamp that uses a single incandescent bulb. An incandescent bulb is the type that gets quite hot when used. Turn on the lamp. Turn off all the other lights in the room.


Stand about two feet from the wall that is the greatest distance from the lamp. There should be nothing between you and the lamp bulb. Place the magnifying glass on the wall so that the lens is flat against the wall. Now, slowly move the lens away from the wall and toward the light. Keep the lens parallel to the surface of the wall. As you move the lens outward, watch the wall.


Observations


Does an image of the lamp appear on the wall? How bright is this image? How big is this image?


Discussion


You should see an upside down image of the light bulb appear as you move the magnifying lens away from the wall. The image should be much brighter than the area around it and much smaller than the size of the real bulb. The image may be only about the size of your fingernail or smaller.


Other Things to Try


Trace the exact size and shape of the magnifying lens on a piece of paper. Cut out this piece of paper and tape in on the wall. Focus the image of the lamp on this piece of paper and copy the bulb image on the paper. Compare the size of the bulb image to the size of the piece of paper. How much bigger is the lens than the focused image of the bulb? Use this ratio of sizes to estimate the increase in the brightness of the image.


Can you explain why the image of the bulb is upside down when it is projected on the wall? See if you can find information about optics in a book or encyclopedia that could help you explain this reversal of the image.


Repeat this experiment using two magnifying lenses. Observe the effect of moving the positions of the two lenses relative to each other and the wall.


Exercises Answer the questions below:


  1. Name three uses for solar energy:
  2. What type of heat energy is transmitted by the sun?
    1. Conduction
    2. Convection
    3. Plasma
    4. Radiation
  3. Circle the following phenomena influenced by the sun:
    1. Pressure
    2. Climate
    3. Weather
    4. Wind

[/am4show]


Cooking involves heating food to bring about chemical changes. Sometimes foods are heated simply because the food tastes better warm than cold. In making tea, we sometimes heat water to help dissolve tea or help dissolve sugar if the tea is sweetened.


Normally the water used to make tea is heated on a range top or in a microwave oven. Using a range or microwave oven requires buying energy in the form of electricity or natural gas. Using a solar cooker does not require any energy costs because it uses a freely available renewable energy source-the sun.


A curved mirror in a bowl-like shape can focus reflected sunlight at a spot for cooking. A mirror about 1.5 meters (5 feet) across can generate a temperature of 177°C (350°F) and boil a liter of water in about fifteen minutes. In sunny areas of the world, solar cookers can be used instead of burning firewood for cooking.


Another way reflected and focused sunlight is used is to generate electricity. In southern California in 1982, a solar-thermal plant was built that can generate ten million watts of electrical power. This plant consists of 1,818 mirrored heliostats. A heliostat is a device that moves to track the sun across the sky and to reflect the sunlight at the same point. Each heliostat has twelve mirrors, and all the heliostats reflect sunlight to the same spot. The reflected light is directed at the top of a 90-meter (295-foot) tall tower. The concentrated sunlight is used to boil water and heat the steam up to 560° C (1,040 ° F). The steam turns a turbine that powers a generator to produce electricity.


One obvious disadvantage of solar-thermal plants is that they only operate when the sun is shining. The heat energy can be stored for a time by heating up a liquid or melting salt. Or the energy can be used to break water into hydrogen and oxygen. The hydrogen can then be stored and burned later to produce water and release energy.
[am4show have=’p8;p9;p11;p38;p92;p22;p49;p75;p84;’ guest_error=’Guest error message’ user_error=’User error message’ ]
Materials


  • Three clear, clean plastic cups
  • Two small tea bags
  • Aluminum foil
  • Watch or clock
  • Measuring cup
  • Water
  • Two spoons
  • White sheet of paper
  • Plastic pan (4 inches deep and 12 inches across is a convenient size but other sizes can be used)


Download Student Worksheet & Exercises


Procedure


You will need to do this experiment on a warm, sunny day.


Use two sheets of aluminum foil and place them crosswise to completely cover the bottom and sides of a plastic pan. Try to arrange the aluminum foil so that it is smooth and curved like a bowl. The aluminum foil will help to reflect the solar energy and concentrate the light and heat toward the center of the pan. Place this aluminum covered pan outside in a warm, sunny spot where the sunlight will shine directly on it.


Add one cup of water to each of two plastic cups. The water you add to the cups should be neither hot nor cold, but about temperature. Place one cup of water in the middle of the pan. Turn the empty plastic cup upside down and place it on top of this cup. Leave this “solar cooker” undisturbed for one hour. The other cup of water should remain inside.


After one hour, gently place one tea bag in each of the water-filled cups. Wait ten minutes and then lift the tea bag out of each cup. Using a spoon, stir each cup of tea. Place both cups of tea on a white piece of paper and look down on the two cups to compare their darkness. Put your finger in each cup of tea to compare their temperatures.


Observations


Which cup of tea is a darker color? Which cup of tea is warmer?


Discussion


You should find that the water left in the “solar cooker” is darker and warmer than the water left in the shade. The darker color indicates that more tea has gone into or dissolved in the warmer water.


Other Things to Try


Place your “solar cooker” in the sun as in this experiment, but place one plastic cup upside down in the middle of the pan. Put a pat of margarine or butter on top of this cup. Will the sun melt this butter? How long does it take to melt? Repeat this activity with a piece of soft cheese and determine if the solar heater will melt the cheese. In a more carefully made solar cooker, the reflective surfaces are angled to focus a large amount of sunlight in one spot and the temperatures obtained are much higher than in your cooker.


Set one cup of water in your “solar cooker.” Set a second cup of water in the sunshine and leave both cups for one hour. Use a thermometer to check the temperature of each cup of water. Does your “solar cooker” help focus the sun’s rays and increase the temperature?


Exercises Answer the questions below:


  1. What type of solar energy are we seeing in this experiment?
    1. Solar fusion
    2. Solar voltaic
    3. Solar thermal
    4. Radiation potential
  2. Name two ways that the earth’s systems depend on the sun:
  3. What is one advantage of solar thermal energy? What is one disadvantage?
    1. Advantage:
    2. Disadvantage:

The energy of sunlight powers our biosphere (air, water, land, and life on the earth’s surface). About 50 percent of the solar energy striking the earth is converted to heat that warms our planet and drives the winds. About 30 percent of the solar energy is reflected directly back into space. The water cycle (evaporation of water followed by rain or snow) is powered by about 20 percent of the solar energy.


Some of the sunlight that reaches the earth is used by plants in photosynthesis. Plants containing chlorophyll use photosynthesis to change sunlight to energy. Since these green plants form the base of the food chain, all plants and animals depend on solar energy for their survival.


When the sun is overhead, about 1,000 watts of solar power strike 1 square meter (10.8 square feet) of the earth’s surface. Using solar cells, this solar energy can be converted to electricity. However, because sunlight cannot be converted completely to electricity, it takes at least a square meter of area to gather enough sunlight to run a 100-watt light bulb.


Solar energy is still more expensive than other methods of generating electricity. However, the cost of solar electricity has greatly decreased since the first solar cells were developed in 1954.


It has been proposed that panels of solar cells on satellites in orbit above the earth could convert solar energy to electricity twenty-four hours a day. These huge solar power satellites could convert electrical energy to microwaves and then beam these microwaves to Earth. At the earth’s surface, tremendous fields covered with antennas could convert the microwave energy back to electricity.


It would take thousands of astronauts many years to build such a complicated system. However, there are many practical uses of solar energy in use today. These uses include heating water, heating and cooling buildings, producing electricity from solar cells, and using rain and snow from the water cycle to power electrical generators at dams.


In the following experiments, you will examine the use of solar energy in heating water, .cooking foods, concentrating sunlight, and producing electricity.
[am4show have=’p8;p9;p11;p38;p92;p70;p22;p49;p75;p84;’ guest_error=’Guest error message’ user_error=’User error message’ ]
Materials


  • Paint brush
  • Thermometer (outdoor type)
  • Newspaper
  • Aluminum foil
  • Water
  • Large, plastic glass
  • Empty aluminum 12-ounce (355 milliliter) soft drink can
  • Black paint or spray paint (flat, not shiny)


Download Student Worksheet & Exercises


Procedure
Go outside and spread a sheet of newspaper on the ground. Place an empty aluminum soft drink can on the newspaper. Have an adult help you paint the outside of the aluminum can. You can use a brush and can of paint or spray paint. Be sure to use paint that is suitable for a metal surface.  The paint should give you a flat (not shiny) surface. Be sure not to get the paint on anything but the can and newspaper. After painting, set the can where the paint can dry overnight.


You will need to do the rest of this experiment on a warm, sunny day. Partially fill a large, plastic glass with cool tap water. Check the temperature of the water with a thermometer. Pour the water from the plastic glass into the painted black can, completely filling the can. Pour out any extra water remaining in the plastic glass. Cover the can’s opening with a small piece of aluminum foil about the size of a quarter.


Set the black can outside in a sunny spot. Pick a place where the sun will shine on the can all day. (You do not want the can to be in the shade.)


After the can of water has been in the sunshine for about four hours, pour the water into the large, plastic glass. Check the temperature of the water with the thermometer. Feel the outside of the can.


Observations


What was the temperature of the cool tap water when it was first placed into the black can? What is the temperature of the water after it was heated in the can for four hours? Does the outside of the can feel hot?


Discussion


You should find a significant increase in the temperature of the water that was left in the black can during the day. The tap water initially may be about 21°C (70°F), but after the water has been heated inside the can, the temperature should rise to more than 38°C (100°F). The exact temperature you achieve in your miniature, solar water heater (black can) will depend on your location and the time of year. However, you should find that the water temperature will go much higher than the temperature of the outside air.


The electromagnetic radiation from the sun includes ultraviolet, visible, and infrared radiation. Ultraviolet radiation is the type of sunlight that causes tanning of skin. Visible radiation is the type of sunlight we see with our eyes. Infrared radiation is the type of sunlight that we feel as heat when the sun is shining on our skin. All these forms of solar radiation have energy associated with them.


When solar energy from the sun’s electromagnetic radiation strikes a black surface, solar energy is converted to heat energy and the surface is warmed. Other colors will absorb solar energy, but lightly colored surfaces tend to reflect the light, while darker colors absorb the solar energy. You may have noticed this difference if you ever walked barefoot on a dark road on a hot summer day.


Direct solar energy is not hot enough for cooking. The higher temperatures required for cooking or for changing water to steam require concentrating the energy of sunlight with mirrors or lenses. However, directly absorbed solar energy is hot enough for heating homes and producing hot water with little or no energy costs.


When we turn on a hot water faucet at a sink, water is taken from a hot water tank. In industrialized countries, we usually heat water using electricity or natural gas and store the hot water in this insulated tank. However, around the world, there are millions of solar heaters used for heating water.


Solar water heaters use a black metal plate covered with insulated glass. These solar heaters are usually placed on rooftops to receive the maximum amount of sunlight. Water flows through tubes beneath the black metal plates. Solar energy heats the black metal plates and the water passing in tubes underneath the plates. The heated water is piped to a storage tank, where it is kept until needed. If the location of the solar heater is not consistently sunny, then an auxiliary heater-using electricity or natural gas-is sometimes used to heat the water.


Other Things to Try


Repeat this experiment covering the black can with a large glass jar. This glass should help trap the heat and make the water get even hotter. What is the maximum temperature you can get with this type of solar heater?


Repeat this experiment and check the temperature of the water each half hour for three hours during the middle of the day. Quickly check the temperature of the water, then return the water to the black metal can. Write down the time that you checked the water, and next to the time, write down the temperature. How long does it take for the water to reach the maximum water temperature?


Repeat this experiment with an unpainted can and a painted can. After one hour, how do the temperatures of the water in each can compare?


Repeat this experiment on a cloudy day. Does the water in the can get as hot without sunshine?


Exercises


  1. The solar energy that hits the earth is responsible for what proportion of the energy on our planet?
    1. Nearly all of it
    2. About 50%
    3. 25%
    4. None of these
  2. Name one way that the physical earth uses the earth’s energy:
  3. True or false: Solar power is generally less expensive than other forms of power.
    1. True
    2. False

[/am4show]


In a typical air conditioning or refrigeration system, a liquid at high pressure is allowed to pass through a valve from a higher pressure to a lower pressure. As the liquid enters the lower pressure region, it changes from a liquid to a gas. This change causes a cooling effect. The liquid cools as it changes to a gas.


In a cooling system, such as a refrigerator or air conditioner, this cold gas is used to cool a box (refrigerator) or a room (air conditioner). Then the cool gas is forced through a compressor pump where it undergoes a warming effect and changes back to a liquid. This excess heat is removed before the liquid is expanded to a gas again. In an air conditioner, the excess heat is blown outside.


Special molecules containing chlorine, fluorine, and carbon atoms are used in most cooling systems. These Freon or chlorofluorocarbon (CFC) molecules are used because they are stable, nontoxic, and will not burn.


In recent years, scientists have discovered that these Freon or CFC molecules are damaging the earth’s ozone layer. Ozone molecules in the upper atmosphere block harmful ultraviolet radiation from reaching the earth. Because these CFC molecules are so stable they tend to stay in the atmosphere for many years, during which time they gradually spread to the upper atmosphere.


In the upper atmosphere, CFC molecules can release chlorine atoms. These atoms cause a chemical reaction that breaks apart ozone. One chlorofluorocarbon molecule may destroy thousands of ozone molecules. Scientists and engineers are looking for new methods of cooling and new gases that are less damaging to the ozone layer.


The main energy used in operating a cooling system is the energy required to run a compressor to force a gas to a higher pressure, where it will change back to a liquid. This energy is normally supplied by electricity or by burning natural gas to run a compressor pump. However, there are systems in which solar energy is used to supply the energy needed for cooling.
[am4show have=’p8;p9;p11;p38;p92;p22;p49;p84;’ guest_error=’Guest error message’ user_error=’User error message’ ]
Materials


  • Thermometer (outdoor type)
  • Newspaper
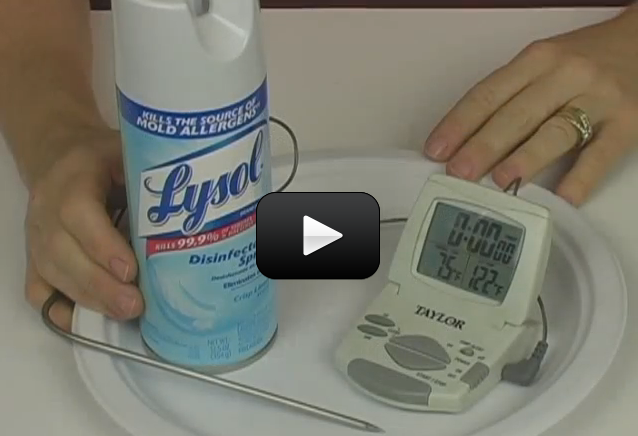
  • Can of Lysol® spray (use pressurized aerosol can, not pump spray)


Procedure


HAVE AN ADULT HELP YOU WITH THIS EXPERIMENT. LYSOL®, LIKE OTHER SPRAY CANS, SHOULD NOT GET NEAR A FLAME, AND THE CONTENTS SHOULD NOT GET IN YOUR EYES.


Set a can of Lysol® spray in the room where the experiment will be done and wait one hour. Observe the temperature of the room by reading the temperature on a thermometer. The can of Lysol® spray should be the same temperature as the room.


Place about ten sheets of newspaper, one on top of the other, on the floor. Have an adult hold the thermometer in one hand and the spray can in the other hand. These items should be held above the newspaper to catch Lysol® liquid that may drip off the thermometer. The adult should hold the nozzle of the Lysol spray can about four inches from the bottom of the thermometer. Have the adult spray the bottom of the thermometer for twenty seconds.


While the adult sprays the Lysol® on the thermometer, you should observe the temperature. After he or she stops spraying, continue to observe the temperature on the thermometer for several minutes.


Observations


What is the temperature of the room and the can of Lysol® spray? Does the temperature drop while the Lysol® is sprayed? What is the temperature while gas is sprayed from the can on the thermometer? What happens to the temperature after the spraying is stopped?


Discussion


You should find that the temperature on the thermometer drops as the Lysol® is sprayed on it. The temperature may decrease by 14° F (8° C) or more. After the spraying is stopped, the temperature may drift slightly lower, and then should gradually increase to the original temperature of the room.


If you shake the can of Lysol®, you should hear the sound of a liquid sloshing or moving inside the can. The can contains gas and liquid. When the can is sprayed, the pressurized gas escapes and liquid expands to a fine mist or vapor (gas). This change, from a higher pressure to a lower pressure gas and from a liquid to a gas, causes a cooling effect. You observe this cooling when you see the thermometer’s temperature decrease.


Other Things to Try


Open a two liter soft drink bottle that has been out in the room for several hours. As you open the bottle, let the carbon dioxide gas that escapes and causes a hissing sound fall on your lips. Does the gas coming out of the soft drink bottle feel hot or cold?
[/am4show]


The evaporation of water for cooling purposes is called evaporative cooling. An important example of this type of cooling is the removal of body heat by humans through sweating. When your body needs to cool, perspiration is released to the surface of your skin where it evaporates. The evaporation of the water in the perspiration causes your skin to cool.


Breezes feel particularly cooling when you have perspiration on your skin. This is because the increased movement of air over your body evaporates more water from your skin than still air does. Water on your skin evaporates more slowly when the humidity is high. This is because the humid air already contains much water vapor. Humid air absorbs less water as vapor than dry air.


Electrical power plants that burn fossil fuels or use nuclear energy to generate electricity use huge water cooling towers for cooling purposes. The water to be cooled is pumped to the top of the tower and allowed to drip down through the tower. As the water moves down the tower, air from the bottom of the tower moves up through the tower, evaporating some of the falling water. The heat lost by the evaporating water cools the remaining water that is collected in a basin under the tower. One pound of water that evaporates in a tower can lower the temperature of 100 pounds (45 kilograms) of other water by nearly 50°C (100°F).
[am4show have=’p8;p9;p11;p38;p92;p22;p49;p84;’ guest_error=’Guest error message’ user_error=’User error message’ ]
Materials


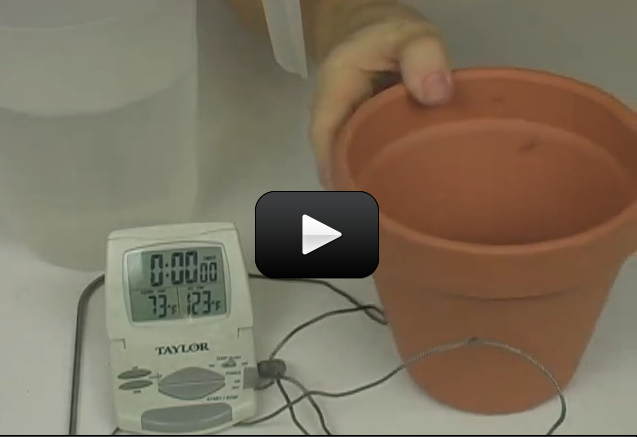
  • Unglazed clay flower pot
  • Plastic bowl
  • Unglazed clay saucer
  • Water
  • Modeling clay
  • Thermometer (optional)


Procedure


Make sure to use an unglazed clay flowerpot for this experiment. Most unglazed clay flowerpots have an orange-red color and rough surfaces. The bottom of the unglazed clay saucer should have a diameter larger than the top diameter of the flowerpot. (Flowerpots and saucers can be purchased at most hardware and plant stores.)


Most clay flowerpots have drainage holes. Check to see if your clay flowerpot has a drainage hole in the bottom. If the one you are using has a hole, seal it with a piece of modeling clay. Add some water to the pot to make sure your seal is watertight.


Place the clay flowerpot and plastic bowl outside on a hot, sunny day and in a spot where they will get plenty of sunshine. Fill both the clay flowerpot and the plastic bowl nearly full with water. Place the clay saucer on top of the flowerpot and fill it with water.


Every hour for three hours, place your hands around the outside of the plastic bowl of water. Then place your hands around the outside of the clay pot filled with water. Next dip your hand into the plastic bowl of water. Remove the clay saucer from the flowerpot and dip your same hand into the pot of water. If you have a thermometer, place it in the plastic bowl of water. Read the temperature on the thermometer after it has been in the water thirty seconds. Next place the thermometer in the clay pot of water. After thirty seconds read the temperature of the water in the clay pot.


Observations


Does the outside of the clay flowerpot appear wet and feel wet after it has been outside several hours?


Does the outside of the plastic bowl feel warmer or cooler than the outside of the clay flowerpot after both containers have been in the sun several hours? Does the water in the clay flowerpot feel warmer or cooler than the water in the plastic bowl?


If you are using a thermometer, what is the temperature of the water in the plastic bowl? What is the temperature of the water in the clay pot?


Discussion


You should find that soon after you add the water to the unglazed clay flowerpot, the outside of the clay pot looks and feels wet. The outside of the clay flowerpot should feel cooler than the outside of the plastic bowl. Also, the water inside the flowerpot should feel much cooler than the water inside the plastic bowl. In fact, if you measured the temperatures of the water in both containers you may have found that the water in the clay pot was cooler by as much as 18°F (10°C). The temperature difference will depend on the air temperature, the humidity, and wind. The higher the humidity and the less wind there is, the smaller the temperature difference between the two containers will be.


The outside of the clay flowerpot becomes wet because water inside the flowerpot moves through the wall of the clay pot. When water reaches the outside surface of the clay pot, it can evaporate. When the water evaporates, it changes from a liquid to a gas or vapor.


Heat energy is required for water to evaporate. This heat energy comes from the clay pot and the water inside the clay pot. When the water evaporates and removes heat from both the pot and water, the temperature of both the pot and water decreases.


Water evaporates from the plastic bowl as well. However, since water cannot move through the plastic, water evaporates only from its surface in the plastic bowl. More heat is removed from the clay pot than the plastic bowl because water is evaporating from a larger area. This is why the outside of the clay pot and the water inside it should feel cooler than the outside of the plastic bowl and the water inside it.


Other Things to Try


Repeat this experiment and record the temperatures of the water in the two containers with a thermometer every hour for five or six hours. Is the temperature of the water in the clay pot always lower than the temperature of the water in the plastic bowl?


If you are ever near the bottom of a waterfall, notice that the air temperature around the waterfall is cooler than air away from the waterfall. Can you explain why?
[/am4show]


Having shade trees around a house can decrease the cost of cooling the house with air conditioning. A house not shaded from the sun absorbs some of the light from the sun and heats up the outside surface of the house. If the house is poorly insulated, some of this heat will penetrate into the house, heating up the inside. The air conditioner will use more energy to remove this added heat.


Properly designed roof overhangs can significantly decrease the heating and cooling costs of a house. Because the earth’s axis is tilted, the sun is lower in the winter in the northern hemisphere. In the summer, the sun is higher in the sky. A properly designed roof overhang allows sunlight in the winter to shine through windows and warm the furnishings in the rooms that receive the direct sunlight. This reduces the heating cost in the winter. In the summer, the overhang blocks the sunlight from shining into the window and heating the furnishings. This reduces the cooling cost in the summer.
[am4show have=’p8;p9;p11;p38;p92;p22;p49;p84;’ guest_error=’Guest error message’ user_error=’User error message’ ]
Materials


  • Two large, glass jars
  • Shady tree
  • Water
  • Thermometer (optional)


Procedure


You will want to do this experiment on a warm, sunny day. Fill both large, glass jars nearly full with water. Place one of the jars outdoors in a spot where sunlight will strike it for several hours. Place the other jar outdoors under a shady tree.


After three hours, feel the water in the jar that was left in the sun. Next feel the water in the jar kept under the shady tree. If you have a thermometer, check the temperature of the water in each jar. Also check the air temperature with the thermometer.


Observations


Does the water in the jar left in the sun feel warmer or cooler than the water in the jar left under the shady tree? If you are using a thermometer, what is the temperature of the air and of the water in each jar? What is the temperature difference of the water in the two jars?


Discussion


The water in the jar that was left in the sun should feel much warmer than the water in the jar left under the shady tree. The temperature difference of the water in the two jars will vary depending on the air temperature and wind conditions. On a hot, sunny day you may find that the temperature of the water in the jar left in the sun is over 18° F (10° C) warmer than the air temperature and the temperature of the water in the jar kept in the shade.


The jar of water left in the sun is constantly bathed with light energy from the sun. Some of this light energy is absorbed by the glass jar and the water in the jar. The light energy that is absorbed by the glass jar and the water is converted into heat energy. This is why the jar of water becomes warm after being in the sun for several hours.


The tree shades the other jar of water from the sun. The jar of water under the tree does not absorb light energy directly from the sun as the other jar did. Instead, much of the light energy from the sun is absorbed and used by the tree.


Since the jar of water under the tree does not absorb light energy directly from the sun, it remains cooler than the jar of water kept in the sun. You may even find that the temperature of the water in the jar shaded from the sun is a few degrees cooler than the air temperature. This is caused by water evaporating from the jar. Heat energy is removed when a liquid evaporates, and the liquid becomes slightly cooler.


Other Things to Try


Repeat this experiment at different times of the day. Do you get similar results? Repeat this experiment when it is cloudy. How does the difference in the temperatures of the jars of water compare on sunny and cloudy days.
[/am4show]


Cooling and heating are opposite processes. Cooling is the removal of heat energy from an object or space and heating is the addition of heat energy to an object or space. We use these opposite processes a great deal in our daily lives. For example, in the kitchen we use the cooling provided by a refrigerator to keep food cold. We also use the heat from a stove to cook food.


Nearly 75 percent of the energy used by the average family household in the United States goes for cooling and heating purposes. Air conditioning and refrigeration are the major cooling requirements of a home, while water and space heating are the most important heating requirements.


In the experiments that follow you will learn more about cooling and heating. You will also learn alternative ways of cooling and heating, using such unusual materials as gases, salts, water, and trees.
[am4show have=’p8;p9;p11;p38;p92;p22;p49;p84;’ guest_error=’Guest error message’ user_error=’User error message’ ]
Materials


  • Epsom salt
  • Aluminum pie pan
  • Water
  • Oven
  • Insulated mitt
  • Two small, zipper-close, plastic bags
  • Sink
  • Measuring cups


Procedure


ASK AN ADULT TO HELP YOU WITH THIS EXPERIMENT. DO NOT USE THE STOVE BY YOURSELF.


Ask an adult to turn on the oven and to set the temperature of the oven to 450° F


(232°C). Pour one-half cup of Epsom salt into an aluminum pie pan and gently shake it to evenly spread the Epsom salt over the bottom of the pan. Place the pie pan in the oven. Heat the Epsom salt in the hot oven for thirty minutes.


Ask an adult to remove the pan of Epsom salt from the hot oven using an insulated mitt. Place the pan on the stovetop and allow it to cool for ten minutes. Make sure the oven is turned off.


Add one-quarter cup of the Epsom salt that was not heated in the oven to a small plastic zipper-close bag. Next add one-quarter cup of room temperature water to the bag, seal, and shake the bag. Feel the temperature of the outside of the bag.


Next add one-quarter cup of the cooled Epsom salt that was heated in the oven to the second zipper-close bag. Add one-quarter cup of room temperature water to the bag and seal the bag. Give the bag a couple of shakes and then feel the outside of the bag.


When you are finished with this experiment, pour the contents of both bags down a sink drain. Then flush the bags and the sink with water. Also rinse out the aluminum pie pan with water. DO NOT DRINK ANY OF THE LIQUID AND DO NOT EAT ANY OF THE EPSOM SALT. EPSOM SALT CAN MAKE YOU SICK IF YOU EAT IT.


Observations


Do you notice any difference in the appearance of the Epsom salt after it is heated in the oven? Does the bag containing the water and the Epsom salt that was not heated feel warm or cool after shaking? Does the bag containing the water and the Epsom salt that was heated feel warm or cool after shaking?


Discussion


Epsom salt is a hydrate of the salt called magnesium sulfate. A hydrate is a chemical substance containing water combined with another chemical substance (usually a salt). The water molecules in a hydrate are called waters of hydration. They can usually be removed from the hydrate by heating. The process of removing water from a hydrate is called dehydration.


In this experiment, when you heated the Epsom salt in the oven, you removed most of the water molecules (waters of hydration) in the salt.


A salt is made of positive and negative ions. Ions are charged atoms or groups of atoms. In Epsom salt, magnesium ions are positive and sulfate ions are negative. The waters of hydration surround these ions in Epsom salt.


You should find that the bag containing water and the dehydrated Epsom salt feels warm. The bag containing water and the hydrated Epsom salt feels cool. When dehydrated Epsom salt is mixed with water, heat is given off. When hydrated Epsom salt is mixed with water, heat is absorbed. When something gives off heat it feels warm, while something that absorbs heat feels cool.


Energy is required to remove individual ions from a salt crystal. However, energy is given off when the individual ions that break away from the crystal become surrounded by water molecules that are dissolving the salt. If more energy is required to remove individual ions from a salt crystal than is given off when the ions become surrounded by water, then the salt solution becomes cold. If more energy is given off when the ions become surrounded by water than is needed to remove individual ions from a salt crystal, then the salt solution becomes warm.


When hydrated Epsom salt dissolves in water, more energy is required to remove the magnesium and sulfate ions (and the waters of hydration) from the crystals than is given off when the magnesium and sulfate ions become surrounded by the dissolving water molecules.


This is why the bag containing the unheated Epsom salt became cold when you added water.


On the other hand, when dehydrated Epsom salt dissolves in water, more energy is given off by the ions becoming surrounded by water molecules than is needed to break the magnesium and sulfate ions from the crystals. This is why the bag containing the dehydrated Epsom salt became warm when you added water.


Most instant hot packs and cold packs that are available in drugstores work on the principle just discussed. When the cold or hot pack is needed, the bag is squeezed to cause the water and salt to mix. Depending on the salt used in the pack, energy is either absorbed (cold pack) or given off (hot pack). Ammonium nitrate is the most commonly used salt in cold packs. And calcium chloride is the most commonly used salt in hot packs.


Other Things to Try


Repeat this experiment using a thermometer to measure the temperature change when the Epsom salt is dissolved in water. Use the thermometer to measure the temperature change when dehydrated magnesium sulfate is dissolved in water.


Repeat this experiment using table salt. Do you observe a temperature change when the table salt dissolves in water?
[/am4show]


An insulator is a substance that partly blocks or slows the flow of heat through it. Styrofoam is a lightweight plastic used in drinking cups. Styrofoam is a good insulator. A cooler or ice chest that is made of Styrofoam or some other insulator tends to block the flow of heat through it.


Heat flows into buildings during warm summer months and from buildings during cold winter months. Energy must be used to cool buildings in the summer and heat them in the winter. Since insulation can slow the flow of heat, the use of insulation in buildings can save energy.


Some common home and building insulation materials include Styrofoam, polyurethane foam, and fiberglass. These materials are all good insulators, which means that they are poor conductors of heat. Placing these insulating materials on attic floors or in building walls tends to trap heat inside during the cold winter and keep heat out during the hot summer.


Plastic foams filled with trapped gas tend to block heat flow. The chemicals used to make polyurethane foam can be sprayed directly into the spaces between walls. These chemicals produce carbon dioxide gas and polyurethane plastic. The gas tends to spread the polymer apart so the weight is mostly plastic but the volume is mostly trapped gas. Polyurethane also is used to insulate refrigerators, refrigerated trucks, pipes, and building walls.


Fiberglass insulation is frequently used in attic floors to insulate homes. Also, fiberglass insulation is used to insulate the Trans-Alaska pipeline. This pipe carries oil 800 miles from Prudhoe Bay in northern Alaska to Valdez in southern Alaska. The crude oil that travels through this pipe is easier to pump if it is hot. An insulated pipeline requires less energy to keep the oil hot.


Energy conservation becomes more and more important as energy costs rise. A great deal of energy is used to cool buildings in summer and heat buildings in winter. Less energy will be needed if buildings are well insulated and energy is not wasted.
[am4show have=’p8;p9;p11;p38;p92;p22;p49;p84;’ guest_error=’Guest error message’ user_error=’User error message’ ]
Materials


  • Two large, plastic cups
  • Small, insulated ice chest or cooler (Styrofoam or plastic)
  • Ice
  • Watch or clock

Procedure


Completely fill each plastic cup with ice. Set one plastic cup out in the room. Set the other plastic cup of ice inside the small ice chest or cooler. Close the lid of the ice chest and leave both cups undisturbed.


Observe the cup of ice left out in the room once every hour. When all the ice has changed to water in the cup left out in the room, open the smaller cooler and observe the cup of ice inside. Continue to check on the cup of ice in the cooler about once an hour and see how long it takes to melt.


Observations


How long does it take for the cup of ice in the room to melt and change to water? When all the ice has melted in the cup in the room, is there still ice in the cup in the ice chest? How long does it take for the ice in the cooler to melt?


Discussion


You should find that the ice in the room melts faster than the ice inside the ice chest. When the ice in the room has all melted and only water remains, the cup inside the insulated cooler may still be mostly ice. Even though both cups were filled with the same amount of ice, they did not melt at the same time.


The temperature in the room is much warmer than the temperature of the cold ice. Since heat always flows from a higher temperature to a lower temperature, the heat in the room flows or moves into the ice and causes it to melt.


Other Things to Try


Repeat this experiment with a larger amount of ice, and you may see a greater difference between insulated and uninsulated containers. Try filling a bucket and an ice chest with equal amounts of ice, and set both containers outside on a warm day. How long does it take the ice in the bucket to melt? How long does it take the ice in the ice chest to melt?


You can reverse the experiment by comparing the flow of heat from the inside of a cup to colder surroundings. Use hot water from a sink faucet to partially fill a Styrofoam cup and a glass cup. Place the Styrofoam cup inside two other Styrofoam cups and cover the top with several layers of aluminum foil. Next place the Styrofoam cups and the glass cup inside the refrigerator and compare how long it takes for the water to cool.


Fill a thermos bottle with hot water. Wait about four hours and check the temperature of the water. Continue to check the temperature about every two hours to find out how long the thermos bottle can keep the water warm. A thermos bottle has glass walls with a vacuum between them and silvered surfaces to reflect heat. The vacuum in a thermos makes an excellent insulator because there are few gas molecules to transfer heat.
[/am4show]


A battery is a device that produces electrical energy from a chemical reaction. Another name for a battery is voltaic cell. Voltaic means to make electricity.

Most batteries contain two or more different chemical substances. The different chemical substances are usually separated from each other by a barrier. One side of the barrier is the positive terminal of the battery and the other side of the barrier is the negative terminal. When the positive and negative terminals of a battery are connected to a circuit, a chemical reaction takes place between the two different chemical substances that produces a flow of electrons (electricity).

When a battery is producing electricity, one of the chemical substances in the battery loses electrons. These electrons are then gained by the other chemical substance.

A battery is designed so that the electrons lost by one chemical substance are made to flow through a circuit, such as a flashlight lamp, before being gained by the other chemical substance. A battery will produce a flow of electrons until all of the chemical substances involved in the chemical reaction are completely used.

[am4show have='p8;p9;p11;p38;p92;p22;p49;p75;p84;p58;' guest_error='Guest error message' user_error='User error message' ]

Materials

  • Earphone or headset  for a portable radio
  • Small piece of aluminum foil
  • Tomato paste or tomato ketchup
  • New, shiny penny
  • Two wires with alligator clips on each end of  the wires
  • Plate
  • AA-size battery
  • Spoon


Download Student Worksheet & Exercises

Procedure

Examine the metal shaft of the part of the earphone or headset that is inserted into a portable radio. You will notice that just below the tip of the shaft there is a plastic spacer. Clip on one of the wires below this spacer. Then clip on the other wire above this spacer.

To test that the wires are properly connected to the earphone or headset, take the unconnected ends of the two wires and touch them to an AA-size battery. One wire should touch the positive end of the battery, while the other is touching the negative end of the battery. Place the earphone or headset to your ear. If your connections are made correctly, you should hear a crackling sound in the earphone or headset. If you do not hear a crackling sound, check your connections carefully.

Place a small piece of aluminum foil, about five inches (13 centimeters) square, on a small plate. Using a spoon, make a puddle of tomato juice on the aluminum foil. The puddle of tomato juice should be slightly larger than a penny. Next, place a new, shiny penny face down in the puddle of tomato juice.

Using the alligator clip, attach one of the wires connected to the earphone to one of the edges of the aluminum foil. Take the end of the other wire and touch the alligator clip to the penny. Move the alligator clip over the penny.

Observations

Do you hear a crackling sound when you touch the alligator clips to the penny in the puddle of tomato juice? What do you hear when you move the alligator clip over the penny? What do you hear when you stop touching the penny with the alligator clip?

Discussion

In this experiment you made a simple battery with a penny, aluminum foil, and tomato juice. You completed a circuit with your battery by touching one of the wires attached to the earphone or headset to the penny, while touching the other wire to the aluminum foil. When you completed the circuit, a flow of electrons was produced by your battery. The crackling sound you heard was caused by the earphone or headset converting electrical energy from your battery into sound energy.

In your battery, the aluminum in the aluminum foil loses electrons. The other part of the reaction is more complex. Either the acid in the tomato juice or copper ions (that form when the copper metal in the penny reacts with the acid in the tomato juice) gain the electrons lost by the aluminum.

The main types of batteries are known as primary and secondary batteries. Dry cell batteries, like the ones used in flashlights and portable radios, are primary batteries. Another important primary battery is the mercury battery. Mercury batteries are typically small and flat. They are used to power cameras, watches, hearing aids, and calculators.

An advantage of primary batteries is that they are generally inexpensive. One disadvantage is that they cannot be recharged. When the chemical substances in the primary batteries are used up, the battery is dead.

Lead storage batteries and nickel-cadmium (NiCad) batteries are examples of secondary batteries. Car batteries are lead storage batteries. Flashlight batteries that are rechargeable are NiCad batteries. Secondary batteries are more expensive than primary batteries. However, unlike primary batteries, lead storage batteries and NiCad batteries can be recharged repeatedly.

Other Things to Try

Repeat this experiment using other coins such as a dime, nickel, or quarter. Do any of these coins cause a louder crackling sound in the earphone or headset?

Repeat this experiment using a nail instead of a coin. Can you make a battery with other juices? To find out, repeat this experiment with other juices such as lemon and orange juice. What do you observe?

Exercises 

  1. Fill in the blank: A battery produces ___________________ energy from _________________________ energy.
  2. Another name for a battery is:
    1. Solar array
    2. Voltaic cell
    3. Nuclear reactor
    4. Fusion cell
  3. As one chemical loses electrons, what happens to the other chemical?
    1. It loses electrons
    2. It gains electrons
    3. Nothing
    4. It decomposes
  4. When will a battery run out?
    1. When its batteries run out
    2. When its chemicals are used up
    3. When all the electrons are gone
    4. When the bunny stops drumming

[/am4show]


How do astronomers find planets around distant stars? If you look at a star through binoculars or a telescope, you’ll quickly notice how bright the star is, and how difficult it is to see anything other than the star, especially a small planet that doesn’t generate any light of its own! Astronomers look for a shift, or wobble, of the star as it gets gravitationally “yanked” around by the orbiting planets. By measuring this wobble, astronomers can estimate the size and distance of larger orbiting objects.


Doppler spectroscopy is one way astronomers find planets around distant stars. If you recall the lesson where we created our own solar system in a computer simulation, you remember how the star could be influenced by a smaller planet enough to have a tiny orbit of its own. This tiny orbit is what astronomers are trying to detect with this method.


Materials


  • Several bouncy balls of different sizes and weights, soft enough to stab with a toothpick
  • Toothpicks

[am4show have=’p8;p9;p11;p38;p92;p17;p44;p83;’ guest_error=’Guest error message’ user_error=’User error message’ ]


Download Student Worksheet & Exercises


  1. Does your ball have a number written on it? If so, that’s the weight, and you can skip measuring the weight with a scale.
  2. If not, weigh each one and make a note in the data table.
  3. Take the heaviest ball and spin it on the table. Can you get it to spin in place? That’s like a Sun without any planets around it.
  4. Insert a toothpick into the ball. Now insert the end of the toothpick into the smallest weight ball. Now spin the original ball. What happened?

What’s Going On?

Nearly half of the extrasolar (outside our solar system) planets discovered were found by using this method of detection. It’s very hard to detect planets from Earth because planets are so dim, and the light they do emit tends to be infrared radiation. Our Sun outshines all the planets in our solar system by one billion times.


This method uses the idea that an orbiting planet exerts a gravitational force on the Sun that yanks the Sun around in a tiny orbit. When this is viewed from a distance, the star appears to wobble. Not only that, this small orbit also affects the color of the light we receive from the star. This method requires that scientists make very precise measurements of its position in the sky.


Exercises


  1. For homework tonight, find out how many extrasolar planets scientists have detected so far.
  2. Also for homework, find out the names (they will probably be a string of numbers and letters together) of the 3 most recent extrasolar planet discoveries.

[/am4show]


UV (ultra-violet) light is invisible, which means you need more than your naked eyeball to do experiments with it. Our sun gives off light in the UV. Too much exposure to the sun and you’ll get a sunburn from the UV rays.


There are many different experiments you can do with UV detecting materials, such as color-changing UV beads and UV nail polish.


Here are a few fun activities you can do with your UV detecting materials:


[am4show have=’p8;p9;p11;p38;p92;p19;p46;p83;p89;’ guest_error=’Guest error message’ user_error=’User error message’ ]


Materials:


  • UV beads
  • sunblock
  • sunglasses
  • sunlight
  • clear plastic bag

Testing Sunblock You can test how effective your sunblock is at stopping harmful rays by slapping a coat of the lotion (or SPF-rated lip balm) on the beads and leaving them out in the sun for a minute. Bring the bead indoors and wipe off… did it change color? If so, then UV rays made it through the sunblock to your bead, and chances are that your sunblock isn’t doing it’s job. Does it matter how thick of a coat you layer on?


You can alternatively place the beads inside a plastic bag and coat the outside of the bag with sunblock. And is the sunblock really waterproof? Meaning that they still are white after dunking the beads underwater while sunblocked…?!


Different Times of Day Stick the UV beads outside and take note how bright the colors are in the morning, noon, and afternoon.  You’ll notice a big difference depending on the sun’s spot in the sky. Does it matter whether it’s sunny or cloudy?


Absorption and Filtration Test out different lenses and filters to see which block UV light.  Lay a handful of beads on the sidewalk and set a pair of sunglasses in top (lenses sitting on the layer of beads).  Did any UV light make it through?  If it didn’t, your beads should stay white. What other things can you test? (Hint: how about inside your car?)


Download Student Worksheet & Exercises


Why does that work? UV sensitive materials have a pigment inside that changes color when exposed to UV light from either the sun or lights that emit in the 350nm – 300nm wavelength.  (UVA is high-energy: 400-320nm, and UVB is low energy: 320-280nm).  If you have fluorescent black lights, use them.  (Do regular incandescent bulbs work? If not, you know they emit light outside the range of the beads!)


When light hits the pigment molecule, it absorbs the energy and actually expands asymmetrically (one end of the molecule expands more than the other).  Different expansion amounts will give you a different color. Although it’s a bit more complicated that that, you now have the basic idea. Your beads will change colors thousands of times before they wear out, so enjoy these super-inexpensive UV detectors!


Exercises


  1. What kinds of light sources didn’t work with the UV beads?
  2. Did your sun block really block out the UV rays?
  3. Which was the best protection against UV rays?

[/am4show]


Crazy Remote

Want to have some quick science fun with your TV remote? Then try this experiment next time you flip on the tube:


Materials:


  • metal frying pan or cookie sheet
  • TV remote control
  • plastic sheet

[am4show have=’p8;p9;p11;p38;p92;p19;p46;p66;p89;’ guest_error=’Guest error message’ user_error=’User error message’ ]


Making IR Visible to the Human Eye

Infra-red light is in the part of the electromagnetic spectrum that isn’t usually visible to human eyes, but using this nifty trick, you will easily be able to see the IR signal from your TV remote, remote-controller for an RC car, and more!


  • TV remote control
  • camera (video or still camera)


Download Student Worksheet & Exercises


Exercises


  1. Look over your data table. What kinds of objects (plastic, metal, natural, etc.) allow infrared light to pass through them?
  2.  Why does the camera work in making the infrared light visible?

[/am4show]


Using the position of the Sun, you can tell what time it us by making one of these sundials. The Sun will cast a shadow onto a surface marked with the hours, and the time-telling gnomon edge will align with the proper time.


In general, sundials are susceptible to different kinds of errors. If the sundial isn’t pointed north, it’s not going to work. If the sundial’s gnomon isn’t perpendicular, it’s going to give errors when you read the time. Latitude and longitude corrections may also need to be made. Some designs need to be aligned with the latitude they reside at (in effect, they need to be tipped toward the Sun at an angle). To correct for longitude, simply shift the sundial to read exactly noon when indicated on your clock. This is especially important for sundials that lie between longitudinal standardized time zones. If daylight savings time is in effect, then the sundial timeline must be shifted to accommodate for this. Most shifts are one hour.


[am4show have=’p8;p9;p11;p38;p92;p17;p44;p67;p73;p83;’ guest_error=’Guest error message’ user_error=’User error message’ ]


Download Student Worksheet & Exercises for ALL Sundials


Simple Sundial

  • Index card
  • Scissors
  • Tape


  1. This sundial takes only a couple minutes to make, and reads easily for beginner students.
  2. Cut the template.
  3. Cut your index card into two triangles by cutting from one corner to the opposite diagonal corner. Stack the two triangles and tape together. This is called your gnomon.
  4. Tape the triangle to your 12-hour line, putting tape on both sides of the gnomon as you stick it to the paper.
  5. Put the sundial in a sunny place where it won’t be disturbed (like inside of a sunny window or on a table outdoors).
  6. Point the sundial so that the gnomon is pointing north. This is most easily done if you orient your sundial at exactly noon in your location. Line up the sundial with the Sun so that the shadow the gnomon makes lines up exactly with the 12.
  7. Tape the sundial down so it won’t move or get blown away.
  8. The gnomon must be exactly perpendicular to the hour markers. Use a ruler or a book edge to help you line this up.

Intermediate Sundial

  • 2 yardsticks or metersticks
  • Protractor
  • Chalk
  • Clock


  1. Find a sunny spot that has concrete and grassy area right next to each other. You’re going to poke the yardstick into the grass and draw on the concrete with chalk, so be sure that the concrete goes in an approximately east-west direction.
  2. First thing in the morning, stick one of the yardsticks into the dirt, right at the edge of the concrete.
  3. At the top of the hour (like at 8 a.m. or 9 a.m.), go out to your yardstick to mark a position.
  4. Lay the second yardstick down along the shadow that the upright yardstick makes on the ground. Use chalk to draw the shadow, and use the yardstick to make your line straight.
  5. Label this line with the hour.
  6. Set your timer and run back out at the top of the next hour.
  7. Repeat steps 3-6 until you finish marking your sundial.
  8. When you’ve completed your sundial, fill out the table.

Advanced Sundial

  • Old CD (this can also be the transparent CD at the top of DVD/CD spindles)
  • Empty CD Case
  • Skewer
  • Sticky tape
  • Cardboard or small piece of clay
  • Protractor
  • Scissors
  • Tape
  • Hot glue


This sundial will work for all longitudes, but has a limited range of latitudes. If you live in the far north or far south, you’ll need to get creative about how to mount the CD so that the gnomon is pointed at the correct angle. For example, at the equator, the CD will lie flat (which is easy!), but near the north and south poles, the CD will be upside down.


  1. Cut out the timeline.
  2. Put a line of double-sided sticky tape along the back of the timeline. Extend the tape about ¼” (on the bottom edge) so it’s hanging off a paper a little.
  3. Flip the timeline over and roll the CD along this bottom edge, sticking the timeline to the edge of the CD. The timeline should be facing inward toward the center of the CD, perpendicular to the CD surface.
  4. Now it’s time to plug up the center hole. You can cut out circles from a CD and attach with tape, or use a small piece of clay.
  5. Push the skewer through the exact middle of the CD.
  6. Open up the CD case.
  7. Position the noon marker at the bottom and stick it using a piece of double-sided sticky tape or hot glue.
  8. The other side of the CD is glued to the CD case at the same angle as your latitude. For example, if I live at 43o north, I would use my protractor on the ground along the base of the CD case and lift the CD until the gnomon reads at 43o. Put a dab of hot glue to attach the CD to the lid of the case.
  9. Go outside and point the gnomon north (you may want to use a compass for this if it’s not noon.)
  10. The dial will have a shadow that falls on the timeline. You can read the time right off the timeline.
  11. For advanced students: Timeline correction: Do you remember how the Sun was fast or slow in the Stargazer’s Wall Chart from the lesson entitled: What’s in the Sky? That wavy line is called the Equation of Time, and you’ll need it to correct your sundial if you want to be completely accurate. This is a great demonstration for a Science Fair project, especially when you add a model of the Sun and Earth to help you explain what’s going on.

What’s Going On?

Sundials have been used for centuries to keep track of the Sun. There are different types of sundials. Some use a line of light to indicate what time it is, while others use a shadow.


Here are a couple of different models that, although they look a lot different from each other, actually all work to give the same results! Your sundial will work all days of the year when the Sun is out.


You’ll notice that north is the direction that your shadow’s length is the shortest. However, if you don’t know where east and west are, all you can do is know where north is. The equinox is a special time of year because the Sun rises in the exact east and sets in the exact west, making these two points exactly perpendicular with the north for your location (which they usually aren’t). At sunset, you can view your shadow (quickly before it disappears) and draw it with chalk on the ground, making a line that runs east-west. 90o CCW from the line is north.


In general, sundials are susceptible to different kinds of errors. If the sundial isn’t pointed north, it’s not going to work.  If the sundial’s gnomon isn’t perpendicular, it’s going to give errors when you read the time. Latitude and longitude corrections may also need to be made. Some designs need to be aligned with the latitude they reside at (in effect, they need to be tipped toward the Sun at an angle). To correct for longitude, simply shift the sundial to read exactly noon when indicated on your clock. This is especially important for sundials that lie between longitudinal standardized time zones. The Equation of Time from the advanced lesson entitled: What’s in the Sky? can be used to correct for the Sun running slow or fast. Remember, this effect is due to both the Earth’s orbit not being a perfect circle and the fact that the tilt axis is not perpendicular to the orbit path.  If daylight savings time is in effect, then the sundial timeline must be shifted to accommodate for this. Most shifts are one hour.


Exercises


  1. What kinds of corrections need to be made for your sundial?
  2. When wouldn’t your sundial work?
  3. How can you improve your sundial to be more accurate?

[/am4show]


spectrometer2Spectrometers are used in chemistry and astronomy to measure light. In astronomy, we can find out about distant stars without ever traveling to them, because we can split the incoming light from the stars into their colors (or energies) and “read” what they are made up of (what gases they are burning) and thus determine their what they are made of. In this experiment, you’ll make a simple cardboard spectrometer that will be able to detect all kinds of interesting things!


SPECIAL NOTE: This instrument is NOT for looking at the sun. Do NOT look directly at the sun. But you can point the tube at a sheet of paper that has the sun’s reflected light on it.


Usually you need a specialized piece of material called a diffraction grating to make this instrument work, but instead of buying a fancy one, why not use one from around your house?  Diffraction gratings are found in insect (including butterfly) wings, bird feathers, and plant leaves.  While I don’t recommend using living things for this experiment, I do suggest using an old CD.


CDs are like a mirror with circular tracks that are very close together. The light is spread into a spectrum when it hits the tracks, and each color bends a little more than the last. To see the rainbow spectrum, you’ve got to adjust the CD and the position of your eye so the angles line up correctly (actually, the angles are perpendicular).


You’re looking for a spectrum (the rainbow image at left) – this is what you’ll see right on the CD itself. Depending on what you look at (neon signs, chandeliers, incandescent bulbs, fluorescent bulbs, Christmas lights…), you’ll see different colors of the rainbow. For more about how diffraction gratings work, click here.


Materials:


  • old CD
  • razor
  • index card
  • cardboard tube

[am4show have=’p8;p9;p11;p38;p92;p19;p46;p105;p83;p89;p91;p101;’ guest_error=’Guest error message’ user_error=’User error message’ ]


Download Student Worksheet & Exercises


Find an old CD and a cardboard tube at least 10 inches long.  Cut a clean slit less than 1 mm wide in an index card or spare piece of cardboard and tape it to one end of the tube.  Align your tube with the slit horizontally, and on the top of the tube at the far end cut a viewing slot about one inch long and ½” inch wide.  Cut a second slot into the tube at a 45 degree angle from the vertical away from the viewing slot.  Insert the CD into this slot so that it reflects light coming through the slit into your eye (viewing slot).


Aim the 1 mm slit at a light source such as a fluorescent light, neon sign, sunset, light bulb, computer screen, television, night light, candle, fireplace… any light source you can find.  Look through the open hole at the light reflected off the compact disk (look for a rainbow in most cases) inside the cardboard tube.


Troubleshooting: This is a quick and easy way to bypass the need for an expensive diffraction grating. Use your spectrometer to look at computer screens, laptops, night lights, neon lights, candles, campfires, fluorescent lights, incandescent lights, LEDs, stoplights, street lights, and any other light sources you can find, even the moon through a telescope.


Exercises


  1. Name three more light sources that you think might work with your spectroscope.
  2.   Why is there a slit at the end of the tube instead of leaving it open?

[/am4show]


If you could stand on the Sun without being roasted, how much would you weigh? The gravitational pull is different for different objects. Let’s find out which celestial object you’d crack the pavement on, and which your lightweight toes would have to be careful about jumping on in case you leapt off the planet.


Weight is nothing more than a measure of how much gravity is pulling on you. Mass is a measure of how much stuff you’re made out of. Weight can change depending on the gravitational field you are standing in. Mass can only change if you lose an arm.


Materials


  • Scale to weigh yourself
  • Calculator
  • Pencil

[am4show have=’p8;p9;p11;p38;p92;p17;p44;p73;p83;’ guest_error=’Guest error message’ user_error=’User error message’ ]


Download Student Worksheet & Exercises


  1. We need to talk about the difference between weight and mass. In everyday language, weight and mass are used interchangeably, but scientists know better.
  2. Mass is how much stuff something is made out of. If you’re holding a bowling ball, you’ll notice that it’s hard to get started, and once it gets moving, it needs another push to get it to stop. If you leave the bowling ball on the floor, it stays put. Once you push it, it wants to stay moving. This “sluggishness” is called inertia. Mass is how much inertia an object has.
  3. Every object with mass also has a gravitational field, and is attracted to everything else that has mass. The amount of gravity something has depends on how far apart the objects are. When you step on a bathroom scale, you are reading your weight, or how much attraction is between you and the Earth.
  4. If you stepped on a scale in a spaceship that is parked from any planets, moons, black holes, or other objects, it would read zero. But is your mass zero? No way. You’re still made of the same stuff you were on Earth, so your mass is the same. But you’d have no weight.
  5. What is your weight on Earth? Let’s find out now.
  6. Step on the scale and read the number. Write it down.
  7. Now, what is your weight on the Moon? The correction factor is 0.17. So multiply your weight by 0.17 to find what the scale would read on the Moon.
  8. For example, if I weigh 100 pounds on Earth, then I’d weight only 17 pounds on the Moon. If the scale reads 10 kg on Earth, then it would read 1.7 kg on the Moon.

What’s Going On?

Weight is nothing more than a measure of how much gravity is pulling on you. This is why you can be “weightless” in space. You are still made of stuff, but there’s no gravity to pull on you so you have no weight. The larger a body is, the more gravitational pull (or in other words the larger a gravitational field) it will have.


The Moon has a fairly small gravitational field (if you weighed 100 pounds on Earth, you’d only be 17 pounds on the Moon).The Earth’s field is fairly large and the Sun has a HUGE gravitational field (if you weighed 100 pounds on Earth, you’d weigh 2,500 pounds on the Sun!).


As a matter of fact, the dog and I both have gravitational fields! Since we are both bodies of mass, we have a gravitational field which will pull things toward us. All bodies have a gravitational field. However, my mass is so small that the gravitational field I have is miniscule. Something has to be very massive before it has a gravitational field that noticeably attracts another body.


So what’s the measurement for how much stuff you’re made of? Mass. Mass is basically a weightless measure of how much matter makes you you. A hamster is made of a fairly small amount of stuff, so she has a small mass. I am made of more stuff, so my mass is greater than the hamster’s. Your house is made of even more stuff, so its mass is greater still. So, here’s a question. If you are “weightless” in space, do you still have mass? Yes, the amount of stuff you’re made of is the same on Earth as it is in your space ship. Mass does not change, but since weight is a measure for how much gravity is pulling on you, weight will change.


Did you notice that I put weightless in quotation marks? Wonder why?


Weightlessness is a myth! Believe it or not, one is never weightless. A person can be pretty close to weightless in very deep space, but the astronauts in a space ship actually do have a bit of weight.


Think about it for a second. If a space ship is orbiting the Earth, what is it doing? It’s constantly falling! If it wasn’t moving forward at tens of thousands of miles an hour it would hit the Earth. It’s moving fast enough to fall around the curvature of the Earth as it falls but, indeed, it’s falling as the Earth’s gravity is pulling it to us.


Otherwise the ship would float out to space. So what is the astronaut doing? She’s falling, too! The astronaut and the space ship are both falling to the Earth at the same rate of speed and so the astronaut feels weightless in space. If you were in an elevator and the cable snapped, you and the elevator would fall to the Earth at the same rate of speed. You’d feel weightless! (Don’t try this at home!)


Either now, or at some point in the future you may ask yourself this question, “How can gravity pull harder (put more force on some things, like bowling balls) and yet accelerate all things equally?” When we get into Newton’s laws in a few lessons, you’ll realize that doesn’t make any sense at all. More force equals more acceleration is basically Newton’s Second law.


Well, I don’t want to take too much time here since this is a little deeper then we need to go but I do feel some explanation is in order to avoid future confusion. The explanation for this is inertia. When we get to Newton’s First law we will discuss inertia. Inertia is basically how much force is needed to get something to move or stop moving.


Now, let’s get back to gravity and acceleration. Let’s take a look at a bowling ball and a golf ball. Gravity puts more force on the bowling ball than on the golf ball. So the bowling ball should accelerate faster since there’s more force on it. However, the bowling ball is heavier so it is harder to get it moving. Vice versa, the golf ball has less force pulling on it but it’s easier to get moving. Do you see it? The force and inertia thing equal out so that all things accelerate due to gravity at the same rate of speed!


Gravity had to be one of the first scientific discoveries. Whoever the first guy was to drop a rock on his foot, probably realized that things fall down! However, even though we have known about gravity for many years, it still remains one of the most elusive mysteries of science. At this point, nobody knows what makes things move toward a body of mass.


Why did the rock drop toward the Earth and on that guy’s foot? We still don’t know. We know that it does, but we don’t know what causes a gravitational attraction between objects. Gravity is also a very weak force. Compared to magnetic forces and electrostatic forces, the gravitational force is extremely weak. How come? No one knows. A large amount of amazing brain power is being used to discover these mysteries of gravity. Maybe it will be you who figures this out!


Exercises


  1. Of the following objects, which ones are attracted to one another by gravity?
    a) Apple and Banana b) Beagle and Chihuahua c) Earth and You d) All of the above
  2. True or False: Gravity accelerates all things differently
  3.  True or False: Gravity pulls on all things differently
  4.  If I drop a golf ball and a golf cart at the same time from the same height, which hits the ground first?
  5.  There is a monkey hanging on the branch of a tree. A wildlife biologist wants to shoot a tranquilizer dart at the monkey to mark and study him. The biologist very carefully aims directly at the shoulder of the monkey and fires. However, the gun makes a loud enough noise that the monkey gets scared, lets go of the branch and falls directly downward. Does the dart hit where the biologist was aiming, or does it go higher or lower then he aimed? (This, by the way, is an old thought problem.)

[/am4show]


A binary system exists when objects approach each other in size (and gravitational fields), the common point they rotate around (called the center of mass) lies outside both objects and they orbit around each other. Astronomers have found binary planets, binary stars, and even binary black holes.


The path of a planet around the Sun is due to the gravitational attraction between the Sun and the planet. This is true for the path of the Moon around the Earth, and Titan around Saturn, and the rest of the planets that have an orbiting moon.


Materials


  • Soup cans or plastic containers with holes punched (like plastic yogurt containers, butter tubs, etc.)
  • String
  • Water
  • Sand
  • Rocks
  • Pebbles
  • Baking soda
  • Vinegar

[am4show have=’p8;p9;p11;p38;p92;p17;p44;p83;’ guest_error=’Guest error message’ user_error=’User error message’ ]


Download Student Worksheet & Exercises


  1. Thread one end of the string through one of the holes and tie a strong knot. Really strong.
  2. Tie the other end through the other hole and tie off.
  3. Go outside.
  4. Fill your can partway with water.
  5. Move away from everyone before you start to swing your container in a gentle circle. As you spin faster and faster, notice where the water is inside the container.
  6. Now empty out the water and replace it with rocks. Spin again and fill out the data table.
  7. To make carbon dioxide gas, you’ll need to work with another lab team. Cover the bottom of your container with baking soda. Add enough vinegar so that the bubbles reach the top without overflowing. Wait patiently for the bubbles to subside. You now have a container filled with carbon dioxide gas (and a little sodium acetate, the leftovers from the reaction). Carefully pour this into the empty container from the other lab team. They can spin again and record their results. When they are done, borrow their container and give them yours so they can fill it for you.

What’s Going On?

The path of a planet around the Sun is due to the gravitational attraction between the Sun and the planet. This is true for the path of the Moon around the Earth, and Titan around Saturn, and the rest of the planets that have an orbiting moon.


Charon and Pluto orbit around each other due to their gravitational attraction to each other. However, Charon is not the moon of Pluto, as originally thought. Pluto and Charon actually orbit around each other. Pluto and Charon also are tidally locked, just like the Earth-Moon system, meaning that one side of Pluto is always faces the same side of Charon.


Imagine you have a bucket half full of water. Can you tilt a bucket completely sideways without spilling a drop? Sure thing! You can swing it by the handle, and even though it’s upside down at one point, the water stays put. What’s keeping the water inside the bucket?


Before we answer this, imagine you are a passenger in a car, and the driver is late for an appointment. They take a turn a little too fast, and you forgot to fasten your seat belts. The car makes a sharp left turn. Which way would you move in the car if they took this turn too fast? Exactly – you’d go sliding to the right. So, who pushed you?


No one! Your body wanted to continue in a straight line, but the car is turning, so the right side car door keeps pushing you to turn you in a curve – into the left turn. The car door keeps moving in your way, turning you into a circle. The car door pushing on you is called centripetal force. Centripetal means “center-seeking.” It’s the force that points toward the center of the circle you’re moving on. When you swing the bucket around your head, the bottom of the bucket is making the water turn in a circle and not fly away. Your arm is pulling on the handle of the bucket, keeping it turning in a circle and not letting it fly away. That’s centripetal force.


Think of it this way: If I throw a ball in outer space, does it go in a straight line or does it wiggle all over the place? Straight line, right? Centripetal force is the force needed to keep an object following a curved path.


Remember how objects will travel in a straight line unless they bump into something or have another force acting on them, such as gravity, drag force, and so forth? Well, to keep the bucket of water swinging in a curved arc, the centripetal force can be felt in the tension experienced by the handle (or your arm, in our case). Swinging an object around on a string will cause the rope to undergo tension (centripetal force), and if your rope isn’t strong enough, it will snap and break, sending the mass flying off in a tangent (straight) line until gravity and drag force pull the object to a stop. This force is proportional to the square of the speed – the faster you swing the object, the higher the force.


Exercises


  1. How is spinning the container like Pluto and Charon?
  2. What would happen if we cut the string while you are spinning? Which way would the container go?
  3. What happens if we triple the size of your container and what’s inside of it?

[/am4show]


We’re going to do a chemistry experiment to simulate the heat generated by the internal core of Neptune by using a substance used for melting snow mixed with baking soda.


Calcium chloride splits into calcium ions and chloride ions when it is mixed with water, and energy is released in the form of heat. The energy released comes from the bond energy of the calcium chloride atoms, and is actually electromagnetic energy. When the calcium ions and chloride ions are floating around in the warm solution, they are free to interact with the rest of the ingredients added, like the sodium bicarbonate, to form carbon dioxide gas and sodium chloride (table salt).


Materials


  • Calcium chloride
  • Sodium bicarbonate (baking soda)
  • Phenol red or red food dye
  • Re-sealable plastic baggie
  • Gallon milk jug container
  • Straight pin
  • Warm water
  • Cold water

[am4show have=’p8;p9;p11;p38;p92;p17;p44;p83;’ guest_error=’Guest error message’ user_error=’User error message’ ]


Download Student Worksheet & Exercises


  1. Cut the top off the milk jug just above the handle so you can easily put your experiment in the jug.
  2. Fill your milk jug with cold water most of the way. Leave enough room for you to add the bag without overflowing the water, and make sure you put in very cold water. Set this aside.
  3. Add an inch of warm water to the plastic bag.
  4. Add a couple of drops of red dye to the bag.
  5. If you are using a hot pack, open the hot pack (use scissors) carefully. You don’t want to puncture the water pouch inside. Throw the water pouch away and pour the rest of the contents into a container (this is calcium chloride). You want a couple of tablespoons of calcium chloride in the plastic baggie.
  6. Seal the bag closed and roll the pellets between your fingers.
  7. Use a straight pin and make six holes near the top of the bag, away from the water.
  8. Open the bag and add a couple of tablespoons of sodium bicarbonate (baking soda). Quickly zip up your bag!
  9. Make sure the bag is sealed before inserting it into your cold water jug. Watch carefully for several minutes and record your observations with the next step.
  10. Draw your experiment during step 9. Label all parts of what’s going on with your experiment:

What’s Going On?

We’re simulating the heat generation on Neptune using a chemistry experiment with a hot pack.


Most instant hot packs available in drugstores work on this same principle we’re about to investigate. When the hot pack is needed, the bag is squeezed to cause the water and salt to mix. Depending on the salt used in the pack, energy is either absorbed (cold pack) or given off (hot pack). Ammonium nitrate is the most commonly used salt in cold packs. And calcium chloride is the most commonly used salt in hot packs.


Calcium chloride splits into calcium ions and chloride ions when it is mixed with water, and energy is released in the form of heat. This is the same heat energy you will feel when holding the baggie and rubbing the pellets.


Dissolving calcium chloride is highly exothermic, meaning that it gives off a lot of heat when mixed with water (the water can reach up to 140oF, so watch your hands!). The energy released comes from the bond energy of the calcium chloride atoms, and is actually electromagnetic energy.


When the calcium ions and chloride ions are floating around in the warm solution, they are free to interact with the rest of the ingredients added, like the sodium bicarbonate, to form carbon dioxide gas and sodium chloride (table salt). You can tell there’s carbon dioxide gas inside when the bag puffs up.


As the gas in the bag increases, it puffs out and increases the pressure. This stretches the bag and some of the gas is released out the holes in the top of the bag, bubbling up to the surface of the milk jug. After a while, the warm water will also rise out of the holes due to the temperature difference between the bag and jug and you’ll see red drift up to the top surface of the milk jug. The heat generated by Neptune is deep in the core, and it bubbles up and radiates out to space, just like the warm bag bubbling its contents to the cold water jug. The entire planet is a whirling, swirling, fast-moving ball of gas and ice that move because of temperature and pressure differences.


Neptune is one of the ice giants of our solar system, and the furthest planet from the sun. Because it’s a gas giant, you couldn’t land your spaceship on the surface because it doesn’t have one. You’d continuously fall until the pressure crushed your ship. And then when you got down far enough, you’d be roasted, because Neptune radiates 2.6 times more energy than it gets from the Sun. That’s impressive, especially since it’s so far from the Sun (30.1 AU, or more than 30 times the Earth-Sun distance). The average daily wind speed on Neptune is 1,200 mph. That’s four times faster than the biggest hurricanes on Earth!


Neptune has more mass than Uranus even though it’s smaller than Uranus. The rings around the planet weren’t confirmed until a space probe passed it and sent us back pictures of the blue planet. It’s hard for backyard astronomers to find this planet, since it’s not a naked-eye object. You need a complicated-looking set of star charts or a GPS tracking system coupled with astronomical data to point your scope in the right direction. Even then, all you see is a white-blue looking star.


Although it’s a gas giant, it’s classified as an ice giant, since there are large amounts of methane and ammonia ices in the upper atmosphere, giving the planet its blue color. The largest of 13 moons is Triton (not to be confused with Saturn’s massive moon, Titan), which orbits Neptune in the opposite direction from the planet’s rotation and also up at an incline from the planet’s equator.


Exercises


  1. What happens when the chemicals come in contact with each other?
  2. What did you notice when you sealed the bag closed and rolled the pellets between your fingers?
  3. What happened when the solution is placed in the cold water jug?
  4. What does this experiment have to do with Neptune? Why did we use the baking soda at all?

[/am4show]


A meteoroid is a small rock that zooms around outer space. When the meteoroid zips into the Earth’s atmosphere, it’s now called a meteor or “shooting star”. If the rock doesn’t vaporize en route, it’s called a meteorite as soon as it whacks into the ground. The word meteor comes from the Greek word for “high in the air.”


Meteorites are black, heavy (almost twice the normal rock density), and magnetic. However, there is an Earth-made rock that is also black, heavy, and magnetic (magnetite) that is not a meteorite. To tell the difference, scratch a line from both rocks onto an unglazed tile. Magnetite will leave a mark whereas the real meteorite will not.


Materials


  • White paper
  • Strong magnet
  • Handheld magnifying glass (optional)

[am4show have=’p8;p9;p11;p38;p92;p17;p44;p67;p73;p90;p83;p96;’ guest_error=’Guest error message’ user_error=’User error message’ ]


Download Student Worksheet & Exercises


  1. Imagine you are going on a rock hunt. You are to find which rocks are meteorites and which are Earth rocks. If you don’t have access to rock samples, just watch the experiment video of the different rock samples. If you’d like to make your own sample collection, here are some ideas:
    1. 8-10 different rocks, including pumice (from a volcano), lodestone (a naturally magnetized piece of magnetite, and often mistaken for meteorites), a fossil, tektite (dry fused glass), pyrite (also known as fool’s gold), marble (calcite or dolomite), and a couple of different kinds of real meteorites (iron meteorite, stony meteorite, etc.) Also add to your bag an unglazed tile and a magnet.
  2. As you watch the experiment video, record your observations on your data sheet.
    1. Since nearly all meteorites have lots of iron, they are usually attracted to a magnet. However, lodestone is an Earth rock that also has a lot of iron. Iron is heavy, and meteorites contain a lot of iron. When looking through the possibilities, remove any lightweight rocks, as they are not usually meteorites.
    2. Meteorites are small. Most never get big enough or hot enough for metal to sink into the core, so the majority are mixed with rock and dust (stony meteorites). The few that do get big and form metal cores are called iron meteorites.
    3. Most meteorites come from the Asteroid Belt. Some meteorites get a dark crust. While others look like splashed metal. They are all dark, at least on the outside. Remove any light-colored rocks.
    4. Rocks that have holes vaporize or explode when they go through the atmosphere, they don’t burn up. Only strong space rocks without holes make it to the ground. Remove any porous rocks.
    5. The ones you have left are either meteorites or lodestone. To tell the difference, scratch a line from both rocks onto an unglazed tile. Magnetite (lodestone) will leave a mark whereas the real meteorite will not.

Finding Meteorites


  1. Place a sheet of white paper outside on the ground. Do this in the morning when you first start up class.
  2. After a few hours (like just before lunchtime), your paper starts to show signs of “dust.”
  3. Carefully place a magnet underneath the paper, and see if any of the particles move as you wiggle the magnet. If so, you’ve got yourself a few bits of space dust.
  4. Use a magnifying lens to look at your space meteorites up close.

What’s Going On?

94% of all meteorites that fall to the Earth are stony meteorites. Stony meteorites will have metal grains mixed with the stone that are clearly visible when you look at a slice.


Iron meteorites make up only 5% of the meteorites that hit the Earth. However, since they are stronger, most of them survive the trip through the atmosphere and are easier to find since they are more resistant to weathering. More than half the meteorites we find are iron meteorites. They are the one of the densest materials on Earth. They stick strongly to magnets and are twice as heavy as most Earth rocks. The Hoba meteorite in Namibia weighs 50 tons.


Since nearly all meteorites have lots of iron, they are usually attracted to a magnet. However, lodestone is an Earth rock that also has a lot of iron. Iron is heavy, and meteorites contain a lot of iron. When looking through the possibilities, remove any lightweight rocks, as they are not usually meteorites.


Meteorites are small. Most never get big enough or hot enough for metal to sink into the core, so the majority are mixed with rock and dust (stony meteorites). The few that do get big and form metal cores are called iron meteorites.


Most meteorites come from the Asteroid Belt. Some meteorites get a dark crust, while others look like splashed metal. They are all dark, at least on the outside.


Rocks that have holes vaporize or explode when they go through the atmosphere, they don’t burn up. Only strong space rocks without holes make it to the ground.


Every year, the Earth passes through the debris left behind by comets. Comets are dirty snowballs that leave a trail of particles as they orbit the Sun. When the Earth passes through one of these trails, the tiny particles enter the Earth’s atmosphere and burn up, leaving spectacular meteor showers for us to watch on a regular basis. The best meteor showers occur when the moon is new and the sky is very dark.


Meteorites are black, heavy (almost twice the normal rock density), and magnetic. However, there is an Earth-made rock that is also black, heavy, and magnetic (magnetite) that is not a meteorite. To tell the difference, scratch a line from both rocks onto an unglazed tile (or the bottom of a coffee mug or the underside of the toilet tank). Magnetite will leave a mark, whereas the real meteorite will not.


If you find a meteorite, head to your nearest geology department at a local university or college and let them know what you’ve found. In the USA, if you find a meteorite, you get to keep it… but you might want to let the experts in the geology department have a thin slice of it to see what they can figure out about your particular specimen.


Exercises


  1.   Are meteors members of the solar system?
  2.  How big are meteors?
  3. Why do we have meteor showers at predictable times of the year?

[/am4show]


Mars is coated with iron oxide, which not only covers the surface but is also present in the rocks made by the volcanoes on Mars.


Today you get to perform a chemistry experiment that investigates the different kinds of rust and shows that given the right conditions, anything containing iron will eventually break down and corrode. When iron rusts, it’s actually going through a chemical reaction: Steel (iron) + Water (oxygen) + Air (oxygen) = Rust
Materials


  • Four empty water bottles
  • Four balloons
  • Water
  • Steel wool
  • Vinegar
  • Water
  • Salt

[am4show have=’p8;p9;p11;p38;p92;p17;p44;p68;p80;p83;’ guest_error=’Guest error message’ user_error=’User error message’ ]


Download Student Worksheet & Exercises


  1. This lab is best done over two consecutive days. Plan to set up the experiment on the first day, and finish up with the observations on the next.
  2. Line up four empty bottles on the table.
  3. Label your bottles so you know which is which: Water, Water + Salt, Vinegar, Vinegar + Salt
  4. Fill two bottles with water.
  5. Fill two with vinegar.
  6. Add a tablespoon of salt to one of the water bottles.
  7. Add one tablespoon of salt to one of the vinegar bottles.
  8. Stuff a piece of steel wool into each bottle so it comes in contact with the liquid.
  9. Stretch a balloon across the mouth of each bottle.
  10. Let your experiment sit (overnight is best, but you can shorten this a bit if you’re in a hurry).
  11. The trick to getting this one to work is in what you expect to happen. The balloon should get shoved inside the bottle (not expand and inflate!). Check back over the course of a few hours to a few days to watch your progress.
  12. Fill in the data table.

What’s Going On?

Rust is a common name for iron oxide. When metals rust, scientists say that they oxidize, or corrode. Iron reacts with oxygen when water is present. The water can be liquid or the humidity in the air. Other types of rust happen when oxygen is not around, like the combination of iron and chloride. When rebar is used in underwater concrete pillars, the chloride from the salt in the ocean combines with the iron in the rebar and makes a green rust.


Mars has a solid core that is mostly iron and sulfur, and a soft pastel-like mantle of silicates (there are no tectonic plates). The crust has basalt and iron oxide. The iron is in the rocks and volcanoes of Mars, and Mars appears to be covered in rust.


When iron rusts, it’s actually going through a chemical reaction:
Steel (iron) + Water (oxygen) + Air (oxygen) = Rust


There are many different kinds of rust. Stainless steel has a protective coating called chromium (III) oxide so it doesn’t rust easily.


Aluminum, on the other hand, takes a long time to corrode because it’s already corroded — that is, as soon as aluminum is exposed to oxygen, it immediately forms a coating of aluminum oxide, which protects the remaining aluminum from further corrosion.


An easy way to remove rust from steel surfaces is to rub the steel with aluminum foil dipped in water. The aluminum transfers oxygen atoms from the iron to the aluminum, forming aluminum oxide, which is a metal polishing compound. And since the foil is softer than steel, it won’t scratch.


Exercises


  1. Why did one balloon get larger than the rest?
  2. Which had the highest pressure difference? Why?

[/am4show]


It just so happens that the Sun’s diameter is about 400 times larger than the Moon, but the Moon is 400 times closer than the Sun. This makes the Sun and Moon appear to be about the same size in the sky as viewed from Earth. This is also why the eclipse thing is such a big deal for our planet. You’re about to make your own eclipses as you learn about syzygy.


A total eclipse happens about once every year when the Moon blocks the Sun’s light. Lunar eclipses occur when the Sun, Moon, and Earth are lined up in a straight line with the Earth in the. Lunar eclipses last hours, whereas solar eclipses last only minutes.


Materials


  • 2 index cards
  • Flashlight or Sunlight
  • Tack or needle
  • Black paper
  • Scissors

[am4show have=’p8;p9;p11;p38;p92;p17;p44;p105;p67;p83;’ guest_error=’Guest error message’ user_error=’User error message’ ]


Download Student Worksheet & Exercises


  1. Trace the circle of your flashlight on the black paper and cut out the circle with paper. This is your Moon. If you are using the Sun instead, cut out a circle about the size of your fist.
  2. Make a tiny hole in one of the index cards by pushing a tack through the middle of the card.
  3. Hold the punched index card a couple inches above the plain one and shine your light through the hole so that a small disk appears on the lower card. Move the cards closer or further until it comes into focus. The disk of light is the Sun.
  4. Ask your lab partner to slowly move the black paper disk in front of your light as you watch what happens to the Sun on the bottom index card.
  5. Continue moving the black paper until you can see the Sun again.
  6. Where does your circle need to be in order to create an annular eclipse? A partial eclipse?
  7. How would you simulate Mercury transiting the Sun? What would you use?
  8. Fill out the table.

What’s Going On?

An eclipse is when one object completely blocks another. If you’re big on vocabulary words, then let the students know that eclipses are one type of syzygy (a straight line of three objects in a gravitational system, like the Earth, Moon, and Sun).


A lunar eclipse is when the Moon moves into the Earth’s shadow, making the Moon appear copper-red.


A solar eclipse is when the Moon’s shadow crawls over the Earth, blocking out the Sun partially or completely. There are three kinds of solar eclipses. A total eclipse blocks the entire Sun, whereas in a partial eclipse the Moon appears to block part, but not all of the Sun’s disk. An annular eclipse is when the Moon is too far from Earth to completely cover the Sun, so there’s a bright ring around the Moon when it moves in front of the Sun.


It just so happens that the Sun’s diameter is about 400 times larger than the Moon, but the Moon is 400 times closer than the Sun. This makes the Sun and Moon appear to be about the same size in the sky as viewed from Earth. This is also why the eclipse thing is such a big deal for our planet.


Transits are where the disk of a planet (like Venus) passes like a small shadow across the Sun. Io transits the surface of Jupiter. In rare cases, one planet will transit another. These are rare because all three objects must align in a straight line.


Astronomers use this method to detect large planets around distant bright stars. If a large planet passes in front of its star, the star will appear to dim slightly.


Note: A transit is not an occultation, which completely hides the smaller object behind a larger one.


Exercises


  1. What other planets can have eclipses?
  2. Which planets transit the Sun?
  3. How is a solar eclipse different from a lunar eclipse?
  4. What phase can a lunar eclipse occur?
  5.  Can a solar eclipse occur at night?

[/am4show]


Scientists do experiments here on Earth to better understand the physics of distant worlds. We’re going
to simulate the different atmospheres and take data based on the model we use.


Each planet has its own unique atmospheric conditions. Mars and Mercury have very thin atmospheres, while Earth has a decent atmosphere (as least, we like to think so). Venus’s atmosphere is so thick and dense (92 times that of the Earth’s) that it heats up the planet so it’s the hottest rock around. Jupiter and Saturn are so gaseous that it’s hard to tell where the atmosphere ends and the planet starts, so scientists define the layers based on the density and temperature changes of the gases. Uranus and Neptune are called ice giants because of the amounts of ice in their atmospheres.


Materials


  • 4 thermometers
  • 3 jars or water bottles
  • Plastic wrap or clear plastic baggie
  • Wax paper
  • Stopwatch

[am4show have=’p8;p9;p11;p38;p92;p17;p44;p83;p84;p30;p57;’ guest_error=’Guest error message’ user_error=’User error message’ ]


Download Student Worksheet & Exercises


  1. Place one thermometer in direct sunlight. This is like the atmosphere of Mercury and Mars.
  2. Place a second thermometer in a jar and cap it. Place this in sunlight. This is the Earth’s, Jupiter’s and Saturn’s atmosphere.
  3. Line the second jar with wax or tissue paper. Place the third thermometer in the jar and cap it. Place it next to the other two in sunlight. This is the atmosphere on Venus.
  4. Insert the fourth thermometer into a plastic baggie, insert it into the bottle and cap it. Make sure the baggie is loose. This is Neptune and Uranus.
  5. Record your data observations in the table, taking data every couple of minutes.

What’s Going On?

Venus is hot enough to melt cannonballs and crush any spaceship that tries to land on the surface. Carbon dioxide is a “greenhouse gas,” meaning that some wavelengths of light can pass through it, but specifically not infrared light, which is also known as heat. Light from the Sun either bounces off the upper cloud layers and back into space, or penetrates the clouds and strikes the surface of Venus, warming up the land. The ground radiates the heat back out, but the carbon dioxide atmosphere is so dense and thick that it traps and keeps the heat down on the surface of the planet. Think of rolling up your windows in your car on a hot day.


The heat is so intense on Venus that the carbon normally locked into rocks sublimated (turned straight from solid to gas) and added to the carbon in the atmosphere, to make even more carbon dioxide.


Mercury doesn’t have much of an atmosphere, which is just like a bare thermometer. There’s nothing to hold onto the heat that strikes the surface. Mars is in a similar situation.


Earth’s atmosphere is simulated by placing the thermometer in a bottle. The Earth has a cloud layer that keeps some of the heat on the planet, but most of it does get radiated back into space. When the clouds are in at night, the planet stays warmer than when it’s clear (and cold).


Venus’s heavy, dense carbon dioxide atmosphere is simulated by using the waxed paper. Venus is the hottest planet in our solar system because of the runaway greenhouse effect that traps most of the heat that makes it through the atmosphere, bouncing it back down to the surface. The average temperature of Venus is over 900oF.


Jupiter and Saturn’s atmospheres are thinner layers of hydrogen and helium than deeper in the core.


Uranus and Neptune are called ice giants because of the amounts of ice in their atmospheres. Their atmospheres are also made of mostly hydrogen and helium.


Exercises


  1. Which atmosphere reached the highest temperature?
  2. Each of the jars received the same amount of energy from the Sun. Why is this not quite like the real solar system?

[/am4show]


While this isn’t actually an air-pressure experiment but more of an activity in density, really, it’s still a great visual demonstration of why Hot Air Balloons rise on cold mornings.


Imagine a glass of hot water and a glass of cold water sitting on a table, side by side. Now imagine you have a way to count the number of water molecules in each glass. Which glass has more water molecules?


The glass of cold water has way more molecules… but why? The cold water is more dense than the hot water. Warmer stuff tends to rise because it’s less dense than colder stuff and that’s why the hot air balloon in experiment 1.10 floated up to the sky.


Clouds form as warm air carrying moisture rises within cooler air. As the warm, wet air rises, it cools and begins to condense, releasing energy that keeps the air warmer than its surroundings. Therefore, it continues to rise. Sometimes, in places like Florida, this process continues long enough for thunderclouds to form. Let’s do an experiment to better visualize this idea.


[am4show have=’p8;p9;p11;p38;p92;p82;p84;p93;p30;p57;’ guest_error=’Guest error message’ user_error=’User error message’ ]


Materials: Two identical tall glasses, hot water, cold water, red and blue food dye, and an index card larger enough to cover the opening of the glasses


Fill two identical water glasses to the brim: one with hot water, the other with cold water. Put a few drops of blue dye in the cold water, a few drops of red dye in the hot water. Place the index card over the mouth of the cold water and invert the glass over the glass of hot water. Line up the openings of both glasses, and slowly remove the card.


Troubleshooting: Always invert the cold glass over the hot glass using an index card to hold the cold water in until you’ve aligned both glasses. You can also substitute soda bottles for water glasses and slide a washer between the two bottles to decrease the flow rate between the bottles so the effect lasts longer.


[/am4show]


When air moves, the air pressure decreases. This creates a lower air pressure pocket right between the cans relative to the surrounding air. Because higher pressure pushes, the cans clink together. Just remember – whenever there’s a difference in pressure, the higher pressure pushes.


You will need about 25 straws and two empty soda cans or other lightweight containers


[am4show have=’p8;p9;p11;p38;p92;p82;p84;p93;p30;p57;’ guest_error=’Guest error message’ user_error=’User error message’ ]


Lay a row of straws parallel to each other on a smooth tabletop. Place two empty soda cans on the straws about an inch apart. Lower your nose to the cans and blow hard through the space between the two cans.


Clink! They should roll toward each other and touch!


[/am4show]


About 400 years ago, Leonardo da Vinci wanted to fly… so he studied the only flying things around at that time: birds and insects. Then he did what any normal kid would do—he drew pictures of flying machines!


Centuries later, a toy company found his drawing for an ornithopter, a machine that flew by flapping its wings (unlike an airplane, which has non-moving wings). The problem (and secret to the toy’s popularity) was that with its wing-flapping design, the ornithopter could not be steered and was unpredictable: It zoomed, dipped, rolled, and looped through the sky. Sick bags, anyone?


Hot air balloons that took people into the air first lifted off the ground in the 1780s, shortly after Leonardo da Vinci’s plans for the ornithopter took flight. While limited seating and steering were still major problems to overcome, let’s get a feeling for what our scientific forefathers experienced as we make a balloon that can soar high into the morning sky.


Materials: A lightweight plastic garbage bag, duct or masking tape, a hand-held hair dryer. And a COLD morning.


Here’s what you do:


[am4show have=’p8;p9;p11;p38;p92;p82;p84;p93;p30;p57;’ guest_error=’Guest error message’ user_error=’User error message’ ]


Shake out a garbage bag to its maximum capacity. Using duct or masking tape, reduce the opening until it is almost-closed leaving only a small hole the size of the hair dryer nozzle. Use the hair dryer to inflate the bag, heating the air inside, but make sure you don’t melt the bag! When the air is at its warmest, release your hold on the bag while at the same time you switch off the hair dryer. The bag should float upwards and stay there for a while.


Troubleshooting: This experiment works best on cold, windless mornings. If it’s windy outside, try a cool room. The greater the temperature difference between the hot air inside the garbage bag versus the cold, still air, the faster the bag rises. The only other thing to watch for is that you’ve taped the mouth of the garbage bag securely so the hot air doesn’t seep out. Be sure the opening you leave is only the diameter of your hair dryer’s nozzle.


Want to go BIGGER? Then try the 60-foot solar tube!
[/am4show]


Where’s the pressure difference in this trick?


At the opening of the glass. The water inside the glass weighs a pound at best, and, depending on the size of the opening of the glass, the air pressure is exerting 15-30 pounds upward on the bottom of the card. Guess who wins? Tip, when you get good at this experiment, try doing it over a friend’s head!


Materials: a glass, and an index card large enough to completely cover the mouth of the glass.


[am4show have=’p8;p9;p11;p38;p92;p82;p84;p93;p100;p30;p57;’ guest_error=’Guest error message’ user_error=’User error message’ ]


Fill a glass one-third with water. Cover the mouth with an index card and over a sink invert the glass while holding the card in place. Remove your hand from the card. Voila! Because atmospheric air pressure is pushing on all sides of both the glass and the card, the card defies gravity and “sticks” to the bottom of the glass. Recall that higher pressure pushes and when you have a difference in pressure, things move. This same pressure difference causes storms, winds, and the index card to stay in place.


[/am4show]


Lots of science toy companies will sell you this experiment, but why not make your own? You’ll need to find a loooooong bag, which is why we recommend a diaper genie. A diaper genie is a 25′ long plastic bag, only both ends are open so it’s more like a tube. You can get three 8-foot bags out of one pack.


Kids have a tendency to shove the bag right up to their face and blow, cutting off the air flow from the surrounding air into the bag. When they figure out this experiment and perform it correctly, this is one of those oooh-ahhh experiments that will leave your kids with eyes as big as dinner plates.


Here’s what you do:


[am4show have=’p8;p9;p11;p38;p92;p82;p84;p93;p30;p57;’ guest_error=’Guest error message’ user_error=’User error message’ ]


Cut an eight-foot section of the diaper genie bag and knot one of the ends. Hold the other end open, take a deep breath, and blow. How many breaths does it take for you to fill up the entire bag with air? Try this now…


After you know how many breaths it takes, do you think you can fill the bag with only ONE breath? The answer is YES! Hold the bag about eight inches from the face and blow long and steady into the bag. As soon as you run out of air, close the end of the bag and slide your hand along the length (toward the knotted end) until you have an inflated blimp.


Troubleshooting: If the bag tears open, use packing tape to mend it.


What’s going on? When you blow air past your lips, a pocket of lower air pressure forms in front of your face. The stronger you blow, the lower the air pressure pocket. The air surrounding this lower pressure region is now at a higher pressure than the surrounding air, which causes things to shift and move. When you blow into the bag (keeping the bag a few inches from your face), you build a lower pressure area at the mouth of the bag, and the surrounding air rushes forward and into the bag.


Substitution Tip: If you can’t locate a diaper genie, you can string together plastic sheets from garbage bags, using lightweight tape to secure the seams. You’ll need to make a 8-12” diameter by eight-foot long tube and close one end. When kids get their eight-foot bag inflated in just one breath, ask them: “Did you really have that much air in your lungs?”


[/am4show]


As you blow into the funnel, the air under the ball moves faster than the other air surrounding the ball, which generates an area of lower air pressure. The pressure under the ball is therefore lower than the surrounding air which is, by comparison, at a higher pressure. This higher pressure pushes the ball back into the funnel, no matter how hard you blow or which way you hold the funnel. The harder you blow, the more stuck the ball becomes. Cool.


Materials: A funnel and a ping pong ball


[am4show have=’p8;p9;p11;p38;p92;p82;p84;p93;p30;p57;’ guest_error=’Guest error message’ user_error=’User error message’ ]


Insert a ping pong ball into a funnel. Place the stem of the funnel between your lips and tilt your head back so ball stays inside. Blow a strong, long stream of air into the funnel.


[/am4show]


As you blow air into the bottle, the air pressure increases inside the bottle. This higher pressure pushes on the water, which gets forced up and out the straw (and up your nose!).


Materials: small lump of clay, water, a straw, and one empty 2-liter soda bottle.


[am4show have=’p8;p9;p11;p38;p92;p82;p84;p93;p30;p57;’ guest_error=’Guest error message’ user_error=’User error message’ ]


Fill a 2-liter soda water bottle full of water and seal it with a lump of clay wrapped around a long straw so that the straw is secured to the mouth of the bottle. (The straw should be partly submerged in the water.) Blow hard into the straw. Splash!


[/am4show]


This experiment illustrates that air really does take up space! You can’t inflate the balloon inside the bottle without the holes, because it’s already full of air. When you blow into the bottle with the holes, air is allowed to leak out making room for the balloon to inflate. With the intact bottle, you run into trouble because there’s nowhere for the air already inside the bottle to go when you attempt to inflate the balloon.


You’ll need to get two balloons, one tack, and two empty water bottles.


[am4show have=’p8;p9;p11;p38;p92;p82;p93;p30;p57;p84;’ guest_error=’Guest error message’ user_error=’User error message’ ]


Poke a balloon into a water bottle and stretch the balloon’s neck covering the mouth of the bottle from the inside. Repeat with the other bottle. Using the tack, poke several small holes in the bottom of one of the water bottles. Putting your mouth to the neck of each bottle, try to inflate the balloons.


A cool twist on this activity is to drill a larger hole in the bottle (say, large enough to be covered up by your thumb) and inflate the balloon inside the bottle with hole open, then plug up the hole with your thumb. The balloon will remain inflated even though its neck is not tied! Where is the higher pressure region now?


[/am4show]


This is a recording of a recent live teleclass I did with thousands of kids from all over the world. I’ve included it here so you can participate and learn, too!


Soar, zoom, fly, twirl, and gyrate with these amazing hands-on classes which investigate the world of flight. Students created flying contraptions from paper airplanes and hangliders to kites! Topics we will cover include: air pressure, flight dynamics, and Bernoulli’s principle.


Materials:


  • 5 sheets of 8.5×11” paper
  • 2 index cards
  • 2 straws
  • 2 small paper clips
  • Scissors, tape
  • Optional: ping pong ball and a small funnel

[am4show have=’p8;p9;p11;p38;p92;p11;p38;p93;’ guest_error=’Guest error message’ user_error=’User error message’ ]


Key Concepts

While the kids are playing with the experiments see if you can get them to notice these important ideas. When they can explain these concepts back to you (in their own words or with demonstrations), you’ll know that they’ve mastered the lesson.


  1. Air pressure is all around us. Air pushes downward and creates pressure on all things.
  2. Air pressure changes all the time.
  3. Higher pressure always pushes.
  4. The faster air travels over a surface, the less time it has to push down on that surface and create pressure. Fast moving air creates low pressure regions. (Bernoulli’s Law).
  5. The four fundamental forces on an airplane are lift, weight, thrust, and drag.

What’s Going On?

There’s air surrounding us everywhere, all at the same pressure of 14.7 pounds per square inch (psi). You feel the same force on your skin whether you’re on the ceiling or the floor, under the bed or in the shower.


An interesting thing happens when you change a pocket of air pressure – things start to move. This difference in pressure causes movement that creates winds, tornadoes, airplanes to fly, and some of the experiments we’re about to do together.


An important thing to remember is that higher pressure always pushes stuff around. While lower pressure does not “pull,” we think of higher pressure as a “push”. The higher pressure inside a balloon pushes outward and keeps the balloon in a round shape.


Weird stuff happens with fast-moving air particles. When air moves quickly, it doesn’t have time to push on a nearby surface, such as an airplane wing. The air just zooms by, barely having time to touch the surface, so not much air weight gets put on the surface. Less weight means less force on the area. You can think of “pressure” as force on a given area or surface. Therefore, a less or lower pressure region occurs wherever there is fast air movement.


There’s a reason airplane wings are rounded on top and flat on the bottom. The rounded top wing surface makes the air rush by faster than if it were flat. When you put your thumb over the end of a gardening hose, the water comes out faster when you decrease the size of the opening. The same thing happens to the air above the wing: the wind rushing by the wing has less space now that the wing is curved, so it zips over the wing faster, and creates a lower pressure area than the air at the bottom of the wing.


The Wright brothers figured how to keep an airplane stable in flight by trying out a new idea, watching it carefully, and changing only one thing at a time to improve it. One of their biggest problems was finding a method for generating enough speed to get off the ground. They also took an airfoil (a fancy word for “airplane wing”), turned it sideways, and rotated it around quickly to produce the first real propeller that could generate an efficient amount of thrust to fly an aircraft.  Before the Wright brothers perfected the airfoil, people had been using the same “screw” design created by Archimedes in 250 BC.  This twist in the propeller was such a superior design that modern propellers are only 5% more efficient than those created a hundred years ago by the two brilliant Wright brothers.


Questions to Ask

When you’ve worked through most of the experiments ask your kids these questions and see how they do:


  1. Higher pressure does which? (a) pushes (b) pulls (c) decreases temperature (d) meows (e) causes winds, storms, and airplanes to fly
  2. The tips on the edge of a paper airplane wing provide more lift by: (a) flapping a lot
    (b) destroying wingtip vortices that kill lift (c) getting stuck in a tree more easily (d) decreasing speed
  3. In the ping pong ball and funnel experiment, the ball stayed in the funnel was because:         (a) you couldn’t blow hard enough (b) you glued it into the funnel (c) the ball had a hole in it  (d) the fast blowing caused a low-pressure region around the ball, causing the surrounding atmospheric pressure to be a higher pressure, thus pushing the ball into the funnel
  4. If your plane takes a nose dive, you should try (a) changing the elevators by pinching the edges (b) change the dihedral angle (c) change how you throw it (d) all of the above
  5. What are the four forces that act on every airplane in flight?
  6. Draw a quick sketch of your plane viewed from the front with a positive dihedral.
  7. If you were designing your own “Flying Paper Machine Kit”, what would be inside the box?
  8. What’s the one thing you need to remember about higher pressure?
  9. What keep an airplane from falling?
  10. Where is the low pressure area on an airplane wing?

Answers:


1 (a, e) 2 (b) 3 (d) 4 (d) 5 (lift, weight, thrust, drag) 8 (higher pressure pushes) 9 (lift) 10 (top surface)


[/am4show]


This lab is a physical model of what happens on Mercury when two magnetic fields collide and form magnetic tornadoes.


You’ll get to investigate what an invisible magnetic tornado looks like when it sweeps across Mercury.


Materials


  • Two clear plastic bottles (2 liter soda bottles work best)
  • Steel washer with a 3/8 inch hole
  • Ruler and stopwatch
  • Glitter or confetti (optional)
  • Duct tape (optional)

[am4show have=’p8;p9;p11;p38;p92;p17;p44;p73;p82;’ guest_error=’Guest error message’ user_error=’User error message’ ]


Download Student Worksheet & Exercises


  1. Determine the different water conditions, such as: changing the temperature, changing the volume (height of water), adding another molecule such as oil, isopropyl alcohol, vinegar, and dish soap, adding solid pieces such as glitter, salt, sugar, or small grains. The different mixtures will give different vortex rotation speeds and different drain times. This is equivalent to changing the atmosphere on Earth and seeing how it affects weather (not magnetic) tornadoes. Write the conditions you wish to test in the data table before you start.
  2. Fill one of the soda bottles with water using the data table. Set the bottle upright on the table.
  3. Set the washer on top of the bottle opening. Make sure there’s no cap on the bottle.
  4. Invert the empty bottle over the water‐filled bottle and line up the openings so they can be easily taped together. You want to tape them before they get wet with the washer between them.
  5. Place the two bottles on a table and watch the water drip from the top to the lower bottle as air bubbles move from bottom to top.
  6. Invert so the water is in the top bottle and circle it a couple of times to start a whirlpool in the bottle. You should see a vortex form inside as the top drains into the lower bottle. The hole in the vortex lets the airfrom the lower bottle flow easily into the upper bottle, so the upper drains easily.
  7. When you’ve finished, empty your bottle and add a different solution and repeat the experiment.

What’s Going On?

Mercury looks peaceful at first glance. However, when you measure the surface with scientific instruments, you’ll see how the Sun blasts away any hope Mercury has of a thin atmosphere with its radiation and solar wind. Not only that, Mercury is ravaged by invisible magnetic tornadoes that start from the planet’s interior magnetic field. If you’ve ever experienced a tornado, you know how terrifying they can be. Now imagine they are the diameter of your entire planet.


These tornadoes are different from the Earth’s, which form when two weather systems smack into each other, creating instability in the atmosphere. The magnetic tornadoes on Mercury form when two magnetic fields collide. These monstrous cyclones form without warning and disappear within minutes.


Magnetic fields, like the Earth’s, are invisible shields that constantly protect us from the Sun. Our Earth is constantly being bombarded with high energy particles that are deflected off the magnetosphere of our planet. Mercury’s magnetic field is weak and it’s constantly being blasted by solar wind, which also carries a magnetic field. When these two fields collide, the magnetic fields spiral and twist to form a magnetic tornado. (Solar wind is a stream of high energy particles from the Sun’s outer atmosphere.)


Exercises


  1.  Define an atmosphere.
  2. What is a magnetic field?
  3.  Where do magnetic fields come from in planets?
  4. Which planets do not have a magnetic field?

[/am4show]


When something feels hot to you, the molecules in that something are moving very fast. When something feels cool to you, the molecules in that object aren’t moving quite so fast. Believe it or not, your body perceives how fast molecules are moving by how hot or cold something feels. Your body has a variety of antennae to detect energy. Your eyes perceive certain frequencies of electromagnetic waves as light. Your ears perceive certain frequencies of longitudinal waves as sound. Your skin, mouth and tongue can perceive thermal energy as hot or cold. What a magnificent energy sensing instrument you are!


Let’s find out how to watch the hot and cold currents in water. Here’s what you need to do:


[am4show have=’p8;p9;p11;p38;p92;p23;p50;p82;p84;p88;p30;p57;’ guest_error=’Guest error message’ user_error=’User error message’ ]


Materials:


  • two bottles of water
  • food coloring
  • bathtub or sink
  • index card or business card


You need:


Two empty bowls (or water bottles)
Food coloring
Hot water (Does not need to be boiling.)
Cold water


1. Put about the same amount of water into two bowls. One bowl should be filled with hot water from the tap. If you’re careful, you can put it in the microwave to heat it up but please don’t hurt yourself. The other bowl should have cold water in it. If you’re using water bottles, pour the hot and cold water into each bottle.


2. Let both bowls sit for a little bit (a minute or so) so that the water can come to rest.


3. Put food coloring in both bowls (or bottles) and watch carefully.


The food coloring should have spread around faster in the hot water bowl than in the cold water bowl. Can you see why? Remember that both bowls are filled with millions and millions of molecules. The food coloring is also bunches of molecules. Imagine that the molecules from the water and the molecules from the food coloring are crashing into one another like the beans on the plate. If one bowl has a higher temperature than the other, does one bowl have faster moving molecules? Yes, the higher temperature means a higher thermal energy. So the bowl with the warmer water has faster moving molecules which crash more and harder with the food coloring molecules, spreading them faster around the bowl.


If you’re using a bottle, you can do an extra step: For bottles, place a business card over the cold bottle and invert the cold bottle over the hot. Remove card.


[/am4show]


Every time I’m served a hot bowl of soup or a cup of coffee with cream I love to sit and watch the convection currents. You may look a little silly staring at your soup but give it a try sometime!


Convection is a little more difficult to understand than conduction. Heat is transferred by convection by moving currents of a gas or a liquid. Hot air rises and cold air sinks. It turns out, that hot liquid rises and cold liquid sinks as well.


Room heaters generally work by convection. The heater heats up the air next to it which makes the air rise. As the air rises it pulls more air in to take its place which then heats up that air and makes it rise as well. As the air get close to the ceiling it may cool. The cooler air sinks to the ground and gets pulled back near the heat source. There it heats up again and rises back up.


This movement of heating and cooling air is convection and it can eventually heat an entire room or a pot of soup. This experiment should allow you to see convection currents.


[am4show have=’p8;p9;p11;p38;p92;p23;p50;p82;p84;p88;p30;p57;’ guest_error=’Guest error message’ user_error=’User error message’ ]


You need:


  • A pot
  • A stove with adult help
  • Pepper
  • Ice cubes
  • Food Coloring (optional)


1. Fill the pot about half way with water.


2. Put about a teaspoon of pepper into the water.


3. Put the pot on the stove and turn on the stove (be careful please).


4. Watch as the water increases in temperature. You should see the pepper moving. The pepper is moving due to the convection currents. If you look carefully you many notice pepper rising and falling.


5. Put an ice cube into the water and see what happens. You should see the pepper at the top of the water move towards the ice cube and then sink to the bottom of the pot as it is carried by the convection currents.


6. Just for fun, put another ice cube into the water, but this time drop a bit of food coloring on the ice cube. You should see the food coloring sink quickly to the bottom and spread out as it is carried by the convection currents.


Did you see the convection currents? Hot water rising in some areas of the pot and cold water sinking in other areas of the pot carried the pepper and food coloring throughout the pot. This rising and sinking transferred heat through all the water causing the water in the pot to increase in temperature.


Heat was transferred from the flame of the stove to the water by convection. More accurately, heat was transferred from the flame of the stove to the metal of the pot by conduction and then from the metal of the pot throughout the water through convection.


[/am4show]


If you’ve ever owned a fish tank, you know that you need a filter with a pump. Other than cleaning out the fish poop, why else do you need a filter? (Hint: think about a glass of water next to your bed. Does it taste different the next day?)


There are tiny air bubbles trapped inside the water, and you can see this when you boil a pot of water on the stove. The experimental setup shown in the video illustrates how a completely sealed tube of water can be heated… and then bubbles come out one end BEFORE the water reaches a boiling point. The tiny bubbles smoosh together to form a larger bubble, showing you that air is dissolved in the water.


Materials:


  • test tube clamp
  • test tube
  • lighter (with adult help)
  • alcohol burner or votive candle
  • right-angle glass tube inserted into a single-hole stopper
  • regular tap water

[am4show have=’p8;p9;p11;p38;p92;p18;p45;p82;p84;p91;p30;p57;’ guest_error=’Guest error message’ user_error=’User error message’ ]


Download Student Worksheet & Exercises


The filter pump in your fish tank ‘aerates’ the water. The simple act of letting water dribble like a waterfall is usually enough to mix air back in. Which is why flowing rivers and streams are popular with fish – all that fresh air getting mixed in must feel good! The constant movement of the river replaces any air lost and the fish stay happy (and breathing). Does it make sense that fish can’t live in stagnant or boiled water?


You don’t need the fancy equipment show in this video to do this experiment… it just looks a lot cooler. You can do this experiment with a pot of water on your stove and watch for the tiny bubbles before the water reaches 212oF.


[/am4show]


This experiment is for advanced students.Have you ever taken a gulp of the ocean? Seawater can be extremely salty! There are large quantities of salt dissolved into the water as it rolled across the land and into the sea. Drinking ocean water will actually make you thirstier (think of eating a lot of pretzels). So what can you do if you’re deserted on an island with only your chemistry set?


Let me show you how to take the salt out of water with this easy setup.


[am4show have=’p8;p9;p11;p38;p92;p45;p68;p80;p82;’ guest_error=’Guest error message’ user_error=’User error message’ ]


Materials:


  • salt
  • water
  • alcohol burner
  • flask with one-hole stopper
  • stand with wire mesh screen
  • two 90-degree glass pipes
  • flexible tubing
  • ring stand with clamp
  • lighter with adult help


[/am4show]


Indoor Rain Clouds

Making indoor rain clouds demonstrates the idea of temperature, the measure of how hot or cold something is. Here’s how to do it:


Take two clear glasses that fit snugly together when stacked. (Cylindrical glasses with straight sides work well.)


Fill one glass half-full with ice water and the other half-full with very hot water (definitely an adult job – and take care not to shatter the glass with the hot water!). Be sure to leave enough air space for the clouds to form in the hot glass.


[am4show have=’p8;p9;p11;p38;p92;p23;p50;p151;p67;p73;p82;p84;p88;p30;p57;’ guest_error=’Guest error message’ user_error=’User error message’ ]


Place the cold glass directly on top of the hot glass and wait several minutes. If the seal holds between the glasses, a rain cloud will form just below the bottom of the cold glass, and it actually rains inside the glass! (You can use a damp towel around the rim to help make a better seal if needed.)


Materials:


  • glass of ice water
  • glass of hot water (see video)
  • towel
  • adult help


  Download Student Worksheet & Exercises


Bottling Clouds

On a stormy, rainy afternoon, try bottling clouds — using the refrigerator! Here’s what you do: Place an empty, clean 2-liter soda bottle in the fridge overnight. Take it out and get an adult to light a match, letting it burn for a few seconds, then drop it into the bottle. Immediately cap the bottle and watch what happens (you should see smoke first, then clouds forming inside). Squeeze the sides of the bottle. The clouds should disappear. When you release the bottle, the clouds should reappear. Materials:


  • 2L soda bottle
  • rubbing alcohol
  • bicycle pump
  • car tire valve (drill a 1/2 inch hole through a 2L soda bottle cap and pull the valve gently through with pliers)


Advanced Idea: You can substitute rubbing alcohol and a bicycle pump for the matches to make a more solid-looking cloud.  Swirl a bit of rubbing alcohol around inside the bottle, just enough to coat the insides, and then pour it out.  Cap your bottle with a rubber stopper fitted with a needle valve (so the valve is poking out of the bottle), and apply your pump.  Increase the pressure inside the bottle (keep a firm hand on the stopper or you’ll wind up firing it at someone) with a few strokes and pull out the stopper quickly.  You should see a cloud form inside.


What’s going on? Invisible water vapor is all around us, all the time, but they normally don’t stick together. When you squeezed the sides of the bottle, you increased the pressure and squeezed the molecules  together.  Releasing the bottle decreases the pressure, which causes the temperature to drop. When it cools inside, the water molecules stick to the smoke molecules, making a visible cloud inside your bottle.


Did you know that most drops of water actually form around a dust particle?  Up in the sky, clouds come together when water vapor condenses into liquid water drops or ice crystals. The clouds form when warm air rises and the pressure is reduced (as you go up in altitude). The clouds form at the spot where the temperature drops below the dew point.


The alcohol works better than the water because it evaporates faster than water does, which means it moves from liquid to vapor more easily (and vividly) than regular old water.


Questions to ask:


  • How many times can you repeat this?
  • Does it matter what size the bottle is?
  • What if you don’t chill the bottle?
  • What if you freeze the bottle instead?

Exercises


  1. Which combination made it rain the best? Why did this work?
  2. Draw your experimental diagram, labeling the different components:
  3. Add in labels for the different phases of matter. Can you identify all three states of matter in your experiment?

[/am4show]
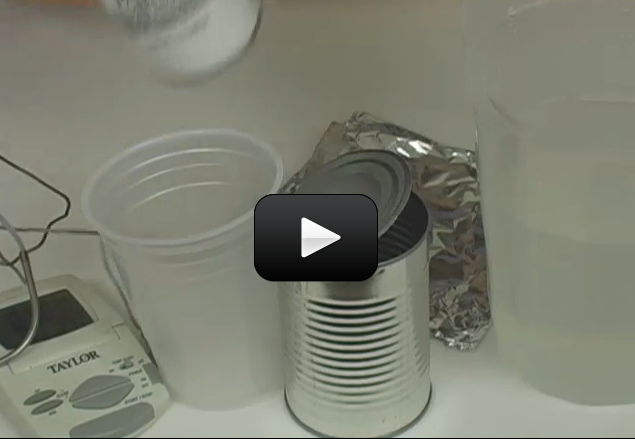

Did you know that supercooled liquids need to heat up in order to freeze into a solid? It’s totally backwards, I know…but it’s true! Here’s the deal:


A supercooled liquid is a liquid that you slowly and carefully bring down the temperature below the normal freezing point and still have it be a liquid. We did this in our Instant Ice experiment.


Since the temperature is now below the freezing point, if you disturb the solution, it will need to heat up in order to go back up to the freezing point in order to turn into a solid.


When this happens, the solution gives off heat as it freezes. So instead of cold ice, you have hot ice. Weird, isn’t it?


Sodium acetate is a colorless salt used making rubber, dying clothing, and neutralizing sulfuric acid (the acid found in car batteries) spills. It’s also commonly available in heating packs, since the liquid-solid process is completely reversible – you can melt the solid back into a liquid and do this experiment over and over again!


The crystals melt at 136oF (58oC), so you can pop this in a saucepan of boiling water (wrap it in a towel first so you don’t melt the bag) for about 10 minutes to liquify the crystals.


[am4show have=’p8;p9;p11;p38;p92;p82;p84;p91;p101;p30;p57;’ guest_error=’Guest error message’ user_error=’User error message’ ]


Materials:


  • Sodium Acetate
  • Disposable aluminum pie plate


Download Student Worksheet & Exercises


You have seen this stuff before – when you combined baking soda and vinegar in a cup, the white stuff at the bottom of the cup left over from the reaction is sodium acetate. (No white stuff? Then it’s mixed in solution with the water. If you heat the solution and boil off all the water, you’ll find white crystals in the bottom of your pan.) The bubbles released from the baking soda-vinegar reaction are carbon dioxide.


[/am4show]


Supercooling a liquid is a really neat way of keeping the liquid a liquid below the freezing temperature. Normally, when you decrease the temperature of water below 32oF, it turns into ice. But if you do it gently and slowly enough, it will stay a liquid, albeit a really cold one!


In nature, you’ll find supercooled water drops in freezing rain and also inside cumulus clouds. Pilots that fly through these clouds need to pay careful attention, as ice can instantly form on the instrument ports causing the instruments to fail. More dangerous is when it forms on the wings, changing the shape of the wing and causing the wing to stop producing lift. Most planes have de-icing capabilities, but the pilot still needs to turn it on.


We’re going to supercool water, and then disturb it to watch the crystals grow right before our eyes! While we’re only going to supercool it a couple of degrees, scientists can actually supercool water to below -43oF!


[am4show have=’p8;p9;p11;p38;p92;p82;p84;p91;p101;p30;p57;’ guest_error=’Guest error message’ user_error=’User error message’ ]


Materials:


  • water
  • glass
  • bowl
  • ice
  • salt


Download Student Worksheet & Exercises


Don’t mix up the idea of supercooling with “freezing point depression”. Supercooling is when you keep the solution a liquid below the freezing temperature (where it normally turns into a solid) without adding anything to the solution. “Freezing point depression” is when you lay salt on the roads to melt the snow – you are lowering the freezing point by adding something, so the solution has a lower freezing point than the pure solvent.


[/am4show]


This is a recording of a recent live teleclass I did with thousands of kids from all over the world. I’ve included it here so you can participate and learn, too!


You’ll discover how to boil water at room temperature, heat up ice to freeze it, make a fire water balloon, and build a real working steam boat as you learn about heat energy. You’ll also learn about thermal energy, heat capacity, and the laws of thermodynamics.


Materials:


  • cup of ice water
  • cup of room temperature water
  • cup of hot water (not scalding or boiling!)
  • tea light candle and lighter (with adult help)
  • balloon (not inflated)
  • syringe (without the needle)
  • block of foam
  • copper tubing (¼” diameter and 12” long)
  • bathtub or sink
  • scissors or razor
  • fat marker (to be used to wrap things around, not for writing)

[am4show have=’p8;p9;p11;p38;p92;p11;p38;’ guest_error=’Guest error message’ user_error=’User error message’ ]


Key Concepts

The terms hot, cold, warm etc. describe what physicists call thermal energy. Thermal energy is how much the molecules are moving inside an object. The faster molecules move, the more thermal energy that object has.


There are three different scales for measuring temperature. Fahrenheit, Celsius and Kelvin. (There’s also a fourth temperature scale for absolute Fahrenheit called Rankine.) Temperature is basically a speedometer for molecules. The faster they are wiggling and jiggling, the higher the temperature and the higher the thermal energy that object has. Your skin, mouth and tongue are antennas which can sense thermal energy.


There are four states of matter: Solid, liquid, gas and plasma. Solids have strong, stiff bonds between molecules that hold the molecules in place. Liquids have loose, stringy bonds between molecules that hold molecules together but allow them some flexibility. Gasses have no bonds between the molecules. Plasma is similar to gas but the molecules are very highly energized. Materials can change from one state to another depending on the temperature and the bonds. Changing from a solid to a liquid is called melting. Changing from a liquid to a gas is called boiling, evaporating, or vaporizing. Changing from a gas to a liquid is called condensation. Changing from a liquid to a solid is called freezing. All materials have given points at which they change from state to state. Melting point is the temperature at which a material changes from solid to liquid.  Boiling point is the temperature at which a material changes from liquid to gas. Condensation point is the temperature at which a material changes from gas to liquid. Freezing point is the temperature at which a material changes from liquid to gas.


What’s Going On?

Heat is the movement of thermal energy from one object to another. Heat can only flow from an object of a higher temperature to an object of a lower temperature (this is the First Law of Thermodynamics). Heat is movement of thermal energy from one object to another. When an object absorbs heat it does not necessarily change temperature.  Objects release heat as they freeze and condense. Objects absorb heat as they evaporate and melt. Freezing points, melting points, boiling points and condensation points are the “speed limits” of the phases. Once the molecules reach that speed they must change state.


Heat capacity is how much heat an object can absorb before its temperature increases. Specific heat is how much heat energy a mass of a material must absorb before it increases 1°C. Heat capacity is influenced by the specific heat of the material and/or the amount of the material. Each material has its own specific heat. The higher a material’s specific heat is, the more heat it must absorb before its temperature increases. A larger amount of something will have a higher heat capacity then a smaller amount of something. Water has a very high heat capacity.


Questions:

  1. True or False: Water is poor at absorbing heat energy.
  2. True or False: A molecule that heats up will move faster.
  3. True or False: A material will be less dense at lower temperatures.
  4. For gases, if we increase the temperature, what happens to the pressure and the volume?
  5. What is specific heat?
  6. What is heat?
  7. Does heat flow from cold to hot? Give an example.
  8. What do the our body sense, heat flow or temperature? Are they the same thing?
  9. How can we boil room temperature water without heating up the water?

Answers:


  1. False.
  2. True.
  3. False. (Usually.)
  4. If we increase the temperature, the pressure increases and the volume decreases. This is called the Ideal Gas Law (remember the ping pong balls from the teleclass?)
  5. Specific heat is how much heat energy a mass of a material must absorb before it increases 1°C.
  6. Heat is the movement of thermal energy from one object to another.
  7. No. Heat flows from hot to cold. (This is the First Law of Thermodynamics.) A hot cup of coffee left out on a cold morning will eventually cool to the surrounding air temperature.
  8. Heat flow. No they are not the same thing. Temperature is a measure of how much energy the molecules have.
  9. By increasing the pressure by decreasing the volume, we can force the bubbles out of the water and it will boil. Boiling is when the liquid water turns into a gas, NOT when the liquid water heats up. Boiling can happen at many different temperatures when you change the pressure.

[/am4show]


Although urine is sterile, it has hundreds of different kinds of wastes from the body. All sorts of things affect what is in your urine, including last night’s dinner, how much water you drink, what you do for exercise, and how well your kidneys work in the first place. This experiment will show you how the kidneys work to keep your body in top shape.


[am4show have=’p8;p9;p11;p38;p92;p29;p56;p81;p87;’ guest_error=’Guest error message’ user_error=’User error message’ ]


Materials


  • 1 liter of water per student
  • 1 can of soda per student
  • 1 sports drink, like Gatorade, per student
  • Red food dye
  • Chalk (or a handful of sand)
  • Coffee filter or cheesecloth
  • pH paper strips
  • Disposable cups
  • Clean glass jar
  • Rubber band
  • Measuring cups

If you are doing the optional Third Bonus Experiment:


  • solution your teacher has prepared for you
  • pipe cleaners
  • cleaned out jar or bottle (pickle, jam, or mayo jar)
  • water
  • borax

Download Student Worksheet & Exercises


Experiment

First Experiment: How Quickly Do the Kidneys Process Fluids?


  1. Drink a liter of water quickly (in less than five minutes).
  2. Wait 20 minutes (you can start on the second part of this lab while you wait) and then collect your urine in a disposable cup in the bathroom and use a pH testing strip to test the pH by dipping it in the cup.
  3. Repeat four times so that you have four samples collected 20 minutes apart.
  4. Repeat steps 1-3  for two different liquids, such as a sports drink and a soda.
  5. Complete the data table for all three liquids.

Second Experiment: Kidney Filtration


  1. Crush a piece of chalk and place it in a clean glass jar. (You can alternatively use a handful of sand from the playground if you don’t have chalk.)
  2. Fill the jar partway with water.
  3. Add a few drops of red food coloring to the water.
  4. The chalk (or sand) represents toxins in the blood. The water represents the blood.
  5. Place a coffee filter (or cheesecloth) on top of the jar and secure with a rubber band. This coffee filter is your kidney.
  6. Tip the jar over a disposable cup and pour the contents into the disposable cup. This is the kidney filtering the blood.
  7. Observe what the filter traps and what it doesn’t and record your observations in the data table.

BONUS Third Experiment: Kidney Stones


  1. A kidney stone is something that develops in the urinary tract from a crystal. Crystals start from “seed crystals” that grow when placed in the right solution.
  2. Use a pipe cleaner to create a shape for crystals to cling to (suggestion: cut into 3 lengths and wrap around one another). Curl the top pipe cleaner around a pencil, making sure the shape will hang nicely in the container without touching the sides.
  3. Add 2 cups of water and 2 cups of borax (sodium tetraborate) into a pot. Heat, stirring continuously for about 5-10 minutes. Do not boil, but only heat until steam rises from the pan.
  4. When the borax has dissolved, add more, and continue to do so until there are bits of borax settling on the bottom of the pan that cannot be stirred in (It may be necessary to stop heating and let the solution settle if it gets too cloudy). You’ll be adding in a lot of borax!  You have now made a supersaturated solution. Make sure your solution is saturated, or your crystals will not grow.
  5. Wait until your solution has cooled to about 130oF (hot to the touch, but not so hot that you yank your hand away). Pour this solution (just the liquid, not the solid bits) into the jar, and add the pipe cleaner shape. Make sure the pipe cleaner is submerged in the solution. Put the jar in a place where the crystals can grow undisturbed overnight, or even for a few days. Warmer locations (such as upstairs or on top shelves) are best.
  6. NOTE: These crystals are NOT edible! Please keep them away from small children and pets!


Kidneys Process Fluids Data Table

Record the pH and volume (did you urinate a lot, medium, or little?)


Drink Type


20 min


40 min


60 min


80 min


Urine tests look at different components of urine. Most urine tests are done to get information about the body’s health and clarify problems that it might be having.  There are over 100 different kinds of urine tests that can be done. Depending on the test, scientists look for different things.


The most obvious, and the one you can do yourself at home, is to look at the color of urine, which is normally clear. Many different things affect urine color, and the darker it is, the less water there is in it. Vitamin B supplements can turn it bright yellow. If you like to eat blackberries, beets or rhubarb, then your urine might be red-brown.


The next thing to check is smell. Since urine doesn’t smell much, it’s a signal if it suddenly takes on an unusual odor. For example, if you have an E. coli infection, your urine will take on a bad odor.


Scientists also check the specific gravity, which is a measure of the amount of substances in the urine. The higher the specific gravity number measures, the more substance is in the urine. For example, when you drink a lot of water, your kidneys add that water into the urine, which makes for a lower the specific gravity number. This test shows how well the kidneys balance the amount of water in urine. The specific gravity for normal urine is between 1.005-1.030.


pH is a measure of how basic or acidic something is, and for a urine test, it’s the pH of the urine itself.  A pH of 7 is neutral, a 9 is strongly basic, and a 4 is strongly acidic. Using a strip of pH paper will tell you how basic or acidic your urine is. Normally, pH is between 4.6-8.0 for urine.


Protein is not supposed to be in the urine, unless you’re sick with a fever, just had a hard workout session, or are pregnant. Scientists look for protein to be present in the urine to detect certain kinds of kidney diseases.


Glucose is sugar in the blood, and usually there’s no glucose in urine, or if there is, it’s only a tiny bit. When scientists detect glucose in the urine, it means that the body’s blood sugar levels are very high, and they know they need to look into things further.


When scientists find nitrites, they know that bacteria are present, especially the kind that cause a urinary tract infection because bacteria make an enzyme that changes nitrates to nitrites in the urine.


Strong, healthy people will have a couple of small crystals in their urine. If scientists find a large number of crystals, then they start looking for kidney stones. If they don’t find kidney stones, then they start looking at how the body metabolizes food to see if there’s a problem.


Most adults make about 1-2 quarts of urine each day, and kids make about 0.6-1.6 quarts per day


Kidneys Filtration Data Table

Amount of Chalk or Sand


Amount of Water


Color of Water after Mixed


Amount of Solids Filtered
Out by Cheesecloth


Questions:


  1. Which fluid produced more urine for the first experiment?
  2. Did the caffeine solutions cause the calcite stones to shrink or have no effect?
  3. What does pouring the chalky water through a coffee filter show?
  4. What are kidney stones and how are they formed?

[/am4show]


Our sense of touch provides us with information that helps us to process and explore our world. Nerves play an important part in the sense of touch by being the wires that carry signals from the skin to the brain. But the body has a plan in place so that our brains don’t get overwhelmed with too much information. This plan is a lot like a blueprint for wiring a house. Just like a house has light switches and electrical outlets in strategic locations, our bodies have touch receptors of various numbers based on their location. In this lab, we will explore an arm to determine where the highest concentrations of nerves are in that limb.


[am4show have=’p8;p9;p11;p38;p92;p29;p56;p81;p87;’ guest_error=’Guest error message’ user_error=’User error message’ ]


Here’s what you need


    • 1 large paper clip
    • 1 metric ruler
    • 1 partner


Download Student Worksheet & Exercises


Here’s what you do


  1. Unfold a paperclip so that it has two open ends. The ends should be about a centimeter apart.
  2. Have your partner uncover their arm up to the shoulder. They should place this arm on the table, palm up, but it is also important that they face away from you. They shouldn’t be able to see the test.
  3. GENTLY touch one or both of the open paperclip ends to your partner’s fingertip. Ask your partner to determine how many points you used to touch them (one or two). Then record their response as (Y) for a correct answer or (N) for incorrect.
  4. Continue testing based on the numbered points in the diagram. Randomly vary the points used to touch your subject’s skin, recording their Y (correct) or N (incorrect) response for each individual area.
  5. Repeat steps 3 and 4, with the paperclip ends separated at a distance of 3 cm, 5 cm, and 10 cm.
  6. Your turn! Switch places and have your partner test you and record your responses.
  7. Finally, use the diagram and your data to design a map of nerve concentrations in the arm and hand. What are some of the advantages of this nerve placement?

 What’s going on?


Endings are nerves are located so that we can use them to collect data. The highest concentrations of nerves are in our hands, feet and mouths. We use our hands to gather a lot of data, our feet for moving around, and our mouths for speaking. Luckily, the areas of our bodies that are more likely to be bumped and the ones we use to help protect ourselves have fewer nerve endings. Areas of particularly low concentration include our backs, rear ends, and arms.


Our tongues have the highest nerve concentration of all. In fact, nerve mapping researchers have learned that over half of our brain’s sensory nerves are connected to our tongues. It makes sense when you realize that we taste, talk, and feel with this relatively small organ. It really needs to connect to so many places in the brain!


Exercises


  1. Where is the highest concentration of nerve endings in the body?
  2. What are nerve ends used for?
  3. Where do you think the least amount of nerve ends should be in the body?

[/am4show]


How do you think animals know we’re around long before they see us? Sure, most have a powerful sense of smell, but they can also hear us first. In this activity, we are going to simulate enhanced tympanic membranes (or ear drums) by attaching styrofoam cups to your ears. This will increase the number of sound waves your ears are able to capture.


[am4show have=’p8;p9;p11;p38;p92;p29;p56;p81;p87;’ guest_error=’Guest error message’ user_error=’User error message’ ]


Here’s what you need


    • 2 styrofoam cups, 12 oz.
    • 2 styrofoam cups, 32 oz.
    • 1 pair of scissors
    • 1 kitchen timer


Download Student Worksheet & Exercises


Here’s what you do


  1. Set the timer and put it on a table or desk. Walk about 6 feet away and face the timer. Listen for the ticking sound. Now, turn your back on the clock so that you are facing the other direction. How has your ability to hear the ticking changed? We can increase the sounds you hear by using the cups.
  2. Get an adult to help with cutting the cups. They will hold one of the smaller cups with one hand and make a cut about an inch (3 cm) from the rim toward the bottom of the cup.
  3. Draw a circle at the end of the cut that is about the size of your ear where it attaches to your hear. Cut out the circle.
  4. Repeat steps 2 and 3 with the other 12 oz. cup. Carefully put them on your ears with their openings pointing forward. You have just added to the size of your ears and they should be able to collect more sound vibrations. Try listening to the timer now with the cups on your ears.
  5. Now repeat steps 2 through 4 with the larger cups. Set the timer one more time and listen to the timer. Compare what you hear with what you heard with your unenhanced ears, and what you hear with the 12 oz. ears.
  6.  On a scale of 0-10, how much did the cups improve what you were able to hear? Note where you would place both the 12 oz. cups and the 32 oz. cups on the scale if 0 is the starting point equal to what you can hear with your own ears.
  7. Repeat step 5 with the bag of water and again with the baggie of air. Note the clarity of the speech you hear through each bag. Rank each bag from loudest, to medium, to quietest.

What’s going on?


Hearing is based on movement. The initial process involves the actual waves coming toward your ear, which are funneled inside to your tympanic membrane.


In this experiment we focused on the initial funneling process. This is done by the visible, external part of your ear, known as the pinna. By making the pinna larger, you also increased their ability to pick up sound vibrations. This enabled you to hear much more, and at louder levels.


The pinna also help to determine the direction from which sound is coming. If a sound is coming from the left, your left ear hears it a little bit before the right. This lets your brain know where the sound originates.


Exercises


  1. Which part of the ear is this experiment testing?
  2. What happens when you change your variable in this experiment?
  3. Did this experiment change your ability to detect which direction a sound came from?

[/am4show]


Have you ever held a plastic ruler over the edge of a desk or table and whacked the end of it? If so, you would notice a funny sound. This sound changes if you change the length of the ruler that is hanging over the edge. The sound you hear is made by the ruler’s vibrations.


In this lab, we begin to learn about sound. You know it is collected and deciphered by your ears, but did you also know that all sound is made when something vibrates? It could be a guitar string, vocal chords in your throat, or a plastic ruler that is hanging over the edge of the desk: vibrations make sound.


[am4show have=’p8;p9;p11;p38;p92;p29;p56;p81;p87;’ guest_error=’Guest error message’ user_error=’User error message’ ]


Here’s what you need


  • 1 desk
  • 1 metric ruler


Download Student Worksheet & Exercises


Here’s what you do


  1. Place the ruler on the desk at the 20 centimeter mark. Hold the portion of the ruler that’s still on the desk down very firmly with one hand. Press down the portion of the ruler hanging off the desk with the other hand. Now let it go. The ruler should begin to vibrate up and down while producing a strange sound.
  2. Now rearrange the ruler so that it is placed at the 15 centimeter mark and give it a thump. What happens to the pitch this time? Is it higher or lower now that the overhanging portion is shorter?
  3. Make sure you try the ruler at 5 centimeters, 10 centimeters, 15 centimeters, 20 centimeters, and 25 centimeters. Listen each time and place the lengths in order from highest to lowest pitch.
  4. Finally, put the ruler at the 25 centimeter mark, with just 5 centimeters on the table and the rest hanging over the edge. Give it a whack and while it’s vibrating, slide the ruler back across the edge of the table to make the overhanging portion shorter and shorter. What happens to the sound?

What’s going on?


The overhanging portion of the ruler is the portion allowed to vibrate. This determines the sound’s pitch. When a short piece is hanging over the edge, a high pitch is made. And when the length is longer, the pitch is lower. This is what happens with all vibrating objects and is a function of their wavelengths.


Did you know that the tiniest bones in your body are found in your ear? They are called ossicles and include the hammer, anvil, and stirrup. They are located just behind your eardrum and collect the vibrations that come into the ear canal and hit your ear drum. When your ear drum begins to vibrate, the tiny bones vibrate as well. This causes your cochlea to vibrate as well, and it sends a signal to your brain for it to interpret.


Exercises


  1. How is sound made?
  2. How do you change the pitch of the ruler?

[/am4show]


You know that sound comes from vibration which are picked up by the pinna (external part of the ears). Then the vibrations vibrate your tympanic membrane, which in turn vibrates the ossicles and then the cochlea. The cochlea sends information through the auditory nerve and sends it to the brain, which recognizes it as sound.


In this lab, you will testing your ability to sort and match different sounds.


[am4show have=’p8;p9;p11;p38;p92;p29;p56;p81;p87;’ guest_error=’Guest error message’ user_error=’User error message’ ]


Here’s what you need


    • 10 film canisters (for 53 mm film rolls)
    • beans
    • rice
    • sawdust (or pencil shavings)
    • paperclips
    • pennies
    • 1 black, felt marker
    • assistant


Download Student Worksheet & Exercises


Here’s what you do


  1. Take the caps off the canisters. Number half of them 1 to 5 and mark the others with A through E.
  2. Prepare your experiment while your partner is out of the room. Fill five of the numbered containers with one of the materials. Note which canister contains each material for data records.
  3. Next fill the lettered containers. Be sure to record which container contains which material for reference.
  4. When the contents have been noted and the lids all replaced, bring in your partner into the room. Ask them to match the sound of the item in the first canister with one of the lettered containers. They can shake, roll, and even drop the containers, but they can’t take off the lid. Note the answer they give.
  5. Repeat step 4 for the rest of the numbered containers. Remember to record the responses.  When the canisters have all been matched, take off the lids and see how well they did.

What’s going on?


Objects produce distinct sounds when they vibrate. These differences can sometimes be distinguished by your ears. If you partner has good ears, listening closely and then correctly matching the contents was probably an easy task.


Now to share a little more about the cochlea: you know it ultimately receives sounds and sends signals to the brain. It is a small organ shaped like a spiral. It’s filled with fluid and tiny cells which are shaped like hairs. These hairlike cells convert the vibrations from sound into signals that can travel the auditory nerve up to the brain. The tiny cells are quite sensitive. They can actually be damaged by extremely loud noises, so remember to protect them with earplugs if you will be exposed to very loud sounds.


Exercises


  1. What are the tiny bones in the ear called?
  2. Name some other parts of the ear.

[/am4show]


Sound has the ability to travel through the states of matter: solids, liquids, and gases. In this experiment we will study the movement of sound through these three states.


[am4show have=’p8;p9;p11;p38;p92;p29;p56;p81;p87;’ guest_error=’Guest error message’ user_error=’User error message’ ]


Here’s what you need


    • 3 baggies, resealable
    • sand
    • water
    • air
    • 1 desktop
    • 1 spoon
    • 1 partner


Download Student Worksheet & Exercises


Here’s what you do


  1. Fill each bag two-thirds of the way full with each material. You should have one bag with sand, one with water, and one with air. Seal each baggie well.
  2. Put the baggies on the desk or on a table. Note the density of the materials. Which is most dense, medium, and least dense?
  3. Place your ear down on the first baggie that is filled with sand. Have your partner use the spoon to tap the table. Listen for the sound through the bag of sand.
  4. Repeat step 3 with the baggie full of water and then the bag of air. Compare what you hear through each state of matter. Rank the tapping you hear through the solid, liquid and gas in order from loudest, to medium, to quietest.
  5. When you have completed the tapping portion of the experiment, hold the bag of sand up to your ear. Have your partner speak to you through the baggie.
  6. Repeat step 5 with the bag of water and again with the baggie of air. Note the clarity of the speech you hear through each bag. Rank each bag from loudest, to medium, to quietest.

What’s going on?


Sound is made by waves travelling through the air. They pass their energy along to the matter through which they are traveling. But now you know that sound doesn’t just travel through the air. Molecules in water are closer together than air molecules, which makes it much easier for them to bump into one another. So the speed that sounds travel through liquid is actually faster than it travels through the air, and the sounds travel further as well. Sound travels fastest of all in solids because the molecules in this state of matter are very densely packed together. Solids pass sound much farther and at much greater speeds.


If there is no matter to bounce their energy along, sound waves can’t really form. So once you leave earth’s atmosphere, there isn’t any sound!


Exercises


  1. What is density?
  2. Put these in their general order of density: liquid, gas, solid.
  3. Which material passes sound waves along farther and faster?

[/am4show]


Levers are classified into three types: first class, second class, or third class. Their class is identified by the location of the load, the force moving the load, and the fulcrum. In this activity, you will learn about the types of levers and then use your body to make each type.

[am4show have='p8;p9;p11;p38;p92;p29;p56;p75;p81;p85;p87;' guest_error='Guest error message' user_error='User error message' ]

Here’s what you need

    • 1 body
    • can of soup
    • meter stick
    • rubber band
    • lemon


Download Student Worksheet & Exercises

Here’s what you do

  1. In a first class lever, the fulcrum is in the middle. The load and effort are on opposite sides with the fulcrum between them. A familiar example of a first class lever is a see saw.
  2. A second class lever has the fulcrum on one end, the load in the middle, and the force on the end opposite the fulcrum. A wheelbarrow is a good example of a second class lever.
  3. Lastly, a third class lever has a fulcrum on one end and the load on the opposite end. The force is applied in the middle in this type of lever. A golf club is an example of a third class lever.
  4. Use the photos to identify the levers of each type in your body.

What’s going on?

Only read further if you have had an opportunity to identify the levers in the pictures. Spoilers below!

Your head moving up and down on your spine is an example of a first class lever. Your neck joint in the middle is the fulcrum, with load and effort on either side. In this example, load and effort switch depending on whether you are moving your head up or down.

Standing on tiptoe is an example of a second class lever where your toes are the fulcrum. The effort, or force, is in your heels – they are lifting your body up. And the resistance is located between your toes and heels.

This leaves us with bicep curls, which are an example of a third class lever. Your elbow serves as the fulcrum, the bicep is the force, and the weight in your hand on the end is the load.

Just for fun, did you know your knee is the largest joint in your whole body? It connects your femur, the largest bone, to the bones of your lower leg. Your smallest joints are the anvil, hammer, and stirrup in your inner ear.

Exercises

  1. Draw a diagram of a first-class lever. Where in your body is this type of lever?
  2. Draw a diagram of a third-class lever. Where will you find this?
  3. Draw a diagram of a second-class lever. Can you give an example of this type of lever in the real world?

[/am4show]


Your eyes have two different light receptors located on the back of the eyeball. These are the rods, which see black, white and grays, and the cones, which see color. In order to adapt to the dark, our eyes make a chemical called visual purple. This helps the rods to see and transmit what you see in situations where there is little light.


Your pupils also increase in diameter in the darkness. This allows for a slight increase in the amount of light entering your eye. This combination of visual purple and more light makes it possible for you to see in darker situations.


[am4show have=’p8;p9;p11;p38;p92;p29;p56;p81;p87;’ guest_error=’Guest error message’ user_error=’User error message’ ]


Here’s what you need


    • 1 dark room
    • 1 light switch
    • 1 partner
    • 1 pencil


Download Student Worksheet & Exercises


Here’s what you do


  1. Turn out the light in a darkened room and give your eyes about 5 minutes to get used to the darkness.
  2. After your eyes have had a chance to acclimate to the low-light conditions, it’s time to get to work. Try to draw a picture of your assistant’s eye. Pay particular attention to how the pupil looks in the darkness.
  3. Now turn on the light while still observing your partner’s eye. What happens to their pupil?
  4. Draw another picture of your partner’s eye with the lights on. Again, pay special attention to the pupil.

What’s going on?


As you flip the light switch on, your partner’s brain realizes that there is a lot of light entering the rods and cones, so it restricts the size of the opening (your partner’s pupil) in order to limit the light. You might notice this on a sunny day if you go from a dark movie theater into the bright sun. It can actually hurt for moment, and makes you squint until your eyes have a chance to adjust to the brightness by reducing the size of your pupils.


Exercises


  1. How does the pupil adapt to light conditions?
  2. What are the two special photoreceptors called and where are they located?
  3. Which photoreceptor is used to help us see in the dark?

[/am4show]


Voluntary nerves are the ones that are under our direct control. Others, called involuntary nerves, are under the control of our brains and create involuntary reactions.


[am4show have=’p8;p9;p11;p38;p92;p29;p56;p81;p87;’ guest_error=’Guest error message’ user_error=’User error message’ ]


Here’s what you need


    • 1 metric ruler
    • 5 volunteers


Download Student Worksheet & Exercises


Here’s what you do


  1. You will begin by testing your visual reflexes with the help of an assistant.
  2. Hold your right elbow at your waist. Position your arm so that it is parallel to the floor. Make a space of about an inch by holding your thumb and forefinger apart. Ask your assistant to hold the ruler vertically, above your thumb and finger.
  3. Your job is to focus on the ruler. Your partner will unexpectedly release it so that it begins to fall. You will attempt to catch the ruler as soon as you possibly can.
  4. Repeat the experiment 5 times, recording the time it takes to catch the ruler each time for your data. Use the times you record to find your average time.
  5. Try this experiment for 5 additional people. Find the average reaction speed of each person and the average speed of the group as a whole.

What’s going on?


This experiment is an example of a voluntary response. Your eyes see the ruler moving and tell your brain, which then tells your fingers to close quickly. This all happens very fast, but involuntary reflexes can be much faster! You may notice in this activity that the ruler falls over half of the way through your fingers before you can stop it. This is partly because of the communication from eyes to brain to fingers. Although the nerves transmit very quickly, the transmission time can still take a little while.


There are two separate systems at work here: the central nervous system is your brain and spinal column and the longer nerves branching out from the spinal cord to every part of your body is the peripheral nervous system. They work in conjunction to coordinate your actions.


If you lines up all of your nerves, end to end, they would stretch for miles and miles: an average length is about 47 miles of nerves. The longest is the sciatic nerve. It goes from the bottom of your spine to the bottom of your foot.


Exercises


  1. What is the voluntary response in this experiment?
  2. What is an involuntary response in your body?  Give an example.

[/am4show]


Your optic nerve can be thought of as a data cord that is plugged in to each eye and connects them to your brain. The area where the nerve connects to the back of your eye creates a blind spot. There are no receptors in this area at all and if something is in that area, you won’t be able to see it. This experiment locates your blind spot.


[am4show have=’p8;p9;p11;p38;p92;p29;p56;p81;p87;’ guest_error=’Guest error message’ user_error=’User error message’ ]


Here’s what you need


    • 1 frog and dot printout
    • 1 meter stick
    • 1 scrap piece of cardboard


Download Student Worksheet & Exercises


Here’s what you do


  1.  Print out the frog and dot and remove the dotted portion. Attach it to the piece of cardboard, which should have a matching portion removed. You can place the paper and cardboard on the meter stick at the notched area.
  2. Now to locate blind spots. First, close your left eye. Look at the frog with your right eye. Can you see the dot and the frog? You should be able to see both at this point, but concentrate on the frog.  Now slowly move the stick toward you so that the frog is coming toward your eye. Pay attention and stop when the dot disappears from your peripheral vision. At this point, the light hitting the dot and reflecting back toward your eye is hitting the blind spot at the back of your right eyeball, so you can’t see it. Record how far your eye is from the card for your right eye.
  3. Continue to move the stick toward your face and at some point you will notice that you are able to see the dot again. Keep moving the stick forward and back. What happens to the dot?
  4.  Repeat steps 2 and 3 with your left eye, keeping your right eye closed. This time, stare at the dot and watch for the frog to disappear. Move the paper on the stick back and forth slowly until you notice the frog disappears. You have found the blind spot for your left eye. Be sure to note the distance the paper is from your eye.

What’s going on?


There are no light receptors in the area of your eye where the optic nerve attaches to your eyeball. This is your blind spot and if an image is in this spot, the light reflected off of it doesn’t get perceived by your eye. So you don’t see it!


Exercises


  1. What did you notice about the vision of the student and the blind spot that you measured?
  2. Why do you think it’s important to know where your blind spot is?

[/am4show]


Like sound, light travels in waves. These waves of light enter your eyes through the pupil, which is the small black dot right in the center of your colored iris. Your lens bends and focuses the light that enters your eye. In this experiment, we will study this process of bending light and we will look at the difference between concave and convex lenses.


[am4show have=’p8;p9;p11;p38;p92;p29;p56;p81;p87;’ guest_error=’Guest error message’ user_error=’User error message’ ]


Here’s what you need


    • 1 washer, 3/8 inch inside diameter
    • 1 microscope slide
    • 1 container of petroleum jelly
    • 1 piece of newsprint with a lot of type
    • 1 pipette, 1 mL
    • water


Download Student Worksheet & Exercises


Here’s what you do


  1. Apply a little petroleum jelly on the washer’s flat side. NOTE: washers have flat and founded sides, so be sure you are putting the petroleum jelly on the flat side of the washer.
  2. Put the washer, petroleum jelly side down, on the middle of the microscope slide. Twist the washer a bit to seat it on the slide and make a seal. This should keep the water in place.
  3. Put the washer and slide on the newsprint. Fill the pipette with water. Use the pipette to slowly place water in the washer. Fill the washer until the water makes a domed shape. You have just made a convex lens!
  4. Find a letter e on the newspaper and put the lens over it. Draw a diagram of what the e looks like through the convex lens.
  5. Now use the pipette to remove water from the washer. Your goal is to create a dip in the surface of the water. Now find the same e and place your new concave lens over the letter. Draw a picture of what the e  looks like through the new lens.

What’s going on?


You can see that a convex lens bends outward and a concave lens bends inward. What does this do to light?


In a convex lens, the domed surface means that if light waves come in through the flat bottom surface, they will be spread out, or refracted, as they exit the curved portion of the lens. But since a concave lens dips inward it creates the opposite effect. When light waves exit the concave surface, they are brought together. This makes images appear smaller.


The lens does all the focusing work but it is actually the shape of the eye that determines what you see. If you have a tall, oblong eye, you are far-sighted. And conversely, if your eyes are short and fat, you are near-sighted. In either case, the lenses are functioning properly but the actual shape of the eye needs a slight adjustment.


Exercises


  1. What are the two main types of lenses?
  2. How are the two main types of lenses shaped
  3. How do the two main types of lenses work?

[/am4show]


 Like sound, light travels in waves. These waves of light enter your eyes through the pupil, which is the small black dot right in the center of your colored iris. Your lens bends and focuses the light that enters your eye. In this experiment, we will study this process of bending light and we will look at the difference between concave and convex lenses.


[am4show have=’p8;p9;p29;p56;p81;p87;’ guest_error=’Guest error message’ user_error=’User error message’ ]


Here’s what you need


    • 1 washer, 3/8 inch inside diameter
    • 1 microscope slide
    • 1 container of petroleum jelly
    • 1 piece of newsprint with a lot of type
    • 1 pipette, 1 mL
    • water


Download Student Worksheet & Exercises


Here’s what you do


  1. Apply a little petroleum jelly on the washer’s flat side. NOTE: washers have flat and founded sides, so be sure you are putting the petroleum jelly on the flat side of the washer.
  2. Put the washer, petroleum jelly side down, on the middle of the microscope slide. Twist the washer a bit to seat it on the slide and make a seal. This should keep the water in place.
  3. Put the washer and slide on the newsprint. Fill the pipette with water. Use the pipette to slowly place water in the washer. Fill the washer until the water makes a domed shape. You have just made a convex lens!
  4. Find a letter e on the newspaper and put the lens over it. Draw a diagram of what the e looks like through the convex lens.
  5. Now use the pipette to remove water from the washer. Your goal is to create a dip in the surface of the water. Now find the same e and place your new concave lens over the letter. Draw a picture of what the e  looks like through the new lens.

What’s going on?


You can see that a convex lens bends outward and a concave lens bends inward. What does this do to light?


In a convex lens, the domed surface means that if light waves come in through the flat bottom surface, they will be spread out, or refracted, as they exit the curved portion of the lens. But since a concave lens dips inward it creates the opposite effect. When light waves exit the concave surface, they are brought together. This makes images appear smaller.


The lens does all the focusing work but it is actually the shape of the eye that determines what you see. If you have a tall, oblong eye, you are far-sighted. And conversely, if your eyes are short and fat, you are near-sighted. In either case, the lenses are functioning properly but the actual shape of the eye needs a slight adjustment.


Exercises


  1. What are the two main types of lenses?
  2. How are the two main types of lenses shaped
  3. How do the two main types of lenses work?

[/am4show]


In this lab, we are going to make an eyeball model using a balloon. This experiment should give you a better idea of how your eyes work. The way your brain actually sees things is still a mystery, but using the balloon we can get a good working model of how light gets to your brain.


[am4show have=’p8;p9;p11;p38;p92;p29;p56;p66;p81;p87;p89;’ guest_error=’Guest error message’ user_error=’User error message’ ]


Here’s what you need


    • 1 biconvex plastic lens
    • 1 round balloon, white, 9 inches
    • 1 assistant
    • 1 votive candle
    • 1 black marker
    • 1 book of matches
    • 1 metric ruler
    • Adult Supervision!


Download Student Worksheet & Exercises


Here’s what you do


  1. Blow up the balloon until it is about the size of a grapefruit. If it’s difficult to inflate, stretch the material a few times or ask an adult to help you.
  2. You will need an extra set of hands for this portion. Ask your partner to hold the neck of the balloon closed to keep the air in while you insert the lens into the opening. The lens will need to be inserted perpendicularly to the balloon’s neck. It will prevent any air from escaping once it’s in place. Like your eye, light will enter through the lens and travel toward the back of the balloon.
  3. Hold the balloon so that the lens is pointing toward you. Take the lens between your thumb and index finger. Look into the lens into the balloon. You should have a clear view of the inside. Start to twist the balloon a little and notice that the neck gets smaller like your pupils do when exposed to light. Practice opening and closing the balloon’s “pupil.”
  4. Have an adult help you put the candle on the table and light it. Turn out the lights.
  5. Put the balloon about 20 to 30 centimeters away from the candle with the lens pointed toward it. The balloon should be between you and the candle. You should see a projection of the candle’s flame on the back of the balloon’s surface. Move the balloon back and forth in order to better focus the image on the back of the balloon and then proceed with data collection.
  6.  Describe the image you see on the back of the balloon. How is it different from the flame you see with your eyes? Draw a picture of how the flame looks.
  7. The focal length is the distance from the flame to the image on the balloon. Measure this distance and record it.
  8. What happens if you lightly push down on the top of the balloon? Does this affect the image? You are experimenting with the affect caused by near-sightedness.
  9. To approximate a farsighted eye, gently push in the front and back of the balloon to make it taller. How does this change what you see?

What’s going on?


Okay, let’s discuss the part of the balloon that relate to parts of your eye. The white portion of the balloon represents your sclera, which you may have already guessed is also the white part of your eye. It is actually a coating made of protein that covers the various muscle in your eye and holds everything together.


Of course, the lens you inserted represents the actual lens in your eye. The muscles surrounding the lens are called ciliary muscles and they are represented by the rubber neck of your balloon. The ciliary muscles help to control the amount of light entering your eyes.


The retina is in the back of your eye, which is represented by the inside back of your balloon. The retina supports your rods and cones. They collect information about light and color and send it to your brain.


Exercises


  1.      How does your eye work like a camera?
  2.      How can you tell if a lens is double convex?
  3.      What is the difference between convex and concave?
  4.      Can you give an example of an everyday object that has both a convex and a concave side?
  5.      How can you change the balloon to make it like a near-sighted eye?
  6.      How can you change the balloon to make it like a far-sighted eye?

[/am4show]


This experiment not only explains how your body uses oxygen, but it is also an experiment in air pressure circles – bonus!  You will be putting a dime in a tart pan that has a bit of water in it. Then you will put a lit candle next to the dime and put a glass over the candle with the glass’s edge on the dime. Once all of the air inside the glass is used up by the candle, the dime will be easy to pick up without even getting your fingers wet! Ready to give it a try?


[am4show have=’p8;p9;p11;p38;p92;p29;p56;p81;p87;’ guest_error=’Guest error message’ user_error=’User error message’ ]


Here’s what you need


    • 1 aluminum tart pan
    • 1 votive candle
    • 1 box of matches
    • 1 clear drinking glass, 12 or 16 oz.
    • 1 dime
    • water
    • 1 pair of goggles
    • Adult supervision!


Download Student Worksheet & Exercises


Here’s what you do


  1. Pour about ¼ inch of water in the pan and place the dime right in the middle.
  2. Position the candle next to the dime and ask an adult to light it for you
  3. Put the drinking glass over the candle with its edge resting on the dime. Watch closely to observe what happens.
  4. Once the water is inside the glass, you can carefully remove the dime from under its edge. If done properly, the water will stay in the glass.

What’s going on?


When you put the glass over the candle, you created a closed system. The candle only had the gas trapped inside the air beneath the glass to burn. As the candle burned, the gases in the glass burned as well. They were transformed from a state of gas to a very compact solid state that stuck to the wick of the candle (this is why the wick gets black when a candle burns).


An important thing to note is that as the air was removed, the pressure inside the glass was reduces. Lower air pressure inside your closed system created an imbalance with the regular air pressure on the outside of the glass. Since there was more pressure on the outside, the water was pushed inside the glass. The dime helped to make a gateway for the water to be more easily pushed into the glass.


This lab serves to illustrate that oxygen is consumable. It’s the same thing that happens inside your body, but at a much slower rate that what you witnessed with the candle. Your lungs contain about 1,490 miles (2,400 km) of air passages to help absorb oxygen. If they could be spread out flat, an average set of lungs have a surface area of approximately 650 square feet.  The sheer size of this system gives you the chance to absorb all the oxygen that your body needs.


Exercises


  1. What do we mean when we say that oxygen is consumable?
  2. What is the difference between an open and a closed system?
  3. Where is the higher pressure in this experiment?
  4. Why does water rise inside the glass?

[/am4show]


Everything living produces some sort of odor. Flowers use them to entice bees to pollinate them. We know that the tastes of foods are enhanced by the way that they smell. As humans, each of us even has own unique odor.

In this lab, we look at the diffusion of scents. They start in one place, but often end up spread around the room and can be detected by many people.

[am4show have='p8;p9;p11;p38;p92;p29;p56;p81;p87;' guest_error='Guest error message' user_error='User error message' ]

Here’s what you need

    • 1 onion
    • 1 lemon
    • 1 bottle of ground cinnamon
    • 1 clove of fresh garlic
    • 1 garlic press
    • 1 pile of fresh coffee grounds
    • 1 kitchen knife
    • 1 cutting board
    • 1 variable-speed fan
    • 1 clock with a second hand


Download Student Worksheet & Exercises

Here’s what you do

  1. Start in a room big enough so that you can prepare the foods at one end and your friends or family members can be at the other end, but positioned so they can’t see what you’re doing.
  2. You will need a simple map of the room showing the locations of your partners, the source of the odor, and the fan (which will help with the scent diffusion). Create a new map for each smell.
  3. Turn on the fan and begin with the onion. Ask an adult to help you with cutting the onion into several small pieces. Be sure to hold the chopped pieces up in front of the fan. Ask your partners to raise their hands when they smell the onion. If they don’t smell it, they can leave their hands down. Note on the onion map where its smell is detected. Indicate with a line the farthest area where the onion is smelled. This is its leading edge.
  4. Check in with your partners once per minute for five minutes. Ask them to raise their hands and repeat the process of noting the areas where the smell is detected. Each time you check, draw a line to indicate the farthest area the smell reaches. This will give you an idea of how fast and how far the smell diffused.
  5.  Repeat steps 3 and 4 with each item: cut and smash the lemon and press the garlic. Which odors travel the farthest? Which ones travel the fastest?

What’s going on?

Many factors affect how quickly odors diffuse. First, the air is constantly moving. As the air molecules in the room are colliding with each other (and with the odor molecules) they help to move the smells farther through the room. Second, the fan makes a huge difference. It accelerates the natural process of air and odor molecules and moves them much farther and faster than they would go otherwise. Finally, the air temperate plays an important role. If the temperature is higher, the air and odor molecules will move faster.

As humans, we can boast about 10,000,000 smell cells in our noses. This seems pretty impressive…unless you compare us to canines. Dogs have over 200,000,000 smelling cells in their nasal cavities!

Exercises

  1. Which odors travel the farthest?
  2.  Which ones travel the fastest?
  3. Why do we use the fan?
  4. Does air temperature matter?

[/am4show]


Peristalsis is the wavelike movement of muscles that move food through your gastrointestinal tract. The process of digestion begins with chewing and mixing the food with saliva. From there, the epiglottis opens up to deposit a hunk of chewed food (called bolus) into your esophagus – this is the tube that runs from your mouth to your stomach. Since the esophagus is so skinny, the muscles along it must expand and contract in order to move food down. In this activity we will examine that process.


[am4show have=’p8;p9;p11;p38;p92;p29;p56;p81;p87;’ guest_error=’Guest error message’ user_error=’User error message’ ]


Here’s what you need


    • 1 tennis ball
    • 1 pair of old nylons
    • 1 pair of scissors


Download Student Worksheet & Exercises


Here’s what you do


  1. Cut away the control top portion of the nylons and remove the toe part as well (have an adult help you, if needed). You should now have a long piece of nylon.
  2. Put the tennis ball in one end of the nylon “esophagus.” Start using both hands to move the ball down the nylon tube until it arrives at the other end.

What’s going on?


The esophagus is lined with muscles that work in waves, expanding and contracting to move food along it down into the stomach. These are very strong muscles: even if you ate upside down they would work!


In the grand scheme of the digestion process, the role of the esophagus is important, but relatively short. It takes about 10 seconds to move food from the mouth to the stomach, but the entire process of digestion can take up to 2 and a half days to finish!


Exercises


  1. What is the tube called that connects the mouth and stomach?
  2. What is the process called that moves food along the digestive tract and how does it work?
  3.  How long is food in the esophagus?

[/am4show]


We now know that odor molecules are diffused throughout a room by the motion of air molecules, which are constantly moving and bumping into them.  We also know that warm air moves faster than cold air, and that increasing the movement of the air (like with a fan) will increase the diffusion process.


In this experiment, we look at what happens when the odor molecules find their way into your nose. Your nose has smell cells located in a small area called the olfactory epithelium. We will use them here to match smells with other smells.


[am4show have=’p8;p9;p11;p38;p92;p29;p56;p81;p87;’ guest_error=’Guest error message’ user_error=’User error message’ ]


Here’s what you need


    • 10 small containers with lids
    • 10 cotton balls
    • 1 bottle of lemon juice
    • 1 cup of black coffee
    • 1 bottle of vanilla extract
    • 1 bottle of cinnamon oil
    • 1 bottle of soy sauce
    • 1 black felt marker
    • 1 assistant


Download Student Worksheet & Exercises


Here’s what you do


  1. Take the lids off of the containers and number the first five with a 1 through 5. Mark the other five with A through E.
  2. Put a cotton ball into each container. Start with the numbered containers and add some lemon, coffee, cinnamon, soy sauce, and vanilla. Record the smell for each number for reference.
  3. Fill the lettered containers with the same liquids, but not in the same order. Be sure to record the material you have used for each letter.
  4. Take the closed containers to your assistant. Ask them to match the scent in the first canister with the proper lettered container without opening the container. Given them permission to roll, drop, and shake the containers, but they can’t be opened. Note their response – are they correct?
  5. Repeat step 4 for each of the containers until they all have been matched. Then check your recorded data and see how well your assistant did with matching.

What’s going on?


Everything here produces a distinct odor. The smells go into your nose where they are interpreted by the tiny hair-like smell cells in your olfactory epithelium. The smell cells work together to distinguish smells and then send the interpreted information to the brain for recognition.


We previously noted that humans have an average of 10,000,000 smell cells, but they aren’t all the same. You have about 20 different types and each detects a specific type of odor. The types work together and your brain translates their signals as a unique odor.


Exercises


  1. What is the scientific name for sense of smell?
  2. What is the name of the tissue which helps the brain to distinguish between smells?

[/am4show]


An oxygen and carbon dioxide exchange takes place in your bloodstream. When you breathe air into your lungs it brings in oxygen, which is carried from your lungs by red blood cells in your bloodstream. Cells of your body use the oxygen and carbon dioxide is produced as waste, which is carried by your blood back to your lungs. You exhale and release the C02. You will study this exchange in today’s lab.


You will be using a pH indicator known as bromothymol blue. When you exhale into a baggie, the carbon dioxide will react with water in the bag. This reaction produces carbonic acid, which starts to acidify the water. More breathes in the bag equal more carbon dioxide, which equal a lower (more acidic) pH. You will notice the bromothymol will turn green when the pH of the water is right about 6.8 and it will turn yellow when the pH drops further to 6.0 and lower.


[am4show have=’p8;p9;p11;p38;p92;p29;p56;p81;p87;’ guest_error=’Guest error message’ user_error=’User error message’ ]


Here’s what you need


    • 1 1 oz. bottle of bromothymol blue
    • 1 straw
    • 1 resealable baggie
    • 1 bottle of ammonia
    • 1 pipette
    • water


Download Student Worksheet & Exercises


Here’s what you do


  1. Pour about 2 ounces of water into the baggie and add two capfuls of the bromothymol blue into it. Close the baggie well and swish the solution around inside it gently to mix. Note the color of the solution for your data record.
  2. Open the baggie a tiny bit and put the straw inside, but DO NOT drink the solution! It could make you sick. Close the bag tightly around the straw and gently blow into the solution. Again, be careful not to suck on the straw.
  3. Watch the color of the solution closely as you continue to blow into the solution and create bubbles of carbon dioxide gas. The color will change to a sea green color and then eventually it will change to bright yellow. Note each color change in your records.
  4. You can return the solution to blue by slowly adding a base – such as ammonia – to the solution in the bag. Bleach will also work. Please ask an adult to help with this. Add one drop at a time, shaking after each addition to mix the solution. You will be able to observe when the pH starts to change back by the color of the solution. It should turn back to green and then to blue.

What’s going on?


Bromothymol blue will change color in a pH range from 6.0 to 7.6.  It is an acid/base indicator. Its basic solution is at a pH of 7.6 or above – this is when it is blue. In acidic conditions, it will turn yellow – this is a pH of 6.0 or below. And when it’s in between the two, it will be the sea green color that you observed in your baggie.


Because carbon dioxide is a little acidic, when we breathe it out into the water and bromothymol blue solution its bubbles start to lower the pH. You saw a small change in pH with the sea green color, but as you continued to exhale and add carbon dioxide, the solution became more and more acidic. This eventually resulted in a pH at or below 6.0 and a bright yellow solution.


In order to exchange oxygen with carbon dioxide in your lungs, they have over 300,000,000 teeny little air sacs calls alveoli. In one minute, you breathe approximately 13 pints of air.


Exercises


  1. What is pH and how it is useful?
  2. What does a yellow color indicate with bromothymol blue?
  3. Is CO2 acidic or basic?

[/am4show]


Food and air both enter your body through your mouth, diverging when they reach the esophagus and trachea. Food goes to the gastrointestinal tract through your esophagus and air travels to your lungs via the trachea, or windpipe.


You will be making a model of how your lungs work in this lab. It will include the trachea, lungs, and the diaphragm, which expands and contracts as it fills and empties your lungs.


[am4show have=’p8;p9;p11;p38;p92;p29;p56;p81;p87;’ guest_error=’Guest error message’ user_error=’User error message’ ]


Here’s what you need


    1. 1 2-liter soda bottle, emptied and cleaned
    2. 1 pair of scissors
    3. 1”Y” valve hose connector
    4. 3 round, 9-inch balloons
    5. 1 #3 one-hole stopper
    6. 1 length of hose, 8-inch
    7. 2 rubber bands
    8. 1 jar of petroleum jelly


Here’s what you do


  1. Cut off the bottom of the 2-liter bottle. Ask an adult for help.
  2. Take the “Y” valve and secure the two balloons to the top branches with the rubber bands.
  3. Put a tiny bit of petroleum jelly on the end of the hose to make it easier to insert into the #3 stopper. Pull 6 inches of hose through the stopper and then thread the hose through the bottle’s neck. Insert the stopper into the top of the bottle.
  4. Put the end of the hose (that is now inside the bottle) into the base of the “Y” valve (which now has balloons on its other branches). Pull the hose through the stopper a bit. Also, pull the lungs up toward the top of the bottle.
  5. Tie a knot in the third, unused balloon. Cut it in half and stretch the part with the knot over the open bottom of the soda bottle. Make sure the bottom balloon is as tight as it can be.
  6. Grab the bottle with one hand, the knot at the bottom of the balloon with the other. Carefully pull the knot on the balloon down. What happens to the balloons in the bottle? Now let go of the knot and observe how this affects the balloons. Note your observations in the experiment’s data.
  7. Sketch your model and label its trachea, lungs, and diaphragm.

What’s going on?


By placing a stopper in the top of the bottle and putting the stretched rubber balloon on the bottom, you have created an enclosed system. The tube at the top of the bottle is the only way for air to enter or exit the model’s lungs. Pulling down on the balloon’s knot reduced the air pressure inside the lungs. As compensation, air was pushed down into the tube to equalize the pressure. This caused the balloon lungs to expand. When you released the knot, the air pressure forced the air out of the balloons.


If you need more help with identification, the tube acts as the trachea, the balloons are the lungs, and the balloon with the knot at the bottom is the diaphragm.


Did you know that an average person breathes about 24,000 times each day? If you live to be 70 years old, that means about 600,000,000 breaths. Make them count!


[/am4show]


Today you will make a calibrated, or marked, container that you will use to measure your lung capacity. You will fill the calibrated container with water, slide a hose into it, take a really deep breath, and blow in the hose. As the air in your lungs enters the container, it will push out the water inside. Just blow as long and as much as you can, then when you flip the bottle over you will be able to read the amount of water you have displaced. If you will subtract the water displaced from the total amount of water in the bottle, the result is your lung capacity.


[am4show have=’p8;p9;p11;p38;p92;p29;p56;p81;p87;’ guest_error=’Guest error message’ user_error=’User error message’ ]


Here’s what you need


    • 1 2-liter soda bottle
    • 1 black marker, permanent
    • 1 12” length of rubber hose
    • 1 large plastic bowl
    • 1 cup measure


Download Student Worksheet & Exercises


Here’s what you do


  1. Fill the 1 cup measure with water. Pour this into the 2-liter bottle and mark the water level with a line using the black, permanent marker. Also, write 1 cup next to the line. Keep adding water, one cup at a time, marking each new 1 cup increment until you have filled the bottle with water.
  2. Now flip the newly-filled bottle of water over 1 cup measure until the cup is about 1/3 full. Put one end of the rubber hose in the top of the bottle (which should be now under water).
  3. Take a really deep breath – as deep as you can – and blow your breath out into the tube. Continue to blow until you can’t push any more air into the bottle. As air goes in the bottle, it pushes an amount of water equal to its volume out and into the bowl.
  4. Put the lid on the bottle and turn it over before lifting it out of the water. How much water is left in the bottle? Subtract this amount from 8.5 cups. This should be your lung capacity.
  5. Record your lung capacity in your data records as, “My lung capacity is ____________ cups.”  You can convert this number to milliliters by multiplying by 0.24. For example, 19 cups would equal 4.5 liters.

What’s going on?


A person who is 70 years old has breathed about 600,000,000 times in their life. But they have also breathed a lot of air – about 13,000,000 cubic feet. This is enough air to fill 52 blimps!


A man’s lungs have a greater capacity than a woman’s – it’s about 6 liters for a man and 4.2 liters for a woman. And since a grown-up has a greater lung capacity than a kid, it makes sense that a 10-year old might breathe 20 times per minute when a grown-up might breathe only 12 times in a minute.


Exercises


  1. Which body system are your lungs a part of?
  2. What are some other parts in this system?
  3. Explain this system’s major function.

[/am4show]


When you exercise your body requires more oxygen in order to burn the fuel that has been stored in your muscles.  Since oxygen is moved through your body by red blood cells, exercise increases your heart rate so that the blood can be pumped through your body faster. This delivers the needed oxygen to your muscles faster. The harder you exercise, the more oxygen is needed, so your heart and blood pump even faster still.


[am4show have=’p8;p9;p11;p38;p92;p29;p56;p81;p87;’ guest_error=’Guest error message’ user_error=’User error message’ ]


Here’s what you need


    • 1 clock with a second hand
    • 1 pencil


Download Student Worksheet & Exercises


Here’s what you do


  1. While sitting quietly, place your first two fingers of one hand onto the wrist of the other hand. Feel for the pulse of your radial artery. Practice taking your pulse in intervals of 6 seconds.
  2. After you have had some practice with the 6 second interval, take your pulse for this amount of time and multiply it by 10. The 6-second rate times 10 is your heart rate per minute. Record each for experiment data.
  3. Now stand up and do 50 jumping jacks. When done, sit down immediately and check your pulse. Again, record the 6-second pulse rate, multiply it by 10 and also record the pulse rate per minute.
  4. Finally, go outside and run around as fast as you can without stopping for 3 minutes. Again, immediately sit and take your pulse. Record the 6-second rate, multiply it by 10 and get your heart rate per minute.

What’s going on?


Exercising means your muscles need more oxygen. They ask your brain to tell your heart and lungs. When your heart gets the message, it starts to beat harder. Your lungs work harder, too. Together, your heart and lungs work as a team to provide the needed oxygen supply to your muscles. You can identify that this process is occurring by your heart rate increase and more rapid breathing rate.


Did you know that your heart is about the size of your fist? It is actually a muscle and it pumps more than a gallon of blood through your body each minute! An average heart rate is 70 beats per minute, but this can vary depending on age and fitness level. Based on 70 bpm, your heart will beat around 100,000 times per day. That’s more than 36 million beats a year!


Exercises


  1. Explain how to take a pulse.
  2. What units do we use to measure pulse?

[/am4show]


Stethoscopes are instruments used to amplify sounds like your heartbeat. Your doctor is trained to use a stethoscope not only to count the beats, but he or she can also hear things like your blood entering and exiting the heart
and its valves opening and closing. Pretty cool!


Today you will make and test a homemade stethoscope. Even though it will be pretty simple, you should still be able to hear your heart beating and your heart pumping. You can also use it to listen to your lungs, just like your doctor does.


[am4show have=’p8;p9;p11;p38;p92;p29;p56;p81;p87;’ guest_error=’Guest error message’ user_error=’User error message’ ]


Here’s what you need


  • 3 12-inch lengths of rubber hose
  • 1 “T” connector
  • 1 funnel


Download Student Worksheet & Exercises


Here’s what you do


  1. Take two pieces of hose and work them onto the top ends of the “T” connector. Put the remaining piece of hose onto the bottom of the “T.” The tool you have made should look like a simple stethoscope, but there are no super cold metal end pieces to worry about with yours.
  2. Put the funnel into the bottom hose – the one hanging from the bottom of the “T” connector. You know have a functioning stethoscope. One word of warning: NEVER YELL INTO THE FUNNEL WHILE THE STETHOSCOPE IS ATTACHED TO SOMEONE’S EARS. THIS COULD DAMAGE EAR DRUMS!
  3. Gently insert the side tubes into your ears. Put the funnel on your chest, just to the left of your breastbone. Listen for your heartbeat. If you are in a sufficiently quiet room you may even be able to hear the opening and closing of your heart’s valves.
  4. After you’ve found your hear, try moving the stethoscope to various areas of your chest and listen for different sounds made by your heart. Ask if you can listen to a friend or family member’s heart. Are the sounds made by another heart the same or different?
  5. Now listen to your lungs, placing the end of the stethoscope just above and to the left of the bottom of your ribcage (Point A), to the right of the bottom of your ribcage (Point B), and just below where your ribs start (point C). Also listen in the middle of your back to the left (point D) and right of your spine (point E). In each spot, take a deep breath and listen for the sound of air entering and exiting the lungs.
  6. For your data records, record how many times your heart beats in a minute while you are quiet and sitting.
  7. Next, do 100 jumping jacks. Sit down immediately and check your heart. Record the number of beats per minute for jumping jacks in your data.
  8. Finally, go outside and run for 3 minutes, non-stop. Then sit and immediately check your heart rate one more time. Record the beats per minute for running in your experiment data.

What’s going on?


Exercise creates a demand for oxygen in your muscles, which is received from work done by your heart and lungs. They get a message from your brain and start to work harder. You can see the proof of their hard work in your recorded data.


Exercises


  1. Approximately how big is your heart?
  2. Which body system is the heart a part of?
  3. What are some of this system’s jobs?
  4. How many chambers does your heart have and what are they called?
  5. How did the heart rate change when you exercised?

[/am4show]


Did you know that your tongue can taste about 10,000 unique flavors? Our tongues take an organized approach to flavor classification by dividing tastes into the four basic categories of sweet, sour, salty, and bitter.


For this experiment, you will need a brave partner! They will be blindfolded and will be attempting to guess foods. Relying only on their sense of taste, they will try to determine what kind of foods you are giving them.


[am4show have=’p8;p9;p11;p38;p92;p29;p56;p81;p87;’ guest_error=’Guest error message’ user_error=’User error message’ ]


Here’s what you need


    • 1 partner
    • 1 blindfold
    • 1 cup of water
    • 1 plate
    • 1 lemon
    • 2 toothpicks
    • 1 sugar cube
    • 1 salty cracker
    • 1 piece of dark chocolate
    • 1 pencil


Download Student Worksheet & Exercises


Here’s what you do


  1. (NOTE: Make sure your partner is not around for the first step!) Prepare a plate with a piece of lemon on a toothpick, a sugar cube, a really salty cracker, and a piece of dark chocolate, which will also be on a toothpick.
  2. Blindfold your partner before they see the plate. Explain that you’re going to give them food samples. Their job is to taste each sample, one at a time, and then determine whether the food is sweet, sour, salty, or bitter. After they have provided a category, see if they can tell you the specific flavor of the food. They should use the water between samples in order to rinse their mouth and prepare for the next food.
  3. Record data and observations for each individual food item. Be sure to list each food, your partner’s group classifications (sweet, sour, salty, or bitter) and what specific flavors that they note.

 What’s going on?


When you put food in your mouth, saliva immediately begins to break it down. Saliva mixes with food and makes a solution, which then takes the food (and its flavor) to the taste pores. There, receptors determine the chemical structure and send this information to your brain, which then decodes and categorizes the taste. The exact nature of the secret code relayed between your taste receptors and your brain is still a mystery. Maybe someday you can help to figure out the science behind it!


Did you know that humans have about 7500 taste buds? That’s a lot compared to most chickens, which only have about 24, total. But it’s a pretty small amount compared to catfish. They have over 175,000 taste buds! Can you imagine what your favorite dessert might taste like if you had that many? I wonder if it would be a good thing, or maybe too much information. Perhaps we are better off with our own perfect number of taste buds!


Exercises


  1. How does saliva help with tasting?
  2. What helps to decode the chemical structure of a food so that the brain can determine its taste type?
  3. Why do foods sometimes become less strong as we age?

[/am4show]


The tongue has an ingenious design. Receptors responsible for getting information are separate and compartmentalized. So, different areas on the tongue actually have receptors for different types of tastes. This helps us to separate and enjoy the distinct flavors. In this experiment, you will be locating the receptors for sweet, sour, salty, and bitter on the tongue’s surface.


[am4show have=’p8;p9;p11;p38;p92;p29;p56;p81;p87;’ guest_error=’Guest error message’ user_error=’User error message’ ]


Here’s what you need


  • 4 cotton swabs
  • 5 wax cups
  • 1 bag of black tea
  • 1 bottle of red vinegar
  • 2 packages of sugar
  • 2 packages of salt
  • 1 microwave
  • water
  • 1 spoon
  • 1 partner
  • 1 blindfold


Download Student Worksheet & Exercises


Here’s what you do


1. Put 3 ounces of water into the first of the wax cups. Bring it to a boil in the microwave and have an adult help you add a teabag. This will make your bitter cup. Let it sit for 5 minutes. While it is steeping, you can prepare the other cups.


2. Fill the remaining cups with 2 ounces of water each. Prepare them as follows:


A.      For the sweet cup, add two packages of sugar to the warm water in one of the cups. Stir until well dissolved.
B.      For the sour cup, add 2 ounces of red vinegar to another cup and stir well.
C.      For the salty cup, put two packages of salt into the final cup. Stir until dissolved.
D.      The last step in cup preparation is to discard the tea bag that has been steeping in the first cup.


3. Now put the blindfold on your partner and have them stick out their tongue.  Dip the first swab into the tea. Using the diagram as a guide, swab each area one at a time: A, B, C, and D.  Ask your partner to identify the flavors as sweet, sour, salty, bitter, or can’t tell  as you swab each individual area. Record your partner’s response for each area.


4.Your partner should rinse out their mouth with water after testing the bitter tea. Then test each of the remaining solutions, one at a time in the same manner.


What’s going on?


Humans can identify thousands of distinct tastes, but we only have four types of taste receptors. When you take a bite of something flavorful, your saliva starts to dissolve it immediately. This solution of flavor and saliva goes to your taste buds and is then interpreted by your brain as sweet, sour, salty, or bitter.


The taste buds have taste receptors which bind to the structure of certain molecules: sweet receptors recognize hydroxyl groups (OH) in sugars, sour receptors find acids (H+, such as the citric acid in a lemon), salt receptors respond to metal ions (like Na+ in table salt), and bitter receptors are triggered by alkaloids. These are bases which contain nitrogen.  It’s interesting to note the location of the bitter taste buds – they are on the back of the tongue.  Since many poisons are alkaloids, their bitter taste may actually trigger vomiting.


Anyone who’s had a stuffy nose can tell you that smell plays a big role in our ability to taste. This makes sense because we know that we can only really taste the 4 distinct true flavors of sweet, sour, salty, and bitter. Our nose works in partnership with our tongue to allow us to identify more complex flavors.


Exercises


  1. How many different types of taste receptors do we have? What are they?
  2. Can you still taste food when you have a stuffy nose?
  3. Which taste receptors recognize the hydroxyl group?

[/am4show]


Digestion starts in your mouth as soon as you start to chew. Your saliva is full of enzymes. They are a kind of chemical key that unlock chains of protein, fat, and starch molecules. Enzymes break these chains down into smaller molecules like sugars and amino acids.


In this experiment, we will examine how the enzymes in your mouth help to break down the starch in a cracker. You will test the cracker to confirm starch content, then put it in your mouth and chew it for a long time in order to really let the enzymes do their job. Finally you will test the cracker for starch content and see what has happened as a result of your chewing.


[am4show have=’p8;p9;p11;p38;p92;p29;p56;p81;p87;’ guest_error=’Guest error message’ user_error=’User error message’ ]


Here’s what you need


    1. 1 package of soda crackers
    2. 1 5” pie tin
    3. 1 craft stick
    4. 1 0.5 oz bottle of iodine
    5. 1 pre-form tube
    6. 1 1 mL plastic pipette
    7. water


Download Student Worksheet & Exercises


Here’s what you do


  1. Take a cracker from the package and put it in the pie tin. Use your thumb to mash it up, making the pieces as small as possible. Add a small amount of water with the pipette. Mix everything up with the craft stick to make a mash of cracker.
  2. Now fill the pipette with iodine. When iodine comes in contact with starch, it changes in color from reddish-brown to a dark blueish-black. Take the pipette and squeeze a few drops onto the cracker mash in various spots. Record what you see in your experiment data.
  3. Take another cracker and chew it up for about 2 minutes. Do you notice any flavor changes as you are chewing? If so, note this. Be particularly aware of any sweet flavors.
  4. Spit the mash into the pre-form tube once you have chewed for 2 minutes. Use the pipette of iodine to add a few drops of iodine to the chewed mash. Note any change in color. If there is no starch, the iodine will stay reddish-brown in color. If starch is present, you will see the color change to a very dark blue-black as it did in step 2. Record what you see in your data.

What’s going on?


This lab gives you a good idea of what happens in digestion, which starts as soon as food enters your mouth. Actually, the process can start even before this as your body prepares for food. Have you ever had a wonderful smell make your mouth water? This is your body’s way of getting ready to get to work digesting that delicious food.


Once you take a bite and the enzymes start to do their job of breaking large, more complex molecules into smaller particles. In this experiment, starch got broken down into simple sugars that your body could easily move around and use as fuel.


There are three sets of saliva-secreting glands in your mouth. They include a gland in the back of your throat called the parotoid gland, one in your lower jaw called the submandibular gland, and the sublingual gland which is under your tongue. The three work together to secrete up to 2 liters of saliva each day.


Exercises


  1. What is the first step in the digestive process?
  2. How does saliva help to digest food?
  3. Name one or more of the main salivary glands and where they are located.

[/am4show]


We have done some extensive experiments on taste buds: how they are categorized, what tastes they recognize, and we have even mapped their location on your tongue. But we haven’t yet mentioned this fact: not all people can taste the same flavors!


So today we will check to see if you have a dominant or recessive gene for a distinct genetic characteristic. We’ll do this by testing your reaction to the taste of a chemical called phenylthiocarbamide (or PTC, for short). The interesting thing about PTC is that some people can taste it – and generally have a very adverse reaction. However, some people can’t taste it at all.


[am4show have=’p8;p9;p11;p38;p92;p29;p56;p81;p87;’ guest_error=’Guest error message’ user_error=’User error message’ ]


Here’s what you need


      • 1 vial of PTC paper
      • family members


Download Student Worksheet & Exercises


Here’s what you do


  1. Put the PTC paper in your mouth. If you have the dominant gene, it will usually taste pretty bitter. It might also be sour or even a little sweet. If it tastes like a piece of paper, you have a recessive gene.
  2. After testing your paper, be sure to note whether you are a taster or non-taster.
  3. Now test at least five more people in your family and note their reactions as tasters or non-tasters. Also note their relationship to you.
  4. If you have enough PTC paper, make a genetic tree of your responses. Put Mom and Dad at the center and list you and your siblings branching out beneath them. Then list both sets of grandparents above each of your parents. Circle the names of family members who test positive and leave the negative testers uncircled.

What’s going on?


The gene that determines whether or not you can taste PTC is a part of your DNA (deoxyribonucleic acid). It is the genetic blueprint that you were born with and it determines everything about you: from hair color to the size of your feet. But DNA also plays an important role in how your five senses function. Colorblindness is a genetic deficiency in which a person cannot see colors has a difficult time with distinguishing them. It can range in severity. Some people who are colorblind can’t tell the difference between colors like red and green, but some see no colors at all. Everything looks like a black and white movie to them. Just like colorblindness, our taste sensitivity can vary. Maybe this explains why some people like liver and brussel sprouts and others can’t stand them!


So to relate this to our test, the ability to taste PTC comes from a gene. We know that if both of your parents can taste it, there is a high likelihood that you will be able to taste it, too. About 70%, or 7 out of 10, people can taste it. But what does it mean?  In truth, not a lot. It doesn’t mean you have a highly developed palate or a better sense of taste. It just means you are lucky enough to have inherited a gene that allows you to taste a disgusting, bitter chemical on a piece of paper. Congratulations!


Exercises


  1. What are the tiny hair-like organelles that send taste messages to your brain called?
  2. What are the bumps on your tongue called?
  3. What kind of trait does this experiment test?

[/am4show]
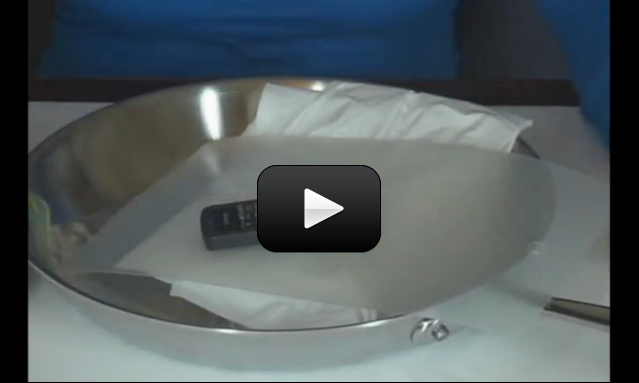

The buildup of things like food and bacteria where your gums and teeth meet, and also between your teeth, is called plaque. Where plaque lives is also where the bacteria turns the sugar in your mouth into harmful acids that attack your teeth’s enamel and can lead to gum disease. Regular brushing is a great way to remove plaque and keep your mouth healthy.


[am4show have=’p8;p9;p11;p38;p92;p29;p56;p81;p87;’ guest_error=’Guest error message’ user_error=’User error message’ ]


Here’s what you need


    • 1 4-pack of red disclosing tablets
    • 1 clear plastic cup
    • 1 mirror
    • 1 red crayon
    • water


Download Student Worksheet & Exercises


Here’s what you do


  1. Disclosing tablets are designed to identify plaque by turning it red. Remove a pill from the packaging and put it in your mouth. Chew it up thoroughly but don’t swallow it. Be very careful not to get any of the dye on clothing or anything else that might stain. The color is very difficult to remove!
  2. Take the cup full of water and rinse out your mouth very well. Spit the water out into the sink. Check your mouth in the mirror. All of that red is plaque! Draw a picture of your mouth and use the red crayon to note where the plaque is attacking your teeth and gums.
  3. You should have a total of 4 pills in the package. You can test other members of your family, or if you would prefer, test yourself over a period of a few days after you have had a chance to observe and identify where you should be doing a better job of tooth-brushing.

What’s going on?


When you chew the tablets they start to dissolve and mix with your saliva. This makes a water soluble dye that affixes to the bacteria and other particles in your mouth. The dye is absorbed by the bacteria, so it holds onto it even after your mouth is rinsed. This enables you to identify the unbrushed areas in your mouth.


Have you ever counted your teeth? They started to appear when you were a baby – about 6 months old or so. Kids have 20 deciduous, or baby teeth. These will fall out and the adult teeth grow in to replace them. Adults usually have 32 total teeth.


Exercises


  1. Why does this experiment work at detecting plaque?
  2.  How can dentists and moms use this to make sure you’re doing a good job brushing?
  3.  What is plaque, and why is it bad for you?

[/am4show]
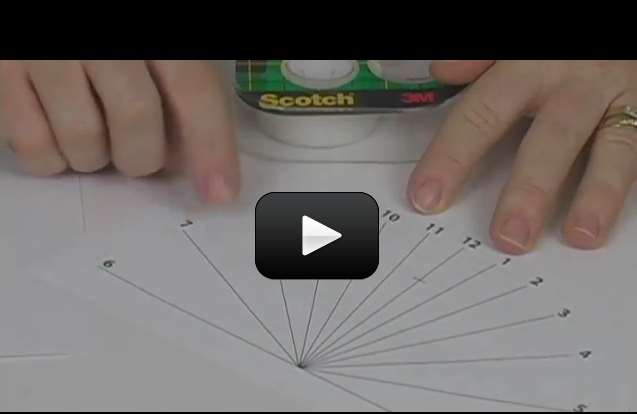

Involuntary responses are ones that you can’t control, but they are usually in place to help with survival. One good example is when you touch something hot. Your hand does not take the time to send a message to your brain and then have the brain tell your hand to pull away. By then, your hand might be seriously hurt! Instead, your body immediately removes your hand in order to protect it from further harm.


Today you will test an involuntary reflex by using the tendon reflex test. A thick, rubbery band called the patellar tendon holds your knee cap in place. Having one leg on top of the other not only stretches the tendon, but it also makes it possible to see a reaction. You can test the reflex by giving your tendon a tap and watching what happens.


[am4show have=’p8;p9;p11;p38;p92;p29;p56;p81;p87;’ guest_error=’Guest error message’ user_error=’User error message’ ]


Here’s what you need


    1. 1 knee
    2. 1 partner


Download Student Worksheet & Exercises


Here’s what you do


  1. Sit with your legs crossed at the knee on the edge of your seat. Reach forward and see if you can feel the patellar tendon. It is right below your knee cap.
  2. Ask your partner to gently tap the tendon with the outside edge of their hand. This will look like a careful little karate chop. If your partner gets the right spot it will be obvious. You will notice your leg kick out a little in a reflex reaction.
  3. Your partner can try other spots on the tendon if reaction isn’t achieved at first. If it hurts, stop right away! It’s possible that you might not have a tendon response reflex. Not everyone does and that is perfectly normal.

What’s going on?


There are three main parts that make up your peripheral nervous system. They are the autonomic nerves, which control reflexes like the one we have studies here. Autonomic nerves also send information to your organs, blood, and other parts of the body. The second part of your peripheral nervous system is made up of the nerves that deal with the five senses. The last part is your motor nerves. They help you to move the muscles in your body and are responsible for voluntary reactions.


The tendon reflex is in place because the knee is such a sensitive and vulnerable part of the body. When the tendon is stretched out and bumped, your body tries to move the leg and knee out of harm’s way so that it won’t get hurt. As you could probably tell, it’s an involuntary response that neutralizes any conscious, voluntary control that your brain has over the leg through the motor nerves.


Exercises


  1. What are the main parts of the nervous system?
  2. What are the two parts of the peripheral nervous system and what are their functions?
  3. Which part of the nervous system controls involuntary reflexes?

[/am4show]
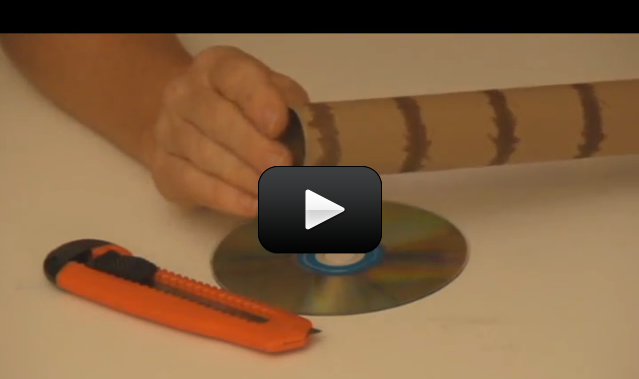

The skeleton is your body’s internal supporting structure. It holds everything together. In addition to providing support, bones act as shock absorbers when you jump, fall, and run. Bones have big responsibilities and so they must be really strong. They also need to be arranged properly for the best support and shock absorption.


In this experiment, we will look at the internal arrangement of the bones holding together your body.


[am4show have=’p8;p9;p11;p38;p92;p29;p56;p81;p87;’ guest_error=’Guest error message’ user_error=’User error message’ ]


Here’s what you need


    • 1 toilet paper tube
    • 50-100 straws
    • 1 roll of tape
    • 1 book


Download Student Worksheet & Exercises


Here’s what you do


  1. First you will explore different bone structures. Start by taking 20 skinny straws and arrange them randomly in your hand so that they are pointing in different directions.
  2. Lay your arm and hand on a table so that it is braced. Next, have a friend place a heavy book on this column of straws. What happens then it’s exposed to the weight?
  3. Now take 20 more straws and arrange in a circle so that they are all held vertically in your hand.
  4. Repeat step 2 with these more organized straws. Do you notice a difference? The uniformly arranged straws should be stronger than those that were randomly arranged.
  5. The tubes inside your bones are more like the uniform model of straws. They also have a kind of glue that hold them in place inside the bones. Let’s incorporate this idea into your model by lining the inside of the toilet paper tube with tape.
  6. Next, add some straws inside the tube as well. Add a single layer of straws, then another layer on top of it. Finally, fill the middle of the tube with straws, making sure they are tightly packed.
  7. Test your model’s strength by placing a book on top of the tube. What happens when the model is exposed to the book’s weight?
  8. For an extra study opportunity, visit the butcher in your local grocery store and ask for the end of a beef bone. (This is sometimes packaged as a soup bone). Look at the end of the bone. What do you see? It should look like a hard outer shell of bone protecting a softer, spongy portion. Draw a picture of your observations.

What’s going on?


In your experiment, it should have been readily apparent that the more organized and uniform straws were much stronger than the randomly arranged ones. Your own bones have a similar pattern in their soft, spongy part called cancellous bone. This portion of bone has a honeycombed structure which makes the bones very strong, but relatively light.  The tiny tubes that make up the honeycomb are called the Haversian system and the actual tissue of the structures is made up of collagen. This allows them to maintain flexibility, but they are still composed of minerals – notably calcium and phosphorus which give them their hardness and strength.


Exercises


  1. Name some of the parts that make up our skeletal system.
  2. What is the smooth, hard, protective layer on the outside of bones called?
  3. What is the inside spongy, porous, honeycombed bone called?
  4. What is the network of tubes inside bones called?

[/am4show]
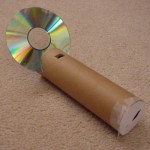

Some groups of muscles are stronger than others because each group is designed for a different and specific function. It just makes sense that the muscle groups in our legs would need to be stronger than the ones in our toes.


For this experiment, you will use a bathroom scale to test the strength of various muscle groups.


[am4show have=’p8;p9;p11;p38;p92;p29;p56;p81;p87;’ guest_error=’Guest error message’ user_error=’User error message’ ]


Here’s what you need


    • 1 bathroom scale
    • 1 pencil
    • 1 partner


Download Student Worksheet & Exercises


Here’s what you do


  1. Put the scale between your knees. Now squeeze it as hard as you can and have your partner record the scale’s reading.
  2. Use the technique to test the muscles in the following list. Place the scale between the body parts and squeeze! Be sure to record the readings for data-keeping purposes.

a. thighs


b. ankles


c. palms


d. elbows


e. elbow and rib cage


What’s going on?


Not all muscles need to be big and powerful. Actually, muscles have various functions and uses that vary by their design. The muscles in our fingers are detail-oriented. They need to be fast and perform relatively small, precise movements like the ones used in writing. The design of a specific muscle group will vary depending upon the muscles’ ultimate use.


Have you even had a muscle cramp? They occur when a muscle is overworked and fatigued. The muscle simply contracts and stays contracted. Not fun!


Exercises


  1. What are the two main types of muscles?
  2. Give an example of a muscle group that’s more specific than your answers above.
  3. Why aren’t the muscles in our fingers big and strong like those in our arms and legs?

[/am4show]


In this experiment, we will continue to explore Ruffini’s endings in your skin. We also look at your body’s ability to detect temperature and regulate its own temperature. You will study how the body cools and warms itself.


[am4show have=’p8;p9;p11;p38;p92;p29;p56;p81;p87;’ guest_error=’Guest error message’ user_error=’User error message’ ]


Here’s what you need


    1. 1 bottle of rubbing alcohol
    2. 1 cotton ball
    3. 1 liquid crystal thermometer strip
    4. 1 cotton glove


Download Student Worksheet & Exercises


Here’s what you do


  1. Position the thermometer strip on the back of your hand. Give it a moment to register the temperature of your body. Record this temperature as a base reading for your data.
  2. Put some rubbing alcohol on a cotton ball. Now use the cotton ball to wipe the alcohol on the surface where you took the reading, right on the back of your hand. Quickly put the thermometer strip right back on the spot where you have put the alcohol and take another reading. Note the temperature in your records.
  3. Now put the glove on your hand and run around in the yard, do some jumping jacks, or find another way to be physically active for 3 minutes. When you have worked up a sweat, come back to the experiment area. With your hand still in the glove, put the liquid crystal thermometer on the back of your hand where you took the first reading. Record this temperature information in your data records.
  4. Finally, take off the glove and observe your hand. Can you tell that your sweat glands have been working? If so, have they been very active or just a little active?

What’s going on?


Your body likes to keep your temperature in equilibrium, which is a state of balance. It works hard to regulate your temperature and avoid any sudden changes that could be harmful. Constant and predictable is your body’s goal and it uses your skin to help.


When you are cold, blood flow to the skin is reduced in order to help stem the loss of heat. Your hair also stands on end in an error to trap air next to the body and help insulate it…although this doesn’t work very well for most of us! This is a more effective tool against heat loss with much furrier mammals.


In order to cool you down, skin can use some of your three million sweat glands. Sweat absorbs and displaces extra heat and can also close openings to cells on the surface to avoid excess gains in heat.


Your data in the lab should have simulated the effects of body temperature in three different conditions: equilibrium, excess cold, and excess heat.


Exercises


  1. What is equilibrium?
  2. How does equilibrium relate to body temperature?
  3. How does our body help to cool us down?

[/am4show]


Your fingers have receptors which perform various jobs. In addition to touch, they can detect pressure, texture, and other physical stimuli.  One specialized type of receptors is called Ruffini’s receptors. They are good at identifying changes in pressure and temperature. In this experiment, we will test their ability to distinguish between hot and cold temperatures. We are actually going to try and trick your Ruffini endings. Do you think it will work?


[am4show have=’p8;p9;p11;p38;p92;p29;p56;p81;p87;’ guest_error=’Guest error message’ user_error=’User error message’ ]


Here’s what you need


    • 3 glasses
    • 1 Celsius/Fahrenheit thermometer
    • hands
    • 1 clock with second hand
    • hot water
    • cold water
    • ice cubes (optional)
    • room-temperature water


Download Student Worksheet & Exercises


Here’s what you do


  1. Place the three glasses in front of you on a table. They should be in a row: left, middle and right.
  2. Put hot water from the faucet into the first glass on your right. Pour very cold water from the tap into the far left glass. You can even add a couple of ice cubes if you have them available. Finally, fill the glass that is in the middle with room temperature water.
  3. Now use your right hand to hold on to the glass on the right with hot water. Really spread out your fingers and wrap them around the glass. Do the same thing with your left hand and the glass filled with cold water. Be sure to check the clock and leave your hands on the glasses for exactly one minute.
  4. After one minute, take your hands and put them both on the middle glass. (You may need to stack one on top of the other if your glasses are narrow). Note the temperature you feel with each hand: hot, cold, or medium. You can use the thermometer to record the actual water temperature.
  5. Now repeat steps 1-4. This time, switch the hot and cold glasses so that you are holding the hot water with your left hand and the cold water with your right hand. Compare these results with your initial results. Do both hands respond in a similar way or is one more sensitive that the other?
  6. Some questions to think about:

Does the temperature of the middle glass feel warmer, cooler, or the same when you touch it with your hand that was holding the warm glass?
What does your hand that was touching the cold glass feel when it touches the middle glass?
What do you feel when both hands are on the middle glass?
Why do you think your hands are not the best instruments for determining temperature?


 What’s going on?


Your hands are designed to adapt to temperature. Touching the warm glass relaxes the muscles of your hands, increases circulation, and enhances flexibility. When your hand touches the cold glass the cells on your skin’s surface begin to contract to minimize loss of heat and your hand becomes less flexible. Then, when you grab the middle can your hands get a bit confused. Relatively speaking, the middle glass feels warmer to the hand that was holding the cold glass and it feels cooler to the hand that was holding the warm one. The hands are still feeling the temperature, but your brain gets confused.


Did you know that our skin does not have receptors to indicated burning hot? This sensation is actually created by three different receptors which fire at the same time: pain, cold, and warm. This explain why to some people, very hot things actually feel cold. If you could prepare a group of alternating hot and cold metal bars, touching them with your fingers would be an odd experience. Your brain will think they are too hot to touch and will tell you to pull away your hand!


Exercises


  1. Does the temperature of the middle glass feel warmercooler, or the same when you touch it with your hand that was holding the warm glass?
  2. What does your hand that was touching the cold glass feel when it touches the middle glass?
  3. What do you feel when both hands are on the middle glass?
  4. Why do you think your hands are not the best instruments for determining temperature?
  5. Which nerve endings help to detect changes in temperature?

[/am4show]


Skin has another function that it vital to your survival: temperature regulation. Being exposed to high temperatures causes your skin’s pores to open up and release sweat onto your body. This helps cool us off by the resulting process of evaporation.


Your pores will close in extremely cold temperatures. Also, the body stops blood flowing to the skin in order to conserve heat for the important vital organs and their processes.


In this lab, we study the moisture that your skin produces – even when you are not aware of it!


[am4show have=’p8;p9;p11;p38;p92;p29;p56;p81;p87;’ guest_error=’Guest error message’ user_error=’User error message’ ]


Here’s what you need


    • 1 gallon baggie
    • 1 string, 12 inches long
    • 1 assistant
    • 1 clock


Download Student Worksheet & Exercises


Here’s what you do


  1. Record a description of how moist your hand is prior to putting it in the baggie. This is at 0 minutes.
  2. Put your hand in the baggie and ask your assistant to tie it closed around your wrist. No air should be able to get in or out of the baggie. Record the time for tracking purposes.
  3. Check your hand every 10 minutes for a half hour. With each observation note the amount of moisture that has accumulated. Record your observations at 10 minutes, 20 minutes, and 30 minutes.
  4. What do you think will happen if you go outside and run around with your hand inside the bag? Try it and see if it accelerates the process.

What’s going on?


Sweat glands are always producing moisture on our skin. Most of the time, we don’t really notice this process. By enclosing your hand in plastic, this moisture can’t evaporate as it normally would. The bag collects and condenses it.


It is interesting to note that your body can produce up to a gallon of water in extremely hot temperatures – 110 degrees Fahrenheit and higher. This is one of the reasons it’s so important to stay hydrated in extreme heat!


Exercises


  1. How is sweat released from the body through the skin?
  2. How does sweat help to cool the body?
  3. What did you observe at the 30 minute mark in your experiment?
  4. What is evaporation and how is it different from condensation?

[/am4show]


This lab has two parts. First, you will learn a bit about how specific chemicals react in a specific manner. And next, you will learn a bit of biology: the structure of bird bones and the minerals that compose them.


[am4show have=’p8;p9;p11;p38;p92;p29;p56;p81;p87;’ guest_error=’Guest error message’ user_error=’User error message’ ]


Here’s what you need


    • 4 fresh chicken wing bones, meat removed
    • 1-16 oz. bottle of distilled white vinegar
    • 2-12 oz. plastic cups
    • 1 fresh egg
    • 1 spoon


Here’s what you do


  1. Make sure all the meat and cartilage is gone. Check near the joints for soft, white-gray matter and clean it off. Now break a bone in half. What does the inside look like? Note the color and hardness for your data. Be sure to wash your hands well after studying the bones.
  2. Pour some vinegar in a cup and gently place the bones in the solution. Add more to cover the bones, if needed. Put the cup in a spot where it won’t be disturbed for a few days. It will take a while for the vinegar to fully react with the bones.
  3. Take a look at the egg and note its color and hardness in your experiment data. Now carefully place the fresh egg in the second cup and pour vinegar over it. Be sure to completely cover the egg. You will need to cover the egg or keep an eye on it. The vinegar will evaporate and will need to be replenished. This portion of the experiment will take around 24 hours.
  4. Use the spoon to remove the egg after 24 hours has passed. Set it down and gently push on it. What happened to the part that used to be shell? Check your notes from the previous day and note any changes that have occurred in the color and hardness of the egg after it has been in the vinegar.
  5. After a few more days, take the chicken bones out of the vinegar. Bend them and see what happens. Do they break as easily as they did the first day? Look at your data and compare the color and hardness of the bones now to how they looked on the first day. Record the changes you observe.

What’s going on?


Calcium is the mineral in both bones and eggshells that makes them hard.  Putting the bones and egg in vinegar caused the calcium to begin to react. Vinegar leached calcium from both the bones and the shell, which caused their hardened structure to become weak.


Did you know that your bones and teeth contain 99% of the calcium in your body? About ¾ of your bones are compact, but the remaining ¼ of them is spongy. But do you think your bones or your teeth are harder? The second hardest material in your entire body is the compact, hard bone. Your teeth enamel is actually the hardest material.


[/am4show]


This experiment has two parts. For the first half, you will mix two chemicals that will produce heat and gas. The temperature receptors in your skin will be able to detect the heat. Your ears will detect the gas at it vibrates and escapes its container.


In the second portion you will demonstrate a characteristic in a chemical reaction. For this experiment, it will be an endothermic reaction, which is the absorption of heat energy. This type of reaction is easy to notice because it makes things cold to touch.  The chemical you will be using, ammonium nitrate, is actually used in emergency cold packs.


[am4show have=’p8;p9;p11;p38;p92;p29;p56;p81;p87;’ guest_error=’Guest error message’ user_error=’User error message’ ]


Here’s what you need


    • 1 measuring cup
    • 1 bottle of calcium chloride
    • 1 bottle of ammonium nitrate
    • 2 resealable baggies
    • water


Download Student Worksheet & Exercises


Here’s what you do


  1. Put about ½ cup of warm water in one of the baggies.
  2. Add about a third of an ounce of calcium chloride to the water. Close the baggie and start to roll around the pellets with your fingers. As they start to dissolve, the chemical also starts to increase the temperature of the water.
  3. Now dispose of these ingredients down the drain. Flush with lots of running water.
  4. Open the ammonium nitrate and fill its cap with pellets. Put these in the second baggie.
  5. Start to pinch the ammonium nitrate through the plastic bag and check for a temperature change. Does anything happen in the absence of water?
  6. Now put a small amount of water (about room temperature) into the bag. Fill it about ¼ of the way full.
  7. Hold the bottom of the bag with both hands and begin to rock it back and forth a bit. This should start to dissolve the pellets. With your hands on the water, you should start to note a temperature decrease. If this doesn’t work, roll the pellets around as you did with the calcium chloride.
  8. When you are finished, you can pour the contents out on to brown spot of grass (because ammonium nitrate is a main ingredient in many fertilizers). Or if you would prefer, just empty the contents down the drain.

What’s going on?


Calcium chloride splits into calcium ions and chloride ions when it is mixed with water. As this occurs, energy is released in the form of heat. This is the same heat energy you felt when holding the baggie and rubbing the pellets.


Adding ammonium nitrate to water causes both its ammonium and nitrate ions to dissolve, which results in heat absorption as iconic bonds are broken. This is an endothermic reaction.


The point of both of these experiments is that the Ruffini’s endings in your skin are what allow the heat and/or cold data to be collected and sent to your brain for translation.


Your skin has many other parts in addition to its receptors. Some examples include hair, blood vessels, and sweat glands. Blood vessels and sweat glands respond to heat and cold, helping to control your body’s temperature. You are probably familiar with how sweat glands help to cool you down (evaporation), but how about blood vessels?  As an example,  if you run around outside on a hot day, your cheeks get red  because the blood vessels on your skin’s surface have dilated, which brings more blood to the surface and allows the body to cool its insides a bit.


Exercises


  1. Which chemical when mixed with water was an endothermic (absorbed heat and felt cold) reaction?
  2. Which chemical resulted in an exothermic reaction (gave off heat)? Why does this happen?
  3. What are ways that the human body can detect temperature?

[/am4show]


In addition to looking pretty neat with all those loops and whirls, your fingertips are great at multitasking. The skin on them has a ton of receptors that help us to gather a lot of information about our environment such as texture, movement, pressure, and temperature.


This experiment will test your ability to determine textures by using touch receptors. You will use shoeboxes with holes cut into them to make texture boxes. Each box will have a textured surface that you can feel, but not see. Through the receptors in your fingers, you will determine whether the surface is rough, waxy, soft, or smooth.


[am4show have=’p8;p9;p11;p38;p92;p29;p56;p81;p87;’ guest_error=’Guest error message’ user_error=’User error message’ ]


Here’s what you need


    • 4 shoeboxes with lids
    • 1 soup can
    • 1 pencil
    • 1 pair of scissors
    • 1 sheet of sandpaper
    • 1 sheet of wax paper
    • 1 sheet of flannel fabric
    • 1 sheet of plastic
    • 1 glue gun
    • 1 pair of gloves
    • partners


Download Student Worksheet & Exercises


Here’s what you do


  1. Using the soup can as a guide, draw a circle at the end of a shoebox.  Then use the scissors to cut out the circle.
  2. Cut a piece of sandpaper to fit the bottom of the shoebox (a ruler might also be handy to get an exact measurement). Glue the sandpaper to the inside bottom of the shoebox. Put the lid on the box and label it as Box 1.
  3. Repeat the first two steps for each of the boxes, putting the wax paper, flannel, and plastic in boxes 2-4. Be sure to label each.
  4. Now ask a partner to reach into each box, feel the texture, and describe it as rough, waxy, soft, or smooth. Record their answer. Use undecided if they aren’t sure.
  5. Once your friend has identified a texture and you have recorded their response, open the box so that you can both see what material they have evaluated. Be sure to note in your data whether your friend was correct with a Y or N. Repeat steps 4 and 5 for each of the boxes.
  6. Have your friend leave the room or look away so that you can rearrange the box lids. Then give them the gloves to wear and repeat the test using gloved hands. Record the data and compare the effectiveness of gloved hands. Does this have an impact on the touch receptors?

What’s going on?


The fabric of the gloves interferes with the ability of our touch receptors to function fully. Our fingertips are feeling the fabric of the gloves on their receptors and this makes it difficult to perceive what they are touching through the gloves.


We have 5 different types of receptors. They are types of nerve endings in our skin and are connected to our brains.


  • The ones that respond to deep pressure are called Pacini’s endings and they are embedded deep in our skin.
  • Merkel’s endings detect moderate pressure.
  • Meissner’s ending respond to vibrations and light pressure.
  • Ruffini’s ending, which detect changes in temperature, can also respond to pressure.
  • Our pain receptors are called free endings.

Exercises


  1. Name, in order, the three main layers of skin.
  2. Which layer of skin contains the mechanoreceptors? Name two more items in this layer.
  3. Name the five types of nerve endings and their specialization.

[/am4show]


Did you know that the patterns on the tips of your fingers are unique? It’s true! Just like no two snowflakes are alike, no two people have the same set of fingerprints. In this experiment, you will be using a chemical reaction to generate your own set of blood-red prints.


[am4show have=’p8;p9;p11;p38;p92;p29;p56;p81;p87;’ guest_error=’Guest error message’ user_error=’User error message’ ]


Here’s what you need


  • 1 oz. bottle of baking soda or sodium carbonate (washing soda)
  • water
  • 1 sheet of goldenrod paper
  • 1 paper towel
  • 1 magnifying lens


Download Student Worksheet & Exercises


Here’s what you do


  1. Pour a couple teaspoons of the baking soda (sodium carbonate) into a cup of water. Swish your right index finger in the damp baking soda and then roll that finger on the goldenrod paper. This should leave a bright red fingerprint on the paper. Label it right index.
  2. Continue the procedure for each finger on both hands to make a full set of prints. Be sure to label each fingerprint as you make it to identify which print goes to each finger. Don’t forget to make prints of your thumbs!
  3. Compare your prints to the basic patterns in the guide. Check for features such as whorls or loops and label them appropriately on your prints. Use abbreviations such as A for accidental, PW for plain whorl, and DL for double loop.
  4. After you have identified the dominant pattern on each of your fingertips, prepare a simple chart for each hand to record the data by finger.
  5. When you are finished studying your own prints, ask a volunteer to let you make prints of their fingers.

What’s going on?


Goldenrod paper is made using phenolphthalein, a chemical that turns red when exposed to materials with relatively high pH. Baking soda (or sodium bicarbonate) is a base which has a pH of about 8.5. Rolling your baking soda covered fingers on the goldenrod paper creates a chemical reaction which produces a red fingerprint.


Exercises


  1. What are the three main types of patterns on fingerprints? Describe each.
  2. How do fingerprints have the potential to help solve crime?
  3. Why does baking soda (or washing soda) show up red on the paper?
  4. What kind of pH do bases have?
  5. What kind of reaction do we see when the red fingerprints show up on the paper?

[/am4show]


Your body moves when muscles pull on the bones through ligaments and tendons. Ligaments attach the bones to other bones, and the tendons attach the bones to the muscles.


If you place your relaxed arm on a table, palm-side up, you can get the fingers to move by pushing on the tendons below your wrist. We’re going to make a real working model of your hand, complete with the tendons that move the fingers! Are you ready?


[am4show have=’p8;p9;p11;p38;p92;p29;p56;p81;p87;’ guest_error=’Guest error message’ user_error=’User error message’ ]


Here’s what you need:


  • five flexible straws
  • scrap of cardboard (at least as big as your hand)
  • five rubber bands
  • 5 feet of string or thin rope (and a lighter with adult help if you’re using nylon rope)
  • hot glue with glue sticks
  • scissors
  • razor


Download Student Worksheet & Exercises


Exercises


  1. What types of muscles are connected to our bones?
  2. Which type of connective tissue connects our muscles to our bones?
  3. What do extensor tendons in our wrist do?
  4. What do flexor tendons do?

[/am4show]


A gram of water (about a thimble of water) contains 1023 atoms. (That’s a ‘1’ with 23 zeros after it.) That means there are 1,000,000,000,000,000,000,000,000 atoms in a thimble of water! That’s more atoms than there are drops of water in all the lakes and rivers in the world.

Nearly all the mass of an atom is in its nucleus which occupies less than a trillionth of the volume of the atom. They are very dense. If you could pack nuclei like marbles, into something the size of a large pea, they would weigh about a billion tons! That’s 2,000,000,000,000 pounds! More than the weight of 20,000 battle ships! That’s a heavy pea!


[am4show have=’p8;p9;p11;p38;p92;p13;p40;p80;’ guest_error=’Guest error message’ user_error=’User error message’ ]


The distance from the nucleus to the electron is 100,000 times the diameter of the nucleus itself. So, if you were to somehow blow up a nucleus to be the size of a golf ball, the electron would be 8,300 feet away or more than 1.5 miles from the golf ball. If you put that golf ball on the ground, you would need to climb to the top of five and a half Sears Towers to get to the electron!


Danish physicist David Bohr, a famous scientist who won the Nobel Prize in Physics in 1922 for his work with the atomic structure.

Let’s compare this to the Sun and the Earth. We’ll be doing more about distances and sizes when we do our lesson in Astronomy, but for now, we’ll just use this quick example:


If you shrank the Sun down to a golf ball, the Earth would only be 9 inches away. Nine inches vs. 1.5 miles! There is 11,000 times more distance  between the nucleus and an electron than there is between the Sun and the Earth! This means that if they were all the same size (to scale), then the Earth-Sun distance is waaaay smaller than the electron-nucleus distance!


Here’s one last example – if you enlarged the hydrogen atom (one proton in the nucleus and one electron in a shell) so that it’s the size of the Earth, the electron would be skimming along on the surface of the Earth while the nucleus (just a proton in this instance) would be only the size of a basketball deep inside the core. The rest, from the core to the surface, is empty space.  (Look out your window – can you even see the curvature of the Earth from where you are?  Probably not – it’s just too vast a distance!)


Are you mind-boggled? What this is basically saying, is that matter is virtually empty. The nucleus, which is incredibly tiny and quite heavy for it’s size, is outrageously far away from its electrons. An atom has almost nothing in it and yet everything we come in contact with is made of this ‘nothing’! I don’t know about you, but I find that fantastic!


We will talk more about this wacky atom thing and we’ll get into more detail about the even wackier electron. In the meantime, try to think about everything as a bunch of atoms. The next time you drink milk, you’re drinking atoms. The next time you feel wind, you’re feeling atoms. A lot of things become a bit clearer if you think of objects as being nothing more than bunches of small particles stuck together.


[/am4show]


This experiment is for advanced students. This lab builds on concepts from the previous carbon dioxide lab.


Limewater….carbon dioxide…indicators. We don’t know too much about these things. Sure, we know a little. Carbon dioxide is exhaled by us and plants need it to grow. Burning fossil fuels produces carbon dioxide.


Indicators…something we observe that confirms to us that something specific is happening. Lime water turns cloudy and forms a precipitate in the presence of carbon dioxide. Blue litmus paper turns red in the presence of an acid. The dog barking at the door and dancing around indicates that you better let the dog out, and quick, to avoid….a pet spill?


[am4show have=’p8;p9;p11;p38;p92;p52;p68;p80;’ guest_error=’Guest error message’ user_error=’User error message’ ]


Materials:


  • Limewater from a previous lab (MSDS)
  • One-hole rubber stopper
  • 900 bend glass tubing
  • Test tube rack
  • 2 Test tubes
  • Sodium hydrogen sulfate (NaHSO4) (MSDS) Sodium hydrogen sulfate is very toxic. Respect it, handle it carefully and responsibly. Do not take it for granted.
  • Sodium carbonate (Na2CO3) (MSDS)

NOTE: Be very careful when handling the sodium hydrogen sulfate – it’s highly corrosive and dangerous when wet.  Handle this chemical only with gloves, and be sure to read over the MSDS before using.


When pouring our limewater into the test tube, be careful! Limewater is dangerous to your skin and your nasal passages. Pour just the limewater into the test tube, not any solids that may have gotten into the limewater container.


A chemical reaction will occur between sodium hydrogen sulfate, sodium carbonate, and water. We could have used any combination of chemicals for this lab that will produce carbon dioxide (CO2), but these chemicals are already in our kits, so……


The reaction will create a gas, that gas, we think, is carbon dioxide. If we are right, we will be bubbling CO2 gas into lime water. If we observe the limewater becoming cloudy and if a precipitate forms on the bottom of the test tube, that is a positive indicator that CO2 is present.


C3000: Experiment 31


Here’s what’s going on in this experiment:


Some combination of chemicals will produce carbon dioxide –> CO2 + ?


Notice that specific chemicals are not in the chemical equation? The actual chemistry of the chemical reaction is not our focus in this lab. We want to experience how an indicator can test for a particular compound or element.


Instead of sodium hydroxide and sodium carbonate and water, we could choose to combine vinegar and baking soda for example. Even simple household supplies can be chemicals for our experiments.


Cleanup: We are going to clean everything thoroughly after we finish the lab. After cleaning with soap and water, rinse thoroughly. Chemists use the rule of “three” in cleaning glassware and tools. After washing, chemists rinse out all visible soap and then rinse three times more.


Storage: Place cleaned tools and glassware in their respective storage places.


Disposal: Liquids can be washed down the drain. Solids are thrown in the trash.


[/am4show]