On a clear night when Jupiter is up, you’ll be able to view the four moons of Jupiter (Europa, Ganymede, Io, and Callisto) and the largest moon of Saturn (Titan) with only a pair of binoculars. The question is: Which moon is which? This lab will let you in on the secret to figuring it out.


You get to learn how to locate a planet in the sky with a pair of binoculars, and also be able to tell which moon is which in the view.


Materials


  • Printout of corkscrew graph
  • Pencil
  • Binoculars (optional)

[am4show have=’p8;p9;p17;p44;p90;’ guest_error=’Guest error message’ user_error=’User error message’ ]


Download Student Worksheet & Exercises


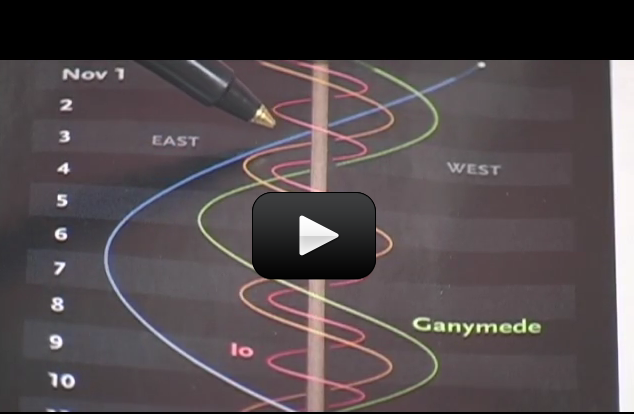
  1. Look at your corkscrew satellite graph. These are common among astronomers for both Saturn and Jupiter. Notice how Saturn has a lot more wavy lines than Jupiter. We’re going to focus on Jupiter for the first part of this lab. Jupiter’s graph is the one on the left with Ganymede as one of the moons.
  2. The wavy lines represent four of Jupiter’s biggest moons: Ganymede, Callisto, Europa, and Io. The central two lines for a band is the width of Jupiter itself. If you see any gaps in the wavy lines, those are times when the moon is behind Jupiter. Each bar across that corresponds to a number is an entire day. The width of the column represents how far away each moon is from Jupiter. Notice at the top it says East and West.
  3. Draw a circle that represents Jupiter.
  4. Notice the largest waves are made by Callisto. Who makes the smallest waves? (Io.)
  5. Look at Dec 4th. Which moons are on which side of Jupiter? (Ganymede is the furthest east, and Io is closer to the planet, still on the east side. On the west, Europa is closer to Jupiter than Callisto.)

What’s Going On?

Jupiter’s Rings and Moons


Jupiter’s moons are threadlike when compared with Saturn’s. Also, unlike Saturn’s rings, Jupiter’s rings come from ash spewed out from the active volcanoes of its moons. Since Jupiter is so large, its gravity likes to catch things. When a volcano shoots its ash-snow up, Jupiter grabs it and swirls it in on itself. The moons are constantly replenishing the rings, which is why they are so much smaller than Saturn’s and much harder to detect (you won’t see them with binoculars or a backyard telescope).
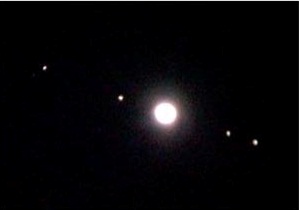

moons-jupiterIf you’re doing the binocular portion of this lab in the evening, the numbers on binoculars refer to the magnification and the lens at the end. For example, 7×50 means you’re viewing the sky at 7X, and the lenses are at 50mm. Most people can easily hold up to 10x50s before their arms get tired. Remember, you’re looking up, not out or down as in normal terrestrial daytime viewing.


Saturn’s Rings and Moons


Galileo Galilei was the first to point a telescope at the sky, and the first to glance at the rings of Saturn in 1610. In the 1980s, the Voyager 1 and Voyager 2 spacecraft flew by, giving us our first real images of the rings of Saturn. Some of the biggest mysteries in our solar system are: What are the rings made up of, and why?


The Cassini-Huygens Mission answered the first question: The rings are made of billions of particles ranging from dust-sized icy grains to a couple of mountain-sized chunks. Actually, Saturn’s rings are an optical illusion. They are not solid, but rather a blizzard of water-ice particles mixed with dust and rock fragments, and each piece orbits Saturn like a little a moon. These billions of particles race around Saturn in tracks, and are herded into position by moons that also orbit within the rings (“shepherd” moons). Shepherd moon Pan orbits in the Encke gap, Daphnis orbits in the Keeler gap, Atlas orbits in the A ring, Prometheus in the F ring, and Pandora in the F ring. These moons keep the gaps open with their gravity.


The second question is harder to answer, but the latest news is that the rings are pieces of comets, asteroids or shattered moons that broke apart before they ever reached Saturn. Although each ring orbits at a different speed around the planet, the Cassini spacecraft had to slow down to 75,000 mph before it dropped into the rings to orbit around the planet.


While the rings are wide enough to see with a backyard telescope, the main rings (A, B and C) are paper-thin, only 10 meters (33 feet) thick.


Uranus and Neptune are called ice giants because of the amounts of ice in their atmospheres. Their atmospheres are also made of mostly hydrogen and helium.


Cassini found that a great plume of icy material blasting from the moon Enceladus is a major source of material for the expansive E ring. Additionally, Cassini has found that most of the planet’s small, inner moons appear to orbit within partial or complete rings formed from particles blasted off their surfaces by impacts of micrometeoroids.


Exercises


  1. Find a date that has all four moons on one side of Jupiter.
  2.  When is Callisto in front of Jupiter and Io behind Jupiter at the same time?
  3. Are the images you’ve drawn in the table what you’d expect to see in binoculars, or are they upside down, mirrored, or inverted?

[/am4show]


If you want to get from New York to Los Angeles by car, you’d pull out a map. If you want to find the nearest gas station, you’d pull out a smaller map. What if you wanted to find our nearest neighbor outside our solar system? A star chart is a map of the night sky, divided into smaller parts (grids) so you don’t get too overwhelmed. Astronomers use these star charts to locate stars, planets, moons, comets, asteroids, clusters, groups, binary stars, black holes, pulsars, galaxies, planetary nebulae, supernovae, quasars, and more wild things in the intergalactic zoo.


How to find two constellations in the sky tonight, and how to get those constellations down on paper with some degree of accuracy.


Materials


  • Dark, cloud-free night
  • Two friends
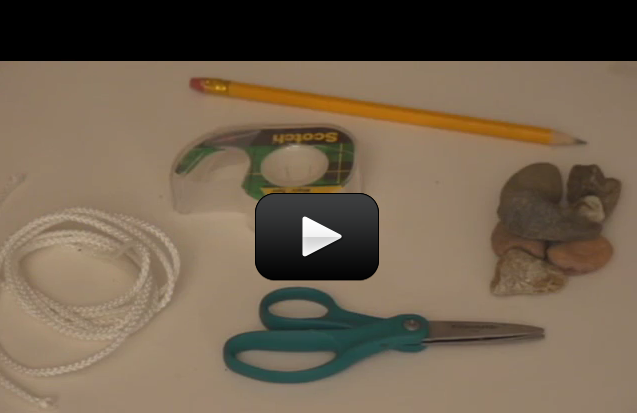
  • String
  • Rocks
  • Pencil

[am4show have=’p8;p9;p17;p44;p105;p67;p73;p96;’ guest_error=’Guest error message’ user_error=’User error message’ ]


Download Student Worksheet & Exercises


  1. Tape your string to the pencil.
  2. Loosely wrap the string around your finger several times so that the tip of the pencil is about an inch above the ground.
  3. Find a constellation. Point to a star in the constellation.
  4. Have a second person place a rock under the pencil tip.
  5. When they’ve placed the rock in position, point to another star.
  6. Have a second person place a rock under the pencil tip again.
  7. Repeat this process until all the stars have rocks under their positions.
  8. You should see a small version of the constellation on your paper.

What’s Going On?

People have been charting stars since long before paper was invented. In fact, we’ve found star charts on rocks, inside buildings, and even on ivory tusks. Celestial cartography is the science of mapping the stars, galaxies, and astronomical objects on a celestial sphere.


Celestial navigation (astronavigation) made it possible for sailors to cross oceans by sighting the Sun, moon, planets, or one of the 57 pre-selected navigational stars along with the visible horizon.


Watch the video that shows how the stars appear to move differently, depending on which part of the Earth you’re viewing from. What’s the difference between living on the equator or in Antarctica (explained in video)?


The first thing to star chart is the Big Dipper, or other easy-to-find constellation (alternates: Cassiopeia for northern hemisphere or the Southern Cross for the southern hemisphere). The Big Dipper is always visible in the northern hemisphere all year long, so this makes for a good target.


Use glow–in-the-dark stars instead of rocks, and charge them with a quick flash from a camera (or a flashlight). Keep your hand as still as you can while the second person lines the rock into position. You can also unroll a large sheet of (butcher or craft) paper and use markers to create a more permanent star chart.


Exercises:


  1. If you have constellations on your class ceiling, chart them on a separate page marking the positions of the rocks with X’s.
  2. Tonight, find two constellations that you will chart. Bring them with you tomorrow using the technique outlined above in Experiment.

[/am4show]


Although urine is sterile, it has hundreds of different kinds of wastes from the body. All sorts of things affect what is in your urine, including last night’s dinner, how much water you drink, what you do for exercise, and how well your kidneys work in the first place. This experiment will show you how the kidneys work to keep your body in top shape.

[am4show have=’p8;p9;p29;p56;p81;p87;’ guest_error=’Guest error message’ user_error=’User error message’ ]


Materials


  • 1 liter of water per student
  • 1 can of soda per student
  • 1 sports drink, like Gatorade, per student
  • Red food dye
  • Chalk (or a handful of sand)
  • Coffee filter or cheesecloth
  • pH paper strips
  • Disposable cups
  • Clean glass jar
  • Rubber band
  • Measuring cups

If you are doing the optional Third Bonus Experiment:


  • solution your teacher has prepared for you
  • pipe cleaners
  • cleaned out jar or bottle (pickle, jam, or mayo jar)
  • water
  • borax

Download Student Worksheet & Exercises


Experiment

First Experiment: How Quickly Do the Kidneys Process Fluids?


  1. Drink a liter of water quickly (in less than five minutes).
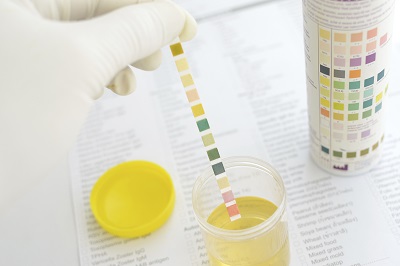
  2. Wait 20 minutes (you can start on the second part of this lab while you wait) and then collect your urine in a disposable cup in the bathroom and use a pH testing strip to test the pH by dipping it in the cup.
  3. Repeat four times so that you have four samples collected 20 minutes apart.
  4. Repeat steps 1-3  for two different liquids, such as a sports drink and a soda.
  5. Complete the data table for all three liquids.

Second Experiment: Kidney Filtration


  1. Crush a piece of chalk and place it in a clean glass jar. (You can alternatively use a handful of sand from the playground if you don’t have chalk.)
  2. Fill the jar partway with water.
  3. Add a few drops of red food coloring to the water.
  4. The chalk (or sand) represents toxins in the blood. The water represents the blood.
  5. Place a coffee filter (or cheesecloth) on top of the jar and secure with a rubber band. This coffee filter is your kidney.
  6. Tip the jar over a disposable cup and pour the contents into the disposable cup. This is the kidney filtering the blood.
  7. Observe what the filter traps and what it doesn’t and record your observations in the data table.

BONUS Third Experiment: Kidney Stones


  1. A kidney stone is something that develops in the urinary tract from a crystal. Crystals start from “seed crystals” that grow when placed in the right solution.
  2. Use a pipe cleaner to create a shape for crystals to cling to (suggestion: cut into 3 lengths and wrap around one another). Curl the top pipe cleaner around a pencil, making sure the shape will hang nicely in the container without touching the sides.
  3. Add 2 cups of water and 2 cups of borax (sodium tetraborate) into a pot. Heat, stirring continuously for about 5-10 minutes. Do not boil, but only heat until steam rises from the pan.
  4. When the borax has dissolved, add more, and continue to do so until there are bits of borax settling on the bottom of the pan that cannot be stirred in (It may be necessary to stop heating and let the solution settle if it gets too cloudy). You’ll be adding in a lot of borax!  You have now made a supersaturated solution. Make sure your solution is saturated, or your crystals will not grow.
  5. Wait until your solution has cooled to about 130oF (hot to the touch, but not so hot that you yank your hand away). Pour this solution (just the liquid, not the solid bits) into the jar, and add the pipe cleaner shape. Make sure the pipe cleaner is submerged in the solution. Put the jar in a place where the crystals can grow undisturbed overnight, or even for a few days. Warmer locations (such as upstairs or on top shelves) are best.
  6. NOTE: These crystals are NOT edible! Please keep them away from small children and pets!


Kidneys Process Fluids Data Table

Record the pH and volume (did you urinate a lot, medium, or little?)


Drink Type


20 min


40 min


60 min


80 min


Urine tests look at different components of urine. Most urine tests are done to get information about the body’s health and clarify problems that it might be having.  There are over 100 different kinds of urine tests that can be done. Depending on the test, scientists look for different things.


The most obvious, and the one you can do yourself at home, is to look at the color of urine, which is normally clear. Many different things affect urine color, and the darker it is, the less water there is in it. Vitamin B supplements can turn it bright yellow. If you like to eat blackberries, beets or rhubarb, then your urine might be red-brown.


The next thing to check is smell. Since urine doesn’t smell much, it’s a signal if it suddenly takes on an unusual odor. For example, if you have an E. coli infection, your urine will take on a bad odor.


Scientists also check the specific gravity, which is a measure of the amount of substances in the urine. The higher the specific gravity number measures, the more substance is in the urine. For example, when you drink a lot of water, your kidneys add that water into the urine, which makes for a lower the specific gravity number. This test shows how well the kidneys balance the amount of water in urine. The specific gravity for normal urine is between 1.005-1.030.


pH is a measure of how basic or acidic something is, and for a urine test, it’s the pH of the urine itself.  A pH of 7 is neutral, a 9 is strongly basic, and a 4 is strongly acidic. Using a strip of pH paper will tell you how basic or acidic your urine is. Normally, pH is between 4.6-8.0 for urine.


Protein is not supposed to be in the urine, unless you’re sick with a fever, just had a hard workout session, or are pregnant. Scientists look for protein to be present in the urine to detect certain kinds of kidney diseases.


Glucose is sugar in the blood, and usually there’s no glucose in urine, or if there is, it’s only a tiny bit. When scientists detect glucose in the urine, it means that the body’s blood sugar levels are very high, and they know they need to look into things further.


When scientists find nitrites, they know that bacteria are present, especially the kind that cause a urinary tract infection because bacteria make an enzyme that changes nitrates to nitrites in the urine.


Strong, healthy people will have a couple of small crystals in their urine. If scientists find a large number of crystals, then they start looking for kidney stones. If they don’t find kidney stones, then they start looking at how the body metabolizes food to see if there’s a problem.


Most adults make about 1-2 quarts of urine each day, and kids make about 0.6-1.6 quarts per day


Kidneys Filtration Data Table

Amount of Chalk or Sand


Amount of Water


Color of Water after Mixed


Amount of Solids Filtered
Out by Cheesecloth


Questions:


  1. Which fluid produced more urine for the first experiment?
  2. Did the caffeine solutions cause the calcite stones to shrink or have no effect?
  3. What does pouring the chalky water through a coffee filter show?
  4. What are kidney stones and how are they formed?

[/am4show]


When high energy radiation strikes the Earth from space, it’s called cosmic rays. To be accurate, a cosmic ray is not like a ray of sunshine, but rather is a super-fast particle slinging through space. Think of throwing a grain of sand at a 100 mph… and that’s what we call a ‘cosmic ray’. Build your own electroscope with this video!


[am4show have=’p8;p9;p17;p44;p76;p90;p58;’ guest_error=’Guest error message’ user_error=’User error message’ ]
Materials:


  • Clean glass jar with a lid
  • Wire coat hanger and sand paper
  • Aluminum foil
  • Vice grips or a hacksaw
  • Scissors
  • Balloon or other object to create a static charge
  • Hot glue gun (optional)


Download Student Worksheet & Exercises


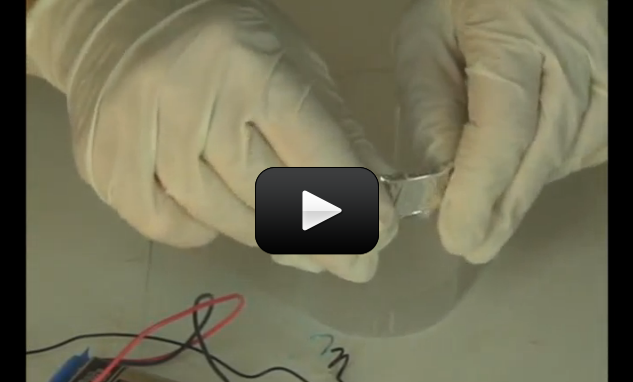
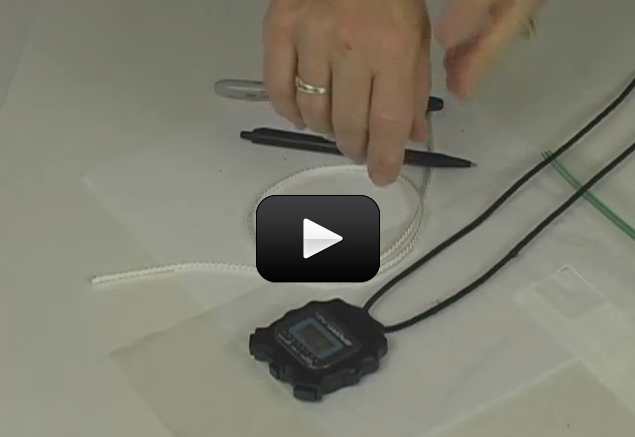
Troubleshooting: This device is also known as an electroscope, and its job is to detect static charges, whether positive or negative.  The easiest way to make sure your electroscope is working is to rub your head with a balloon and bring it near the foil ball on top – the foil “leaves” inside the jar should spread apart into a V-shape.

Exercises


  1. How does this detector work?
  2. Do all particles leave the same trail?
  3. What happens when the magnet is brought close to the jar?

[/am4show]


The Moon appears to change in the sky. One moment it’s a big white circle, and next week it’s shaped like a sideways bike helmet. There’s even a day where it disappears altogether. So what gives?


The Sun illuminates half of the Moon all the time. Imagine shining a flashlight on a beach ball. The half that faces the light is lit up. There’s no light on the far side, right? For the Moon, which half is lit up depends on the rotation of the Moon. And which part of the illuminated side we can see depends on where we are when looking at the Moon. Sound complicated? This lab will straighten everything out so it makes sense.


Materials


  • ball
  • flashlight

[am4show have=’p8;p9;p17;p44;p105;p67;p90;’ guest_error=’Guest error message’ user_error=’User error message’ ]


This first video will show you how the moon changes it’s appearance over the course of its cycle:


This video will show you how to demonstrate why the moon changes it’s appearance over the course of its cycle:


Download Student Worksheet & Exercises


  1. This lab works best if your room is very dark. Button down those shades and make it as dark as you can.
  2. Assign one person to be the Sun and hand them the flashlight. Stay standing up about four feet away from the group. The Sun doesn’t move at all for this activity.
  3. Assign one person to be the Moon and hand them the ball. Stay standing up, as you’ll be circling the Earth.
  4. The rest of the people are the Earth, and they stand or sit right the middle (so they don’t get a flashlight in their eyes as the Moon orbits).
  5. Start with a new Moon. Shine the flashlight above the heads of the Earth. Move the Moon (ball) into position so that the ball blocks all the light from the flashlight. Ask the Earth kids how much light they can see on their side of the Moon (should be none). Which phase of the Moon is this?
  6. Now the Moon moves around to the opposite side of the Earth so that the Earth kids can see the entire half of the ball lit up by the flashlight. Ask the Earth kids how much light they can see on their side of the Moon (should be half the ball). Which phase of the Moon is this?
  7. Now find the positions for first quarter. Where does the Moon need to stand so that the Earth kids can see the first quarter Moon?
  8. Continue around in a complete circle and fill out the diagram. Color in the circles to indicate the dark half of the Moon. For example, the new Moon should be completely darkened.
  9. Now it’s time to investigate why Venus and Mercury have phases. Put the Sun in the center and assign a student to be Venus. Venus gets the ball.
  10. Venus should be walking slowly around the Sun. The Sun is going to have to rotate to always face Venus, since the Sun normally gives off light in every direction.
  11. The Earth kids need to move further out from the Sun than Venus, so they will be watching Venus orbit the Sun from a distance of a couple of feet.
  12. Earth kids: What do you notice about how the Sun lights up Venus from your point of view? Is there a time when you get to see Venus completely illuminated, and other times when it’s completely dark?
  13. Draw a diagram of what’s going on, labeling Venus’s full phase, new phase, half phases, crescent, and gibbous phases. Label the Sun, Earth, and all eight phases of Venus.

Reading


The Sun illuminates half of the Moon all the time. Imagine shining a flashlight on a beach ball. The half that faces the light is lit up. There’s no light on the far side, right? So for the Moon, which half is lit up depends on the rotation of the Moon. And which part of the illuminated side we can see depends on where we are when looking at the Moon. Sound complicated? This lab will straighten everything out so it makes sense.


One question you’ll hear is: Why don’t we have eclipses every month when there’s a new Moon? The next lesson is all about eclipses, but you can quickly answer their questions by reminding them that the Moon’s orbit around the Earth is not in the same plane as the Earth’s orbit around the Sun (called the ecliptic). It’s actually off by about 5o. In fact, only twice per month does the Moon pass through the ecliptic.


The lunar cycle is approximately 28 days. To be exact, it takes on average 29.53 days (29 days, 12 hours, 44 minutes) between two full moons.  The average calendar month is 1/12 of a year, which is 30.44 days. Since the Moon’s phases repeat every 29.53 days, they don’t quite match up. That’s why on Moon phase calendars, you’ll see a skipped day to account for the mismatch.


A second full Moon in the same month is called a blue Moon. It’s also a blue Moon if it’s the third full Moon out of four in a three-month season, which happens once every two or three years.


The Moon isn’t the only object that has phases. Mercury and Venus undergo phases because they are closer to the Sun than the Earth. If we lived on Mars, then the Earth would also have phases.


Exercises


  1. Does the sun always light up half the Moon?
  2. How many phases does the Moon have?
  3. What is it called when the Moon appears to grow?
  4. What is it called when you see more light than dark on the Moon?
  5. How long does it take for a complete lunar cycle?

[/am4show]


Do you have thick or thin hair? Let’s find out using a laser to measure the width of your hair and a little knowledge about diffraction properties of light. (Since were using lasers, make sure you’re not pointing a laser at anyone, any animal, or at a reflective surface.)


[am4show have=’p8;p9;p19;p46;p89;p99;’ guest_error=’Guest error message’ user_error=’User error message’ ]


Light is also called “electromagnetic radiation”, and it can move through space as a wave, which makes it possible for light to interact in surprising ways through interference and diffraction. This is especially amazing to watch when we use a concentrated beam of light, like a laser.


If we shine a flashlight on the wall, you’ll see the flashlight doesn’t light up the wall evenly. In fact, you’ll probably see lots of light with a scattering of dark spots, showing some parts of the wall more illuminated than the rest. What happens if you shine a laser on the wall? You’ll see a single dot on the wall.


In this experiment, we used a laser to discover how interference and diffraction work. We can use diffraction to accurately measure very small objects, like the spacing between tracks on a CD, the size of bacteria, and also the thickness of human hair.


Here’s what you need:


  • a strand of hair
  • laser pointer
  • tape
  • calculator
  • ruler
  • paper
  • clothespin

WARNING! The beam of laser pointers is so concentrated that it can cause real damage to your retina if you look into the beam either directly or by reflection from a shiny object. Do NOT shine them at others or yourself.


Download Student Worksheet & Exercises


  1. Tape the hair across the open end of the laser pointer (the side where the beam emits from)
  2. Measure 1 meter (3.28 feet) from the wall and put your laser right at the 1 meter mark.
  3. Clip the clothespin onto the laser so that it keeps the laser on.
  4. Where the mark shows up on the wall, tape a sheet of paper.
  5. Mark on the sheet of paper the distance between the first two black lines on either side of the center of the beam.
  6. Use your ruler to measure (in centimeters) to measure the distance between the two marks you made on the paper. Convert your number from centimeters to meters (For me, 8 cm = 0.08 meters.)
  7. Read the wavelength from your laser and write it down. It will be in “nm” for nanometers. My laser was 650 nm, which means 0.000 000 650 meters.
  8. Calculate the hair width by multiplying the laser wavelength by the distance to the wall (1 meter), and divide that number by the distance between the dark lines. Multiply your answer by 2 to get your final answer. Here’s the equation:

Hair width = [(Laser Wavelength) x (Distance to Wall)]  / [ (Distance between dark lines) x 0.5 ]


In the video:


  • wavelength was 650 nm = 0.000 000 650 meters
  • distance from the wall was 1 meter
  • the distance between the dark lines was 8 cm = 0.08 m

Using a calculator, this gives a hair width of 0.000 0162 5meters, or 16.25 micrometers (or 0.000 629 921 26 inches). Now you try!


What’s Going On?


The image here shows how two different waves of light interact with each other. When a single light wave hits a wall, it shows up as a bright spot (you wouldn’t see a “wave”, because we’re talking about light).


When both waves hit the wall, if they are “in phase”, they add together (called constructive interference), and you see an even brighter spot on the wall.


If the waves are “out of phase”, then they subtract from each other (called “destructive interference”) and you’d see a dark spot. In advanced labs, like in college, you’ll learn how to create a phase shift between two waves by adding extra travel length to one of the waves along its path.


So why are there dark lines along the light line when you shine your laser on the hair in this experiment? It has to do with something called “interference”.


One kind of interference happens when light goes through a small and narrow opening, called a slit. When light travels through a single slit, it can interfere with itself. This is called diffraction.


When light travels through one of two slits, it can interfere with light traveling through the other slit, a lot like how water ripples can interfere with each other as they travel over the surface of water.


If you’re wondering where the slit is in this experiment, you’re right! There’s no narrow opening that light it traveling through. in fact, light appears to be traveling around something, doesn’t it? Light from the laser must travel around the hair to get to the wall. The way that light does this has to do with Babinet’s Principle, which relates the opposite of a slit (a small object the size of a slit) to the slit itself.


It turns out amazingly enough that when light hits a small solid object, like a piece of hair, it creates the same interference pattern as if the hair were replaced with a hole of the same size. This idea is called Babinet’s Principle.


By measuring the diffraction pattern on the wall, we can measure the width of a small object that the light had to travel around by measuring the dark lanes in the spot on the wall. In our lab, the small object is a piece of your hair!


Questions to Ask:


  1. What would happen to the diffraction pattern if the hair width was smaller?
  2. Using this experiment, how can you tell if the hair is round or oval?
  3. If we redid these experiments with a different color laser instead of red, what changes would you have needed to make?
  4. How can you modify this experiment to measure the width of a track on a CD? Does the track width change as a function of location on the CD? If so, is it larger or smaller near the outside?

Exercises 


  1.  Which light source gave the most interesting results?
  2. What happens when you aim a laser beam through the diffraction grating?
  3. How is a CD different and the same as a diffraction grating?
  4. Why does the feather work?

[/am4show]


Many wonders are visible when flying over the Earth at night, especially if you are an astronaut on the International Space Station (ISS)! Passing below are white clouds, orange city lights, lightning flashes in thunderstorms, and dark blue seas. On the horizon is the golden haze of Earth’s thin atmosphere, frequently decorated by dancing auroras as the video progresses. The green parts of auroras typically remain below the space station, but the station flies right through the red and purple auroral peaks. You’ll also see solar panels of the ISS around the frame edges. The wave of approaching brightness at the end of each sequence is just the dawn of the sunlit half of Earth, a dawn that occurs every 90 minutes, as the ISS travels at 5 miles per second to keep from crashing into the earth.


Video Credit: Gateway to Astronaut Photography, NASA


When two blocks of the Earth slip past each other suddenly, that’s what we call an earthquake! From a physics point of view, earthquakes are a release of the elastic potential energy that builds up. Most energy is released as heat, not as shaking, during an earthquake. 90% of all earthquakes happen along the Ring of Fire, which is the active zone that surrounds the Pacific Ocean.


[am4show have=’p8;p9;p30;p57;p79;p70;’ guest_error=’Guest error message’ user_error=’User error message’ ]


The Earth has four main layers: the hard skin on the surface is the crust which extends only 30 miles; the hot magma section is a soupy mass of rock that extends approximately 1800 miles; and the core which is made out of two parts: the hot liquid metal outer core surrounds the solid nickel -iron inner core.


The plates on the crust float on magma, which is a lot like the consistency tar. The crust has seven main tectonic plates that slide around and can either slide apart from each other (called a normal fault that is usually found on the sea floor), collide into each other (called a thrust fault), or move in opposite directions (strike-slip fault) at different speeds. Where the plates are sliding apart on the sea floor, the temperature of the water can rise over 1200oF. Scientists measure the speeds of the plates moving from 1 to 10 inches per year.


There are three different waves that travel through the planet when an earthquake happens. The first waves are the compression-type “P-waves” (primary waves), which travel through the entire planet, including liquid water and solid rock. Most people don’t notice the P-waves, but they do notice the secondary “S-waves”, which follow 60-90 seconds after the P-waves. Following the S-waves are the surface waves, which are like when you wave a bed sheet up and down.


Earthquakes are detected and measured by many different types of instruments, like strain gauges, creep meters, tilt sensors, seismometers, x-ray imagery, and more. These detectors aren’t perfect, though. Earthquake detectors not only discover earthquakes but also glacier movement, nuclear explosions, meteor impacts, and volcano eruptions!


After you watch the video, click the link to do your seismology calculations to figure out both the epicenter and the magnitude of four different earthquakes:


If you’d like to measure the Earth’s Magnetic Pulse, you can do that here.


[/am4show]


We have done some extensive experiments on taste buds: how they are categorized, what tastes they recognize, and we have even mapped their location on your tongue. But we haven’t yet mentioned this fact: not all people can taste the same flavors!


So today we will check to see if you have a dominant or recessive gene for a distinct genetic characteristic. We’ll do this by testing your reaction to the taste of a chemical called phenylthiocarbamide (or PTC, for short). The interesting thing about PTC is that some people can taste it – and generally have a very adverse reaction. However, some people can’t taste it at all.


[am4show have=’p8;p9;p29;p56;p81;p87;’ guest_error=’Guest error message’ user_error=’User error message’ ]


Here’s what you need


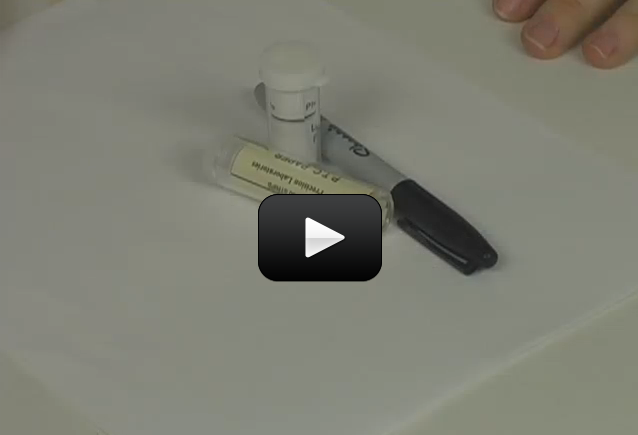
      • 1 vial of PTC paper
      • family members


Download Student Worksheet & Exercises


Here’s what you do


  1. Put the PTC paper in your mouth. If you have the dominant gene, it will usually taste pretty bitter. It might also be sour or even a little sweet. If it tastes like a piece of paper, you have a recessive gene.
  2. After testing your paper, be sure to note whether you are a taster or non-taster.
  3. Now test at least five more people in your family and note their reactions as tasters or non-tasters. Also note their relationship to you.
  4. If you have enough PTC paper, make a genetic tree of your responses. Put Mom and Dad at the center and list you and your siblings branching out beneath them. Then list both sets of grandparents above each of your parents. Circle the names of family members who test positive and leave the negative testers uncircled.

What’s going on?


The gene that determines whether or not you can taste PTC is a part of your DNA (deoxyribonucleic acid). It is the genetic blueprint that you were born with and it determines everything about you: from hair color to the size of your feet. But DNA also plays an important role in how your five senses function. Colorblindness is a genetic deficiency in which a person cannot see colors has a difficult time with distinguishing them. It can range in severity. Some people who are colorblind can’t tell the difference between colors like red and green, but some see no colors at all. Everything looks like a black and white movie to them. Just like colorblindness, our taste sensitivity can vary. Maybe this explains why some people like liver and brussel sprouts and others can’t stand them!


So to relate this to our test, the ability to taste PTC comes from a gene. We know that if both of your parents can taste it, there is a high likelihood that you will be able to taste it, too. About 70%, or 7 out of 10, people can taste it. But what does it mean?  In truth, not a lot. It doesn’t mean you have a highly developed palate or a better sense of taste. It just means you are lucky enough to have inherited a gene that allows you to taste a disgusting, bitter chemical on a piece of paper. Congratulations!


Exercises


  1. What are the tiny hair-like organelles that send taste messages to your brain called?
  2. What are the bumps on your tongue called?
  3. What kind of trait does this experiment test?

[/am4show]


Stethoscopes are instruments used to amplify sounds like your heartbeat. Your doctor is trained to use a stethoscope not only to count the beats, but he or she can also hear things like your blood entering and exiting the heart
and its valves opening and closing. Pretty cool!


Today you will make and test a homemade stethoscope. Even though it will be pretty simple, you should still be able to hear your heart beating and your heart pumping. You can also use it to listen to your lungs, just like your doctor does.

[am4show have=’p8;p9;p29;p56;p81;p87;’ guest_error=’Guest error message’ user_error=’User error message’ ]


Here’s what you need


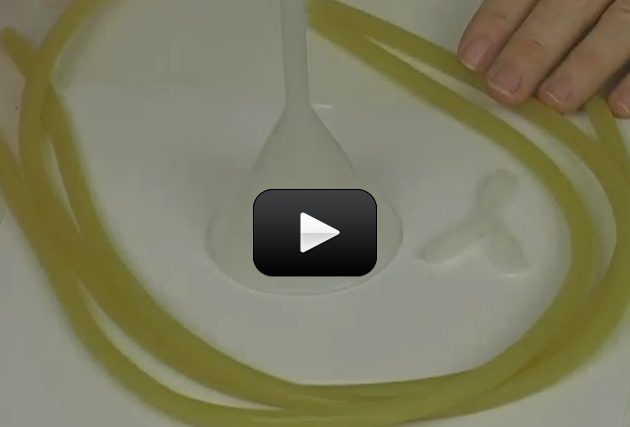
  • 3 12-inch lengths of rubber hose
  • 1 “T” connector
  • 1 funnel


Download Student Worksheet & Exercises


Here’s what you do


  1. Take two pieces of hose and work them onto the top ends of the “T” connector. Put the remaining piece of hose onto the bottom of the “T.” The tool you have made should look like a simple stethoscope, but there are no super cold metal end pieces to worry about with yours.
  2. Put the funnel into the bottom hose – the one hanging from the bottom of the “T” connector. You know have a functioning stethoscope. One word of warning: NEVER YELL INTO THE FUNNEL WHILE THE STETHOSCOPE IS ATTACHED TO SOMEONE’S EARS. THIS COULD DAMAGE EAR DRUMS!
  3. Gently insert the side tubes into your ears. Put the funnel on your chest, just to the left of your breastbone. Listen for your heartbeat. If you are in a sufficiently quiet room you may even be able to hear the opening and closing of your heart’s valves.
  4. After you’ve found your hear, try moving the stethoscope to various areas of your chest and listen for different sounds made by your heart. Ask if you can listen to a friend or family member’s heart. Are the sounds made by another heart the same or different?
  5. Now listen to your lungs, placing the end of the stethoscope just above and to the left of the bottom of your ribcage (Point A), to the right of the bottom of your ribcage (Point B), and just below where your ribs start (point C). Also listen in the middle of your back to the left (point D) and right of your spine (point E). In each spot, take a deep breath and listen for the sound of air entering and exiting the lungs.
  6. For your data records, record how many times your heart beats in a minute while you are quiet and sitting.
  7. Next, do 100 jumping jacks. Sit down immediately and check your heart. Record the number of beats per minute for jumping jacks in your data.
  8. Finally, go outside and run for 3 minutes, non-stop. Then sit and immediately check your heart rate one more time. Record the beats per minute for running in your experiment data.

What’s going on?


Exercise creates a demand for oxygen in your muscles, which is received from work done by your heart and lungs. They get a message from your brain and start to work harder. You can see the proof of their hard work in your recorded data.


Exercises


  1. Approximately how big is your heart?
  2. Which body system is the heart a part of?
  3. What are some of this system’s jobs?
  4. How many chambers does your heart have and what are they called?
  5. How did the heart rate change when you exercised?

[/am4show]


Today you will make a calibrated, or marked, container that you will use to measure your lung capacity. You will fill the calibrated container with water, slide a hose into it, take a really deep breath, and blow in the hose. As the air in your lungs enters the container, it will push out the water inside. Just blow as long and as much as you can, then when you flip the bottle over you will be able to read the amount of water you have displaced. If you will subtract the water displaced from the total amount of water in the bottle, the result is your lung capacity.


[am4show have=’p8;p9;p29;p56;p81;p87;’ guest_error=’Guest error message’ user_error=’User error message’ ]


Here’s what you need


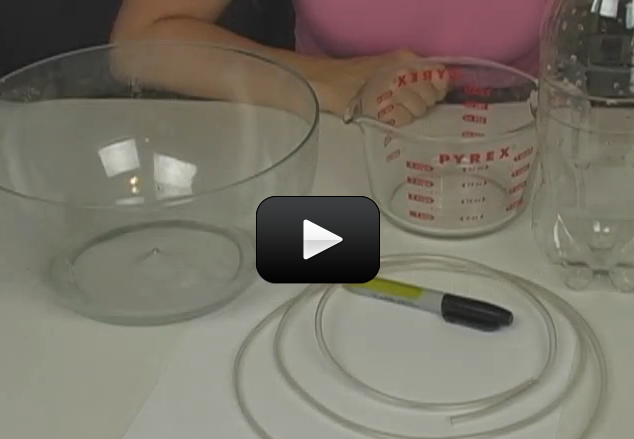
    • 1 2-liter soda bottle
    • 1 black marker, permanent
    • 1 12” length of rubber hose
    • 1 large plastic bowl
    • 1 cup measure


Download Student Worksheet & Exercises


Here’s what you do


  1. Fill the 1 cup measure with water. Pour this into the 2-liter bottle and mark the water level with a line using the black, permanent marker. Also, write 1 cup next to the line. Keep adding water, one cup at a time, marking each new 1 cup increment until you have filled the bottle with water.
  2. Now flip the newly-filled bottle of water over 1 cup measure until the cup is about 1/3 full. Put one end of the rubber hose in the top of the bottle (which should be now under water).
  3. Take a really deep breath – as deep as you can – and blow your breath out into the tube. Continue to blow until you can’t push any more air into the bottle. As air goes in the bottle, it pushes an amount of water equal to its volume out and into the bowl.
  4. Put the lid on the bottle and turn it over before lifting it out of the water. How much water is left in the bottle? Subtract this amount from 8.5 cups. This should be your lung capacity.
  5. Record your lung capacity in your data records as, “My lung capacity is ____________ cups.”  You can convert this number to milliliters by multiplying by 0.24. For example, 19 cups would equal 4.5 liters.

What’s going on?


A person who is 70 years old has breathed about 600,000,000 times in their life. But they have also breathed a lot of air – about 13,000,000 cubic feet. This is enough air to fill 52 blimps!


A man’s lungs have a greater capacity than a woman’s – it’s about 6 liters for a man and 4.2 liters for a woman. And since a grown-up has a greater lung capacity than a kid, it makes sense that a 10-year old might breathe 20 times per minute when a grown-up might breathe only 12 times in a minute.


Exercises


  1. Which body system are your lungs a part of?
  2. What are some other parts in this system?
  3. Explain this system’s major function.

[/am4show]


In this lab, we’re going to investigate the wonders of electrochemistry. Electrochemistry became a new branch of chemistry in 1832, founded by Michael Faraday. Michael Faraday is considered the “father of electrochemistry”. The knowledge gained from his work has filtered down to this lab. YOU will be like Michael Faraday. I imagined he would have been overjoyed to do this lab and see the results. You are soooo lucky to be able to take an active part in this experiment. Here’s what you’re going to do…


You will be “creating” metallic copper from a solution of copper sulfate and water, and depositing it on a negative electrode. Copper is one of our more interesting elements. Copper is a metal, and element 29 on your periodic table. It conducts heat and electricity very well.


Many things around you are made of copper. Copper wire is used in electrical wiring. It has been used for centuries in the form of pipes to distribute water and other fluids in homes and in industry. The Statue of Liberty is a wonderful example of how beautiful 180,000 pounds of copper can be. Yes, it is made of copper, and no, it doesn’t look like a penny…..on the surface. The green color is copper oxide, which forms on the surface of copper exposed to air and water. The oxide is formed on the surface and does not attack the bulk of the copper. You could say that copper oxide protects the copper.


[am4show have=’p8;p9;p25;p52;p91;’ guest_error=’Guest error message’ user_error=’User error message’ ]


Our bodies use copper to our advantage, but in a proper form that is not toxic. Too much copper will make you sick and could kill you. Remember…don’t eat your chemistry set!


Materials:


  • Carbon rod (MSDS)
  • Copper sulfate (CuSo4) (MSDS)
  • Aluminum foil
  • 9V battery with clip
  • 2 wires
  • Disposable cup
  • Water

You are going to make a saturated solution of copper sulfate (CuSO4) in water. Pour a measuring spoon of granulated copper sulfate in the measuring cup of water. Stir well. Continue adding a spoonful and stirring until no more crystals will go into solution. The solution is saturated when no more crystals will dissolve and there are undissolved crystals at the bottom of the container.


C1000: Experiment


Download Student Worksheet & Exercises


Here’s what’s going on in this experiment:


CuSO4 + H2O (Copper sulfate is added to water)


CuSO4 + H2O –> Cu2+ + SO42- (Copper sulfate plus water yields positively charged carbon ion and negatively charged sulfate ion)


When mixed with water, copper sulfate dissociates into copper and sulfate ions. Notice that the ions, now separated, take on negative and positive charges.


Next, 9V of electricity is passed through the solution with an electrode of carbon and an electrode of aluminum foil inserted into the solution. As electricity flows from one electrode to another, the copper ions, being positively charged, are attracted to the negative electrode. You can confirm this in two ways. One, if litmus paper, held close to an electrode, turns blue, that is the negative electrode. The other way is to just follow the negative lead from the battery to the negative electrode.


As the process moves along, the negative electrode gains copper ions. Evidence of this is seen on the surface of the electrode.


Here’s the breakdown of the entire process:

When the copper sulfate (CuSO4) mixed with water (H2O), the copper sulfate dissociated:


CuSO4 –> Cu2+ + SO42-


When power is added to the solution, the copper ions move toward the negative cathode (carbon rod) and take electrons from it, forming solid copper right on the electrode:


Cu2++ 2e –> Cu(s)


On the positive anode (the aluminum foil), you’ll see bubbles instead of a solid forming. The anode attracted electrons from the water molecule to form oxygen bubbles:


6H2O –> O2 + 4H3O+ + 4e


Let’s put these two reactions together to get the overall reaction of:


2Cu2+ + 6H2O –> 2Cu + O2 + 4H3O+


Note the difference between galvanic cells and electrolytic cells: galvanic use spontaneous chemical reactions (like in a car battery) to generate electricity, and electrolytic cells use electricity to make the chemical reaction to occur and move electrons to move in a way they would go on their own (like in this experiment).


Clean up: Clean everything thoroughly after you are finished with the lab. After cleaning with soap and water, rinse thoroughly. Chemists use the rule of “three” in cleaning glassware and tools. Rinse three times, wash with soap, rinse three times.


Wipe off the carbon rod to remove the copper. The aluminum goes in the trash, but the solution and solids at the bottom cannot. The liquid contains copper, a toxic heavy metal that needs proper disposal and safety precautions. Another chemical reaction needs to be performed to remove the heavy metal from the copper sulfate. Add a thumb sized piece of steel wool to the solution. The chemical reaction will pull out the copper out of the solution. The liquid can be washed down the drain. The solids cannot be washed down the drain, but they can be put in the trash. Use a little water to rinse the container free of the solids.


Place all chemicals, cleaned tools, and glassware in their respective storage places.


Dispose of all solid waste in the garbage. Liquids can be washed down the drain with running water. Let the water run awhile to ensure that they have been diluted and sent downstream.


Going Further

Here is a link to information about making your own geode (crystal lined rock) of copper sulfate crystals:


http://chemistry.about.com/od/growingcrystals/ht/geode.htm


[/am4show]


Food and air both enter your body through your mouth, diverging when they reach the esophagus and trachea. Food goes to the gastrointestinal tract through your esophagus and air travels to your lungs via the trachea, or windpipe.


You will be making a model of how your lungs work in this lab. It will include the trachea, lungs, and the diaphragm, which expands and contracts as it fills and empties your lungs.


[am4show have=’p8;p9;p29;p56;p81;p87;’ guest_error=’Guest error message’ user_error=’User error message’ ]


Here’s what you need


    1. 1 2-liter soda bottle, emptied and cleaned
    2. 1 pair of scissors
    3. 1”Y” valve hose connector
    4. 3 round, 9-inch balloons
    5. 1 #3 one-hole stopper
    6. 1 length of hose, 8-inch
    7. 2 rubber bands
    8. 1 jar of petroleum jelly


Here’s what you do


  1. Cut off the bottom of the 2-liter bottle. Ask an adult for help.
  2. Take the “Y” valve and secure the two balloons to the top branches with the rubber bands.
  3. Put a tiny bit of petroleum jelly on the end of the hose to make it easier to insert into the #3 stopper. Pull 6 inches of hose through the stopper and then thread the hose through the bottle’s neck. Insert the stopper into the top of the bottle.
  4. Put the end of the hose (that is now inside the bottle) into the base of the “Y” valve (which now has balloons on its other branches). Pull the hose through the stopper a bit. Also, pull the lungs up toward the top of the bottle.
  5. Tie a knot in the third, unused balloon. Cut it in half and stretch the part with the knot over the open bottom of the soda bottle. Make sure the bottom balloon is as tight as it can be.
  6. Grab the bottle with one hand, the knot at the bottom of the balloon with the other. Carefully pull the knot on the balloon down. What happens to the balloons in the bottle? Now let go of the knot and observe how this affects the balloons. Note your observations in the experiment’s data.
  7. Sketch your model and label its trachea, lungs, and diaphragm.

What’s going on?


By placing a stopper in the top of the bottle and putting the stretched rubber balloon on the bottom, you have created an enclosed system. The tube at the top of the bottle is the only way for air to enter or exit the model’s lungs. Pulling down on the balloon’s knot reduced the air pressure inside the lungs. As compensation, air was pushed down into the tube to equalize the pressure. This caused the balloon lungs to expand. When you released the knot, the air pressure forced the air out of the balloons.


If you need more help with identification, the tube acts as the trachea, the balloons are the lungs, and the balloon with the knot at the bottom is the diaphragm.


Did you know that an average person breathes about 24,000 times each day? If you live to be 70 years old, that means about 600,000,000 breaths. Make them count!


[/am4show]


Ammonia has been used by doctors, farmers, chemists, alchemists, weightlifters, and our families since Roman times. Doctors revive unconscious patients, farmers use it in fertilizer, alchemists tried to use it to make gold, weightlifters sniff it into their lungs to invigorate their respiratory system and clear their heads prior to lifting tremendous loads. At home, ammonia is used to clean up the ketchup you spilled on the floor and never cleaned up.


The ammonia molecule (NH3) is a colorless gas with a strong odor – it’s the smell of freshly cleaned floors and windows. Mom is not cleaning with straight ammonia (it’s gas at room temperature because it boils at -28oF, so the stuff she cleans with is actually ammonium hydroxide, a solution of ammonia and water). Ammonia is found when plants and animals decompose, and it’s also in rainwater, volcanoes, your kidneys (to neutralize excess acid), in the ocean, some fertilizers, in Jupiter’s lower cloud decks, and trace amounts are found in our own atmosphere (it’s lighter than air).


[am4show have=’p8;p9;p25;p52;p91;’ guest_error=’Guest error message’ user_error=’User error message’ ]


Ammonia is a strong base – it combines with acids to form salts:


NH3 + HCl –> NH4Cl


But ammonia also can act as a weak acid. Remember, an acid is a proton donor, as in this reaction with lithium, where the ammonia molecule donated one hydrogen atom:


2 Li + 2 NH3 –> 2 LiNH2 + H2


In this experiment, we make a stink and then we see something that will make us go ooooooh…and aaaaw. How fun is that? But you need to follow the instructions carefully and perform your experiment safely. Promise?


Ammonia will be generated by the combination of ammonium chloride and sodium carbonate. The amount of ammonia generated in this experiment is not a large amount. However, you really should experience this particular stink.


Materials:


  • 3 test tubes and rack
  • sodium carbonate (MSDS)
  • ammonium chloride (MSDS)
  • copper sulfate (MSDS)
  • sodium hydrogen sulfate (NaHSO4) (MSDS) Sodium hydrogen sulfate is very toxic. Respect it, handle it carefully and responsibly. Do not take it for granted.
  • water
  • test tube stopper
  • measuring spoon
  • gloves, goggles

NOTE: Be very careful when handling the sodium hydrogen sulfate – it’s highly corrosive and dangerous when wet. Handle this chemical only with gloves, and be sure to read over the MSDS before using.


A chemical reaction is going to occur when the ammonium chloride, sodium chloride, and another chemical reaction is going to occur when the copper sulfate is added. These compounds are the reactants in our chemical reaction, and the blue liquid, CuCl (copper chloride), at the end of the experiment, will be our product. This experiment displays two types of reactions, a decomposition reaction when we combine ammonium chloride and sodium chloride, and a double replacement reaction when we add copper sulfate to the mixture.


C1000: Experiments


Download Student Worksheet & Exercises


When we combine ammonium chloride and sodium carbonate, ammonia will be produced. We will add copper sulfate to that mixture, producing two chemical compounds with totally different properties from those exhibited by the original chemicals.


Two chemical reactions will occur in this experiment:


(1) When you add ammonium chloride and sodium chloride to the water, a decomposition reaction will occur that produces ammonia gas, carbon dioxide gas, and sodium chloride dissolved in water. It is identified as a decomposition reaction because the reactants breakdown into elements or simpler compounds.


NaHCO3 + 2NH4Cl –> NH3 + CO2 + NaCl + 2H2O


sodium carbonate + ammonium chloride –> ammonia + carbon dioxide + sodium chloride + water


(2) The next reaction takes place when copper sulfate is added to the sodium chloride and water. The products of this reaction are sodium sulfate and copper chloride (the blue color). This reaction is identified as a double replacement reaction due to the fact that the two reactants break apart and recombine, the reactants trading parts, recombining to form two other different compounds with properties completely different than those of the reactants.


NaCl + CuSO4 —> NaSO4 + CuCl


sodium chloride + copper sulfate –> sodium sulfate + copper chloride


Big suggestion here: All chemical vapors are best experienced by “wafting”, a procedure that brings the vapor to you, instead of sticking your nose in the test tube, bringing you to the vapors. Please get in the habit of smelling properly. If ammonia vapors can bring unconscious people back to consciousness, you should probably make sure you are sniffing safely.


Reminder: Always wash your hands or gloves, and your chemistry tools, when switching from one chemical to another to avoid contamination that could affect the experiment adversely.


Store: Put all chemicals away in their proper places to keep them organized and ready to be used again. All tools should be put away as well, but make sure hat they have been cleaned and dried before storing them. A rule of thumb in chemistry is always wash something three times.


Disposal: Pour liquids down the drain using plenty of water. Throw solid waste into the outside garbage to prevent filling the house with bad smells.


[/am4show]


Digestion starts in your mouth as soon as you start to chew. Your saliva is full of enzymes. They are a kind of chemical key that unlock chains of protein, fat, and starch molecules. Enzymes break these chains down into smaller molecules like sugars and amino acids.


In this experiment, we will examine how the enzymes in your mouth help to break down the starch in a cracker. You will test the cracker to confirm starch content, then put it in your mouth and chew it for a long time in order to really let the enzymes do their job. Finally you will test the cracker for starch content and see what has happened as a result of your chewing.


[am4show have=’p8;p9;p29;p56;p81;p87;’ guest_error=’Guest error message’ user_error=’User error message’ ]


Here’s what you need


    1. 1 package of soda crackers
    2. 1 5” pie tin
    3. 1 craft stick
    4. 1 0.5 oz bottle of iodine
    5. 1 pre-form tube
    6. 1 1 mL plastic pipette
    7. water


Download Student Worksheet & Exercises


Here’s what you do


  1. Take a cracker from the package and put it in the pie tin. Use your thumb to mash it up, making the pieces as small as possible. Add a small amount of water with the pipette. Mix everything up with the craft stick to make a mash of cracker.
  2. Now fill the pipette with iodine. When iodine comes in contact with starch, it changes in color from reddish-brown to a dark blueish-black. Take the pipette and squeeze a few drops onto the cracker mash in various spots. Record what you see in your experiment data.
  3. Take another cracker and chew it up for about 2 minutes. Do you notice any flavor changes as you are chewing? If so, note this. Be particularly aware of any sweet flavors.
  4. Spit the mash into the pre-form tube once you have chewed for 2 minutes. Use the pipette of iodine to add a few drops of iodine to the chewed mash. Note any change in color. If there is no starch, the iodine will stay reddish-brown in color. If starch is present, you will see the color change to a very dark blue-black as it did in step 2. Record what you see in your data.

What’s going on?


This lab gives you a good idea of what happens in digestion, which starts as soon as food enters your mouth. Actually, the process can start even before this as your body prepares for food. Have you ever had a wonderful smell make your mouth water? This is your body’s way of getting ready to get to work digesting that delicious food.


Once you take a bite and the enzymes start to do their job of breaking large, more complex molecules into smaller particles. In this experiment, starch got broken down into simple sugars that your body could easily move around and use as fuel.


There are three sets of saliva-secreting glands in your mouth. They include a gland in the back of your throat called the parotoid gland, one in your lower jaw called the submandibular gland, and the sublingual gland which is under your tongue. The three work together to secrete up to 2 liters of saliva each day.


Exercises


  1. What is the first step in the digestive process?
  2. How does saliva help to digest food?
  3. Name one or more of the main salivary glands and where they are located.

[/am4show]


This experiment is for advanced students.


Purple and white colors, making the whitewash that Tom Sawyer used, and produce an exothermic chemical reaction…..does it get any better?


Limewater is one of the compounds we work with in this experiment. Limewater was used in the old days of America. We’re talking about the 80’s…..the 1880’s.


Traveling medicine shows sold what was called “patent medicines”. These usually had no medicinal properties at all. The man in charge, the salesman of the operation, was called a “huckster”. He would have the one of the people gathered around to listen to him blow into limewater. Their exhaled breath contains carbon dioxide, and the lime water turned cloudy, just like in our experiment.


The man would hold up the glass with the cloudy limewater in it and pour in some of his fantastic remedy. As long as the “medicine” was acidic, it would turn the cloudy limewater clear. This was proof that the remedy would cure whatever ailed the person.


[am4show have=’p9;p52;’ guest_error=’Guest error message’ user_error=’User error message’ ]


Today, lime water is used in the traditional making of corn tortillas, tamales, and corn chips. People who have marine (saltwater) aquariums use lime water to assist in maintaining a healthy tank. Lime water is also used in the hide tanning process to remove hair. Parchment paper is made possible by the use of lime water as well. Here’s what you’ll need for your experiment with limewater:


Materials:


  • Granulated white sugar (MSDS)
  • Distilled water
  • Test tube rack
  • 2 test tubes
  • On-hole rubber stopper
  • Measuring spoon
  • 900 bend glass tubing
  • Test tube clamp
  • Potassium permanganate (KMnO4) (MSDS)
  • Sodium hydrogen sulfate (NaHSO4 ) (MSDS) Sodium hydrogen sulfate is very toxic. Respect it, handle it carefully and responsibly. Do not take it for granted.
  • Measuring syringe
  • Calcium hydroxide, Ca(OH)2 (MSDS) to add to H20 to make limewater (MSDS)

NOTE: Be very careful when handling the sodium hydrogen sulfate – it’s highly corrosive and dangerous when wet. Handle this chemical only with gloves, and be sure to read over the MSDS before using.


Keep the potassium permanganate solution from entering the glass tube and being transported into the limewater.


Saturated calcium hydroxide solution has been historically called lime water Ca(OH)2 . That is what we will be bubbling our carbon dioxide into. It looks like water, but isn’t. Limewater smells like dirt and has an alkaline taste. (Don’t taste to find out. Not a safe laboratory practice.)


Saturated calcium hydroxide solution has been used as paint since the early years of the settlement of America. Ever hear of Tom Sawyer and the whitewashed fence? Whitewash is another name for limewater. We’re going to be using some pretty nasty chemicals, but you already follow all the safety precautions. Just remember to remember, and be careful.


The solution in one of your test tubes is going t undergo a chemical reaction to produce carbon dioxide. Another solution will be the indicator that CO2 has been produced.


C3000: Experiment


Download Student Worksheet & Exercises


Here’s what’s going on in this experiment:


When carbon dioxide is produced and bubbled into the lime water, a chemical reaction takes place.


Ca(OH)2 + CO2 –> CaCO3 + H2O


Calcium hydroxide (lime water) and carbon dioxide yields calcium carbonate and water. A milky precipitate forms that is calcium carbonate (CaCO3).


Cleanup: Clean everything thoroughly after you are finished with the lab. After cleaning with soap and water, rinse thoroughly. Chemists use the rule of “three” in cleaning glassware and tools. After washing, chemists rinse out all visible soap and then rinse three times more.


Storage: Place all chemicals, cleaned tools, and glassware in their respective storage places.


Disposal: Dispose of all solid waste in the garbage. Liquids can be washed down the drain with running water. Let the water run awhile to ensure that they have been diluted and sent downstream.


[/am4show]


This experiment is for advanced students. This is a repeat of the experiment: Can Fish Drown? but now we’re going to do this experiment again with your new chemistry glassware.


The aquarium looked normal in every way, except for the fish. They were breathing very fast and sinking head first to the bottom of the tank. They would sink a few inches, then jerk into proper movement again.


The student had to figure out what was wrong. He had set up the aquarium as an ongoing science project, and it was his responsibility to maintain the fish tank. His grade depended on it.


He went to his mom for help. She looked over the setup. “Have you tested the water?”


A quizzical look on his face, the boy said, “Everything is normal nitrates, nitrites, hardness, alkalinity, and pH. The pH was a little acidic, but not outside the proper range.”


[am4show have=’p9;p52;p91;’ guest_error=’Guest error message’ user_error=’User error message’ ]


His mother said to him, “Show me how you would look if you were gasping for air and look in the mirror while you do it.”


He did, and he remarked, “I look like my fish.” I swear a light bulb actually appeared over his head and lit all up. He said, “They need air!” His mom was standing near the aquarium holding an air pump, vinyl tubing, and an air stone.


“Looking for this?” His mom said. He and his mom set up the air pump and soon his fish were jumping in the air and kissing him on the cheek. Well, maybe not that last part, but you get the idea. Water does not contain an inexhaustible amount of oxygen in it. It must be replenished if there is something in the water that is using it up.


The oxygen carrying capacity of water varies with conditions. Rainbow trout are found in cold water streams because the colder the water, the more oxygen it will hold. Rainbow trout need lots of oxygen in their water to survive. Other species of fish are found only in warmer water because they are adapted to a condition of less oxygen in the water. Still other fish can gulp the air from the surface if the water is severely depleted of oxygen. I have seen carp gulping air as they swim around in a pond looking for food on a hot summer day.


In this experiment we will discover that water does contain oxygen. We will subject the water to heat and we will see the oxygen for ourselves.


Materials:


  • Test tube rack
  • Test tube
  • Test tube holder
  • Rubber stopper
  • 90 degree bent glass tubing
  • Alcohol burner
  • Striker

Be careful not to let your water boil. Pressure will build up inside the test tube because only a small amount of pressure at a time can leave via the glass tubing. Pressure will build up and the stopper will fly off or the test tube will rupture. (Glass shrapnel and boiling water will get all over you. Not a pleasant thought.)


Inserting the glass tubing into and through the stopper is the most dangerous part of this lab or any other lab requiring this to be done. Most lab injuries, student or chemist, are due to cuts from broken glass. Proper technique will save you the pain of a deep cut. Lubricate the rubber stopper with glycerol if you have it. (It is a non-reactive laboratory grease that will not contaminate as badly as household or automotive oils and greases.) DO NOT use any other grease or oil. You probably don’t have any glycerol, so your second choice is just plain old water.


So, water on the tubing, gently start the glass tubing into the stopper. Don’t grip the glass with your hands, get a thick wash cloth, small towel, or work gloves and grab the tubing. Gently twist the tubing as you push gently on the tubing. Don’t pull to one side or the other, make your push a straight line. Once the tubing gets going, don’t stop unless you have to. Your second shot may be much more difficult because you have pushed a lot of the water off the tubing.


You are not going to see a chemical change. You are not going to work with chemicals. You are going to see for yourself that there is oxygen in water. That is, of course, what fish use up in the water. Unless it is replenished, fish can’t breath and they suffocate….not drown. The oxygen is replenished in the wild through various means. We can replenish the water with air pumps and water changes.


C3000: Experiment


Cleanup: Clean everything thoroughly after you are finished with the lab. After cleaning with soap and water, rinse thoroughly. Chemists use the rule of “three” in cleaning glassware and tools. After washing, chemists rinse out all visible soap and then rinse three times more.


Heated surfaces will be hot for awhile. Let things rest for a couple of minutes before doing your cleanup.


Your test tube probably has a blackened surface. It should wipe off easily, or will with a little soap, water, and a light touch.


Storage: Place all chemicals, cleaned tools, and glassware in their respective storage places.


Disposal: Dispose of all solid waste in the garbage. Liquids can be washed down the drain with running water. Let the water run awhile to ensure that they have been diluted and sent downstream.


The filter pump in your fish tank ‘aerates’ the water. The simple act of letting water dribble like a waterfall is usually enough to mix air back in. Which is why flowing rivers and streams are popular with fish – all that fresh air getting mixed in must feel good! The constant movement of the river replaces any air lost and the fish stay happy (and breathing). Does it make sense that fish can’t live in stagnant or boiled water?


[/am4show]


This experiment is for advanced students.


Don’t put this in your car….yet. Hydrogen generation, capture, and combustion are big deals right now. The next phase of transportation, and a move away from fossil fuels in not found in electric cars. Electric cars are waiting until hydrogen fuel cell vehicles become practical. It can be done and is being done.


Cars being powered by hydrogen are here, but not on the market yet. Engineers and chemists are always finding new ways to improve the chemical reaction that produces hydrogen and making the vehicles more efficiently use the fuel. Hydrogen fuel is not just easy to make, it is inexpensive, and the “exhaust” is water.


We will generate hydrogen in this lab. We will also see how combustible it is. Just let your imagination wander….just a bit and you will see noiseless cars and trucks zipping along the streets and interstates, carrying people and cargo. The Indianapolis 500 wouldn’t be quite the same, though. “And there they go, roaring, I mean quietly entering turn two…”


[am4show have=’p9;p52;p68;p80;’ guest_error=’Guest error message’ user_error=’User error message’ ]


Materials:


  • Goggles
  • Gloves
  • Measuring syringe
  • Water
  • Test tube rack
  • One-hole rubber stopper
  • Alcohol burner
  • Lighter
  • Test tube
  • Test tube holder
  • Water bath
  • Chemistry stand
  • Rubber tubing
  • 90 degree bend glass tubing
  • Zn powder (MSDS)
  • Copper sulfate CuSo4 (MSDS)
  • Sodium hydrogen sulfate NaHSO4 (MSDS) Sodium hydrogen sulfate is very toxic. Respect it, handle it carefully and responsibly. Do not take it for granted.

NOTE: Be very careful when handling the sodium hydrogen sulfate – it’s highly corrosive and dangerous when wet. Handle this chemical only with gloves, and be sure to read over the MSDS before using.


We will combine sodium hydrogen sulfate, water, and zinc. As soon as they are all together in our test tube, bubbles will begin forming in the solution. The bubbles will continue coming off, but we can speed up the reaction by adding a little copper sulfate. Now, instead of leisurely coming off, the gas is being given off quickly and we must act quickly ourselves to capture as much of the gas as possible. We can aid the gas movement ourselves by swirling the solution gently.


C3000: Experiment


Download Student Worksheet & Exercises


Here’s what’s going on in this experiment:


NaHSO4 + H2O + Zn + CuSO4 –> H2 + NaSO4 + CuHSO4 + ZnO


Sodium hydrogen sulfate is added to water and dissolved completely. Zinc is added and hydrogen gas is generated by the chemical reaction. Copper sulfate is added as a catalyst to speed up the generation of hydrogen.


Double replacement occurs where the compounds are broken apart and the pieces realign and re-bond with different parts of the original molecules, and zinc oxide is left as a byproduct of the oxidation of the zinc powder. Hydrogen gas is freed in the reaction.


Cleanup: We are going to clean everything thoroughly after we finish the lab. After cleaning with soap and water, rinse thoroughly. Chemists use the rule of “three” in cleaning glassware and tools. After washing, chemists rinse out all visible soap and then rinse three times more.


Storage: Place cleaned tools and glassware in their respective storage places.


Disposal: Liquids must be neutralized before they can be washed down the drain. Solids are thrown in the outside trash.


[/am4show]


This experiment is for advanced students.


In industry, hydrogen peroxide is used in paper making to bleach the pulp before they form it into paper. Biologists, when preparing bones for display, use peroxide to whiten the bones.


At home, 3% peroxide combined with ammonium hydroxide is used to give dark-haired people their desired blonde moment. Peroxide is also used on wounds to clean them and remove dead tissue. Peroxide slows the flow from small blood vessels and oozing in wounds as well.


[am4show have=’p9;p52;p91;’ guest_error=’Guest error message’ user_error=’User error message’ ]


Peroxide is a chemical produced in a Bombardier Beetle, and it squirts its irritating load into the face or onto the lips of a predator. Zebra fish produce peroxide after their skin is damaged. This action acts as a signal to produce an abundance of white cells to fight any infection and assist in the healing.


Scientists believe that healing can occur in humans in the same way. Future experiments may prove them right. It is also believed that people who have asthma have elevated levels of peroxide in their lungs, levels much higher than people without asthma.


Hydrogen peroxide can also help an animal that has eaten poison. A small amount of it can be put down the animal’s throat to induce vomiting and clear the poison out of their body as much as possible. Did your dog get too close to a skunk? There is no real “cure” other than a lot of time outside to air out, but peroxide mixed with hand soap is pretty good at removing the stink. Then, how you remove that stink from yourself…..another problem.


Materials:


  • 2 test tubes
  • Burner
  • Lighter
  • Chemistry stand
  • Test tube holder
  • Glass jar
  • Water pan
  • Water
  • Rubber tubing
  • 90o glass tubing
  • 3% Hydrogen peroxide (H2O2) (MSDS)

Hydrogen peroxide comes in a dark bottle because sunlight will slowly decompose hydrogen peroxide in the same way that we are doing with the exception that our way is much quicker.


When finished heating hydrogen peroxide, if you leave everything together, water will climb the tubing and attempt to enter the hot test tube. Cold water and hot peroxide are not safely compatible. To avoid this, remove the stopper from the test tube and set it aside while the solution cools.


Wait until all the equipment is cool enough to touch before disassembling for cleaning and storage.


When heating the test tube, be careful. Don’t heat in one place for too long. Move the flame of the burner around periodically to heat the reaction area of the test tube uniformly.


Don’t boil the peroxide too vigorously. If boiling gets too wild, remove the burner form the test tube until it calms down, then move it back to heat again.


At all times, keep the flame and peroxide apart…well apart.


Hydrogen peroxide is going to get broken down, is going to decompose, into the base elements of hydrogen and oxygen.


C3000: Experiment


Download Student Worksheet & Exercises


Here’s what’s going on in this experiment:


Hydrogen peroxide (H2O2) breaks down with heat. A decomposition reaction occurs where hydrogen peroxide breaks down into its component elements, H2 and O2


2H2O2 –> 2H2O + O2


2 molecules of hydrogen peroxide are heated, creating a chemical decomposition reaction, producing 2 molecules of water and 1 molecule of oxygen.


Cleanup: Clean everything thoroughly after you are finished with the lab. After cleaning with soap and water, rinse thoroughly. Chemists use the rule of “three” in cleaning glassware and tools. After washing, chemists rinse out all visible soap and then rinse three times more.


Storage: Place cleaned tools and glassware in their respective storage places.


Disposal: Liquids can be washed down the drain


Going further: Elephant’s Toothpaste

A really fun experiment with hydrogen peroxide is making Elephant’s toothpaste. It requires an adult helper, and is fun for the kid and the adult.


Materials:


  • Empty 20 or 24 ounce plastic bottle
  • 3 % hydrogen peroxide
  • Liquid dish soap
  • Warm water
  • Food coloring
  • One packet or 2 1/2 ounces of yeast
  • One really big container to contain the big mess – laundry tub, bathtub, etc.

This video below is a demonstration of the Elephant Toothpaste experiment using much nastier chemicals than the ones I’ve mentioned above… the hot gas generated is actually oxygen. Enjoy!


Procedure:


  • Dissolve the yeast in a little warm water and stir well. Use just enough water to make a pourable liquid. Let it sit for about 5 minutes while you prepare the rest of the experiment.
  • Pour 1/2 cup of hydrogen peroxide, 1/4 cup of dish soap and a little bit of food coloring in the bottle. Swirl to mix and put the bottle in the middle of your large pot, container or sink.
  • Pour the yeast solution into the bottle. A funnel can help, but be prepared to pour fairly quickly and remove it again because the reaction will start as soon as you start pouring.
  • Stand back and watch the fun!

[/am4show]


This experiment is for advanced students.


This time we’re going to use a lot of equipment… really break out all the chemistry stuff. We’ll need all this stuff to generate oxygen with potassium permanganate (KMNO4). We will work with this toxic chemical and we will be careful…won’t we?


[am4show have=’p9;p52;’ guest_error=’Guest error message’ user_error=’User error message’ ]


Oxygen is pretty important… it’s only the single most important thing that mammals need. Besides breathing, oxygen is important for so much on this world. Oxygen is used in welding, rocket fuel, and water treatment. Without oxygen, there is no oxidation and no fire. Simply put, we wouldn’t have rusty bicycles or campfires. Can your believe it?


Potassium permanganate is an important chemical in the film industry. It is used to make props like cloth, ropes, and glass, appear “old”. Some films it has been used in are “Troy”, “Indiana Jones”, and “300”. The KMnO4 stains any organic material. KMnO4 is also used as an antiseptic, and is used to treat skin ulcers and rashes. It is also used to treat foot fungus…..phew! People living in the country are sometimes plagued with an iron taste or a rotten egg smell in the water from their wells. Potassium permanganate can be used to remove the taste and smell from the water.


Materials:


  • Chemistry stand
  • Plastic tub
  • Water
  • 2 test tubes
  • Test tube clamp
  • Potassium permanganate (KMnO4) (MSDS)
  • Alcohol burner
  • Lighter
  • One-hole rubber stopper
  • Solid rubber stopper
  • 900 bend glass tube
  • Measuring spoon
  • Rubber tubing
  • Match
  • Wooden splint

Be careful inserting the glass tubing into the stopper. Wet the short end of the glass tube with water and gently push and twist the glass through the stopper. Wear work gloves and work carefully and slowly. Do not use oil or grease you have laying around the house.


When lighting the oxygen in the test tube, use a wooden splint. Wooden splints can be purchased from craft stores, or make your own by shaving thin strips from a piece of pine wood.


C3000: Experiment


Download Student Worksheet & Exercises


Here’s what’s going on in this experiment:


2KMnO4 + O2 –> K2MnO4 + MnO2 + O2


Potassium permanganate is heated and produces potassium manganate, manganese dioxide, and oxygen


Oxygen is generated by heating the KMnO4, and is collected in the test tubes. We will test the contents of the tubes to see if oxygen has been generated. What do you think will happen when a glowing splint is pushed up inside the test tube? Don’t know? Do the experiment and try to figure it out. Remember, in order for there to be flame, you need fuel and oxygen. If that gas was carbon dioxide, what would happen when the glowing splint was placed inside?


Cleanup: Clean everything thoroughly after you are finished with the lab. After cleaning with soap and water, rinse thoroughly. Chemists use the rule of “three” in cleaning glassware and tools. After washing, chemists rinse out all visible soap and then rinse three times more.


Storage: Place all chemicals, cleaned tools, and glassware in their respective storage places.


Disposal: Dispose of all solid waste in the garbage. Liquids can be washed down the drain with running water. Let the water run awhile to ensure that they have been diluted and sent downstream.


[/am4show]


When you exercise your body requires more oxygen in order to burn the fuel that has been stored in your muscles.  Since oxygen is moved through your body by red blood cells, exercise increases your heart rate so that the blood can be pumped through your body faster. This delivers the needed oxygen to your muscles faster. The harder you exercise, the more oxygen is needed, so your heart and blood pump even faster still.


[am4show have=’p8;p9;p29;p56;p81;p87;’ guest_error=’Guest error message’ user_error=’User error message’ ]


Here’s what you need


    • 1 clock with a second hand
    • 1 pencil


Download Student Worksheet & Exercises


Here’s what you do


  1. While sitting quietly, place your first two fingers of one hand onto the wrist of the other hand. Feel for the pulse of your radial artery. Practice taking your pulse in intervals of 6 seconds.
  2. After you have had some practice with the 6 second interval, take your pulse for this amount of time and multiply it by 10. The 6-second rate times 10 is your heart rate per minute. Record each for experiment data.
  3. Now stand up and do 50 jumping jacks. When done, sit down immediately and check your pulse. Again, record the 6-second pulse rate, multiply it by 10 and also record the pulse rate per minute.
  4. Finally, go outside and run around as fast as you can without stopping for 3 minutes. Again, immediately sit and take your pulse. Record the 6-second rate, multiply it by 10 and get your heart rate per minute.

What’s going on?


Exercising means your muscles need more oxygen. They ask your brain to tell your heart and lungs. When your heart gets the message, it starts to beat harder. Your lungs work harder, too. Together, your heart and lungs work as a team to provide the needed oxygen supply to your muscles. You can identify that this process is occurring by your heart rate increase and more rapid breathing rate.


Did you know that your heart is about the size of your fist? It is actually a muscle and it pumps more than a gallon of blood through your body each minute! An average heart rate is 70 beats per minute, but this can vary depending on age and fitness level. Based on 70 bpm, your heart will beat around 100,000 times per day. That’s more than 36 million beats a year!


Exercises


  1. Explain how to take a pulse.
  2. What units do we use to measure pulse?

[/am4show]


An oxygen and carbon dioxide exchange takes place in your bloodstream. When you breathe air into your lungs it brings in oxygen, which is carried from your lungs by red blood cells in your bloodstream. Cells of your body use the oxygen and carbon dioxide is produced as waste, which is carried by your blood back to your lungs. You exhale and release the C02. You will study this exchange in today’s lab.


You will be using a pH indicator known as bromothymol blue. When you exhale into a baggie, the carbon dioxide will react with water in the bag. This reaction produces carbonic acid, which starts to acidify the water. More breathes in the bag equal more carbon dioxide, which equal a lower (more acidic) pH. You will notice the bromothymol will turn green when the pH of the water is right about 6.8 and it will turn yellow when the pH drops further to 6.0 and lower.


[am4show have=’p8;p9;p29;p56;p81;p87;’ guest_error=’Guest error message’ user_error=’User error message’ ]


Here’s what you need


    • 1 1 oz. bottle of bromothymol blue
    • 1 straw
    • 1 resealable baggie
    • 1 bottle of ammonia
    • 1 pipette
    • water


Download Student Worksheet & Exercises


Here’s what you do


  1. Pour about 2 ounces of water into the baggie and add two capfuls of the bromothymol blue into it. Close the baggie well and swish the solution around inside it gently to mix. Note the color of the solution for your data record.
  2. Open the baggie a tiny bit and put the straw inside, but DO NOT drink the solution! It could make you sick. Close the bag tightly around the straw and gently blow into the solution. Again, be careful not to suck on the straw.
  3. Watch the color of the solution closely as you continue to blow into the solution and create bubbles of carbon dioxide gas. The color will change to a sea green color and then eventually it will change to bright yellow. Note each color change in your records.
  4. You can return the solution to blue by slowly adding a base – such as ammonia – to the solution in the bag. Bleach will also work. Please ask an adult to help with this. Add one drop at a time, shaking after each addition to mix the solution. You will be able to observe when the pH starts to change back by the color of the solution. It should turn back to green and then to blue.

What’s going on?


Bromothymol blue will change color in a pH range from 6.0 to 7.6.  It is an acid/base indicator. Its basic solution is at a pH of 7.6 or above – this is when it is blue. In acidic conditions, it will turn yellow – this is a pH of 6.0 or below. And when it’s in between the two, it will be the sea green color that you observed in your baggie.


Because carbon dioxide is a little acidic, when we breathe it out into the water and bromothymol blue solution its bubbles start to lower the pH. You saw a small change in pH with the sea green color, but as you continued to exhale and add carbon dioxide, the solution became more and more acidic. This eventually resulted in a pH at or below 6.0 and a bright yellow solution.


In order to exchange oxygen with carbon dioxide in your lungs, they have over 300,000,000 teeny little air sacs calls alveoli. In one minute, you breathe approximately 13 pints of air.


Exercises


  1. What is pH and how it is useful?
  2. What does a yellow color indicate with bromothymol blue?
  3. Is CO2 acidic or basic?

[/am4show]


This experiment is for advanced students.


Ever use soap? Sodium hydroxide (NaOH) is the main component in lye soap. NaOH is mixed with some type of fat (vegetable, pig, cow, etc). Scent can be added for the ‘pretty’ factor and pumice or sand can be added for the manly “You’re coming off my hands and I’ll take no guff” factor. Lots of people still make their own soap and they enjoy doing it.


[am4show have=’p9;p52;p91;’ guest_error=’Guest error message’ user_error=’User error message’ ]


One of the coolest uses for sodium hydroxide is in tissue digestion. By “tissue” we mean meat, bone, sinew…..meaning bodies! People who pick up dead animal (road kills) for the county dump their catch in barrels containing sodium hydroxide. The NaOH eats everything up and then the “sludge” is dumped in the landfill. They used NaOH to make them decompose. So this stuff is nasty and should never be touched with your bare hands!!


Materials:


  • Erlenmeyer flask
  • Alcohol burner
  • Lighter
  • Heating rod
  • Sodium carbonate (Na2CO3) (MSDS)
  • Calcium hydroxide (Ca(OH)2) (MSDS)
  • Measuring spoon
  • Water
  • Tripod stand
  • Wire screen
  • Chemistry stand
  • Test tube holder
  • Test tube rack
  • Test tube
  • Filter paper
  • Funnel
  • Stock bottle for NaOH storage (MSDS)

Don’t inhale any fumes from reactions or powder welling out of chemical containers, especially calcium hydroxide dust. We want to test our product to see if it is NaOH. It should turn red litmus blue.


We will perform a bunch of operations in this lab.


  1. Heating our calcium hydroxide / sodium carbonate mixture to create calcium carbonate and sodium hydroxide.
  2. Filter out the calcium carbonate to collect the sodium hydroxide.
  3. Test our sodium hydroxide product for the properties of NaOH.

C3000: Experiments


Download Student Worksheet & Exercises


Here’s what’s going on in this experiment:


Ca (OH)2 + Na2CO3 –> 2NaOH + CaCO3


Calcium hydroxide and sodium carbonate are combined in water and heated to produce sodium hydroxide and calcium carbonate


This is a double replacement reaction because the calcium ion and the sodium ion have swapped places


Cleanup: We are going to clean everything thoroughly after we finish the lab. After cleaning with soap and water, rinse thoroughly. Chemists use the rule of “three” in cleaning glassware and tools. After washing, chemists rinse out all visible soap and then rinse three times more.


Storage: Place cleaned tools and glassware in their respective storage places.


Disposal: Liquids must be neutralized with vinegar, if a base, or baking soda, if an acid, before washing them down the drain. Before actually washing them down the drain check again with litmus paper to ensure that they have been neutralized. Solids are thrown in the trash.


[/am4show]


This experiment is for advanced students.

Potassium permanganate (KMnO4) in water turns an intense, deep, purple. It is important in the film industry for aging props and clothing to make them look much older than they are.

Also, artists use it in bone carving. People who carve antlers and bone use KMnO4 to darken the surface of the bone to make it look aged. They make the carving, soak it in potassium permanganate, then carve more, and repeat. The end result is a carving that has a light golden brown color. More dipping will darken the carving even more.

Potassium permanganate is going to undergo a chemical change with this activity. In this experiment, we will be able to witness several indicators of chemical change. Color changes, bubbles from gas generation, temperature change, and color disappearance are all indicators of chemical changes.

[am4show have='p9;p52;p91;' guest_error='Guest error message' user_error='User error message' ] Examples of chemical color changes we might be familiar with are autumn leaves changing color and a half eaten apple quickly turning brown.

Physical changes can mimic the indicators of chemical change, so we will need to always think through what we observe and then decide whether it is a physical or chemical change. Physical changes that mimic chemical changes can be color and temperature. The key is that physical changes are changes in state (solid, liquid, gas, sublimation) or changes in the condition of the material. In our pursuit of science knowledge, we will observe many physical and chemical changes. We need to be able to identify them accurately to really understand what is happening in an experiment.

Materials:
  • 3% Hydrogen peroxide (KMnO4) (MSDS)
  • Test tube rack
  • 2 test tubes
  • Potassium permanganate (KMnO4) (MSDS)
  • Sodium hydrogen sulfate (NaHSO4) (MSDS) Sodium hydrogen sulfate is very toxic. Respect it, handle it carefully and responsibly. Do not take it for granted.
  • Measuring syringe
  • Water
  • Measuring spoon
  • Solid rubber stopper
NOTE: Be very careful when handling the sodium hydrogen sulfate – it’s highly corrosive and dangerous when wet. Handle this chemical only with gloves, and be sure to read over the MSDS before using.

Always cap your chemicals after use and set them aside where they won’t get in the way. Your lab area should always be clear, clean, and uncluttered. Water and a fire extinguisher should be within arm’s reach. Always clean equipment before using any of it on another chemical.

Potassium permanganate is going to undergo a chemical reaction that will turn the deep violet or purple solution clear. It is a very cool experiment and looks like a lot of fun.

C3000: Experiment


Download Student Worksheet & Exercises

Here’s what’s going on in this experiment: KMnO4 + NaHSO4 + H2O2 = MnSO4 + O2 + NaOH + KOH

Potassium permanganate is added to sodium hydroxide, and then hydrogen peroxide is added and quickly capped.

MnSO4 + O2 + NaOH + KOH

The product of the reaction is manganese sulfate, oxygen, sodium hydroxide, and potassium hydroxide. The remaining chemicals are all clear, so the desired result is obtained.

Cleanup: Clean everything thoroughly after you are finished with the lab. After cleaning with soap and water, rinse thoroughly. Chemists use the rule of “three” in cleaning glassware and tools. After washing, chemists rinse out all visible soap and then rinse three times more.

Storage: Place cleaned tools and glassware in their respective storage places.

Disposal: Liquids can be washed down the drain

Click here for Homework Problem Set #14

[/am4show]

This experiment is for advanced students.

How do you know if your brother is stealing your candy? Unwrap a wrapped hard candy that he likes a lot. Roll the candy around in the powdered food dye that matches the candy. (Push the powder into the candy so it “disappears”.) Re-wrap the candy. Set the candy in the place where it usually disappears from. Wait ten minutes after the candy disappears. Find your brother. He will be sporting a new color on his hands and mouth. Dye is hard to remove. It will have to be worn every day at school until it fades away as the skin cells slough off. The dye he now wears is in indicator that he has been taking your candy.

[am4show have='p9;p52;' guest_error='Guest error message' user_error='User error message' ] Did you guess that this lab is about indicators? A reagent is chemical compound that creates a reaction in another substance; the product of that chemical reaction is an indicator of the presence, absence, or concentration of another substance.

Your brother’s situation is not a chemical reaction, but a reaction will be observed in his looks and his mood.

We are going to prepare copper sulfate and ammonium iron sulfate solutions and test them to see if our reagent, potassium hexacynoferrate II will cause chemical changes that indicate that copper is present in one, and iron is present in the other.

I’m sure your brother will stay far away from your candy from now on. I know this is obvious, but don't eat anything in this lab or use it to coat candy... that was just an example to illustrate what an indicator is and how to use it.

Materials:
  • Erlenmeyer flask
  • Water
  • Potassium hexacynoferrate II K4Fe(CN)6 (MSDS)
  • Copper sulfate CuSO4 (MSDS)
  • Measuring spoon
  • Solid rubber stopper
  • Test tube rack
  • 3 Test tubes
  • Measuring syringe
  • Small labeled container for NaOH
  • Dropper pipette
  • Ammonium iron sulfate NH4Fe(SO4)2 (MSDS)
  • Sodium hydroxide NaOH (MSDS)
We need to remember to only make as much Potassium hexacynoferrate II as we need. Label test tubes with contents information clearly visible. Always remember that when the term “reagent” is used in chemistry it is referring to an indicator chemical.

We will put together two solutions with metallic chemicals dissolved in water in each. Let’s pretend we have no idea if they are metallic or not. Many times as a chemist, when analyzing a customer’s of a production chemical, we are looking for metal in a solution as an indicator of something good or something bad. If one of the factory’s systems contains a corrosive liquid flowing through its veins, it would be good to know if some metal somewhere is corroding, being dissolved, by the fluid. Our tests could confirm a problem or set the boss’s mind to rest….and get us a big bonus if we save the day.

C3000: Experiments

Here’s what’s going on in this experiment:
In test tube #1: Copper sulfate solution into which we added Potassium hexacynoferrate II. A color change occurred (brown) and a precipitate fell out of the liquid to rest on the bottom of the test tube. This reaction was an indicator for the presence of metal.

In test tube #2: Ammonium iron sulfate solution into which we added Potassium hexacynoferrate II. A color change occurred (dark blue). This reaction was an indicator for the presence of metal.

Cleanup: We are going to clean everything thoroughly after we finish the lab. After cleaning with soap and water, rinse thoroughly. Chemists use the rule of “three” in cleaning glassware and tools. After washing, chemists rinse out all visible soap and then rinse three times more.

Storage: Place cleaned tools and glassware in their respective storage places.

Disposal: Liquids, after neutralization, can be washed down the drain. Solids are thrown in the trash.

Click here to go to next lesson on Characteristics and capacity of buffers

[/am4show]

This experiment is for advanced students.

In gas form, element #59 is deadly. However, when iodine is in liquid form, it helps heal cuts and scrapes. The iodine molecule occurs in pairs, not as a single atom (many halogens do this, and it's called a diatomic molecule). It's hard to find iodine in nature, though it's essential for staying healthy... too little iodine in the body takes a heavy toll on how well the brain operates.

A chunk of iodine is blackish-blue, and will sublimate (go from a solid straight to a gas). Iodine is the heaviest element needed by living things. Iodized salt is sodium chloride fortified with iodine to prevent people from not getting enough iodine in their daily diets.

Iodine is found in seaweed (kelp) and seafood as well as vegetables that are grown in dirt that has high iodine levels. People that live inland and do not eat fish often have lower iodine levels than their coastal, fish-eating neighbors. The trick is not to get too much or too little iodine in your diet, because the symptoms of deficiency and excess levels are quite similar.

Starch (like cornstarch) are used as an indicator for detecting iodine in chemistry experiments. When combined with iodine, starch forms a blue-black color in the solution. We're going to do this and many other activities in this lab, because this experiment is actually several labs rolled into one. First, we have to make iodine, store it, and then we get to use it in several experiments. Are you ready?

[am4show have='p9;p52;p91;' guest_error='Guest error message' user_error='User error message' ] Materials:
  • Goggles
  • Gloves
  • Glass jar
  • Chemistry stand
  • Test tubes
  • Test tube holder
  • Measuring spoon
  • Corn starch peanut
  • Water cup
  • 90 degree bend glass tubing
  • One-hole rubber stopper
  • Paper towels
  • Stain-free work surface
  • Solid rubber stopper
  • Denatured alcohol
  • Dark brown glass storage bottle for iodine
  • Dropper pipettes
  • Alcohol burner
  • Lighter
  • Measuring syringe
  • Water
  • Potassium iodide KI (MSDS)
  • Potassium permanganate KMnO4 (MSDS)
  • Sodium hydrogen sulfate NaHSO4 (MSDS) AKA: Sodium Bisulfate Sodium hydrogen sulfate is very toxic. Respect it, handle it carefully and responsibly. Do not take it for granted.
NOTE: Be very careful when handling the sodium hydrogen sulfate – it’s highly corrosive and dangerous when wet. Handle this chemical only with gloves, and be sure to read over the MSDS before using.

Remember that iodine is toxic paper and harmful to the environment. Safely shake test tube to homogenize chemicals using a solid rubber stopper and dispose of in the outside trash.

NOTE: Heat slowly and carefully. You don’t want your test tube in the flame. The end of the glass tubing should not extend into the alcohol. From time to time, touch the end of the glass tubing to the alcohol to rinse iodine from the tube into the alcohol, but the glass tubing shouldn’t reside in the alcohol. Conduct this experiment outdoors or in an extremely well ventilated area inside the house.

Follow cleanup instructions carefully for safety. These are very toxic substances we are working with.

As heating progresses, purple gas will form in the upper test tube. A brown color will begin to form in the alcohol. Heat until purple smoke disappears from the upper test tube.

C3000: Experiments


Here’s what’s going on in this experiment: 2KI + KMnO4 + NaSO4 + H2O--> I2 + MnO2 + KOH +KIO3 + Na2SO4

Potassium iodide and potassium permanganate and sodium sulfate and water are heated to produce free iodine gas and magnesium oxide and potassium hydroxide and potassium iodide and sodium sulfate.

All this to produce the iodine we need for the next several experiments.

Cleanup: We are going to clean everything thoroughly after we finish the lab. After cleaning with soap and water, rinse thoroughly. Chemists use the rule of “three” in cleaning glassware and tools. After washing, chemists rinse out all visible soap and then rinse three times more.

Storage: Place cleaned tools and glassware in their respective storage places.

Disposal: Liquids need to be filtered through a paper towel and washed down the drain with plenty of water. Solids are thrown in the outside trash.

Going Further

*Save all solutions you make in these experiments. You will use them in the other experiments.

Testing Iodine solution

After the drops of iodine are in the test tube with water, observe. Any solid particles in the test tube prove that our iodine is not soluble in water.

Addition with Iodine

Using the solution from the above experiment, adding KI will dissolve all the solids that were observed. Why did the solids disappear? Well, nothing dramatic was seen, but an addition compound was created.

I2 + KI --> KI I2

Sodium Thiosulfate

Sodium thiosulfate (Na2S2O3) solution is pipette drop by drop to above solution until it turns clear. The reaction that takes place turns our solution into sodium hypoiodite (NaOI)

Packing Peanut

We fill a glass jar with water and 10 drops of iodine and mix well. The water will be a pale brown. Dissolve a corn starch peanut in water. When we add starch solution to the iodine and water, the water turns clear, then blue. We have just created iodine starch!

Colorless Iodine

Sodium thiosulfate solution from an experiment above. Put a few droppers of this solution into the iodine starch and stir. Colorless! We have a colorless iodine solution….very cool!

Iodine and Heat

To set this one up, dropper one drop of iodine solution into a test tube half-filled with water. Then we regain our bright blue color by adding our starch solution to the iodine water. When we add heat, The solution turns clear! But, we’re not done. The test tube goes into a half full jar of cool water. The solution in the test tube is turning blue. If you keep doing these actions over and over again, you will keep getting the same results. Did you notice something? The reaction is ________. Think, now. (Psst! It's reversible!)

Colorless Iodine Without Heat

In this experiment we use alcohol to achieve a clear solution. We pour some iodine starch solution into some alcohol and the solution turns clear. The alcohol removed the iodine from the solution.

Click here to download Equilibrium Constants and Reaction Mechanisms.

[/am4show]

WARNING!! THIS EXPERIMENT IS PARTICULARLY DANGEROUS!! (No kidding.) This experiment is for advanced students.

We've created a video that shows you how to safely do this experiment, although if you're nervous about doing this one, just watch the video and skip the actual experiment.

Bromine is a particularly nasty chemical, so be sure to very carefully follow the steps we've outlined in the video. You MUST do this experiment outdoors. We'll be making a tiny amount to show how the chemical reactions involving bromine work.

[am4show have='p9;p52;' guest_error='Guest error message' user_error='User error message' ] Isn’t it interesting how many ways we can use the same techniques and, by just changing a few chemicals, we can learn about so many different chemical reactions? This lab is similar in technique to the Generating Hydrochloric Acid lab. Using the same techniques, we will produce hydrogen bromide.

Hydrogen bromide (HBr) was used as a sedative in the late 1800s and early 1900s. Once they found out how poisonous it really was (after enough people became blind and/or dead), someone had the wonderful idea that maybe we shouldn’t use it anymore. It was also used to control epilepsy until the substitute Phenobarbital came on the scene in 1911. HBr is still used to treat epilepsy in dogs. In cats HBr causes inflammation of the lungs and makes for a very unhappy cat.

Materials:
  • Alcohol burner
  • Lighter
  • Wire screen
  • Tripod stand
  • Glass jar
  • Rubber tubing
  • 900 Glass tubing
  • One-hole rubber stopper
  • Chemistry stand
  • Test tube holder
  • Test tube
  • Potassium bromide (KBr) (MSDS)
  • Sodium hydrogen sulfate (NaHSO4) (MSDS) Sodium hydrogen sulfate is very toxic. Respect it, handle it carefully and responsibly. Do not take it for granted.
  • Burette
  • Water
  • Sodium carbonate (Na2CO3) (MSDS)
  • Silver nitrate (AgNO3) (MSDS)
NOTE: Be very careful when handling the sodium hydrogen sulfate – it’s highly corrosive and dangerous when wet. Handle this chemical only with gloves, and be sure to read over the MSDS before using. Maintain good and proper lab techniques. We are working with some nasty stuff in this lab. We need to perform this lab outdoors if possible, or indoors with lots of ventilation. The reaction advances in stages:
  • Bubbles in the burette tell us the reaction is occurring.
  • Brown streaks will appear in the water contained in the glass jar as gas collects there.
  • Brown vapor will begin to appear in the test tube. When the reaction is complete, the test tube will contain lots of brown vapor.
After we produce HBr, we will perform a number of tests to see if it is an acid or a base.
  1. Test contents of test tube with blue litmus paper. Red color change indicates an acid.
  2. Add baking soda to the HBr. Bubbles and the solution turning white. HBr is an acid in this test because it is obviously reacting with a base.
  3. If a magnesium strip placed in the HBr corrodes, or starts to dissolve, then HBr is an acid.
  4. With the addition of silver nitrate to the HBr, if a white cloudiness occurs and crystals form in the bottom of the test tube, then HBr is an acid.

C3000: Experiment


Download Student Worksheet & Exercises Here’s what’s going on in this experiment: KBr + NaHSO4 --> HBr + KNaSO4 Potassium bromide and sodium hydrogen sulfate, when heated, produce hydrogen bromide and potassium sodium sulfate. Cleanup: We are going to clean everything thoroughly after we finish the lab. After cleaning with soap and water, rinse thoroughly. Chemists use the rule of “three” in cleaning glassware and tools. After washing, chemists rinse out all visible soap and then rinse three times more. Storage: Place cleaned tools and glassware in their respective storage places. Disposal: Liquids can be washed down the drain. Solids are thrown in the trash.

Click here to download Homework Problem Set #9.

[/am4show]

WARNING!! THIS EXPERIMENT IS PARTICULARLY DANGEROUS!! (No kidding.) This experiment is for advanced students.


We’ve created a video that shows you how to safely do this experiment, although if you’re nervous about doing this one, just watch the video and skip the actual experiment.


The gas you generate with this experiment is lethal in large doses, so you MUST do this experiment outdoors. We’ll be making a tiny amount to show how the chemical reactions of chlorine and hydrogen work.


[am4show have=’p9;p52;’ guest_error=’Guest error message’ user_error=’User error message’ ]


Hydrochloric acid is a strong acid. It is highly corrosive, which means that this acid will destroy or irreversibly damage another substance it comes in contact with. Simple terms….it is pretty nasty, so take special care when working with or around it.


HCl is used in processing leather, cleaning products, and in the food industry. We are most familiar with HCl in the form of Gastric Acid. HCl is in gastric acid and is one of the main ingredients in our stomach to aid in digestion of our food. In our lab we will produce hydrogen chlorine gas and add water to turn change it into hydrochloric acid.


Materials:


  • Glass jar
  • 900 bend glass tubing
  • One-hole rubber stopper
  • Chemistry stand
  • Wire mesh
  • 2 Test tubes
  • Test tube clamp
  • Alcohol burner
  • Lighter
  • Tripod stand
  • Sodium hydrogen sulfate (MSDS) Sodium hydrogen sulfate is very toxic. Respect it, handle it carefully and responsibly. Do not take it for granted.
  • Salt
  • One-hole cork
  • Medicine dropper
  • Water
  • Solid rubber stopper

NOTE: Be very careful when handling the sodium hydrogen sulfate – it’s highly corrosive and dangerous when wet. Handle this chemical only with gloves, and be sure to read over the MSDS before using.


Perform this experiment outdoors. If that is not a possibility, and you must do it inside, open doors and windows to provide lots of ventilation. Hydrogen chlorine gas inhalation can be fatal, but we are only producing a very small amount.


There are many steps in this lab, so go slow and steady. Read the lab over several times so you are sure what is going on and what is happening next.


When we shake the sodium hydrogen sulfate and the salt together in a stoppered test tube, we are trying to produce a heterogeneous mixture. Heterogeneous is a scientific word that means substance are mixed all together to be as one. A sample taken from one spot in the mixture should be the same as a sample taken from any other spot in the mixture.


At some point in this lab, we need to point the test tube containing the reaction slightly down. This is so the hydrogen chlorine gas can flow downhill. The gas is denser than air, so it will sink to the bottom of anything air filled…..like a room or a test tube.


Hydrogen chloride gas is poisonous – DO NOT INHALE!


When the medicine dropper / cork tool is placed in the water, water will be sucked up into the test tube. The water combines with the hydrogen chlorine gas to create hydrochloric acid.


A double replacement chemical reaction will take place in this experiment. A free hydrogen ion (+) and a free sodium ion (+) will be produced. Because their charges are alike, they cannot bond, but they can take each other’s place. The spots they each left are negatively charged after the hydrogen and sodium have departed. Opposites attract, and they reorganize into a double replacement reaction.


C3000: Experiment


Download Student Worksheet & Exercises


Here’s what’s going on in this experiment:


NaCl + NaHSO4 –> HCl + Na2SO4


Salt is combined with sodium hydrogen sulfate and heated to produce hydrochloric acid and sodium sulfate


Cleanup: We are going to clean everything thoroughly after we finish the lab. After cleaning with soap and water, rinse thoroughly. Chemists use the rule of “three” in cleaning glassware and tools. After washing, chemists rinse out all visible soap and then rinse three times more.


Storage: Place cleaned tools and glassware in their respective storage places.


Disposal: Our HCl needs to be neutralized before disposal. Put a bit of baking soda into the test tube. The contents should bubble as the neutralization is taking place. After neutralization, the liquid is safe, and can be washed down the drain. Solids are thrown in the trash.


[/am4show]


Your body moves when muscles pull on the bones through ligaments and tendons. Ligaments attach the bones to other bones, and the tendons attach the bones to the muscles.


If you place your relaxed arm on a table, palm-side up, you can get the fingers to move by pushing on the tendons below your wrist. We’re going to make a real working model of your hand, complete with the tendons that move the fingers! Are you ready?


[am4show have=’p8;p9;p29;p56;p81;p87;’ guest_error=’Guest error message’ user_error=’User error message’ ]


Here’s what you need:


  • five flexible straws
  • scrap of cardboard (at least as big as your hand)
  • five rubber bands
  • 5 feet of string or thin rope (and a lighter with adult help if you’re using nylon rope)
  • hot glue with glue sticks
  • scissors
  • razor


Download Student Worksheet & Exercises


Exercises


  1. What types of muscles are connected to our bones?
  2. Which type of connective tissue connects our muscles to our bones?
  3. What do extensor tendons in our wrist do?
  4. What do flexor tendons do?

[/am4show]


Did you know that the patterns on the tips of your fingers are unique? It’s true! Just like no two snowflakes are alike, no two people have the same set of fingerprints. In this experiment, you will be using a chemical reaction to generate your own set of blood-red prints.


[am4show have=’p8;p9;p29;p56;p81;p87;’ guest_error=’Guest error message’ user_error=’User error message’ ]


Here’s what you need


  • 1 oz. bottle of baking soda or sodium carbonate (washing soda)
  • water
  • 1 sheet of goldenrod paper
  • 1 paper towel
  • 1 magnifying lens


Download Student Worksheet & Exercises


Here’s what you do


  1. Pour a couple teaspoons of the baking soda (sodium carbonate) into a cup of water. Swish your right index finger in the damp baking soda and then roll that finger on the goldenrod paper. This should leave a bright red fingerprint on the paper. Label it right index.
  2. Continue the procedure for each finger on both hands to make a full set of prints. Be sure to label each fingerprint as you make it to identify which print goes to each finger. Don’t forget to make prints of your thumbs!
  3. Compare your prints to the basic patterns in the guide. Check for features such as whorls or loops and label them appropriately on your prints. Use abbreviations such as A for accidental, PW for plain whorl, and DL for double loop.
  4. After you have identified the dominant pattern on each of your fingertips, prepare a simple chart for each hand to record the data by finger.
  5. When you are finished studying your own prints, ask a volunteer to let you make prints of their fingers.

What’s going on?


Goldenrod paper is made using phenolphthalein, a chemical that turns red when exposed to materials with relatively high pH. Baking soda (or sodium bicarbonate) is a base which has a pH of about 8.5. Rolling your baking soda covered fingers on the goldenrod paper creates a chemical reaction which produces a red fingerprint.


Exercises


  1. What are the three main types of patterns on fingerprints? Describe each.
  2. How do fingerprints have the potential to help solve crime?
  3. Why does baking soda (or washing soda) show up red on the paper?
  4. What kind of pH do bases have?
  5. What kind of reaction do we see when the red fingerprints show up on the paper?

[/am4show]