[am4show have='p8;p9;p11;p38;p72;p77;p92;' guest_error='Guest error message' user_error='User error message' ]

Getting Started

Taught from a college-level, secular perspective, this course prepares students to engage with real science the way professional astronomers do.

Students will explore planets, stars, black holes, galaxies, and more through interactive labs, stargazing, real science projects, and weekly assignments that spark curiosity and build confidence.

Whether your student dreams of becoming a scientist or just loves looking at the night sky, this course is designed to ignite their passion for space and help them think like a real astronomer.

Each week, students will have a lesson with a teacher (watch live or recorded), build hands-on projects, and complete homework assignments. It's important that students complete each set of projects and assignments, as weeks will build on each other in complexity and content.

Near the end of the term, students will complete their capstone project. Students will have the opportunity to participate in scientific research that contributes to the real astronomical community—by measuring stars and submitting their findings for publication in a scientific journal.

Students may take part in real research opportunities and have the chance to publish their work in scientific journals—an impressive accomplishment to highlight on college applications. (No telescope required.)

Special Concern: How Can Faith-Based Homeschool Students Succeed in Secular College Science Courses?

How to Help Students Transition to Mainstream Science Without Undermining Their Beliefs

If your student is from a faith-based family, you might feel hesitant about their participation in this course. We completely understand, and wanted to share our perspective to help address your concerns.

Students who are taught how to think, rather than what to think—by learning to observe, reason logically, and evaluate evidence—tend to transition more easily into college-level science, even if their earlier learning was faith-based.

By gradually introducing mainstream scientific models in high school and focusing on real-world skills like data analysis and problem-solving, students gain the tools to engage thoughtfully with new material. Helping them decode the vocabulary and explore multiple viewpoints respectfully prepares them to enter any science course with both confidence and clarity.

While the rest of the Supercharged Science program is creation- and evolution-neutral (focusing on observable science), this astronomy course is taught from a secular perspective based on current scientific models and evidence, the same content you'd find in a college course. Click for details.

Whether you’re still deciding if this course is the right fit or you’re ready to dive in, we’ve created resources to make the process easy to understand. Start by downloading the course info packet (below) to learn what to expect, and jump into the first lesson and see how your student does with the program!

[/am4show]


[am4show have='p8;p9;p10;p11;p38;p37;' guest_error='Guest error message' user_error='User error message' ]

Chemistry Fundamentals


This is a recording of a recent live teleclass I did with thousands of kids from all over the world. I've included it here so you can participate and learn, too!

Materials:

  • Chemistry Worksheet
  • Aluminum pie plate
  • Bowl
  • Clear glue or white glue
  • Disposable cups
  • Goggles & gloves
  • Hydrogen peroxide
  • OPTIONAL: Instant reusable hand warmer (containing sodium acetate )
  • Liquid soap
  • Popsicle sticks
  • Scissors or pliers
  • Sodium tetraborate (also called “Borax”)
  • Water bottle
  • Yeast
  • Yellow highlighter

Optional: If you want to see your experiments glow in the dark, you'll need a fluorescent UV black light (about $10 from the pet store - look in cleaning supplies under "Urine-Off" for a fluorescent UV light). UV flashlights and UV LEDs will not work.

Click here to go to next lesson on Chemistry Review.

[/am4show]


How does the eye work? If you are amazed as I am about how the different parts of the eye are put together, then this is the lab for you! It's important not only to learn how to take apart video cameras and blenders to find out how they work, but also to be fascinated by how the different parts of living creatures work ... like the eye!

In today’s dissection, we’ll be looking at a cow eye. Because cow eyes are so similar to humans eyes, you’ll learn a lot about your own eyes by dissecting the cow eye. Eyes are a very special organ that form images from the world around you and then send the images to your brain for processingYou will be able to see the cornea, iris, pupil, connecting muscles and veins, and other features.

Materials:

[am4show have='p8;p9;p28;p55;' guest_error='Guest error message' user_error='User error message' ]

Here’s what to do:

  1. Take a good look at the outside of the eye.  Try to find as many of the external parts as you can.  You might notice the sclera, which covers the eyeball.  You’ll also notice fat and muscle around the eye.  Covering the front of the eye is the cornea, which was clear when the cow was alive but may look cloudy now.  Next, look through the cornea to the iris (the colored part of the eye) and the iris (the dark center.)
  2. Cut away the fat and muscle, then use a scalpel to cut the cornea.  (Get adult supervision whenever you are cutting.)  The liquid that comes out is called aqueous humor.  It is mostly water and helps the cornea keep its shape.
  3. Now make an incision into the sclera on the side opposite the cornea, and continue to cut with scissors until you end up with two halves, one with the cornea and one without.
  4. Place the side with the cornea on the cutting surface and cut through the cornea.  You’ll hear a crunching sound.  This is the sound of the many layers of tissue that make up the thick, protective cornea.
  5. Pull out the iris.  It may be stuck to the cornea or may be back with the rest of the eye.  Try to get it out in one piece.  Notice that there is a hole in the center.  This is the pupil, which lets in light.  The pupil becomes larger or smaller to let in more or less light.
  6. Next, remove the lens, which looks kind of like a marble.  Look through the lens and try putting it on some newspaper and looking through it to read the newspaper.  What do you notice?  You’ll likely see an upside down image of what you’re looking at.  The lens of a cow (and human) eye, gather bits of light that bounce off an image and project those points of light as an image.
  7. Now go back to the rest of the eye.  There may be some clear gel, called vitreous humor, in the eye.  This liquid helped keep the shape of the lens.  If it’s still in eye, dump it out so you can easily see the back the eye.  There, you’ll see some blood vessels and a thin film.  This is called the retina.  When the cow looked at something, light went through the lens, and the image showed up on the retina.  The retina then sent a message to the brain, through the optic nerve, and the brain interpreted what was being seen.
  8. If you move the retina around, you’ll find that it is only stuck to the eye in one spot.  This is where the optic nerve was.  If you can find the optic nerve, try pinching it with your fingers.  A white substance called myelin may come out.  Myelin surrounds nerves and helps messages move along more quickly.
  9. Behind the retina, you may find a blue-green substance called tapetum.  This shiny material makes the eyes of some animals, like cows and cats, shine when light is shown on them.

Here are the basic steps to observe:

  1. Observe the external anatomy of the eye. See if you can locate the following:
    1. Sclera
    2. Cornea
    3. Optic nerve
    4. Excess fat and muscle tissue
  2. Remove the excess fat from the eye using a sharp scalpel. Then, cut through the sclera around the middle of the eye and see if you can locate the following:
    1. Posterior half of eye
      1. Optic nerve
      2. Retina
      3. Optic disc
      4. Choroid coat
        1. Tapetum lucidum
    2. Anterior half of eye
      1. Cornea
      2. Lens
      3. Iris
      4. Ciliary body
    3. Vitreous humor
  3. Cut the cornea from the eye and observe the following:
    1. Aqueous humor
    2. Cornea
    3. Sclera
    4. Iris
    5. Lens
    6. Ciliary body

[/am4show]

Click here to go to part:28 Finale!


Dissection in biology provides a hands-on education above and beyond reading a textbook. By seeing, touching and exploring different organs, muscles and tissues inside an animal and seeing how they work together allows you to really understand your own body and appreciate the amazing world around us. And it's not hard  - you can dissect a kidney right at home using an inexpensive specimen with a dissection guide and simple dissection tools! Many doctors, surgeons and veterinarians report that their first fascination with the body started with a biology dissection class.

In today’s dissection, we’ll be looking at a kidney. Kidneys are critical for removing toxic waste and regulating the levels of water, sugars, salts, and acids in the bodies of mammals. There are many things that make a kidney interesting, including its unique bean shape and the fact that it contains about a million microscopic structures called nephrons that are key in the blood filtration process.

Materials:

[am4show have='p8;p9;p28;p55;p153;p65;p78;p86;p87;' guest_error='Guest error message' user_error='User error message' ]

  1. Observe the external anatomy of the kidney. See if you can locate the following:
    1. Cortex
    2. Renal artery
    3. Renal vein
    4. Ureter
  2. Cut the kidney in half longitudinally, as seen in figure 1 (incision 1). Look for the following in the cross section from incision 1:
    1. Cortex
    2. Medulla
    3. Pyramid
    4. Renal pelvis
  3. Cut the kidney in half again, as seen in figure 2 (incision 2). Look for the following, this time as a cross section from incision 2:
    1. Cortex
    2. Medulla
    3. Pyramid
    4. Renal pelvis

[/am4show]

Click here to go to part 27:Cow Eye Dissection


Dissection in biology provides a hands-on education above and beyond reading a textbook. By seeing, touching and exploring different organs, muscles and tissues inside an animal and seeing how they work together allows you to really understand your own body and appreciate the amazing world around us. And it's not hard  - you can dissect a sheep brain right at home using an inexpensive specimen with a dissection guide and simple dissection tools! Many doctors, surgeons and veterinarians report that their first fascination with the body started with a biology dissection class.

In today’s dissection, we’ll be looking at a sheep brain. Brains, while still not entirely understood by biologists or psychologists, are critical for movement, respiration, thought, memory, processing sensory signals, and more. What we talk about in today’s dissection just scratches the surface of all there is to know about the brain, which is the most complex organ in the human body.

Materials:

[am4show have='p8;p9;p28;p55;p153;p65;p78;p86;p87;' guest_error='Guest error message' user_error='User error message' ]

  1. Observe the external anatomy of the brain. See if you can locate the following:
    1. Arachnoid mater
    2. Pia mater
    3. Dura mater (may not be present on specimen)
    4. Sulci
    5. Gyri
    6. Cerebrum
    7. Cerebellum
    8. Left and right hemispheres
    9. Longitudinal fissure
    10. Transverse fissure
    11. Olfactory bulbs
    12. Optic chiasm
    13. Spinal cord
    14. Medulla oblongata
    15. Infundibulum
    16. Hypothalamus
    17. Pons
    18. Nerves: abducens, trigeminal, oculomotor
  2. Cut the brain in half longitudinally. Look for the following in the cross section from incision 1:
    1. Arbor vitae
    2. Sulci
    3. Gyri
    4. Cerebrum
    5. Cerebellum
    6. Olfactory bulbs
    7. Spinal cord
    8. Medulla oblongata
    9. Hypothalamus
    10. Thalamus
    11. Pons
    12. Corpus callosum
      1. Inferior colliculus
      2. Superior colliculus
    13. Pineal gland
    14. Nerves: abducens, trigeminal, oculomotor
  3. Cut the brain in half again, perpendicular to your first cut. Look for the following, this time as a cross section from the second incision:
    1. White matter
    2. Gray matter

[/am4show]

Click here to go to part:26 Sheep Kidney Dissection


Dissection in biology provides a hands-on education above and beyond reading a textbook. By seeing, touching and exploring different organs, muscles and tissues inside an animal and seeing how they work together allows you to really understand your own body and appreciate the amazing world around us. And it's not hard  - you can dissect a heart right at home using an inexpensive specimen with a dissection guide and simple dissection tools! Many doctors, surgeons and veterinarians report that their first fascination with the body started with a biology dissection class.

In today’s dissection, we’ll be looking at a sheep heart. Like humans, sheep have four-chambered hearts. Hearts are an essential organ--they pump blood through your body to keep you alive!

Materials:

[am4show have='p8;p9;p28;p55;p153;p65;p78;p86;p87;' guest_error='Guest error message' user_error='User error message' ]

  1. Observe the external anatomy of the heart. See if you can locate the following:
    1. Right ventricle
    2. Left ventricle
    3. Coronary blood vessel
    4. Apex
    5. Auricles
    6. Superior vena cava
    7. Inferior vena cava
    8. Pulmonary vein
    9. Pulmonary artery
    10. Aorta
  2. Cut the heart following incisions 1-4 in the guidebook and see if you can locate the following:
    1. Left atrium:
      1. Aorta
      2. Mitral valve
      3. Chordae tendineae
      4. Trabeculae carneae
      5. Papillary muscles
    2. Right atrium
      1. Tricuspid valve
      2. Aortic semilunar valve
      3. Pulmonary semilunar valve
  3. Now, try to draw a diagram showing how blood flows into and out of the heart. How many of the parts we identified above can you include in your diagram?

[/am4show]

Click here to go to part:25 Sheep Brain Dissection


In today’s dissection, we’ll be looking at an owl pellet. Owls are carnivores, and they eat things like moles, shrews, rodents, birds, insects, and even crayfish. Owls are unable to digest the bones and fur of these creatures, so they regurgitate (or spit up) what are called pellets--small bundles of all the indigestible parts of the owl’s prey.

Owl pellet dissection is an easy, hands-on way to learn about the eating habits of birds of prey. (Owl pellets are the regurgitated remains of an owl's meal.) But don't be grossed out - finding and piecing together the bones inside owl pellets is fascinating work for a young scientist such as yourself! As you dissect the pellet, you'll find skeletons of mice, voles, birds, and more. Synthetic pellets are available for younger children if you'd like to use a substitute.

Dissection in biology provides a hands-on education above and beyond reading a textbook. By seeing, touching and exploring different organs, muscles and tissues inside an animal and seeing how they work together allows you to really understand your own body and appreciate the amazing world around us. And it's not hard  - you can dissect a pellet right at home using an inexpensive specimen with a dissection guide and simple dissection tools! Many doctors, surgeons and veterinarians report that their first fascination with the body started with a biology dissection class.

Materials:

[am4show have='p8;p9;p28;p55;p153;p65;p78;p86;p87;' guest_error='Guest error message' user_error='User error message' ]


Procedure

  1. Observe the external anatomy of your owl pellet. See if you can identify the following:
    1. Fur
    2. Bones
  2. Gently break apart the owl pellet, separating it into two piles: one pile of fur and the other of bones.
  3. Use your prey guide to identify some or all of the following:
    1. Skull
    2. Mandible
    3. Clavicle
    4. Humerus
    5. Scapula
    6. Pelvis
    7. Femur
    8. Fibula and Tibia
    9. Radius and Ulna
    10. Bird parts
    11. Insect parts
    12. Crayfish parts
  4. See if you can piece some of the bones back together, and determine what sort of prey you are looking at--is it a mole, shrew, rodent, bird, insect, crayfish, or something else?

[/am4show]

Click here to go to part:24 Sheep Heart Dissection


Dissection in biology provides a hands-on education above and beyond reading a textbook. By seeing, touching and exploring different organs, muscles and tissues inside an animal and seeing how they work together allows you to really understand your own body and appreciate the amazing world around us. And it’s not hard  – you can dissect a frog right at home using an inexpensive specimen with a dissection guide and simple dissection tools! Many doctors, surgeons and veterinarians report that their first fascination with the body started with a biology dissection class.

In today’s dissection, we’ll be looking at a frog. Frogs are members of the Class Amphibia. There are many things that make frogs interesting: they live both in water and on land, they actually begin life in water as limbless tadpoles, and some can change color depending on their environment.

Materials

[am4show have='p8;p9;p28;p55;p153;p65;p78;p86;p87;' guest_error='Guest error message' user_error='User error message' ]

Procedure

  1. Observe the external anatomy of your frog. See if you can locate the following:
    1. Hind legs with 5 webbed digits
    2. Front legs with four digits
    3. Skin
    4. Anus
    5. Eyes
    6. Tympanum (eardrum)
    7. Mouth
      1. Vomerine teeth
      2. Maxillary teeth
  2. Cut open the frog
    1. Lay the frog on its back and pin its limbs to the tray
    2. Use forceps to lift some of the skin between the hind legs of the the frog, and use a scalpel to make a small incision
    3. Using scissors, cut up the center of the frog’s body, making sure to cut only through the skin
    4. Cut down the sides of the frog at either end of the cut, creating flaps of skin
    5. Pin the flaps to the dissection tray
    6. Repeat steps 2.3-2.5 but this time cut through the muscle of the frog
    7. Pin the muscle flaps to the dissection tray
  3. Look for the following organs:
    1. Fat bodies
    2. Eggs (female specimens only)
    3. Heart
    4. Liver
    5. Gallbladder
    6. Stomach
    7. Small intestine
    8. Pancreas
    9. Spleen
    10. Ovaries and oviducts (female specimens only)
    11. Kidneys

[/am4show]

Click here to go to part:23 Owl Pellet Dissection


Dissection in biology provides a hands-on education above and beyond reading a textbook. By seeing, touching and exploring different organs, muscles and tissues inside an animal and seeing how they work together allows you to really understand your own body and appreciate the amazing world around us. And it’s not hard – you can dissect a crayfish right at home using an inexpensive specimen with a dissection guide and simple dissection tools! Many doctors, surgeons and veterinarians report that their first fascination with the body started with a biology dissection class.

In today’s dissection, we’ll be looking at a crayfish. Crayfish are members of the phylum Arthropoda. There are many things that make crayfish interesting: they dwell at the bottom of streams, rivers, and ponds; they feed on just about anything that comes their way (that’s why they’re called freshwater scavengers); and they have many appendages that help them save energy.

Materials

[am4show have='p8;p9;p28;p55;p153;p65;p78;p86;p87;' guest_error='Guest error message' user_error='User error message' ]


Procedure

  1. Observe the external anatomy of your crayfish. See if you can locate the following:
    1. Head
    2. Thorax
    3. Abdomen
    4. Cephalothorax (region where the head is fused to the thorax)
    5. Chelipeds (claws)
    6. Jointed walking legs
    7. Swimmerets (see if you can figure out whether your crayfish is
    8. male or female)
    9. Mouth
    10. Anus
    11. Antennae
    12. Telson
  2. Remove a section of the carapace
    1. Cut 1: Cut up the length of the crayfish--from the bottom edge of the cephalothorax to just below the eyes
      1. Keep your cut parallel to the table
    2. Cut 2: Cut straight down each end of your first cut
    3. Cut 3: Cut the length of each side of the abdomen using the same technique you used in cuts 1 and 2
    4. Remove the exoskeleton
  3. Look for the following organs:
    1. Gills (connected to the walking legs)
    2. Heart
    3. Esophagus
    4. Digestive gland
    5. Cardiac stomach
    6. Pyloric stomach
    7. Intestine
    8. Anus
    9. Green glands
    10. Nerve cord
    11. Gonads

[/am4show]

Click here to go to part 22:Dissecting a Frog


Dissection in biology provides a hands-on education above and beyond reading a textbook. By seeing, touching and exploring different organs, muscles and tissues inside an animal and seeing how they work together allows you to really understand your own body and appreciate the amazing world around us. And it’s not hard – you can dissect a starfish right at home using an inexpensive specimen with a dissection guide and simple dissection tools! Many doctors, surgeons and veterinarians report that their first fascination with the body started with a biology dissection class.

In today’s dissection, we’ll be looking at a starfish. Starfish are members of the phylum Echinoderm. There are many things that make starfish interesting: their rays are symmetrical around their center (this is called radial symmetry), they use seawater instead of blood to transport nutrients through their bodies (this is called a water vascular system), and they move around using tube feet on the underside of their bodies.

Materials

[am4show have='p8;p9;p28;p55;p153;p65;p69;p86;p87;' guest_error='Guest error message' user_error='User error message' ]


Procedure

  1. Observe the external anatomy of your starfish. See if you can locate the following:
    1. Madreporite (sieve plate)
    2. The spiny skin on the top side of the starfish
    3. Tube feet
    4. Ambulacral grooves
    5. Mouth
  2. Remove a large piece of skin from one of the starfish’s rays
    1. Using your scissors, snip off a small piece of the tip of one ray
      1. Choose a ray that does not attach near the madreporite
    2. Take the point of the scissors, place it into the opening you created in step 2.1.1 above, and carefully cut up the length of the ray, around the center of the starfish, and back down the length of the ray
      1. Make your cut parallel to the table
      2. Do not cut around the madreporite, rather keep your cut to the inside of the madreporite
  3. Look for the following organs:
    1. Digestive glands
    2. Pyloric stomach and pyloric ducts
    3. Cardiac stomach
    4. Gonads (ovaries or testes)
  4. Identify the parts of the water vascular system:
    1. Madreporite
    2. Stone canal
    3. Ring canal
    4. Radial canal
    5. Ampullae
    6. Tube feet

[/am4show]

Click here to go to part:21 Dissecting a Crayfish


Dissection in biology provides a hands-on education above and beyond reading a textbook. By seeing, touching and exploring different organs, muscles and tissues inside an animal and seeing how they work together allows you to really understand your own body and appreciate the amazing world around us. And it's not hard  - you can dissect a fish right at home using an inexpensive specimen with a dissection guide and simple dissection tools! Many doctors, surgeons and veterinarians report that their first fascination with the body started with a biology dissection class

.

In today’s dissection, we’ll be looking at a perch. Perch are members of the phylum Chordata. There are many things that make perch interesting: they are bony fishes which make them “true” fishes, they live in both freshwater and saltwater, and their diets change based on how big they are.

Materials:

[am4show have='p8;p9;p28;p55;p153;p65;p78;p86;p87;' guest_error='Guest error message' user_error='User error message' ]

Observe the external anatomy of your perch. See if you can locate the following:

  1. Head
  2. Trunk
  3. Tail
  4. Fins
    1. Caudal fin
    2. Posterior dorsal fin
    3. Anterior dorsal fin
    4. Pectoral fin
    5. Pelvic fin
    6. Anal fin
  5. Operculum
  6. Eye
  7. Nostril
  8. Mandible
  9. Maxilla
  10. Anus
  11. Lateral line

Open the trunk of the fish following incisions 1-4 in the guidebook and locate the following:

  1. Gills
  2. Stomach
  3. Swim bladder
  4. Kidney
  5. Gonad
  6. Intestine
  7. Liver
  8. Pyloric caeca
  9. Spleen
  10. Gallbladder
  11. Heart

Open the skull of the fish and locate the following:

  1. Skull
  2. Fatty tissue
  3. Cerebrum
  4. Cerebellum
  5. Olfactory bulbs

[/am4show]

Click here to go to part 20:Dissecting a Starfish


Dissection in biology provides a hands-on education above and beyond reading a textbook. By seeing, touching and exploring different organs, muscles and tissues inside an animal and seeing how they work together allows you to really understand your own body and appreciate the amazing world around us. And it's not hard  - you can dissect a grasshopper right at home using this inexpensive specimen with a dissection guide and simple dissection tools! Many doctors, surgeons and veterinarians report that their first fascination with the body started with a biology dissection class.

Materials:

[am4show have='p8;p9;p28;p55;p153;p65;p78;p86;p87;' guest_error='Guest error message' user_error='User error message' ]

Procedure

  1. Observe the external anatomy of your grasshopper. See if you can locate the following:
    1. Head
      1. Antennae
      2. Eyes (compound and simple)
      3. Mouth
        1. Labrum
        2. Mandibles
        3. Maxillae
        4. Labium
        5. Labial palps
    2. Thorax
      1. Legs
        1. Femur
        2. Tibia
        3. Tarsus
        4. Spurs
      2. Wings (front and hind)
      3. Pronotum
    3. Abdomen
      1. Tympanum
      2. Spiracles
      3. Ovipositors (female specimen only)
  2. Using your scissors, detach each part of the grasshopper’s mouth
  3. Using your scissors, remove a section of the exoskeleton from the grasshopper
    1. Remove the wings and legs from the right side of the grasshopper
    2. Cut from the end of the abdomen up to the head of the grasshopper, making your cut just to the right of the mid dorsal line
    3. Cut down the right side of the exoskeleton on either end of your first cut
    4. Pin the exoskeleton to your dissection tray
  4. Look for the following organs:
    1. Heart
    2. Ovaries (female specimen only)
    3. Digestive tract
      1. Esophagus
      2. Crop
      3. Stomach
      4. Gastric caeca
      5. Intestine
      6. Rectum
    4. Malpighian tubules

[/am4show]

Click here to go to part:19 Perch Dissection


Dissection in biology provides a hands-on education above and beyond reading a textbook. By seeing, touching and exploring different organs, muscles and tissues inside an animal and seeing how they work together allows you to really understand your own body and appreciate the amazing world around us. And it's not hard  - you can dissect a worm right at home using an inexpensive specimen with a dissection guide and simple dissection tools! Many doctors, surgeons and veterinarians report that their first fascination with the body started with a biology dissection class

.

In today’s dissection, we’ll be looking at an earthworm. Earthworms play an important role in their ecosystem--when they tunnel through dirt they mix nutrients which helps make the soil healthy and able to support plant life.

Materials:

[am4show have='p8;p9;p28;p55;p153;p65;p78;p86;p87;' guest_error='Guest error message' user_error='User error message' ]

Procedure:

  1. Observe the external anatomy of your earthworm. See if you can locate the following:
    1. Anterior and posterior ends
    2. Prostomium
    3. Anus
    4. Septa
    5. Clitellum
    6. Dorsal and ventral surfaces
    7. Bristles
    8. Genital pores
  2. Pin each end of the worm to the tray with the dorsal side facing up
  3. Begin a cut about an inch below the clitellum, and cut up toward the mouth (be careful not to cut too deep and damage the internal organs)
    1. Pin the skin flaps of the worm to the tray
  4. Look for the following organs:
    1. Mouth
    2. Pharynx
    3. Esophagus
    4. Crop
    5. Gizzard
    6. Intestine
    7. Hearts
    8. Dorsal blood vessel
    9. Ventral blood vessel
    10. Ventral nerve cord
    11. Brain
    12. Seminal vesicles
    13. Seminal receptacle

[/am4show]

Click here to go to part:18 Grasshopper Dissection


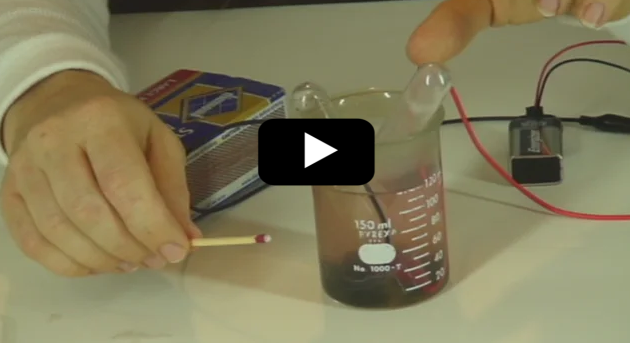
This experiment is just for advanced students. If you guessed that this has to do with electricity and chemistry, you’re right! But you might wonder how they work together. Back in 1800, William Nicholson and Johann Ritter were the first ones to split water into hydrogen and oxygen using electrolysis. (Soon afterward, Ritter went on to figure out electroplating.) They added energy in the form of an electric current into a cup of water and captured the bubbles forming into two separate cups, one for hydrogen and other for oxygen.

This experiment is not an easy one, so feel free to skip it if you need to. You don’t need to do this to get the concepts of this lesson but it’s such a neat and classical experiment (my students love it) so you can give it a try if you want to. The reason I like this is because what you are really doing in this experiment is ripping molecules apart and then later crashing them back together.

Have fun and please follow the directions carefully. This could be dangerous if you’re not careful. The image shown here is using graphite from two pencils sharpened on both ends, but the instructions below use wire.  Feel free to try both to see which types of electrodes provide the best results.

[am4show have='p9;p40;p76;p91;p58;' guest_error='Guest error message' user_error='User error message' ]

You will need:

  • 2 test tubes or thin glass or plastic something closed at one end. I do not recommend anything wider than a half inch in diameter.
  • 2 two wires, one needs to be copper, at least 12 inches long. Both wires need to have bare ends.
  • 1 Cup
  • Water
  • One 9 volt battery
  • Long match or a long thin piece of wood (like a popsicle stick) and a match
  • Rubber bands
  • Masking tape
  • Salt

Download Student Worksheet & Exercises
1. Fill the cup with water.

2. Put a tablespoon or so of salt into the water and stir it up. (The salt allows the electricity to flow better through the water.)

2. Put one wire into the test tube and rubber band it to the test tube so that it won’t come out (see picture).

3. Use the masking tape to attach both wires to the battery. Make sure the wire that is in the test tube is connected to the negative (-) pole of the battery and that the other is connected to the positive (+) pole. Don’t let the bare parts of the different wires touch. They could get very hot if they do.

4. Fill the test tube to the brim with the salt water.

5. This is the tricky part. Put your finger over the test tube, turn it over and put the test tube, open side down, into the cup of water. (See picture.)

6. Now put the other wire into the water. Be careful not to let the bare parts of the wires touch.

7. You should see bubbles rising into the test tube. If you don’t see bubbles, check the other wire. If bubbles are coming from the other wire either switch the wires on the battery connections or put the wire that is bubbling into the test tube and remove the other. If you see no bubbles check the connections on the battery.

8. When the test tube is half full of gas (half empty of salt water depending on how you look at it) light the long match or the wooden stick. Then take the test tube out of the water and let the water drain out. Holding the test tube with the open end down, wait for five seconds and put the burning stick deep into the test tube (the flame will probably go out but that’s okay). You should hear an instant pop and see a flash of light. If you don’t, light the stick again and try it another time. For some reason, it rarely works the first time but usually does the second or third.

A water molecule, as you saw before, is two hydrogen atoms and one oxygen atom. The electricity encouraged the oxygen to react with the copper wire leaving the hydrogen atoms with no oxygen atom to hang onto. The bubbles you saw were caused by the newly released hydrogen atoms floating through the test tube in the form of hydrogen gas. Eventually that test tube was part way filled with nothing but pure hydrogen gas.

But how do you know which bubbles are which? You can tell the difference between the two by the way they ignite (don’t’ worry – you’re only making a tiny bit of each one, so this experiment is completely safe to do with a grown up).

It takes energy to split a water molecule. (On the flip side, when you combine oxygen and hydrogen together, it makes water and a puff of energy. That’s what a fuel cell does.) Back to splitting the water molecule - as the electricity zips through your wires, the water molecule breaks apart into smaller pieces: hydrogen ions (positively charged hydrogen) and oxygen ions (negatively charged oxygen). Remember that a battery has a plus and a minus charge to it, and that positive and negative attract each other.

So, the positive hydrogen ions zip over to the negative terminal and form tiny bubbles right on the wire. Same thing happens on the positive battery wire. After a bit of time, the ions form a larger gas bubble. If you stick a cup over each wire, you can capture the bubbles and when you’re ready, ignite each to verify which is which.

If the match burns brighter, the gas is oxygen. If you hear a POP!, the gas is hydrogen. Oxygen itself is not flammable, so you need a fuel in addition to the oxygen for a flame. In one case, the fuel is hydrogen, and hence you hear a pop as it ignites. In the other case, the fuel is the match itself, and the flame glows brighter with the addition of more oxygen.

When you put the match to it, the energy of the heat causes the hydrogen to react with the oxygen in the air and “POP”, hydrogen and oxygen combine to form what? That’s right, more water. You have destroyed and created water! (It’s a very small amount of water so you probably won’t see much change in the test tube.)

The chemical equations going on during this electrolysis process look like this:

A reduction reaction is happening at the negatively charged cathode. Electrons from the cathode are sticking to the hydrogen cations to form hydrogen gas:

2 H+(aq) + 2e- --> H2(g)

2 H2O(l) + 2e- --> H2(g) + 2 OH-(aq)

The oxidation reaction is occurring at the positively charged anode as oxygen is being generated:

2 H2O(l)  --> O2(g) + 4 H+(aq) + 4e-

4 OH-(aq) --> O2(g) + 2 H2O(l) + 4 e-

Overall reaction:

2 H2O(l)  --> 2 H2(g) + O2(g)

Note that this reaction creates twice the amount of hydrogen than oxygen molecules. If the temperature and pressure for both are the same, you can expect to get twice the volume of hydrogen to oxygen gas (This relationship between pressure, temperature, and volume is the Ideal Gas Law principle.)

This is the idea behind vehicles that run on sunlight and water.  They use a solar panel (instead of a 9V battery) to break apart the hydrogen and oxygen and store them in separate tanks, then run them both back together through a fuel cell, which captures the energy (released when the hydrogen and oxygen recombine into water) and turns the car's motor. Cool, isn't it?

Note: We're going to focus on Alternative Energy in Unit 12 and create all sorts of various energy sources including how to make your own solar battery, heat engine, solar & fuel cell vehicles (as described above), and more!

Exercises

  1. Why are bubbles forming?
  2. Did bubbles form at both wires, or only one? What kind of bubbles are they?
  3. What would happen if you did this experiment with plain water? Would it work? Why or why not?
  4. Which terminal (positive or negative) produced the hydrogen gas?
  5. Did the reaction create more hydrogen or more oxygen?

[/am4show]


If you have a Fun Fly Stick, then pull it out and watch the video below. If not, don't worry - you can do most of these experiments with a charged balloon (one that you've rubbed on your hair). Let' play with a more static electricity experiments, including making things move, roll, spin, chime, light up, wiggle and more using  static electricity! [am4show have='p8;p9;p97;p58;' guest_error='Guest error message' user_error='User error message' ] Materials:
  • sheet of paper
  • two empty, clean soup cans
  • aluminum foil
  • long straight pin
  • three film canisters (or M&M containers or small plastic bottles)
  • penny
  • neon bulb (optional)
  • small styrofoam ball or single packing peanut
  • fishing line or thread
  • chopstick
  • foam cup
  • small aluminum pie tins or make your own from aluminum foil
  • hot glue with glue sticks
  • Fun Fly Stick (also called "Wonder Fly Stick")
This video show you how to get the most out of your Fun Fly Stick. If you don't have a Fly Stick, simply use an inflated balloon that you've rubbed on your head. In the video, the Electrostatic Lab is mounted on a foam meat tray I found at the grocery store.
  Download Student Worksheet & Exercises The triboelectric series is a list that ranks different materials according to how they lose or gain electrons. Near the top of the list are materials that take on a positive charge, such as air, human skin, glass, rabbit fur, human hair, wool, silk, and aluminum. Near the bottom of the list are materials that take on a negative charge, such as amber, rubber balloons, copper, brass, gold, cellophane tape, Teflon, and silicone rubber. When you turn on your Fun Fly Stick (or rub your head with a balloon), one end of the Fun Fly Stick takes on a positive charge and the other end holds the negative charge. When you rub your head with a balloon, the hair takes on a positive charge and the balloon takes on a negative charge. When you scuff along the carpet, you build up a static charge (of electrons). Your socks insulate you from the ground, and the electrons can’t cross your sock-barrier and zip back into the ground. When you touch someone (or something grounded, like a metal faucet), the electrons jump from you and complete the circuit, sending the electrons from you to them (or it). Exercises
  1. What is common throughout all these experiments that make them work?
  2. What makes the neon bulb light up? What else would work besides a neon bulb?
  3. Does it matter how far apart the soup cans are?
  4. Why does the foil ball go back and forth between the two cans?
  5.  Why do the pans take on the same charge as the Fly Stick?
  6.  When sticking a sheet of paper to the wall, does it matter how long you charge the paper for?
  7.  Draw a diagram to explain how the electrostatic motor works. Label each part and show where the charges are and how they make the rotor turn.
[/am4show]  


The shell of chicken eggs are made mostly of calcium carbonate (CaCO3), which which reacts with distilled white vinegar (try placing a raw egg in a glass of vinegar overnight). The shell has over 15,000 tiny little mores that allows air and moisture to pass through, and a protective outer coating to keep out harmful things like dust and bacteria.

We're going to peek inside of an egg and discover the transparent protein membrane (made of the same protein your hair is made up of: keratin) and also peek in the air space that forms when the egg cools and contracts (gets smaller). Can you find the albumen (the egg white)? It's made up of mostly water with about 40 different proteins.

[am4show have='p8;p9;p28;p55;p65;p86;p87;' guest_error='Guest error message' user_error='User error message' ]

The chalaze are the thin rope-like strands that anchor the yolk in the center of the egg. The more prominent they are, the fresher the egg you've got. The yolk itself is more protein than water compared with the white. That's where you'll find all the fat, lecithin, and minerals. The exact shade of color of the yolk is going to depend on the hen that actually laid it.

Materials:

  • bowl
  • chicken egg
  • spoon
  • toothpick

Here's what you do:

[/am4show]

Download Egg Dissection Lab here for older grades (5-12th) and here for younger grades (K-4).

Click here to go to part 16:Clam Dissection


Going Further


We are all made of trillions of cells, and each cell as a job to do, like detecting light, sensing touch, carry oxygen, digest food… there are over 200 different jobs just in your own body alone for cells to do! DNA are the instructions that tell cells what their job is.


Find the full DNA experiment here.

Click here to go to part 15:Dissecting a Chicken Egg


If you were an astrobiologist, you would be working with space scientists and marine biologists also, because you would need to understand how life works here on earth in extreme environments in order to help you understand what you find out there in space.


Click here to go to Part 12: Cells


Osmosis is how water moves through a membrane. A carrot is made up of cells surrounded by cell membranes. The cell membrane’s job is to keep the cell parts protected. Water can pass through the membrane, but most things can’t.


Find the full Carrot Osmosis experiment here.

Click here to go to Part 14: DNA


Animals, plants and other living things look different, and contain many different kinds of cells, but when you get down to it, all of us are just a bunch of cells – and that makes cells pretty much the most important thing when it comes to life!

[am4show have='p8;p9;p11;p38;p72;p77;p92;' guest_error='Guest error message' user_error='User error message' ]

Molecules are the building blocks of matter. You’ve probably heard that before, right? But that does it mean? What does a molecule look like? How big are they? Let’s find out.

While you technically can measure the size of a molecule, despite the fact it’s usually too small to do even with a regular microscope, what you can’t do is see an image of the molecule itself. The reason has to do with the limits of nature and wavelengths of light, not because our technology isn’t there yet, or we’re not smart enough to figure it out. Scientists have to get creative about the ways they do about measuring something that isn’t possible to see with the eyes.

Here’s what you do:

Step 1: Place water in the pie pan and sprinkle in the chalk dust. You want a light, even coating on the surface.

Step 2: Place dish soap inside the medicine dropper and hold it up.

Step 3: Squeeze the medicine dropper carefully and slowly so that a single drop forms at the tip. Don’t let it fall!

Step 4: Hold the ruler up and measure the drop. Record this in your data sheet.

Step 5: Hold the tip of the dropper over the pie pan near the surface and let it drop onto the water near the center of the pie pan.

Step 6: Watch it carefully as it spreads out to be one molecule thick!

Step 7: Quickly measure and record the diameter of the layer of the detergent on your data sheet.

Step 8: Use equations for sphere and cylinder volume to determine the height (which we assume to be one molecule thick) of the soap when it’s spread out. That’s the approximate width of the molecule!

What you've done in this experiment is taken a small sphere of soap, and made it flatten itself out to a disk that is one molecule thick. The chalk dust is only there so that you can actually see this happening. When you let the drop hit the surface of the water, due to the structure of the molecules, they repel each other as much as possible. Because of this, we can easily measure the thickness of the soap disk on the surface. The total volume of the drop does not change during the experiment (the act of releasing the drop doesn't change how much soap is in the drop). So the volume of the spherical soap is the same as the volume.

Find the full Measuring the Size of a Molecule experiment here.

Click here to go to Part 13: Osmosis

[/am4show]


Ecology studies nature and how the whole ecosystem works. An ecosystem is a community of interacting living things in their environment.

[am4show have='p8;p9;p11;p38;p72;p77;p92;' guest_error='Guest error message' user_error='User error message' ]
Find the full Terra Aqua experiment here.

Click here to go to Part 11: Astrobiology

[/am4show]
A virus is like when you catch a cold or the chicken pox – the virus uses the cells in your body to make copies of itself so it can spread throughout your body. Bacteria on the other hand, are living microorganisms, most of which don’t harm people at all (there are exceptions, like when they cause strep throat and tuberculosis).

Find the full Laser Microscope experiment here.

Click here to go to Part 9: Bioluminescence

Find the full Laser Microscope experiment here.

There’s a special way scientists classify and name all living things – it’s called “taxonomy”. All living things are divided into the following groups, called kingdoms. All kingdoms are made up of smaller groups which are made of even smaller groups, and so on. A series of groups within one system is called a hierarchy. It’s how you find your serving spoon in a drawer with a million other silverware pieces – it makes it easy and fast to find out about what you want.


Click here to go to Part 8: Viruses & Bacteria


Here’s a neat experiment you can do to measure the rate of photosynthesis of a plant, and it’s super-simple and you probably have most of what you need to do it right now at home!


You basically take small bits of a leaf like spinach, stick it in a cup of water that has extra carbon dioxide in it, and shine a light on it. The plant will take the carbon dioxide from the water and the light from the lamp and make oxygen bubbles that stick to it and lift it to the surface of the water, like a kid holding a bunch of helium balloons. And you time how long this all takes and you have the rate of photosynthesis for your leaf.

Click here to go to Part 7: Taxonomy


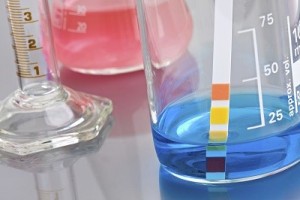
Acids are sour tasting (like a lemon), bases are bitter (like unsweetened cocoa powder). Substances in the middle are more neutral, like water. Scientists use the pH (power of hydrogen, or potential hydrogen) scale to measure how acidic or basic something is. Hydrochloric acid registers at a 1, sodium hydroxide (drain cleaner) is a 14. Water is about a 7. pH levels tell you how acidic or alkaline (basic) something is, like dirt. If your soil is too acidic, your plants won't attract enough hydrogen, and too alkaline attracts too many hydrogen ions. The right balance is usually somewhere in the middle (called 'pH neutral'). Some plants change color depending on the level of acidity in the soil - hydrangeas turn pink in acidic soil and blue in alkaline soil.

Some things you can test (in addition to the ones in the video) include: Sprite, distilled white vinegar, baking soda, Vanish, laundry detergent, clear ammonia, powdered Draino, and Milk of Magnesia. DO NOT mix any of these together! Simply add a bit to each cup and test it with your pH strips. Here's a quick video demonstration:


Click here to go to Part 6: Bonus Content: Measuring Photosynthesis


There are many different kinds of acids: citric acid (in a lemon), tartaric acid (in white wine), malic acid (in apples), acetic acid (in vinegar), and phosphoric acid (in cola drinks). The battery acid in your car is a particularly nasty acid called sulfuric acid that will eat through your skin and bones. Hydrochloric acid is found in your stomach to help digest food, and nitric acid is used to make dyes in fabrics as well as fertilizer compounds.

Botany (plant biology) studies the nature of plants and their environment. Take a look at some of the things you get to study when you’re a botanist!

[am4show have='p8;p9;p11;p38;p72;p77;p92;' guest_error='Guest error message' user_error='User error message' ]
 

Click here to go to Part 6: Botany 2

Find the full Gummy Bear experiment here.
[/am4show]
If you’ve ever watched a bird take off, you know it flaps its wings first, then somehow lifts itself off the ground. Some birds need to get a running start, and overs can just hover straight up. What about an airplane – how does an airplane take off? Does it need to flap its wings? Let's find out!

[am4show have='p8;p9;p11;p38;p72;p77;p92;' guest_error='Guest error message' user_error='User error message' ]
[/am4show]

Click here to go to Part 5: Botany 1

You can learn more about airfoils here, and if you want to learn how to fly a real airplane, go here.

Entomologists study insects, including what they look like and how they react and behave, and also the environment they like to live in.

[am4show have='p8;p9;p11;p38;p72;p77;p92;' guest_error='Guest error message' user_error='User error message' ]


Click here to go to Part 4: Birds & Flight

[/am4show]


(Where's Part 1? You just watched it above in the "What is Biology" section!) Scientists don’t just classify things based on how they look. For example, alligators and crocodiles both look similar, and how they look actually depends on which part of the world they came from. [am4show have='p8;p9;p11;p38;p72;p77;p92;' guest_error='Guest error message' user_error='User error message' ]

Click here to go to Part 3: Entomology

[/am4show]

Dissection in biology provides a hands-on education above and beyond reading a textbook. By seeing, touching and exploring different organs, muscles and tissues inside an animal and seeing how they work together allows you to really understand your own body and appreciate the amazing world around us. And it's not hard  - you can dissect a clam right at home using this inexpensive clam specimen with a dissection guide and simple dissection tools! Many doctors, surgeons and veterinarians report that their first fascination with the body started with a biology dissection class.

Materials:

[am4show have='p8;p9;p28;p55;p153;p65;p78;p86;p87;' guest_error='Guest error message' user_error='User error message' ]


Procedure:

  1. Place clams, one at a time, into boiling water; just long enough that they are easily opened.
  2. Take the clams out and snip the abductor muscles so the clams lie flat.
  3. Refer to diagrams (click on links above) and locate the following:
    1. Abductor muscles
    2. Gills
    3. Mantel
    4. Excurrent siphon
    5. Incurrent siphon
    6. Stomach
    7. Foot
    8. Mouth
    9. Intestine

Questions to Consider:

  1. Is it easier to see the parts in the diagram or the real clam? Why?
  2. Do the skewers enter more easily into the incurrent siphon or the excurrent siphon? Why?
  3. Where do the siphons end?
  4. Measure the diameter of the clam, the size of their stomach, and the size of their gills, on several clams.
    1. Are they all the same?
    2. How great are the distances?
    3. Can this data be graphed?

[/am4show]

Click here to go to part 17:Earthworm Dissection


Entomologists study insects, including what they look like and how they react and behave, and also the environment they like to live in.


Scientists don’t just classify things based on how they look. For example, alligators and crocodiles both look similar, and how they look actually depends on which part of the world they came from.


Content coming soon!


[am4show have=’p8;p9;p22;p49;p75;p84;p58;’ guest_error=’Guest error message’ user_error=’User error message’ ]


[/am4show]


Click here to go to next lesson on Redox reactions

Let’s get more practice with Henry’s Law, partial pressures, mole fraction, and weight percent with these sample calculations:
[am4show have=’p9;p59;’ guest_error=’Guest error message’ user_error=’User error message’ ]


[/am4show]


Click  here for the next lesson in Colligative Properties Part 2.

Osmosis is how cells allow water to pass through in and out of the cell through a special membrane using a bit of chemistry. Here is how they do it…


[am4show have=’p9;p59;’ guest_error=’Guest error message’ user_error=’User error message’ ]


The carrot itself is a type of root—it is responsible for conducting water from the soil to the plant. The carrot is made of cells. Cells are mostly water, but they are filled with other substances too (organelles, the nucleus, etc).


We’re going to do two experiments on a carrot: first we’re going to figure out how to move water into the cells of a carrot. Second, we’ll look at how to move water within the carrot and trace it. Last, we’ll learn how to get water to move out of the carrot. And all this has to do with cells!


Osmosis is how water moves through a membrane. A carrot is made up of cells surrounded by cell membranes. The cell membrane’s job is to keep the cell parts protected. Water can pass through the membrane, but most things can’t.


And water always moves through cell membranes towards higher chemical concentrations. For example, a carrot sitting in salt water causes the water to move into the salty water. The water moves because it’s trying to equalize the amount of water on both the inside and outside of the membrane. The act of salt will draw water out of the carrot, and as more cells lose water, the carrot becomes soft and flexible instead of crunchy and stiff.


You can reverse this process by sticking the carrot into fresh water. The water in the cup can diffuse through the membrane and into the carrot’s cells. If you tie a string around the carrot, you’ll be able to see the effect more clearly! Here’s what you do:


Download Student Worksheet & Exercises


In this experiment we will see the absorption of water by a carrot. Make note of differences between the carrot before the experiment, and the carrot afterward.


Materials


  • 2 carrots
  • Sharp knife (be careful!)
  • Cutting board
  • Glass
  • Water
  • Food coloring

Procedure :


Step 1: Cut the tip off of a carrot (with adult supervision).


Step 2: Place the carrot in a glass half full of water


Step 3: Place the carrot somewhere where it can get some sunshine.


Step 4: Observe the carrot over several days.


What’s going on?

When surrounded by pure water, the concentration of water outside the carrot cells is greater than the concentration inside. Osmosis makes water move from greater concentrations to lesser concentrations. This is why the carrot grows in size—it fills with water!


Procedure:

Step 1: Re-do the four steps above in a new cup, and this time put several (10-12) drops of food coloring into the water.


Step 2: With the help of an adult, cut the carrot in half length-wise.


What’s going on?

Carrots are roots. They conduct water from the soil to the plant. If we were to repeat this experiment several times—first cutting the carrot at half a day, then one day, then one day and a half, etc—we would see the movement of the water up the root.


Experiment #2: Water moving OUT of the carrot via osmosis

In this experiment we answer the question “what if the concentration of water is greater inside the carrot?”


Materials


  • Large carrot
  • 3 tablespoons of salt
  • Two glasses
  • String
  • water

Procedure

Step 1: Snap the carrot in half and tie a piece of string around each piece of carrot (make sure they’re tied tightly).


Step 2: Place each half in a glass half full of warm water.


Step 3: In one of the glasses, dissolve the salt.


Step 4: Leave overnight.


Step 5: The next morning pull on the strings. What do you observe?


What’s going on?

The salt-water carrot shrunk while the non-salt-water carrot bloated!


This is because of osmosis. Carrots are made up of cells. Cells are full of water. When the concentration of water outside the cell is greater than the concentration of water inside the cell, the water flows into the cell. This is why the non-salt-water carrot bloated—the concentration was greater outside the cell than inside. The concentration of water was greater inside the salt-water carrot than outside (because there was so much salt!) so the water flowed out of the cell. This made the salt-water carrot shrink.


Questions to Ask:

  1. What happens if you try different vegetables besides carrots?
  2. How do you think this relates to people? Do we really need to drink 8 glasses of water a day?
  3. What happens (on the osmosis scale) if humans don’t drink water?
  4. Use your compound microscope to look at a sample and draw the cells (both before and after taking a bath in the solution) in your science journal.
  5. What did you expect to happen to the string? What really happened to the string?
  6. Which solution made the carrot rubbery? Why?
  7. Did you notice a change in the cell size, shape, or other feature when soaked in salt water? (Check your journal!)
  8. Why did we bother tying a string? Would a rubber band have worked?
  9. What would happen to a surfer who spent all day in the ocean without drinking water?
  10. What do you expect to happen to human blood cells if they were placed in a beaker of salt water?

[/am4show]


Click here for the next lesson on Colligative Properties Part 1.

Let’s do some sample calculations for the energy of a system that include enthalpy and specific heat.


[am4show have=’p9;p59;’ guest_error=’Guest error message’ user_error=’User error message’ ]


[/am4show]


Click here to download the Homework Problem Set #7.

[am4show have=’p9;p59;’ guest_error=’Guest error message’ user_error=’User error message’ ]


[/am4show]


Click here for next lesson on Properties of log and ln.

[am4show have=’p9;p59;’ guest_error=’Guest error message’ user_error=’User error message’ ]


[/am4show]


Click here for next lesson on Rate Law Part 2

[am4show have=’p9;p59;’ guest_error=’Guest error message’ user_error=’User error message’ ]


[/am4show]


Click here for next lesson in the Arrhenius Equation.

[am4show have=’p9;p59;’ guest_error=’Guest error message’ user_error=’User error message’ ]


[/am4show]


Click  here for next lesson in Half-Life.

[am4show have=’p9;p59;’ guest_error=’Guest error message’ user_error=’User error message’ ]


[/am4show]


Click here for the next lesson on Rate Law Part 1

Supercooling a liquid is a really neat way of keeping the liquid a liquid below the freezing temperature. Normally, when you decrease the temperature of water below 32oF, it turns into ice. But if you do it gently and slowly enough, it will stay a liquid, albeit a really cold one!


In nature, you’ll find supercooled water drops in freezing rain and also inside cumulus clouds. Pilots that fly through these clouds need to pay careful attention, as ice can instantly form on the instrument ports causing the instruments to fail. More dangerous is when it forms on the wings, changing the shape of the wing and causing the wing to stop producing lift. Most planes have de-icing capabilities, but the pilot still needs to turn it on.


We’re going to supercool water, and then disturb it to watch the crystals grow right before our eyes! While we’re only going to supercool it a couple of degrees, scientists can actually supercool water to below -43oF!


[am4show have=’p8;p9;p82;p84;p91;p101;p30;p57;’ guest_error=’Guest error message’ user_error=’User error message’ ]


Materials:


  • water
  • glass
  • bowl
  • ice
  • salt


Download Student Worksheet & Exercises


Don’t mix up the idea of supercooling with “freezing point depression”. Supercooling is when you keep the solution a liquid below the freezing temperature (where it normally turns into a solid) without adding anything to the solution. “Freezing point depression” is when you lay salt on the roads to melt the snow – you are lowering the freezing point by adding something, so the solution has a lower freezing point than the pure solvent.


Here’s an image of how the shape of the ice crystals are affected by magnetism:


[/am4show]


Click here to go to next lesson on Colloids and Polymers


This is a recording of a recent live teleclass I did with thousands of kids from all over the world. I’ve included it here so you can participate and learn, too! Learn about the world of rocks, crystals, gems, fossils, and minerals by moving beyond just looking at pretty stones and really being able to identify, test, and classify samples and specimens you come across using techniques that real field experts use. While most people might think of a rock as being fun to climb or toss into a pond, you will now be able to see the special meaning behind the naturally occurring material that is made out of minerals by understanding how the minerals are joined together, what their crystalline structure is like, and much more.


Materials:


[am4show have=’p8;p9;p11;p38;’ guest_error=’Guest error message’ user_error=’User error message’ ]


[/am4show]


NEW


OLD


First Law of Thermodynamics: Energy is conserved. Energy is the ability to do work. Work is moving something against a force over a distance. Force is a push or a pull, like pulling a wagon or pushing a car. Energy cannot be created or destroyed, but can be transformed.


Materials: ball, string


[am4show have=’p8;p9;p10;p37;p88;’ guest_error=’Guest error message’ user_error=’User error message’ ]


Roll a ball down a hill. The amount of energy the ball had while at rest at the top of the hill (potential energy) turns into kinetic energy while it zips to the bottom.


You can also swing on a swing and see this effect happen over and over again: when you’re at the highest point of your swing, you have the highest potential energy but zero kinetic energy (your speed momentarily goes to zero as you change direction). At the lowest point of your swing (when you’re moving the fastest), all your potential energy has turned into kinetic energy. Why do you eventually stop? The reason you eventually slow down and stop instead of swinging back and forth forever is that you have air resistance and friction where the chain is suspended from the bar.


Learn more about this scientific principle in Unit 4 and Unit 5 and Unit 13.
[/am4show]


Click here to go to next lesson on Combustion.


A battery is a device that produces electrical energy from a chemical reaction. Another name for a battery is voltaic cell. Voltaic means to make electricity.


Most batteries contain two or more different chemical substances. The different chemical substances are usually separated from each other by a barrier. One side of the barrier is the positive terminal of the battery and the other side of the barrier is the negative terminal. When the positive and negative terminals of a battery are connected to a circuit, a chemical reaction takes place between the two different chemical substances that produces a flow of electrons (electricity).


When a battery is producing electricity, one of the chemical substances in the battery loses electrons. These electrons are then gained by the other chemical substance.


A battery is designed so that the electrons lost by one chemical substance are made to flow through a circuit, such as a flashlight lamp, before being gained by the other chemical substance. A battery will produce a flow of electrons until all of the chemical substances involved in the chemical reaction are completely used.


[am4show have=’p8;p9;p22;p49;p75;p84;p58;’ guest_error=’Guest error message’ user_error=’User error message’ ]


Materials


  • Earphone or headset  for a portable radio
  • Small piece of aluminum foil
  • Tomato juice
  • New, shiny penny
  • Two wires with alligator clips on each end of  the wires
  • Plate
  • AA-size battery
  • Spoon


Download Student Worksheet & Exercises


Procedure


Examine the metal shaft of the part of the earphone or headset that is inserted into a portable radio. You will notice that just below the tip of the shaft there is a plastic spacer. Clip on one of the wires below this spacer. Then clip on the other wire above this spacer.


To test that the wires are properly connected to the earphone or headset, take the unconnected ends of the two wires and touch them to an AA-size battery. One wire should touch the positive end of the battery, while the other is touching the negative end of the battery. Place the earphone or headset to your ear. If your connections are made correctly, you should hear a crackling sound in the earphone or headset. If you do not hear a crackling sound, check your connections carefully.


Place a small piece of aluminum foil, about five inches (13 centimeters) square, on a small plate. Using a spoon, make a puddle of tomato juice on the aluminum foil. The puddle of tomato juice should be slightly larger than a penny. Next, place a new, shiny penny face down in the puddle of tomato juice.


Using the alligator clip, attach one of the wires connected to the earphone to one of the edges of the aluminum foil. Take the end of the other wire and touch the alligator clip to the penny. Move the alligator clip over the penny.


Observations


Do you hear a crackling sound when you touch the alligator clips to the penny in the puddle of tomato juice? What do you hear when you move the alligator clip over the penny? What do you hear when you stop touching the penny with the alligator clip?


Discussion


In this experiment you made a simple battery with a penny, aluminum foil, and tomato juice. You completed a circuit with your battery by touching one of the wires attached to the earphone or headset to the penny, while touching the other wire to the aluminum foil. When you completed the circuit, a flow of electrons was produced by your battery. The crackling sound you heard was caused by the earphone or headset converting electrical energy from your battery into sound energy.


In your battery, the aluminum in the aluminum foil loses electrons. The other part of the reaction is more complex. Either the acid in the tomato juice or copper ions (that form when the copper metal in the penny reacts with the acid in the tomato juice) gain the electrons lost by the aluminum.


The main types of batteries are known as primary and secondary batteries. Dry cell batteries, like the ones used in flashlights and portable radios, are primary batteries. Another important primary battery is the mercury battery. Mercury batteries are typically small and flat. They are used to power cameras, watches, hearing aids, and calculators.


An advantage of primary batteries is that they are generally inexpensive. One disadvantage is that they cannot be recharged. When the chemical substances in the primary batteries are used up, the battery is dead.


Lead storage batteries and nickel-cadmium (NiCad) batteries are examples of secondary batteries. Car batteries are lead storage batteries. Flashlight batteries that are rechargeable are NiCad batteries. Secondary batteries are more expensive than primary batteries. However, unlike primary batteries, lead storage batteries and NiCad batteries can be recharged repeatedly.


Other Things to Try


Repeat this experiment using other coins such as a dime, nickel, or quarter. Do any of these coins cause a louder crackling sound in the earphone or headset?


Repeat this experiment using a nail instead of a coin. Can you make a battery with other juices? To find out, repeat this experiment with other juices such as lemon and orange juice. What do you observe?


Exercises 


  1. Fill in the blank: A battery produces ___________________ energy from _________________________ energy.
  2. Another name for a battery is:
    1. Solar array
    2. Voltaic cell
    3. Nuclear reactor
    4. Fusion cell
  3. As one chemical loses electrons, what happens to the other chemical?
    1. It loses electrons
    2. It gains electrons
    3. Nothing
    4. It decomposes
  4. When will a battery run out?
    1. When its batteries run out
    2. When its chemicals are used up
    3. When all the electrons are gone
    4. When the bunny stops drumming

[/am4show]


Click here to go to next lesson on Electrochemistry Analysis

In this lab, we’re going to investigate the wonders of electrochemistry. Electrochemistry became a new branch of chemistry in 1832, founded by Michael Faraday. Michael Faraday is considered the "father of electrochemistry". The knowledge gained from his work has filtered down to this lab. YOU will be like Michael Faraday. I imagined he would have been overjoyed to do this lab and see the results. You are soooo lucky to be able to take an active part in this experiment. Here's what you're going to do...

You will be “creating” metallic copper from a solution of copper sulfate and water, and depositing it on a negative electrode. Copper is one of our more interesting elements. Copper is a metal, and element 29 on your periodic table. It conducts heat and electricity very well.

Many things around you are made of copper. Copper wire is used in electrical wiring. It has been used for centuries in the form of pipes to distribute water and other fluids in homes and in industry. The Statue of Liberty is a wonderful example of how beautiful 180,000 pounds of copper can be. Yes, it is made of copper, and no, it doesn’t look like a penny…..on the surface. The green color is copper oxide, which forms on the surface of copper exposed to air and water. The oxide is formed on the surface and does not attack the bulk of the copper. You could say that copper oxide protects the copper.

[am4show have='p8;p9;p25;p52;p91;' guest_error='Guest error message' user_error='User error message' ] Our bodies use copper to our advantage, but in a proper form that is not toxic. Too much copper will make you sick and could kill you. Remember…don’t eat your chemistry set! Materials:
  • Carbon rod (MSDS)
  • Copper sulfate (CuSo4) (MSDS)
  • Aluminum foil
  • 9V battery with clip
  • 2 wires
  • Disposable cup
  • Water
You are going to make a saturated solution of copper sulfate (CuSO4) in water. Pour a measuring spoon of granulated copper sulfate in the measuring cup of water. Stir well. Continue adding a spoonful and stirring until no more crystals will go into solution. The solution is saturated when no more crystals will dissolve and there are undissolved crystals at the bottom of the container.

C1000: Experiment


Download Student Worksheet & Exercises

Here’s what’s going on in this experiment:

CuSO4 + H2O (Copper sulfate is added to water)

CuSO4 + H2O --> Cu2+ + SO42- (Copper sulfate plus water yields positively charged carbon ion and negatively charged sulfate ion)

When mixed with water, copper sulfate dissociates into copper and sulfate ions. Notice that the ions, now separated, take on negative and positive charges.

Next, 9V of electricity is passed through the solution with an electrode of carbon and an electrode of aluminum foil inserted into the solution. As electricity flows from one electrode to another, the copper ions, being positively charged, are attracted to the negative electrode. You can confirm this in two ways. One, if litmus paper, held close to an electrode, turns blue, that is the negative electrode. The other way is to just follow the negative lead from the battery to the negative electrode.

As the process moves along, the negative electrode gains copper ions. Evidence of this is seen on the surface of the electrode.

Here's the breakdown of the entire process:


When the copper sulfate (CuSO4) mixed with water (H2O), the copper sulfate dissociated:

CuSO4 --> Cu2+ + SO42-

When power is added to the solution, the copper ions move toward the negative cathode (carbon rod) and take electrons from it, forming solid copper right on the electrode:

Cu2++ 2e- --> Cu(s)
On the positive anode (the aluminum foil), you'll see bubbles instead of a solid forming. The anode attracted electrons from the water molecule to form oxygen bubbles:

6H2O --> O2 + 4H3O+ + 4e- Let's put these two reactions together to get the overall reaction of: 2Cu2+ + 6H2O --> 2Cu + O2 + 4H3O+

Note the difference between galvanic cells and electrolytic cells: galvanic use spontaneous chemical reactions (like in a car battery) to generate electricity, and electrolytic cells use electricity to make the chemical reaction to occur and move electrons to move in a way they would go on their own (like in this experiment).

Clean up: Clean everything thoroughly after you are finished with the lab. After cleaning with soap and water, rinse thoroughly. Chemists use the rule of “three” in cleaning glassware and tools. Rinse three times, wash with soap, rinse three times.

Wipe off the carbon rod to remove the copper. The aluminum goes in the trash, but the solution and solids at the bottom cannot. The liquid contains copper, a toxic heavy metal that needs proper disposal and safety precautions. Another chemical reaction needs to be performed to remove the heavy metal from the copper sulfate. Add a thumb sized piece of steel wool to the solution. The chemical reaction will pull out the copper out of the solution. The liquid can be washed down the drain. The solids cannot be washed down the drain, but they can be put in the trash. Use a little water to rinse the container free of the solids.

Place all chemicals, cleaned tools, and glassware in their respective storage places.

Dispose of all solid waste in the garbage. Liquids can be washed down the drain with running water. Let the water run awhile to ensure that they have been diluted and sent downstream.

Going Further

Here is a link to information about making your own geode (crystal lined rock) of copper sulfate crystals:

http://chemistry.about.com/od/growingcrystals/ht/geode.htm [/am4show]

Click here for Potassium Permanganate


Magnesium is one of the most common elements in the Earth’s crust. This alkaline earth metal is silvery white, and soft. As you perform this lab, think about why magnesium is used in emergency flares and fireworks. Farmers use it in fertilizers, pharmacists use it in laxatives and antacids, and engineers mix it with aluminum to create the BMW N52 6-cylinder magnesium engine block. Photographers used to use magnesium powder in the camera’s flash before xenon bulbs were available.


Most folks, however, equate magnesium with a burning white flame. Magnesium fires burn too hot to be extinguished using water, so most firefighters use sand or graphite.


We’re going to learn how to (safely) ignite a piece of magnesium in the first experiment, and next how to get energy from it by using it in a battery in the second experiment. Are you ready?


[am4show have=’p8;p9;p25;p52;p80;p91;’ guest_error=’Guest error message’ user_error=’User error message’ ]


Materials:


  • magnesium strip (MSDS)
  • matches with adult help
  • tile or concrete surface (something non-flammable)
  • gloves, goggles

Burning magnesium produces ultraviolet light. This isn’t good for your eyes, and the brightness of the flame is another danger for your eyes. Avoid looking directly into the flame.


Burning magnesium is so hot that if it gets on your skin it will burn to it and not come off. As difficult as burning magnesium is to put out, avoid letting the burning metal come in contact with you or anything else that might catch fire.


As explained later in this lab, magnesium burns in carbon dioxide. Therefore, a CO2 fire extinguisher won’t work to put it out. Water won’t work, CO2 won’t work. It takes a dry chemical fire extinguisher to put it out, or just wait for it to burn up completely on its own.


Magnesium is a metal, and in this experiment, you’ll find that some metals can burn. The magnesium in this first experiment combines with the oxygen in the air to produce a highly exothermic reaction (gives off heat and light). The ash left from this experiment is magnesium oxide:


2Mg (s) + O2 (g) –> 2Mg O (s)


Not all the magnesium from this experiment turned directly into the ash on the table – some of it transformed into the smoke that escaped into the air.


Caution: Do NOT look directly at the white flame (which also contains UV), and do NOT inhale the smoke from this experiment!


C3000: Experiment 52


Download Student Worksheet & Exercises


Here’s what’s going on in this experiment:


As you burn your magnesium, you will get your very own fireworks show….a little one, but still cool.


2Mg + O2 –> 2MgO


Magnesium burned in oxygen yields magnesium oxide. Because the temperature of burning magnesium is so high, small amounts of magnesium react with nitrogen in the air and produce magnesium nitride.


3Mg + N2 –> 2Mg3N2


Magnesium plus nitrogen yield magnesium nitride.  Magnesium will also burn in a beaker of dry ice instead of in air (oxygen).


2Mg + CO2 –> 2MgO + C


Magnesium burned in carbon dioxide yields magnesium oxide and carbon (ash, charcoal, etc.)


Cleanup: Rinse off and pat dry the rest of the magnesium strip.


Storage: Place everything back in its proper place in your chemistry set.


Disposal: Dispose of all solid waste in the garbage.


Magnesium Battery

Now let’s see how to make a battery using magnesium, table salt, copper wire, and sodium hydrogen sulfate (AKA sodium bisulfate).


Materials:


  • magnesium strip
  • test tube and rack
  • light bulb (from a flashlight)
  • 2 pieces of wire
  • measuring cup of water
  • salt (sodium chloride)
  • copper wire (no insulation, solid core)
  • measuring spoon
  • sodium hydrogen sulfate (NaHSO4) (MSDS) Sodium hydrogen sulfate is very toxic. Respect it, handle it carefully and responsibly. Do not take it for granted.
  • gloves, goggles

NOTE: Be very careful when handling the sodium hydrogen sulfate – it’s highly corrosive and dangerous when wet.  Handle this chemical only with gloves, and be sure to read over the MSDS before using.

C1000: Experiment 75
C3000: Experiment 295


We’re going to do another electrolysis experiment, but this time using magnesium instead of zinc. In the previous electrolysis experiment, we used electrical energy to start a chemical reaction, but this time we’re going to use chemical energy to generate electricity.  Using two electrodes, magnesium and copper, we can create a voltaic cell.


TIP: Use sandpaper to scuff up the surfaces of the copper and magnesium so they are fresh and oxide-free for this experiment.  And do this experiment in a DARK room.


How cool is it to generate electricity from a few strips of metal and salt water? Pretty neat! This is the way carbon-core batteries work (the super-cheap brands labeled ‘Heavy Duty’ are carbon-zinc or ‘dry cell’ batteries). However, in dry cell batteries scientists use a crumbly paste instead of a watery solution (hence the name) by mixing in additives.


In this chemical reaction, when the magnesium metal enters into the solution, it leaves 2 electrons behind and turns into a magnesium ion:


Oxidation: Mg (s) –> Mg2+(aq) + 2e


The magnesium strip takes on a negative charge (cathode), and the copper strip takes on a positive charge (anode).  The copper strip snatches up the electrons:


Reduction: Cu2+(aq) + 2e –> Cu (s)


and you have a flow of electrons that run through the wire from surplus (cathode) to shortage (anode), which lights up the bulb.


Note: You can substitute a zinc strip or aluminum strip for the magnesium strip and a carbon rod (from a pencil) for the copper wire.


Going further: You can expand on this experiment by substituting copper sulfate and a salt bridge to make a voltaic cell from two half-cells in Experiment 16.5 of the Illustrated Guide to Home Chemistry Experiments.


[/am4show]


Click here to go to next lesson on Making Copper

This experiment shows how a battery works using electrochemistry. The copper electrons are chemically reacting with the lemon juice, which is a weak acid, to form copper ions (cathode, or positive electrode) and bubbles of hydrogen.


These copper ions interact with the zinc electrode (negative electrode, or anode) to form zinc ions. The difference in electrical charge (potential) on these two plates causes a voltage.


Materials:


  • one zinc and copper strip
  • two alligator wires
  • digital multimeter
  • one fresh large lemon or other fruit

[am4show have=’p8;p9;p18;p45;p76;p91;p58;’ guest_error=’Guest error message’ user_error=’User error message’ ]


Download Student Worksheet & Exercises


Roll and squish the lemon around in your hand so you break up the membranes inside, without breaking the skin or leaking any juice. If you’re using non-membrane foods, such as an apple or potato, you are all ready to go.


Insert the copper and zinc strips into the lemon, making sure they do not contact each other inside. Clip one test wire to each metal strip using alligator wires to connect to the digital multimeter. Read and record your results.


What happens when you gently squeeze the lemon? Does the voltage vary over time?


You can try potatoes, apples, or any other fruit or vegetable containing acid or other electrolytes. You can use a galvanized nail and a copper penny (preferably minted before 1982) for additional electrodes.


If you want to light a light bulb, try using a low-voltage LED in the 1.7V or lower hooked up to several lemons connected in series. For comparison, you’ll need about 557 lemons to light a standard flashlight bulb.


What’s going on?


The basic idea of electrochemistry is that charged atoms (ions) can be electrically directed from one place to the other. If we have a glass of water and dump in a handful of salt, the NaCl (salt) molecule dissociates into the ions Na+ and Cl-.


When we plunk in one positive electrode and one negative electrode and crank up the power, we find that opposites attract: Na+ zooms over to the negative electrode and Cl- zips over to the positive. The ions are attracted (directed) to the opposite electrode and there is current in the solution.


Electrochemistry studies chemical reactions that generate a voltage and vice versa (when a voltage drives a chemical reaction), called oxidation and reduction (redox) reactions. When electrons are transferred between molecules, it’s a redox process.


Fruit batteries use electrolytes (solution containing free ions, like salt water or lemon juice) to generate a voltage. Think of electrolytes as a material that dissolves in water to make a solution that conducts electricity. Fruit batteries also need electrodes made of conductive material, like metal. Metals are conductors not because electricity passes through them, but because they contain electrons that can move. Think of the metal wire like a hose full of water. The water can move through the hose. An insulator would be like a hose full of cement – no charge can move through it.


You need two different metals in this experiment that are close, but not touching inside the solution. If the two metals are the same, the chemical reaction doesn’t start and no ions flow and no voltage is generated – nothing happens.


Exercises


  1.  What kinds of fruit make the best batteries?
  2.  What happens if you put one electrode in one fruit and one electrode in another?
  3.  What happens if you stick multiple electrode pairs around a piece of fruit, and connect them in series (zinc to copper to zinc to copper to zinc…etc.) and measure the voltage at the start and end electrodes?

[/am4show]


Click here to go to next lesson on Magnesium Battery

Mars is coated with iron oxide, which not only covers the surface but is also present in the rocks made by the volcanoes on Mars.


Today you get to perform a chemistry experiment that investigates the different kinds of rust and shows that given the right conditions, anything containing iron will eventually break down and corrode. When iron rusts, it’s actually going through a chemical reaction: Steel (iron) + Water (oxygen) + Air (oxygen) = Rust
Materials


  • Four empty water bottles
  • Four balloons
  • Water
  • Steel wool
  • Vinegar
  • Water
  • Salt

[am4show have=’p8;p9;p17;p44;p68;p80;p83;’ guest_error=’Guest error message’ user_error=’User error message’ ]


Download Student Worksheet & Exercises


  1. This lab is best done over two consecutive days. Plan to set up the experiment on the first day, and finish up with the observations on the next.
  2. Line up four empty bottles on the table.
  3. Label your bottles so you know which is which: Water, Water + Salt, Vinegar, Vinegar + Salt
  4. Fill two bottles with water.
  5. Fill two with vinegar.
  6. Add a tablespoon of salt to one of the water bottles.
  7. Add one tablespoon of salt to one of the vinegar bottles.
  8. Stuff a piece of steel wool into each bottle so it comes in contact with the liquid.
  9. Stretch a balloon across the mouth of each bottle.
  10. Let your experiment sit (overnight is best, but you can shorten this a bit if you’re in a hurry).
  11. The trick to getting this one to work is in what you expect to happen. The balloon should get shoved inside the bottle (not expand and inflate!). Check back over the course of a few hours to a few days to watch your progress.
  12. Fill in the data table.

What’s Going On?

Rust is a common name for iron oxide. When metals rust, scientists say that they oxidize, or corrode. Iron reacts with oxygen when water is present. The water can be liquid or the humidity in the air. Other types of rust happen when oxygen is not around, like the combination of iron and chloride. When rebar is used in underwater concrete pillars, the chloride from the salt in the ocean combines with the iron in the rebar and makes a green rust.


Mars has a solid core that is mostly iron and sulfur, and a soft pastel-like mantle of silicates (there are no tectonic plates). The crust has basalt and iron oxide. The iron is in the rocks and volcanoes of Mars, and Mars appears to be covered in rust.


When iron rusts, it’s actually going through a chemical reaction:
Steel (iron) + Water (oxygen) + Air (oxygen) = Rust


There are many different kinds of rust. Stainless steel has a protective coating called chromium (III) oxide so it doesn’t rust easily.


Aluminum, on the other hand, takes a long time to corrode because it’s already corroded — that is, as soon as aluminum is exposed to oxygen, it immediately forms a coating of aluminum oxide, which protects the remaining aluminum from further corrosion.


An easy way to remove rust from steel surfaces is to rub the steel with aluminum foil dipped in water. The aluminum transfers oxygen atoms from the iron to the aluminum, forming aluminum oxide, which is a metal polishing compound. And since the foil is softer than steel, it won’t scratch.


Exercises


  1. Why did one balloon get larger than the rest?
  2. Which had the highest pressure difference? Why?

[/am4show]


Click here to go to next lesson on Fruit Battery

Never polish your tarnished silver-plated silverware again! Instead, set up a ‘silverware carwash’ where you earn a nickel for every piece you clean. (Just don’t let grandma in on your little secret!)


We’ll be using chemistry and electricity together (electrochemistry) to make a battery that reverses the chemical reaction that puts tarnish on grandma’s good silver.  It’s safe, simple, and just needs a grown-up to help with the stove.


[am4show have=’p8;p9;p20;p47;p76;’ guest_error=’Guest error message’ user_error=’User error message’ ]


Here’s what you need:


  • stove (with adult help)
  • skillet
  • aluminum foil
  • water
  • baking soda
  • salt
  • real silverware (not stainless)


Download Student Worksheet & Exercises


You can safely dip it into a self-polishing solution:


  1. In a saucepan lined with aluminum foil, heat a solution of 1 cup water, 1 teaspoon baking soda, and 1 teaspoon salt.
  2. When your solution bubbles, place the tarnished silverware directly on the foil. (Try a piece that’s really tarnished to see the cleaning effects the best.)

What’s happening? This is a very simple battery, believe it or not! The foil is the negative charge, the silverware is the positive, and the water-salt-baking-soda solution is the electrolyte.


Your silver turns black because of the presence of sulfur in food. Here’s how the cleaning works: The tarnished fork (silver sulfide) combines with some of the chemicals in the water solution to break apart into sulfur (which gets deposited on the foil) and silver (which goes back onto the fork). Using electricity, you’ve just relocated the tarnish from the fork to the foil. Just rinse clean and wipe dry.


Toss the foil in the trash (or recycling) when you’re done, and the liquids go down the drain.


Exercises


  1. Where is the electrolyte in this experiment?
  2. Where does the black stuff that was originally on the silverware go?
  3. Where’s the electricity in this experiment?
  4. Where would you place your DMM probes to measure the generated voltage?

[/am4show]


Click here to go to next lesson on Batteries storing energy

If you don’t have equipment lying around for this experiment, wait until you complete Unit 10 (Electricity) and then come back to complete this experiment. It’s definitely worth it!


Electroplating was first figured out by Michael Faraday. The copper dissolves and shoots over to the key and gets stuck as a thin layer onto the metal key. During this process, hydrogen bubbles up and is released as a gas. People use this technique to add material to undersized parts, for place a protective layer of material on objects, to add aesthetic qualities to an object.


Materials:


  • one shiny metal key
  • 2 alligator clips
  • 9V battery clip
  • copper sulfate (MSDS)
  • one copper strip or shiny copper penny
  • one empty pickle jar
  • 9V battery

[am4show have=’p8;p9;p18;p45;p76;p80;’ guest_error=’Guest error message’ user_error=’User error message’ ]


Download Student Worksheet & Exercises


Place the copper sulfate in your jar and add a thin stream of water as you stir. Add enough water to make a saturated solution (dissolves most of the solids). Connect one alligator wire to the copper strip and the positive (red) wire from the clip lead. Connect the other alligator wire to the key and the negative (black) lead.


Place the copper strip and the key in the solution without touching each other. (If they touch, you’ll short your circuit and blow up your battery.) Let this sit for a few minutes… and notice what happens.


Clean up: Clean everything thoroughly after you are finished with the lab. After cleaning with soap and water, rinse thoroughly. Chemists use the rule of “three” in cleaning glassware and tools. Rinse three times, wash with soap, rinse three times.


Wipe off the electrodes. The solution and solids at the bottom of your cup cannot go in the trash. The liquid contains copper, a toxic heavy metal that needs proper disposal and safety precautions. Another chemical reaction needs to be performed to remove the heavy metal from the copper sulfate: Add a thumb sized piece of steel wool to the solution. The chemical reaction will pull out the copper out of the solution. The liquid can be washed down the drain. The solids cannot be washed down the drain, but they can be put in the trash. Use a little water to rinse the container free of the solids.


Place all chemicals, cleaned tools, and glassware in their respective storage places.


Dispose of all solid waste in the garbage. Liquids can be washed down the drain with running water. Let the water run awhile to ensure that they have been diluted and sent downstream.


Exercises


  1. Look at your key. What color is it?
  2.  Where did the copper on your key come from?
  3.  What happened when you added a second battery?
  4.  Which circuit (series or parallel) did the reaction accelerate faster with?

[/am4show]


Click here to go to next lesson on Electrochemical cells and voltage

This experiment is just for advanced students. If you guessed that this has to do with electricity and chemistry, you’re right! But you might wonder how they work together. Back in 1800, William Nicholson and Johann Ritter were the first ones to split water into hydrogen and oxygen using electrolysis. (Soon afterward, Ritter went on to figure out electroplating.) They added energy in the form of an electric current into a cup of water and captured the bubbles forming into two separate cups, one for hydrogen and other for oxygen.


This experiment is not an easy one, so feel free to skip it if you need to. You don’t need to do this to get the concepts of this lesson but it’s such a neat and classical experiment (my students love it) so you can give it a try if you want to. The reason I like this is because what you are really doing in this experiment is ripping molecules apart and then later crashing them back together.


Have fun and please follow the directions carefully. This could be dangerous if you’re not careful. The image shown here is using graphite from two pencils sharpened on both ends, but the instructions below use wire.  Feel free to try both to see which types of electrodes provide the best results.


[am4show have=’p9;p40;p76;p91;p58;’ guest_error=’Guest error message’ user_error=’User error message’ ]


You will need:


  • 2 test tubes or thin glass or plastic something closed at one end. I do not recommend anything wider than a half inch in diameter.
  • 2 two wires, one needs to be copper, at least 12 inches long. Both wires need to have bare ends.
  • 1 Cup
  • Water
  • One 9 volt battery
  • Long match or a long thin piece of wood (like a popsicle stick) and a match
  • Rubber bands
  • Masking tape
  • Salt


Download Student Worksheet & Exercises
1. Fill the cup with water.


2. Put a tablespoon or so of salt into the water and stir it up. (The salt allows the electricity to flow better through the water.)


2. Put one wire into the test tube and rubber band it to the test tube so that it won’t come out (see picture).


3. Use the masking tape to attach both wires to the battery. Make sure the wire that is in the test tube is connected to the negative (-) pole of the battery and that the other is connected to the positive (+) pole. Don’t let the bare parts of the different wires touch. They could get very hot if they do.


4. Fill the test tube to the brim with the salt water.


5. This is the tricky part. Put your finger over the test tube, turn it over and put the test tube, open side down, into the cup of water. (See picture.)


6. Now put the other wire into the water. Be careful not to let the bare parts of the wires touch.


7. You should see bubbles rising into the test tube. If you don’t see bubbles, check the other wire. If bubbles are coming from the other wire either switch the wires on the battery connections or put the wire that is bubbling into the test tube and remove the other. If you see no bubbles check the connections on the battery.


8. When the test tube is half full of gas (half empty of salt water depending on how you look at it) light the long match or the wooden stick. Then take the test tube out of the water and let the water drain out. Holding the test tube with the open end down, wait for five seconds and put the burning stick deep into the test tube (the flame will probably go out but that’s okay). You should hear an instant pop and see a flash of light. If you don’t, light the stick again and try it another time. For some reason, it rarely works the first time but usually does the second or third.


A water molecule, as you saw before, is two hydrogen atoms and one oxygen atom. The electricity encouraged the oxygen to react with the copper wire leaving the hydrogen atoms with no oxygen atom to hang onto. The bubbles you saw were caused by the newly released hydrogen atoms floating through the test tube in the form of hydrogen gas. Eventually that test tube was part way filled with nothing but pure hydrogen gas.


But how do you know which bubbles are which? You can tell the difference between the two by the way they ignite (don’t’ worry – you’re only making a tiny bit of each one, so this experiment is completely safe to do with a grown up).


It takes energy to split a water molecule. (On the flip side, when you combine oxygen and hydrogen together, it makes water and a puff of energy. That’s what a fuel cell does.) Back to splitting the water molecule – as the electricity zips through your wires, the water molecule breaks apart into smaller pieces: hydrogen ions (positively charged hydrogen) and oxygen ions (negatively charged oxygen). Remember that a battery has a plus and a minus charge to it, and that positive and negative attract each other.


So, the positive hydrogen ions zip over to the negative terminal and form tiny bubbles right on the wire. Same thing happens on the positive battery wire. After a bit of time, the ions form a larger gas bubble. If you stick a cup over each wire, you can capture the bubbles and when you’re ready, ignite each to verify which is which.


If the match burns brighter, the gas is oxygen. If you hear a POP!, the gas is hydrogen. Oxygen itself is not flammable, so you need a fuel in addition to the oxygen for a flame. In one case, the fuel is hydrogen, and hence you hear a pop as it ignites. In the other case, the fuel is the match itself, and the flame glows brighter with the addition of more oxygen.


When you put the match to it, the energy of the heat causes the hydrogen to react with the oxygen in the air and “POP”, hydrogen and oxygen combine to form what? That’s right, more water. You have destroyed and created water! (It’s a very small amount of water so you probably won’t see much change in the test tube.)


The chemical equations going on during this electrolysis process look like this:


A reduction reaction is happening at the negatively charged cathode. Electrons from the cathode are sticking to the hydrogen cations to form hydrogen gas:


2 H+(aq) + 2e –> H2(g)


2 H2O(l) + 2e –> H2(g) + 2 OH(aq)


The oxidation reaction is occurring at the positively charged anode as oxygen is being generated:


2 H2O(l)  –> O2(g) + 4 H+(aq) + 4e


4 OH(aq) –> O2(g) + 2 H2O(l) + 4 e-


Overall reaction:


2 H2O(l)  –> 2 H2(g) + O2(g)


Note that this reaction creates twice the amount of hydrogen than oxygen molecules. If the temperature and pressure for both are the same, you can expect to get twice the volume of hydrogen to oxygen gas (This relationship between pressure, temperature, and volume is the Ideal Gas Law principle.)


This is the idea behind vehicles that run on sunlight and water.  They use a solar panel (instead of a 9V battery) to break apart the hydrogen and oxygen and store them in separate tanks, then run them both back together through a fuel cell, which captures the energy (released when the hydrogen and oxygen recombine into water) and turns the car’s motor. Cool, isn’t it?


Note: We’re going to focus on Alternative Energy in Unit 12 and create all sorts of various energy sources including how to make your own solar battery, heat engine, solar & fuel cell vehicles (as described above), and more!


Exercises


  1. Why are bubbles forming?
  2. Did bubbles form at both wires, or only one? What kind of bubbles are they?
  3. What would happen if you did this experiment with plain water? Would it work? Why or why not?
  4. Which terminal (positive or negative) produced the hydrogen gas?
  5. Did the reaction create more hydrogen or more oxygen?

[/am4show]


Click here to go to next lesson on Electroplating


Electricity. Chemistry. Nothing in common, have nothing to do with each other. Wrong! Electrochemistry has been a fact since 1774. Once electricity was applied to particular solutions, changes occurred that scientists of the time did not expect.


In this lab, we will discover some of the same things that Farraday found over 300 years ago. We will be there as things tear apart, particles rush about, and the power of attraction is very strong. We’re not talking about dancing, we’re talking about something much more important and interesting….we’re talking about ELECTROCHEMISTRY!


[am4show have=’p8;p9;p25;p52;’ guest_error=’Guest error message’ user_error=’User error message’ ]


Materials:


  • Test tube rack
  • 9V battery clip
  • 9V battery
  • Flashlight lamp
  • Gloves
  • Electrical wires
  • Aluminum foil
  • Water
  • Sugar
  • Salt
  • Sodium carbonate (MSDS)
  • Measuring spoon

When the salt sodium chloride (NaCl) mixes with water, it separates into its positively (Na+) and negatively (Cl-) charged particles (ions). When a substance mixes with water and separates into its positive and negative parts, it’s called a ‘salt’.


Salts can be any color of the rainbow, from the deep orange of potassium dichromate to the vivid purple of potassium permanganate to the inky black of manganese dioxide. Did you know that MSG (monosodium glutamate) is a salt? Most salts are not consumable, as in the lead poisoning you’d get if you ingested lead diacetate.


If you pass a current through the solution of salt and water, opposites attract: the positive ions are attracted tot he negative pole and the negative ions go toward the positive pole. These migrations ions allow electricity to flow, which is why ‘salt’ solutions conduct electricity.


C1000: Experiments


Download Student Worksheet & Exercises


Here’s what’s going on in this experiment:


Our experiment uses a saturated solution of table salt that is just sitting in a container minding its own business. That just won’t do! We must intervene. Our 9V battery pushes its voltage through the saltwater. That electric current tears the sodium from the chlorine. These positively and negatively charged ions rush about, looking for something they are attracted to. Opposites attract, so positively charged sodium ions find spending time with the negative electrode a treat. They are very happy together. Negatively charged chlorine ions are attracted to the positive electrode. The match is wonderful, and the negativity and the positivity somehow enjoy the time spent with each other.


NaCl –> Na+ + Cl


Sodium chloride decomposes into sodium and chlorine ions


Cleanup: Clean everything thoroughly after you are finished with the lab. After cleaning with soap and water, rinse thoroughly. Chemists use the rule of “three” in cleaning glassware and tools. After washing, chemists rinse out all visible soap and then rinse three times more.


Storage: Place all chemicals, cleaned tools, and glassware in their respective storage places.


Disposal: Dispose of all solid waste in the garbage. Liquids can be washed down the drain with running water. Let the water run awhile to ensure that they have been diluted and sent downstream.


[/am4show]


Click here to go to next lesson on Electrolysis

If you guessed that electrochemistry has to do with electricity and chemistry, you’re right! But you might wonder how they work together. Back in 1800, William Nicholson and Johann Ritter were the first ones to split water into hydrogen and oxygen using electrolysis. (Soon afterwards, Ritter went on to figure out electroplating.) They added energy in the form of an electric current into a cup of water and captured the bubbles forming into two separate cups, one for hydrogen and other for oxygen.
[am4show have=’p9;p52;p91;’ guest_error=’Guest error message’ user_error=’User error message’ ]


The chemical reaction inside electrochemical cells is also a redox reaction. Batteries (also known as galvanic or voltaic cells) use a spontaneous chemical reaction inside to create energy. The acid inside the battery reacts with the metal electrodes (the plus and minus ends of the battery) to provide electricity (energy).


Most metals oxidize – the corrosion itself is the oxidative deterioration. You can protect metals from corrosion (but not completely) by inhibiting the oxidant (when you paint the surface or even allow a thin layer of oxide to form then seal it to protect it. You can also make a coating layer that isn’t affected by water or oxygen and use that to coat the metal surface (like coating iron with sodium chromate).


[/am4show]


Click here to go to next lesson on More on Electrochemistry

This is a cool video from a Teacher’s Educational Channel in Europe I thought you might enjoy about the science of fireworks:


You can view the full video here.


Click here to go to your next lesson in Electrochemistry.

Charcoal crystals uses evaporation to grow the crystals, which will continue to grow for weeks afterward.  You’ll need a piece of very porous material, such as a charcoal briquette, sponge, or similar object to absorb the solution and grow your crystals as the liquid evaporates.  These crystals are NOT for eating, so be sure to keep your growing garden away from young children and pets! This project is exclusively for advanced students, as it more involves toxic chemicals than just salt and sugar.


[am4show have=’p9;p40;p79;’ guest_error=’Guest error message’ user_error=’User error message’ ]


The materials you will need for this project:


  • Charcoal Briquettes (or pieces of sponge or brick or porous rock)
  • Distilled Water
  • Uniodized Salt
  • Ammonia (Keep this out of reach of children!)
  • Laundry Bluing
  • Food Coloring (optional)
  • Pie Plate (glass or tin)
  • Measuring Spoons
  • Disposable Cup
  • Popsicle Stick


Download worksheet and exercises


The first thing you’ll need to whip up a batch of solution, then you’ll start growing your garden.  Here’s how you do it:


1. Into a disposable cup, stir together (use a popsicle stick to mix it up, not your good silverware) 1 cup of water, 1 tablespoon of ammonia, 1/2 cup of laundry bluing, and 1/2 cup of salt (non-iodized).


2. Place your charcoal or sponge in a pie tin and pour your solution from step 1 over it.


3. Wait impatiently for a few days to one week.  As the liquid evaporates, the salts are left behind, forming your crystals.


4. Continue to add more solution (to replace the evaporated solution) to keep your crystals growing.  Think of it as ‘watering’ (with your special solution) your crystals, which are growing in your ‘soil’ (sponge).


5. You can dot the sponge with drops of food coloring to grow different colors in your garden.


Questions to Consider…

Why do you think you needed ammonia and ‘laundry bluing’ for this experiment?  What is ‘laundry bluing’, anyway?  Why do the crystals form just on the porous object and not the glass/metal pie plate?   Let us know in the comment field below what you think:


[/am4show]


Click here to go to next lesson on Science of Fireworks


Potassium perchlorate is usually safer than chlorate salt, but it sometimes is hard to get it. In the past, the only supplier in the US makes ammonium perchlorate, the oxidizer that was used with the space shuttle booster rockets, and each shuttle launch required 1.5 million pounds of it, which was twice the annual consumption rate, so when there were a lot of shuttle launches, the fireworks market took a hit and it was near impossible to get any potassium perchlorate.
[am4show have=’p9;p52;p91;’ guest_error=’Guest error message’ user_error=’User error message’ ]


Fireworks also have finders, which hold the mixture together, usually dextrin (a kind of starch).


Binders aren’t stable and are usually added when the firework is ready to go.


Fireworks can have regulators (metals) added to control the speed of the reaction.
Reducing agents like sulfur and charcoal, are used to burn the oxygen and make the hot gases and control the reaction speed.


[/am4show]


Click here to go to next lesson on Charcoal Crystals


Second Law of Thermodynamics: Heat flows from hot to cold. Heat is the movement of thermal energy from one object to another. Heat can only flow from an object of a higher temperature to an object of a lower temperature. Heat can be transferred from one object to another through conduction, convection and radiation.


Temperature is basically a speedometer for molecules. The faster they are wiggling and jiggling, the higher the temperature and the higher the thermal energy that object has. Your skin, mouth and tongue are antennas which can sense thermal energy. When an object absorbs heat it does not necessarily change temperature.


Materials: hot cup of cocoa


[am4show have=’p8;p9;p10;p37;p88;’ guest_error=’Guest error message’ user_error=’User error message’ ]


Leave a cup of hot coffee out on a cold morning. Does the coffee get warmer or cooler over time? Your coffee gets cooler, as heat travels from the coffee to the cool morning.


Learn more about this scientific principle in Unit 13.


[/am4show]


Click here to go to next lesson on Fireworks


First Law of Thermodynamics: Energy is conserved. Energy is the ability to do work. Work is moving something against a force over a distance. Force is a push or a pull, like pulling a wagon or pushing a car. Energy cannot be created or destroyed, but can be transformed.


Materials: ball, string


[am4show have=’p8;p9;p10;p37;p88;’ guest_error=’Guest error message’ user_error=’User error message’ ]


Roll a ball down a hill. The amount of energy the ball had while at rest at the top of the hill (potential energy) turns into kinetic energy while it zips to the bottom.


You can also swing on a swing and see this effect happen over and over again: when you’re at the highest point of your swing, you have the highest potential energy but zero kinetic energy (your speed momentarily goes to zero as you change direction). At the lowest point of your swing (when you’re moving the fastest), all your potential energy has turned into kinetic energy. Why do you eventually stop? The reason you eventually slow down and stop instead of swinging back and forth forever is that you have air resistance and friction where the chain is suspended from the bar.


Learn more about this scientific principle in Unit 4 and Unit 5 and Unit 13.
[/am4show]


Click here to go to next lesson on Thermodynamics: Second law


What do you do if you don’t know the concentration of a solution? We use a method called titration to determine how many moles are present in the solution of an acid or a base by neutralizing it. A titration curve is when you graph out the pH as you drop it in the solution.


[am4show have=’p9;p52;p91;’ guest_error=’Guest error message’ user_error=’User error message’ ]


[/am4show]


Click here to go to next lesson on pH and solubility

This experiment is for advanced students. All chemical reactions are equilibrium reactions. This experiment is really cool because you’re going to watch how a chemical reaction resists a pH change.


[am4show have=’p9;p52;’ guest_error=’Guest error message’ user_error=’User error message’ ]


Materials:


  • baking soda
  • universal indicator
  • distilled white vinegar
  • 3 test tubes with stoppers
  • distilled water
  • medicine droppers
  • clear soda
  • safety goggles and gloves


  1. First add water to a test tube and then add 10 drops of universal indicator and shake it up.
  2. Compare the color with your color chart and find the pH number. Set aside.
  3. Into a second test tube, add baking soda and water. Shake it up again!
  4. Add 10 drops universal indicator and shake the second test tube up again.
  5. Compare the second test tube with the pH chart to find the number.
  6. Using your medicine dropper, place soda to the second test be and look for a color change.
  7. Keep adding dropper-fulls of soda until you get the pH to match the first test tube (7).
  8. Add two drops of distilled white vinegar and look for a color change. Add more drops as needed.
  9. What happened?

We had two solutions that were both around 7. When we added an acid to one of them, the pH should have decreased. But why when we added the acid to the baking soda-carbonated soda solution, did it not change at all? That’s because it’s a buffer solution, which resists changes in pH.


[/am4show]


Click here to go to next lesson on Titrations and pH curves

Cobalt chloride (CoCl2) has a dramatic color change when combined with water, making it a great water indicator. A concentrated solution of cobalt chloride is red at room temperature, blue when heated, and pale-to-clear when frozen. The cobalt chloride we’re using is actually cobalt chloride hexahydrate, which means that each CoCl2 molecule also has six water molecules (6H2O) stuck to it.

[am4show have='p8;p9;p18;p45;p68;p80;' guest_error='Guest error message' user_error='User error message' ] For this experiment you'll need:
  • cobalt chloride
  • cotton swab
  • goggles
  • test tube with stopper
  • index card
  • distilled water
  • hair dryer


Download Student Worksheet & Exercises

Fill your test tube partway with water and add 1 teaspoon of cobalt chloride. Cap and shake until the solids dissolve. Continue to add cobalt chloride, 1 teaspoon at a time, until you cannot dissolve any more into your solution. (You have just made a saturated solution.)

Using your cotton swab like a paintbrush, dip into the solution (your “paint”) and write on the index card. Use a hair dryer to blow across the solution. (Be careful not to scorch the paper!) What happens? Stick it in the freezer. Now what happens? What if you blow dry it after it comes out of the freezer? What else can you come up with? What happens if you spritz it with water?

What's Going On? The cobalt changes color when hydrated/dehydrated – think of it as an indicator for water. It should be red when you first mix it, but blue when hit with the hair dryer. It doesn’t react to acids and bases the way the anthocyanin (in red cabbage juice) or universal indicator does, but rather with humidity.

Bonus Experiment Idea! You can grow red crystals by cooling off a cup of hot water. Here's how: into a test tube, add 40 drops of hot water and 2 small spoon measure of cobalt chloride. Suspend a small pebble attached to a thread into the test tube (this is your starter-seed for your crystals to attach to). If after a day or two your crystals aren't growing, just reheat the solution and add a little bit more of the chemical.

ANOTHER Bonus Experiment Idea! By soaking a strip of tissue or crepe paper (it's got to be thin) in the cobalt chloride solution, you can create your own weather forecaster! Simply let dry and when it turns blue, you're in for blue skies and pink means it's going to rain. (It's basically a humidity gauge.)

[/am4show]

Click here to go to next lesson on Potassium Hexacynoferrate


If you love the idea of mixing up chemicals and dream of having your own mad science lab one day, this one is for you. You are going to mix up each solid with each liquid in a chemical matrix.


In a university class, one of the first things you learn in chemistry is the difference between physical and chemical changes. An example of a physical change happens when you change the shape of an object, like wadding up a piece of paper. If you light the paper wad on fire, you now have a chemical change. You are rearranging the atoms that used to be the molecules that made up the paper into other molecules, such as carbon monoxide, carbon dioxide, ash, and so forth.


How can you tell if you have a chemical change? If something changes color, gives off light (such as the light sticks used around Halloween), or absorbs heat (gets cold) or produces heat (gets warm), it’s a chemical change.


What about physical changes? Some examples of physical changes include tearing cloth, rolling dough, stretching rubber bands, eating a banana, or blowing bubbles.


About this experiment: Your solutions will turn red, orange, yellow, green, blue, purple, hot, cold, bubbling, foaming, rock hard, oozy, and slimy, and they’ll crystallize and gel — depending on what you put in and how much!


This is the one set of chemicals that you can mix together without worrying about any lethal gases.  I do recommend doing this OUTSIDE, as the alcohol and peroxide vapors can irritate you. Always have goggles on and gloves on your hands, and a hose handy in case of spills. Although these chemicals are not harmful to your skin, they can cause your skin to dry out and itch. Wear gloves (latex or similar) and eye protection (safety goggles), and if you’re not sure about an experiment or chemical, just don’t do it. (Skip the peroxide and cold pack if you have small kids.)


Materials:
• sodium tetraborate (borax, laundry aisle)
• sodium bicarbonate (baking soda, baking aisle)
• sodium carbonate (washing soda, laundry aisle)
• calcium chloride (AKA “DriEz” or “Ice Melt”)
• citric acid (spice section, used for preserving and pickling)
• ammonium nitrate (single-use disposable cold pack)
• isopropyl rubbing alcohol
• hydrogen peroxide
• acetic acid (distilled white vinegar)
• water
• liquid dish soap (add to water)
• muffin tin or disposable cups
• popsicle sticks for stirring and mixing
• tablecloths (one for the table, another for the floor)
• head of red cabbage (indicator)


[am4show have=’p8;p9;p18;p45;’ guest_error=’Guest error message’ user_error=’User error message’ ]


Download Student Worksheet & Exercises


Step 1: Cover your kitchen table with a plastic tablecloth (and possibly the floor). Place your chemicals on the table. A set of muffin cups make for an excellent chemistry experiment lab. (Alternatively, you can use empty plastic ice cube trays.) You will mix in these cups. Leave enough space in the cups for your chemicals to mix and bubble up — don’t fill them all the way when you do your experiments!


Step 2: Set out your liquid chemicals in easy-to-pour containers, such as water bottles (be sure to label them, as they all will look the same): alcohol, hydrogen peroxide, water, acetic acid, and dish soap (mixed with water). Set out small bowls (or zipper bags if you’re doing this with a crowd) of the powders with the tops of your water bottles as scoopers. The small scoopers regulate the amounts you need for a muffin-sized reaction. Label the powders, as they all look the same.


Step 3: Prepare the indicator by coarsely chopping the head of red cabbage and boiling the pieces for five minutes in a pot full of water. Carefully strain out all the pieces with a fine-mesh strainer; the reserved liquid is your indicator (it should be blue or purple).


When you add this indicator to different substances, you will see a color range: hot pink, tangerine orange, sunshine yellow, emerald green, ocean blue, velvet purple, and everything in between. Test out the indicator by adding drops of cabbage juice to something acidic, such as lemon juice, and see how different the color is when you add indicator to a base, such as baking soda mixed with water.


Have your indicator in a bottle by itself. An old soy sauce bottle with a built-in regulator that keeps the pouring to a drip is perfect. You can also use a bowl with a bulb syringe, but cross-contamination could be a problem. Or it could not be — depending on whether you want the kids to see the effects of cross-contamination during their experiments. (The indicator bowl will continually turn different colors throughout the experiment.)


Step 4: Start mixing it up! When I teach this class, I let them have at all the chemicals at once (even the indicator), and of course, this leads to a chaotic mix of everything. When the chaos settles down, and they start asking good questions, I reveal a second batch of chemicals they can use. (I have two identical sets of chemicals, knowing that the first set will get used up very quickly.)


Step 5: After the initial burst of enthusiasm, your kids will instinctively start asking better questions. They will want to know why their green goo is creeping onto the floor while someone else’s just bubbled up hot pink, seemingly mixed from the same stuff. Give them a chance to figure out a more systematic approach, and ask if they need help before you jump in to assist.


What’s happening with the indicator? An indicator is a compound that changes color when you dip it in different things, such as vinegar, alcohol, milk, or baking soda mixed with water. There are several extracts you can use from different substances. You’ll find that different indicators are affected differently by acids and bases. Some change color only with an acid, or only with a base. Turmeric, for example, is good only for bases. (You can prepare a turmeric indicator by mixing 1 teaspoon turmeric with 1 cup rubbing alcohol.)


Why does red cabbage work? Red cabbage juice has anthocyanin, which makes it an excellent indicator for these experiments. Anthocyanin is what gives leaves, stems, fruits, and flowers their colors. (Did you know that certain flowers, such as hydrangeas, are blue in acidic soil but turn pink when transplanted to a basic soil?) You’ll need to get the anthocyanin out of the cabbage and into a more useful form so you can use it as a liquid indicator.


Tip for Testing Chemical Reactions: Periodically hold your hand under the muffin cups to test the temperature. If it feels hot, it’s an exothermic reaction (giving off energy in the form of heat, light, explosions …). The chemical-bond energy is converted to thermal energy (heat) in these experiments. If it feels cold, you’ve made an endothermic reaction (absorbing energy, where the heat from the mixture converts to bond energy). Sometimes you’ll find that your mixture is so cold that it condenses the water outside the container (like water drops on the outside of an ice-cold glass of water on a hot day).


Variations for the Indicator: Red cabbage isn’t the only game in town. You can make an indicator out of many other substances, too. Here’s how to prepare different indicators:
• Cut the substance into smaller pieces. Boil the chopped substance for five minutes. Strain out the pieces and reserve the juice. Cap the juice (indicator) in a water bottle, and you’re ready to go.
• What different substances can you use? We’ve had the best luck with red cabbage, blueberries, red and green grapes, beets, cherries, and turmeric. You can make indicator paper strips using paper towels or coffee filters. Just soak the paper in the indicator, remove and let dry. When you’re ready to use one, dip it in partway so you can see the color change and compare it to the color it started out with.
• Use the indicator both before and after you mix up chemicals. You will be surprised and dazzled by the results!


Teaching Tips: You can make this lab more advanced by adding a postage scale (to measure the solids in exact measurements), small beakers and pipettes for the liquid measurements, and data sheets to record temperature, reactivity, and acid/base indicator levels. (Hint: Make the data sheet like a matrix, to be sure you get all the possible combinations.)


For the student: Your mission is to mix up solutions that:
• Generate heat (exothermic)
• Get ice-cold on their own (endothermic)
• Crystallize
• Are self-gelling
• Bubble up and spit
• Ooze creepy concoctions
• Are the most impressive (the ooohhhh-aaahhhhh factor).


For the parent: Your mission is to:
• Make sure everything in reach is covered with plastic tablecloths, drop cloths, or tarps
• Open all the windows and turn on the fans (or just do this experiment outside near the hose)
• Keep all small children and pets away
• Slap on a pair of rubber gloves
• Encourage the kids to try it and test it
• Remember that there are no such things as mistakes, only learning opportunities. (Don’t forget that we usually learn more from mistakes than we do when we’re successful!)


For the truly exceptional parent: Your mission is also to:
• Secretly get an identical second set of chemicals from the grocery store (see shopping list above) and hide them in a bin nearby
• Have all the chemicals out and ready for the kids to use
• Be sure the kids know your rules before you let them loose (no eating, running, or horseplay; all goggles must stay on; etc.)
• Have a bin full of water nearby for washing up
• Let the kids loose to experiment and play without expectation
• Play with the kids, get into the act (“Wow! It turned green! How did you do that?!” instead of “Well, I’m not going to clean THAT up.”)
• Expect kids to dump everything and mix it all together at the same time without much thought about what they are trying to accomplish
• When their supplies run out, pull out your second bin and smile
• Encourage the kids to try their ideas out
o When they ask, “Will this work?” you can reply
with confidence, “I don’t know — try it!”


Click here to view another version of this experiment: Acids & Bases.
[/am4show]


Click here to go to next lesson on Cobalt Colors

Phenolphthalein is a weak, colorless acid that changes color when it touches acidic (turns orange) or basic (turns pink/fuchsia) substances. People used to take it as a laxative (not recommended today, as ingesting high amounts may cause cancer). Use gloves when handling this chemical, as your skin  can absorb it on contact. I’ll show you how:


[am4show have=’p8;p9;p18;p45;p80;’ guest_error=’Guest error message’ user_error=’User error message’ ]
Materials:


  • 2 test tubes
  • sodium carbonate (washing soda)
  • phenolphthalien (liquid)
  • medicine dropper
  • water
  • test tube stoppers
  • gloves and goggles


Download Student Worksheet & Exercises


Sprinkle a tiny amount of sodium carbonate into the bottom of your test tube. Fill your test tube partway with water (the solution should still be clear). Add a few drops of phenolphthalein (which is clear inside the dropper), cap, and shake.


[/am4show]


Click here to go to next lesson on Acid-base Matrix

You can go your whole life without paying any attention to the chemistry behind acids and bases. But you use acids and bases all the time! They are all around you. We identify acids and bases by measuring their pH.


Every liquid has a pH. If you pay particular attention to this lab, you will even be able to identify most acids and bases and understand why they do what they do. Acids range from very strong to very weak. The strongest acids will dissolve steel. The weakest acids are in your drink box. The strongest bases behave similarly. They can burn your skin or you can wash your hands with them.


Acid rain is one aspect of low pH that you can see every day if you look for it. This is a strange name, isn’t it? We get rained on all the time. If people were dissolving, if the rain made their skin smoke and burn, you’d think it would make headlines, wouldn’t you? The truth is acid rain is too weak to harm us except in very rare and localized conditions. But it’s hard on limestone buildings.


[am4show have=’p8;p9;p25;p52;’ guest_error=’Guest error message’ user_error=’User error message’ ]


Acids are liquids with a pH less than seven. A pH of seven is considered neutral. Bases are liquids with a pH greater than seven.


The combustion of fossil fuels such as oil, gasoline, and coal, create acid rain. Rain, normally at a pH of about 5.6, is always at least slightly acidic. Carbon dioxide is released into the air reacts with moisture in the air to form carbonic acid (HCO3). Sulfur dioxide and nitrogen oxides are released into the air by fossil fuel combustion. They react with the slightly acidic rain and form sulfuric acid (H2SO4) and nitric acid (HNO3).


We’re going to have fun with color changes in this experiment. We will make magic paper that changes color to tell us important things about liquids. It’s called litmus paper.


Litmus is harvested from a plant called a lichen, and bottled up as a powder. We’ll take the powder and make an acid-base indicator with it. Then we will use what we make to test solutions. And if you exercise your mind a bit, you will discover ways to use your litmus paper to discover things about the house and the world around you.


Materials:


  • Test tube rack
  • 2 Test tubes
  • Test tube stopper
  • Distilled water
  • Ruler
  • Litmus powder (MSDS)
  • Measuring spoon
  • Denatured alcohol (MSDS)
  • Pipette
  • Sodium carbonate (Na2CO3) (MSDS)
  • Sodium hydrogen sulfate (NaHSO4) (MSDS) Sodium hydrogen sulfate is very toxic. Respect it, handle it carefully and responsibly. Do not take it for granted.
  • Scissors
  • Filter paper (or paper towel or coffee filter)
  • Impervious surface

NOTE: Be very careful when handling the sodium hydrogen sulfate – it’s highly corrosive and dangerous when wet. Handle this chemical only with gloves, and be sure to read over the MSDS before using.


We will be using a ruler to measure the amount of water in a test tube. Ordinarily, chemists use more accurate measurement tools than a ruler. For the first part of this lab, making litmus solution, all we need is an approximate volume of water.


We will also be shaking a liquid in a test tube. Ever leave the top of a blender off when the “on” button is depressed? If not, just believe that it’s not a good idea. There is a certain technique t use when shaking up a liquid. We’ll place a stopper on a test tube and shake vigorously. Remember to do that as a chemist would do.


In a laboratory, whenever a chemist stoppers a solution and shakes it, it will be done the same way no matter if it is a toxic substance or just salt and water. That way, they are in the habit of doing it one way, the right way, so a mistake is not made at any time. A mistake at the wrong time could even be fatal.


Stopper the test tube firmly. Seat it well, but don’t grind down on the stopper. A test tube is thin-walled glassware, and as we grip harder it could collapse in our hand and now we have open cuts, blood, and toxic chemical is now entering your bloodstream. Stoppered firmly, we hold the test tube in our hand and place our thumb over the stopper for added security. To top off our safety measures, point the test tube, with a thumb firmly on top, away from us or anyone else and shake to our heart’s content.


We need to be careful with our chemicals. After using a chemical, cap the container to prevent spillage and contamination. Clean everything thoroughly after you are finished with the lab, or if you are going to reuse a tool. To dip a measuring spoon into one chemical after another, contaminates the chemicals and will affect your results.


Download Student Worksheet & Exercises


Clean everything thoroughly after you are finished with the lab. After cleaning with soap and water, rinse thoroughly. Chemists use the rule of “three” in cleaning glassware and tools. After washing, chemists rinse out all visible soap and then rinse three times more.


Place all chemicals, cleaned tools, and glassware in their respective storage places.


Dispose of all solid waste in the garbage. Liquids can be washed down the drain with running water. Let the water run awhile to ensure that they have been diluted and sent downstream.


You can test how acidic different substances are with an acid-base indicator like litmus paper.


Using the litmus powder in the chemistry set, we will make litmus paper. Our litmus paper is going to start out blue, and will turn red when an acid is placed on it. You can turn it back to blue by placing a few drops of a basic solution on it.


Let’s look a little further into the chemistry behind acids and bases. An acid produces hydronium ions (example: H3O+) when dissolved in water. The + or notation on a molecule tells us that after a chemical reaction creates it, the molecule is left with a net positive (electrons have been lost) or net negative charge (electrons have been added). Now, the ion could have more than just a +1 or -1 charge. Often, we will discover molecules with positive or negative charges of 2, 3, or 4.


Every liquid has a pH, and some of them may surprise you. Fruits contain citric acid, malic acid, and ascorbic acids, and the distilled white vinegar in your kitchen is a weak form of acetic acid. You’ll find carbonic acids in sodas, and lactic acid in buttermilk. And remember that acids taste sour and bases taste bitter? Don’t taste your chemicals, but the sour taste of vinegar and lemons and the bitter taste of club soda water and baking soda are familiar to people.


Generally, acids are sour in taste, change litmus paper from blue to red, react with metals to produce a metal salt and hydrogen, react with bases to produce a salt and water, and conduct electricity. Strong acids often produce a stinging feeling on mucus membranes (don’t ever taste an acid, or any chemical for that matter!).


Acids are proton donors (they produce H+ ions). Strong acids and bases all have one thing in common: they break apart (completely dissociate) into ions when placed in water. This means that once you dunk the acid molecule in water, it splits apart and does not exist as a whole molecule in water. Strong acids form H+ and an anion, such as sulfuric acid:


H2SO4 –> H++ HSO4


There are six strong acids:


  • hydrochloric acid (HCl)
  • nitric acid (HNO3) used in fireworks and explosives
  • sulfuric acid (H2SO4) which is the acid in your car battery
  • hydrobromic acid (HBr)
  • hydroiodic acid (HI)
  • perchloric acid (HClO4)

The record-holder for the world’s strongest acid are the carborane superacids (over a million times stronger than concentrated sulfuric acid). Carborane acids are not highly corrosive even though are super-strong. Here’s the difference between acid strength and corrosiveness: the carborane acid is quick to donate protons, making it a super-strong acid. However, it not as reactive (negatively charged) as hydrofluoric (HF) acid, which is so corrosive that it will dissolve glass, many metals, and most plastics.


What makes the HF so corrosive is the highly reactive Fl ion. Even though HF is super-corrosive, it’s not a strong acid because it does not completely dissociate (break apart into H+ and Fl) in water. Do you see the difference? Weak acids only partly dissociate in water, such as acetic acid (CH3COOH).


On the other hand, bases taste bitter (again, don’t even think about putting these in your mouth!), feel slippery (don’t touch bases with your bare hands!), don’t change the color of litmus paper, but can turn red litmus back to blue, conduct electricity when in a solution, and react with acids to form salts and water. Soaps and detergents are usually bases, along with house cleaning products like ammonia.


Bases are also electron pair donors (they produce OH ions). Strong bases also completely dissociate into the OH (hydroxide ion) and a cation. LiOH (lithium hydroxide), NaOH (sodium hydroxide), KOH (potassium hydroxide), RbOH (rubidium hydroxide), CsOH (cesium hydroxide), Ca(OH)2 (calcium hydroxide), Sr(OH)2 (strontium hydroxide), and Ba(OH)2 (barium hydroxide). Weak bases only partly dissociate in water, such as ammonia (NH3)


pH stands for “power of hydrogen” and is a measure of how acidic a substance is. We can make homemade indicators to test how acidic (or basic) something is by squeezing out a special kind of juice (dye) called anthocyanin. Certain flowers have anthocyanin in their petals, which can change color depending on how acidic the soil is (hibiscus, hydrangeas, and marigolds for example). The more acidic a substance, the more red the indicator will become.


Going Further

Experiment: What household items are acidic or basic? Test various liquids to see. You may be surprised. Liquids you should be sure to test are vinegar, lemon or orange juice, baking soda, and cola. Use a dropper to place drops onto the paper instead of dunking the strip into your entire carton of orange juice. Litmus flavored orange juice is not my first choice in the morning.


Experiment: Collect soil samples from various places. Not the types of plants growing in the immediate area you are sampling from. Place about an inch of dirt in the bottom of a test tube. Fill the test tube near the top with water. Use distilled water if you have it for more accuracy. Stopper the tube and shake vigorously. Use your pipette to place drops of the water on your litmus paper and see if the soil is acidic or basic. Is there a correlation between the acidity of the soil and the plants that grow there?


Note: Litmus paper will not be able to indicate how acidic the rain in your area is, because the acid content in the water droplet is not high enough to register on the indicator. The effects of acid rain take time to develop and require more sensitive equipment to detect. [/am4show]


Click here to go to next lesson on Water to Wine

You can go your whole life without paying any attention to the chemistry behind acids and bases. But you use acids and bases all the time! They are all around you. We identify acids and bases by measuring their pH.


Every liquid has a pH. If you pay particular attention to this lab, you will even be able to identify most acids and bases and understand why they do what they do. Acids range from very strong to very weak. The strongest acids will dissolve steel. The weakest acids are in your drink box. The strongest bases behave similarly. They can burn your skin or you can wash your hands with them.


Acid rain is one aspect of low pH that you can see every day if you look for it. This is a strange name, isn’t it? We get rained on all the time. If people were dissolving, if the rain made their skin smoke and burn, you’d think it would make headlines, wouldn’t you? The truth is acid rain is too weak to harm us except in very rare and localized conditions. But it’s hard on limestone buildings.


[am4show have=’p8;p9;p25;p52;’ guest_error=’Guest error message’ user_error=’User error message’ ]


Acids are liquids with a pH less than seven. A pH of seven is considered neutral. Bases are liquids with a pH greater than seven.


The combustion of fossil fuels such as oil, gasoline, and coal, create acid rain. Rain, normally at a pH of about 5.6, is always at least slightly acidic. Carbon dioxide is released into the air reacts with moisture in the air to form carbonic acid (HCO3). Sulfur dioxide and nitrogen oxides are released into the air by fossil fuel combustion. They react with the slightly acidic rain and form sulfuric acid (H2SO4) and nitric acid (HNO3).


We’re going to have fun with color changes in this experiment. We will make magic paper that changes color to tell us important things about liquids. It’s called litmus paper.


Litmus is harvested from a plant called a lichen, and bottled up as a powder. We’ll take the powder and make an acid-base indicator with it. Then we will use what we make to test solutions. And if you exercise your mind a bit, you will discover ways to use your litmus paper to discover things about the house and the world around you.


Materials:


  • Test tube rack
  • 2 Test tubes
  • Test tube stopper
  • Distilled water
  • Ruler
  • Litmus powder (MSDS)
  • Measuring spoon
  • Denatured alcohol (MSDS)
  • Pipette
  • Sodium carbonate (Na2CO3) (MSDS)
  • Sodium hydrogen sulfate (NaHSO4) (MSDS) Sodium hydrogen sulfate is very toxic. Respect it, handle it carefully and responsibly. Do not take it for granted.
  • Scissors
  • Filter paper (or paper towel or coffee filter)
  • Impervious surface

NOTE: Be very careful when handling the sodium hydrogen sulfate – it’s highly corrosive and dangerous when wet. Handle this chemical only with gloves, and be sure to read over the MSDS before using.


We will be using a ruler to measure the amount of water in a test tube. Ordinarily, chemists use more accurate measurement tools than a ruler. For the first part of this lab, making litmus solution, all we need is an approximate volume of water.


We will also be shaking a liquid in a test tube. Ever leave the top of a blender off when the “on” button is depressed? If not, just believe that it’s not a good idea. There is a certain technique t use when shaking up a liquid. We’ll place a stopper on a test tube and shake vigorously. Remember to do that as a chemist would do.


In a laboratory, whenever a chemist stoppers a solution and shakes it, it will be done the same way no matter if it is a toxic substance or just salt and water. That way, they are in the habit of doing it one way, the right way, so a mistake is not made at any time. A mistake at the wrong time could even be fatal.


Stopper the test tube firmly. Seat it well, but don’t grind down on the stopper. A test tube is thin-walled glassware, and as we grip harder it could collapse in our hand and now we have open cuts, blood, and toxic chemical is now entering your bloodstream. Stoppered firmly, we hold the test tube in our hand and place our thumb over the stopper for added security. To top off our safety measures, point the test tube, with a thumb firmly on top, away from us or anyone else and shake to our heart’s content.


We need to be careful with our chemicals. After using a chemical, cap the container to prevent spillage and contamination. Clean everything thoroughly after you are finished with the lab, or if you are going to reuse a tool. To dip a measuring spoon into one chemical after another, contaminates the chemicals and will affect your results.


Download Student Worksheet & Exercises


Clean everything thoroughly after you are finished with the lab. After cleaning with soap and water, rinse thoroughly. Chemists use the rule of “three” in cleaning glassware and tools. After washing, chemists rinse out all visible soap and then rinse three times more.


Place all chemicals, cleaned tools, and glassware in their respective storage places.


Dispose of all solid waste in the garbage. Liquids can be washed down the drain with running water. Let the water run awhile to ensure that they have been diluted and sent downstream.


You can test how acidic different substances are with an acid-base indicator like litmus paper.


Using the litmus powder in the chemistry set, we will make litmus paper. Our litmus paper is going to start out blue, and will turn red when an acid is placed on it. You can turn it back to blue by placing a few drops of a basic solution on it.


Let’s look a little further into the chemistry behind acids and bases. An acid produces hydronium ions (example: H3O+) when dissolved in water. The + or notation on a molecule tells us that after a chemical reaction creates it, the molecule is left with a net positive (electrons have been lost) or net negative charge (electrons have been added). Now, the ion could have more than just a +1 or -1 charge. Often, we will discover molecules with positive or negative charges of 2, 3, or 4.


Every liquid has a pH, and some of them may surprise you. Fruits contain citric acid, malic acid, and ascorbic acids, and the distilled white vinegar in your kitchen is a weak form of acetic acid. You’ll find carbonic acids in sodas, and lactic acid in buttermilk. And remember that acids taste sour and bases taste bitter? Don’t taste your chemicals, but the sour taste of vinegar and lemons and the bitter taste of club soda water and baking soda are familiar to people.


Generally, acids are sour in taste, change litmus paper from blue to red, react with metals to produce a metal salt and hydrogen, react with bases to produce a salt and water, and conduct electricity. Strong acids often produce a stinging feeling on mucus membranes (don’t ever taste an acid, or any chemical for that matter!).


Acids are proton donors (they produce H+ ions). Strong acids and bases all have one thing in common: they break apart (completely dissociate) into ions when placed in water. This means that once you dunk the acid molecule in water, it splits apart and does not exist as a whole molecule in water. Strong acids form H+ and an anion, such as sulfuric acid:


H2SO4 –> H++ HSO4


There are six strong acids:


  • hydrochloric acid (HCl)
  • nitric acid (HNO3) used in fireworks and explosives
  • sulfuric acid (H2SO4) which is the acid in your car battery
  • hydrobromic acid (HBr)
  • hydroiodic acid (HI)
  • perchloric acid (HClO4)

The record-holder for the world’s strongest acid are the carborane superacids (over a million times stronger than concentrated sulfuric acid). Carborane acids are not highly corrosive even though are super-strong. Here’s the difference between acid strength and corrosiveness: the carborane acid is quick to donate protons, making it a super-strong acid. However, it not as reactive (negatively charged) as hydrofluoric (HF) acid, which is so corrosive that it will dissolve glass, many metals, and most plastics.


What makes the HF so corrosive is the highly reactive Fl ion. Even though HF is super-corrosive, it’s not a strong acid because it does not completely dissociate (break apart into H+ and Fl) in water. Do you see the difference? Weak acids only partly dissociate in water, such as acetic acid (CH3COOH).


On the other hand, bases taste bitter (again, don’t even think about putting these in your mouth!), feel slippery (don’t touch bases with your bare hands!), don’t change the color of litmus paper, but can turn red litmus back to blue, conduct electricity when in a solution, and react with acids to form salts and water. Soaps and detergents are usually bases, along with house cleaning products like ammonia.


Bases are also electron pair donors (they produce OH ions). Strong bases also completely dissociate into the OH (hydroxide ion) and a cation. LiOH (lithium hydroxide), NaOH (sodium hydroxide), KOH (potassium hydroxide), RbOH (rubidium hydroxide), CsOH (cesium hydroxide), Ca(OH)2 (calcium hydroxide), Sr(OH)2 (strontium hydroxide), and Ba(OH)2 (barium hydroxide). Weak bases only partly dissociate in water, such as ammonia (NH3)


pH stands for “power of hydrogen” and is a measure of how acidic a substance is. We can make homemade indicators to test how acidic (or basic) something is by squeezing out a special kind of juice (dye) called anthocyanin. Certain flowers have anthocyanin in their petals, which can change color depending on how acidic the soil is (hibiscus, hydrangeas, and marigolds for example). The more acidic a substance, the more red the indicator will become.


Going Further

Experiment: What household items are acidic or basic? Test various liquids to see. You may be surprised. Liquids you should be sure to test are vinegar, lemon or orange juice, baking soda, and cola. Use a dropper to place drops onto the paper instead of dunking the strip into your entire carton of orange juice. Litmus flavored orange juice is not my first choice in the morning.


Experiment: Collect soil samples from various places. Not the types of plants growing in the immediate area you are sampling from. Place about an inch of dirt in the bottom of a test tube. Fill the test tube near the top with water. Use distilled water if you have it for more accuracy. Stopper the tube and shake vigorously. Use your pipette to place drops of the water on your litmus paper and see if the soil is acidic or basic. Is there a correlation between the acidity of the soil and the plants that grow there?


Note: Litmus paper will not be able to indicate how acidic the rain in your area is, because the acid content in the water droplet is not high enough to register on the indicator. The effects of acid rain take time to develop and require more sensitive equipment to detect. [/am4show]


Click here to go to next lesson on Making Litmus Paper


Strong acids and strong bases (which we’ll talk about in a minute) all have one thing in common: they break apart (completely dissociate) into ions when placed in water. This means that once you dunk the acid molecule in water, it splits apart and does not exist as a whole molecule in water. Strong acids form H+ and a negative ion

The seven strong acids are: hydrochloric acid (HCl), nitric acid (HNO3) used in fireworks and explosives, sulfuric acid (H2SO4) which is the acid in your car battery, hydrobromic acid (HBr), hydroiodic acid (HI), and perchloric acid (HClO4). The record-holder for the world’s strongest acid are the carborane (CAR-bor-ane) superacids (over a million times stronger than concentrated sulfuric acid).

[am4show have='p9;p52;p91;' guest_error='Guest error message' user_error='User error message' ]
Carborane acids are not highly corrosive even though are super-strong. Here’s the difference between acid strength and corrosiveness: the carborane acid is quick to donate protons, making it a super-strong acid. However, it not as reactive (negatively charged) as hydrofluoric (HF) acid, which is so corrosive that it will dissolve glass, many metals, and most plastics.

[/am4show]

Click here to go to next lesson on Making Litmus Paper


[am4show have=’p9;p59;’ guest_error=’Guest error message’ user_error=’User error message’ ]


[/am4show]


Click here to go to next lesson on Acid and Base Reactions.

Strong acids and strong bases (which we’ll talk about in a minute) all have one thing in common: they break apart (completely dissociate) into ions when placed in water. This means that once you dunk the acid molecule in water, it splits apart and does not exist as a whole molecule in water. Strong acids form H+ and a negative ion


The seven strong acids are: hydrochloric acid (HCl), nitric acid (HNO3) used in fireworks and explosives, sulfuric acid (H2SO4) which is the acid in your car battery, hydrobromic acid (HBr), hydroiodic acid (HI), and perchloric acid (HClO4). The record-holder for the world’s strongest acid are the carborane (CAR-bor-ane) superacids (over a million times stronger than concentrated sulfuric acid).


[am4show have=’p9;p52;p91;’ guest_error=’Guest error message’ user_error=’User error message’ ]


Carborane acids are not highly corrosive even though are super-strong. Here’s the difference between acid strength and corrosiveness: the carborane acid is quick to donate protons, making it a super-strong acid. However, it not as reactive (negatively charged) as hydrofluoric (HF) acid, which is so corrosive that it will dissolve glass, many metals, and most plastics.


[/am4show]


Click here to go to next lesson on K w and the pH scale

First discovered in 1886 by Hans Heinrich Landolt, the iodine clock reaction is one of the best classical chemical kinetics experiments. Here’s what to expect:  Two clear solutions are mixed. At first there is no visible reaction, but after a short time, the liquid suddenly turns dark blue.

Usually, this reaction uses a solution of hydrogen peroxide with sulfuric acid, but you can substitute a weaker (and safer) acid that works just as well:  acetic acid (distilled white vinegar). The second solution contains potassium iodide, sodium thiosulfate (crystals), and starch (we’re using a starch packing peanut, but you can also use plain old cornstarch). Combine one with the other to get the overall reaction, but note that there are actually two reactions happening simultaneously.

[am4show have='p8;p9;p18;p45;p91;' guest_error='Guest error message' user_error='User error message' ]

Materials:

  • sodium thiosulfate
  • potassium iodide
  • two plastic test tubes
  • packing peanut
  • disposable droppers
  • hydrogen peroxide
  • distilled white vinegar
  • distilled water
  • four disposable cups
  • popsicle sticks
  • clock
  • measuring spoons and cups
  • goggles and gloves


Download Student Worksheet & Exercises

In the first (slow) reaction, the triiodide ion is produced:

H2O2 + 3 I- + 2 H+ ? I3- + 2 H2O

In the second (fast) reaction, triiodide is reconverted to iodide by the thiosulfate.

I3- + 2 S2O32- ? 3 I- + S4O62-

After some time the solution always changes color to a very dark blue, almost black (the solution changes color due to the triiodide-starch complex).

Let’s get started! Rinse everything out very thoroughly with water three times, to ensure that nothing is contaminated before the experiment so you can get a clean start.  You can use droppers or measuring spoons (dedicated just to chemistry, not used for cooking) to measure your chemicals.  For droppers, make sure you’re using one dropper per chemical, and leave the dropper in the chemical when not in use to decrease the chances of cross-contamination.

Measure out 1 cup of distilled water and pour it into your first cup. Add ½ teaspoon sodium thiosulfate and stir until all the crystals are dissolved.  Touch the cup to feel the temperature change.  Is it hotter or colder?

Measure out 1 cup of distilled water into a new container.  Drop in the starch packing peanut and stir it around until it dissolves.  Packing peanuts can be made of cornstarch (as yours is, which is why it “melts” in water) or polystyrene (which melts in acetone, not water).

Into a third cup, measure out 1 cup of hydrogen peroxide.

Into the fourth cup, measure out 1 cup of distilled white vinegar.

Fill your plastic test tube with three parts starch (packing peanut) solution.  Add two parts distilled vinegar and two parts potassium iodide.  (Make sure you don’t cross-contaminate your chemicals — use clean measuring equipment each time.)  Your solution should be clear.

Into another plastic test tube, measure out three parts starch solution. Add two parts hydrogen peroxide and two parts sodium thiosulfate solution.  If the solution in the test tube is clear, you’re ready to move on to the next step.

Your next step is to pour one solution into the other and cap it, rocking it gently to mix the solution.  While you’re doing this, have someone clock the time from when the two solutions touch to when you see a major change.

What’s going on? There are actually two reactions going on at the same time.  When you combined the two solutions, the hydrogen peroxide (H2O2) combines with the iodide ions (I) to create triiodide (I3) and water (H2O). The sodium thiosulfate (S2O32) grabs the triiodide to form iodine, which is clear.  But the sodium thiosulfate eventually runs out, allowing the triiodide to accumulate (indicated by the solution changing color).  The time you measure is actually the time it takes to produce slightly more iodide ions than the sodium thiosulfate can wipe out.

By accelerating the first reaction, you can shorten the time it takes the solution to change color. There are a few ways to do this: You can decrease the pH (increasing H+ concentration), or increase the iodide or hydrogen peroxide. To lengthen the time delay, add more sodium thiosulfate.

[/am4show]

Click here for the next lesson in Iodine.


Chemical equilibrium is the condition that happens when the concentration of the reactants and products don’t have any net change over time. This doesn’t mean that the reaction stops, just that the producing and consuming of the molecules is in balance.

Most chemical reactions are reversible, just like phases changes. Do you remember the hot icicle experiment? Do you remember how to get it back to the starting point? You have to add energy to the solid sodium acetate to turn it back into a liquid, so it can turn back into a solid again. Then let that experiment sit for a bit (overnight or about 12 hours) and in the morning, you’ll have crystals growing on your pipe cleaner. Now if you want to reverse this reaction, all you have to do is add energy to the system and the crystals will dissolve back into the solution. You can heat it up in the microwave or in a pot of water on the stove, and the crystals will disappear.
[am4show have='p9;p52;p91;' guest_error='Guest error message' user_error='User error message' ]


When your reaction is in equilibrium, you can do things to disturb it, like increasing the temperature or adding more of something. The system will respond and shift to account for these changes.

[/am4show]

Click here to go to next lesson on Iodine Clock reaction


Chemical equilibrium is the condition that happens when the concentration of the reactants and products don’t have any net change over time. This doesn’t mean that the reaction stops, just that the producing and consuming of the molecules is in balance.


Most chemical reactions are reversible, just like phases changes. Do you remember the hot icicle experiment? Do you remember how to get it back to the starting point? You have to add energy to the solid sodium acetate to turn it back into a liquid, so it can turn back into a solid again. Then let that experiment sit for a bit (overnight or about 12 hours) and in the morning, you’ll have crystals growing on your pipe cleaner. Now if you want to reverse this reaction, all you have to do is add energy to the system and the crystals will dissolve back into the solution. You can heat it up in the microwave or in a pot of water on the stove, and the crystals will disappear.
[am4show have=’p9;p52;p91;’ guest_error=’Guest error message’ user_error=’User error message’ ]


When your reaction is in equilibrium, you can do things to disturb it, like increasing the temperature or adding more of something. The system will respond and shift to account for these changes.


[/am4show]


Click here to go to next lesson on Le Chatelier’s principle