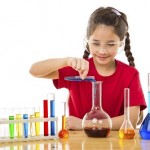
The summer chemistry section is full of great experiments that are not only fun but also designed to hone your observational skills. Chemistry experiments really speak for themselves, much better than I can ever put into words. And I’m going to provide you with a lot of these experiments to help you develop your observing techniques. Are you ready?
 |
 |
 |
|||
 |
 |
 |
|||
 |
 |
 |
|||
 |
 |
 |
|||
 |
 |
 |
|||
 |
|
 |
Simple Spectrometer and the more advanced Calibrated Spectrometer
|
||
 |
 |
 |
|||
 |
 |
 |
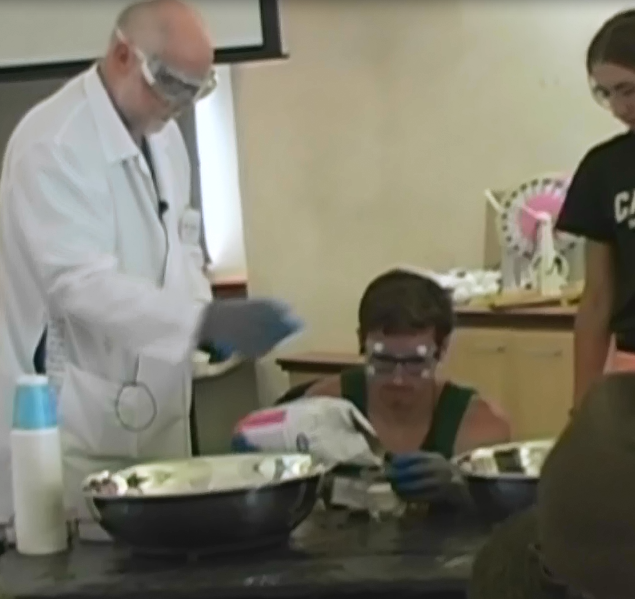
As promised, here’s the Liquid Nitrogen Ice Cream Social video that was only available to a handful of participants at our live summer camp last week! This is probably one of the last times Dr. Tom Frey will be doing this presentation, so we didn’t want to miss the opportunity to record it and share it with you!
Dr. Tom Frey just retired as a chemistry professor at Cal Poly State University, where he taught courses (including how to make your own lab glassware) for 42 years. He’s not only a mentor of mine, but a close personal friend and I am happy to share his talent and passion for science with you through this special, one of a kind video.
I really hope you enjoy it!
[am4show have=’p8;p9;p10;p37;p109;p95;’ guest_error=’Guest error message’ user_error=’User error message’ ]
Let me know what you think!
[/am4show]
A ferrofluid becomes strongly magnetized when placed in a magnetic field. This liquid is made up of very tiny (10 nanometers or less) particles coated with anti-clumping surfactants and then mixed with water (or solvents). These particles don’t “settle out” but rather remain suspended in the fluid.
The particles themselves are made up of either magnetite, hematite or iron-type substance.
Ferrofluids don’t stay magnetized when you remove the magnetic field, which makes them “super-paramagnets” rather than ferromagnets. Ferrofluids also lose their magnetic properties at and above their Curie temperature points.
Ferrofluids are what scientists call “colloidal suspensions”, which means that the substance has properties of both solid metal and liquid water (or oil), and it can change phase easily between the two. (We as show you this in the video below.) Because ferrofluids can change phases when a magnetic field is applied, you’ll find ferrofluids used as seals, lubricants, and many other engineering-related uses.
Here’s a video on toner cartridges and how to make your own homemade ferrofluid. It’s a bit longer than our usual video, but we thought you’d enjoy the extra content.
[am4show have=’p8;p9;p21;p48;p77;p91;p101;’ guest_error=’Guest error message’ user_error=’User error message’ ]
Download Student Worksheet & Exercises
Engineering and scientists use ferrofluids to make a liquid seal in hard disks around the spinning disks to keep out dust and grit (hard drives must be kept exceptionally clean!). They do this by adding a layer of ferrofluid between the rotating shaft and magnets which surround the shaft.
You can also use ferrofluids to reduce friction, the way ice and water are used in ice skating rinks. If you coat a strong magnet with ferrofluid, you can get it to glide across a smooth surface like a hockey puck.
NASA uses ferrofluids in the flight instruments for spacecraft, also!
Each particle of ferrofluid is like a each grain or a micro-magnet, which not only interacts with magnetic fields, but also with light.
With loudspeakers, the large magnets that interacting with the coil often heat up. If we replace the magnet with ferrofluid (which is a liquid, remember!) it will actively conduct the heat away from the coil and cool it down because cold ferrofluid is more strongly attracted than hot, and thus the cooler fluid flows toward the coil, and the warmer fluid moves away from the coil.
Exercises
- Is the ferrofluid a solid or a liquid?
- Does the strength of a magnet matter?
- What would happen if the magnet went over the rim of the cup?
- Does the ferrofluid have a north and south pole?
- What happens if you bring a compass near the ferrofluid?
- Name three specific ways ferrofluid makes our lives easier. How might you use a ferrofluid if you were inventing something?
[/am4show]
You’d be surprised at where vitamin C pops up in your kitchen – I know I was! I found it in my broccoli, butternut squash, sweet potatoes, swiss chard, spinach, carrots, kale, peas, leeks, tomatoes, guava, watermelon, grapefruit, pecans, raspberries, bell peppers, onion, papaya, pineapple, and pistachios!
Vitamin C is essential for humans and some animals (mostly primates), protecting the body from oxidative stress (involved in many diseases) and helping heal wounds. When humans don’t get enough vitamin C, they get sick with scurvy (bleeding from all mucus membranes, brown spots on the skin…), which is actually how scientists discovered vitamin C in the first place.
Plants and most animals actually make their own vitamin C by converting glucose (sugar).
Latest research (2008) discovered that the red blood cells in humans and primates more efficiently use vitamin C already in the body by recycling DHA. The neat part about t his discovery is that only humans and some primates have this ability – plants and most other animals do not.
Let’s find out how much of this vitamin is already in your home – are you ready?
There are two videos to watch – the first shows you how to make your own homemade indicator, and the second shows you how to use it.
[am4show have=’p8;p9;p101;’ guest_error=’Guest error message’ user_error=’User error message’ ]
Materials:
- cornstarch
- water
- old saucepan (just for chemistry)
- disposable stirring stick or spoon
- iodine
- stove with adult help
- foods to test (you’ll be throwing them away when you are done – don’t eat them!)
[/am4show]
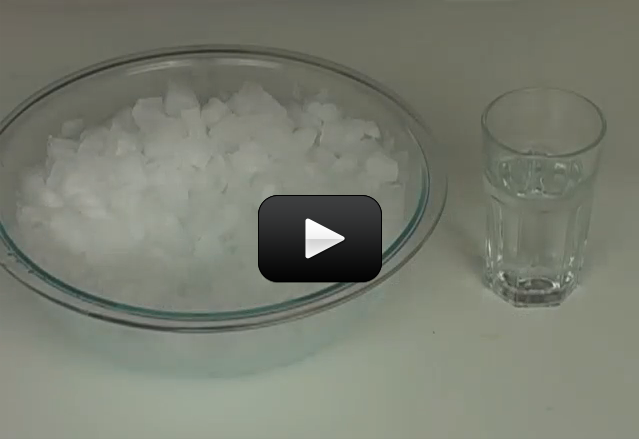
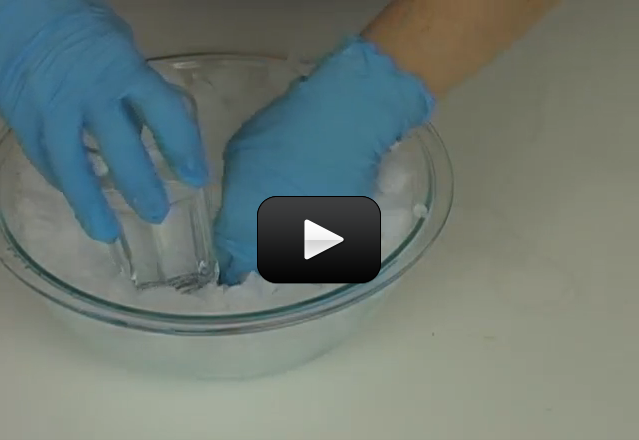
Supercooling a liquid is a really neat way of keeping the liquid a liquid below the freezing temperature. Normally, when you decrease the temperature of water below 32oF, it turns into ice. But if you do it gently and slowly enough, it will stay a liquid, albeit a really cold one!
In nature, you’ll find supercooled water drops in freezing rain and also inside cumulus clouds. Pilots that fly through these clouds need to pay careful attention, as ice can instantly form on the instrument ports causing the instruments to fail. More dangerous is when it forms on the wings, changing the shape of the wing and causing the wing to stop producing lift. Most planes have de-icing capabilities, but the pilot still needs to turn it on.
We’re going to supercool water, and then disturb it to watch the crystals grow right before our eyes! While we’re only going to supercool it a couple of degrees, scientists can actually supercool water to below -43oF!
[am4show have=’p8;p9;p82;p84;p91;p101;p30;p57;’ guest_error=’Guest error message’ user_error=’User error message’ ]
Materials:
- water
- glass
- bowl
- ice
- salt
Download Student Worksheet & Exercises
Don’t mix up the idea of supercooling with “freezing point depression”. Supercooling is when you keep the solution a liquid below the freezing temperature (where it normally turns into a solid) without adding anything to the solution. “Freezing point depression” is when you lay salt on the roads to melt the snow – you are lowering the freezing point by adding something, so the solution has a lower freezing point than the pure solvent.
[/am4show]
Did you know that supercooled liquids need to heat up in order to freeze into a solid? It’s totally backwards, I know…but it’s true! Here’s the deal:
A supercooled liquid is a liquid that you slowly and carefully bring down the temperature below the normal freezing point and still have it be a liquid. We did this in our Instant Ice experiment.
Since the temperature is now below the freezing point, if you disturb the solution, it will need to heat up in order to go back up to the freezing point in order to turn into a solid.
When this happens, the solution gives off heat as it freezes. So instead of cold ice, you have hot ice. Weird, isn’t it?
Sodium acetate is a colorless salt used making rubber, dying clothing, and neutralizing sulfuric acid (the acid found in car batteries) spills. It’s also commonly available in heating packs, since the liquid-solid process is completely reversible – you can melt the solid back into a liquid and do this experiment over and over again!
The crystals melt at 136oF (58oC), so you can pop this in a saucepan of boiling water (wrap it in a towel first so you don’t melt the bag) for about 10 minutes to liquify the crystals.
[am4show have=’p8;p9;p82;p84;p91;p101;p30;p57;’ guest_error=’Guest error message’ user_error=’User error message’ ]
Materials:
- Sodium Acetate
- Disposable aluminum pie plate
Download Student Worksheet & Exercises
You have seen this stuff before – when you combined baking soda and vinegar in a cup, the white stuff at the bottom of the cup left over from the reaction is sodium acetate. (No white stuff? Then it’s mixed in solution with the water. If you heat the solution and boil off all the water, you’ll find white crystals in the bottom of your pan.) The bubbles released from the baking soda-vinegar reaction are carbon dioxide.
[/am4show]
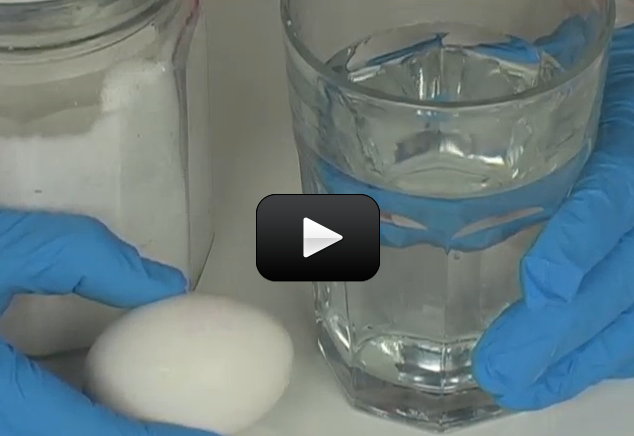
Did you know that most people can’t crack an egg with only one hand without whacking it on something? The shell of an egg is quite strong! Try this over a sink and see if you can figure out the secret to cracking an egg in the palm of your hand…(Hint: the answer is below the video – check it out after you’ve tried it first!)
How can you tell if an egg is cooked or raw? Simply spin it on the counter and you’ll get a quick physics lesson in inertia…although you might not know it. A raw egg is all sloshy inside, and will spin slow and wobbly. A cooked egg is all one solid chunk, so it spins quickly. Remember the Chicken and the Clam experiment?
[am4show have=’p8;p9;p28;p55;p68;p101;’ guest_error=’Guest error message’ user_error=’User error message’ ]
Materials:
- hard-boiled egg
- glass
- water
- salt
Download Student Worksheet & Exercises
This experiment is all about density. Density is basically how tightly packed atoms are. Mathematically, density is mass divided by volume. In other words, it is how heavy something is, divided by how much space it takes up. If you think about atoms as marbles (which we know they’re not from the last lessons but it’s a useful model), then something is more dense if its marbles are jammed close together.
For example, take a golf ball and a ping pong ball. Both are about the same size or, in other words, take up the same volume. However, one is much heavier, has more mass, than the other. The golf ball has its atoms much more closely packed together than the ping pong ball and as such the golf ball is denser.
Here’s a riddle: Which is heavier, a pound of bricks or a pound of feathers? Well, they both weigh a pound so neither one is heavier! Now, take a look at it this way, which is denser, a pound of bricks or a pound of feathers? Aha! The pound of bricks is much denser since it takes up much less space. The bricks and the feathers weigh the same but the bricks take up a much smaller volume. The atoms in a brick are much more squooshed together then the atoms in the feathers.
Back to the experiment – have you ever noticed you how float a lot easier in the ocean than the lake? If so, then you already know how salt can affect the density of the water. Saltwater is more dense that regular water, and your body tissues contain water (among other things).
Did you know that thinner people are more dense than heavier people? For example, championship swimmers will sink and have to work harder to stay afloat, but the couch potato next door will float more easily in the water.
[/am4show]
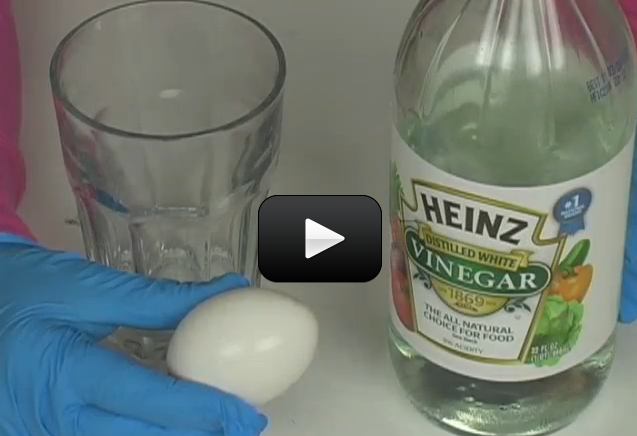
If you soak chicken bones in acetic acid (distilled vinegar), you’ll get rubbery bones that are soft and pliable as the vinegar reacts with the calcium in the bones. This happens with older folks when they lose more calcium than they can replace in their bones, and the bones become brittle and easier to break. Scientists have discovered calcium is replaced more quickly in bodies that exercise and eating calcium rich foods, like green vegetables.
This is actually two experiments in one – here’s what you need to do:
[am4show have=’p8;p9;p28;p55;p68;p101;’ guest_error=’Guest error message’ user_error=’User error message’ ]
Materials:
- hard boiled egg
- glass or clean jar
- distilled white vinegar
Download Student Worksheet & Exercises
When you first plop the egg in the vinegar, do you notice the tiny bubbles? The acetic acid (distilled vinegar) reacts with the calcium carbonate in the eggshell, and you may even notice a color change over a couple of days.
How high does your egg bounce? Does it matter how long you leave it in the vinegar for?
The second part of this experiment is to try this again, but now use a raw egg (wash your hands after handling your egg due to salmonella!) You’ll get a difference result – the eggshell will become flexible, but don’t bounce them.
Exercises
- Describe what the eggshell looked like before the reaction.
- Describe the acetic acid
- The product you witnessed in this chemical reaction was carbon dioxide, a colorless, odorless gas. How can you tell there really was a chemical reaction?
- Why did the egg turn to “rubber?”
[/am4show]
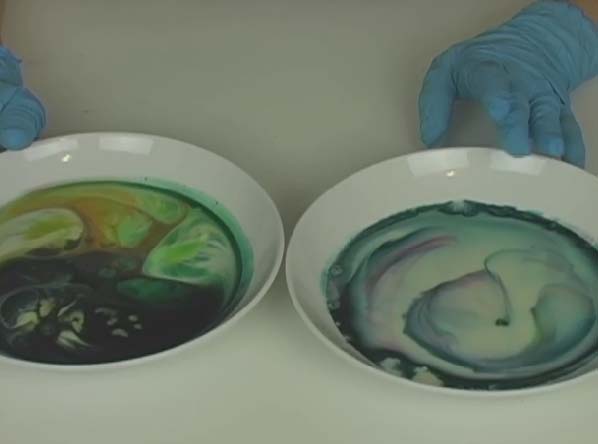
Have you ever tried washing dishes without soap? It doesn’t work well, especially if there’s a lot of grease, fat, or oil on the dish!
The oils and fats are slippery and repel water, which makes them a great choice for lubration of bearing and wheels, but lousy for cleaning up after dinner.
So what’s inside soap that makes it clean off the dish? The soap molecule looks a lot like a snake, with a head and a tail. The long tail loves oil (hydrophobic) and the head loves water (hydrophilic). The hydrophilic end dissolves in water and the hydrophobic end wraps itself around fat and oil in the dirty water, cleaning it off your dishes.
Let’s do an experiment that will really make you appreciate soap and fat:
[am4show have=’p8;p9;p68;p80;p101;’ guest_error=’Guest error message’ user_error=’User error message’ ]
Materials:
- whole milk (if you have it – otherwise, use lowfat)
- food dye
- bowl
- liquid soap
Download Student Worksheet & Exercises
While it may not look like it (or taste like it), milk is mostly water with minerals, proteins, and fat trapped inside. When you add a drop of soap, the hydrophobic end races around and grabs the fat and links up with other tail ends of soap molecules, forming the colors you see in the dish. The higher the fat content of your milk, the longer the show.
[/am4show]
A combustion reaction gives off energy, usually in the form of heat and light. The reaction itself includes oxygen combining with another compound to form water, carbon dioxide, and other products.
A campfire is an example of wood and oxygen combining to create ash, smoke, and other gases. Here’s the reaction for the burning of methane (CH4) which gives carbon dioxide (CO2) and water (H2O):
[am4show have=’p8;p9;p101;’ guest_error=’Guest error message’ user_error=’User error message’ ]
CH4 + 2 O2 –> CO2 + 2 H2O
Ok – so here are the steps from the video.
- First, cut off a strip of citrus fruit. It can be an orange, lemon, lime, tangerine, or grapefruit.
- Do you see those little holes in the peel? They have oil inside of them.
- Light a candle.
- Pinch the peel between your fingers, with peel side toward the flame. You want to squirt a tiny amount of oil from the peel or rind toward the flame
The oil from citrus fruits is very flammable. When you squeeze the oil out of the fruit peel it vaporizes enough that you can flash your flame. The flash point (temp that the oil will ignite) of the oil is 122 deg F. A candle flame is about 2600 degree F. (If it doesn’t work, heat up the peel side over the flame for a few seconds first, to get those tiny pockets of oil heated up and ready to burst.)
[/am4show]
When you think of slime, do you imagine slugs, snails, and puppy kisses? Or does the science fiction film The Blob come to mind? Any way you picture it, slime is definitely slippery, slithery, and just plain icky — and a perfect forum for learning real science.
But which ingredients work in making a truly slimy concoction, and why do they work? Let’s take a closer look!
Imagine a plate of spaghetti. The noodles slide around and don’t clump together, just like the long chains of molecules (called polymers) that make up slime. They slide around without getting tangled up. The pasta by itself (fresh from the boiling water) doesn’t hold together until you put the sauce on. Slime works the same way. Long, spaghetti-like chains of molecules don’t clump together until you add the sauce … until you add something to cross-link the molecule strands together.
[am4show have=’p8;p9;p98;’ guest_error=’Guest error message’ user_error=’User error message’ ]
To make our different slimes, we’ll be using borax as the cross-linking agent. There a lots of different polymers you can try, including starch, glue, and polyvinyl alcohol. The polymer (usually glue) mixture is the “spaghetti” (the long chain of molecules), and the “sauce” is the borax mixture (the cross-linking agent). You need both in order to create slime. Keep your slime in the fridge for a week, or a month in the freezer (although it might change colors). Nuke it in the microwave for a few seconds to thaw.
[/am4show]
This is a Bonus Lab, which means that the experiments in this section require adult help (we’re working with fire in several of them), and/or the materials are more expensive and hard to find.
Use the experiments in this section for kids wanting to go even further and deeper into the subject. Since these are more involved, be sure to browse through the videos for these experiments first before purchasing materials for these additional labs.
You do not need to do ALL the experiments – just pick the ones you want to do! Look over the experiments and note which items are needed, and off you go!
Click here for a printer-friendly version of this page.
Materials for Kitchen Chemistry
- Milk (whole or lowfat)
- Food dye
- Dish soap
- Water and Ice
- Bowl
- Drinking glass
- Egg (two hardboiled)
- Vinegar
- Salt
- Hydrogen peroxide
- Yeast (the kind you use for bread)
- Empty water or soda bottle (1 liter size)
- Cornstarch (a couple tablespoons)
- Iodine (from the pharmacy)
- Fresh citrus for testing
- Popsicle sticks or disposable plastic spoon
- Acetone (fingernail polish remover)
- Styrofoam cup
Materials for Bubblology
- Straws
- String
- Paper clips (small)
- 2L soda bottles
- Plastic berry basket
- Wire coat hangers (bendable)
- Thick rubber bands
- Stiff card stock (or paper)
- Plate or cookie sheet
- Balloon
- 6 feet of loosely woven inch-wide fabric trim (lace)
- Scissors
- Water (distilled if you have it)
- 1-2 cups clear Ivory dish soap OR liquid Joy Ultra OR green Dawn
- Buckets to hold your soap solution
- Glycerin (check your pharmacy)
Materials for Acids and Bases
- pH paper OR a head of red cabbage and paper towels/coffee filter
- Juice or fruit (anything you have will work)
Materials for Instant Crystal Sculptures
- Reusable hand warmer (the kind with a metal disc inside you flex to activate the sodium acetate)
- Disposable plate
- Scissors
Materials for Liquid Magnets
- Vegetable cooking oil (1/4 cup)
- Old toner or liquid toner
- Magnet
- Small soda bottle with cap
Materials for Volcanoes
- 9 cups flour
- 3 cups dirt
- 4 cups salt
- 1 cup sand
- Water
- Disposable roasting pan
- 4 cups baking soda
- 4 cups distilled white vinegar
- 2 empty water bottles
- 1 cup liquid dish soap
- 1 cup aluminum sulfate (check gardening section)
- 18” length of clear, flexible tubing (any diameter between ¼” – ½”)
- Red food dye (optional)
Materials for Water Purification Experiment
- coffee with grinds mixed back in stored in an old plastic water bottle
- popsicle sticks for mixing
- activated carbon granules (from a fish tank supply store)
- clean water
- funnel
- two cotton balls
- three small disposable cups (clear is best so you can see what you’re doing)
- medicine dropper or syringe (no needle)
- aluminum sulfate (AKA alum from the spice section)
- calcium hydroxide (AKA lime) from the gardening section. Note: keep this chemical packed away, as the dust is toxic and should not be inhaled.
Materials for Slime Science
- yellow highlighter pen
- guar gum (check health food stores)
- sodium tetraborate (AKA: borax)
- liquid starch (check the laundry aisle for Vano or Sta-Flo)
- cornstarch (about 2 cups)
- white glue
- clear glue
- disposable cups
- popsicle sticks
- measuring spoons
- water
- sugar (about 1 cup)
- goggles
- PVA (polyvinyl alcohol) (optional)
- food dye (optional)
Materials for Bouncy Balls
- Sodium Silicate (from Unit 3)
- Ethyl Alcohol (check your pharmacy)
- 2 disposable cups (don’t use your kitchen glassware, as you’ll never get it clean again)
- 2 Popsicle sticks (again, use something disposable to stir with)
- Gloves for your hands
- Goggles for your face
Materials for Burning Money
- Shallow baking dish
- Tongs
- Rubbing Isopropyl Alcohol (50-91%)
- Dollar bill
- Fire extinguisher with adult help
Materials for Football Ice Cream:
- 1 quart whole milk (do not substitute, unless your child has a milk allergy, use soy or almond milk)
- 1 pint heavy cream (do not substitute, unless your child has a milk allergy, then skip)
- 1 cup sugar (or other sweetener)
- 1 tsp vanilla (use non-alcohol kind)
- Rock salt (use table salt if you can’t find it)
- Lots of ice
- Freezer-grade zipper-style bags (you’ll need quart and gallon sizes)
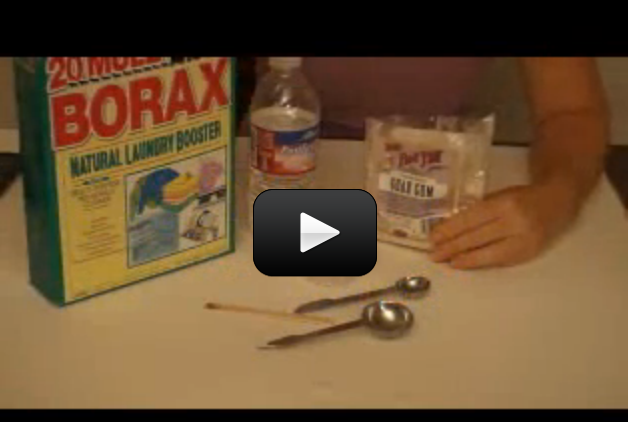
Materials for Colored Campfires & Spectrometer
- Old ceramic or metal pot with lid
- Heat-proof surface
- BBQ lighter with adult help
- Methanol
- Popsicle sticks
Select the chemical additive you want:
- Boric acid
- Sodium tetraborate (borax)
- Epsom salts (magnesium sulfate)
- Regular table salt (sodium chloride)
- Salt substitute (potassium chloride)
- Ice Melt or Dri-Ez (pure calcium chloride)
To build the spectrometer:
- Cardboard box (ours is 10″ x 5″ x 5″, but anything close to this will work fine)
- Diffraction grating (you can order a sheet here)
- Two razor blades (with adult help)
- Masking tape
- Ruler
- Photocopy of a cm (centimeter) ruler (or sketch a line with 1 through 10 cm markings on it, about 4cm wide)
Materials for Iodine Rainbow
- Iodine (clear, non-ammonia from the pharmacy)
- Hydrogen peroxide (3% solution)
- Vinegar (distilled white is best)
- Cornstarch (tiny pinch) or one starch packing peanut
- Water
- Sodium Thiosulfate
- Sodium Carbonate (AKA: “washing soda“)
- Phenolphthalein (keep this out of reach of kids)
- 6 disposable cups
- 6 Popsicle sticks
- Gloves for your hands
- Goggles for your face
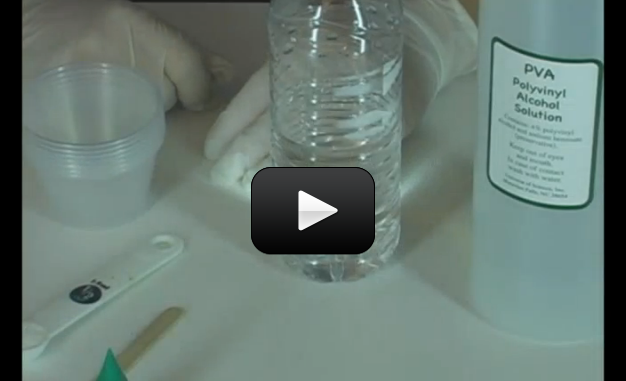
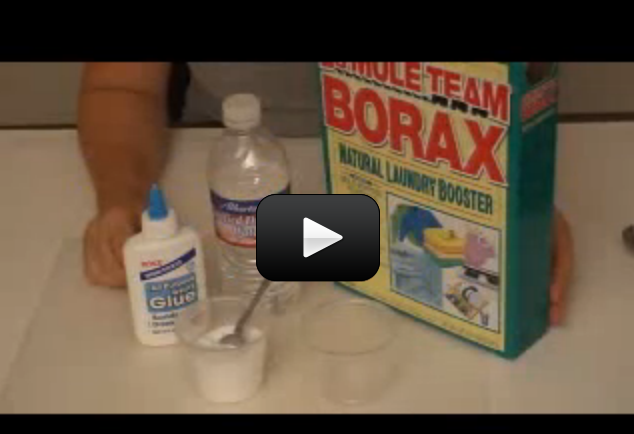
Instead of using glue as a polymer (as in the slime recipes above), we're going to use PVA (polyvinyl alcohol). Most liquids are unconnected molecules bouncing around. Monomers (single molecules) flow very easily and don't clump together. When you link up monomers into longer segments, you form polymers (long chains of molecules).
Polymers don't flow very easily at all - they tend to get tangled up until you add the cross-linking agent, which buddies up the different segments of the molecule chains together into a climbing-rope design.
[am4show have='p8;p9;p79;p80;p101;' guest_error='Guest error message' user_error='User error message' ]
Materials:
- PVA (polyvinyl alcohol)
- Borax (sodium tetraborate)
- Disposable cups
- Popsicle sticks
Here's what you do:
Download Student Worksheet & Exercises
By adding borax to the mix, you cross-link the long chains of molecules together into a fishnet, and the result is a gel we call slime. PVA is used make sponges, hoses, printing inks, and plastic bags.
You can add food coloring (or a bit of liquid Ivory dish soap to get a marbled appearance). You can also add a dollop of titanium dioxide sunscreen to your slime before cross-linking it to get a metallic sheen.
[/am4show]
Squishy Slime Mix 1 cup sugar, 12 cups water, and 3 cups cornstarch in a saucepan. Stir constantly over medium heat until thickened, about 5 minutes. Place a glop in each of several bowls along with drops of food coloring in each. Place a dollop of each color into a plastic sandwich bad and zip it shut. You can squish and squeeze without getting your hands slimy!
[am4show have=’p8;p9;p101;’ guest_error=’Guest error message’ user_error=’User error message’ ]
Bonus Idea: Messy Squishy Slime II Mix one teaspoon fiber (psyllium fiber like Metamucuil) with one cup cold water. (You can add food dye or use glow juice instead of water if you’d like). Heat mixture (use a stove with adult help, or use a microwave for a few minutes) until it looks slimy. Stir once or twice while heating.
Bonus Idea: Messy Squish Slime III Mix 1 cup cornstarch and 2-2/3 cups cheap vegetable oil together, stirring to combine. Let sit for an hour (if it’s a hot day, stick it in the fridge while you wait). Get a friend to rub a balloon on their head (to charge it up) as you slowly tip the slime to pour it into a second container. Bring the balloon close (but not touching) to the slime – you’ll see the slime react to the balloon! You’ll either see the slime wiggle closer, gel up, or break off a piece, depending on the consistency of your slime. Have fun!
Download Student Worksheet & Exercises
[/am4show]
Ever wonder why ketchup doesn't flow easily out of the bottle? Now you know it's because the ketchup acts just like the cornstarch-water experiment here. More examples of non-Newtonian fluids are ketchup, blood, paint, and shampoo.
We're going to whip up a batch of non-Newtonian fluid that's going to act like both a solid and a liquid. Here's what you do:
[am4show have='p8;p9;p101;' guest_error='Guest error message' user_error='User error message' ]
Corny Slime Fill a large bowl with two cups of cold water. Mix in one cup of cornstarch. The faster you stir, the harder it is to stir. Go s l o w l y . Grab it with your hand - it should form a hard ball that you can't squish. When you relax your grip, the ball should melt and drip between your fingers as if liquid. If this is not what's happening for you, adjust the amounts of cornstarch and water you have in your bowl.
Click here to learn how to expand this activity into Walking on Water.
We can also make a substance very similar to silly putty using these materials:
- liquid starch (use sta-flo, vano, or make your own from cornstarch and water
- white or clear glue
- disposable cups
- popsicle sticks
What's going on? The water-cornstarch mixture is made up of long molecular chains (polymers) that get all tangled up when you scrunch them together (and the slime feels solid). The polymers are so slick that as soon as you release the tension, they slide free (and the slime drips between your fingers). This of spaghetti noodles with butter - they get tangled up, but are still allowed to slide freely. This cornstarch-water substance is both a solid and a liquid. Scientists call this a non-Newtonian fluid.
For a smaller scale version of this experiment, try making a small amount and placing it in an empty water bottle. Notice how it acts like a liquid when you gently roll the bottle, but turns into solid bits when you shake it hard.
For an edible version of this experiment, replace the water with condensed milk. Heat one can of milk with one tablespoon cornstarch over low heat (get adult help with the stove), stirring until the mixture thickens. Remove from heat and allow to cool. (You can add food dye and/or alcohol-free flavorings if you'd like!) For chocolate slime, add two tablespoons chocolate syrup to the saucepan while cooking... great for a Slime Birthday Party!
Here's what happens if you run sound waves through your cornstarch solution:
[/am4show]
The glue is a polymer, which is a long chain of molecules all hooked together like tangled noodles. When you mix the two solutions together, the water molecules start linking up the noodles together all along the length of each noodle to get more like a fishnet. Scientists call this a polymetric compound of sodium tetraborate and lactated glue. We call it bouncy putty.
Here’s what you do:
[am4show have=’p8;p9;p68;p101;’ guest_error=’Guest error message’ user_error=’User error message’ ]
- Combine ½ cup water with one teaspoon of Borax in a cup and stir with a popsicle stick.
- In another cup, mix equal parts white glue and water.
- Add in a glob of glue mixture to the borax.
- Stir for one second with a popsicle stick, then quickly pull the putty out of cup and play with it until it dries enough to bounce on table (3-5 minutes).
- Pick up an imprint from a textured surface or print from a newspaper, bounce and watch it stick, snap it apart quickly and ooze apart slowly.
Download Student Worksheet & Exercises
[/am4show]
Is it hot where you live in the summer? What if I gave you a recipe for making ice cream that doesn’t require an expensive ice cream maker, hours of churning, and can be made to any flavor you can dream up? (Even dairy-free if needed?)
If you’ve got a backyard full of busy kids that seem to constantly be in motion, then this is the project for you. The best part is, you don’t have to do any of the churning work… the kids will handle it all for you!
This experiment is simple to set up (it only requires a trip to the grocery store), quick to implement, and all you need to do guard the back door armed with a hose to douse the kids before they tramp back into the house afterward.
One of the secrets to making great ice cream quickly is [am4show have=’p8;p9;p23;p50;p80;p88;p101;’ guest_error=’Guest error message’ user_error=’User error message’ ] to be sure that the milk and cream is COLD. I will make this particular recipe, it’s usually with hundreds of kids, and our staff will stuff the milk products in the freezer for an hour or two or under hundreds of pounds of ice to make sure it’s super-cold.
If you’re going for the dairy-free kind, simply skip the milk and cream and add a bit of extra time to the chill time of your substitute ‘milk’. We’ve had the best luck with almond and soy milk. Are you ready?
Here’s what you need:
Materials:
- 1 quart whole milk (do not substitute, unless your child has a milk allergy, then use soy or almond milk)
- 1 pint heavy cream (do not substitute, unless your child has a milk allergy, then skip)
- 1 cup sugar (or other sweetener)
- 1 tsp vanilla (use non-alcohol kind)
- rock salt (use table salt if you can’t find it)
- lots of ice
- freezer-grade zipper-style bags (you’ll need quart and gallon sizes)
Download Student Worksheet & Exercises
How does that work? Ice cream is basically “fluffy milk”. You need to whip in a lot of air into the milk fat to get the fluffy pockets that make this stuff worthwhile. The more the kids shake the bag, the faster it will turn into ice cream.
Why do we put salt on the ice?
If you live in an area where they put salt on the roads, you already know that people do this to melt the ice. But how does salt melt ice? Think about the chemistry of what’s going on. Water normally freezes at zero degrees Celsius. But salt water presses lower than zero, so the freezing point of salt water is lower than fresh water. By sprinkling salt on the roads, you’re lowering the point at which water freezes at. When you add a solute (salt) to the solvent (water) to alter the freezing point of the solution, it’s known as the “freezing point depression”.
Tips: Don’t use nonfat milk – it won’t work with this style of ice-cream making. if you’re adding fruit or chocolate bits, make sure you get those cold in advance too, or they will slow down your process as they heat your milk solution. (We usually add those bits last after the ice cream is done.)
IMPORTANT: Do NOT substitute dry ice for the water ice – the carbon dioxide gases build quickly and explode the bag, and now you have flying bits of dry ice that will burn skin upon contact. That’s not the biggest issue, though… the real problem is that now animals (like your dog) and small children pop a random piece of dry ice into their mouths, which will earn your family a visit to the ER. So stick with the regular ice from your fridge.
[/am4show]
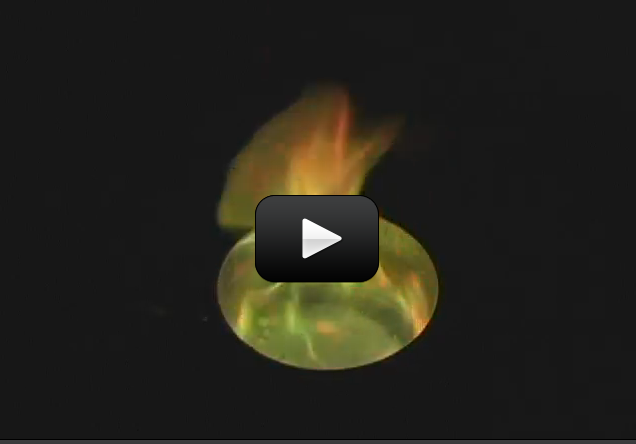
Always have a FIRE EXTINGUISHER and ADULT HELP handy when performing fire experiments. NO EXCEPTIONS.
This video will show you how to transform the color of your flames. For a campfire, simply sprinkle the solids into your flames (make sure they are ground into a fine powder first) and you’ll see a color change. DO NOT do this experiment inside your house – the fumes given off by the chemicals are not something you want in your home!
One of the tricks to fire safety is to limit your fuel. The three elements you need for a flame are: oxygen, spark, and fuel. To extinguish your flames, you’ll have to either wait for the fuel to run out or smother the flames to cut off the oxygen. When you limit your fuel, you add an extra level of safety to your activities and a higher rate of success to your eyebrows.
Here’s what we’re going to do: first, make your spectrometer: you can make the simple spectrometer or the more-advanced calibrated spectrometer. Next, get your chemicals together and build your campfire. Finally, use your spectrometer to view your flames.
[am4show have=’p8;p9;p25;p52;p91;p101;’ guest_error=’Guest error message’ user_error=’User error message’ ]
Download Student Worksheet & Exercises
This experiment is at your own risk! You MUST get an experienced adult to help you with this activity.
- Boric Acid or placing a copper pipe directly in the fire will give you GREEN flames
- Borax (sodium tetraborate) gives a YELLOW-GREEN flame
- Epsom salts (magnesium sulfate) will give you WHITE-PURPLE flames
- Table salt (sodium chloride) will give you YELLOW flames
- Washing soda (sodium carbonate) will give you YELLOW-GREEN flames
- Calcium Chloride (Ice Melt, Dri-Ez) will give an ORANGE flame (make sure it says ‘Calcium Chloride’ – there are a lot of other types of molecules used to melt ice!)
- Potassium Chloride (Nu Salt) will give you RAINBOW flames
- RED flames are made with strontium, which isn’t something you want kids to be playing with.
How to Tell Which Elements are Burning
Once you’ve got the hang of how to make colored flames, your next step is to create a spectroscope. When you aim your nifty little device at the flames, you’ll be able to split the light into its spectra and see which elements are burning. For example, if you were to view hydrogen burning with your spectroscope, you’d see the bottom appear in your spectrometer:

Notice how one fits into the other, like a puzzle. When you put the two together, you’ve got the entire spectrum.
What’s the difference between the two? The upper picture (absorption spectrum of hydrogen) is what astronomers see when they use their spectrometers on distant stars when looking through the earth’s atmosphere (a cloud of gas particles). The lower picture (emission spectrum of hydrogen) is what you’d see if you were looking directly at the source itself.
Note – Do NOT use your spectrometer to look at the sun! When astronomers look at stars, they have computers look for them – they aren’t putting their eye on the end of a tube.
What about other elements?
Each element has it’s own special ‘signature’, unique as a fingerprint, it leaves behind when it burns. This is how we can tell what’s on fire in a campfire. For example, here’s what you’d see for the following elements:
Just get the feel for how the signature changes depending on what you’re looking at. For example, a green campfire is going to look a lot different from a regular campfire, as you’re burning several elements in addition to just carbon. When you look at your campfire with your spectroscope, you’re going to see all the signatures at the same time. Imagine superimposing all four sets of spectral lines above (carbon, neon, magnesium, and nitrogen) into one single spectrum… it’s going to look like a mess! It takes a lot of hard work to untangle it and figure out which lines belong to which element. Thankfully these days, computers are more than happy to chug away and figure most of it out for us.
Here’s the giant rainbow of absorption lines astronomers see when they point their instruments at the sun:

Do you see all the black lines? Those are called emission lines, and since astronomers have to look through a lot of atmosphere to view the sun, there’s a lot of the spectrum missing (shown by the black lines), especially corresponding to water vapor. The water absorbs certain wavelengths of light, which corresponds to the black lines.
[/am4show]
Guar gum comes from the guar plant (also called the guaran plan), and people have found a lot of different and interesting uses for it. It’s one of the primary substitutes for fat in low-fat and fat-free foods. Cooks like to use guar gum in foods as it has 8 times the thickening power of cornstarch, so much less is needed for the recipe. Ice cream makers use it to keep ice crystals from forming inside the carton. Doctors use it as a laxative for their patients.
When we teach kids how to make slime using guar gum, they call it “fake fat” slime, mostly because it’s used in fat-free baking. You can find guar gum in health food stores or order it online. We’re going to whip up a batch of slime using this “fake fat”. Ready?
Here’s what you do:
[am4show have=’p8;p9;p68;p79;p101;’ guest_error=’Guest error message’ user_error=’User error message’ ]
Download Student Worksheet & Exercises
- Fill a cup with 7 tablespoons of cold water.
- Stir in 1/4 teaspoon of guar gum, stir with a popsicle stick 10 times and stop, leaving the stick in.
- Cautiously dip a pinkie into the cup, then rub it in their fingers. Does it smell?
- Leave it for 2 minutes to thicken.
- In a fresh cup, mix 1 teaspoon borax (sodium tetraborate) in one tablespoon water.
- Add ½ teaspoon of the Borax Solution to the Guar solution. Stir and it will form a gel that looks like real boogers!
[/am4show]
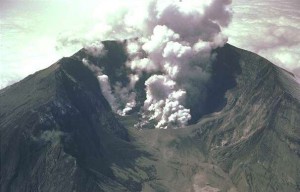
If you’ve ever wanted to make your own version of a volcano that burps and spit all over the place, then this is the experiment for you. We used to teach kids how to make genuine Fire & Flame volcanoes, but parents weren’t too happy about the shower of sparks that hit the ceiling and fireballs that shot out of the thing… so we’ve toned it down a bit to focus more on the lava flow.
[am4show have=’p8;p9;p73;p101;’ guest_error=’Guest error message’ user_error=’User error message’ ]
FIRST STEP: Make the volcano.
The first thing to do is mix up your own volcano dough. You can choose from the following two mixtures. The Standard Volcano Dough is akin to play dough; the Earthy Volcano Dough looks more like the real thing. Either way, you’ll need a few days on the shelf or a half-hour in a low-temperature oven to bake it dry. Alternatively, you can use a slab of clay for the dough.
- Standard Volcano Dough Mix together 6 cups flour, 2 cups salt, ½ cup vegetable oil, and 2 cups warm water. The resulting mixture should be firm but smooth. Stand a water or soda bottle in a roasting pan and mold the dough around it into a volcano shape.
- Earthy Volcano Dough Mix 2½ cups flour, 2½ cups dirt, 1 cup sand, and 1½ cups salt. Add water by the cup until the mixture sticks together. Build the volcano around an empty water bottle on a disposable turkey-style roasting pan. It will dry in two days if you have the time, but why wait? You can erupt when wet if the mixture is stiff enough! (And if it’s not, add more flour until it is.)
SECOND STEP: Create the reaction.
- Soda Volcanoes Fill the bottle most of the way with warm water and a bit of red food coloring. Add a splash of liquid soap and ¼ cup baking soda. Stir gently. When ready, add vinegar in a steady stream and watch that lava flow.
- Air Pressure Sulfur Volcanoes Wrap the volcano dough around an 18” piece of clear, flexible tubing. Shape the dough into a volcano and place in a disposable roasting pan. Push and pull the tube from the bottom until the other end of the tube is just below the volcano tip. If you clog the ends of the tubing with clay, just trim away the clog with scissors. Using your fingers, shape the inside top of the volcano to resemble a small paper cup. Your solution needs a chamber to mix and grow in before overflowing down the mountain. The tube goes at the bottom of the clay-cup space. Be sure the volcano is SEALED to the cookie sheet at the bottom. You won’t want the solution running out of the bottom of the volcano instead of popping out the top!
-
- Make your chemical reactants.
- Solution 1: Fill one bucket halfway with warm water and add 1 to 2 cups baking soda. Add 1 cup of liquid dish soap and stir very gently so you don’t make too many bubbles.
- Make your chemical reactants.
-
-
- Solution 2: Fill a second bucket halfway with water and add 1 cup of aluminum sulfate (also called alum; find this in the gardening section of the hardware store or check the spice section of the grocery store). Add red food coloring and stir.
-
-
-
- Putting it all together: Count ONE (and pour in Solution 1) … TWO (inhale air only!) …… and THREE (pour in Solution 2 as you put your lips to the tube from the bottom of the volcano and puff as hard as you can!) Lava should not only flow but burp and spit all over the place!
-
Download Student Worksheet & Exercises
Exercises
- How is this activity similar to the volcanoes on Mars?
- What gas is produced with this reaction?
- Which planets have volcanoes?
[/am4show]
Ever wonder how the water draining down your sink gets clean again? Think about it: The water you use to clean your dishes is the same water that runs through the toilet. There is only one water pipe to the house, and that source provides water for the dishwasher, tub, sink, washing machine, toilet, fish tank, and water filter on the front of your fridge. And there’s only one drain from your house, too! How can you be sure what’s in the water you’re using?
This experiment will help you turn not only your coffee back into clear water, but the swamp muck from the back yard as well. Let’s get started.
[am4show have=’p8;p9;p80;p84;p101;p30;p57;’ guest_error=’Guest error message’ user_error=’User error message’ ]
- clean play sand
- alum (check the spice section of the grocery store)
- distilled water
- water sample (a cup of coffee with the ground put back in works great)
- activated carbon (check an aquarium store)
- cheese cloth
- clear disposable cups
- popsicles
- medicine dropper or syringe (no needle)
- funnel
- 2 cotton balls
- measuring spoon (1/4 tsp and 1/2 tsp)
Download Student Worksheet & Exercises
There are several steps you need to understand as we go along:
- Aeration: Aerate water to release the trapped gas. You do this in the experiment by pouring the water from one cup to another.
- Coagulation: Alum collects small dirt particles, forming larger, sticky particles called floc.
- Sedimentation: The larger floc particles settle to the bottom of the cup.
- Filtration: The smaller floc particles are trapped in the layer of sand and cotton.
- Disinfection: A small amount of disinfectant is added to kill the remaining bacteria. This is for informational purposes only — we won’t be doing it in this experiment. (Bleach and kids don’t mix!)
Preparing the Sample
Make your “swamp muck” sample by filling a small pitcher with water, coffee, and the coffee grounds. Fill up another small pitcher with clean water. In a third small pitcher, pour a small scoop of charcoal carbon and cold water.
Fill one clear plastic cup half full of swamp muck. Stir in ½ teaspoon aluminum sulfate (also known as alum) and ¼ teaspoon calcium hydroxide (also known as lime; it’s nasty stuff to breathe in so keep it away from kids). You have just made floc, the heavy stuff that settles to the bottom.
Aside: For pH balance, you can add small amounts of lime to raise the pH (level 7 is optimal), if you have pH indicators on hand (find these at the pharmacy).
Stir it up and sniff — then don’t touch for 10 minutes as you make the filter.
Making the Filter
Grab a cotton ball and fluff it out HUGE. Then stuff it into the funnel. The funnel will take two or three balls. (Don’t stuff too hard, or nothing will get through!) Strain out the carbon granules from the pitcher, and put the black carbon water back into the pitcher. Place the funnel over a clean cup and pour the black water directly over the cotton balls. Run the dripped-out water back through the funnel a few times. Those cotton balls will turn gray-black! Discard all the carbon water.
Add a layer of sand over the top of the cotton balls. It should cover the balls entirely and come right up to the top of the funnel. Fill a third empty cup half-full of clean water from the pitcher. Drip (using a dropper) clean water into the funnel. (This gets the filter saturated and ready to filter.)
Showtime!
It’s time to filter the swamp muck. Without disturbing the sample, notice where the floc is… the dark, solid layer at the bottom. You’ve already filtered out the larger particles without using a filter! Using a dropper, take a sample from the layer above the floc (closer to the top of your container) and drip it into the funnel. If you’ve set up your experiment just right, you’ll see clear water drip out of your funnel.
Continue this process until the liquid starts to turn pale – which indicates that your filter is saturated and can’t filter out any more particles.
To dissect the filter and find out where the muck got trapped, invert the funnel over four layers of paper towel. Usually the blacker the cotton, the better the filter will work. Look for coffee grounds in the sand.
“Radioactive” Sample
Activate a disposable light stick. Break open the light stick (use gloves when handling the inner liquid), and using the dropper, add the liquid to the funnel. You can also drip the neon liquid by the drop into the swamp muck sample and pass it through your filter.
You can test out other types of “swamp muck” by mixing together other liquids (water, orange juice, etc.) and solids (citrus pulp, dirt, etc.). Stay away from carrot juice, grape juice, and beets — they won’t work with this type of filter.
[/am4show]
Ever play with a prism? When sunlight strikes the prism, it gets split into a rainbow of colors. Prisms un-mix the light into its different wavelengths (which you see as different colors). Diffraction gratings are tiny prisms stacked together.
When light passes through a diffraction grating, it splits (diffracts) the light into several beams traveling at different directions. If you’ve ever seen the ‘iridescence’ of a soap bubble, an insect shell, or on a pearl, you’ve seen nature’s diffraction gratings.
Scientist use these things to split incoming light so they can figure out what fuels a distant star is burning. When hydrogen burns, it gives off light, but not in all the colors of the rainbow, only very specific colors in red and blue. It’s like hydrogen’s own personal fingerprint, or light signature.
While this spectrometer isn't powerful enough to split starlight, it's perfect for using with the lights in your house, and even with an outdoor campfire. Next time you're out on the town after dark, bring this with you to peek different types of lights - you'll be amazed how different they really are. You can use this spectrometer with your Colored Campfire Experiment also.
SPECIAL NOTE: This instrument is NOT for looking at the sun. Do NOT look directly at the sun. But you can point the tube at a sheet of paper that has the the sun’s reflected light on it.
Here's what you do:
[am4show have='p8;p9;p25;p52;p105;p91;p101;' guest_error='Guest error message' user_error='User error message' ]
Download Student Worksheet & Exercises
You will need:
- cardboard box (ours is 10" x 5" x 5", but anything close to this will work fine)
- linear diffraction grating (you can order one here)
- 2 razor blades (with adult help)
- masking tape
- ruler
- photocopy of a ruler (or sketch a line with 1 through 10 cm markings on it, about 4cm wide)
1. Using a small box, measure 4.5 cm from the edge of the box. Starting here, cut a hole for the double-razor slit that is 1.5 cm wide 3 cm long.
2. From the other edge (on the same side), cut a hole to hold your scale that is 11 cm wide and 4 cm tall.
3. Print out the scale and attach it to the edge of the box.
4. Very carefully line up the two razors, edge-to-edge to make a slit and secure into place with tape.
5. On the opposite side of the box, measure over 3 cm and cut a hole for the diffraction grating that is 4 cm wide and 3 cm tall.
5. Tape your diffraction grating over the hole.
Aim the razor slit at a light source such as a fluorescent light, neon sign, sunset, light bulb, computer screen, television, night light, candle, fireplace… any light source you can find. Put the diffraction grating up to your eye and look at the inner scale. Move the spectrometer around until you can get the rainbow to be on the scale inside the box.
How to Calibrate the Spectrometer with the Scale Inside your box is a scale in centimeters. Point your slit to a fluorescent bulb, and you'll see three lines appear (a blue, a green, and a yellow-orange line). The lines you see in the fluorescent bulb are due to mercury superimposed on a rainbow continuous spectrum due to the coating. Each of the lines you see is due to a particular electron transition in the visible region of Hg (mercury). The blue line (435 nm), the green line (546 nm), and the yellow orange line (579 nm). (If you look at a sodium vapor street light you'll see a yellow line (actually 2 closely spaced) at 589 nm.)
Step 1. Line the razor slits along the length of the fluorescent tube to get the most intense lines. Move the box laterally (the lines will move due to parallax shift).
Step 2. Take scale readings at the extreme of the these movements and take the average for the scale reading. For instance, if the blue line averages to the 8.8 cm value, this corresponds to the 435 nm wavelength. Do this for the other 2 lines.
Step 3. On graph paper, plot the cm ( the ruler scale values) on the vertical axis and the wavelength (run this from 400-700 nm) on the horizontal axis. Draw the best straight lines thru the 3 points (4 lines if you use the Na (sodium) street lamp). You've just calibrated the spectrometer.
Step 4. Line the razor slits up with another light source. Notice which lines appear and where they are on your scale. Find the value on your graph paper. For example, if you see a line appear at 5.5 cm, use your finger to follow along to the 5.5 cm until you hit the best-fit line, and then read the corresponding value on the wavelength axis. You now have the wavelength for the line you've just seen!
Notes on Calibration and Construction: If you swap out different diffraction gratings, you will have to re-calibrate. If you make a new spectrometer, you will have to re-calibrate to the Hg (mercury) lines for each new spectrometer. If you do remake the box, use a scale that is translucent so you can see the numbers. If you use a clear plastic ruler, it may let in too much light from the outside making it difficult to read the emission line.
What other light sources work? Use your spectrometer to look at computer screens, laptops, night lights, neon lights, candles, campfires, fluorescent lights, incandescent lights, LEDs, stoplights, street lights, and any other light sources you can find. When you walk down town at night and look at various "neon" signs. Ne (neon) is a real burner! Do this with a friend who is willing to vouch for your sanity.
Question: What happens when you aim a laser through a diffraction grating? (See picture above - can you find the two dots on either side of the main later dot?)
[/am4show]
When I teach camp, the last experiment on Chemistry day is to ‘walk on water’. I present the kids with a milky-white tub full of water and a secret ingredient. I stick my hand in the tub and pull it out (slowly) so they can see it’s clearly a liquid (as it dribbles off my fingers), and the kids always gasp in surprise when I then smack it with my hand, because now it looks rock-solid.
Their challenge? To step up and across without sinking. Of course, sinking can be fun, too!
NOTE: You’ll see a tub full of water at the end of the line – this helps wash off their feet after they’re done stepping across.
Here’s what you need to do:
[am4show have=’p8;p9;p101;’ guest_error=’Guest error message’ user_error=’User error message’ ]
Fill a large tub or kiddie pool with as much cornstarch as you can afford for your group of kids. (You’ll need at least 50-100 pounds to make this worthwhile.) Start to add water, a little bit at a time, stirring with your hands and arms. The faster you stir, the harder it is to stir. Go s l o w l y . You want approximately a 2:1 ratio of cornstarch:water.
When your mixture is nearly ready, grab a chunk of it with your hand – it should form a hard ball that you can’t squish. When you relax your grip, the ball should melt and drip between your fingers as if liquid. Adjust the amounts of cornstarch and/or water to get it just right.
What’s going on? The water-cornstarch mixture is made up of long molecular chains (polymers) that get all tangled up when you scrunch them together (and the slime feels solid). The polymers are so slick that as soon as you release the tension, they slide free (and the slime drips between your fingers). This of spaghetti noodles with butter – they get tangled up, but are still allowed to slide freely. This cornstarch-water substance is both a solid and a liquid. Scientists call this a non-Newtonian fluid.
Ever wonder why ketchup doesn’t flow easily out of the bottle? Now you know it’s because the ketchup acts just like the cornstarch-water experiment above. More examples of non-Newtonian fluids are ketchup, blood, paint, and shampoo.
For a smaller scale version of this experiment, try making a small amount and placing it in an empty water bottle. Notice how it acts like a liquid when you gently roll the bottle, but turns into solid bits when you shake it hard.
[/am4show]

If you’re fascinated by the simple complexity of the standard soap bubble, then this is the lab for you. You can easily transform these ideas into a block-party Bubble Festival, or just have extra fun in the nightly bathtub. Either way, your kids will not only learn about the science of water, molecules, and surface tension, they’ll also leave this lab cleaner than they started (which is highly unusually for science experiments!)
Soap also makes water stretchy. If you’ve ever tried making bubbles with your mouth just using spit, you know that you can’t get the larger, fist-sized spit bubbles to form completely and detach to float away in the air. Spit is 94% water, and water by itself has too much surface tension, too many forces holding the molecules together. When you add soap to it, they relax a bit and stretch out. Soap makes water stretch and form into a bubble.
[am4show have=’p8;p9;p80;p101;’ guest_error=’Guest error message’ user_error=’User error message’ ]
Download Student Worksheet & Exercises
The absolute best time to make gigantic bubbles is on an overcast day, right after it rains. Bubbles have a thin cell wall that evaporates quickly in direct sun, especially on a low-humidity day. If you live in a dry area with low-humidity, be sure to use glycerin. The glycerin will add moisture and deter the rapid thinning of the bubble’s cell wall (which cause bubbles to tear and pop).
Best Bubble Solution Gently mix together 6 cups cold water in a shallow tub with 1 cup green Dawn (or clear Ivory) dish soap. If it’s a hot, dry day, add a few tablespoons of glycerin. (Glycerin can be found at the drugstore.) If you’re finding the solution too thin, add a second cup of dish soap. You can add all sorts of things to find the perfect soap solution: lemon juice, sugar, corn syrup, Karo syrup, maple syrup, glycerin — to name just a few. Each will add its own properties to the bubble solution. (You can have buckets of each variation along with plain dish soap and water to compare.) You can reduce the water, increase the soap, etc… but here’s a good starting point: 2 cups dish soap with 1 cup Karo syrup and 6 cups cold water.
Zillions of Tiny Bubbles can be made with strawberry baskets. Simply dip the basket into the bubble solution and twirl around. You can also use plastic six-pack soda can holders.
Trumpet Bubbles are created by using a modified water bottle. Cut off the bottom of the bottle, dip the large end in the soap solution, put the small end to your lips, and blow. You can separate the bubble from the trumpet by rolling the large end up and away from your bubble.
Bubble Castles are built with a straw and a plate. First, spread bubble solution all over a smooth surface (such as a clean cookie sheet, plate, or tabletop). Dip one end of a straw in the bubble solution and blow bubbles all over the surface. Make larger domes with smaller ones inside. Notice how the bubbles change shape and size when they connect with others.
Stretch and Squish! Get one hand-sized bubble in each hand. Slap them together (so they join, not pop!). What if you join them s l o w l y?
Light Show is always a favorite. Find a dark room. Find a BIG flashlight and stand it on end. Rub soap solution all over the bottom of an uncolored plastic lid (such as from a coffee can). Balance the lid, soapy side up, on the flashlight (or on the spring-type clothespins). Blow a hemisphere bubble on top of the lid. Blow gently along the side of the bubble. Watch the colors swirl.
Weird Shapes are the simplest way to show how soap makes water stretchy. Dip a rubber band completely in the soap solution and pull it up. Stretch the rubber band using your fingers. Twist and tweak into all sorts of shapes. Note that the bubble always finds a way of filling the shape with the minimum amount of surface area. Make a Moebius bubble by cutting a thick ribbon, giving one end a half-twist, and reattaching the ends (by sewing, stapling, or taping).
Polygon Shapes allow you to make square and tetrahedral bubbles. Create different 3-D shapes by bending pipe cleaners into cubes, tetrahedrons, or whatever you wish. Alternatively, you can use straws threaded onto string to make 3-D triangular shapes. Notice how the film always finds its minimum surface area. Can you make square bubbles?
Gigantic Bubbles Using the straws and string, thread two straws on three feet of string and tie off. Grasp one straw in each hand and dip in soap solution. Use a gentle wind as you walk to make BIG bubbles. Find air thermals (warm pockets of air) to take your bubbles up, up, UP!
Kid-in-a-Bubble Pour your best bubble solution into a child’s plastic swimming pool. Lay a Hula-hoop down, making sure there is enough bubble solution to just cover the hoop. Have your child stand in the pool (use a stool if you want to avoid wet feet), and lift the hoop! For a more permanent project, use an old car tire sliced in half lengthwise (the hard way) to hold the bubble solution. The kid stands in the hole and doesn’t get wet!
Electric Bubbles Blow some fist-sized bubbles and set them loose. Rub an inflated balloon on your head or wool sweater to charge the balloon and get the charged balloon close to a soap bubble. If you are fast and careful enough, you can steer the bubble around the room.
Hover Bubbles Since bubbles are light, you can float them on a gas that is slightly denser than the air they are filled with, such as carbon dioxide. Place a shallow glass dish inside a larger glass dish or tank (like an unoccupied aquarium). Into the smaller dish, add two cups vinegar and one cup baking soda.
After the fizzing has subsided, your larger container is now filled with carbon dioxide gas. Make sure it’s away from drafts or movement so the invisible carbon dioxide gas stays in there. Gently blow bubbles near the opening so they settle into the large tank. (Don’t blow directly into the container, or you’ll slosh out the CO2.) Your bubbles will hover in the tank so you can have a closer look. What colors do you see? Do the colors change? Does the bubble stay in one place, rise, sink, or move around? If your bubble stays in the tank without popping, you’ll notice that it slowly becomes larger!
Mammoth Bubbles To create bubbles the size of a small car, use your lace trim. Knot the ends together to form a large loop, and dip your lace into the bubble solution. Gently pick up the loop with your hands about two feet apart, the rest dangling below. You should see a thin bubble film in the loop. Keep your hands spread apart and walk (keeping the bottom loop above the ground), and a bubble will form behind you. When it’s big enough, close the loop by bringing your hands together to seal off the bubble. You can also spin slowly in a circle to put yourself inside a “bubble-bagel” (mathematical term for this shape: toroid). If you do this in a place with warm updrafts (like next to a building), your bubbles will float up and away and quite possibly attract a small crowd… like the photo below.
The How and Why Explanation If you pour a few droplets of water onto a sweater or fabric, you’ll notice that the water will just sit there on the surface in a ball (or oval, if the drop is large enough). If you touch the ball of water with a soapy finger, the ball disappears into the fibers of the fabric! What happened?
Soap makes water “wetter” by breaking down the water’s surface tension by about two-thirds. Surface tension is the force that keeps the water droplet in a sphere shape. It’s the reason you can fill a cup of water past the brim without it spilling over. Without soap, water can’t get into the fibers of your clothes to get them clean. That’s why you need soap in the washing machine.
Soap also makes water stretchy. If you’ve ever tried making bubbles with your mouth just using spit, you know that you can’t get the larger, fist-sized spit bubbles to form completely and detach to float away in the air. Spit is 94% water, and water by itself has too much surface tension, too many forces holding the molecules together. When you add soap to it, they relax a bit and stretch out. Soap makes water stretch and form into a bubble.
The soap molecule looks a lot like a snake; it’s a long chain that has two very different ends. The head of the snake loves water, and the tail loves dirt. When the soap molecule finds a dirt particle, it wraps its tail around the dirt and holds it.
The different colors of a soap bubble come from how the white light bounces off the bubble into your eye. Some of the light bounces off the top surface of the bubble and bends only a little bit, while the rest passes through the thin film and bounces off the inner surface of the bubble and refracts more.
If you made the Hover Bubbles, you’ll notice that the bubbles slowly get larger the longer they live in the tank. Remember that the bubble is surrounded by CO2 gas as it sinks. The bubble grows because carbon dioxide seeps through the bubble film faster than the air seeps out, as CO2 is more soluble in water than air (meaning that CO2 mixes more easily with water than air does).
[/am4show]
 Click here for a printer-friendly version of this page.
Objective You’re going to do several chemistry experiments that expose your kids to the different type of chemical reactions. I want you to focus on honing your observational skills when you do the experiments. Did the temperature, color or volume change? Even the smallest differences can indicate something big is going on. The first thing to do is watch the video on the Chemical Demonstrations website page, and then dive into the experiments.
Main Ideas Chemistry is chocked full of demonstrations and experiments for two big reasons. First, they’re fun. But more importantly, the reason we do experiments in chemistry is to hone your observational skills. Chemistry experiments really speak for themselves, much better than I can ever put into words or show you on a video. And I’m going to hit you with a lot of these chemistry demonstrations to help you develop your observing techniques.
While the kids are playing with the experiments see if you can get them to notice these important ideas. When they can explain these concepts back to you (in their own words or with demonstrations), you’ll know that they’ve mastered the lesson.
About the Experiments A lot of folks get nervous around chemistry. You can’t always ’see’ what’s going on (are there toxic gases generated from that reaction?), and many people have a certain level of fear around chemicals in general.
I don’t want you dipping your hands in molten lead or lying on a bed of nails while someone with a sledgehammer breaks a cinder block on your stomach. Demonstrations of this kind that result in injury are the ones forever burned in the memory of the audience, who are now fearful and have made the generalization that chemicals are dangerous and their effects are bad. In fact, every chemical is potentially harmful if not handled properly. That is why I’ve prepared a special set of chemistry experiments that include step-by-step demonstrations on how to properly handle the chemicals, use them in the experiment, and dispose of them when you’re finished.
Chemistry is predictable, just as dropping a ball from a height always hits the floor. Every time you add 1 teaspoon of baking soda to 1 cup of vinegar, you get the same reaction. It doesn’t simply stop working one time and explode the next. I’m going to walk you through every step of the way, and leave you to observe the reactions and write down what you notice. At first, it’s going to seem like a lot of disjointed ideas floating around, but after awhile, you’ll start to see patterns in the way chemicals interact with each other. Keep working at Chemistry and eventually it will click into place. And if there’s an experiment you don’t want to do, just skip it (or just watch the video). Some of this may be a review for you, especially if you’ve completed Units 3 (Matter) and 8 (Chemistry 1).
The How and Why Explanation There are several different types of chemical reactions: combustion, decomposition, synthesis, and displacement. All chemical reactions somehow fit into one of these, and here’s how you can tell them apart…
Combustion: A combustion reaction gives off energy, usually in the form of heat and light. The reaction itself includes oxygen combining with another compound to form water, carbon dioxide, and other products. A campfire is an example of wood and oxygen combining to create ash, smoke, and other gases.
Synthesis: This reaction happens when simple compounds come together to form a more complicated compound. The iron (Fe) in a nail combines with oxygen (O2) to form rust, also called iron oxide (Fe2O3).
Oxidation-Reduction (Redox Reaction): When the oxidation numbers of atoms change during the reaction, it’s called a redox reaction. Oxidation happens when a compound loses electrons (increases oxidation state) and reduction occurs when a compound gains electrons (decrease in oxidation state). Electroplating is an example of a redox reaction.
Decomposition: On the other side, a decomposition reaction breaks a complicated molecule into simpler ones. When you leave a bottle of hydrogen peroxide on the counter, it decomposes into water (H2O) and oxygen (O2).
Displacement: There are several different types of displacement reactions, including single, double, and acid-base more on this later). Antacids like calcium hydroxide (CaOH) combine with stomach acid (HCl) to form calcium chloride salt (CaCl2) and water (H2O).
Questions to Ask When you’ve worked through most of the experiments ask your kids these questions and see how they do:
- What’s true about phenolphthalein? (a) it goes from clear to pink when mixed with bases (b) it’s impossible to spell (c) it is colorless in acidic solutions (d) soluble in water
- How does increasing the hydrogen peroxide affect the rate of the iodine clock reaction?
- Which chemical turns coldest when added to water? (a) calcium chloride (b) aluminum sulfate (c) ammonium nitrate (d) citric acid
- A polymer is: (a) a long piece of spaghetti (b) an element on the periodic table (c) a long molecular chain (d) a plastic bag
- What does a cross-linking agent do?
- Which of the following are cross-linking agents? (a) calcium (b) borax (c) white glue (d) starch (e) bubble gum
- Which substance is both a solid and a liquid? (a) bubble gum (b) slime (c) cornstarch and water (d) last night’s dinner
Answers:
- What’s true about phenolphthalein? (a) it goes from clear to pink when mixed with bases (b) it’s impossible to spell (c) it is colorless in acidic solutions (d) soluble in water
- How does increasing the hydrogen peroxide affect the rate of the iodine clock reaction? By accelerating the first reaction, you can shorten the time it takes the solution to change color. There are a few ways to do this: You can decrease the pH (increasing H+ concentration), or increase the iodide or hydrogen peroxide. (To lengthen the time delay, add more sodium thiosulfate.)
- Which chemical turns coldest when added to water? (a) calcium chloride (b) aluminum sulfate (c) ammonium nitrate (d) citric acid
- A polymer is: (a) a long piece of spaghetti (b) an element on the periodic table (c) a long molecular chain (d) a plastic bag
- What does a cross-linking agent do? Coagulates the polymers. (Turns the long polymer chains into something that looks more like a fishnet.)
- Which of the following are cross-linking agents? (a) calcium (b) borax (c) white glue (d) starch (e) bubble gum
- Which substance is both a solid and a liquid? (a) bubble gum (b) slime (c) cornstarch and water (d) last night’s dinner
 Click here for a printer-friendly version of this page.
Objective When you think of slime, do you imagine slugs, snails, and puppy kisses? Or does the science fiction film The Blob come to mind? Any way you picture it, slime is definitely slippery, slithery, and just plain icky — and a perfect forum for learning real science.
Imagine a plate of spaghetti. The noodles slide around and don’t clump together, just like the long chains of molecules (called polymers) that make up slime. They slide around without getting tangled up. The pasta by itself (fresh from the boiling water) doesn’t hold together until you put the sauce on. Slime works the same way. Long, spaghetti-like chains of molecules don’t clump together until you add the sauce … until you add something to cross-link the molecule strands together.
About the Experiment To make our different slimes, we’ll be using borax as the cross-linking agent. There a lots of different polymers you can try, including starch, glue, and polyvinyl alcohol. The polymer (usually glue) mixture is the “spaghetti” (the long chain of molecules), and the “sauce” is the borax mixture (the cross-linking agent). You need both in order to create slime. Keep your slime in the fridge for a week, or a month in the freezer (although it might change colors). Nuke it in the microwave for a few seconds to thaw.
The How and Why Explanation The cross-linking agent in the slime mixtures can be either liquid starch or borax (sodium tetraborate). When you mix the glue and water together, you’ve got a cup full of long molecule chains, like a pile of ropes. When you cross-link the polymers, it’s like building a net with the rope, and it happens very quickly to give you that rubbery, stretchy substance kids are so fond of.
Questions to Ask When you’ve worked through most of the experiments ask your kids these questions and see how they do:
- A polymer is: (a) a long piece of spaghetti (b) an element on the periodic table (c) a long molecular chain (d) a plastic bag
- What does a cross-linking agent do?
- Which of the following are cross-linking agents? (a) calcium (b) borax (c) white glue (d) starch (e) guar gum
- What does PVA stand for? What kind of water does it mix with?
- Which substance is both a solid and a liquid? (a) guar gum (b) bouncy putty (c) starch slime (d) corny slime
 Click here for a printer-friendly version of this page.
Objective This experiment will teach you about the different types of filtration as you turn your coffee back into clear water as well as the swamp muck from the back yard. You can test out other types of “swamp muck” by mixing together other liquids (water, orange juice, etc.) and solids (citrus pulp, dirt, etc.). Stay away from carrot juice, grape juice, and beets — they won’t work with this type of filter.
About the Experiment Ever wonder how the water draining down your sink gets clean again? Think about it: The water you use to clean your dishes is the same water that runs through the toilet. There is only one water pipe to the house, and that source provides water for the dishwasher, tub, sink, washing machine, toilet, fish tank, and water filter on the front of your fridge. And there’s only one drain from your house, too! How can you be sure what’s in the water you’re using?
In our live Science Camp Workshops during the summer, we let the kids bring in their own samples which usually includes a blenderized version of leftovers from dinner, plant trimmings, coffee grounds, and dirt. It’s quite a smelly class once everyone cracks open their samples!
The How and Why Explanation There are several steps to understand as we go along:
- Aeration: Aerate water to release the trapped gas. You do this in the experiment by pouring the water from one cup to another.
- Coagulation: Alum collects small dirt particles, forming larger, sticky particles called floc.
- Sedimentation: The larger floc particles settle to the bottom of the cup.
- Filtration: The smaller floc particles are trapped in the layer of sand and cotton.
- Disinfection: A small amount of disinfectant is added to kill the remaining bacteria. This is for informational purposes only — we won’t be doing it in this experiment.
Questions to Ask When you’ve worked through most of the experiments ask your kids these questions and see how they do:
- What is the alum used for in the water filtration experiment? (a) to adjust the pH (b) to form floc (c) to float to the top (d) to purify the sample
- What does the activated carbon do? (a) turns the cotton balls black (b) sinks the floc (c) adjusts the pH (d) adds to the filtering power of the cotton (e) none of the above (f) all of the above
- Draw a sketch of your filter, labeling the different layers.

Click here for a printer-friendly version of this page.
Objective If you’re fascinated by the simple complexity of the standard soap bubble, then this is the lab for you. You can easily transform these ideas into a block-party Bubble Festival, or just have extra fun in the nightly bathtub. Either way, your kids will not only learn about the science of water, molecules, and surface tension, they’ll also leave this lab cleaner than they started (which is highly unusually for science experiments!)
About the Experiments The absolute best time to make gigantic bubbles is on an overcast day, right after it rains. Bubbles have a thin cell wall that evaporates quickly in direct sun, especially on a low-humidity day. If you live in a dry area with low-humidity, be sure to use glycerin. The glycerin will add moisture and deter the rapid thinning of the bubble’s cell wall (which cause bubbles to tear and pop).
The How and Why Explanation If you pour a few droplets of water onto a sweater or fabric, you’ll notice that the water will just sit there on the surface in a ball (or oval, if the drop is large enough). If you touch the ball of water with a soapy finger, the ball disappears into the fibers of the fabric! What happened?
Soap makes water “wetter” by breaking down the water’s surface tension by about two-thirds. Surface tension is the force that keeps the water droplet in a sphere shape. It’s the reason you can fill a cup of water past the brim without it spilling over. Without soap, water can’t get into the fibers of your clothes to get them clean. That’s why you need soap in the washing machine.
Soap also makes water stretchy. If you’ve ever tried making bubbles with your mouth just using spit, you know that you can’t get the larger, fist-sized spit bubbles to form completely and detach to float away in the air. Spit is 94% water, and water by itself has too much surface tension, too many forces holding the molecules together. When you add soap to it, they relax a bit and stretch out. Soap makes water stretch and form into a bubble.
The soap molecule looks a lot like a snake; it’s a long chain that has two very different ends. The head of the snake loves water, and the tail loves dirt. When the soap molecule finds a dirt particle, it wraps its tail around the dirt and holds it.
The different colors of a soap bubble come from how the white light bounces off the bubble into your eye. Some of the light bounces off the top surface of the bubble and bends only a little bit, while the rest passes through the thin film and bounces off the inner surface of the bubble and refracts more.
If you made the Hover Bubbles, you’ll notice that the bubbles slowly get larger the longer they live in the tank. Remember that the bubble is surrounded by CO2 gas as it sinks. The bubble grows because carbon dioxide seeps through the bubble film faster than the air seeps out, as CO2 is more soluble in water than air (meaning that CO2 mixes more easily with water than air does).
Questions to Ask
- Which soap solution makes the biggest bubbles?
- Does water temperature matter?
- How would you make a square bubble?
- Why can you poke a straw through a bubble after it’s been dipped in bubble solution?
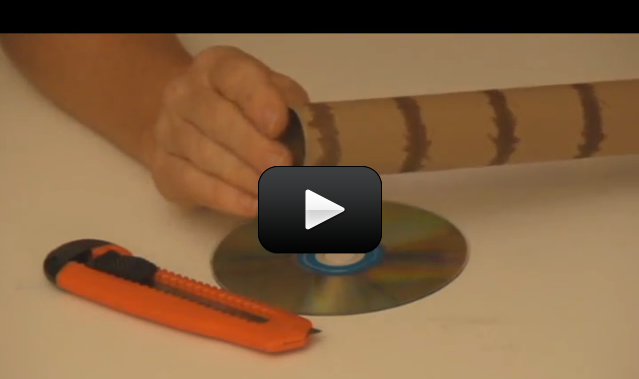
 Spectrometers are used in chemistry and astronomy to measure light. In astronomy, we can find out about distant stars without ever traveling to them, because we can split the incoming light from the stars into their colors (or energies) and “read” what they are made up of (what gases they are burning) and thus determine their what they are made of. In this experiment, you’ll make a simple cardboard spectrometer that will be able to detect all kinds of interesting things!
SPECIAL NOTE: This instrument is NOT for looking at the sun. Do NOT look directly at the sun. But you can point the tube at a sheet of paper that has the sun’s reflected light on it.
Usually you need a specialized piece of material called a diffraction grating to make this instrument work, but instead of buying a fancy one, why not use one from around your house? Diffraction gratings are found in insect (including butterfly) wings, bird feathers, and plant leaves. While I don’t recommend using living things for this experiment, I do suggest using an old CD.
CDs are like a mirror with circular tracks that are very close together. The light is spread into a spectrum when it hits the tracks, and each color bends a little more than the last. To see the rainbow spectrum, you’ve got to adjust the CD and the position of your eye so the angles line up correctly (actually, the angles are perpendicular).
You’re looking for a spectrum (the rainbow image at left) – this is what you’ll see right on the CD itself. Depending on what you look at (neon signs, chandeliers, incandescent bulbs, fluorescent bulbs, Christmas lights…), you’ll see different colors of the rainbow. For more about how diffraction gratings work, click here.
Materials:
- old CD
- razor
- index card
- cardboard tube
[am4show have=’p8;p9;p19;p46;p105;p83;p89;p91;p101;’ guest_error=’Guest error message’ user_error=’User error message’ ]
Download Student Worksheet & Exercises
Find an old CD and a cardboard tube at least 10 inches long. Cut a clean slit less than 1 mm wide in an index card or spare piece of cardboard and tape it to one end of the tube. Align your tube with the slit horizontally, and on the top of the tube at the far end cut a viewing slot about one inch long and ½” inch wide. Cut a second slot into the tube at a 45 degree angle from the vertical away from the viewing slot. Insert the CD into this slot so that it reflects light coming through the slit into your eye (viewing slot).
Aim the 1 mm slit at a light source such as a fluorescent light, neon sign, sunset, light bulb, computer screen, television, night light, candle, fireplace… any light source you can find. Look through the open hole at the light reflected off the compact disk (look for a rainbow in most cases) inside the cardboard tube.
Troubleshooting: This is a quick and easy way to bypass the need for an expensive diffraction grating. Use your spectrometer to look at computer screens, laptops, night lights, neon lights, candles, campfires, fluorescent lights, incandescent lights, LEDs, stoplights, street lights, and any other light sources you can find, even the moon through a telescope.
To make a CALIBRATED Spectrometer, go here.
Exercises
- Name three more light sources that you think might work with your spectroscope.
- Why is there a slit at the end of the tube instead of leaving it open?
[/am4show]
This is one of those 'chemistry magic show' type of experiments to wow your friends and family. Here's the scoop: you take a cup of clear liquid, add it to another cup of clear liquid, stir for ten seconds, and you'll see a color change, a state change from liquid to solid, and you can pull a rubber-like bouncy ball right out of the cup.
If you have trouble locating the ingredients, you can order them online here:
- Sodium Silicate (from Unit 3)
- Ethyl Alcohol (check your pharmacy)
- Disposable cups (at least two - and don't use your kitchen glassware, as you'll never get it clean again)
- Popsicle sticks (again, use something disposable to stir with)
Download Student Worksheet & Exercises
1. In one cup, measure four tablespoons of sodium silicate solution (it should be a liquid). Sodium silicate can be irritating to the skin for some people, so wear rubber gloves when doing this experiment!
2. Measure 1 tablespoon of ethyl alcohol into a second cup. Ethyl alcohol is extremely flammable—cap it and keep out of reach when not in use.
3. Pour the alcohol into the sodium silicate solution and stir with a Popsicle stick.
4. You’ll see a color change (clear to milky-white) and a state change (liquid to a solid clump.
5. Using gloves, gather up the polymer ball and firmly squeeze it in your hands.
6. Compress it into the shape you want—is it a sphere, or do you prefer a dodecahedron?
7. Bounce it!
8. Be patient when squeezing the compound together. If it breaks apart and crumbles, gather up the pieces and firmly press together.
Store your bouncy ball in a Ziploc bag!
What’s Going On?
Silicones are water repellent, so you’ll find that food dye doesn’t color your bouncy ball. You’ll find silicone in greases, oils, hydraulic fluids, and electrical insulators.
The sodium silicate is a long polymer chain of alternating silicon and oxygen atoms. When ethanol (ethyl alcohol) is added, it bridges and connects the polymer chains together by cross-linking them.
Think of a rope ladder—the wooden rungs are the cross-linking agents (the ethanol) and the two ropes are the polymer chains (sodium silicate).
Safety information for Sodium Silicate: MSDS.
Questions to Ask
1. Before the reaction, what was the sodium silicate like? Was it a solid, liquid, or gas? What color was it? Was it slippery, grainy, viscous, etc.?
2. What was the ethanol like before the reaction?
3. How is the product (the bouncy ball) different from the two chemicals in the beginning?
4. Was the bouncy ball the only molecule that was formed?
5. Was this reaction a physical or chemical change?
Did you know? Silly putty is actually a mixture of silicone and chalk!
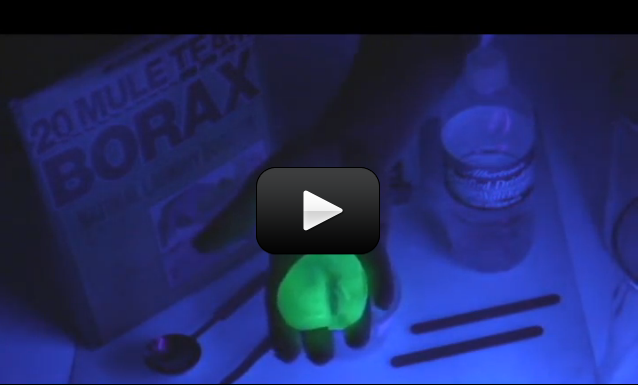
When you think of slime, do you imagine slugs, snails, and puppy kisses? Or does the science fiction film The Blob come to mind? Any way you picture it, slime is definitely slippery, slithery, and just plain icky — and a perfect forum for learning real science.
But which ingredients work in making a truly slimy concoction, and why do they work? Let’s take a closer look…
Imagine a plate of spaghetti. The noodles slide around and don’t clump together, just like the long chains of molecules (called polymers) that make up slime. They slide around without getting tangled up. The pasta by itself (fresh from the boiling water) doesn’t hold together until you put the sauce on. Slime works the same way. Long, spaghetti-like chains of molecules don’t clump together until you add the sauce … until you add something to cross-link the molecule strands together.
The sodium-tetraborate-and-water mixture is the “spaghetti” (the long chain of molecules, also known as a polymer), and the “sauce” is the glue-water mixture (the cross-linking agent). You need both in order to create a slime worthy of Hollywood filmmakers.
[am4show have=’p8;p9;p18;p45;p101;’ guest_error=’Guest error message’ user_error=’User error message’ ]
Materials:
- popsicle sticks
- water
- disposable cups
- borax (laundry whitener)
- clear glue (or glue gel) or white glue
- yellow highlighter
- measuring spoons
- scissors
- UV black light
Download Student Worksheet & Exercises
To make this slime, combine ½ cup of water with 1 teaspoon of sodium tetraborate (also known as ‘Borax’) in a cup and stir with a popsicle stick.
In another cup, mix equal parts white glue and water. Add a glob of the glue mixture to the sodium tetraborate mixture. Stir for a second with a popsicle stick, then quickly pull the putty out of the cup and play with it until it dries enough to bounce on the table (3 to 5 minutes). Pick up an imprint from a textured surface or print from a newspaper, bounce and watch it stick, snap it apart quickly and ooze it apart slowly …
To make glowing slime, add one simple ingredient to make your slime glow under a UV light (or in sunlight)! You’ll need to extract the dye from the felt of a bright yellow highlighter pen and use the extract instead of water. (Simply cut open the pen and let water trickle over the felt into a cup: instant glow juice.) For the best slime results, substitute clear glue or glue gel for the white glue.
Don’t forget: You’ll need a long-wave UV source (also known as a “black light”) to make it glow (fluorescent lights tend to work better than incandescent bulbs or LEDs) – check the shopping list for where to get one. This slime will glow faintly in sunlight, because you get long-wave UV light from the sun — it’s just that you get all the other colors, too, making it hard to see the glow.
Is your slime a solid, a liquid, or a bubbly gas? The best slimes we’ve seen have all three states of matter simultaneously: solid chunks suspended in a liquidy form with gas bubbles trapped inside. Yeecccccch!!
What other stuff glows under a black light? Loads of stuff! There are a lot of everyday things that fluoresce (glow) when placed under a black light. Note that a black light emits high-energy UV light. You can’t see this part of the spectrum (just as you can’t see infrared light, found in the beam emitted from the remote control to the TV), which is why “black lights” were named that. Stuff glows because fluorescent objects absorb the UV light and then spit light back out almost instantaneously. Some of the energy gets lost during that process, which changes the wavelength of the light, which makes this light visible and causes the material to appear to glow. (More on this in Unit 9.)
How to Make Glow Juice
You can add glow juice in place of water in any experiment. Here’s how you make the glow juice by itself:
Moon Blob
 The most slippery substance on the planet, this dehydrated gel is a super-slippery, super long polymer chain of molecules that will actually climb up and out of your container if you don’t use a lid. This slime is sensitive to light, temperature, and concentration (the amount of water you use) so if yours isn’t very responsive, check those three things.
Mixing this gel takes at least two days, and when you do it, make only a half recipe so you can make adjustments if yours isn’t quite right. We use ours on ‘Slip and Slides’ instead of water for a super-fun ride! (Hint – don’t try to stand, or you’ll break your arm when you crash!)
[/am4show]
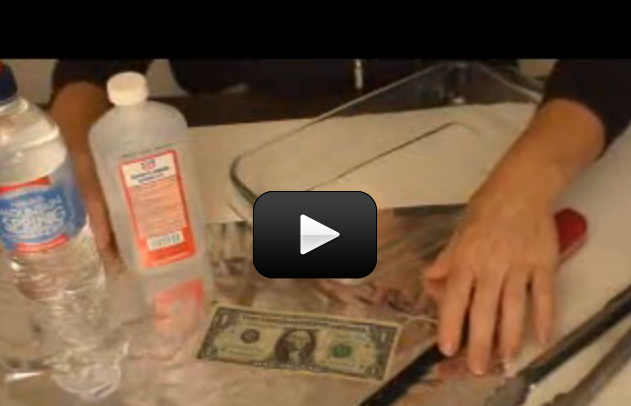
What state of matter is fire? Is it a liquid? I get that question a LOT, so let me clarify. The ancient scientists (Greek, Chinese… you name it) thought fire was a fundamental element. Earth, Air Water, and Fire (sometimes Space was added, and the Chinese actually omitted Air and substituted Wood and Metal instead) were thought to be the basic building blocks of everything, and named it an element. And it’s not a bad start, especially if you don’t have a microscope or access to the internet.
Today’s definition of an element comes from peeking inside the nucleus of an atom and counting up the protons. In a flame, there are lots of different molecules from NO, NO2, NO3, CO, CO2, O2, C… to name a few. So fire can’t be an element, because it’s made up of other elements. So, what is it?
[am4show have=’p8;p9;p18;p45;p91;p101;’ guest_error=’Guest error message’ user_error=’User error message’ ]
Fire is a combination of different gases and hot plasma. It’s a complicated exothermic (gives off heat) chemical reaction that releases a lot of heat and light (you can feel and see the flame). You need three things for a flame: oxygen, fuel, and a spark. When you take away one of these three, you snuff the flame and stop the chemical reaction. You start with fuel (usually contains carbon), and add oxygen to get carbon dioxide, carbon monoxide, nitric oxide, and many other gases and leftover ash. Most flames are hot enough to heat the gas mixture to create tiny bits of plasma within the flame, so fire is actually involved in two states of matter.
In this experiment, we’re going to see how you can protect a surface from burning using water. Are you ready?
Materials:
- Shallow baking dish
- Tongs
- Rubbing Isopropyl Alcohol (50-91%)
- Water (omit if using 50-70% alcohol)
- Dollar bill
- Fire extinguisher
- Adult help
Download Student Worksheet & Exercises
What’s going on? Alcohol burns with a slightly blue and orange flame (as shown in the video). The secret to keeping the dollar bill from burning is the water you mixed in with the alcohol. Water has a high heat capacity, which means that the water absorbs the energy from the flame and keep the bill from catching on fire. If you dipped the dollar bill in pure 100% alcohol, the temperature would rise high enough on the bill to burn. The reason we chose a bill instead of regular paper is that the dollar bill is a combination of linen and paper, making it much stronger and absorbent for this experiment.
You need both the water and the alcohol for this experiment. The water, as it absorbs the energy from the flame, heats up to its boiling point and then vaporizes, keeping the bill cool enough to not catch on fire. The alcohol is the fuel needed to keep the flame going. It’s a delicate balance between the two, but here are a couple of variations you can try out:
- You can change the color of the flame by adding in a sprinkling of salt (for yellow), boric acid (for green), or epsom salt (for white).
- You can also try mixing different ratios of water to alcohol, using 50%, 70% and 91% isopropyl alcohol. You can also try ethyl alcohol (which is an entirely different molecule) but will react about the same with this experiment. Note that if you decrease the water content too much, you’re going to lose your dollar bill.
[/am4show]
If you had a choice between a glass of lemon juice or apple juice, most folks would pick the sweeter one – apple. Did you know that apples are loaded with malic acid, and are actually considered to be acidic? It’s just that there is so much more sugar in an apple than a lemon that your taste buds can be fooled. Here’s a scientific way (which is much more reliable) to tell how acidic something is.
Acids are sour tasting (like a lemon), bases are bitter (like unsweetened cocoa powder). Substances in the middle are more neutral, like water. Scientists use the pH (power of hydrogen, or potential hydrogen) scale to measure how acidic or basic something is. Hydrochloric acid registers at a 1, sodium hydroxide (drain cleaner) is a 14. Water is about a 7. pH levels tell you how acidic or alkaline (basic) something is, like dirt. If your soil is too acidic, your plants won’t attract enough hydrogen, and too alkaline attracts too many hydrogen ions. The right balance is usually somewhere in the middle (called ‘pH neutral’). Some plants change color depending on the level of acidity in the soil – hydrangeas turn pink in acidic soil and blue in alkaline soil.
There are many different kinds of acids: citric acid (in a lemon), tartaric acid (in white wine), malic acid (in apples), acetic acid (in vinegar), and phosphoric acid (in cola drinks). The battery acid in your car is a particularly nasty acid called sulfuric acid that will eat through your skin and bones. Hydrochloric acid is found in your stomach to help digest food, and nitric acid is used to make dyes in fabrics as well as fertilizer compounds.
[am4show have=’p8;p9;p18;p45;p101;’ guest_error=’Guest error message’ user_error=’User error message’ ]
Materials:
- Litmus paper or pH paper (you can cut into strips)
- apple
- lemon
- vinegar
- baking soda
- cup with water
- (Advanced Students only: make your own sodium hydroxide here)
Here’s a video that shows you how to test several different things, including how to safely test stronger acids and bases, should you wish to test your own out.
Some things you can test (in addition to the ones in the video) include: Sprite, distilled white vinegar, baking soda, Vanish, laundry detergent, clear ammonia, powdered Draino, and Milk of Magnesia. DO NOT mix any of these together! Simply add a bit to each cup and test it with your pH strips. Here’s a quick video demonstration:
(Note – we didn’t list the chemicals on the shopping list as there were a LOT of stuff to get for only one experiment, so just sit back and watch!)
No pH strips? The chop up a head of red cabbage and whirl in a blender with water. Pass through a strainer (discard the solids), and pour this new ‘indicator’ into several cups. Add Sprite to one cup and watch for a color change. Add baking soda and watch for another color change. Continue down the line, adding only one chemical per cup into your cabbage juice.
Click here to view another version of this experiment: Chemical Matrix.
[/am4show]
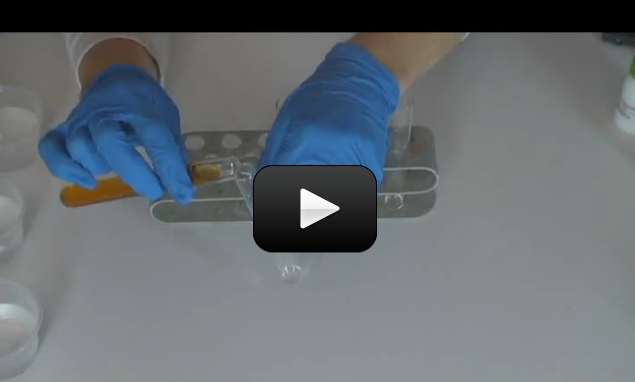
This is the experiment that your audience will remember from your chemistry magic show. Here’s what happens – you call up six ‘helpers’ and hand each a seemingly empty test tube. Into each test tube, pour a little of the main gold-colored solution, say a few magic words, and their test tubes turn clear, black, pink, gold, yellow, and white. With a flourish, ask them to all pour their solutions back into yours and the final solution turns from inky black to clear. Voila!
I first saw a similar experiment when I was a kid, and I remembered it all the way through college, where I asked my professor how I could duplicate the experiment on my own. I was told that the chemicals used in that particular experiment were way too dangerous, and no substitute experiment was possible, especially for the color reversal at the end. I was determined to figure out an alternative. After two weeks of nothing but chemistry and experiment testing, I finally nailed it – and the best part is, you have most of these chemicals at the grocery store. (And the best part is, I can share it with you as I’ve eliminated the nasty chemicals so you don’t have to worry about losing an eyeball or a finger.)
NOTE: This experiment requires adult help, as it uses chemicals that are toxic if randomly mixed together. Follow the instructions carefully, and do not mix random chemicals together.
Are you ready to mix up your own rainbow?
[am4show have=’p8;p9;p18;p45;p91;p101;’ guest_error=’Guest error message’ user_error=’User error message’ ]
Materials:
- Iodine (non-clear, non-ammonia from the pharmacy)
- Hydrogen peroxide (3% solution)
- Vinegar (distilled white is best)
- Cornstarch (tiny pinch) or one starch packing peanut
- Water (distilled)
- Sodium Thiosulfate
- Sodium Carbonate (AKA: “washing soda“)
- Phenolphthalein (keep this out of reach of kids) – this is optional
- Disposable plastic cups (about eight)
- Popsicle sticks
- Gloves for your hands
- Goggles for your face
- Medicine droppers (at least four)
Download Student Worksheet & Exercises
[/am4show]
Hydrogen peroxide is used to fuel rockets, airplanes, and other vehicle engines. Chemistry teachers everywhere use it to demonstrate the power of a catalyst.
To speed up a reaction without altering the chemistry of the reaction involves adding a catalyst. A catalyst changes the rate of reaction but doesn’t get involved in the overall chemical changes.
For example, leaving a bottle of hydrogen peroxide outside in the sunlight will cause the hydrogen peroxide to decompose. However, this process takes a long time, and if you don’t want to wait, you can simply toss in a lump of charcoal to speed things along.
The carbon is a catalyst in the reaction, and the overall effect is that instead of taking two months to generate a balloon full of oxygen, it now only takes five minutes. The amount of charcoal you have at the end of the reaction is exactly the same as before it started.
A catalyst can also slow down a reaction. A catalytic promoter increases the activity, and a catalytic poison (also known as a negative catalyst, or inhibitor) decreases the activity of a reaction. Catalysts offer a different way for the reactants to become products, and sometimes this means the catalyst reacts during the chemical reaction to form intermediates. Since the catalyst is completely regenerated before the reaction is finished, it’s considered ‘not used’ in the overall reaction.
In this experiment, you'll see that there's a lot of oxygen hiding inside the peroxide - enough to really make things interesting and move around! You'll also find out what happens to soap when you bubble oxygen through it. Are you ready?
[am4show have='p8;p9;p101;' guest_error='Guest error message' user_error='User error message' ]
Materials:
- hydrogen peroxide
- yeast (the kind you'd use for baking bread)
- liquid soap
- shallow dish
- water or soda bottle
The hydrogen is mixed with the soap first. The catalyst (yeast) causes the hydrogen peroxide to break down into oxygen and water. Since there's a lot of oxygen trapped in the peroxide, this decomposition happens very quickly and the oxygen rushes out of the container fast! As this happens, the water and soap mix together and turns into foam as the oxygen bubbles through trying to escape.
[/am4show]
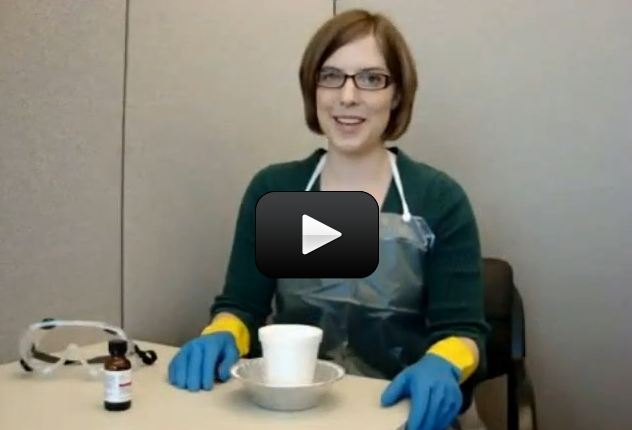
This is looks like a chemical reaction but it’s not – it’s really just a physical change. It’s a really neat trick you can do for your friends or in a magic show. Here’s how it works:
[am4show have=’p8;p9;p68;p101;’ guest_error=’Guest error message’ user_error=’User error message’ ]
Download Student Worksheet & Exercises
You can use styrofoam beads, packing peanuts, styrofoam packing materials, or even a styrofoam cup and place it in your glass jar containing acetone. Styrofoam is made up of polystyrene foam, which is mostly air (that’s why foam is so lightweight). When you add the foam cup to the acetone, you’re removing the air in the foam which makes it look like you’re dissolving this huge amount of cups (you can go through a whole stack with only a cup of acetone).
Why does this work? You are removing the structure that supports the shape of the foam, and are left with only the foam molecules at the bottom of the container (it will look like a blob). Think about a camping tent: when you take away the poles, what happens to the tent? It loses its support structure and collapses down. The same thing is happening to the foam when you place it in the acetone – you are removing the structure that holds the shape. Acetone is found in most nail polish removers.
[/am4show]