Make sure you’ve completed the How to Use a Microscope activity before you start here!
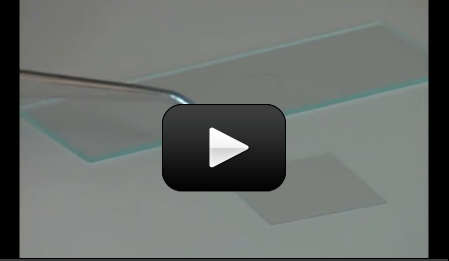
This is simplest form of slide preparation! All you need to do is place it on the slide, use a coverslip (and you don’t even have to do that if it’s too bumpy), and take a look through the eyepiece. No water, stains, or glue required.
You know that this is the mount type you need when your specimen doesn’t require water to live. Good examples of things you can try are cloth fibers (the image here is of cotton thread at 40X magnification), wool, human hair, salt, and sugar. It’s especially fun to mix up salt and sugar first, and then look at it under the scope to see if you can tell the difference.
[am4show have=’p8;p9;p11;p38;p92;p26;p53;p74;’ guest_error=’Guest error message’ user_error=’User error message’ ]
Here’s what you do:
1. Pull a hair from your head and lay it on a slide. If it’s super-curly, use a bit of tape at either end, stretching it along the length of the slide. Keep the tape near the ends so it doesn’t come into your field of view when you look through the microscope.
2. Lower the stage to the lowest setting and rotate the nose piece to the lowest magnification power.
3. Place the slide on the stage in your clips.
4. Focus the hair by looking through the eyepiece and slowly turning the coarse adjustment knob. When you’re close to focus, switch to the fine adjustment knob until it pops into sharp view.
5. Open your science notebook and draw a circle. Sketch what you see (don’t forget the title and mag power!)
6. When you’re done, lower the stage all the way and insert a new slide… and repeat. Find at least six things to look at. We’re not only learning how to look and draw, but hammering a habit of how to handle the scope properly, so do as many as you can find.
Don’t forget to check the windowsills for interesting bits. Use baby food jars or film canisters to collect your specimens in and keep them safe until you need them.
TIP: If you want to keep your specimen on the slide for a couple of months, use a drop of super glue and lay a coverslip down on top, pressing gently using a toothpick (not your fingers) to get the air bubbles out. Let dry.
[/am4show]
We won’t be able to recommend a specific store in your area. Telescope or camera stores often sell microscopes. This page has recommendations on how to shop for microscopes and even shows you how you can make a basic microscope: https://www.sciencelearningspace.com/2010/07/microscope-shop-list/
i dont have a microscope were can i find one in alberta
haha about the eylashes I used to get confused because our teacher had microscopes that had little black pointers so that you could place your thing by it and then show it to someone and they know what your looking at… I thought it had like a million and one of the pointers so I would always put it in the wrong place… until I realized it was my eyelashes!
THESE THINGS WERE SOOOOOOOOOOO COOL!!! The blood that I looked at on a pre-done slide looked like a rock slide on a snowy mountain! (Because of the white light of the microscope.) The mouth smear that was pre-done looked like cheetah spots IN PINK with little black dots at the end of all of them! IT WAS AWESOME!!
Ok… thanks so much! 🙂
It’s actually a skill to learn how to look through a microscope so that it’s clear. I would recommend practicing by covering up one eye (not the one you’re looking through the scope with), and also trying looking in a dark room (if you have an electric light on your scope). That should help when you are first learning how to look.
When I’m looking through my lens, sometimes I can see thick strands of something randomly. It took me a while, but I realized it was my eyelashes… 😉
Any tips?
Thanks in advance