One of the most remarkable images of our planet has always been how dynamic the atmosphere is a photo of the Earth taken from space usually shows swirling masses of white wispy clouds, circling and moving constantly. So what are these graceful puffs that can both frustrate astronomers and excite photographers simultaneously?
Clouds are frozen ice crystals or white liquid water that you can see with your eyes. Scientists who study clouds go into a field of science called nephology, which is a specialized area of meteorology. Clouds don’t have to be made up of water – they can be any visible puff and can have all three states of matter (solid, liquid, and gas) existing within the cloud formation. For example, Jupiter has two cloud decks: the upper are water clouds, and the lower deck are ammonia clouds.
We’re going to learn how to build a weather instrument that will record whether (weather?) the day was sunny or cloudy using a very sensitive piece of paper. Are you ready?
The paper from a sun print kit has a very special coating that makes the paper react to light. Most sun print kits use set of light-sensitive chemicals such as potassium ferricyanide and ferric ammonium citrate to make a cyanotype solution. The paper changes color when exposed to UV light. In fact, you can try exposing the paper to different colors and see which changes the paper the most over a set amount of time!
The last step of this chemical process is to ‘set’ the reaction by washing it in plain water – this keeps the image on the paper so it doesn’t all disappear when you hang it on the wall. After the paper dries, the area exposed to UV light turns blue, and everything shaded turns white.
You can use sun print paper to test how well your sunblock works – just smear your favorite sunscreen over a sheet (or put a couple dabs of each kind) and see how well the paper stays protected: if it turns white, the light is getting through. If it stays blue, the sunscreen blocked the light!
First invented in the 1600s, thermometers measure temperature using a sensor (the bulb tip) and a scale. Temperature is a way of talking about, measuring, and comparing the thermal energy of objects. We use three different kinds of scales to measure temperature. Fahrenheit, Celsius, and Kelvin. (The fourth, Rankine, which is the absolute scale for Fahrenheit, is the one you’ll learn about in college.)
Mr. Fahrenheit, way back when (18th century) created a scale using a mercury thermometer to measure temperature. He marked 0° as the temperature ice melts in a tub of salt. (Ice melts at lower temperatures when it sits in salt. This is why we salt our driveways to get rid of ice). To standardize the higher point of his scale, he used the body temperature of his wife, 96°.
As you can tell, this wasn’t the most precise or useful measuring device. I can just imagine Mr. Fahrenheit, “Hmmm, something cold…something cold. I got it! Ice in salt. Good, okay there’s zero, excellent. Now, for something hot. Ummm, my wife! She always feels warm. Perfect, 96°. ” I hope he never tried to make a thermometer when she had a fever.
Just kidding, I’m sure he was very precise and careful, but it does seem kind of weird. Over time, the scale was made more precise and today body temperature is usually around 98.6°F.
Later, (still 18th century) Mr. Celsius came along and created his scale. He decided that he was going to use water as his standard. He chose the temperature that water freezes at as his 0° mark. He chose the temperature that water boils at as his 100° mark. From there, he put in 100 evenly spaced lines and a thermometer was born.
Last but not least Mr. Kelvin came along and wanted to create another scale. He said, I want my zero to be ZERO! So he chose absolute zero to be the zero on his scale.
Absolute zero is the theoretical temperature where molecules and atoms stop moving. They do not vibrate, jiggle or anything at absolute zero. In Celsius, absolute zero is -273 ° C. In Fahrenheit, absolute zero is -459°F (or 0°R). It doesn’t get colder than that!
As you can see, creating the temperature scales was really rather arbitrary:
“I think 0° is when water freezes with salt.”
“I think it’s just when water freezes.”
“Oh, yea, well I think it’s when atoms stop!”
Many of our measuring systems started rather arbitrarily and then, due to standardization over time, became the systems we use today. So that’s how temperature is measured, but what is temperature measuring?
Temperature is measuring thermal energy which is how fast the molecules in something are vibrating and moving. The higher the temperature something has, the faster the molecules are moving. Water at 34°F has molecules moving much more slowly than water at 150°F. Temperature is really a molecular speedometer.
Let’s make a quick thermometer so you can see how a thermometer actually works:
When something feels hot to you, the molecules in that something are moving very fast. When something feels cool to you, the molecules in that object aren’t moving quite so fast. Believe it or not, your body perceives how fast molecules are moving by how hot or cold something feels. Your body has a variety of antennae to detect energy. Your eyes perceive certain frequencies of electromagnetic waves as light. Your ears perceive certain frequencies of longitudinal waves as sound. Your skin, mouth and tongue can perceive thermal energy as hot or cold. What a magnificent energy sensing instrument you are!
Hygrometers measure how much water is in the air, called humidity. If it's raining, it's 100% humidity. Deserts and arid climates have low humidity and dry skin. Humidity is very hard to measure accurately, but scientists have figured out ways to measure how much moisture is absorbed by measuring the change in temperature (as with a sling psychrometer), pressure, or change in electrical resistance (most common).
The dewpoint is the temperature when moist air hits the water vapor saturation point. If the temperature goes below this point, the water in the air will condense and you have fog. Pilots look for temperature and dewpoint in their weather reports to tell them if the airport is clear, or if it''s going to be 'socked in'. If the temperature stays above the dewpoint, then the airport will be clear enough to land by sight. However, if the temperature falls below the dewpoint, then they need to land by instruments, and this takes preparation ahead of time.
A sling psychrometer uses two thermometers (image above), side by side. By keeping one thermometer wet and the other dry, you can figure out the humidity using a humidity chart. Such as the one on page two of this document. The psychrometer works because it measures wet-bulb and dry-bulb temperatures by slinging the thermometers around your head. While this sounds like an odd thing to do, there's a little sock on the bottom end of one of the thermometers which gets dipped in water. When air flows over the wet sock, it measures the evaporation temperature, which is lower than the ambient temperature, measured by the dry thermometer.
Scientists use the difference between these two to figure out the relative humidity. For example, when there's no difference between the two, it's raining (which is 100% humidity). But when there's a 9oC temperature difference between wet and dry bulb, the relative humidity is 44%. If there's 18oC difference, then it's only 5% humidity.
You can even make your own by taping two identical thermometers to cardboard, leaving the ends exposed to the air. Wrap a wet piece of cloth or tissue around the end of one and use a fan to blow across both to see the temperature difference!
One of the most precise are chilled mirror dewpoint hygrometers, which uses a chilled mirror to detect condensation on the mirror's surface. The mirror's temperature is controlled to match the evaporation and condensation points of the water, and scientists use this temperature to figure out the humidity.
We're going to make a very simple hygrometer so you get the hand of how humidity can change daily. Be sure to check this instrument right before it rains. This is a good instrument to read once a day and log it in your weather data book.
This device works because human hair changes length with humidity, albeit small. We magnify this change by using a lever arm (the arrow and mark the different places on the cardboard to indicate levels of humidity. Does all hair behave the same way? Does it matter if you use curly or straight hair, or even the color of the hair? Does gray work better than blonde?
Most weather stations have anemometers to measure wind speed or wind pressure. The kind of anemometer we’re going to make is the same one invented back in 1846 that measures wind speed. Most anemometers use three cups, which is not only more accurate but also responds to wind gusts more quickly than a four-cup model.
Some anemometers also have an aerovane attached, which enables scientists to get both speed and direction information. It looks like an airplane without wings – with a propeller at the front and a vane at the back.
Other amemometers don’t have any moving parts – instead they measure the resistance of a very short, thin piece of tungsten wire. (Resistance is how much a substance resists the flow of electrical current. Copper has a low electrical resistance, whereas rubber has a very high resistance.) Resistance changes with the material’s temperature, so the tungsten wire is heated and placed in the airflow. The wind flowing over the wire cools it down and increases the resistance of the wire, and scientists can figure out the wind speed.
Scientists also use sonic anemometers, which use ultrasonic waves to detect wind speed. The great thing about sonic anemometers is that they can measure speed in all three directions, which is great for studying wind that is not all moving in the same direction (like gusts and hurricanes).
Sonic anemometers send a sound wave from one side to the other and measure the time it takes to travel. Which means that these can also be used as thermometers, as temperature will also change the speed of sound. Since there are no moving parts, you’ll find these types of anemometers in harsh conditions, like on a buoy or in the desert, where salt disintegrates and dust gets in the way of the cup-style anemometer. The big drawback to sonic anemometers is water (like dew or rain): if the transducers get wet, it changes the speed of sound and gives an error in the reading.
The quickest anemometer to make is to attach the end of a string (about 12″ long) to a ping pong ball. Suspend the string in the wind, like from a fan or hair dryer (use the ‘cool’ setting). Since the ball is so lightweight, it’s quite responsive to wind speed.
Add a protractor flipped upside down (so you can measure the angle of the string). Use the measurements below to figure out the wind speed. For example, mark the 90o angle with “0 mph”. This is your ping pong ball at rest in no wind. Use the numbers below to make the rest:
Angle
Wind Speed
degrees
mph
90
0
80
8
70
12
60
15
50
18
40
21
30
26
20
33
Now let’s make a four-cup anemometer. Here’s what you need to do:
Materials:
four lightweight cups
two sticks or popsicle sticks
tape or hot glue
tack or pin
pencil with eraser on top
block of foam (optional)
How steady was the wind that you measured? If you place your anemometer next to a door or a window, is there wind? How fast? Where could you place your anemometer so you can quickly read it each day?
By making two anemometers, one that you already know what the wind speed is, you can easily figure out how to calibrate the other. For example, how fast do the cups fly around when the ping pong ball anemometer indicates 12 mph? Can you see each cup, or are they a blur? You’ll get a feel for how to read the four-cup model by eye once you’ve had practice.
French physicist Blaise Pascal. He developed work on natural and applied sciences as well being a skilled mathematician and religious philosopher.
A barometer uses either a gas (like air) or a liquid (like water or mercury) to measure pressure of the atmosphere. Scientists use barometers a lot when they predict the weather, because it’s usually a very accurate way to predict quick changes in the weather.
Barometers have been around for centuries – the first one was in the 1640s!
At any given momen, you can tell how high you are above sea level by measure the pressure of the air. If you measure the pressure at sea level using a barometer, and then go up a thousand feet in an airplane, it will always indicate exactly 3.6 kPa lower than it did at sea level.
Scientists measure pressure in “kPa” which stands for “kilo-Pascals”. The standard pressure is 101.3 kPa at sea level, and 97.7 kPa 1,000 feet above sea level. In fact, every thousand feet you go up, pressure decreases by 4%. In airplanes, pilots use this fact to tell how high they are. For 2,000 feet, the standard pressure will be 94.2 kPa. However, if you’re in a low front, the sea level pressure reading might be 99.8 kPa, but 1000 feet up it will always read 3.6 kPa lower, or 96.2 kPa.
At standard pressure, depending on the kind of barometer you have, you’ll find they all read one of these: 101.3 kPa; 760 mmHg (millimeters of mercury, or “torr”); 29.92 inHg (inches of mercury); 14.7 psi (pounds per square inch); 1013.25 millibars/hectopascal. They are all different unit systems that all say the same thing.
Just like you can have 1 dollar or four quarters or ten dimes or 20 nickels or a hundred pennies, it’s still the same thing.
Why does water boil differently at sea level than it does on a mountain top?
It takes longer to cook food at high altitude because water boils at a lower temperature. Water boils at 212oF at standard atmospheric pressure. But at elevations higher than 3,500 feet, the boiling point of water is decreased.
The boiling point is defined when the temperature of the vapor pressure is equal to the atmospheric pressure. Think of vapor pressure as the pressure made by the water molecules hitting the inside of the container above the liquid level. But since the saucepan of water is not sealed, but rather open to the atmosphere, the vapor simply expands to the atmosphere and equals out. Since the pressure is lower on a mountaintop than at sea level, this pressure is lower, and hence the boiling point is lowered as well.
Also known as an udometer or pluviometer or ombrometer, or just plan old ‘rain cup’, this device will let you know how much water came down from the skies. Folks in India used bowls to record rainfall and used to estimate how many crops they would grow and thus how much tax to collect!
These devices reports in “millimeters of rain” or “”centimeters of rain” or even inches of rain”. Sometimes a weather station will collect the rain and send in a sample for testing levels of pollutants.
While collecting rain may seem simple and straightforward, it does have its challenges! Imagine trying to collect rainfall in high wind areas, like during a hurricane. There are other problems, like trying to detect tiny amounts of rainfall, which either stick to the side of the container or evaporate before they can be read on the instrument. And what happens if it rains and then the temperature drops below freezing, before you’ve had a chance to read your gauge? Rain gauges can also get clogged by snow, leaves, and bugs, not to mention used as a water source for birds.
So what’s a scientist to do?
Press onward, like all great scientists! And invent a type of rain gauge that will work for your area. We’re going to make a standard cylinder-type rain gauge, but I am sure you can figure out how to modify it into a weighing precipitation type (where you weigh the amount in the bottle instead of reading a scale on the side), or a tipping bucket type (where a funnel channels the rain to a see-saw that tips when it gets full with a set amount of water) , or even a buried-pit bucket (to keep the animals out).
[am4show have=’p8;p9;p71;p84;p100;p30;p57;’ guest_error=’Guest error message’ user_error=’User error message’ ]
Materials:
A combustion reaction gives off energy, usually in the form of heat and light. The reaction itself includes oxygen combining with another compound to form water, carbon dioxide, and other products.
A campfire is an example of wood and oxygen combining to create ash, smoke, and other gases. Here’s the reaction for the burning of methane (CH4) which gives carbon dioxide (CO2) and water (H2O):
First, cut off a strip of citrus fruit. It can be an orange, lemon, lime, tangerine, or grapefruit.
Do you see those little holes in the peel? They have oil inside of them.
Light a candle.
Pinch the peel between your fingers, with peel side toward the flame. You want to squirt a tiny amount of oil from the peel or rind toward the flame
The oil from citrus fruits is very flammable. When you squeeze the oil out of the fruit peel it vaporizes enough that you can flash your flame. The flash point (temp that the oil will ignite) of the oil is 122 deg F. A candle flame is about 2600 degree F. (If it doesn’t work, heat up the peel side over the flame for a few seconds first, to get those tiny pockets of oil heated up and ready to burst.)
The ferryboat was one of the ways folks got from island to island. Usually ferries make quick, short trips from one spot to another, picking up cars, people, or packages and transporting them across the water. In Venice, you’ll hear the ferry also referred to as the “water bus” or “water taxi”. Ferries that travel longer distances usually transport cars and trucks.
If you live in a waterside city or group of small islands, then the ferry is probably in your daily routine, because they are much cheaper than building complicated bridges or underwater tunnels.
Some ferries don’t have a “front” and “back”, but are double-ended and completely reversible, which allows them to shuttle back and forth across short distances without turning around. You’ll find these ferries in Australia, British Colombia, and Washington state.
There are many different types of ferries, including hovercraft, hydrofoils, and catamaran. Hydrofoils (shown in the image above) have special “wings” attached to the bottom of the boat that actually lift the boat out of the water when the speed increases. The special wing is designed to work in water and generate enough lift to move the massive boat out of the water so only a small part of the wing remains in the water to minimize friction (drag) force on the boat. With less friction, the boat can go even faster!
We’re going to make a simple ferry that works in the pool or bathtub. Don’t forget to add a remote control with extra-long wires!
Catamarans are boats with two or more hulls that are strapped together and move by either wind power (using sails) or engine power. They are one of the first boats humans ever floated in. Catamarans are used when speed and large payloads are needed: their interesting geometric design (their balance is based on geometry, not weight) allows them to glide through the water with lower friction and carry more than single-hulled boats.
We’re going to create two different versions of the catamaran, mainly depending on how many water bottles you have available. Put these in a swimming pool and watch them zoom!
[am4show have=’p8;p9;p98;p108;’ guest_error=’Guest error message’ user_error=’User error message’ ]
Materials:
This robot as a BIG version of the tiny Bristlebot robot. Using an eccentric drive motor, this robot will show you how a cell phone vibrates by using an off-center weight being slung around by a motor. We built these types of robots in all sizes: from tiny toothbrush versions all the way to large commercial-sized sweeper brooms.
This project is just the right size to give you a fun robot that really works. It’s lightweight enough so you don’t have to use large, expensive motors or power supplies and worry about high voltage… so enjoy!
Amphibious vehicles is a craft which travels on both land and water. And it doesn't need to be limited to just cars. There are amphibious bicycles, buses, and RVs. Hovercraft are amphibious, too!
Amphibious crafts started back in the 1800s as steam-powered barges. In the 1950s, the German Schimmwagen was a small jeep that could travel in water as well as on land. The most popular amphibious vehicle on the market is the 1960 Amphibicar (photo shown left) and later the Gibbs Aquada.
The secret to making an amphibious vehicle is this: it must be designed so it floats in water (it must be watertight and buoyant) and robust enough to travel on land. Many amphibious creations either leaked, sank, or never made it off the drawing board. But that's what being a scientist is all about: coming up with an overall goal and figuring out a way to overcome the problems faced along the way.
We're going to build our own version using items like foam blocks and hobby motors. Are you ready? [am4show have='p8;p9;p20;p47;p108;p98;' guest_error='Guest error message' user_error='User error message' ] Materials:
foam block (at least 2" x 6")
propeller
straw
two wood skewers
four wheels (tops from milk jugs, yogurt containers, etc)
The image here is the 2003 Gibbs Aqauda at full speed in deep water! It looks like it’s just skipping along the surface, doesn’t it?
The Gibbs company uses auto, marine, and propulsion technologies to build water-land vehicles used mostly by the military. But wouldn’t it save time to cut through the traffic on the bridge if you could skim through the water?
One of the main issues with amphibious vehicles is that they are painfully slow – both in the water and on land. (Although the 2003 Aquada gets up to 30 mph in water.)
The other issue is safety – the lift from the bow on a boat is needed to avoid plunging, but on a car you don’t want the front end to lift at high speeds. Also a boat distributes the load evenly across the hull while a car has concentrated loads where the suspension is attached to the frame.
The Aquada car uses a 160 hp engine for land and a compact jet that produces 2,000 pounds of thrust. It broke the record for crossing the English Channel by four whole hours (third image below with the orange boat in the background).
And if the car goes fast enough, you can pull a waterskier.
The Gibbs company has also invented the Humdinga, which is for military use, as it has four-wheel drive at can cruise at 40 mph on water, as well as the Quadski, which travels at 50 mph on land or sea.
We’re going to build our own model, though not with a jet engine. We’re going to use a motor, wheels, floats, and wires to build a real working model you can use in the tub tonight. Our model is also going to have a transmission that will enable you to get two different speeds using very simple materials. Are you ready? Here’s what you need to do:
How many of these items do you already have? We’ve tried to keep it simple for you by making the majority of the items things most people have within reach (both physically and budget-wise).
This particular shopping list has many different projects on it, so we’ve broken the list into sections based on the projects. For example, the roller coaster activities are all in one area, the weather station in another, etc. You might want to view the videos before gathering your supplies.
When you think of slime, do you imagine slugs, snails, and puppy kisses? Or does the science fiction film The Blob come to mind? Any way you picture it, slime is definitely slippery, slithery, and just plain icky — and a perfect forum for learning real science.
But which ingredients work in making a truly slimy concoction, and why do they work? Let’s take a closer look!
Imagine a plate of spaghetti. The noodles slide around and don’t clump together, just like the long chains of molecules (called polymers) that make up slime. They slide around without getting tangled up. The pasta by itself (fresh from the boiling water) doesn’t hold together until you put the sauce on. Slime works the same way. Long, spaghetti-like chains of molecules don’t clump together until you add the sauce … until you add something to cross-link the molecule strands together.
To make our different slimes, we’ll be using borax as the cross-linking agent. There a lots of different polymers you can try, including starch, glue, and polyvinyl alcohol. The polymer (usually glue) mixture is the “spaghetti” (the long chain of molecules), and the “sauce” is the borax mixture (the cross-linking agent). You need both in order to create slime. Keep your slime in the fridge for a week, or a month in the freezer (although it might change colors). Nuke it in the microwave for a few seconds to thaw.
[/am4show]
This is a Bonus Lab, which means that the experiments in this section require adult help (we’re working with fire in several of them), and/or the materials are more expensive and hard to find.
Use the experiments in this section for kids wanting to go even further and deeper into the subject. Since these are more involved, be sure to browse through the videos for these experiments first before purchasing materials for these additional labs.
You do not need to do ALL the experiments – just pick the ones you want to do! Look over the experiments and note which items are needed, and off you go!
Objective You will learn about force, acceleration, velocity, and what scientist really mean when they say, “Try it again…and again…and again… until you get the result you want.” This lab uses the Iteration Technique to solving a problem, which is different than the Scientific Method, and actually much more widely used by engineers in the science field.
About the Experiment This lab is an excellent opportunity for kids to practice their resilience, because we guarantee this experiment will not work the first several times they try it. While you can certainly help the kids out, it’s important that you help them figure it out on their own. You can do this by asking questions instead of rushing in to solve their problems. For instance, when the marble flies off the track, you can step back and say:
“Hmmm… did the marble go to fast or too slow?”
“Where did it fly off?”
“Wow – I’ll bet you didn’t expect that to happen. Now what are you going to try?”
Become their biggest fan by cheering them on, encouraging them to make mistakes, and try something new (even if they aren’t sure if it will work out). One of the greatest gifts you can give your child is the expectation of their success.
The How and Why To make the roller coasters, you’ll need foam pipe insulation, which is sold by the six-foot increments at the hardware store. You’ll be slicing them in half lengthwise, so each piece makes twelve feet of track. It comes in all sizes, so bring your marbles when you select the size. The ¾” size fits most marbles, but if you’re using ball bearings or shooter marbles, try those out at the store. (At the very least you’ll get smiles and interest from the hardware store sales people.) Cut most of the track lengthwise (the hard way) with scissors. You’ll find it is already sliced on one side, so this makes your task easier. Leave a few pieces uncut to become “tunnels” for later roller coasters.
The next step is to join your track together before adding all the features like loops and curves. Join two tracks together in butt-joint fashion and press a piece of masking tape lengthwise along both the inside and the underside of the track. A third piece of tape should go around the entire joint circumferentially. Make this connection as smooth as possible, as your high-speed marble roller coaster will tend to fly off the track at the slightest bump.
Loops Swing the track around in a complete circle and attach the outside of the track to chairs, table legs, and hard floors with tape to secure in place. Loops take a bit of speed to make it through, so have your partner hold it while you test it out before taping. Start with smaller loops and increase in size to match your entrance velocity into the loop. Loops can be used to slow a marble down if speed is a problem.
Camel-Backs Make a hill out of track in an upside-down U-shape. Good for show, especially if you get the hill height just right so the marble comes off the track slightly, then back on without missing a beat.
Whirly-Birds Take a loop and make it horizontal. Great around poles and posts, but just keep the bank angle steep enough and the marble speed fast enough so it doesn’t fly off track.
Corkscrew Start with a basic loop, then spread apart the entrance and exit points. The further apart they get, the more fun it becomes. Corkscrews usually require more speed than loops of the same size.
Jump Track A major show-off feature that requires very rigid entrance and exit points on the track. Use a lot of tape and incline the entrance (end of the track) slightly while declining the exit (beginning of new track piece).
Pretzel The cream of the crop in maneuvers! Make a very loose knot that resembles a pretzel. Bank angles and speed are the most critical, with rigid track positioning a close second. If you’re having trouble, make the pretzel smaller and try again. You can bank the track at any angle because the foam is so soft. Use lots of tape and a firm surface (bookcases, chairs, etc).
Troubleshooting Marbles will fly everywhere, so make sure you have a lot of extras! If your marble is not following your track, look very carefully for the point of departure – where it flies off.
Does the track change position with the weight of the marble, making it fly off course? Make the track more rigid by taping it to a surface.
Is the marble jumping over the track wall? Increase your bank angle (the amount of twist the track makes along its length).
Does your marble just fall out of the loop? Increase your marble speed by starting at a higher position. When all else fails and your marble still won’t stay on the track, make it a tunnel section by taping another piece on top the main track. Spiral-wrap the tape along the length of both pieces to secure them together.
Why does the marble stick to the track? The faster the marble travels in a loop, the more it sticks to the track. This is the same pancake feeling you get when your body gets pulled into a tight turn (whether in a car or on a roller coaster). The faster and tighter the turn, the more the “pancake feeling”. That pancake thing is called acceleration. You’re feeling a pull away from the center of the loop, which will vary depending on how fast you are going, called centrifugal force.
That’s usually enough for kids. But if you really want to be thoroughly confused, keep reading about how centripetal and centrifugal forces are NOT the same thing:
What about centripetal force? Ah, yes… these two words constantly throw college students into a frenzy, partially because there is no clear definition in most textbooks. As I best understand it, centripetal (translation = “center-seeking”) force is the force needed to keep an object following a curved path. Remember how objects will travel in a straight line unless they bump into something or have another force acting on it (gravity, drag force, etc.)? Well, when you swing a bucket of water around, the force to keep the bucket of water swinging in a curved arc is the centripetal force, which can be felt in the tension experienced by the handle (or your arm, in our case). Swinging an object around on a string will cause the rope to undergo tension (centripetal force), and if your rope isn’t strong enough, it will snap and break, sending the mass flying off in a tangent (straight) line until gravity and drag force pull the object to a stop. This force is proportional to the square of the speed… the faster you swing the object, the higher the force.
Centrifugal (translation = “center-fleeing”) force has two different definitions, which also causes confusion. The inertial centrifugal force is the most widely referred to, and is purely mathematical, having to do with calculating kinetic forces using reference frames, and is used with Newton’s laws of motion. It’s often referred to as the ‘fictitious force’.
The other kind, reactive centrifugal force, happens when objects move in a curved path. This force is actually the same magnitude as centripetal force, but in the opposite direction, and you can think of it as the reaction force to the centripetal force. Think of how you stand on the Earth… your weight pushes down on the Earth, and a reaction force (called the “normal” force) pushes up in reaction to your weight, keeping you from falling to the center of the Earth. A centrifugal governor (spinning masses that regulate the speed of an engine) and a centrifugal clutch (spinning disk with two masses separated by a spring inside) are examples of this kind of force in action.
One more example: Imagine driving a car along a banked turn. The road exerts a centripetal force on the car, keeping the car moving in a curved path (the “banked” turn). If you neglected to buckle your seat belt and the seats have a fresh coat of Armor-All (making them slippery), then as the car turns along the banked curve, you get “shoved” toward the door. But who pushed you? No one – your body wanted to continue in a straight line but the car keeps moving in your path, turning your body in a curve. The push of your weight on the door is the reactive centrifugal force, and the car pushing on you is the centripetal force.
What about the fictitious (inertial) centrifugal force? Well, if you imagine being inside the car as it is banking with the windows blacked out, you suddenly feel a magical ‘push’ toward the door away from the center of the bend. This “push” is the fictitious force invoked because the car’s motion and acceleration is hidden from you (the observer) in the reference frame moving within the car.
Objective This noisy lab lets you experiment with the idea that sound is a vibration. By making over a dozen different noisemakers, you can explore how to change the sound speed and use everyday materials to annoy your parents.
About the Experiments Instead of starting with an explanation of how sound works, mystify your kids with it instead by picking one of the experiments that you know your kids will like. After they’ve build the project (you might want ear muffs for this lab), you can start asking them how they think it works. Give them the opportunity to figure it out by changing different things on their noisemaker (stretch the rubber band, increase the tube length, etc) to allow them a chance to hone their skills at figuring things out.
The How and Why Explanation Sound is everywhere. It can travel through solids, liquids, and gases, but it does so at different speeds. It can rustle through trees at 770 MPH (miles per hour), echo through the ocean at 3,270 MPH, and resonate through solid rock at 8,600 MPH. Sound is made by things vibrating back and forth, whether it’s a guitar string, drum head, or clarinet. The back and forth motion of an object (like the drum head) creates a sound wave in the air that looks a lot like a ripple in a pond after you throw a rock in. It radiates outward, vibrating it’s neighboring air molecules until they are moving around, too. This chain reaction keeps happening until it reaches your ears, where your “sound detectors” pick up the vibration and works with your brain to turn it into sound.
Your voice is a vibration, and you can feel it when you place a hand on your throat when you speak. As long as there are molecules around, sound will be traveling though them by smacking into each other. That’s why if you put an alarm clock inside a glass jar and remove the air, there’s no sound from the clock. There’s nothing to transfer the vibrational energy to – nothing to smack into to transfer the sound. It’s like trying to grab hold of fog – there’s nothing to hold on to.
Sound can change according to the speed at which it travels. Another word for sound speed is pitch. When the sound speed slows, the pitch lowers. With clarinet reeds, it’s high. Guitar strings can do both, as they are adjustable. If you look carefully, you can actually see the low pitch strings vibrate back and forth, but the high pitch strings move so quickly it’s hard to see. But you can detect the effects of both with your ears.
The range of your ears is about 20 – 20,000 Hz (cycles per second). Bats and dogs can hear a lot higher than we can. The image (right) is a real picture of an aircraft as it breaks the sound barrier – meaning that the aircraft is passing the speed that sounds travels at (about 700 mph). The white cloud you see in the photo is related to the shock waves that are forming around the craft as it moves into supersonic speeds. You can think of a shock wave as big pressure front, which creates clouds. In this photo, the pressure from the shock waves is condensing the water vapor in the air.
There are lots of things on earth that break the sound barrier – bullets and bullwhips, for example. The loud crack from a whip is the tip zipping faster than the speed of sound. Your air horn is a loud example of how sound waves travel through the air.
Questions to Ask When you’ve worked through most of the experiments ask your kids these questions and see how they do:
Sound travels fastest in (a) air (b) the ocean (c) rock (d) outer space
The hornet works because (a) the rubber band vibrates when the wind flies over it (b) you’ve trapped a real wasp in there (c) the string vibrates when you twirl it around (d) the card vibrates with the wind
An old-fashioned telephone made from cups and string work great because (a) no batteries are required (b) the cup vibrates (c) the string vibrates (d) your voice vibrates (e) all of the above
Knowing what you do know about sound and cups, which way do you think you would hold a cup up to your ear (open end or closed end?) to hear the conversation on the other side of a door?
When you replaced the string with a slinky, why can’t you talk or hear voices through it anymore? What can you hear instead?
What would you use to completely block out the sound of an alarm clock?
Does the pitch increase or decrease when you fill a glass bottle while tapping the side with a fork?
List out the different kinds of strings tested with the String Test, and number them in order of best to worst.
Have you ever shot a billiard ball toward another on a pool table and watched the first one stop while the second goes flying? This has to do with a concept known as momentum. [am4show have='p8;p9;p10;p37;p95;' guest_error='Guest error message' user_error='User error message' ] Momentum can be defined as inertia in motion. Something must be moving to have momentum. Momentum is how hard it is to get something to stop or to change directions. A moving train has a whole lot of momentum. A moving ping pong ball does not. You can easily stop a ping pong ball, even at high speeds. It is difficult, however, to stop a train even at low speeds.
Mathematically, momentum is mass times velocity, or Momentum=mv. The heavier something is and/or the faster it’s moving the more momentum it has. The more momentum something has, the more force it takes to get it to change velocity and the more force it can apply if it hits something.
Momentum is inertia in motion, how hard it is to get something to change directions or speed. Momentum = mv. Conservation of momentum; mv = mv. If something hits something else the momentum of the objects before the collision will equal the momentum of the objects after the collision.
This experiment is a great example of how momentum can be transferred from one object to another, just like on the pool table.
Materials (refer to shopping list for online stores):
five 1/2" ball bearings (or similar size)
1-4 neodymium magnets
paper towel tube
The ball furthest from the magnet breaks free because it has enough momentum (which is directly related to speed) to escape the magnetic field of the strong magnet. What happens if you try this experiment without the magnets? Can you get one ball bearing to transfer all its momentum to a second one? You can read more about momentum here.
Newton's Third Law states that all forces come in pairs. When you push against the wall, the wall pushes back against you with an equal amount of force (or push). When a rocket fires, the rocket moves forward as the exhaust gases move in the opposite direction. An inflated balloon will zip through the air as the air escapes. For every action there is an equal and opposite reaction.
If you were to fart in space, what do you think would happen (before it froze)? You would move in the opposite direction!
This rocket car uses high pressure on the inside to blow a weight out the back (the neoprene stopper) and propel itself forward.
When you pump air into the bottle, you are building up pressure inside the bottle. The neoprene cork stays in because there's a high amount of friction between the bottle and the cork. Eventually, however, there's enough of a push from the inside pressure to overcome this frictional force and cause the cork to go flying out of the bottle, which in turn propels the rocket forward. The compressed air inside the bottle also escapes out the open end, which also propels the rocket car forward!
These rockets use air pressure to launch your lightweight rocket skyward. Using simple materials, you'll be able to make your launcher in minutes and as many rockets as you want. The first time I flew these, they got stuck on the roof, so be prepared with a few extras just in case.
[am4show have='p8;p9;p10;p37;p109;p95;' guest_error='Guest error message' user_error='User error message' ]
Materials:
2L soda bottle
1/2" PVC pipe
duct tape
pen or pencil
index cards
sheets of paper
bicycle inner tube
The higher pressure is generated inside the bottle when you stomp on it. Because air is a gas, it's also compressible, which means you can pack the same volume of air into a tighter space. When you decrease the volume, you increase the pressure. Since higher pressure always pushes, the rocket feels a push as soon as the bottle collapses down, which moves the rocket forward.
[/am4show]
If you’ve never done this experiment, you have to give it a try! This activity will show you the REAL reason that you should never look at the sun through anything that has lenses in it.
Because this activity involves fire, make sure you do this on a flame-proof surface and not your dining room table! Good choices are your driveway, cement parking lot, the concrete sidewalk, or a large piece of ceramic tile. Don’t do this experiment in your hand, or you’re in for a hot, nasty surprise.
As with all experiments involving fire, flames, and so forth, do this with adult help (you’ll probably find they want to do this with you!) and keep your fire extinguisher handy.
Magnifying lenses, telescopes, and microscopes use this idea to make objects appear different sizes by bending the light. When light passes through a different medium (from air to glass, water, a lens…) it changes speed and usually the angle it’s traveling at. A prism splits incoming light into a rainbow because the light bends as it moves through the prism. A pair of eyeglasses will bend the light to magnify the image.
This is two projects in one. No one starts out soldering well (I know I didn’t). So, we’re going to start out by just practicing soldering parts onto a PCB that doesn’t do anything. No point in making mistakes on a real project and possibly ruining it.
Once you have the hang of soldering, we’ll make a working siren. Just follow along with the steps in the video. By the way, the siren circuit isn’t that different from the Audible Light Probe. It makes sound in a similar way, and is just wired to make different frequencies take turns by charging capacitors at different rates.
To make this project, you’ll need to get a Police Siren Kit. You’ll also need a soldering iron with a stand and some basic tools (scissors, hot glue gun, drill, wire strippers, pliers, screwdriver). (Need a recommendation for a soldering iron? Click here.)
There are TWO versions of the Police Siren since the previous supplier went out of business! If you’ve purchased a science program from us, you’ll want to match up the one included in the package with the right video, because you can have either one, depending on how recently you purchased your program from us. If you’re wanting to purchase the siren separately (not from us), there’s an order link above, and you’ll want to watch the second set of videos near the bottom of this page.
Older Version of the Police Siren:
This is the Old Version that comes with TWO boards inside the package along with a booklet. The two videos below are for this one.
In the video below, you will learn how to solder:
And now build the project:
New Version of the Police Siren:
This is the NEW version that has only ONE board in the package. You can purchase the Police Siren directly from Jameco here. (Part Number: 2161617). The practice board and the siren are both in the same board. There are three videos for the new board. The first one introduces you to soldering, the second practices building the components, and the third finishes the siren project.
This video below shows you step by step how to build the sample board…
This video below shows you how to build the siren itself.
This project is for advanced students. Make sure you’ve completed the Police Siren project first!
This is a really cool one. You’re actually going to build a miniature radio station. You can broadcast your voice or music to a regular FM radio. It just has a very short range (about 100 feet, or 30 meters).
It’s just a bit more complicated than the siren, and it will need some “tuning” when you’re done with it. Take your time with this one and have fun.
To make this project, you’ll need the Wireless FM Transmitter kit, your soldering equipment, and basic tools (pliers, wire strippers, scissors, etc.)
There are two versions of this kit: Version 1 & Version 2. No matter which version you have, start watching the top video. For Version 2 kit owners, when it comes time to start building the kit, you’ll find complete building instructions on the lower video. Return to the top video for tuning and troubleshooting instructions.
This project is for advanced students. Make sure you’ve completed the Police Siren project first!
This is my favorite burglar alarm because it’s innocent-looking, hair-triggered, and completely obnoxious. Here’s what happens: after you build this circuit, you hang the wire loop around a metal doorknob, add the battery, and stand back. When an unsuspecting thief comes into your room, the alarm sounds as soon as they touch the other side of the door knob… and presto! You caught your burglar.
This circuit uses an IC (integrated circuit) called the LM324, which is a quad op-amp (operational amplifier), which produces a voltage that many times larger than the voltage difference between the inputs. Created in 1972, these low-power op-amps are actually four op-amps packaged into one. Although they are commonplace today in many electronic devices, they first started out in the 1940s as vacuum-tube devices at Bell Labs.
Are you ready to build a super-cool burglar alarm? To make this project, you’ll need to Door Knob Touch Alarm Kit, soldering equipment, and basic tools (scissors, hot glue gun, drill, wire strippers, pliers, screwdriver). (Don’t know how to solder yet? Click here for a lesson!)
Did you know you can create a compound microscope and a refractor telescope using the same materials? It’s all in how you use them to bend the light. These two experiments cover the fundamental basics of how two double-convex lenses can be used to make objects appear larger when right up close or farther away.
Things like lenses and mirrors can bend and bounce light to make interesting things, like compound microscopes and reflector telescopes. Telescopes magnify the appearance of some distant objects in the sky, including the moon and the planets. The number of stars that can be seen through telescopes is dramatically greater than can be seen by the unaided eye.
Hold one magnifier above the penny and look through it.
Bring the second magnifying lens above the first so now you’re looking through both. Move the second lens closer and/or further from the penny until the penny comes into sharp focus. You’ve just made a compound microscope.
Who’s inside the building on an older penny?
Try finding the spider/owl on the dollar bill. (Hint: It’s in a corner next to the “1”.)
Keeping the distance between the magnifiers about the same, slowly lift up the magnifiers until you’re now looking through both to a window.
Adjust the distance until your image comes into sharp (and upside-down) focus. You’ve just made a refractor telescope, just like Galileo used 400 years ago.
Find eight different items to look at through your magnifiers. Make four of them up-close so you use the magnifiers as a microscope, and four of them far-away objects so you use the magnifiers like a telescope. Complete the data table.
What’s Going On?
What I like best about this activity is how easily we can break down the basic ideas of something that seems much more complex and intimidating, like a telescope or microscope, in a way that kids really understand.
When a beam of light hits a different substance (like a window pane or a lens), the speed at which the light travels changes. (Sound waves do this, too!) In some cases, this change turns into a change in the direction of the beam.
For example, if you stick a pencil is a glass of water and look through the side of the glass, you’ll notice that the pencil appears shifted. The speed of light is slower in the water (140,000 miles per second) than in the air (186,282 miles per second). This is called optical density, and the result is bent light beams and broken pencils.
You’ll notice that the pencil doesn’t always appear broken. Depending on where your eyeballs are, you can see an intact or broken pencil. When light enters a new substance (like going from air to water) perpendicular to the surface (looking straight on), refractions do not occur.
However, if you look at the glass at an angle, then depending on your sight angle, you’ll see a different amount of shift in the pencil. Where do you need to look to see the greatest shift in the two halves of the pencil?
Why does the pencil appear bent? Is it always bent? Does the temperature of the water affect how bent the pencil looks? What if you put two pencils in there?
Depending on if the light is going from a lighter to an optically denser material (or vice versa), it will bend different amounts. Glass is optically denser than water, which is denser than air.
Not only can you change the shape of objects by bending light (broken pencil or whole?), but you can also change the size. Magnifying lenses, telescopes, and microscopes use this idea to make objects appear different sizes.
Exercises
Can light change speeds?
Can you see ALL light with your eyes?
Give three examples of a light source.
What’s the difference between a microscope and a telescope?
If you’ve never made a paperclips jump together and link up by themselves, turned water into ink, or made metal rings pass through solid rope, you’re missing out. Big time. We’re going to show you our set of incredible magic-show-style tricks that will make you truly amazing.
But, there is something you should know about magic…
Magic is not something you do, it’s something you perform. Any one of the following activities can become part of a first-rate magic show, or just a way to entertain your brain while waiting for the bus. It’s all a matter of how you deliver it.
Just like reading words is not singing, pulling a rabbit out of your hand is not magic. You need to pack as much ‘show’ into your act as you work to create the illusion and make it as believable as you can. This is called your ‘performance’, and you’ll be spending most of your time with this step… and that’s not the step we’re going to be doing here!
In this set of experiments, we’re going to show you several science experiments and a few hand trick secrets that you can develop into a magic show. You’ll need to figure out the ‘story’ to use – what you’re going to say to the audience and how you’re going to say it. Practice your presentation over and over, in front of the dog, mirror, friends, or team of stuffed animals until it’s smooth enough so you’re comfortable with doing it.
Most experiments require nothing more than a few household items. You’ll find materials listed separately for each magic trick. Before we start, though, there are two things I really want you to remember, now that you’re entering into the Magician’s World:
1. Never repeat a magic trick. Ever. Period.
2. Never give away your secret. Never, ever, ever in a million years.
If you find you’re being hounded by the audience to give it away, shrug and turn away. Don’t cave in, don’t give in. Keep your mouth shut and smile. (That alone will drive them nuts, which can be fun to watch, too.) Just smile and move onto something else. Another magic trick, perhaps?
This trick is one of my favorites, because it's super-easy and quick... you'll have a hard time describing to yourself how it even happened. Most scientists can't explain it either. Are you ready?
Materials: dollar bill, two paperclips, and a rubber band.
This particular trick kept me tied up for hours as a kid. I was so determined to figure this out that I eventually had a rope-impression rubbed into my skin when I finally did slide out. I’ll bet it doesn’t take you nearly as long, and you can substitute bracelets for the rope to make it more comfortable as you work. You need two kids for this trick to work. And a camera to capture the moment.
Materials: 6 feet of rope, two kids, and 4 bracelets (optional)
Here’s what you do:
[am4show have=’p8;p9;p100;’ guest_error=’Guest error message’ user_error=’User error message’ ]
Instead of using glue as a polymer (as in the slime recipes above), we're going to use PVA (polyvinyl alcohol). Most liquids are unconnected molecules bouncing around. Monomers (single molecules) flow very easily and don't clump together. When you link up monomers into longer segments, you form polymers (long chains of molecules).
Polymers don't flow very easily at all - they tend to get tangled up until you add the cross-linking agent, which buddies up the different segments of the molecule chains together into a climbing-rope design.
By adding borax to the mix, you cross-link the long chains of molecules together into a fishnet, and the result is a gel we call slime. PVA is used make sponges, hoses, printing inks, and plastic bags.
You can add food coloring (or a bit of liquid Ivory dish soap to get a marbled appearance). You can also add a dollop of titanium dioxide sunscreen to your slime before cross-linking it to get a metallic sheen.
Squishy Slime Mix 1 cup sugar, 12 cups water, and 3 cups cornstarch in a saucepan. Stir constantly over medium heat until thickened, about 5 minutes. Place a glop in each of several bowls along with drops of food coloring in each. Place a dollop of each color into a plastic sandwich bad and zip it shut. You can squish and squeeze without getting your hands slimy!
Bonus Idea: Messy Squishy Slime II Mix one teaspoon fiber (psyllium fiber like Metamucuil) with one cup cold water. (You can add food dye or use glow juice instead of water if you’d like). Heat mixture (use a stove with adult help, or use a microwave for a few minutes) until it looks slimy. Stir once or twice while heating.
Bonus Idea: Messy Squish Slime III Mix 1 cup cornstarch and 2-2/3 cups cheap vegetable oil together, stirring to combine. Let sit for an hour (if it’s a hot day, stick it in the fridge while you wait). Get a friend to rub a balloon on their head (to charge it up) as you slowly tip the slime to pour it into a second container. Bring the balloon close (but not touching) to the slime – you’ll see the slime react to the balloon! You’ll either see the slime wiggle closer, gel up, or break off a piece, depending on the consistency of your slime. Have fun!
Ever wonder why ketchup doesn't flow easily out of the bottle? Now you know it's because the ketchup acts just like the cornstarch-water experiment here. More examples of non-Newtonian fluids are ketchup, blood, paint, and shampoo.
We're going to whip up a batch of non-Newtonian fluid that's going to act like both a solid and a liquid. Here's what you do:
Corny Slime Fill a large bowl with two cups of cold water. Mix in one cup of cornstarch. The faster you stir, the harder it is to stir. Go s l o w l y . Grab it with your hand - it should form a hard ball that you can't squish. When you relax your grip, the ball should melt and drip between your fingers as if liquid. If this is not what's happening for you, adjust the amounts of cornstarch and water you have in your bowl.
Click here to learn how to expand this activity into Walking on Water.
We can also make a substance very similar to silly putty using these materials:
liquid starch (use sta-flo, vano, or make your own from cornstarch and water
white or clear glue
disposable cups
popsicle sticks
What's going on? The water-cornstarch mixture is made up of long molecular chains (polymers) that get all tangled up when you scrunch them together (and the slime feels solid). The polymers are so slick that as soon as you release the tension, they slide free (and the slime drips between your fingers). This of spaghetti noodles with butter - they get tangled up, but are still allowed to slide freely. This cornstarch-water substance is both a solid and a liquid. Scientists call this a non-Newtonian fluid.
For a smaller scale version of this experiment, try making a small amount and placing it in an empty water bottle. Notice how it acts like a liquid when you gently roll the bottle, but turns into solid bits when you shake it hard.
For an edible version of this experiment, replace the water with condensed milk. Heat one can of milk with one tablespoon cornstarch over low heat (get adult help with the stove), stirring until the mixture thickens. Remove from heat and allow to cool. (You can add food dye and/or alcohol-free flavorings if you'd like!) For chocolate slime, add two tablespoons chocolate syrup to the saucepan while cooking... great for a Slime Birthday Party!
Here's what happens if you run sound waves through your cornstarch solution:
The glue is a polymer, which is a long chain of molecules all hooked together like tangled noodles. When you mix the two solutions together, the water molecules start linking up the noodles together all along the length of each noodle to get more like a fishnet. Scientists call this a polymetric compound of sodium tetraborate and lactated glue. We call it bouncy putty.
Combine ½ cup water with one teaspoon of Borax in a cup and stir with a popsicle stick.
In another cup, mix equal parts white glue and water.
Add in a glob of glue mixture to the borax.
Stir for one second with a popsicle stick, then quickly pull the putty out of cup and play with it until it dries enough to bounce on table (3-5 minutes).
Pick up an imprint from a textured surface or print from a newspaper, bounce and watch it stick, snap it apart quickly and ooze apart slowly.
Is it hot where you live in the summer? What if I gave you a recipe for making ice cream that doesn’t require an expensive ice cream maker, hours of churning, and can be made to any flavor you can dream up? (Even dairy-free if needed?)
If you’ve got a backyard full of busy kids that seem to constantly be in motion, then this is the project for you. The best part is, you don’t have to do any of the churning work… the kids will handle it all for you!
This experiment is simple to set up (it only requires a trip to the grocery store), quick to implement, and all you need to do guard the back door armed with a hose to douse the kids before they tramp back into the house afterward.
One of the secrets to making great ice cream quickly is [am4show have=’p8;p9;p23;p50;p80;p88;p101;’ guest_error=’Guest error message’ user_error=’User error message’ ] to be sure that the milk and cream is COLD. I will make this particular recipe, it’s usually with hundreds of kids, and our staff will stuff the milk products in the freezer for an hour or two or under hundreds of pounds of ice to make sure it’s super-cold.
If you’re going for the dairy-free kind, simply skip the milk and cream and add a bit of extra time to the chill time of your substitute ‘milk’. We’ve had the best luck with almond and soy milk. Are you ready?
Here’s what you need:
Materials:
1 quart whole milk (do not substitute, unless your child has a milk allergy, then use soy or almond milk)
1 pint heavy cream (do not substitute, unless your child has a milk allergy, then skip)
1 cup sugar (or other sweetener)
1 tsp vanilla (use non-alcohol kind)
rock salt (use table salt if you can’t find it)
lots of ice
freezer-grade zipper-style bags (you’ll need quart and gallon sizes)
How does that work? Ice cream is basically “fluffy milk”. You need to whip in a lot of air into the milk fat to get the fluffy pockets that make this stuff worthwhile. The more the kids shake the bag, the faster it will turn into ice cream.
Why do we put salt on the ice?
If you live in an area where they put salt on the roads, you already know that people do this to melt the ice. But how does salt melt ice? Think about the chemistry of what’s going on. Water normally freezes at zero degrees Celsius. But salt water presses lower than zero, so the freezing point of salt water is lower than fresh water. By sprinkling salt on the roads, you’re lowering the point at which water freezes at. When you add a solute (salt) to the solvent (water) to alter the freezing point of the solution, it’s known as the “freezing point depression”.
Tips: Don’t use nonfat milk – it won’t work with this style of ice-cream making. if you’re adding fruit or chocolate bits, make sure you get those cold in advance too, or they will slow down your process as they heat your milk solution. (We usually add those bits last after the ice cream is done.)
IMPORTANT: Do NOT substitute dry ice for the water ice – the carbon dioxide gases build quickly and explode the bag, and now you have flying bits of dry ice that will burn skin upon contact. That’s not the biggest issue, though… the real problem is that now animals (like your dog) and small children pop a random piece of dry ice into their mouths, which will earn your family a visit to the ER. So stick with the regular ice from your fridge.
Always have a FIRE EXTINGUISHER and ADULT HELP handy when performing fire experiments. NO EXCEPTIONS.
This video will show you how to transform the color of your flames. For a campfire, simply sprinkle the solids into your flames (make sure they are ground into a fine powder first) and you’ll see a color change. DO NOT do this experiment inside your house – the fumes given off by the chemicals are not something you want in your home!
One of the tricks to fire safety is to limit your fuel. The three elements you need for a flame are: oxygen, spark, and fuel. To extinguish your flames, you’ll have to either wait for the fuel to run out or smother the flames to cut off the oxygen. When you limit your fuel, you add an extra level of safety to your activities and a higher rate of success to your eyebrows.
Here’s what we’re going to do: first, make your spectrometer: you can make the simple spectrometer or the more-advanced calibrated spectrometer. Next, get your chemicals together and build your campfire. Finally, use your spectrometer to view your flames.
This experiment is at your own risk! You MUST get an experienced adult to help you with this activity.
Boric Acid or placing a copper pipe directly in the fire will give you GREEN flames
Borax (sodium tetraborate) gives a YELLOW-GREEN flame
Epsom salts (magnesium sulfate) will give you WHITE-PURPLE flames
Table salt (sodium chloride) will give you YELLOW flames
Washing soda (sodium carbonate) will give you YELLOW-GREEN flames
Calcium Chloride (Ice Melt, Dri-Ez) will give an ORANGE flame (make sure it says ‘Calcium Chloride’ – there are a lot of other types of molecules used to melt ice!)
Potassium Chloride (Nu Salt) will give you RAINBOW flames
RED flames are made with strontium, which isn’t something you want kids to be playing with.
How to Tell Which Elements are Burning
Once you’ve got the hang of how to make colored flames, your next step is to create a spectroscope. When you aim your nifty little device at the flames, you’ll be able to split the light into its spectra and see which elements are burning. For example, if you were to view hydrogen burning with your spectroscope, you’d see the bottom appear in your spectrometer:
Notice how one fits into the other, like a puzzle. When you put the two together, you’ve got the entire spectrum.
What’s the difference between the two? The upper picture (absorption spectrum of hydrogen) is what astronomers see when they use their spectrometers on distant stars when looking through the earth’s atmosphere (a cloud of gas particles). The lower picture (emission spectrum of hydrogen) is what you’d see if you were looking directly at the source itself.
Note – Do NOT use your spectrometer to look at the sun! When astronomers look at stars, they have computers look for them – they aren’t putting their eye on the end of a tube.
What about other elements?
Each element has it’s own special ‘signature’, unique as a fingerprint, it leaves behind when it burns. This is how we can tell what’s on fire in a campfire. For example, here’s what you’d see for the following elements:
Just get the feel for how the signature changes depending on what you’re looking at. For example, a green campfire is going to look a lot different from a regular campfire, as you’re burning several elements in addition to just carbon. When you look at your campfire with your spectroscope, you’re going to see all the signatures at the same time. Imagine superimposing all four sets of spectral lines above (carbon, neon, magnesium, and nitrogen) into one single spectrum… it’s going to look like a mess! It takes a lot of hard work to untangle it and figure out which lines belong to which element. Thankfully these days, computers are more than happy to chug away and figure most of it out for us.
Here’s the giant rainbow of absorption lines astronomers see when they point their instruments at the sun:
Do you see all the black lines? Those are called emission lines, and since astronomers have to look through a lot of atmosphere to view the sun, there’s a lot of the spectrum missing (shown by the black lines), especially corresponding to water vapor. The water absorbs certain wavelengths of light, which corresponds to the black lines.
Guar gum comes from the guar plant (also called the guaran plan), and people have found a lot of different and interesting uses for it. It’s one of the primary substitutes for fat in low-fat and fat-free foods. Cooks like to use guar gum in foods as it has 8 times the thickening power of cornstarch, so much less is needed for the recipe. Ice cream makers use it to keep ice crystals from forming inside the carton. Doctors use it as a laxative for their patients.
When we teach kids how to make slime using guar gum, they call it “fake fat” slime, mostly because it’s used in fat-free baking. You can find guar gum in health food stores or order it online. We’re going to whip up a batch of slime using this “fake fat”. Ready?
Here’s what you do:
[am4show have=’p8;p9;p68;p79;p101;’ guest_error=’Guest error message’ user_error=’User error message’ ]
If you’ve ever wanted to make your own version of a volcano that burps and spit all over the place, then this is the experiment for you. We used to teach kids how to make genuine Fire & Flame volcanoes, but parents weren’t too happy about the shower of sparks that hit the ceiling and fireballs that shot out of the thing… so we’ve toned it down a bit to focus more on the lava flow.
The first thing to do is mix up your own volcano dough. You can choose from the following two mixtures. The Standard Volcano Dough is akin to play dough; the Earthy Volcano Dough looks more like the real thing. Either way, you’ll need a few days on the shelf or a half-hour in a low-temperature oven to bake it dry. Alternatively, you can use a slab of clay for the dough.
Standard Volcano Dough Mix together 6 cups flour, 2 cups salt, ½ cup vegetable oil, and 2 cups warm water. The resulting mixture should be firm but smooth. Stand a water or soda bottle in a roasting pan and mold the dough around it into a volcano shape.
Earthy Volcano Dough Mix 2½ cups flour, 2½ cups dirt, 1 cup sand, and 1½ cups salt. Add water by the cup until the mixture sticks together. Build the volcano around an empty water bottle on a disposable turkey-style roasting pan. It will dry in two days if you have the time, but why wait? You can erupt when wet if the mixture is stiff enough! (And if it’s not, add more flour until it is.)
SECOND STEP: Create the reaction.
Soda Volcanoes Fill the bottle most of the way with warm water and a bit of red food coloring. Add a splash of liquid soap and ¼ cup baking soda. Stir gently. When ready, add vinegar in a steady stream and watch that lava flow.
Air Pressure Sulfur Volcanoes Wrap the volcano dough around an 18” piece of clear, flexible tubing. Shape the dough into a volcano and place in a disposable roasting pan. Push and pull the tube from the bottom until the other end of the tube is just below the volcano tip. If you clog the ends of the tubing with clay, just trim away the clog with scissors. Using your fingers, shape the inside top of the volcano to resemble a small paper cup. Your solution needs a chamber to mix and grow in before overflowing down the mountain. The tube goes at the bottom of the clay-cup space. Be sure the volcano is SEALED to the cookie sheet at the bottom. You won’t want the solution running out of the bottom of the volcano instead of popping out the top!
Make your chemical reactants.
Solution 1: Fill one bucket halfway with warm water and add 1 to 2 cups baking soda. Add 1 cup of liquid dish soap and stir very gently so you don’t make too many bubbles.
Solution 2: Fill a second bucket halfway with water and add 1 cup of aluminum sulfate (also called alum; find this in the gardening section of the hardware store or check the spice section of the grocery store). Add red food coloring and stir.
Putting it all together: Count ONE (and pour in Solution 1) … TWO (inhale air only!) …… and THREE (pour in Solution 2 as you put your lips to the tube from the bottom of the volcano and puff as hard as you can!) Lava should not only flow but burp and spit all over the place!
Ever wonder how the water draining down your sink gets clean again? Think about it: The water you use to clean your dishes is the same water that runs through the toilet. There is only one water pipe to the house, and that source provides water for the dishwasher, tub, sink, washing machine, toilet, fish tank, and water filter on the front of your fridge. And there’s only one drain from your house, too! How can you be sure what’s in the water you’re using?
This experiment will help you turn not only your coffee back into clear water, but the swamp muck from the back yard as well. Let’s get started.
[am4show have=’p8;p9;p80;p84;p101;p30;p57;’ guest_error=’Guest error message’ user_error=’User error message’ ]
clean play sand
alum (check the spice section of the grocery store)
distilled water
water sample (a cup of coffee with the ground put back in works great)
There are several steps you need to understand as we go along:
Aeration: Aerate water to release the trapped gas. You do this in the experiment by pouring the water from one cup to another.
Coagulation: Alum collects small dirt particles, forming larger, sticky particles called floc.
Sedimentation: The larger floc particles settle to the bottom of the cup.
Filtration: The smaller floc particles are trapped in the layer of sand and cotton.
Disinfection: A small amount of disinfectant is added to kill the remaining bacteria. This is for informational purposes only — we won’t be doing it in this experiment. (Bleach and kids don’t mix!)
Preparing the Sample
Make your “swamp muck” sample by filling a small pitcher with water, coffee, and the coffee grounds. Fill up another small pitcher with clean water. In a third small pitcher, pour a small scoop of charcoal carbon and cold water.
Fill one clear plastic cup half full of swamp muck. Stir in ½ teaspoon aluminum sulfate (also known as alum) and ¼ teaspoon calcium hydroxide (also known as lime; it’s nasty stuff to breathe in so keep it away from kids). You have just made floc, the heavy stuff that settles to the bottom.
Aside: For pH balance, you can add small amounts of lime to raise the pH (level 7 is optimal), if you have pH indicators on hand (find these at the pharmacy).
Stir it up and sniff — then don’t touch for 10 minutes as you make the filter.
Making the Filter
Grab a cotton ball and fluff it out HUGE. Then stuff it into the funnel. The funnel will take two or three balls. (Don’t stuff too hard, or nothing will get through!) Strain out the carbon granules from the pitcher, and put the black carbon water back into the pitcher. Place the funnel over a clean cup and pour the black water directly over the cotton balls. Run the dripped-out water back through the funnel a few times. Those cotton balls will turn gray-black! Discard all the carbon water.
Add a layer of sand over the top of the cotton balls. It should cover the balls entirely and come right up to the top of the funnel. Fill a third empty cup half-full of clean water from the pitcher. Drip (using a dropper) clean water into the funnel. (This gets the filter saturated and ready to filter.)
Showtime!
It’s time to filter the swamp muck. Without disturbing the sample, notice where the floc is… the dark, solid layer at the bottom. You’ve already filtered out the larger particles without using a filter! Using a dropper, take a sample from the layer above the floc (closer to the top of your container) and drip it into the funnel. If you’ve set up your experiment just right, you’ll see clear water drip out of your funnel.
Continue this process until the liquid starts to turn pale – which indicates that your filter is saturated and can’t filter out any more particles.
To dissect the filter and find out where the muck got trapped, invert the funnel over four layers of paper towel. Usually the blacker the cotton, the better the filter will work. Look for coffee grounds in the sand.
“Radioactive” Sample
Activate a disposable light stick. Break open the light stick (use gloves when handling the inner liquid), and using the dropper, add the liquid to the funnel. You can also drip the neon liquid by the drop into the swamp muck sample and pass it through your filter.
You can test out other types of “swamp muck” by mixing together other liquids (water, orange juice, etc.) and solids (citrus pulp, dirt, etc.). Stay away from carrot juice, grape juice, and beets — they won’t work with this type of filter.
Ever play with a prism? When sunlight strikes the prism, it gets split into a rainbow of colors. Prisms un-mix the light into its different wavelengths (which you see as different colors). Diffraction gratings are tiny prisms stacked together.
When light passes through a diffraction grating, it splits (diffracts) the light into several beams traveling at different directions. If you’ve ever seen the ‘iridescence’ of a soap bubble, an insect shell, or on a pearl, you’ve seen nature’s diffraction gratings.
Scientist use these things to split incoming light so they can figure out what fuels a distant star is burning. When hydrogen burns, it gives off light, but not in all the colors of the rainbow, only very specific colors in red and blue. It’s like hydrogen’s own personal fingerprint, or light signature.
While this spectrometer isn't powerful enough to split starlight, it's perfect for using with the lights in your house, and even with an outdoor campfire. Next time you're out on the town after dark, bring this with you to peek different types of lights - you'll be amazed how different they really are. You can use this spectrometer with your Colored Campfire Experiment also.
SPECIAL NOTE: This instrument is NOT for looking at the sun. Do NOT look directly at the sun. But you can point the tube at a sheet of paper that has the the sun’s reflected light on it.
photocopy of a ruler (or sketch a line with 1 through 10 cm markings on it, about 4cm wide)
1. Using a small box, measure 4.5 cm from the edge of the box. Starting here, cut a hole for the double-razor slit that is 1.5 cm wide 3 cm long.
2. From the other edge (on the same side), cut a hole to hold your scale that is 11 cm wide and 4 cm tall.
3. Print out the scale and attach it to the edge of the box.
4. Very carefully line up the two razors, edge-to-edge to make a slit and secure into place with tape.
5. On the opposite side of the box, measure over 3 cm and cut a hole for the diffraction grating that is 4 cm wide and 3 cm tall.
5. Tape your diffraction grating over the hole.
Aim the razor slit at a light source such as a fluorescent light, neon sign, sunset, light bulb, computer screen, television, night light, candle, fireplace… any light source you can find. Put the diffraction grating up to your eye and look at the inner scale. Move the spectrometer around until you can get the rainbow to be on the scale inside the box.
How to Calibrate the Spectrometer with the Scale Inside your box is a scale in centimeters. Point your slit to a fluorescent bulb, and you'll see three lines appear (a blue, a green, and a yellow-orange line). The lines you see in the fluorescent bulb are due to mercury superimposed on a rainbow continuous spectrum due to the coating. Each of the lines you see is due to a particular electron transition in the visible region of Hg (mercury). The blue line (435 nm), the green line (546 nm), and the yellow orange line (579 nm). (If you look at a sodium vapor street light you'll see a yellow line (actually 2 closely spaced) at 589 nm.)
Step 1. Line the razor slits along the length of the fluorescent tube to get the most intense lines. Move the box laterally (the lines will move due to parallax shift).
Step 2. Take scale readings at the extreme of the these movements and take the average for the scale reading. For instance, if the blue line averages to the 8.8 cm value, this corresponds to the 435 nm wavelength. Do this for the other 2 lines.
Step 3. On graph paper, plot the cm ( the ruler scale values) on the vertical axis and the wavelength (run this from 400-700 nm) on the horizontal axis. Draw the best straight lines thru the 3 points (4 lines if you use the Na (sodium) street lamp). You've just calibrated the spectrometer.
Step 4. Line the razor slits up with another light source. Notice which lines appear and where they are on your scale. Find the value on your graph paper. For example, if you see a line appear at 5.5 cm, use your finger to follow along to the 5.5 cm until you hit the best-fit line, and then read the corresponding value on the wavelength axis. You now have the wavelength for the line you've just seen!
Notes on Calibration and Construction: If you swap out different diffraction gratings, you will have to re-calibrate. If you make a new spectrometer, you will have to re-calibrate to the Hg (mercury) lines for each new spectrometer. If you do remake the box, use a scale that is translucent so you can see the numbers. If you use a clear plastic ruler, it may let in too much light from the outside making it difficult to read the emission line.
What other light sources work? Use your spectrometer to look at computer screens, laptops, night lights, neon lights, candles, campfires, fluorescent lights, incandescent lights, LEDs, stoplights, street lights, and any other light sources you can find. When you walk down town at night and look at various "neon" signs. Ne (neon) is a real burner! Do this with a friend who is willing to vouch for your sanity.
Question: What happens when you aim a laser through a diffraction grating? (See picture above - can you find the two dots on either side of the main later dot?)
When I teach camp, the last experiment on Chemistry day is to ‘walk on water’. I present the kids with a milky-white tub full of water and a secret ingredient. I stick my hand in the tub and pull it out (slowly) so they can see it’s clearly a liquid (as it dribbles off my fingers), and the kids always gasp in surprise when I then smack it with my hand, because now it looks rock-solid.
Their challenge? To step up and across without sinking. Of course, sinking can be fun, too!
NOTE: You’ll see a tub full of water at the end of the line – this helps wash off their feet after they’re done stepping across.
Here’s what you need to do:
[am4show have=’p8;p9;p101;’ guest_error=’Guest error message’ user_error=’User error message’ ]
Fill a large tub or kiddie pool with as much cornstarch as you can afford for your group of kids. (You’ll need at least 50-100 pounds to make this worthwhile.) Start to add water, a little bit at a time, stirring with your hands and arms. The faster you stir, the harder it is to stir. Go s l o w l y . You want approximately a 2:1 ratio of cornstarch:water.
When your mixture is nearly ready, grab a chunk of it with your hand – it should form a hard ball that you can’t squish. When you relax your grip, the ball should melt and drip between your fingers as if liquid. Adjust the amounts of cornstarch and/or water to get it just right.
What’s going on? The water-cornstarch mixture is made up of long molecular chains (polymers) that get all tangled up when you scrunch them together (and the slime feels solid). The polymers are so slick that as soon as you release the tension, they slide free (and the slime drips between your fingers). This of spaghetti noodles with butter – they get tangled up, but are still allowed to slide freely. This cornstarch-water substance is both a solid and a liquid. Scientists call this a non-Newtonian fluid.
Ever wonder why ketchup doesn’t flow easily out of the bottle? Now you know it’s because the ketchup acts just like the cornstarch-water experiment above. More examples of non-Newtonian fluids are ketchup, blood, paint, and shampoo.
For a smaller scale version of this experiment, try making a small amount and placing it in an empty water bottle. Notice how it acts like a liquid when you gently roll the bottle, but turns into solid bits when you shake it hard.
You might be curious about how to observe the sun safely without losing your eyeballs. There are many different ways to observe the sun without damaging your eyesight. In fact, the quickest and simplest way to do this is to build a super-easy pinhole camera that projects an image of the sun onto an index card for you to view.
CAUTION: DO NOT LOOK AT THE SUN THROUGH ANYTHING WITH LENSES!!
This simple activity requires only these materials:
With your tack, make a small hole in the center of one of the cards. Stack one card about 12″ above the over and go out into the sun. Adjust the spacing between the cards so a sharp image of the sun is projected onto the lower paper. The sun will be about the size of a pea.
You can experiment with the size of the hole you use to project your image. What happens if your hole is really big? Too small? What if you bend the lower card while viewing? What if you punch two holes? Or three?
Exercises
How many longitude degrees per day does the sunspot move?
Do all sunspots move at the same rate?
Did some of the sunspots change size or shape, appear or disappear?
Did you know you can see the moons of Jupiter and Saturn with only a pair of binoculars? During the summer, there’s really nothing better than star gazing with a pair of binoculars with your kids, and I’m going to help you hit the highlights, even if you don’t know an atom from an angström. I’ve put together a list of my favorite picks from the northern hemisphere’s summer sky. So get out your binoculars, pop the popcorn, and spend time outdoors with your kids.
Need a pair of binoculars? For kids, I recommend the $35 pair Cometron by Celestron. They’re great for kids and beginners, and you can use them for terrestrial bird-watching as well as night-sky observing.
For adults, Orion’s 10×50 UltraViews are excellent. I personally own a set of these, and I’ve also added an L-adapter and camera tripod for longer viewing sessions.
ONLINE Stargazing!
We are going to have monthly stargazing! All you need are clear, dark skies and a group of kids! You don’t need binoculars, but they can be nice to have.
Here are star gazing videos you can watch by month:
The best time to view the moon is a few days before first quarter and after third quarter. (Click here for a Phases of the Moon Calendar). This way, you’ll be able to view the ‘terminator’ (the line between light and dark on the surface), which will make the craters pop out even more through your binoculars. If you have an inflatable raft, bring it out, pump it up, and stretch out on it as you view through your binoculars – it will greatly reduce the stress on your neck.
If you’re viewing the full moon, one of the easiest things to find are the Apollo Landing sites. First, you’ll need a map: click here for a printable Moon Map. The image on the right shows the current moon phase. If the sky’s clear and the moon is big and bright, just pop outside and look up.
The first thing you want to do is orient the map so you have it right-side up. The easiest way to do that is to find the ‘belly button’ on the moon (called Tycho). It’s the large crater near the bottom. Find it also on the Moon Map and presto! You’ve just found your first astronomy feature!
Now, let’s see if we can find where Apollo 11 landed. Are you ready?
The Apollo 11 mission was the first human space flight to land on the Moon. Launched on July 16, 1969, it carried Mission Commander Neil Alden Armstrong, Command Module Pilot Michael Collins, and Lunar Module Pilot Edwin Eugene ‘Buzz’ Aldrin, Jr. On July 20, Armstrong and Aldrin became the first humans to land on the Moon, while Collins orbited above. To find the Apollo 11 landing site, just go straight up from Tycho until you hit the first large, dark basin (called the Sea of Tranquility) and you’re there.
Planets
The moon, sun, and planets all follow an arc cross the sky called the ‘ecliptic’. Often you’ll find Venus as the bright star hanging in the western sky at sunset or the eastern sky at dawn, depending on the time of year. If you’re star gazing on a night when the moon’s also up, you’ll have two points you can connect so you can see approximately where this arc is in the sky.
Mercury rises or sets near dawn or dusk, and is very hard to locate (owing to its close proximity to the sun). Saturn, Mars, and Jupiter change their location depending on the time of year, so you’ll need a star chart to help you out.
To find Uranus, Neptune, and Pluto, you’re going to need a seasoned astronomer with a telescope nearby. Uranus rises just before midnight, but it’s not visible with the naked eye in most skies. Same with Neptune – it also rises before midnight, but it’s such a faint object that unless you know exactly where to look, you’re not going to find it. Pluto, the dwarf planet, can be found in Sagittarius with an 8″ telescope and dark skies, as it’s 14th magnitude (see below for magnitude information).
Deep-Sky Observing
The next set of celestial objects require a dark sky and patience as well as a map to know where to look. You can try using aninteractive Sky Map if you’re at the computer and want to plan out what you’re going to see tonight and familiarize yourself with the night sky ahead of time, or use the paper Sky Map which is the same one I personally use (it’s free) so you can print it out and take outside with you.
NOTE: The images below are larger and brighter than what you’ll see through your binoculars! What you’ll usually see is a fuzzy patch (sometimes green), whether it’s an open cluster, galaxy, or nebula. The reason you won’t see colors is that your eyes are tuned for green, so green is what you see the easiest in dark conditions. The binoculars will help you see bits of color that are usually invisible to your naked eyes. Without binoculars, you’ll be able to see about 4,000 celestial objects on a dark night. With binoculars, that number jumps to over 100,000!
The photos below were taken with a camera, which easily collects all the visible colors (not just green)! In addition, the images below were taken with a 8-14″ diameter telescope. While binoculars are like having two telescopes (one for each eye), they simply aren’t large enough to gather more light than a 14″ diameter telescope. However, the images you will see are brighter than if you were to look through a small telescope the same diameter as your lenses.
The numbers on binoculars refer to the magnification and the lens at the end. For example, 7×50 means you’re viewing the sky at 7X, and the lenses are at 50mm. Most people can easily hold up to 10x50s before their arms get tired. Remember, you’re looking up, not out or down as in normal terrestrial daytime viewing.
Long story short – look for fuzzy green smudges, and then reference the click-able images here for a better idea of what you’re looking at.
Click on the images below to view a larger picture.
Hercules Cluster (M13)
Click for larger image.
In the armpit of Hercules you’ll find the M13 globular cluster that looks like a spray of tiny diamonds in a telescope, but a faint fuzzy patch in your binoculars. While it looks like a cotton ball (or hairy armpit, depending on your point of view), it’s actually a massive collection of over 100,000 stars.
Globular clusters are groups of stars held together by their own mutual gravity… sort of like a big family reunion. You might need help finding Hercules for your location – it’s basically a box with arms and legs coming off each corner.
Before diving into finding these objects, spend time finding the constellations. When you do just one or two new constellations each night, you’ll be amazed at how many you can identify by the end of summer.
Scorpius Star Clouds (M6 & M7)
Click for larger image.
There are two open star clusters (smaller groups of stars, like the Pleiades) in Scorpio. You’ll find Scorpio near your south-western horizon after sunset. See if you can make out the claws, head, heart (red star), and stinger (shaped like a giant hook) using your naked eyes. Looking at the end of the stinger section through binoculars, you will be able to locate the Butterfly Cluster (M6) and Ptolemy’s Cluster (M7) in the same view.
M6 will be in the upper part of your field of view (image left) and has the rough outline of a butterfly. M7 is larger and brighter than M6, but even through binoculars you should be able to make out the subtle blue and yellow tints of the stars along with a gold sun in the center (especially if you have sharp eyesight). If you can’t, don’t worry – the fact that you found a fuzzy green patch is just as good!
Lagoon Nebula (M8)
Click for larger image.
Can you find the teapot in the night sky? Originally called Sagittarius the Archer, this constellation looks like it’s pouring hot tea right onto Scorpius’s tail. The Milky Way runs right through the teapot in a way that makes it look like hot steam is coming out of the spout. It’s in this hot steam area that you’ll find all kinds of neat binocular treats!
The one we’re focusing on is the Lagoon Nebula (M8), which is a huge emission nebula. An emission nebula is just like it sounds – it’s a big cloud of gas that’s giving off light in different colors. Usually it emits light because a nearby hot star adding energy to the cloud so that it lights up. (More technically, the hot star’s high-energy photons ionizes the gas cloud.)
Swan Nebula (M17)
Click here for larger image.
The Swan Nebula (M17) is another emission nebula just north of the lid of the teapot. While it doesn’t look much like a swan at first sight, here are two things to look for that really gave it the name:
1. Look for a straight bar of light along the side of the cloud.
2. Can you find the faint hook curving off the end?
The hook-bar appearance is what made astronomers first think of a swan. What do you think? Does it look like this in your binoculars?
Teapot Cluster (M22)
Click for larger image.
This globular cluster is going to look a lot like M13 (above) – like a cotton ball of stars. Just by scanning the Milky Way near the teapot, you’re going to find all sorts of viewing treasures… and this is one of the larger ones. You will be able to see a fuzzy halo around a bright core if you allow your eyes to rest on this object for several minutes and adjust.
When you look up at the night sky, it seems like the pinpoints of light are each isolated from each other. When viewed through your binoculars however, single stars can actually transform into tens of millions of stars. Globular clusters are massive groups of stars held together by gravity, using housing between tens of thousands to millions of stars (think New York City).
Dumbbell Nebula (M27)
Click for larger image.
Dying stars blow off shells of heated gas that glow in beautiful patterns. William Hershel (1795) coined the term ‘planetary nebula’ because the ones he looked at through 18th century telescopes looked like planets. They actually have nothing to do with planets – they are shells of dust feathering away.
Usually you need a telescope to see a planetary nebula, but this is one you’ll be able to pick out with binoculars. Find the bright star Altair in the Summer Triangle (the three stars, Deneb, Altair, and Vega make up a large triangle in Cygnus the Swan). Draw a line between Altair to Deneb. Look for a tiny box about a third the way up from Altair toward Deneb.
Did you know that when you look at Sagittarius (the Teapot), you’re looking straight into the heart of our galaxy? Although it’s obscured by lots of dust and gases, when you point your binoculars at the teapot, you’re looking int he direction of the center of the Milky Way galaxy (and also into the heart of a dormant (non-feeding) super massive black hole).
The Coat Hanger
Click for larger image.
Do you see the coat hanger shape? It’s sort of tilted so the hook is on its side… got it yet? You’ll actually be able to see this tiny and distinct form through your binoculars on a dark night. Find the bright star Altair in the Summer Triangle (the three stars, Deneb, Altair, and Vega make up a large triangle in Cygnus the Swan). Now go a little to the northwest.
Can you count the six stars that lie in a straight line (for the coat hanger’s bottom section)? There’s another four in the hook shape, for a total of ten stars that are 7th magnitude.
The magnitude scale was invented by the ancient Greeks. The brightest stars they could see were a magnitude of 1, and the stars they could barely make out became magnitude 6. But that’s not the weird part… it’s the distance between the magnitudes that’s unusual. Let me explain…
A star one magnitude lower than another is two-and-a-half times brighter. For example, a magnitude 2 star is 2.5 times brighter than a magnitude 3 star. This makes a star that is five magnitude numbers lower than another exactly 100 times brighter. So, a magnitude 1 star is 100 times brighter than a magnitude 6 star.
Astronomers today have added negative magnitudes for super-bright stars and refined the scale to account for stars that were previously unseen. The brightest star in the sky is Sirius (magnitude -1.4), which is near the Orion constellation in the winter (for the northern hemisphere). The planet Mars varies in magnitude, but the brightest it gets is -2.8. Venus also changes in magnitude (due to distance and phase), but gets as bright as magnitude -4.4. A full moon measures at a magnitude -12.6. (And don’t ever look at the Sun. At magnitude -26.8 the Sun’s rays can damage your eyes!) Without a telescope, your eyes can just barely see magnitude 6 stars.
North America Nebula
This object is perfect for binoculars, as it’s too large for most telescopes! I’m going to warn you, though, you must have dark skies to see this one at all.
Look overhead after sunset and find the summer triangle (Deneb, Vega, and Altair) in the Cygnus the Swan constellation. Zoom your binoculars to the Deneb, slightly to the east, and you’ll make out a fuzzy green cloud in the rough shape of North America.
Did you know there’s a black hole in Cygnus? Once you’ve identified the constellation, you can boldly claim to have found the location of the first black hole ever found called Cygnus X-1.
Want more?
If your kids are crazy for astronomy and want to go above and beyond what we’ve covered here, then your next step is to contact your local astronomy club for their next public star party. If you want to move up to a telescope, check out our telescope recommendations here.
Fill the bathtub and climb in. Grab your water bottle and tack and poke several holes into the lower half the water bottle. Fill the bottle with water and cap it. Lift the bottle above the water level in the tub and untwist the cap. Water should come streaming out. Close the cap and the water streams should stop. Open the cap and when the water streams out again, can you “pinch” two streams together using your fingers?
Materials: A tack, and a plastic water bottle with cap, and bathtub
What’s happening? First, you’re getting clean. Second, you’re playing with pressure again. Watch the water level when you uncap the bottle. As the water streams out, the water level in the bottle moves downward. Notice how the space for air increases in the top of the bottle as the water line moves down. (The air comes in through the mouth of the bottle.) When you cap on the bottle, there’s no place for air to enter the bottle. The water line wants to move down, but since there’s no incoming air to equalize the pressure, the flow of water through the holes stops. Technically speaking, there’s a small decrease in pressure in the air pocket in the top of the bottle and therefore the air outside the bottle has a higher pressure that keeps the water in the bottle. Higher pressure pushes!
This experiment illustrates that air really does take up space! You can’t inflate the balloon inside the bottle without the holes, because it’s already full of air. When you blow into the bottle with the holes, air is allowed to leak out making room for the balloon to inflate. With the intact bottle, you run into trouble because there’s nowhere for the air already inside the bottle to go when you attempt to inflate the balloon.
You’ll need to get two balloons, one tack, and two empty water bottles.
Poke a balloon into a water bottle and stretch the balloon’s neck covering the mouth of the bottle from the inside. Repeat with the other bottle. Using the tack, poke several small holes in the bottom of one of the water bottles. Putting your mouth to the neck of each bottle, try to inflate the balloons.
A cool twist on this activity is to drill a larger hole in the bottle (say, large enough to be covered up by your thumb) and inflate the balloon inside the bottle with hole open, then plug up the hole with your thumb. The balloon will remain inflated even though its neck is not tied! Where is the higher pressure region now?
Fire eats air, or in more scientific terms, the air gets used up by the flame and lowers the air pressure inside the jar. The surrounding air outside the jar is now at a higher pressure than the air inside the jar and it pushes the balloon into the jar. Remember: Higher pressure pushes!
Materials: a balloon, one empty glass jar, scrap of paper towel , matches with an adult
Blow up a balloon so that it is just a bit larger than the opening of the jar and can’t be easily shoved in. With an adult, light the small wad of paper towel on fire and drop it into the jar. Place the balloon on top. When the fire goes out, lift the balloon. The jar goes with it!
As you blow air into the bottle, the air pressure increases inside the bottle. This higher pressure pushes on the water, which gets forced up and out the straw (and up your nose!).
Materials: small lump of clay, water, a straw, and one empty 2-liter soda bottle.
Fill a 2-liter soda water bottle full of water and seal it with a lump of clay wrapped around a long straw so that the straw is secured to the mouth of the bottle. (The straw should be partly submerged in the water.) Blow hard into the straw. Splash!
If your kids are hog-wild about flying and can't seem to get enough of paper airplanes, flying kites, and rockets, here's something you can do that will last their entire lifetime.
One of the best ways to introduce kids into the world of aeronautics and aviation is to get them inside a small airplane. By having the kids actually FLY, they get a chance to interact with a real pilot, see how the airplane responds to the controls, and get a taste for what their future can really be like if they keep up their studies in aerodynamics.
We're going to learn how to fly an airplane from a certified flight instructor. He's going to walk you through every step, from pre-flight to take-off to landing. You'll hear the radio transmissions from other aircraft flying in the area, how the control tower directs traffic, and more. We've used a special microphone inside the cockpit to cut down on the engine noise (which actually was rigged up to only record when it heard voice sounds), so the sound might seem different than you expected.
Rent this video from the library or video rental store: One-Six Right
Check out Flight Trainingto find local pilots and magazines you can really learn from.
Visit your local airport and ask for a list of CFIs (Certified Flight Instructors) who can provide you with your first flight. It's usually much less expensive than you think!
When we teach our Summer Science Camps, one of the first things we do is give away a free airplane lesson. We do this for a number of reasons, but first and foremost, to reinforce that when you teach science, you must do it by starting with the experiment first, then follow it up with the academic content. I know it sounds backwards from most approaches to teaching science, and it is! BUT it's the best way that kids learn in the long-term.
With this method, you are able to introduce a topic that really gets kids excited because now they have a real-world, hands-on application of it that really makes sense to them. When kids are excited about a subject, it's much easier for them to pick up the academics. Once they start asking you questions, they've signaled you that they are ready to learn more about it (like lift, drag, aerodynamics, wing design, etc.)
It's also such a wonderful thing to see the kids come up to us, years later, with their eyes still twinkling over the memory of their first flying lesson!
Want to build a kite in less than 5 minutes? This kite is basically a paper airplane on a string. It’s fast and easy to make. The best thing about this kite is that it needs next to no wind to get airborne, so you can simply run with it to get it up in the sky.
You'll need to get: 11”x17” sheet of paper (you can also tape two 8.5" x 11" sheets together to make this size), 10 feet of string, two donut stickers (also known as page reinforcement stickers), a stapler, and a straw.
Why does this kite fly? This kite soars because you’re holding the kite at the correct angle to the wind. The kite actually has two things (scientifically speaking) going on that help it fly: first, the shape of the wing cause a pressure difference that create lift under the wing surface, the same way that real airplanes generate lift. Second, the angle that the kite hits the wind generates impact lift on the kite, the same way fighter jets generates lift, since fighter jet’s wings are not curved like an airplane’s. In an airplane, the wind flows both over and under the kite, and with this shape, the air flying over the kite is traveling a bit faster than the wind under the kite. Higher wind speed means lower pressure, so the underside of the kite now has a relatively higher pressure, thus pushing the kite upwards into the sky.
Can I add string to any paper airplane and make it into a kite? Anytime someone asks us a question like this, we respond with a very enthusiastic: “I don’t know. Try it!” Then we offer enough tools for the job with a smile. We want kids experimenting with new ideas (even if we’re not entirely sure if they will work). So go ahead, roll up your sleeves, test out your ideas, and prepared to learn.
Take an 11x17-inch sheet of paper and fold it in half so it now becomes 8 ½ x 11 inches. Curl one corner tip to the center fold, 2 inches from the same end. Do the same with the other side, and secure the fold with a staple. Two inches below the staple, punch a hole near the center fold and attach donut stickers (to keep string from tearing through the paper). Attach a good length of string and run! This kite works with little-to-no wind. Just run!
Note: To make a string handle, cut a straw in half and thread one of the pieces onto the end of the string, looping the free end back onto the main line. Wind the excess string around the straw.
Teaching Tip: When we teach kids how to make this kite, we punch holes both on both sides of the staple and ask the kids which hole works best.
Troubleshooting: The bat kite needs very little wind to fly – in fact, most kids get their kites airborne just by running. Depending on where the staple is located, you can place your string forward or aft of (behind) the staple. Encourage kids to test and find their own answer, but our recommendation is to shoot for the aft hole 3.5 inches from the nose and the staple 1.5 inches from the nose. This kite is very forgiving about measurements.
Ever wonder how airplanes fly through those fluffy white things in the sky? If they can't see where they are going, how do they get there?
You might be tempted to think: "GPS!" Ah, yes... but airplanes were flying through clouds long before GPS was ever invented. So how did they do it? That's what this video is all about.
Although most new planes are being outfitted with "glass cockpits", which is to say computer screens with GPS systems, there's really nothing like a plane with vacuum-tube instruments, crackling radios, transponders, VOS, and DMEs. We're going to show you how IFR pilots (those who are specially trained to fly only by instruments without peeking out the window) use their equipment to get the plane down to the ground.
Are you ready? Then strap on your seat belt and get ready to fly with a certified instrument flight instructor...
If you’re fascinated by the simple complexity of the standard soap bubble, then this is the lab for you. You can easily transform these ideas into a block-party Bubble Festival, or just have extra fun in the nightly bathtub. Either way, your kids will not only learn about the science of water, molecules, and surface tension, they’ll also leave this lab cleaner than they started (which is highly unusually for science experiments!)
Soap also makes water stretchy. If you’ve ever tried making bubbles with your mouth just using spit, you know that you can’t get the larger, fist-sized spit bubbles to form completely and detach to float away in the air. Spit is 94% water, and water by itself has too much surface tension, too many forces holding the molecules together. When you add soap to it, they relax a bit and stretch out. Soap makes water stretch and form into a bubble.
[am4show have=’p8;p9;p80;p101;’ guest_error=’Guest error message’ user_error=’User error message’ ]
The absolute best time to make gigantic bubbles is on an overcast day, right after it rains. Bubbles have a thin cell wall that evaporates quickly in direct sun, especially on a low-humidity day. If you live in a dry area with low-humidity, be sure to use glycerin. The glycerin will add moisture and deter the rapid thinning of the bubble’s cell wall (which cause bubbles to tear and pop).
Best Bubble Solution Gently mix together 6 cups cold water in a shallow tub with 1 cup green Dawn (or clear Ivory) dish soap. If it’s a hot, dry day, add a few tablespoons of glycerin. (Glycerin can be found at the drugstore.) If you’re finding the solution too thin, add a second cup of dish soap. You can add all sorts of things to find the perfect soap solution: lemon juice, sugar, corn syrup, Karo syrup, maple syrup, glycerin — to name just a few. Each will add its own properties to the bubble solution. (You can have buckets of each variation along with plain dish soap and water to compare.) You can reduce the water, increase the soap, etc… but here’s a good starting point: 2 cups dish soap with 1 cup Karo syrup and 6 cups cold water.
Zillions of Tiny Bubbles can be made with strawberry baskets. Simply dip the basket into the bubble solution and twirl around. You can also use plastic six-pack soda can holders.
Trumpet Bubbles are created by using a modified water bottle. Cut off the bottom of the bottle, dip the large end in the soap solution, put the small end to your lips, and blow. You can separate the bubble from the trumpet by rolling the large end up and away from your bubble.
Bubble Castles are built with a straw and a plate. First, spread bubble solution all over a smooth surface (such as a clean cookie sheet, plate, or tabletop). Dip one end of a straw in the bubble solution and blow bubbles all over the surface. Make larger domes with smaller ones inside. Notice how the bubbles change shape and size when they connect with others.
Stretch and Squish! Get one hand-sized bubble in each hand. Slap them together (so they join, not pop!). What if you join them s l o w l y?
Light Show is always a favorite. Find a dark room. Find a BIG flashlight and stand it on end. Rub soap solution all over the bottom of an uncolored plastic lid (such as from a coffee can). Balance the lid, soapy side up, on the flashlight (or on the spring-type clothespins). Blow a hemisphere bubble on top of the lid. Blow gently along the side of the bubble. Watch the colors swirl.
Weird Shapes are the simplest way to show how soap makes water stretchy. Dip a rubber band completely in the soap solution and pull it up. Stretch the rubber band using your fingers. Twist and tweak into all sorts of shapes. Note that the bubble always finds a way of filling the shape with the minimum amount of surface area. Make a Moebius bubble by cutting a thick ribbon, giving one end a half-twist, and reattaching the ends (by sewing, stapling, or taping).
Polygon Shapes allow you to make square and tetrahedral bubbles. Create different 3-D shapes by bending pipe cleaners into cubes, tetrahedrons, or whatever you wish. Alternatively, you can use straws threaded onto string to make 3-D triangular shapes. Notice how the film always finds its minimum surface area. Can you make square bubbles?
Gigantic Bubbles Using the straws and string, thread two straws on three feet of string and tie off. Grasp one straw in each hand and dip in soap solution. Use a gentle wind as you walk to make BIG bubbles. Find air thermals (warm pockets of air) to take your bubbles up, up, UP!
Kid-in-a-Bubble Pour your best bubble solution into a child’s plastic swimming pool. Lay a Hula-hoop down, making sure there is enough bubble solution to just cover the hoop. Have your child stand in the pool (use a stool if you want to avoid wet feet), and lift the hoop! For a more permanent project, use an old car tire sliced in half lengthwise (the hard way) to hold the bubble solution. The kid stands in the hole and doesn’t get wet!
Electric Bubbles Blow some fist-sized bubbles and set them loose. Rub an inflated balloon on your head or wool sweater to charge the balloon and get the charged balloon close to a soap bubble. If you are fast and careful enough, you can steer the bubble around the room.
Hover Bubbles Since bubbles are light, you can float them on a gas that is slightly denser than the air they are filled with, such as carbon dioxide. Place a shallow glass dish inside a larger glass dish or tank (like an unoccupied aquarium). Into the smaller dish, add two cups vinegar and one cup baking soda.
After the fizzing has subsided, your larger container is now filled with carbon dioxide gas. Make sure it’s away from drafts or movement so the invisible carbon dioxide gas stays in there. Gently blow bubbles near the opening so they settle into the large tank. (Don’t blow directly into the container, or you’ll slosh out the CO2.) Your bubbles will hover in the tank so you can have a closer look. What colors do you see? Do the colors change? Does the bubble stay in one place, rise, sink, or move around? If your bubble stays in the tank without popping, you’ll notice that it slowly becomes larger!
Mammoth Bubbles To create bubbles the size of a small car, use your lace trim. Knot the ends together to form a large loop, and dip your lace into the bubble solution. Gently pick up the loop with your hands about two feet apart, the rest dangling below. You should see a thin bubble film in the loop. Keep your hands spread apart and walk (keeping the bottom loop above the ground), and a bubble will form behind you. When it’s big enough, close the loop by bringing your hands together to seal off the bubble. You can also spin slowly in a circle to put yourself inside a “bubble-bagel” (mathematical term for this shape: toroid). If you do this in a place with warm updrafts (like next to a building), your bubbles will float up and away and quite possibly attract a small crowd… like the photo below.
The How and Why Explanation If you pour a few droplets of water onto a sweater or fabric, you’ll notice that the water will just sit there on the surface in a ball (or oval, if the drop is large enough). If you touch the ball of water with a soapy finger, the ball disappears into the fibers of the fabric! What happened?
Soap makes water “wetter” by breaking down the water’s surface tension by about two-thirds. Surface tension is the force that keeps the water droplet in a sphere shape. It’s the reason you can fill a cup of water past the brim without it spilling over. Without soap, water can’t get into the fibers of your clothes to get them clean. That’s why you need soap in the washing machine.
Soap also makes water stretchy. If you’ve ever tried making bubbles with your mouth just using spit, you know that you can’t get the larger, fist-sized spit bubbles to form completely and detach to float away in the air. Spit is 94% water, and water by itself has too much surface tension, too many forces holding the molecules together. When you add soap to it, they relax a bit and stretch out. Soap makes water stretch and form into a bubble.
The soap molecule looks a lot like a snake; it’s a long chain that has two very different ends. The head of the snake loves water, and the tail loves dirt. When the soap molecule finds a dirt particle, it wraps its tail around the dirt and holds it.
The different colors of a soap bubble come from how the white light bounces off the bubble into your eye. Some of the light bounces off the top surface of the bubble and bends only a little bit, while the rest passes through the thin film and bounces off the inner surface of the bubble and refracts more.
If you made the Hover Bubbles, you’ll notice that the bubbles slowly get larger the longer they live in the tank. Remember that the bubble is surrounded by CO2 gas as it sinks. The bubble grows because carbon dioxide seeps through the bubble film faster than the air seeps out, as CO2 is more soluble in water than air (meaning that CO2 mixes more easily with water than air does).
You'll see these in toy stores, but why not design your own version? You can add weight to the nose, widen the fins, and lengthen the slingshot part to figure out how to get to to soar further.
Materials:
foam tube (I used a piece of foam from 3/4" pipe insulation, but you can also use a paper towel tube)
foam sheet
film canister or other small container to hold the rubber band in place (or tape the rubber bands to the outside using duct tape)
Punch a small hole in the bottom of a black Kodak film canister. Chain 5 rubber bands together and push one end of the rubber band chain through the hole from the outside, catching it with a paper clip on the inside like a cotter pin so it can’t slip back through the opening.
Hot glue the canister into one end of a 6-inch piece of ¾-inch foam pipe insulation. Check the hardware store for this insulation, which comes in 6 foot. Tape the circumference of the pipe with a few wraps of duct tape. The rubber bands should be hanging out of the foam pipe.
Cut out triangular fins from a foam sheet and attach with hot glue to the opposite end. To launch, hook the rubber band over your thumb, pull back, and release!
This is the kind of thing I wish I had back in grade school. I could have launched these across the room without anyone being the wiser. Be sure to fold the nose down securely, or you'll have air leaks (and no launch!) This is a smaller version of the Rocketships experiment.
Materials:
All you need is a
Spiral-wrap a thin strip of paper around and along the length of a wood pencil and use tape to secure. You can alternately use a naked straw instead of making your own rocket body from paper, but then you’ll need a slightly smaller launch tube straw.
Hot glue triangular fins made from an index card to one end. Fold the opposite end over twice and secure the fold with a ring of tape to make a nose for the rocket. Insert straw into the rocket body and blow hard!
[/am4show]
This is a simpler version of the box kite. By making it out of everyday materials and changing the structure so that it's more rigid, all you need is an afternoon to make this simple and colorful kite.
The directions here are for making a single cell (image is a pyramid of four cells), and the largest we've ever made is ten without needing stronger materials. (It's the straws that bend under the weight). You can add a tail to keep it from spinning during flight.
Materials: Six straws, one sheet of tissue paper, string, crepe paper streamers, glue sticks (not included), scissors and tape.
Thread three naked straws (straws with the wrapper removed) onto a length of string and tie it off to make a stiff triangle. Thread two more straws onto a string and attach to a different corner of the triangle, making a 2D diamond shape.
Thread one straw onto a string and attach one end to each diamond apex, pulling your shape into a 3D tetrahedral triangle or pyramid shape.
Cover two adjacent sides with tissue paper and use glue sticks to fold the tissue around the straws and back onto itself. Then attach a bridle string along the tissue fold. Add a crepe paper streamer for a tail and you’re ready to fly!
Tip: You can also make four tetrahedral shapes and stack them into one giant pyramid! [/am4show]
Objective You’re going to be using your circuits together with a frame to build a set of real, working robots. We’re going to spend most of our time learning how to get the electrical components to work together, and not very much time on how they individually work. For example, we’re not going to talk about how a motor transforms electricity into a spinning motion, but rather how to wire up a set of motors to make a robot move forward and reverse. It’s more important to learn how these elements work. (The details concerning why they work comes a bit later down the line.)
Robots are electro-mechanical devices, meaning that they rely on both electronics and mechanics to do their ‘thing’. If a robot has sensors, it can react with its environment and have some degree of intelligence. When scientists design robots, they first determine what they want the robot to do. Turn on a light? Make pancakes? Drive the car? Once you’ve outlined your tasks, then the real fun begins… namely, figuring out exactly how to accomplish the tasks.
About the Experiments The robots in this section aren’t going to look very flashy. In fact, they may all look about the same – all made of wood, metal, and wires! That’s because we’re focusing on the harder parts (the movement and framework), and leaving the decoration and flashy stuff to you. Once your kids wrap their heads around how to get their robot moving, ask them how they could improve it (make it less wobbly, faster, louder, brighter…etc).
In our live Science Camp Workshops during the summer, we spend an entire day just on this section. First, we have all the students make the Jigglebot (because it’s the fastest to build) and then the Racecar (so they see how to do the wheel-axle assembly), and then we leave the lab open for the remainder of the time and let them have at the rest of the materials. The adults basically sit back and let the kids figure out how to build what they want, and are simply available to answer questions, find oddball parts, or drill holes when needed. It’s a great open-lab environment that works well with large groups of students. (Although if you’re nervous about doing this, just stick with the robots we’ve outlined and your kids will still have an outstanding learning experience.)
Troubleshooting Electricity experiments can be frustrating because unlike other activities, you can’t tell where you’re going wrong if the circuit doesn’t work. Here are the things we test for when troubleshooting a circuit with the students:
Are the batteries in right? (Flat side goes to the spring.)
Is the connection between the alligator clip and the wire a metal-to-metal connection? (Often kids will clip the alligator clip onto the plastic insulation.)
If it’s an LED that you’re trying to light up, remember that those are picky about which way you hook up the plus and minus (red and black). Switch the wires if you’re having trouble.
Change out the wires. Sometimes the wire can break inside – it can get disconnected from the alligator clip inside the plastic insulation, but you can’t see it. When it doubt, swap out your wires.
The How and Why Explanation Leonardo da Vinci designed a mechanical knight back in the late 1400s. His drawing sketched out how it could sit upright and move arms, legs, and jaws. Jacques de Vaucanson, in the late 1700s, created the first life-sized mechanical automatons, including a mechanical duck that could flap its wings. It was the Japanese toy industry that really kicked off the mechanical revolution of inventions with complex mechanical inventions that could either paint pictures, fire arrows from a quiver, or serve tea. Not long after, in 1898, Nikola Tesla demonstrated the first radio-controlled torpedo. In 1948, the first electronic autonomous robots (robots that do their ‘thing’ automatically) were Elmer and Elsie, who could sense light, contact, and navigate through a room.
By putting together motors, switches, lights, buzzers, light detectors, tilt and motion sensors, and pressure sensors, you can develop a homemade robot worthy of the science fair’s winner’s circle.
In addition to interacting with their environment, robots need to be able to move somehow. Robots can move by spinning wheels, turning propellers, moving pistons, grinding gears, or by eccentric (off-center) drive.
While the instructions for the robots focus mainly on the chassis (body or frame) and locomotion (movement), you will want to add lights, buzzers, and any sensors from the Burglar Alarms section to make the robot your very own.
Questions to Ask When you’ve worked through most of the experiments ask your kids these questions and see how they do:
How can you add headlights (LEDs) and a horn (buzzer) to the Racecar robot?
Did you figure out how to make the Waterbot go both forward and reverse?
What makes the Jigglebot and Bristlebot move?
What’s the difference between a SPST and DPDT switch? Which would you use when?
How would you improve the Cookie Snatcher Robot Arm?
This is a double-project, because each requires the scraps of the other. The origami airplane requires a square sheet of paper, and the ninja star needs the strip left over from turning a regular sheet of copy paper into a square sheet.
Both of these contraptions fly well if you take your time and make them carefully. Just watch yourself with the ninja star - it's not only fast and furious, the ends are sharp and guaranteed to turn heads... and necks. [am4show have='p8;p9;p93;' guest_error='Guest error message' user_error='User error message' ]
P.S. I learned how to make this ninja star back in 4th grade, where I was sworn to secrecy in the girl's bathroom with my best friend. Although I've made thousands of these, I've never showed anyone else! I've kept this secret for a long time, so I ask you now to keep these instructions a secret between us. Are you in?
My students love making this one, because it's not only a throwing star like the Ninja Star, but also opens up to be a frisbee! You'll need eight sheets of square paper, all the same size. They don't have to be large - I use two that are cut into quarters. Here's what you do:
Objective You’re going to do several chemistry experiments that expose your kids to the different type of chemical reactions. I want you to focus on honing your observational skills when you do the experiments. Did the temperature, color or volume change? Even the smallest differences can indicate something big is going on. The first thing to do is watch the video on the Chemical Demonstrations website page, and then dive into the experiments.
Main Ideas Chemistry is chocked full of demonstrations and experiments for two big reasons. First, they’re fun. But more importantly, the reason we do experiments in chemistry is to hone your observational skills. Chemistry experiments really speak for themselves, much better than I can ever put into words or show you on a video. And I’m going to hit you with a lot of these chemistry demonstrations to help you develop your observing techniques.
While the kids are playing with the experiments see if you can get them to notice these important ideas. When they can explain these concepts back to you (in their own words or with demonstrations), you’ll know that they’ve mastered the lesson.
About the Experiments A lot of folks get nervous around chemistry. You can’t always ’see’ what’s going on (are there toxic gases generated from that reaction?), and many people have a certain level of fear around chemicals in general.
I don’t want you dipping your hands in molten lead or lying on a bed of nails while someone with a sledgehammer breaks a cinder block on your stomach. Demonstrations of this kind that result in injury are the ones forever burned in the memory of the audience, who are now fearful and have made the generalization that chemicals are dangerous and their effects are bad. In fact, every chemical is potentially harmful if not handled properly. That is why I’ve prepared a special set of chemistry experiments that include step-by-step demonstrations on how to properly handle the chemicals, use them in the experiment, and dispose of them when you’re finished.
Chemistry is predictable, just as dropping a ball from a height always hits the floor. Every time you add 1 teaspoon of baking soda to 1 cup of vinegar, you get the same reaction. It doesn’t simply stop working one time and explode the next. I’m going to walk you through every step of the way, and leave you to observe the reactions and write down what you notice. At first, it’s going to seem like a lot of disjointed ideas floating around, but after awhile, you’ll start to see patterns in the way chemicals interact with each other. Keep working at Chemistry and eventually it will click into place. And if there’s an experiment you don’t want to do, just skip it (or just watch the video). Some of this may be a review for you, especially if you’ve completed Units 3 (Matter) and 8 (Chemistry 1).
The How and Why Explanation There are several different types of chemical reactions: combustion, decomposition, synthesis, and displacement. All chemical reactions somehow fit into one of these, and here’s how you can tell them apart…
Combustion: A combustion reaction gives off energy, usually in the form of heat and light. The reaction itself includes oxygen combining with another compound to form water, carbon dioxide, and other products. A campfire is an example of wood and oxygen combining to create ash, smoke, and other gases.
Synthesis: This reaction happens when simple compounds come together to form a more complicated compound. The iron (Fe) in a nail combines with oxygen (O2) to form rust, also called iron oxide (Fe2O3).
Oxidation-Reduction (Redox Reaction): When the oxidation numbers of atoms change during the reaction, it’s called a redox reaction. Oxidation happens when a compound loses electrons (increases oxidation state) and reduction occurs when a compound gains electrons (decrease in oxidation state). Electroplating is an example of a redox reaction.
Decomposition: On the other side, a decomposition reaction breaks a complicated molecule into simpler ones. When you leave a bottle of hydrogen peroxide on the counter, it decomposes into water (H2O) and oxygen (O2).
Displacement: There are several different types of displacement reactions, including single, double, and acid-base more on this later). Antacids like calcium hydroxide (CaOH) combine with stomach acid (HCl) to form calcium chloride salt (CaCl2) and water (H2O).
Questions to Ask When you’ve worked through most of the experiments ask your kids these questions and see how they do:
What’s true about phenolphthalein? (a) it goes from clear to pink when mixed with bases (b) it’s impossible to spell (c) it is colorless in acidic solutions (d) soluble in water
How does increasing the hydrogen peroxide affect the rate of the iodine clock reaction?
Which chemical turns coldest when added to water? (a) calcium chloride (b) aluminum sulfate (c) ammonium nitrate (d) citric acid
A polymer is: (a) a long piece of spaghetti (b) an element on the periodic table (c) a long molecular chain (d) a plastic bag
What does a cross-linking agent do?
Which of the following are cross-linking agents? (a) calcium (b) borax (c) white glue (d) starch (e) bubble gum
Which substance is both a solid and a liquid? (a) bubble gum (b) slime (c) cornstarch and water (d) last night’s dinner
Answers:
What’s true about phenolphthalein? (a) it goes from clear to pink when mixed with bases (b) it’s impossible to spell (c) it is colorless in acidic solutions (d) soluble in water
How does increasing the hydrogen peroxide affect the rate of the iodine clock reaction? By accelerating the first reaction, you can shorten the time it takes the solution to change color. There are a few ways to do this: You can decrease the pH (increasing H+ concentration), or increase the iodide or hydrogen peroxide. (To lengthen the time delay, add more sodium thiosulfate.)
Which chemical turns coldest when added to water? (a) calcium chloride (b) aluminum sulfate (c) ammonium nitrate (d) citric acid
A polymer is: (a) a long piece of spaghetti (b) an element on the periodic table (c) a long molecular chain (d) a plastic bag
What does a cross-linking agent do? Coagulates the polymers. (Turns the long polymer chains into something that looks more like a fishnet.)
Which of the following are cross-linking agents? (a) calcium (b) borax (c) white glue (d) starch (e) bubble gum
Which substance is both a solid and a liquid? (a) bubble gum (b) slime (c) cornstarch and water (d) last night’s dinner
How many of these items do you already have? We’ve tried to keep it simple for you by making the majority of the items things most people have within reach (both physically and budget-wise).
You do not need to do ALL the experiments – just pick the ones you want to do! Look over the experiments and note which items are needed, and off you go!
NOTE: Radio Shack part numbers have been replaced. Click here for full chart.
This is a Bonus Lab, which means that the experiments in this section require materials which are more expensive and hard to find than the average grocery store. Use the experiments in this section for kids wanting to go even further and deeper into the subject. Since these are more involved, be sure to browse through the videos for these experiments first before purchasing materials for these additional labs.
This lab builds on the ideas from the Electric Lab, and actually reuses a number of components from it. You’ll want to cross off the items you already purchased from the Electricity Shopping List so you don’t duplicate.
Materials
AA battery pack – If you are planning to make all the robots, you’ll need 20 battery holders and 40 AA batteries. However, you can get by with only 2 battery packs if you reuse these from one robot project to the next, or by not attaching the pack to the robot and simply connecting the power to your circuit.
3VDC motors – If you don’t want to rip apart one robot to build another, you’ll need 22 motors to build all 18 robots. Otherwise, you can get by with about four and reuse the motors with each new project.
Alligator clip leads – If you don’t want to reuse these with each robot, you’ll need 46 clip leads. Otherwise, you can get by with a set of 10 wires.
Enough AA batteries for your battery cases (Cheap dollar-store “heavy duty” type are perfect. Do NOT use alkaline batteries like Duracell or Energizer!)
19 wheels (tops from film canisters, small yogurt containers, milk jugs, orange juice, etc. Only two of these can be large ones like old CDs.)
12 straws
4 old brushes (at least 3 are old toothbrushes, and one can be an old scrubbing brush)
3 tacks
2 index cards
8-12 empty plastic water or soda bottles
4-6 markers or pens and a big piece of paper (like posterboard)
2 blocks of foam (2” x 4” x 6” or larger). You can use different shapes of foam blocks. The packing material from boxes work great, and they are cheap!
scrap of cardboard
5 large paper clips
9 brass fasteners
cork from a wine bottle
long bolt (at least 3″ long) with hexnut
3 wooden spring-type clothespins
25 wooden skewers
Film canister (or similar candy tube)
9 propellers to make all 7 robots that use propellers. However, you can reuse these simply by pulling them off one robot and sticking them on another. You can rip these off old toys, cheap fans, or get them from your local hobby store – make sure they fit onto your motor shaft!
1 tiny gear that fits onto your motor shaft, and one larger gear that slides onto a skewer (you can rip these out of an old toy, printer, etc.). There’s only one robot that requires a gear set.
Plastic soap container (optional for if you want to make a remote-control for your robots)
50 popsicle sticks (at least one is the smaller size, the rest can be tongue-depressor size)
How many of these items do you already have? We’ve tried to keep it simple for you by making the majority of the items things most people have within reach (both physically and budget-wise).
You do not need to do ALL the experiments – just pick the ones you want to do! Look over the experiments and note which items are needed, and off you go!
We’re going to reuse some of the materials listed here that are more expensive, like the motors, batteries, wires, switches, lights, etc. in the Laser Lab and the Robot Lab, so you can get a couple extras if you don’t want to tear apart your projects after you’ve built them.
Note to e-Science students: These materials are from Unit 10.
Materials
Regular sized latex balloon
Ping pong ball
Bubble solution (make your own with 1 cup clear Ivory dish soap + 12 cups cold water)
I carried one of these kites in my backpack in grade school, as it collapses down very small when not in use. You can make smaller versions from still paper, but the one we're going to do uses plastic.
Here's what you need to get:
Two 24 inch wood dowels (or two 24 inch long plastic balloon sticks), four donut stickers (also known as page reinforcement stickers), string, plastic garbage bags, tape and scissors.
Cut a garbage bag into a rectangle 24 inches high and 30 inches long. Snip the corner of the upper right side as follows:
From the upper right corner, measure 9 inches to the left and mark with a dot (the dot will be on an edge). From the corner again, measure down 7.5 inches and make another dot (again, on an edge). Connect the dots and cut along a line. Cut the left upper corner to match. Tip: You can easily do this by folding the bag in half and follow the cut you just made.
Snip the lower bottom corners the same way. From the lower right corner, measure over 9 inches to the left and mark with a dot, then measure 16.5 inches up from the corner and mark with another dot. Connect the dots and cut along the line. Do the same for the left side. Shape the top straight edge of your kite by cutting a shallow curve (like the neckline of a T-shirt) for better airflow.
Your kite should look like a rectangle with a triangle attached to either side, pointing out. At those points, punch a hole and reinforce it with donut hole savers. Attach six feet of string with double knots at each hole, then knot the ends together. Spread your kite out flat. Line up your dowels where the rectangle edges meet the triangle edges, one for each side and tape them in place. Add a spool of string and you are ready to go!
[/am4show]
I carried one of these kites in my backpack in grade school, as it collapses down very small when not in use. You can make smaller versions from still paper, but the one we're going to do uses plastic.
Here's what you need to get:
Two 24 inch wood dowels (or two 24 inch long plastic balloon sticks), four donut stickers (also known as page reinforcement stickers), string, plastic garbage bags, tape and scissors.
Cut a garbage bag into a rectangle 24 inches high and 30 inches long. Snip the corner of the upper right side as follows:
From the upper right corner, measure 9 inches to the left and mark with a dot (the dot will be on an edge). From the corner again, measure down 7.5 inches and make another dot (again, on an edge). Connect the dots and cut along a line. Cut the left upper corner to match. Tip: You can easily do this by folding the bag in half and follow the cut you just made.
Snip the lower bottom corners the same way. From the lower right corner, measure over 9 inches to the left and mark with a dot, then measure 16.5 inches up from the corner and mark with another dot. Connect the dots and cut along the line. Do the same for the left side. Shape the top straight edge of your kite by cutting a shallow curve (like the neckline of a T-shirt) for better airflow.
Your kite should look like a rectangle with a triangle attached to either side, pointing out. At those points, punch a hole and reinforce it with donut hole savers. Attach six feet of string with double knots at each hole, then knot the ends together. Spread your kite out flat. Line up your dowels where the rectangle edges meet the triangle edges, one for each side and tape them in place. Add a spool of string and you are ready to go!
Have you tried sticking a plastic wheel straight onto a motor shaft to create a race car? The first thing you’ll find is that the shaft is usually so slick that it doesn’t stay attached to the wheel without a ton of glue. And IF you’re able to attach the wheel to the motor firmly, it usually doesn’t have enough ‘oomph’ to turn the wheel without a push-start. The trouble is that you’ve got too much speed and not enough torque at the wheel.
The motor will generate the certain amount of power, but you can use that power in different ways. For example, a fan needs to be turning at high speed to be of any use, so it makes sense to simply strap a propeller onto the shaft and power up the motor. However, if you need a motor shaft to spin more slowly and with more ‘oomph’, then you need to add a couple of gears to help you do this.
When we build these race cars with college students, we made larger versions that could really transport them across the parking lot. Only instead of a tiny hobby motor turning the pinion (the gear attached to the motor shaft) as we’re going to do in our experiment here, the students powered their ride-on cars with a battery-powered drill they had to hold while riding it across the floor.
The biggest challenge students faced was selecting the gears. Depending on the student’s weight and rolling friction of the wheels, they would need to find the right gear combo for their car. The main thing to keep in mind is that you always trade speed for torque (twisting motion).
In the case with gears, the power is always the same (from the drill), but we slowed the rotation speed way down to increase the amount of torque (how much ‘oomph’ a wheel had to turn) in order to get it rolling. We’re going to experiment with this idea by creating our own geared race cars. Are you ready?
Objective When you think of slime, do you imagine slugs, snails, and puppy kisses? Or does the science fiction film The Blob come to mind? Any way you picture it, slime is definitely slippery, slithery, and just plain icky — and a perfect forum for learning real science.
Imagine a plate of spaghetti. The noodles slide around and don’t clump together, just like the long chains of molecules (called polymers) that make up slime. They slide around without getting tangled up. The pasta by itself (fresh from the boiling water) doesn’t hold together until you put the sauce on. Slime works the same way. Long, spaghetti-like chains of molecules don’t clump together until you add the sauce … until you add something to cross-link the molecule strands together.
About the Experiment To make our different slimes, we’ll be using borax as the cross-linking agent. There a lots of different polymers you can try, including starch, glue, and polyvinyl alcohol. The polymer (usually glue) mixture is the “spaghetti” (the long chain of molecules), and the “sauce” is the borax mixture (the cross-linking agent). You need both in order to create slime. Keep your slime in the fridge for a week, or a month in the freezer (although it might change colors). Nuke it in the microwave for a few seconds to thaw.
The How and Why Explanation The cross-linking agent in the slime mixtures can be either liquid starch or borax (sodium tetraborate). When you mix the glue and water together, you’ve got a cup full of long molecule chains, like a pile of ropes. When you cross-link the polymers, it’s like building a net with the rope, and it happens very quickly to give you that rubbery, stretchy substance kids are so fond of.
Questions to Ask When you’ve worked through most of the experiments ask your kids these questions and see how they do:
A polymer is: (a) a long piece of spaghetti (b) an element on the periodic table (c) a long molecular chain (d) a plastic bag
What does a cross-linking agent do?
Which of the following are cross-linking agents? (a) calcium (b) borax (c) white glue (d) starch (e) guar gum
What does PVA stand for? What kind of water does it mix with?
Which substance is both a solid and a liquid? (a) guar gum (b) bouncy putty (c) starch slime (d) corny slime
Objective This experiment will teach you about the different types of filtration as you turn your coffee back into clear water as well as the swamp muck from the back yard. You can test out other types of “swamp muck” by mixing together other liquids (water, orange juice, etc.) and solids (citrus pulp, dirt, etc.). Stay away from carrot juice, grape juice, and beets — they won’t work with this type of filter.
About the Experiment Ever wonder how the water draining down your sink gets clean again? Think about it: The water you use to clean your dishes is the same water that runs through the toilet. There is only one water pipe to the house, and that source provides water for the dishwasher, tub, sink, washing machine, toilet, fish tank, and water filter on the front of your fridge. And there’s only one drain from your house, too! How can you be sure what’s in the water you’re using?
In our live Science Camp Workshops during the summer, we let the kids bring in their own samples which usually includes a blenderized version of leftovers from dinner, plant trimmings, coffee grounds, and dirt. It’s quite a smelly class once everyone cracks open their samples!
The How and Why Explanation There are several steps to understand as we go along:
Aeration: Aerate water to release the trapped gas. You do this in the experiment by pouring the water from one cup to another.
Coagulation: Alum collects small dirt particles, forming larger, sticky particles called floc.
Sedimentation: The larger floc particles settle to the bottom of the cup.
Filtration: The smaller floc particles are trapped in the layer of sand and cotton.
Disinfection: A small amount of disinfectant is added to kill the remaining bacteria. This is for informational purposes only — we won’t be doing it in this experiment.
Questions to Ask When you’ve worked through most of the experiments ask your kids these questions and see how they do:
What is the alum used for in the water filtration experiment? (a) to adjust the pH (b) to form floc (c) to float to the top (d) to purify the sample
What does the activated carbon do? (a) turns the cotton balls black (b) sinks the floc (c) adjusts the pH (d) adds to the filtering power of the cotton (e) none of the above (f) all of the above
Draw a sketch of your filter, labeling the different layers.
Did you notice how BIG these kites can get? And yes, that's me in the photo, at full size!
If you're looking for a kite that will lift you off your feet, THIS IS THE ONE! I'm going to show you how to build a smaller version first, so you get the hang of how it goes together.
Afterward, you can make a 6-foot, 9-foot, or 12-foot model. Just keep your proportions right and find strong, lightweight materials (bamboo is a popular choice, but watch the wall-thickness or it too can get heavy).
The photo here is the 9-foot tall version of this kite, which sports a 25-foot tail. To fly this, you'll need a lot of wind, so if you live near the beach, you might be able to get this up. Otherwise, you can try to get it airborne by doing what I used to do with mine - tie it to the bumper of your pickup truck and drive out in the country with about a mile of strong string!
The 6-foot versions in a strong wind will generate enough to lift small kids, so watch out (and get your camera).
If you can find balloon sticks (white plastic stiff tubes about 3 feet long), use them. They’re inexpensive, lightweight, and easy to work with. Otherwise, use wood dowels from a hardware store or 36” bamboo gardening stakes from a nursery.
[am4show have='p8;p9;p94;' guest_error='Guest error message' user_error='User error message' ]
Materials: Two 36" dowels or plastic balloon sticks, string, plastic garbage bags, crepe paper streamers, tape and scissors.
Make a lowercase T-shape with two sticks, crossing one stick one-third the way down from the top, and lash them together with string or tape.
Outline the diamond-shape by attaching thin string around the ends of the dowels clockwise. Use a garbage bag for the kite skin by trimming the plastic bag with an inch of excess outside the kite outline, fold the trimmed plastic over the kite string and tape it along the edge.
Attach crepe paper streamers for a tail. Then attach a bridle to the kite by tying one string to the top and bottom of the vertical dowel, and other string to both ends of the horizontal dowel. Tie the main kite string line (the one with attached to the spool) around both bridles. You’ll need to play with the string lengths to adjust the angle that the kite makes with the wind.
To make the large red kite in the photo above, simply make the diamond kite as described above, with these modifications:
Use 6 foot lengths of bamboo for a 6x6 foot kite or 9 foot lengths for a 9x9 foot kite. You can find these poles for the spars at your hardware store. Use rip-stop nylon from a fabric store for the skin and a sewing machine to attach the skin to the spars where you are instructed to use tape above.
Tip: Place the sewing machine in the center of the room as you will need space to maneuver the kite around the needle as you work. The tail for this large kite should be 25-40 feet long (start longer and sip as you go).
Instead of string, use nylon cord with a tensile strength of at least 500 pounds and tie the end onto the bumper of a truck—unless you want to be lifted off the ground! We have successfully made a 12 foot version of this kite, which requires about a mile of string takes hours to pull it in. If you love to fly, this is the ultimate project!
Objective Kids love going fast and blowing things skyward. This set of experiments should satisfy both needs. The goal is to not only provide them with a safe set of activities that will keep their eyebrows intact, but also to get them really excited about aerodynamics and rocket design by building projects that really work. Most rockets will require a certain amount of tweaking (like the Flying Machines experiments did) in order to fly straight. This is an excellent time to hone their observation skills and get them into the habit of changing and testing only one thing at a time.
We’re going to continue learning about pressure as we generate high pressure through both bicycle pumps as well as chemical reactions. The first thing to do is watch the video on the Rocketry website page, and then dive into the experiments.
Main Ideas While the kids are playing with the experiments see if you can get them to notice these important ideas. When they can explain these concepts back to you (in their own words or with demonstrations), you’ll know that they’ve mastered the lesson.
For every action, there is an equal and opposite reaction.
The position of the center of pressure relative to the center of gravity of a rocket determines how stable the flight will be.
About the Experiments The experiments in this section vary from small indoor flights to rockets that go over a football field in distance. All rockets move by a quick release in pressure. Once your rocket takes flight, take a clear look (or better, a video so you can watch it a few times over) at how it flies when it’s up there. By launching at an angle instead of straight up, you’ll get a better view… just be sure your launch area is clear.
Stability of Flight: A rocket has two key points (CP & CG, covered in the Flying Machinesexperiments) that you need to know in order to have stable flight. Here’s how you find and adjust them:
Finding the Center of Pressure: You can find center of pressure by tying a string around the rocket body and swinging it around your head. The balance point is your center of pressure. Mark the point as CP.
Finding the Center of Gravity: Balance your rocket on a pencil tip. Mark the point as CG. Note if this is forward or aft of your CP.
To adjust the CG/CP: It’s easier to adjust the CG – add weight to the nose or more fins to the tail section. Re-measure your CG when you’re done.
The How and Why Explanation Rockets shoot skyward with massive amounts of thrust, produced by chemical reaction or air pressure. Scientists create the thrust force by shoving a lot of gas (either air itself, or the gas left over from the combustion of a propellant) out small exit nozzles.
According to the universal laws of motion, for every action, there is equal and opposite reaction. If flames shoot out of the rocket downwards, the rocket itself will soar upwards. It’s the same thing if you blow up a balloon and let it go—the air inside the balloon goes to the left, and the balloon zips off to the right (at least, initially, until the balloon neck turns into a thrust-vectored nozzle, but don’t be concerned about that just now).
A rocket has a few parts different from an airplane. One of the main differences is the absence of wings. Rockets utilize fins, which help steer the rocket, while airplanes use wings to generate lift. Rocket fins are more like the rudder of an airplane than the wings.
Another difference is the how rockets get their speed. Airplanes generate thrust from a rotating blade, whereas rockets get their movement by squeezing down a high-energy gaseous flow and squeezing it out a tiny exit hole.
If you’ve ever used a garden hose, you already know how to make the water stream out faster by placing your thumb over the end of the hose. You’re decreasing the amount of area the water has to exit the hose, but there’s still the same amount of water flowing out, so the water compensates by increasing its velocity. This is the secret to converging rocket nozzles—squeeze the flow down and out a small exit hole to increase velocity.
The rockets we’re about to build get their thrust by generating enough pressure and releasing that pressure very quickly. You will generate pressure both by pumping and by chemical reaction, which generates gaseous products. Let’s get started!
Questions to Ask When you’ve worked through most of the experiments ask your kids these questions and see how they do:
If you inflate a balloon (don’t tie the end), which direction does the air in the balloon and the balloon itself travel? (a) both the same way (b) in opposite directions (c) nothing happens
When you drop an effervescent tablet into water, what happens? (a) bubbles foam up (b) it burps (c) carbon dioxide gas is released (d) it produces a chemical reaction that can propel a rocket skyward
Puff Rockets use which of the following propellants? (a) air pressure (b) chemical reactions (c) both (d) neither
The most dangerous parts of the Water Rocket experiment is are: (a) working with high pressure (b) that you’ve stripped out the threads that normally secure the cap in place, and now it’s easier to accidentally release the rocket and shoot someone’s eyeballs out (c) reusing the bottles over and over causes fissures and cracks to form in the bottle, increasing the chances of bursting if you don’t replace the bottle after every 7-10 launches (d) all of the above and more
The most important things to remember when launching water rockets are: (a) safety goggles or face shield (b) 70 psi maximum air pressure (c) always hold the valve-side down when holding the bottle (d) only use soda bottles that are build to hold pressure (e) never water bottles, juice bottles, sports drink bottles, or any others that don’t say pssssst! when you first open them
To get the multi-staging rockets to work correctly, where does the trigger need to be? (a) inside the first balloon (b) on the string (c) in the straw (d) squished between the first balloon and the cup
How does a Slingshot Rocket work? Where does the thrust come from?
If your Blow Gun Rocket straw rips loose, what can you do to quickly repair it without rebuilding the entire rocket?
Objective You’re going to do several experiments that change air pressure and mystify your kids. The goal is to set them thinking about how and why things fly (you’ll do this by learning about air pressure and Bernoulli’s law, but you don’t need to tell them that). The first thing to do is watch the video below and then dive into the experiments.
Main Ideas While the kids are playing with the experiments see if you can get them to notice these important ideas. When they can explain these concepts back to you (in their own words or with demonstrations), you’ll know that they’ve mastered the lesson.
Air pressure is all around us. Air pushes downward and creates pressure on all things.
Air pressure changes all the time.
Higher pressure always pushes.
The faster air travels over a surface, the less time it has to push down on that surface and create pressure. Fast moving air creates low pressure regions. (Bernoulli’s Law).
The four fundamental forces on an airplane are lift, weight, thrust, and drag.
About the Experiments There are a lot of experiments in this section that will hone your child’s observation skills. About half the experiments are on flying machines and the other half consist of air pressure demonstrations. When their airplane doesn’t work right, ask them what exactly it’s doing (or not doing), and then take a more careful look at how it’s constructed. Focus on watching what happens when you make small changes, and try to change only one thing at a time.
The How and Why Explanation There’s air surrounding us everywhere, all at the same pressure of 14.7 pounds per square inch (psi). You feel the same force on your skin whether you’re on the ceiling or the floor, under the bed or in the shower.
An interesting thing happens when you change a pocket of air pressure – things start to move. This difference in pressure causes movement that creates winds, tornadoes, airplanes to fly, and some of the experiments we’re about to do together.
An important thing to remember is that higher pressure always pushes stuff around. While lower pressure does not “pull,” we think of higher pressure as a “push”. The higher pressure inside a balloon pushes outward and keeps the balloon in a round shape.
Weird stuff happens with fast-moving air particles. When air moves quickly, it doesn’t have time to push on a nearby surface, such as an airplane wing. The air just zooms by, barely having time to touch the surface, so not much air weight gets put on the surface. Less weight means less force on the area. You can think of “pressure” as force on a given area or surface. Therefore, a less or lower pressure region occurs wherever there is fast air movement.
There’s a reason airplane wings are rounded on top and flat on the bottom. The rounded top wing surface makes the air rush by faster than if it were flat. When you put your thumb over the end of a gardening hose, the water comes out faster when you decrease the size of the opening. The same thing happens to the air above the wing: the wind rushing by the wing has less space now that the wing is curved, so it zips over the wing faster, and creates a lower pressure area than the air at the bottom of the wing.
The Wright brothers figured how to keep an airplane stable in flight by trying out a new idea, watching it carefully, and changing only one thing at a time to improve it. One of their biggest problems was finding a method for generating enough speed to get off the ground. They also took an airfoil (a fancy word for “airplane wing”), turned it sideways, and rotated it around quickly to produce the first real propeller that could generate an efficient amount of thrust to fly an aircraft. Before the Wright brothers perfected the airfoil, people had been using the same “screw” design created by Archimedes in 250 BC. This twist in the propeller was such a superior design that modern propellers are only 5% more efficient than those created a hundred years ago by the two brilliant Wright brothers.
Questions to Ask When you’ve worked through most of the experiments ask your kids these questions and see how they do:
Higher pressure does which? (a) pushes (b) pulls (c) decreases temperature (d) meows (e) causes winds, storms, and airplanes to fly
The tips on the edge of a paper airplane wing provide more lift by: (a) flapping a lot
(b) destroying wingtip vortices that kill lift (c) getting stuck in a tree more easily (d) decreasing speed
In the ping pong ball and funnel experiment, the ball stayed in the funnel was because: (a) you couldn’t blow hard enough (b) you glued it into the funnel (c) the ball had a hole in it (d) the fast blowing caused a low-pressure region around the ball, causing the surrounding atmospheric pressure to be a higher pressure, thus pushing the ball into the funnel
In the sneaky bottle experiment, which of the two bottles was the balloon able to inflate in? (a) the one with a hole (b) the one with no holes (c) the one the kid fit inside
If your plane takes a nose dive, you should try (a) changing the elevators by pinching the edges (b) change the dihedral angle (c) change how you throw it (d) all of the above
What are the four forces that act on every airplane in flight?
Draw a quick sketch of your plane viewed from the front with a positive dihedral.
Why does the index card stay in place when you invert the cup of water in the magic water glass trick?
When the balloon was squished into the jam jar with the snuffed candle, where was the higher pressure?
10. Why does the water stop streaming out of the bottle when you put the cap on in the streaming water experiment? Why does the water come out if you squeeze the capped bottle?
11. How can you make the fountain bottle shoot even higher?
12. If you were designing your own “Flying Paper Machine Kit”, what would be inside the box?
13. What’s the one thing you need to remember about higher pressure?
14. What keep an airplane from falling?
15. Where is the low pressure area on an airplane wing?
How many of these items do you already have? We’ve tried to keep it simple for you by making the majority of the items things most people have within reach (both physically and budget-wise).
You do not need to do ALL the experiments – just pick the ones you want to do! Look over the experiments and note which items are needed, and off you go!
Optional Materials: These rockets go a lot further, but also require adult help to create or are more expensive to build. Watch the video first before starting these projects!
razor blade
vice or vice grips
drill with ½” drill bit (spade bit is best)
air compressor and/or air tank
spray-nozzle for compressor/tank
3 foot piece of metal tubing that fits just inside the larger straws (listed above)
How many of these items do you already have? We’ve tried to keep it simple for you by making the majority of the items things most people have within reach (both physically and budget-wise).
You do not need to do ALL the experiments – just pick the ones you want to do! Look over the experiments and note which items are needed, and off you go!
This kite is sometimes referred to as a "Comet Kite", as it has a main head area and a loooong tail section. We recommend making the kite from lightweight garbage bags, as they tend to hold up better than tissue paper, and don't require sewing they way ripstop nylon material does.
Here's what you need to get: Wire coat hanger or thin plastic dowel, string, straw, plastic garbage bags, tape, and scissors.
Here's what you do: [am4show have='p8;p9;p94;' guest_error='Guest error message' user_error='User error message' ]
Bend a very thin wire coat hanger into a D-shape. Tape a covering of a trimmed plastic garbage bag for a kite skin. Along the straight side of the D, tape a ten-foot pieced-together section of garbage bag the same width as the D for the tail. Attach a bridle of string to the top and bottom of the coat hanger section, and add a main kite line to the bridle. This kite works best in an area with a lot of wind, such as the beach. Try making a larger version with a fifty foot tail!
How many of these items do you already have? We’ve tried to keep it simple for you by making the majority of the items things most people have within reach (both physically and budget-wise).
You do not need to do ALL the experiments – just pick the ones you want to do! Look over the experiments and note which items are needed, and off you go!
10 index cards (large enough to cover the mouth of the water glass)
3 empty soda cans
Empty glass jar
Empty 2-liter soda bottle
2 empty water bottles
12” flexible tubing (or use a flexible straw)
Matches with adult help
Test tube
2-liter soda bottle
Tools
Scissors
Tongs
Tape
Duct tape
Hair dryer
Stove with adult help
Optional
The projects that require these items are either more expensive or harder to build and require adult help. Watch the videos before shopping for these items!
Every flying thing, whether it's an airplane, spacecraft, soccer ball, or flying kid, experiences four aerodynamic forces: lift, weight, thrust, and drag. An airplane uses a propeller or jet engine to generate thrust. The wings create lift. The smooth, pencil-thin shape minimizes drag. And the molecules that make up the airplane attribute to the weight.
Think of a time when you were riding in a fast-moving car. Imagine rolling down the window and sticking out your hand, palm down. The wind slips over your hand. Suppose you turn your palm to face the horizon. In which position do you think you would feel more force against your hand?
When designing airplanes, engineers pay attention to details, such as the position of two important points: the center of gravity and the center of pressure (also called the center of lift). On an airplane, if the center of gravity and center of pressure points are reversed, the aircraft’s flight is unstable and it will somersault into chaos. The same is true for rockets and missiles!
How to Build an Airplane
Materials: balsa wood flyer
This video shows how to use a balsa airplane to show what all the parts (rudder, wings, elevator, fuselage) are for. You can pick one up for a few dollars, usually at a toy store, or make your own (see second video below).
As you blow into the funnel, the air under the ball moves faster than the other air surrounding the ball, which generates an area of lower air pressure. The pressure under the ball is therefore lower than the surrounding air which is, by comparison, at a higher pressure. This higher pressure pushes the ball back into the funnel, no matter how hard you blow or which way you hold the funnel. The harder you blow, the more stuck the ball becomes. Cool.
Insert a ping pong ball into a funnel. Place the stem of the funnel between your lips and tilt your head back so ball stays inside. Blow a strong, long stream of air into the funnel.
Objective You’re going to build on the Flying Machines concepts by building larger airfoils called Kites. The goal is to get them even more excited about fluid mechanics and aerodynamics by building projects that really fly. We’re going to continue learning about air pressure and Bernoulli’s law through the different kite designs. The first thing to do is watch the video on the Kites website page, and then dive into the experiments.
Main Ideas While the kids are playing with the experiments see if you can get them to notice these important ideas. When they can explain these concepts back to you (in their own words or with demonstrations), you’ll know that they’ve mastered the lesson.
Higher pressure always pushes.
The faster air travels over a surface, the less time it has to push down on that surface and create pressure. Fast moving air creates low pressure regions. (Bernoulli’s Law).
The four fundamental forces on a kite are lift, weight, thrust, and drag. (The thrust is the pull on the string, and the lift occurs when wind flows over the top and bottom of the kite.)
About the Experiments The experiments in this section will take more time to put together, as you are building several different kite designs, including the box kite, the dragon, the diamond, and the rotor kite. If your kite doesn’t take off immediately, ask your child how it doesn’t work… did the nose tip over, did it spin, flip, or just tumble? Asking better questions is one of the key ingredients to making a great a scientist. Focus on watching what happens when you make small changes, and try to change only one thing at a time.
Before flight, hold your kite where the main line attaches to the bridle (the part that attaches to the string spool). Adjust the strings so that the kite hangs about 30 degrees into the wind. Use your fingers on the bridle on a windy day to find the “magic spot” or the place where your kite picks right up and flies best.
Moving the bridle forward makes the kite fly higher in smooth winds and moving it backward helps it fly in gusty winds. If your kite fails to rise, try a windier spot or a shorter tail. If it flies then quickly crashes, you may need to shorten your bridle or change the angle. If your kite spins around and around while flying, add more tail length.
The How and Why Explanation Kites are airplanes on a string. They use both high and low pressure to gain altitude and soar skyward. Not all kites need tails—the tail section helps stabilize an otherwise unstable kite design by adding a bit of weight near the bottom. While kites need to be lightweight, the framework needs to be strong, as they can withstand winds greater than 70 mph at higher altitudes.
To launch a kite, you can start with it on the ground and simply start running, hold it in your hands and toss it behind you as you run, or have someone hold it for you and toss it up as you start to run with the string. The best launch method depends on the kind of kite you’re working with. For example, the Bat Kite just needs to be tossed into the air with a kid running in front of it, while the rotor kite is going to require a windy day or a bicycle.
Questions to Ask When you’ve worked through most of the experiments ask your kids these questions and see how they do:
1. Kites need string so: (a) they don’t get lost (b) to hold them at the correct angle to the wind (c) so you can pull the kite in when you’re done (d) all the above
2. Kites can be in the shape of which ones? (a) box (b) pyramid (c) diamond (d) hippos
3. Which part of the kite is the most adjustable? (a) the kite skin (b) the tail (c) the bridle (d) the frame
4. Which kite is collapsible and easy to carry? (a) sled (b) dragon (c) bat (d) rotor (e) tetrahedral (f) diamond
5. If your kite crashes to the ground, what two things can you try changing?
6. How do you get your kite to spin in circles?
7. How much wind does the Rotor kite need? (a) a day at the beach could work (b) zero (c) winds like a hurricane (d) running ought to do it
8. What do you do if your kite doesn’t lift off the ground? (a) run faster (b) find a windier spot (c) let go of the kite (d) stop stepping on it (e) all of the above
9. Where is the higher pressure area on the kite during flight? (a) the topside (b) the underside (c) the tail (d) nowhere
10. What is the frame for on a kite? (a) to keep the kite in the right shape (b) to provide weight in the right places (c) so it can break (d) so you have something to attach the bridle to
11. Which kite works with the least amount of wind?
Objective You will learn about light waves and optics in this Laser Lab. Kids will play with their lasers and see what happens when they shine it on and through different objects.
Laser Safety Before we start our laser experiments, you’ll need eye protection – tinted UV ski goggles are great to use, as are large-framed sunglasses, but understand that these methods of eye protection will not protect your eyes from a direct beam. They are intended as a general safety precaution against laser beam scatter. (If you’re using a Class I or II laser, you don’t need to wear the goggles – but it is a good habit to get the kids into, so it’s up to you.)
About the Experiment This lab is an excellent opportunity for kids to practice asking better questions. Don’t worry too much about academics at this point – just give them a box of materials and let them figure these things out on their own. One of the neat things you can do is ask the kids some questions about what they are doing.
For example, when they shine their laser on a window, you’ll see part of the beam pass through while another part gets reflected back… now why is that? And why does the CD produce so many different reflections? Sometimes these reflections are hard to find actually seeing the beam itself. While red lasers are impossible to see with the naked eye, you can make your beam visible by doing your experiments in a steamy dark bathroom (after a hot shower).
The How and Why The word “LASER” stands for Light Amplification by Stimulated Emission of Radiation. A laser is an optical light source that emits a concentrated beam of photons. Lasers are usually monochromatic – the light that shoots out is usually one wavelength and color, and is in a narrow beam.
By contrast, light from a regular incandescent light bulb covers the entire spectrum as well as scatters all over the room. (Which is good, because could you light up a room with a narrow beam of light?)
There are about a hundred different types of atoms in the entire universe, and they are always vibrating, moving, and rotating. When you add energy to an atom, it vibrates faster and moves around a lot more. When the atoms relax back down to their “normal” state, they emit a photon (a light particle). A laser controls the way energized atoms release photons.
Imagine kids zooming all over the playground, a mixture of joy and chaos. Light from an incandescent light bulb works the same way – the bulb emits high energy photons that bounce all over the place. Can you round up the kids and get them to jumping in unison? Sure you can – just hit the play button on a song, and they’ll be clapping and stamping together. You can do the same with light – when you focus the energy into a narrow beam, it’s much more powerful than having it scattered all over the place. That’s just what a laser is – a high-energy, highly-focused beam of light.
Questions to Ask When you’ve worked through most of the experiments ask your kids these questions and see how they do:
What does LASER stand for?
How is a laser different from an incandescent bulb?
If you don't have access to an air compressor or air tank with a spray-nozzle, you can either make your own rocket launcher (watch second video below), or make the blow-gun rockets. Either way, you're going to be launching sky-high in no time!
Materials:
Two straws each in two different sizes
two sheets
index cards
scissors
tape
hot glue gun
air compressor or air tank with spray-nozzle
metal tubing that fits just inside the larger straws
Make a very long straw by joining two straws with tape. Roll an 8½x11-inch sheet of paper into a long tube and tape it shut. Cut triangle fins out of the index card and hot glue to the base end of the rocket.
Construction Tip: Younger kids can roll the paper around a dowel to help.
To make the nosecone, cut a circle out of paper. You can trace the inner diameter of masking tape roll to get a good circle. To make a flat circle into a 3D cone, begin to cut the circle in half, but stop cutting when you get to the center. Slide one flap over the other to form a nose for your rocket and tape it shut. Pile a lot of glue inside the cone insert the long straw and wait to for it to dry. Slip the straw inside the tube and seal the nosecone to the rocket body.
When dry, blow into your straw to check for leaks. It should be impossible to blow through. If you have a leak, go back and fix it now. Otherwise, slip a metal tube slightly larger than the straw over the straw and blow hard. Tip: Check a hardware store for the metal tube.
What’s going on? This rocket uses air pressure to launch itself skyward. When you blow hard, you create a higher pressure region behind the rocket. Higher pressure always pushes, so off it goes!
If you have an air tank or compressor handy, the nozzle from it to blast these rockets hundred of feet in the air! Check out the video below for making your own rocket launcher that uses a bicycle pump!
Repair Tip: If your straws come loose, simply cut the rocket body just below the nosecone and rebuild the straw-cone assembly, fastening it in place when dry.
Materials & Tools:
drill & bits
red hot blue glue
gloves
respirator (for gluing session)
PVC pipe cutter (adults only!)
wire strippers
soldering equipment
measuring tape
teflon tape
marker
car tire valve
vice grips
wire
9V battery with clip
momentary ON switch
car tire valve
3/4″ threaded sprinkler valve (in-line)
3/16″ brass tubing
1/2″ screw top cap
1-1/4" SCH40 PVC pipe pieces:
3 pieces 16" long
2 pieces 6-1/2" long
1 piece 3" long
1-1/4" SCH40 PVC pipe pieces:
3 pieces 16" long
2 pieces 6-1/2" long
1 piece 3" long
1-1/4" Fittings:
Four 90 deg elbows, slip fit
1 cross
1 end cap, slip fit
1" SCH40 PVC pipe pieces & fittings:
One 1" pipe 5" long
2 slip caps (1" dia)
One 3" pipe 3" long
1/2" SCH40 PVC pipe pieces:
1 piece 12" long
More fittings:
1/2" adapter (female slip on one end, threaded male on the other)
One threaded 1/2 cap
1" female slip fit to 3/4" threaded male adapter
1-1/4" to 1" slip fit adapter
1/2" female slip fit to 3/4" threaded male adapter
How many of these items do you already have? We’ve tried to keep it simple for you by making the majority of the items things most people have within reach (both physically and budget-wise).
You do not need to do ALL the experiments – just pick the ones you want to do! Look over the experiments and note which items are needed, and off you go!
At the opening of the glass. The water inside the glass weighs a pound at best, and, depending on the size of the opening of the glass, the air pressure is exerting 15-30 pounds upward on the bottom of the card. Guess who wins? Tip, when you get good at this experiment, try doing it over a friend’s head!
Materials: a glass, and an index card large enough to completely cover the mouth of the glass.
Fill a glass one-third with water. Cover the mouth with an index card and over a sink invert the glass while holding the card in place. Remove your hand from the card. Voila! Because atmospheric air pressure is pushing on all sides of both the glass and the card, the card defies gravity and “sticks” to the bottom of the glass. Recall that higher pressure pushes and when you have a difference in pressure, things move. This same pressure difference causes storms, winds, and the index card to stay in place.
About 400 years ago, Leonardo da Vinci wanted to fly… so he studied the only flying things around at that time: birds and insects. Then he did what any normal kid would do—he drew pictures of flying machines!
Centuries later, a toy company found his drawing for an ornithopter, a machine that flew by flapping its wings (unlike an airplane, which has non-moving wings). The problem (and secret to the toy’s popularity) was that with its wing-flapping design, the ornithopter could not be steered and was unpredictable: It zoomed, dipped, rolled, and looped through the sky. Sick bags, anyone?
Hot air balloons that took people into the air first lifted off the ground in the 1780s, shortly after Leonardo da Vinci’s plans for the ornithopter took flight. While limited seating and steering were still major problems to overcome, let’s get a feeling for what our scientific forefathers experienced as we make a balloon that can soar high into the morning sky.
Materials: A lightweight plastic garbage bag, duct or masking tape, a hand-held hair dryer. And a COLD morning.
Shake out a garbage bag to its maximum capacity. Using duct or masking tape, reduce the opening until it is almost-closed leaving only a small hole the size of the hair dryer nozzle. Use the hair dryer to inflate the bag, heating the air inside, but make sure you don’t melt the bag! When the air is at its warmest, release your hold on the bag while at the same time you switch off the hair dryer. The bag should float upwards and stay there for a while.
Troubleshooting: This experiment works best on cold, windless mornings. If it’s windy outside, try a cool room. The greater the temperature difference between the hot air inside the garbage bag versus the cold, still air, the faster the bag rises. The only other thing to watch for is that you’ve taped the mouth of the garbage bag securely so the hot air doesn’t seep out. Be sure the opening you leave is only the diameter of your hair dryer’s nozzle.
Lots of science toy companies will sell you this experiment, but why not make your own? You’ll need to find a loooooong bag, which is why we recommend a diaper genie. A diaper genie is a 25′ long plastic bag, only both ends are open so it’s more like a tube. You can get three 8-foot bags out of one pack.
Kids have a tendency to shove the bag right up to their face and blow, cutting off the air flow from the surrounding air into the bag. When they figure out this experiment and perform it correctly, this is one of those oooh-ahhh experiments that will leave your kids with eyes as big as dinner plates.
Cut an eight-foot section of the diaper genie bag and knot one of the ends. Hold the other end open, take a deep breath, and blow. How many breaths does it take for you to fill up the entire bag with air? Try this now…
After you know how many breaths it takes, do you think you can fill the bag with only ONE breath? The answer is YES! Hold the bag about eight inches from the face and blow long and steady into the bag. As soon as you run out of air, close the end of the bag and slide your hand along the length (toward the knotted end) until you have an inflated blimp.
Troubleshooting: If the bag tears open, use packing tape to mend it.
What’s going on? When you blow air past your lips, a pocket of lower air pressure forms in front of your face. The stronger you blow, the lower the air pressure pocket. The air surrounding this lower pressure region is now at a higher pressure than the surrounding air, which causes things to shift and move. When you blow into the bag (keeping the bag a few inches from your face), you build a lower pressure area at the mouth of the bag, and the surrounding air rushes forward and into the bag.
Substitution Tip: If you can’t locate a diaper genie, you can string together plastic sheets from garbage bags, using lightweight tape to secure the seams. You’ll need to make a 8-12” diameter by eight-foot long tube and close one end. When kids get their eight-foot bag inflated in just one breath, ask them: “Did you really have that much air in your lungs?”
Objective You’re going to take a deeper look at the atom by stripping off part of it called the electron and messing around with it to make things move, stick, jump, and have bad hairdos. This is an excellent time to hone their observation skills and get them into the habit of changing and testing only one thing at a time.
Main Ideas While the kids are playing with the experiments see if you can get them to notice these important ideas. When they can explain these concepts back to you (in their own words or with demonstrations), you’ll know that they’ve mastered the lesson.
Opposite charges attract, like charges repel.
Electrons cannot be seen, but they are very small particles that are easy to move around.
About the Experiments The experiments in this section are mostly the same ones found in Unit 10, for two reasons. First, these are the activities we do when we teach Science Camp Workshops during the summer, and we’ve added live video from these workshops so you can see us in action. Second, have you seen how massive Unit 10 is? We took the feedback we received to heart and now we’ve made Unit 10 a lot more doable by chunking the experiments down into three main categories and minimized the academics so you can focus on getting your kids excited just by doing the coolest experiments from the section.
Electricity experiments can be frustrating because unlike other activities, you can’t tell where you’re going wrong if the circuit doesn’t work. Here are the things we test for when troubleshooting a circuit with the students:
Are the batteries in right? (Flat side goes to the spring.)
Is the connection between the alligator clip and the wire a metal-to-metal connection? (Often kids will clip the alligator clip onto the plastic insulation.)
If it’s an LED that you’re trying to light up, remember that those are picky about which way you hook up the plus and minus (red and black). Switch the wires if you’re having trouble.
Change out the wires. Sometimes the wire can break inside – it can get disconnected from the alligator clip inside the plastic insulation, but you can’t see it. When it doubt, swap out your wires.
The How and Why Explanation Blow up a balloon. If you rub a balloon on your head, the balloon is now filled up with extra electrons, and now has a negative charge. Your head now has a positive charge because your head was electrically balanced (same number of positive and negative charges) until the balloon stole your negative electrons, leaving you with an unbalanced positive charge. When you put the balloon close to your head, notice how your hair reaches out for the balloon. Your hair is positive, the balloon is negative, and you can see how they are attracted to each other!
Your hair stands up when you rub it with a balloon because your head is now positively charged, and all those plus charges don’t like each other (repel). They are trying to get as far away from each other as possible, so they spread far apart.
The triboelectric series is a list that ranks different materials according to how they lose or gain electrons. Near the top of the list are materials that take on a positive charge, such as air, human skin, glass, rabbit fur, human hair, wool, silk, and aluminum. Near the bottom of the list are materials that take on a negative charge, such as amber, rubber balloons, copper, brass, gold, cellophane tape, Teflon, and silicone rubber.
When you rub a glass rod with silk, the glass takes on a positive charge and the silk holds the negative charge. When you rub your head with a balloon, the hair takes on a positive charge and the balloon takes on a negative charge.
When you scuff along the carpet in socks, you gather up an electric charge in your body. That charge was static until you zapped someone else. The movement of electric charge is called electric current. When electric current passes through a material, it does it by electrical conduction. There are different kinds of conduction, such as metallic conduction, where electrons flow through a conductor (like metal) and electrolysis, where charged atoms (called ions) flow through liquids.
An electrical circuit is like a NASCAR raceway. The electrons (race cars) zip around the race loop (wire circuit) super-fast to make stuff happen. Although you can’t see the electrons zipping around the circuit, you can see the effects: lighting up LEDs, sounding buzzers, clicking relays, etc.
There are many different electrical components that make the electrons react in different ways, such as resistors (limit current), capacitors (collect a charge), transistors (gate for electrons), relays (electricity itself activates a switch), diodes (one-way street for electrons), solenoids (electrical magnet), switches (stoplight for electrons), and more. We’re going to use a combination diode-light-bulb (LED), buzzers, and motors in our circuits right now.
A CIRCUIT looks like a CIRCLE. When you connect the batteries to the LED with wire and make a circle, the LED lights up. If you break open the circle, electricity (current) doesn’t flow and the LED turns dark. LED stands for “Light Emitting Diode”. Diodes are one-way streets for electricity – they allow electrons to flow one way but not the other.
Let’s get started building circuits!
Questions to Ask When you’ve worked through most of the experiments ask your kids these questions and see how they do:
Why does the hair stick to the balloon? Does the shape of the balloon matter? Does hair color matter? Hair texture? How much goop you have in your hair?
What other things does the balloon stick to?
What happens when you bring the balloon close to a pile of confetti?
Why do you think the ping pong ball moved? Are there other objects you can try instead of the ping pong ball?
Why does the water wiggle and move when you bring the balloon close to it? What if you bring the balloon close to a pan full of water?
Are you able to make the yardstick rotate all the way around in a full circle?
Can we see electrons? What charge does the electron have?
We didn't include this particular experiment in our shopping list, as the tube's kind of expensive and can only be used for one particular experiment, BUT it's an incredible blast to do in the summer.
Here's the main idea - an incredibly loooooong and super-lightweight black plastic garbage bag is filled with air and allowed to heat itself in the sun. In a few short minutes, the entire 60-foot tube tube rises into the air. Before you try this experiment, try the Hot Air Balloon first!
Your kids will actually get to see several science principles in action, including: hot air is less dense than cool air (when the balloon rises); black objects heat up faster (when the air heats up inside); gases expand when heated (you'll see the bag self-inflate as it heats up).
Here's what you do:
1. In the morning during summer, when there's no wind and it's still cool, stretch your tube out flat in the shade. If it's already hot, fill the tube indoors with a fan. It's the temperature difference that will make this bag rise. If the temperature of the air inside the tube is nearly the same as the outside air, then it will simply remain on the ground.
2. Open one end of the tube and (with a few friends to help you), walk (or run) to fill it full of air, and tie off the end when it's full. It may still be a bit baggy in some places - don't worry - it will fill itself out when it heats up.
3. Tie off a length of lightweight string (like kite string) to one end. This will make sure you can get your tube back!
4. Bring it into the sun and watch it slowly rise of the ground.
NOTE: Kids can get a bit overexcited when they do this experiment, so watch they don't puncture the bag. You can seal it back up with a thick strip of lightweight packing tape if needed.
DO NOT let the solar tube rise without the string. If it gets loose at higher altitudes, it's a serious threat to airplanes.
This is another favorite of mine - you can fold this one in under two minutes. Make sure you tweak your airplane to get it to fly just the way you want.
Why can this thing fly? It doesn’t even LOOK like a plane! When I teach at the university, this is the plane that mathematically isn’t supposed to be able to fly! There are endless variations to this project—you can change the number of loops and the size of loops, you can tape two of these together, or you can make a whole pyramid of them. Just be sure to have fun!
This experiment is one of my favorites to use when teaching university-level fluid mechanics, because it is quite a complex task to demonstrate and analyze the aerodynamic lift. The easiest explanation is that lift is generated by the rotation of the cups. How and why the vortex generates lift is much more complex, but remember that as the air velocity increases, the pressure decreases. And remember... higher pressure regions always push.
[am4show have='p8;p9;p93;' guest_error='Guest error message' user_error='User error message' ]
Materials: Two paper cups, 5 to 7 rubber bands, and tape.
Here's what you do:
1. Tape two paper cups together, bottom-to-bottom.
2. Chain together six rubber bands.
3. Loop one end of the rubber band chain over your thumb and hold your arm out horizontally straight, palm up. Drape the remainder of the chain along your arm.
4. Place the taped cups at the free end of the rubber band chain near your shoulder and slowly wind the rubber bands around the middle section of the cups. When you wind near the end, stop, stretch the chain back toward your elbow, make sure the rubber band comes from the underside of the cups.
5. Now release the cups. The cups should rotate quickly and take air, then gracefully descend down for a light landing.
You can try further experiments with your butterfly cups: Try reversing the rotation direction, spin the cups in a cloud of fog or smoke while your video-tape their flight, performing the same experiment underwater (add small particles to the water so you can see the lines of flow!), change the size of the cups, and change the number of cups.
Build your own paper version of a soaring, looping flying machine, much like the one DaVinci dreamed of. You can either hold this by the keep (the folded part on the bottom) and throw like a jet, or hold onto the very edge at the back and simply let go from a tall height. Either way, it'll still fly.
This is one of the fastest plane designs we've come across. Slick, swift, and strong, you'll need a hefty throw to break our record of 127 feet. If you do, let us know so we can celebrate with you!
This super-fast dart flyer requires only a sheet of paper and three patient minutes. Take the challenge and dig out a stopwatch and tape measure to record your best "time aloft" and "distance traveled". I usually write mine right onto the wing itself (on the underside).
In fact, each time it flies well, I'll take a measurement and so pretty soon my plane has a data table under the wing. This way, I know which plane to choose in a race!
A classic that we just had to toss into the mix. The best thing about this plane it that it shows you how to fold an airplane without using tape. Notice how the wings of this airplane are different than the stunt plane designs - the swept back design mimics those used on fighter planes from the Air Force.
The trick to any paper airplane, be it a dart, stunt, or glider, is in the tweaking. In order to turn a disappointing nose-diver into a stellar barrel-roller, you’ll need to pay close attention to your dihedral angle (angle the wings make with the horizon) and elevator angle (pinching up or down to the tail section).
• Throw your airplane. Notice if you threw it hard, medium, or easy. Try modifying the throw to see which one works better for this particular airplane design. Stunt planes tend to work better with an easy throw and jets zoom with a fast throw.
• Now make the wing dihedral neutral (level with the horizon). Pinch up on the elevators a tiny bit and give it another like the throw that worked best last time.
• If the plane nose dives sharply, give it more of a pinch up on the elevators. If it nosed up first, then pitched down and crashed, you’ve got too much ‘up elevator’ in the back. What happens when you pinch one elevator up and one down?
• If the airplane still won’t fly correctly, then check your symmetry. Are your wings exactly the same size and shape? When you fold your airplane, do the wings sit right on top of each other? Most airplanes don’t like being asymmetrical, and it’ll show up when you try to fly.
Did you know that the Wright brothers figured out one of the biggest leaps in propeller technology? Prop blades had basically stayed the same for about 2,500 years until they figured out to take an airplane wing, turn it sideways and rotate it to create thrust. The main idea being a wing is that it needs to have a half-twist and the thickness needs to vary along its length (this is because you want to get the same amount of thrust at each point along its length, or one part of the propeller will generate more thrust and rip itself apart).
[am4show have='p8;p9;p93;' guest_error='Guest error message' user_error='User error message' ]
This project is pretty bullet-proof—to fly the helicopters, all you need to do is drop them!
We're going to make spinning, flying fish! All you need is a strip of paper and a pair of scissors to make these. If you 're like me, you'll make a whole grocery-bag full of a rainbow assortment and drop them from the upstairs railing - it's quite a show!
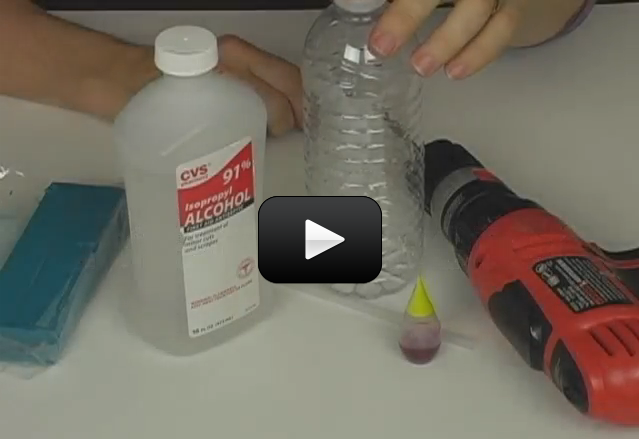
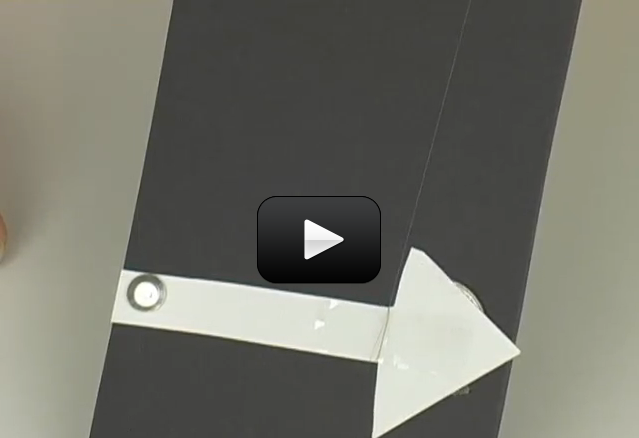
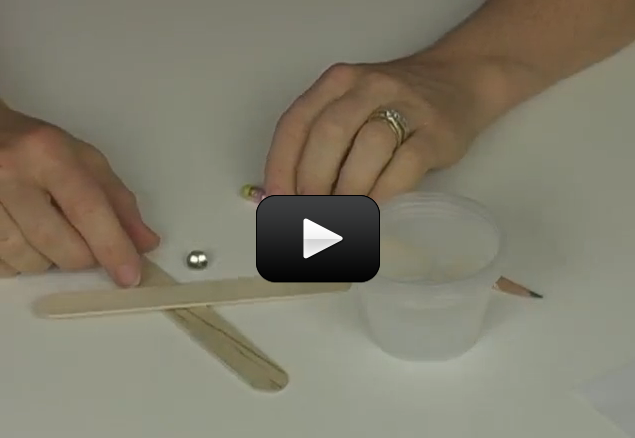
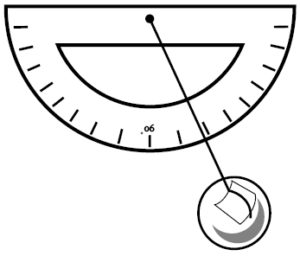
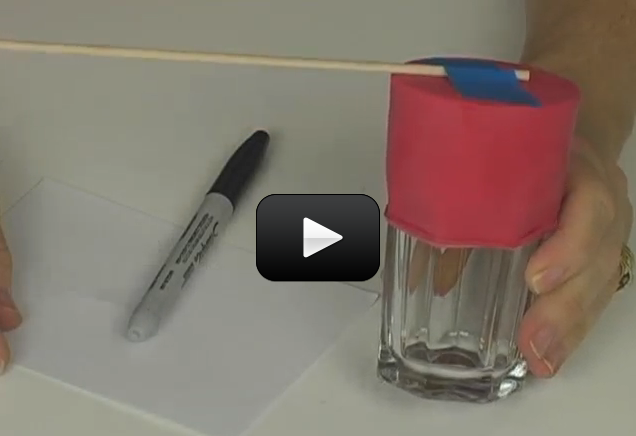

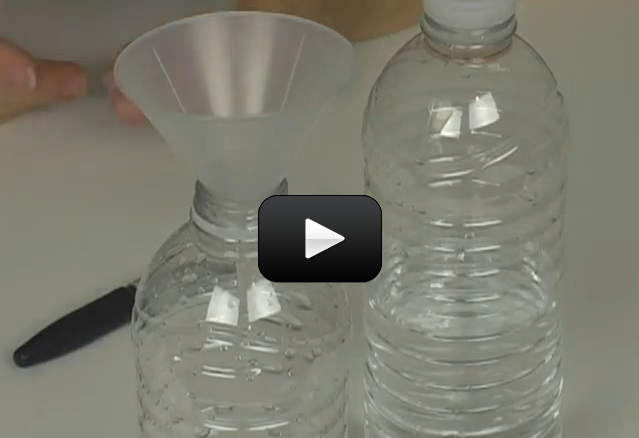
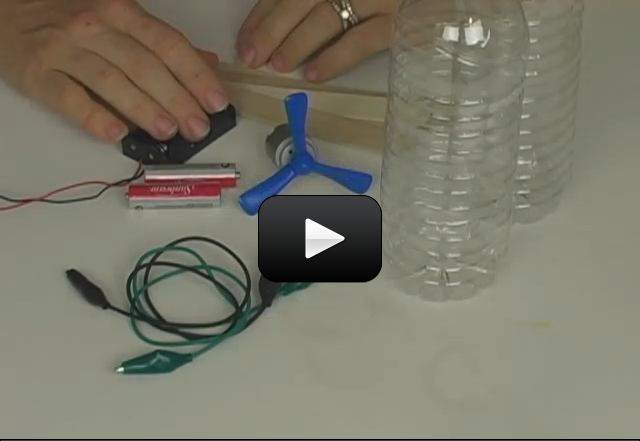

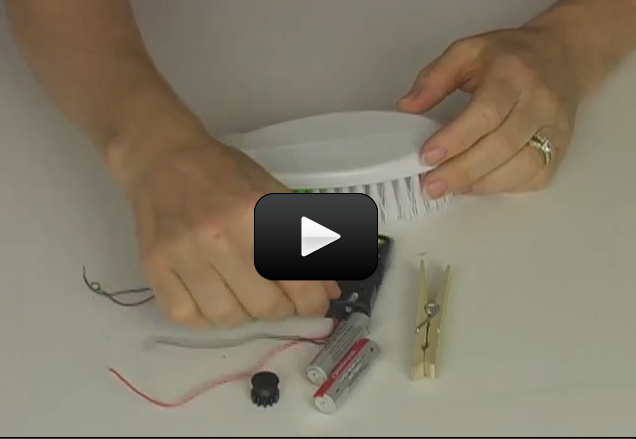
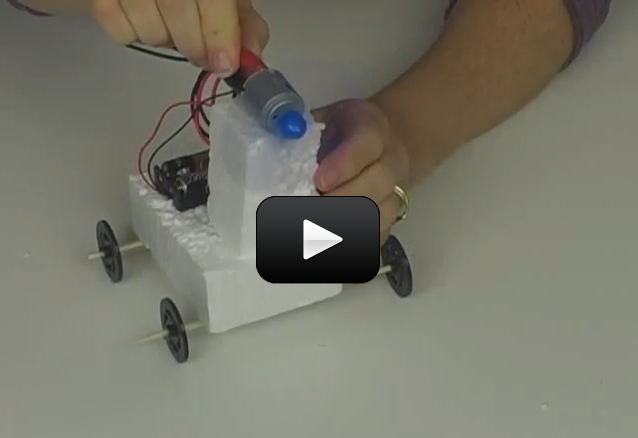
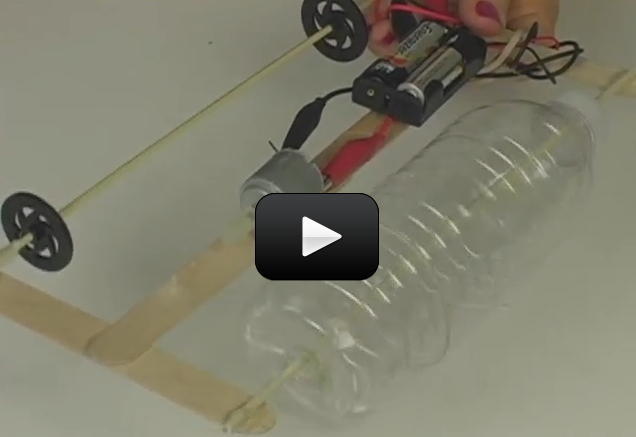
 The image here is the 2003 Gibbs Aqauda at full speed in deep water! It looks like it’s just skipping along the surface, doesn’t it?
 The Aquada car uses a 160 hp engine for land and a compact jet that produces 2,000 pounds of thrust. It broke the record for crossing the English Channel by four whole hours (third image below with the orange boat in the background).
 We’re going to build our own model, though not with a jet engine. We’re going to use a motor, wheels, floats, and wires to build a real working model you can use in the tub tonight. Our model is also going to have a transmission that will enable you to get two different speeds using very simple materials. Are you ready? Here’s what you need to do:
 Click here for a printer-friendly version of this page.
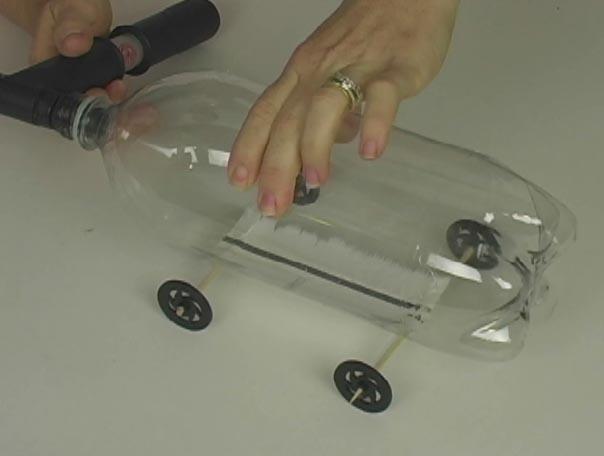
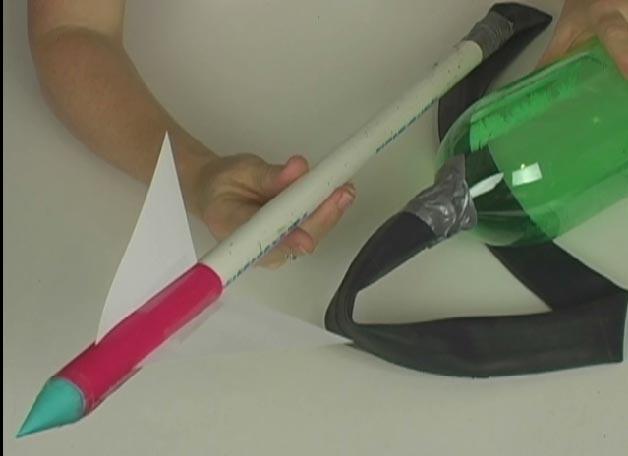


 This project is for advanced students. Make sure you’ve completed the
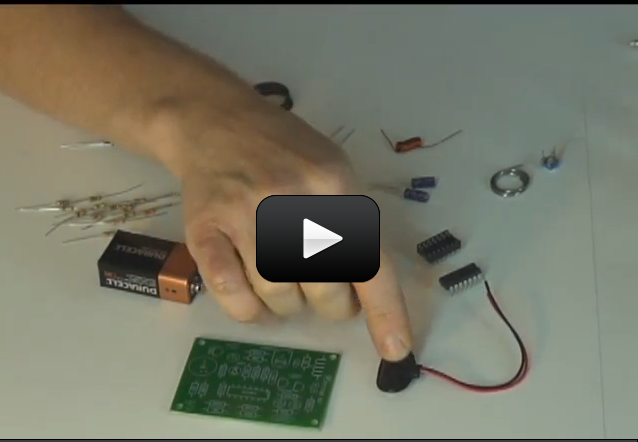
 This project is for advanced students. Make sure you’ve completed the
 Did you know you can create a compound microscope and a refractor telescope using the same materials? It’s all in how you use them to bend the light. These two experiments cover the fundamental basics of how two double-convex lenses can be used to make objects appear larger when right up close or farther away.
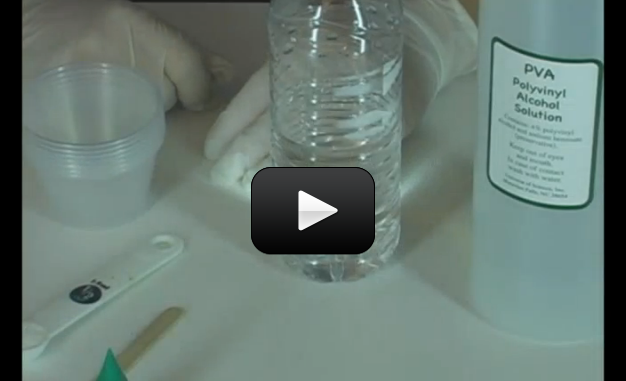
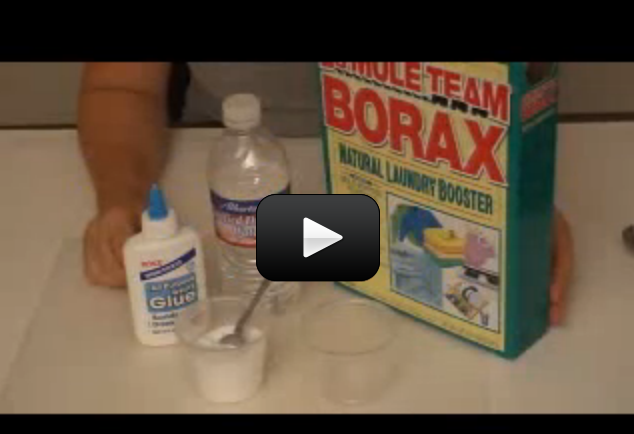
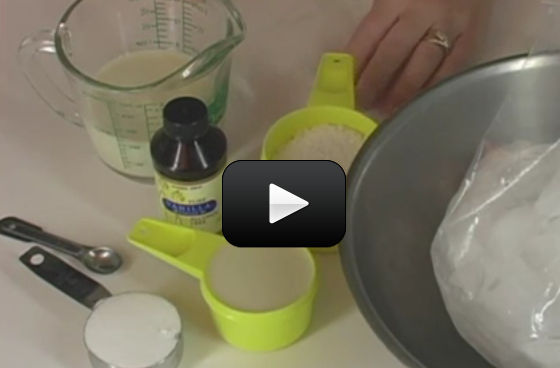
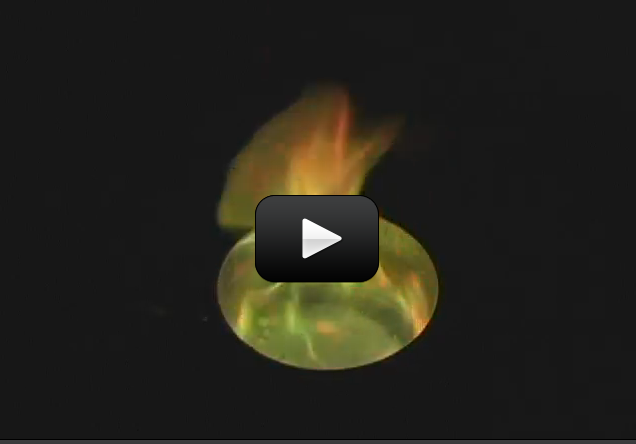


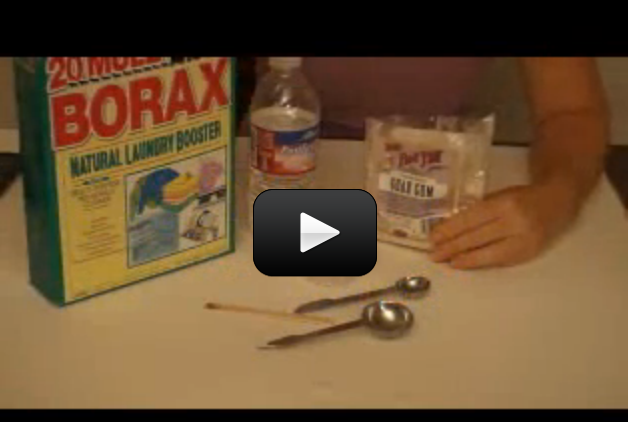

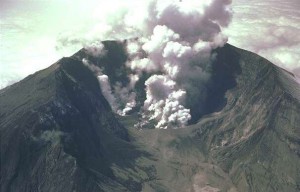
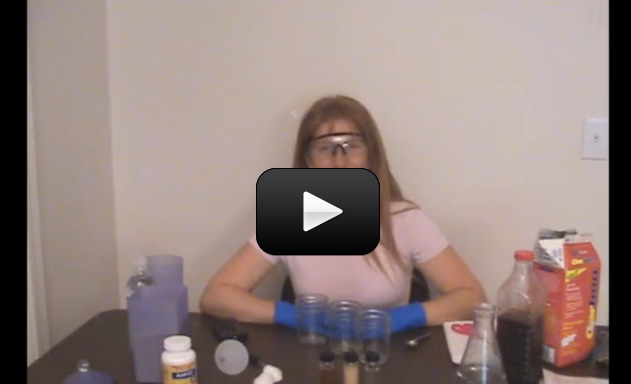
 Did you know you can see the moons of Jupiter and Saturn with only a pair of binoculars? During the summer, there’s really nothing better than star gazing with a pair of binoculars with your kids, and I’m going to help you hit the highlights, even if you don’t know an atom from an angström. I’ve put together a list of my favorite picks from the northern hemisphere’s summer sky. So get out your binoculars, pop the popcorn, and spend time outdoors with your kids.
 If you’re viewing the full moon, one of the easiest things to find are the Apollo Landing sites. First, you’ll need a map:


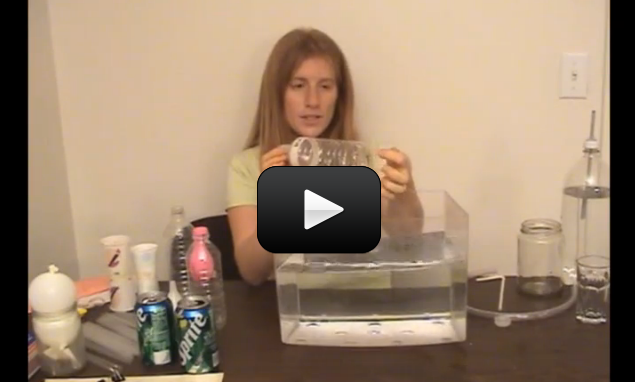

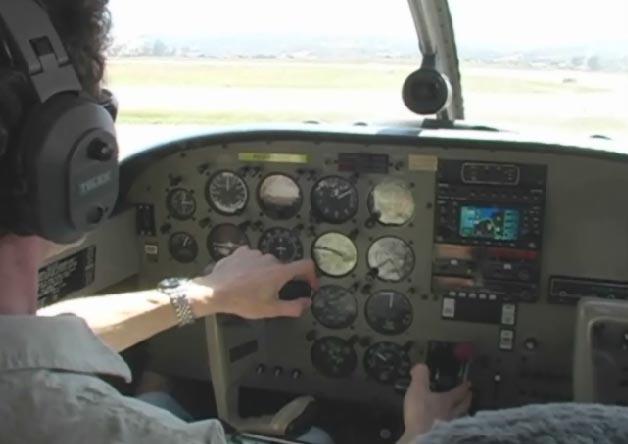


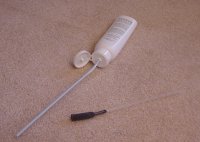
 Objective You’re going to be using your circuits together with a frame to build a set of real, working robots. We’re going to spend most of our time learning how to get the electrical components to work together, and not very much time on how they individually work. For example, we’re not going to talk about how a motor transforms electricity into a spinning motion, but rather how to wire up a set of motors to make a robot move forward and reverse. It’s more important to learn how these elements work. (The details concerning why they work comes a bit later down the line.)


 Click here for a printer-friendly version of this page.
 Click here for a printer-friendly version of this page.


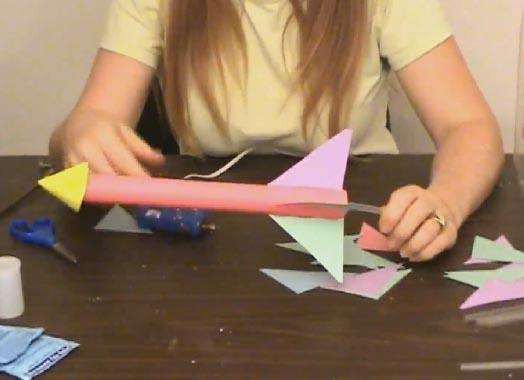
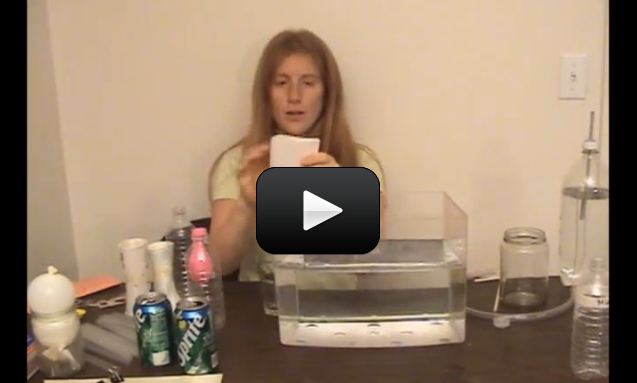


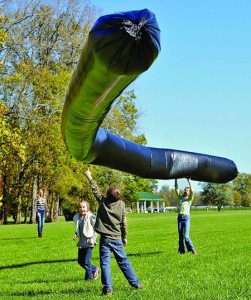 We didn't include this particular experiment in our shopping list, as the tube's kind of expensive and can only be used for one particular experiment, BUT it's an incredible blast to do in the summer.
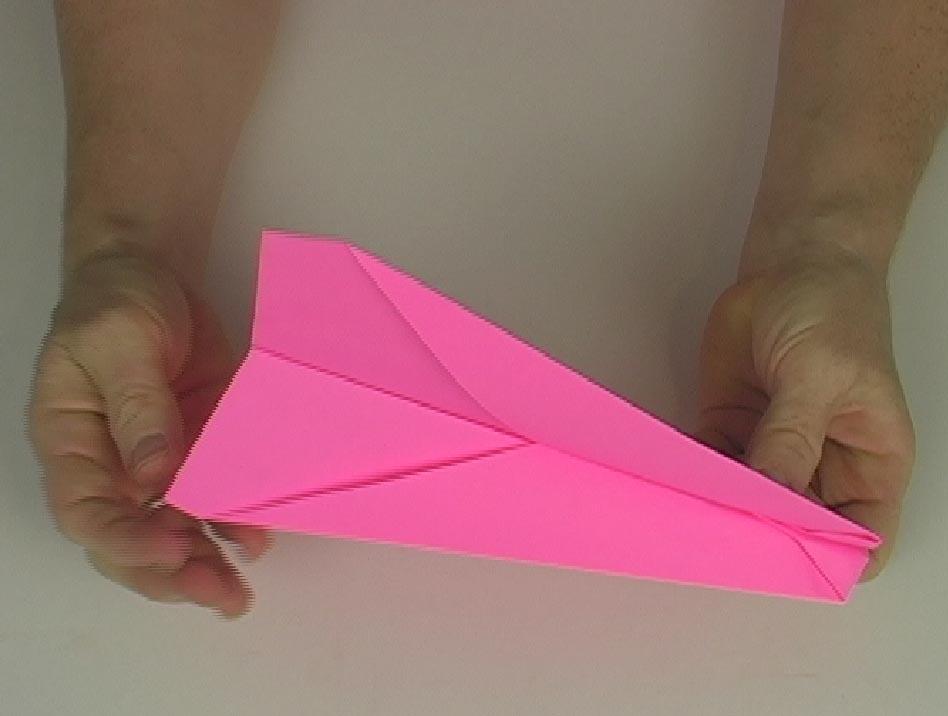

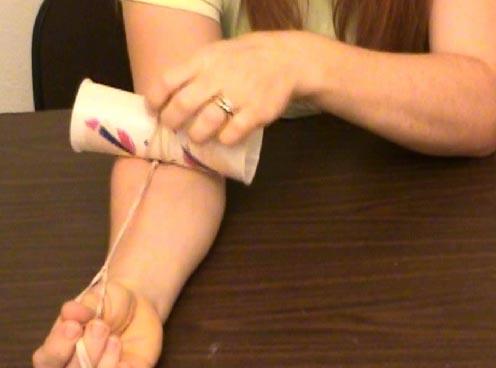

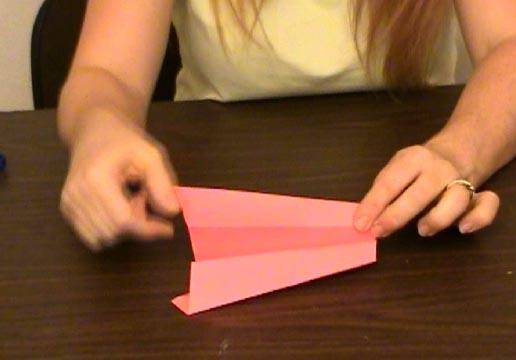
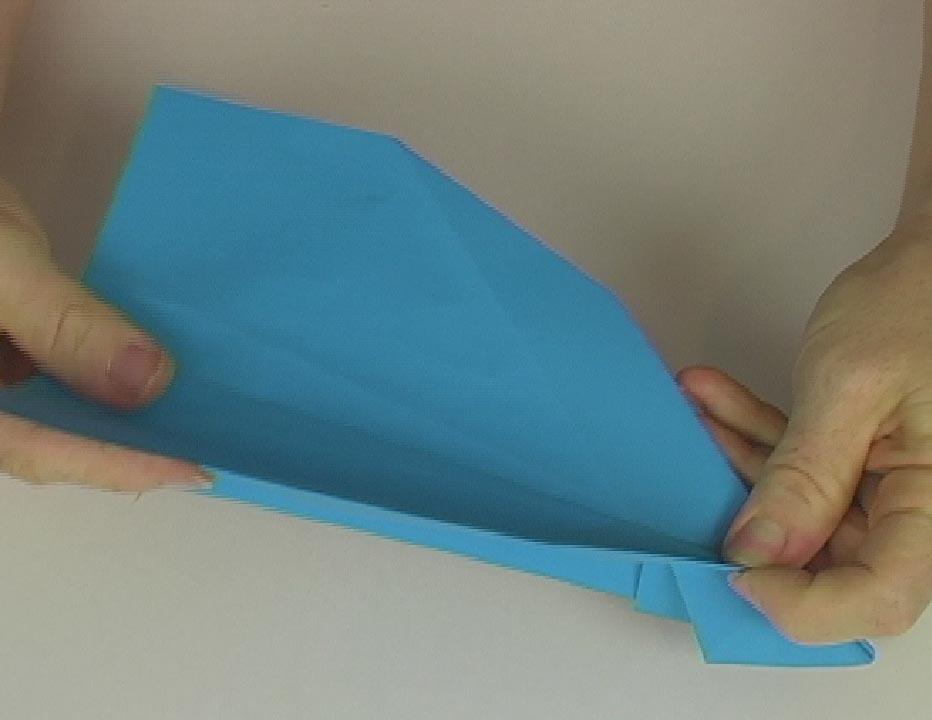
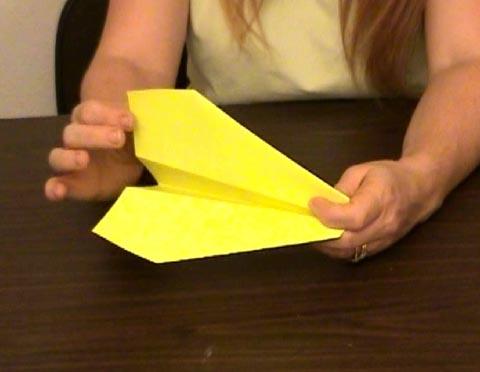

 We’ve included several flying designs for you to test, including: