 If you have a pet, they’ll be sure to get a great workout chasing this nifty little robot. If you can, I totally encourage you to make two or more and have a contest!
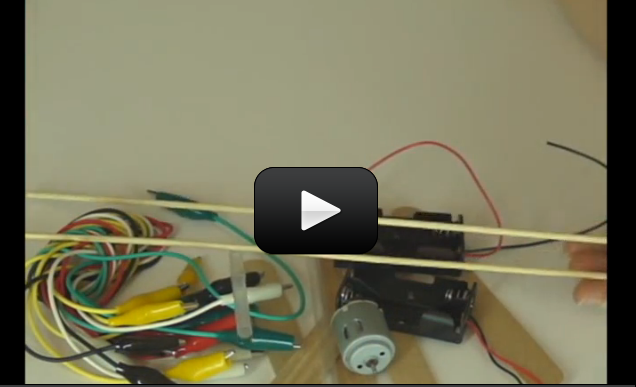
This BumperBot is one of the simplest robots you can make that uses a touch sensor, tricycle gear, and simple parts from around the house. (And there’s no computer programming required.) Using a switch that reverses direction upon impact, this robot will have your kid’s mind-wheels spinning. Be sure to follow the wiring directions EXACTLY as shown or it won’t work right!
Please login or register to read the rest of this content.
There is most likely a bad connection, but I will need to see what you built in order to help. Please send pictures to [email protected]. Be sure to describe the problem in your email.
I found three lids & punched holes in them, then I built the robot. It was just working, but now the motor won’t turn no matter what I do-help?
Best thing is to make a note of this experiment. Then you can build it once you’re able to get the supplies.
Both rechargeable and non-rechargeable batteries provide direct current (DC).
Direct current means positive is always positive and negative is always negative.
Battery chargers take the alternating current (AC) from wall outlets, convert it to DC, and regulate the voltage and current to properly charge the batteries.
I REALLY want to make this but I do not have the wheels… I have something similar called a boomerang car that automatically switches directions whether it hits something or not, but it would be fun to have it switch directions only when it hits something.
Also, I have a question. Do rechargable batteries provide AC [alternating current] or DC [direct current]? Rechargable batteries are charged by power outlets [AC], but don’t batteries provide DC???
DC stands for direct current. Batteries provide direct current. With direct current the polarity remains the same. In other words, the positive connection remains positive, and the negative connection remains negative.
AC stands for alternating current. Power outlets in a house provide alternating current. With alternating current the positive and negative connections switch places at a regular cycle (60 times a second in the united states)
What is the difference between DC and AC power?
Can we use one AA battery pack and one AAA battery pack instead? Both put the same amount of voltage out (3V) so would this work?
You can find links for all supplies in your Science Packet. It is available under Step 1 on this page: https://www.sciencelearningspace2.com/science-with-aurora/.
Just use the Find (CTRL-F) to search for the parts.
where can I buy 1.5-3VDC hobby motor, AA battery cases and alligator clip wires?
Do you have flash enabled in your browser? You should have a slider and controls on all the videos.
I cant go forward or back in the video so i had to wait till the end and then watch the whole video agian till I got to the part I missed But the robot was very cool!
Yes – you’ll want to trace it through with your finger when the switch is thrown one way or the other. It reverses the direction of electric current to the motor when it bumps into a wall.
OK thank you. Now what causes the moter to go forward or reverse?Is it somehow connected up so that it can switch the way the electricity is running through the cords?
This is actually a harder problem than it seems. Since there’s only one motor in this robot, if you put the buzzer across the motor terminals, it will only work in one direction because buzzers are polarized (they have a specific plus-minus direction). If you use a bi-polar LED (a LED that lights up in both directions, like red and green), it will work and indicate the direction of the motor. You can do what you are thinking, but you’ll need a few more electronics components to do it.
we built the bumper bot and it works great. So we decided to make it buzz when it back up. We have been working on it , brainstorming and experimenting but we cannot get it to buzz and back up at the same time and then stop when going forward.Do you have any ideas
First – great job building this one! It’s a little more challenging than the rest of the robots. Okay, so now to troubleshoot the problem (which by the way, is where you can expect to spend most of your time as a scientist)… it sounds like it’s working when there’s no weight on the wheel, but not when it’s on the ground, correct? Did you try new batteries so it’s got as much power as possible? What happens if you make it lighter, not heavier, by taking the battery case off and holding it in your hand alongside the robot… does it work then? If so, then the batteries aren’t providing enough power to the motor you’ve chosen, and you need to either boost the amps (connect another battery back in parallel (plus to plus) with the one already there) or choose a motor that needs less power to move, or you can “gear down” the motor by using a motor with a gearbox attached (they have these in hobby stores). Let me know what happens so I can help… 🙂
HI Aurora!
We have completed the bumber-bot and it spins great while in the air, but when we put it on the floor, nothing happens even when we push the clip onto the pennies. We tried putting weight (small rock) on the front to add weight and even added a rubber band around the circumference of the wheel, but nothing works. Any ideas? Thank you!!
Tammy:)
Ah, got it. Sometimes I wish I was RIGHT THERE where you are so I can see what you’re describing. 🙂 Okay, so the wiring didn’t work. Let’s get more specific: does the motor run at all when you move the skewer so that the bare metal clip lead heads hit the copper penny, even if you lift the bumperbot into the air? If so, then it’s a matter of low batteries so you’ll want to get a fresh set. If not, then it’s either a wiring issue or your batteries aren’t in right or totally dead, so make sure the batteries are in correctly and are fresh, and then see if you can trace through the wires as you go through the video to see where the error is.
“Troubleshooting” is actually one of the most important skills an engineer and scientist develop… so let’s get you started with yours! Don’t let yourself get frustrated for long (that doesn’t move you forward toward your goal and only wastes time and energy)… instead, get curious about what’s going on and see how quickly you can spot the problem so you can learn from it.
Oh, sorry 🙂 I meant the video worked. I watched it carefully and the robot still didn’t work. Didn’t mean to be confusing! 🙂
-Lucy Aslinger-
Did you get it to work? I see that you posted that it did, so… ?
I hooked up the wires like it showed in the video (or so I thought… I may be wrong) and it still didn’t work! I tested both battery packs and they worked, my wheels have plenty of freedom to turn, and yet it still won’t budge! I picked it up off the floor (with it still hooked up) and the wheel wasn’t turning. Any clue as to what might be wrong?
-Lucy Aslinger-
Yay! It works now! Thanks!
-Lucy Aslinger-
I’ll have my team connect with you right away!
I had access to this a couple of weeks ago, but didn’t have the supplies I needed…and now I have the supplies but it won’t show me the video!
-Lucy Aslinger-
It sounds like you’ve got a short circuit somewhere… I would watch the video again step by step during the wiring part to check over the wires and make sure they are not touching anything they shouldn’t… also look for the alligator clip itself touching more than one contact.
Hi Aurora
we tried working on a Bumperbot but it would not work and the batteries warmed up a lot can you give us some tips please
You can secure the motor with a rubber band or a zip tie if hot glue isn’t working, and the battery holder sounds like it had a couple of hot batteries, which happens when there’s a short circuit, so you’ll want to check your wiring again with the video. 🙂 Let me know how it goes!
Our machine is In fully working condition, but whenever I run it, the motor falls off (I’m using a hot glue gun). How do I make it stay? Also, the batteries get so hot the battery pack fell of! How do I stop this?
Sure thing! With motors, you can have either high speed and low torque (turning ability) like you have in a car on the freeway, or low speed and high torque, like a tractor pulling a heavy load. The same engine can do both, depending on which gear it’s connected to.
That’s what a shifter/transmission does in your car, and although most cars are automatic these days, you can still hear the car shifting as you speed up or slow down.
A small gear on the motor connected to a large gear on the wheel will “gear down” the car and make the wheel spin slower, which is a good thing with hobby motors since they spin ridiculously fast.
If you have a motor that’s too slow, you reverse the gears and put the larger gear on the motor and the small one on the wheel.
Does that help?
Hi Aurora. Can you explain how to “gear down” the motor?
Okay, so this is a little tricky to do without seeing your project, but here are things to check:
1. Can you make the motor turn in both directions by simply hooking it up to the battery back directly?
2. Is the penny tarnished or shiny?
3. You can check to see if the connection between the penny and alligator clip are good if you bypass the penny and tap the alligator clips together (the one on the penny and the one on the slider-skewer). This will also let you know if you’ve wired it up correctly.
Let me know how it goes so I can help!
Hi Aurora!
I am making the bumper bot with my sisters and the negative side of the switch isn’t working. I hooked the positive side and the motor up, and they both work, but nothing happens on the other side, so it only goes in one direction. I watched the video again, checking to make sure that everything was wired correctly, and that I had good connections between the alligator clips and wires, but the motor won’t turn. . . even in the air. Do you have any suggestions?
don’t let pets kill it!!! 🙂
We built a few of these bumperbots (1 for each of my 3 children). They all spin great when not on the floor but as soon as we put them down, they do nothing. We thought of traction and have tried a few things to add traction but that seems to be making it worse. If we give it a little push, it will go but quite slowly. We have tried changing out batteries and adding things to the wheels to add traction. The other problem we are having is that when the bot hits the wall, it makes a connection and begins to move backwards, but then the clip moves just enough to have no connection at all and of course stops. We have tried adding a brad upside down on top of the penny and then splaying the ends so it connects farther from the penny, but that is not really working either. Ideas? I am getting frustrated and the kids have no idea how to make it work and are not wanting to keep working on it. Help.
Great job on building it! If your batteries are fresh, then your motor’s going to spin very fast (3,000-5,000 rpm), and will slip if there’s not much traction between the wheel and the floor. You can increase the traction by adding a little weight just above the front wheel (small rocks and duct tape come to mind), or by scuffing up the rim (use sandpaper) of the wheel you’re using. You can also hot glue a section of a fat rubber band around the circumference so the wheel is lined with rubber.
Since the motor is high speed, it’s also low torque (the amount of ‘oomph’ the wheel pushes with against the floor). You can learn how to ‘gear down‘ the motor by making it spin slower but with more ‘oomph’ (torque).
And you’re right – the back wheels are just along for the ride (there’s no motor attached to the axle).
We have designed the bumper bot. However, when we turn it on the front wheel goes so fast and the back wheels don’t really do anything so it is not going anywhere. Its almost as if the front wheel is too powerful. Any suggestions?
Ah, got it – you were looking for a schematic diagram. Sorry I didn’t pick up on that sooner. Sounds like you figured it out, so I don’t need to post it. 🙂
Happy experimenting!
Aurora
Hi Aurora,
Thanks for the quick reply. Actually, my son didn’t have any trouble getting the robot to work, it was I who had trouble visualizing what was happening. I wanted to make a diagram that clarified the circuits for me. Your explanation helped; I was finally was able to draw a picture that makes sense to my son and me.
Jean
Hi Jean,
There are two ways to wire it up:
First way: Move the skewer/clip-lead-switch to one of the ON positions, and wire up the motor with the battery pack so that the motor turns on. Then slide the switch to the opposite ON position and wire the second side so that the motor spins in the reverse direction using the second battery pack, ignoring your first circuit of wires as you go.
Here is the second way:
1. Connect the clip lead to the skewer, with the other end to your motor.
2. Twist the red wire from one batter pack to the black of the other battery pack. Add a clip lead to this connection. The other end of the clip lead goes to the other motor terminal.
3. Connect a third clip lead to the available red battery wire, with the other end going to one of the pennies.
4. Connect a fourth clip lead to the last available (black) wire on the battery pack, with the other end to the second penny.
Let me know if you still have trouble!
Hi Aurora,
We finally have a working bumber-bot. It took us a while to unscramble our maze of wires. We are now trying to diagram the whole thing so we can make sense of it, but so far our diagrams look like a tangle of lines. We are trying to figure out if the 2 battery packs are connected in parallel, of if one pack provides power to run the motor in one direction, and the other pack provides power in the other direction. You don’t have to give us the answer, but maybe a clue about how to figure this out.
Jean & Tim