Simple Hovercraft
Hovercraft transport people and their stuff across ice, grass, swamp, water, and land. Also known as the Air Cushioned Vehicle (ACV), these machines use air to greatly reduce the sliding friction between the bottom of the vehicle (the skirt) and the ground. This is a great example of how lubrication works – most people think of oil as the only way to reduce sliding friction, but gases work well if done right.
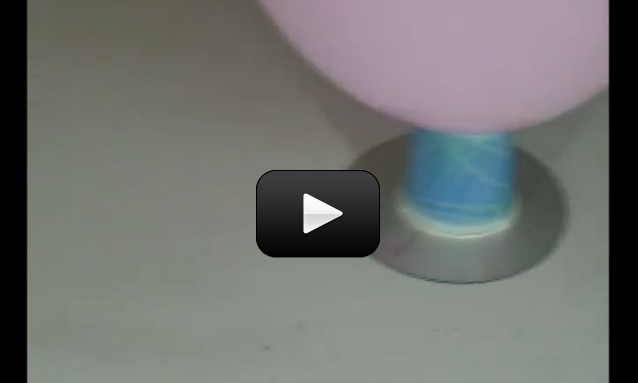
In this case, the readily-available air is shoved downward by the pressure inside of balloon. This air flows down through the nozzle and out the bottom, under the CD, lifting it slightly as it goes and creating a thin layer for the CD to float on.
Although this particular hovercraft only has a ‘hovering’ option, I’m sure you can quickly figure out how to add a ‘thruster’ to make it zoom down the table! (Hint – you will need to add a second balloon!)
Here’s what you need:
Please login or register to read the rest of this content.
We’re putting together a section on Bernoulli’s principle and air pressure dynamics – look for it in our Flight Lab this summer.
It’s currently under construction. You will find it in the Flight Lab this summer. Sorry for the trouble!
sorry for the typos…I was trying to say that it would be more user friendly to have a topical reading link on the experiment page.
Does anyone out there know where to find the reading for this experiment, or is the paragraph at the top of the page it?
Where is the reading on air pressure, or the audio teleclass on Bernoulli’s principles? I tried to find it, but got lost
I did see some reading about Bernoulli in one of your comments above.
I agree that it most be mom and kid friendly to have the subject reading linked to the experiment page.
I’m trying out E Science for the first time. The Hovercraft is going to be our first activity.
AWESOME!
-Charli(7th grader)
wooooooooooooooooooooooooooooooooooooooooooooooooooowww!! how did she come up with this stuff???!!
We actually tried this many times, before deciding to forgo the cup/paper altogether. Then attaching the balloon straight onto the bottle top worked wonderfully! Especially on our glass topped stove, but almost as well on our kitchen table. The girls loved the OOH-AHH factor, and learning about physics and air pressure was super fun! Keep the fun experiments coming Aurora!! Thank you!
Is the balloon coming off the bottle top, or is the top coming off the CD? For the first case, try a balloon with a smaller neck; the second case needs more hot glue!
The bottle cap keeps popping off. Any ideas?
it is so easy! our mom works and we log on and see what we can find to do today. we had so much fun with this experiment. thanks so much aurora!
love&peace,
deborah rossel’s 3 kids
Duct tape? Although if you use tape, you’ll have to re-tape it each time, but it might be worth it…
we can not the balloon to stay on ;(
can you help ?
I’m glad you got it working! If you ever have trouble getting something to work, let us know so we can help. Science is supposed to be fun, but it can get frustrating sometimes, I know.
We jimmi-rigged it util we could get it to work. Thank you for encouraging us that these experiments do work as we’ve tried many that haven’t.
this is one of the forst experiments we’ve done, and it worked out really well! the best place we found to glide it was on our flat topped stove(talk about smooth!)
Are you looking for Bernoulli’s principle defined? Unit 20 (to be released soon) is all about air pressure and fluid dynamics, which cover’s Bernoulli’s as well. Here’s an excerpt from the section about why airplanes fly that I am still working on:
The wings on an airplane use an idea from an Italian scientist named Bernoulli, and his idea was this: the faster air flows, the less time it has to push down on the surface and because of this, the air pressure is lowered.
An airplane wing has a curved surface on top to get the wind to move over the top faster, which decreases the pressure over the top of the wing. Just like with the ping pong ball in the funnel, where the air moved the fastest was where the pressure was lowest. On an airplane wing, the lower air pressure is on the top of the wing. Since higher pressure is now on the bottom surface, and higher pressure always pushes, the wings (and also the whole airplane) go up.
When you referred to the audio teleclass on Bernoulli’s principles on one of comments as to the scientific principles to look into regarding the hovercraft, was that part of Unit 1: Mechanics: Force, Friction, & Gravity teleclass? Thanks.
It’s simple to do – you blow up the balloon and use a large piece of tape to tape the neck of the balloon to either the top surface of the CD or the side of the cup. If it’s off-center, then your hovercraft will spin (which can be fun), so be fure to get it as close to the center line of the CD as possible!
Hi Aurora, Thanks for so many awesome experiments. You mentioned adding a thruster to the hovercraft by adding a second balloon – can you please elaborate on that? We can’t quite figure how to attach it . Thanks
My 3 children loved this project! Thanks for all you do to help us to educate our children!
We wanted you to know that we tried the punching balloon and it was fun. Our original hovercraft had a few modifications so our findings will not necessarily be the same as anybody else. Our modifications include, using a spout off a reusable sports bottle that was larger on the bottom and smaller on top than one requested for a 2 liter, a plastic cup instead of paper, and we used a DVD that had a label on it. All of these “modifications” surely added weight to the experiment.
The punching balloon has a larger “stem” on it so we added adhesive tape around the the spout to give the balloon a larger surface area to grab onto. We had to adjust this because it added weight to the hovercraft. Our cup had to be cut a couple of times for various heights because the stem of the balloon is much longer than a regular balloon. What we discovered was when all the pieces were too heavy, nothing hovered. Before final adjustments, the balloon would sometimes fall on its side the then hovercraft would just spin in circles. The final adjustments proved that the hovercraft would zoom along for much longer and a little quicker than a regular balloon.
My 11 year old wants you to know that it requires two people to to attach the larger balloon
I let him know that you have much more experience, so you may be able to handle it.
Thanks we had fun and we are looking forward to Summer Camp tomorrow,
Jennie
After we viewed the video explaining how to make the hovercraft, my daughter said, “OK, let’s do it!” Then we did it. Thank you! I am looking forward to a great hands-on learning summer with three plus + kids!
gigi
Great idea! I’ll see what I can do…
We are really enjoying the experiments.Thank you!
I agree with others that it would be EXCELLENT if under each video you would include a link to where we can find the information on the forces at work or other educational material that goes along with it. The links would really help save time trying to look things up. Parents may not always even know what to look up to explain the forces at work for each experiment. Thanks again!
Make sure there’s air coming out of the tiny holes you punched. The biggest problem we usually find is that there’s a bump or something dragging on the table – it’s GOT to be smooth. Can you send us a picture?
My hovercraft does not work well, I have tried all the things you suggested plus more..Could it be the weight of the cup I am needing to use, as we are unable to find the paper cups where we live in Mexico and are using styro foam cups .
please help
Thanks for your feedback! And yes, we really do try to have as much content in the right place where you need it. For questions, you’ve got it perfect – ANY questions you have just type in these comment fields and you’ll get a response zipped back to you.
For air pressure and Bernoulli’s principles, you’ll find a BIG section on that released June 1st with our e-Camp in our Aerodynamics Unit. I can certainly put a link to it from the hovercraft page when it’s published, but we really don’t get into the mechanics of it until that section.
If you have more questions, don’t hesitate to ask!
First of all, let me say that my boys absolutely love the experiments on this site (1st and 2nd grade). My oldest LOVES science and until now, I have not had the time to pull together science experiments (which he asks to do daily). I love his interest in science and this is a great way to foster that interest. He also loves to research the answers to his questions. If I have reading materials available or videos that answer his questions, he is very self-directed in finding the answers and then sharing them with his brother.
That being said, it would be great if you had links to the teaching material somewhere on the page near the experiment video. For example, links to a reading on air pressure, or the audio teleclass on Bernoulli’s principles, or even how to start measuring things like speed. This would be a great help instead of having to search the site or the web to find the answers to the questions.
Keep up the great work on such a fun site
Ours worked best with a cup instead of an index card. The boys are having races right now.
You can use a regular bottle cap too. You just nedd 7-9 holes instead of 3-4.
Great question! And yes, the kids readily gobble up projects like hovercraft, sling-shot helicopters, etc. but what are they really learning? We use the experiments as a hook – for example, we would start a lesson by building something really cool – like a hovercraft, and then when they’ve played around with it a bit, they’re going to start asking questions like – how does it hover? Why does it rotate this way every time we launch it? How can we make it go faster? Etc..etc… This signals you that they are ready for the more academic side of things, so you’d pull out the reading on air pressure, or the audio teleclass on Bernoulli’s principles, or even talk to them about how to start measuring things (how do you know you’re going faster if you’re nit measuring things? And how will you measure speed is a totally great question to answer! It’s all based on stuff they’re going to encounter in real life, but the main difference is how to deliver it – I don’t recommend cracking open a text and reading dry paragraphs first… rather start with the juicy, fun, exciting stuff which will naturally spark their curiosity and lead them to better questions and hungry for more. That’s the way the real world is, after all. Does that help?
Firstly, let us say that we appreciate your approach to science education, and although we’ve only begun we believe this will be an asset to our girls who are 10 and 8. We would like to ask how you approach converting the fun experimental wow factor into the kind of knowledge they will be expected to know on tests and in life? That is, we think it will be easy for them to remember a homemade “hover craft” for example, but will they understand the scientific principles that make it work? In short, how do we link the fun with the drier side of science…facts, figures and formulas.
This experiment should call for a few extra paper cups so you can bat your hovercraft back and forth across the table…
We loved this experiment! I have KG, 1st and 3rd. So we watched Magic School Bus “air” and it fit very well with this experiment.
we found that we didn’t need the cup and it worked better to open the sports bottle top just a little.
this is so cooooooooooooool
This hovercraft is AMAZING!!!!!!!!!!!!!!! I recommend this experiment to any person who is learning about physics. We didn’t have a sports bottle top but we used a dish soap bottle top.
-Parker+Greta
i am having fun!
New favorite sound: “(excited laughter, followed by) That was awesome mom!!”
thanks Aurora!!
this is cool i love it Sully 10
this is so cool thanks Emma 12
We tried this and it works. We did have to make extra holes and we used a glass table top. Great experiment and easy to do. (Mom)
I LOVE IT!!!!! (Son)
Love the hovercraft project! My five year old was (and still is hours later) excited about experiments. He wants MORE SCIENCE and so do I (even my three year old was involved)! I’m terrible with projects and this was my first try with your material. What didn’t work at first was a great opportunity to problem solve with my kids. We did get the hovercraft to work just like the video. Wow! I actually made something work. You are the coolest!
I love the video
Thanks for adding these simple experiments to the main site…Before it was so hard to find them..I love that you have them all under getting started…